Topics
Representations of Selections
We usually visualize the marquee as a selection in Photoshop, but there are other representations of selections. These are them.
Marquee Selections
Marquee selections are very temporary. They’re not saved in files when they’re closed. You can select all on your canvas with ⌘-A. Deselect everything with ⌘-D. ⌘-clicking on a transparent layer or a channel selects content.
A.K.A. marching ants, the marquee is as old as Photoshop. It’s actually the poorest of all representations of selections because you cannot tell if the selection is feathered or not.
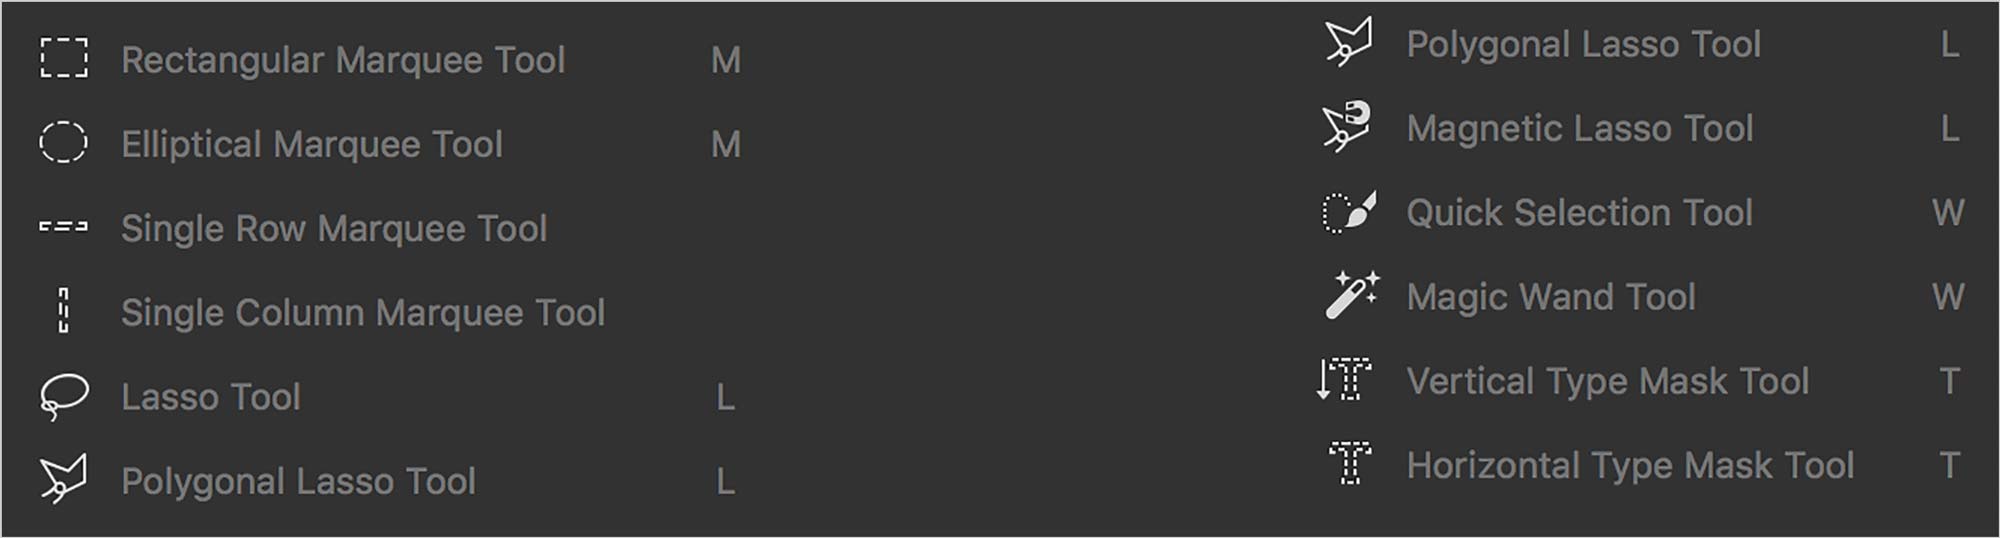
Marquee tools are the ones that display a selection with a marquee. All marquee-based tools in Photoshop are:
Important Keyboard Shortcuts
- D: Set foreground & background swatches to default colours, black & white.
- X: Switch focus of foreground/background colours.
- ⌘-Delete: Fill with background colour.
- Option-Delete: Fill with foreground colour.
- B: Brush Tool. Right-click with Brush tool for controls.
- [ or ] : Make brush smaller or bigger.
- ⌘-D to deselect
- ⌘-A to select all
Marquee Tool
The Marquee Tool can be either rectangular or elliptical. These are some practical tips for dragging with the tool:
- Hold Shift to constrain proportions.
- Hold Option drag a marquee from the center.
- Hold the Space Bar while dragging it to move it on the canvas.
- While a marquee-based tool is active, you can drag the current selection around on the canvas.
- Option-drag within a marquee selection to subtract from the selection.
- Shift-drag outside of a marquee selection to add to it.
While you have an active marquee, you can right-click, then choose Transform Selection…. This will allow you to transform the selection with a bounding box. You can zoom while it’s active. Once you’re done, hit Return to accept your transformation.
Add a Brightness/Contrast adjustment layer to brighten it up.
Lasso
Lasso Tool
To use the Lasso Tool, you simply drag it around the canvas. When you drop your mouse, the selection closes itself. As with all the marquee tools, Shift adds and Option subtracts from the selection.
Polygon Lasso Tool
You don’t drag with this tool; you just click from one spot to the next. Hitting the delete key removes the last click. Escape deselects while you’re drawing a selection.
Quick Selection
The Quick Selection tool has pretty much replaced the Magic Wand Tool. It pours a selection onto the image like water. The marquee stops when it detects contrast. The keyboard shortcut for the tool is w.
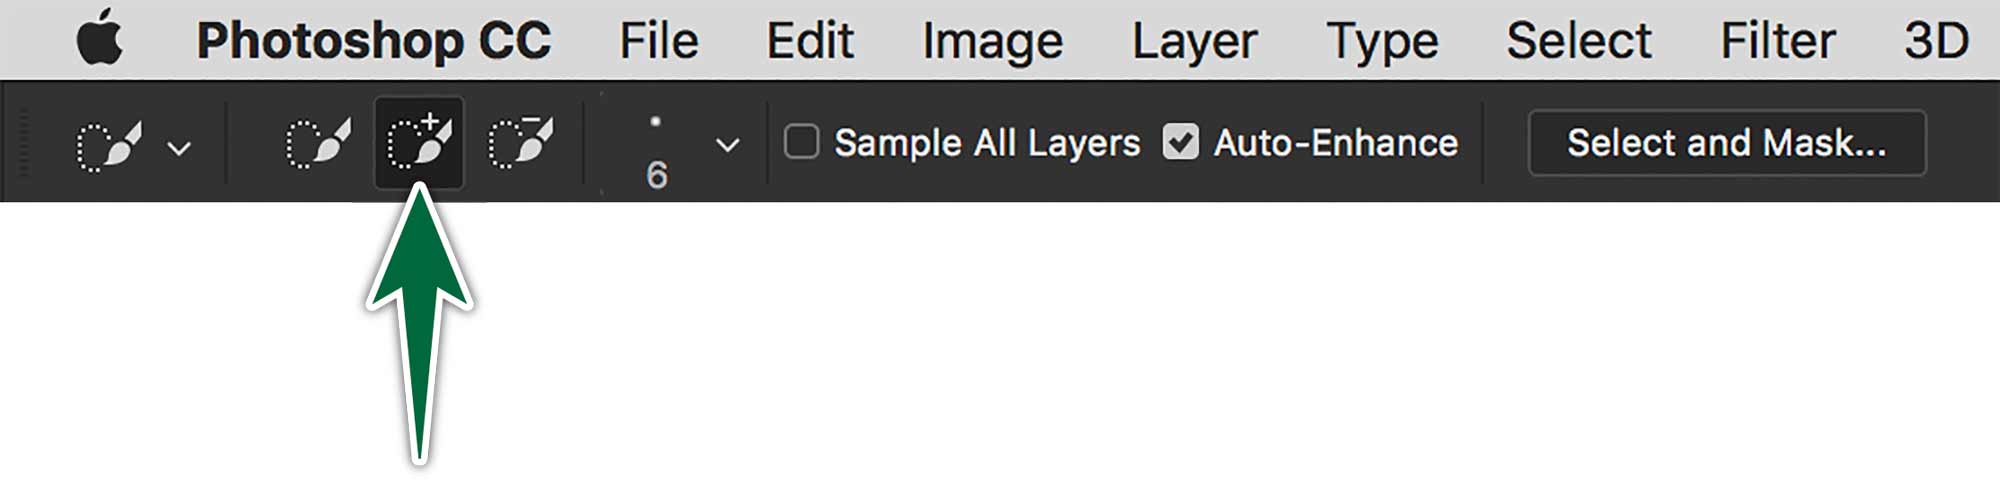
There are few options for this tool. You simply set it to one of three modes: New Selection, Add to Selection or Subtract from Selection. You can set the tool to add to the selection automatically, as shown above. This is the default I use. You can keep it in the default mode, then hold Shift or Option to respectively add or remove from the selection.
You can change the size of the Quick Selection brush with the Options Bar, or with [ or ] keys.
Auto-Enhance is fairly self-explanatory. Photoshop analyses the selection once you drop it and attempts to improve it. Sometimes this works. Sometimes it does more harm than good.
As with other tools in Photoshop, you can save all tool presets with the Presets menu in the Control Bar.
Select Colour Range
Go Select > Colour Range…. You have the choice of sampling colours on the canvas or choosing colours from the dropdown menu.
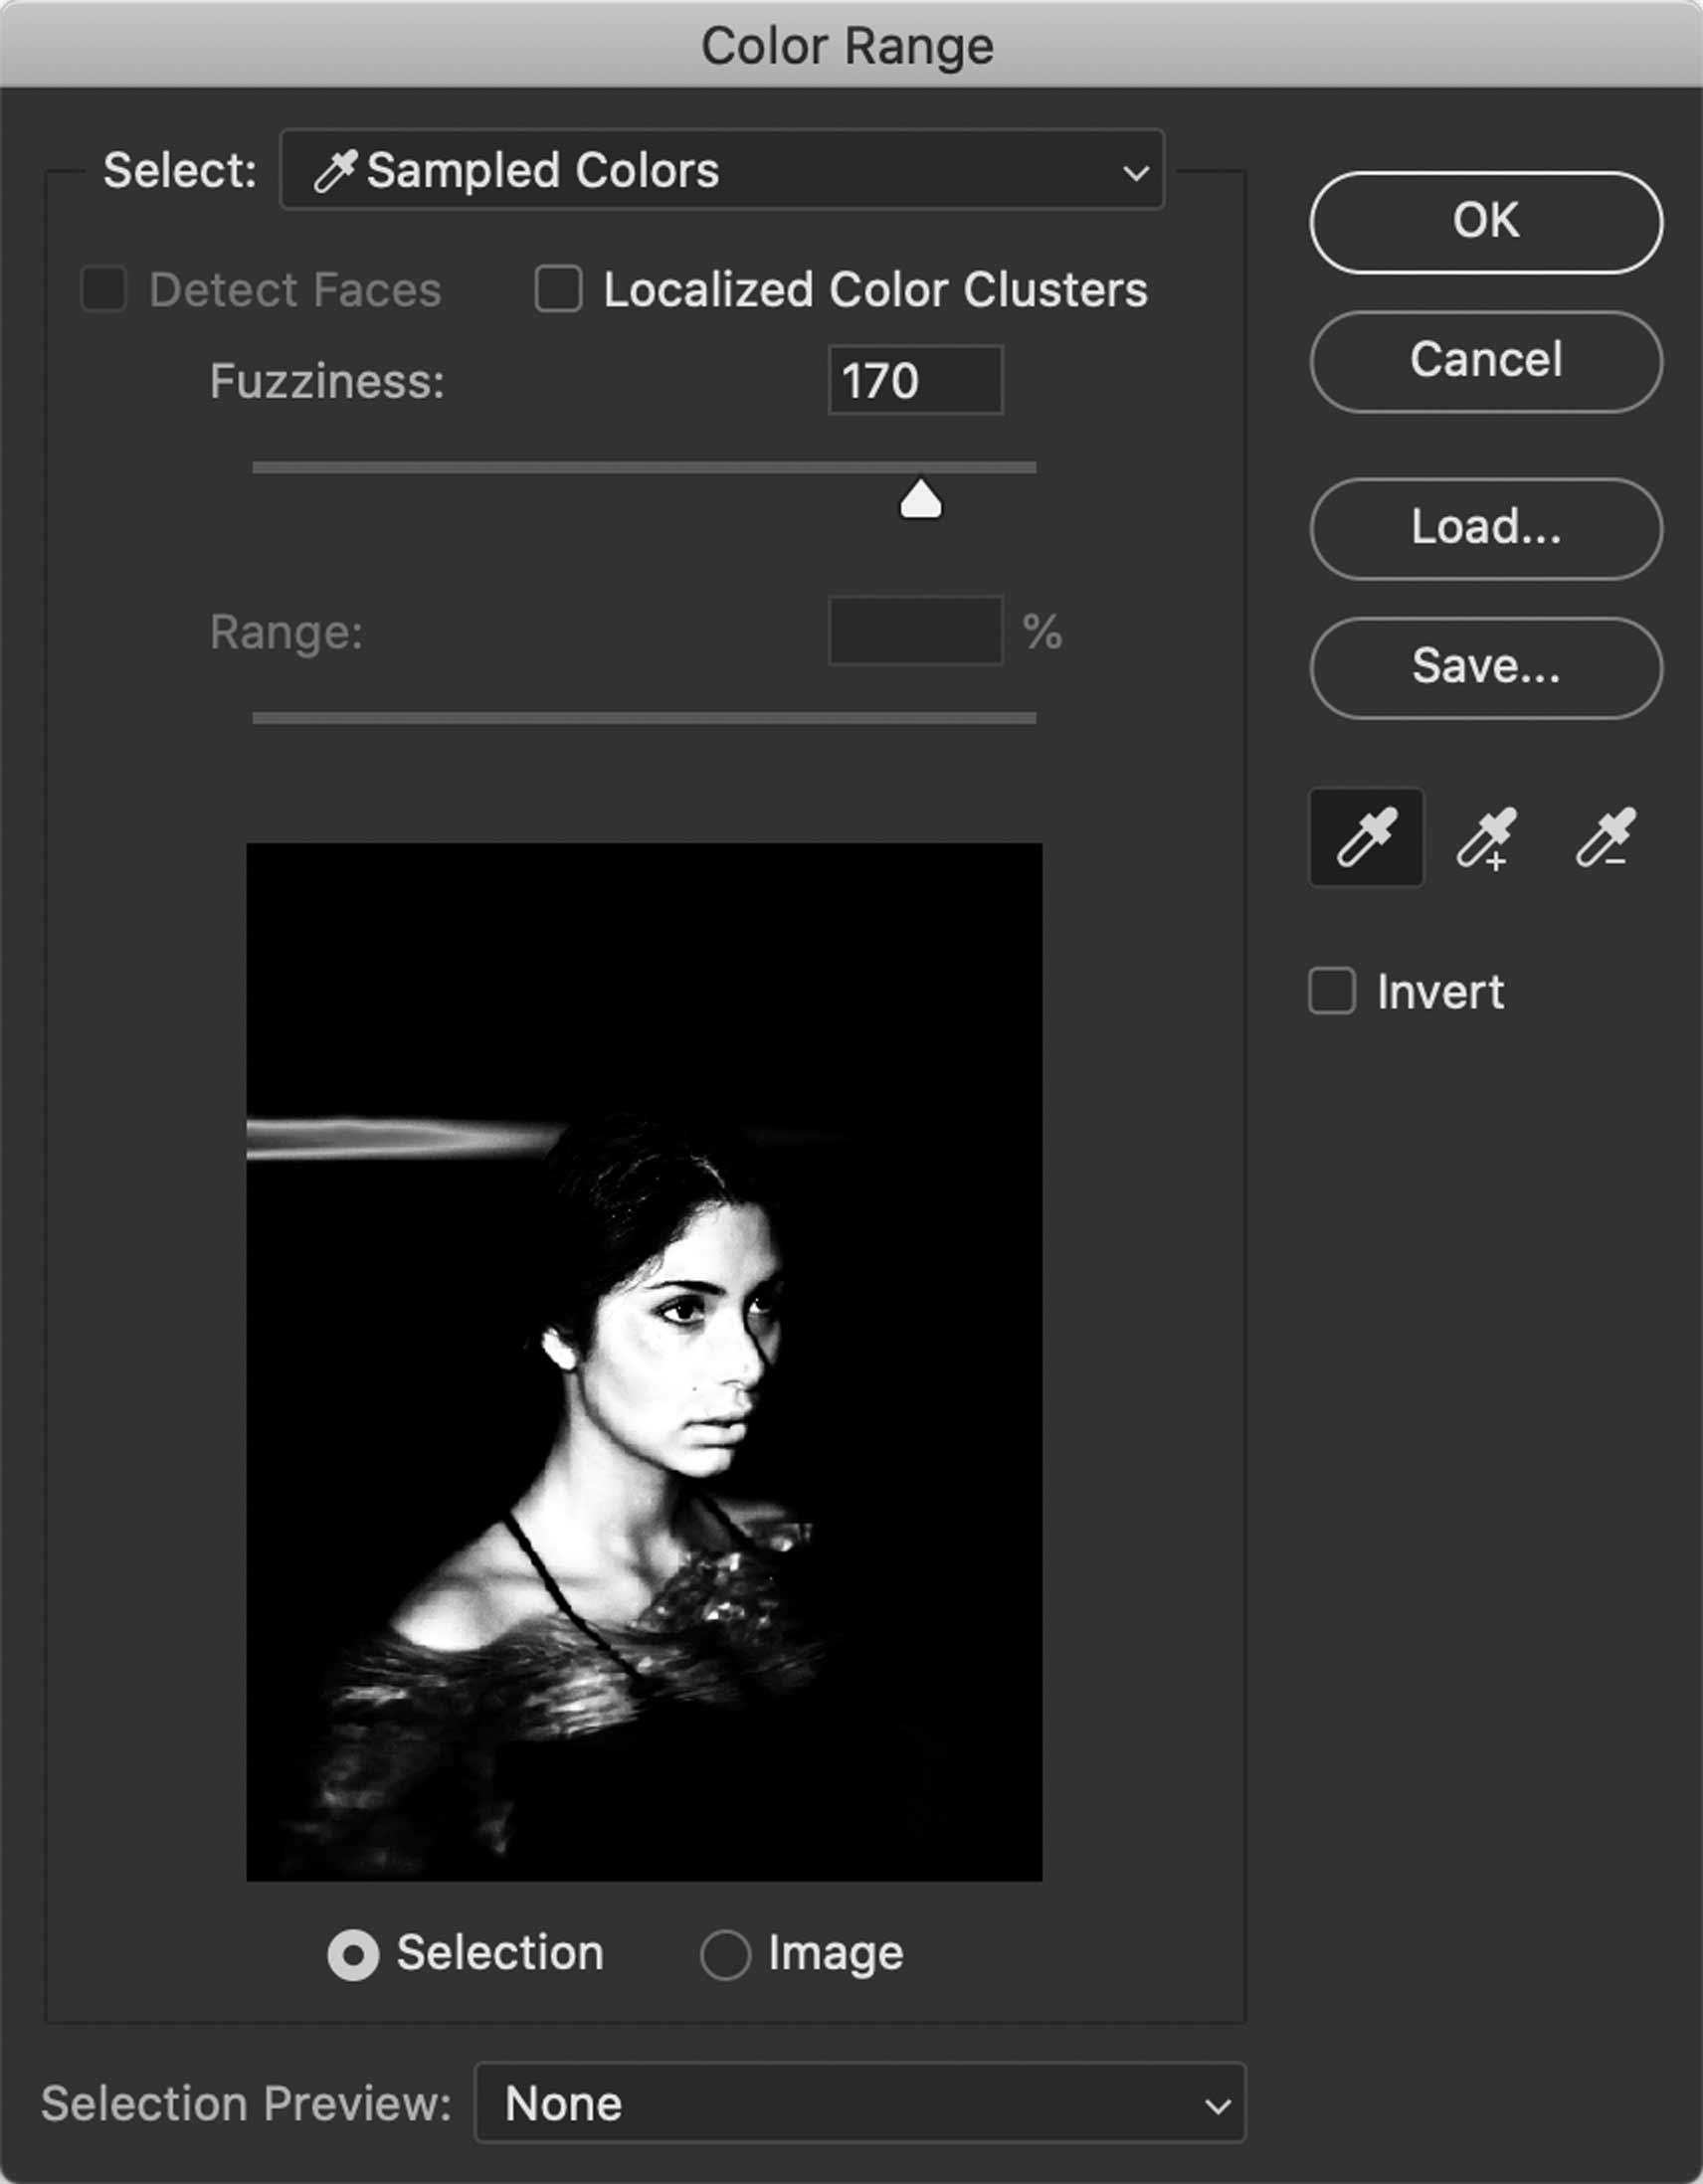
The Fuzziness slider determines the tolerance of the selection. That’s how little or how much different the colour can be.
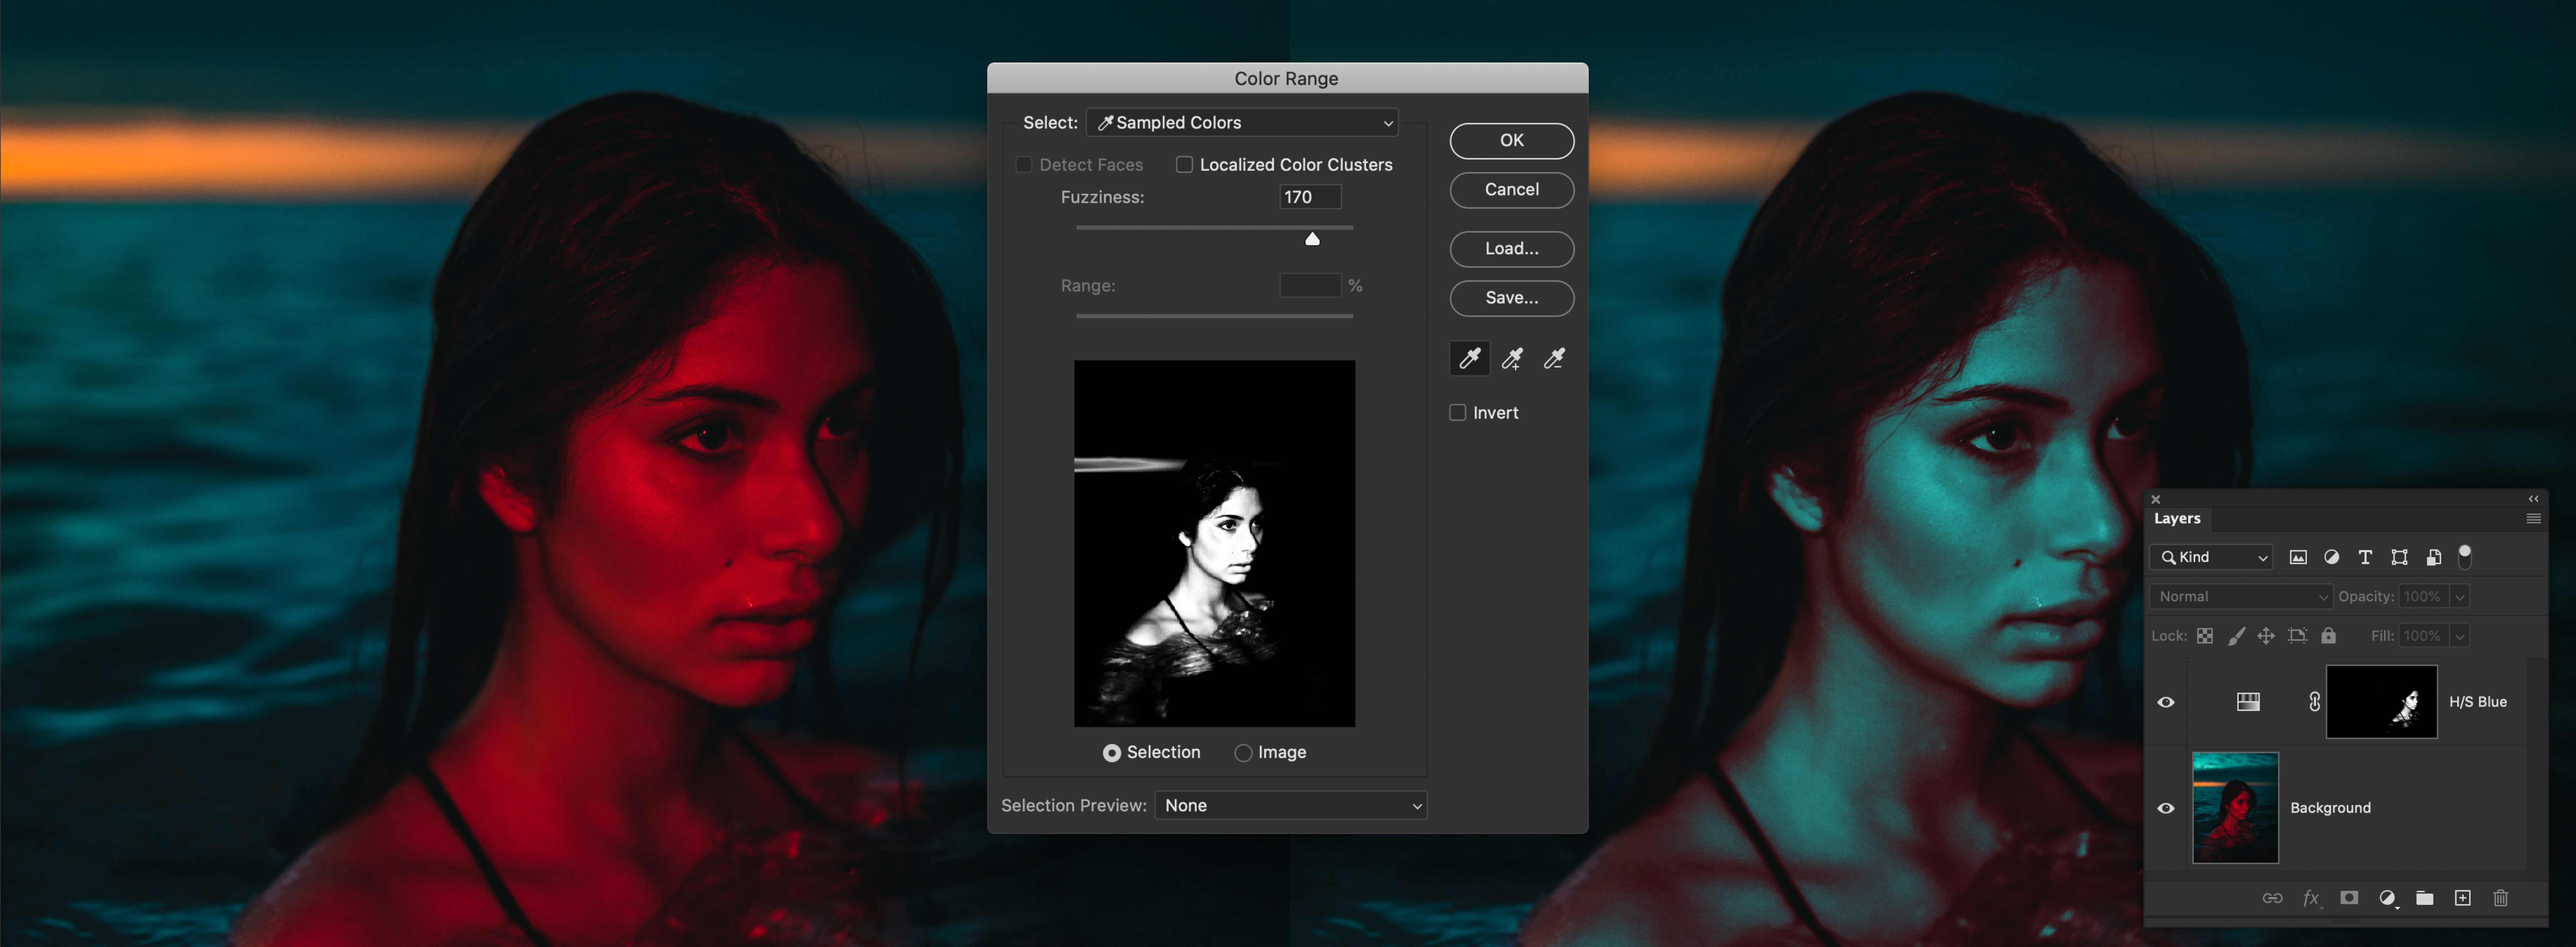
Once Select Colour Range has done its thing, we can add an Adjustment Layer to edit her colour to match the photo.
Select Focus Area
When you use Select > Focus Area… Photoshop examines the image for sharp and blurry areas. It can output the resulting selection to a mask on a new layer.

The first part of the dialogue is simply the preview. Choose the setting you prefer. Parameters allow you to include more or fewer pixels in your selection. Output is what you get once you click OK. The best choice is New Layer with Layer Mask. It’s most editable.
Ai Driven Selections
Select Subject
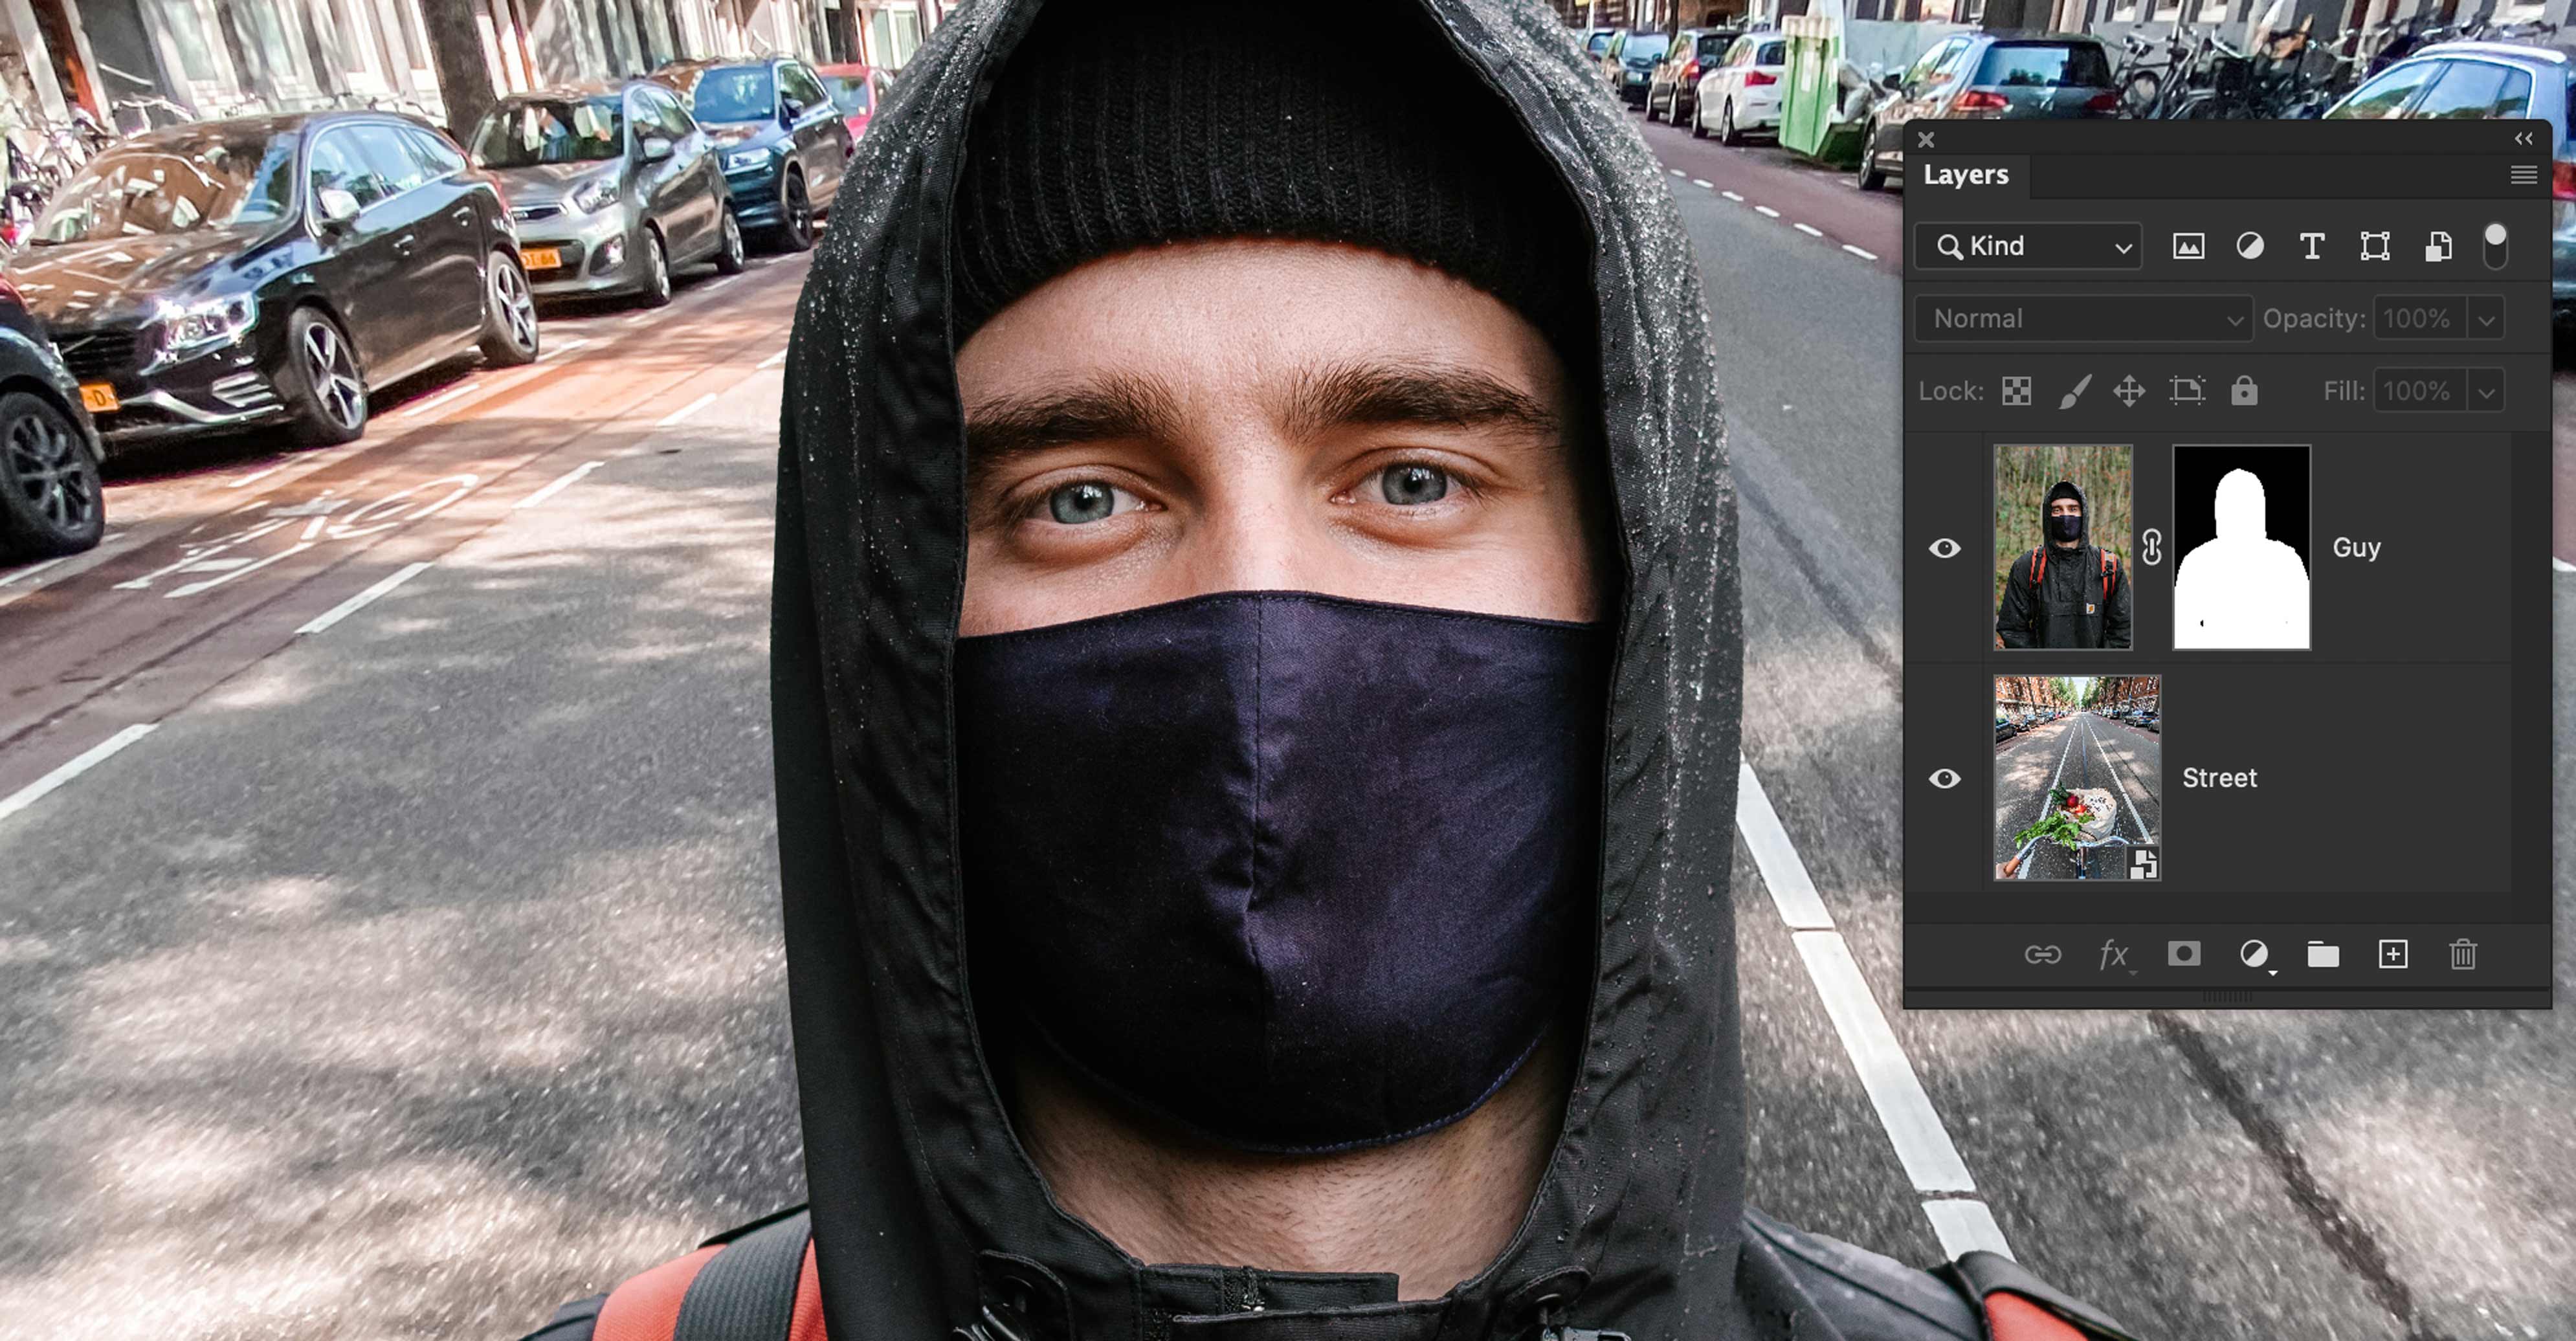
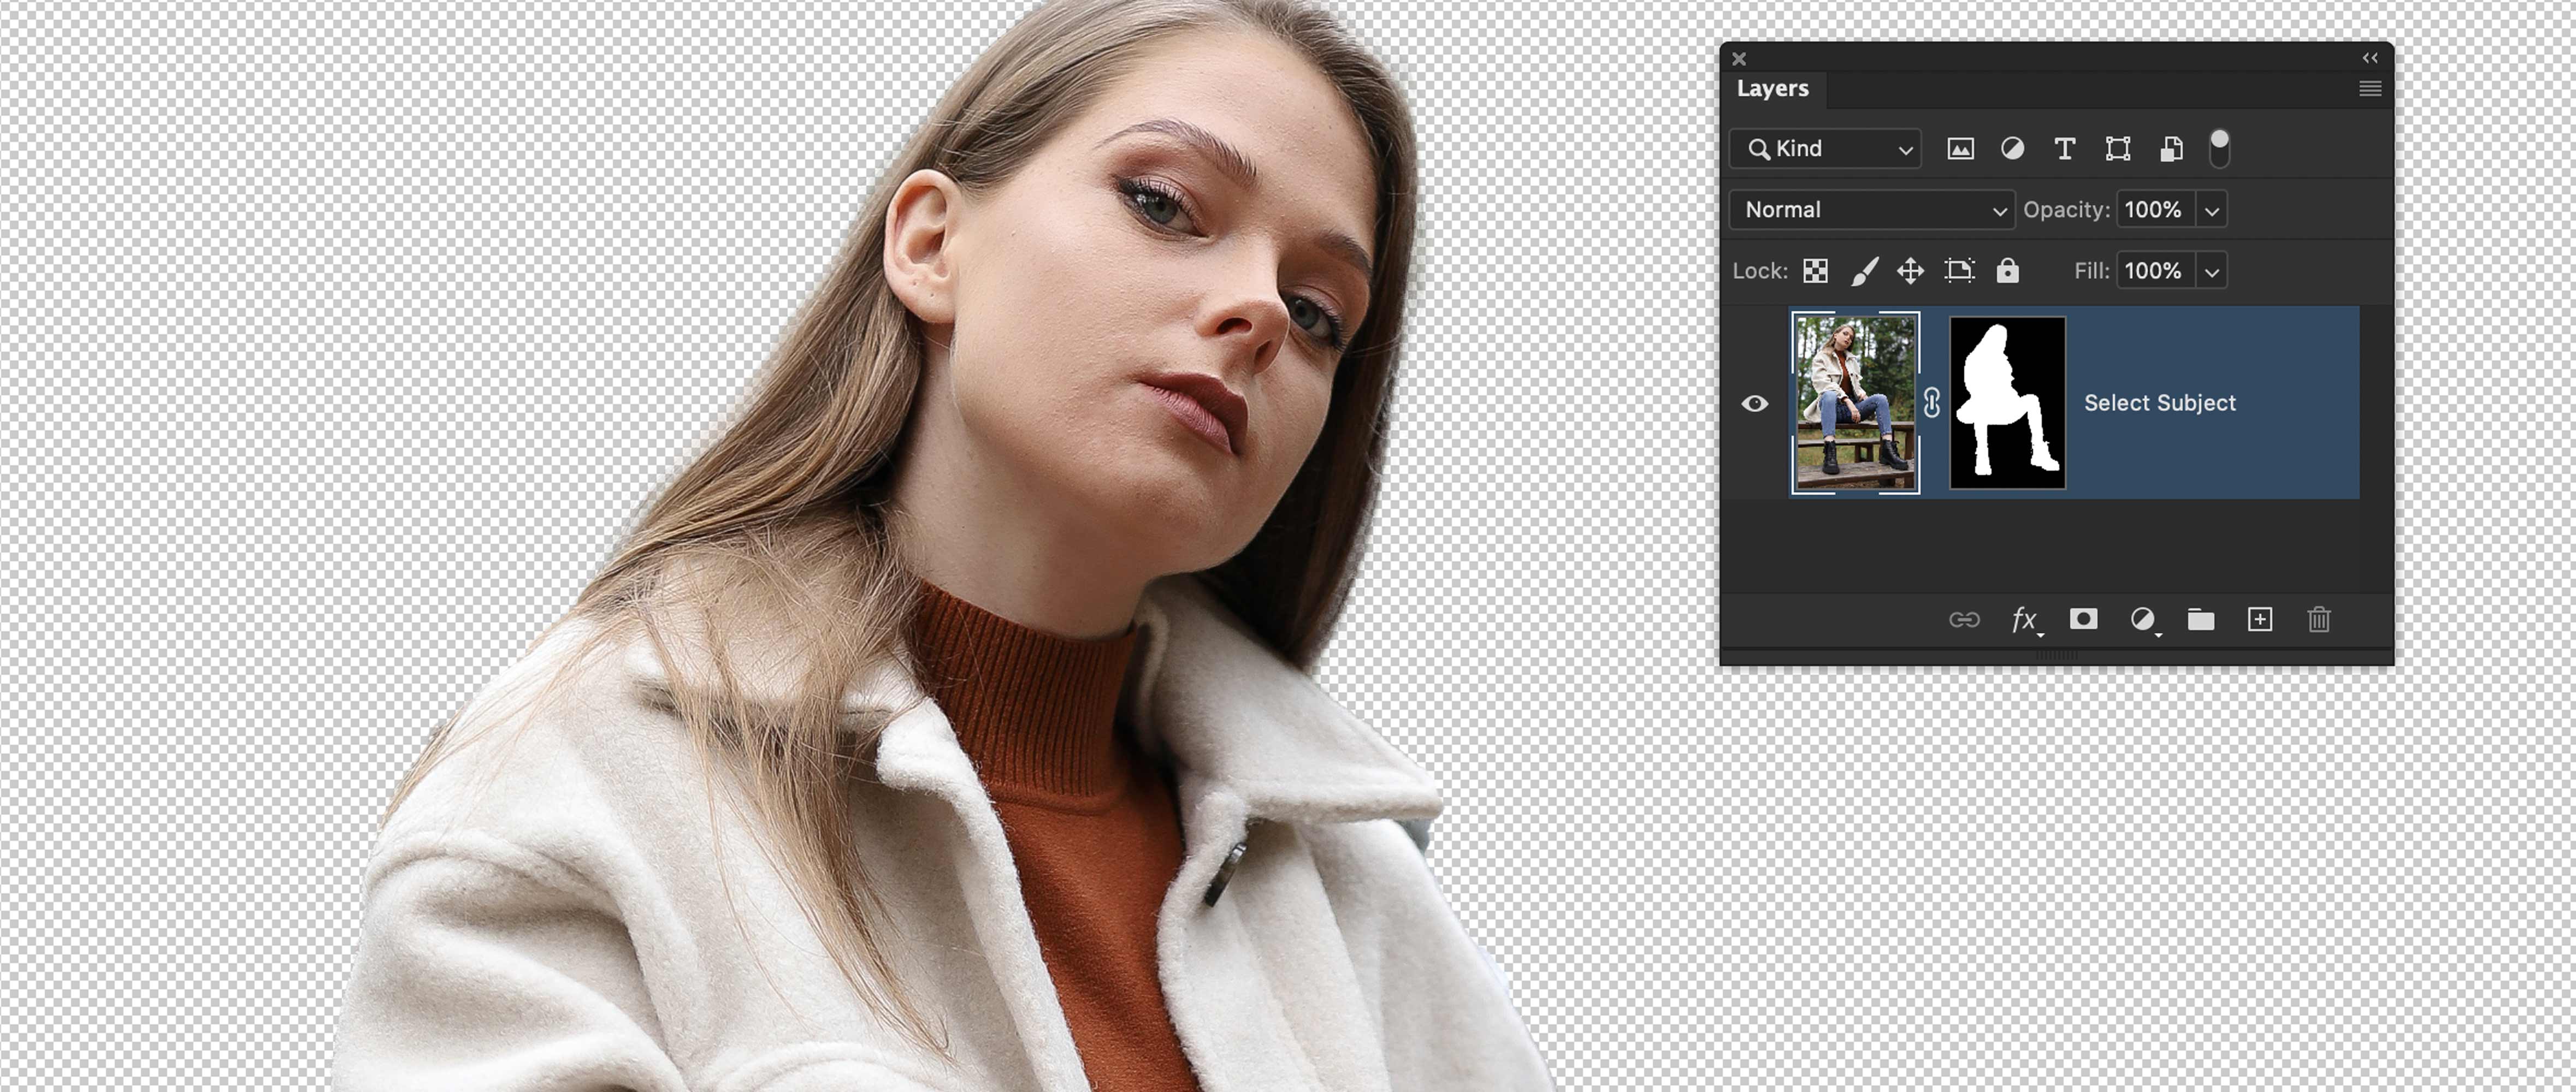
The Select Subject is part of Adobe’s smart suite of tools that uses artificial intelligence to find content in a photo.
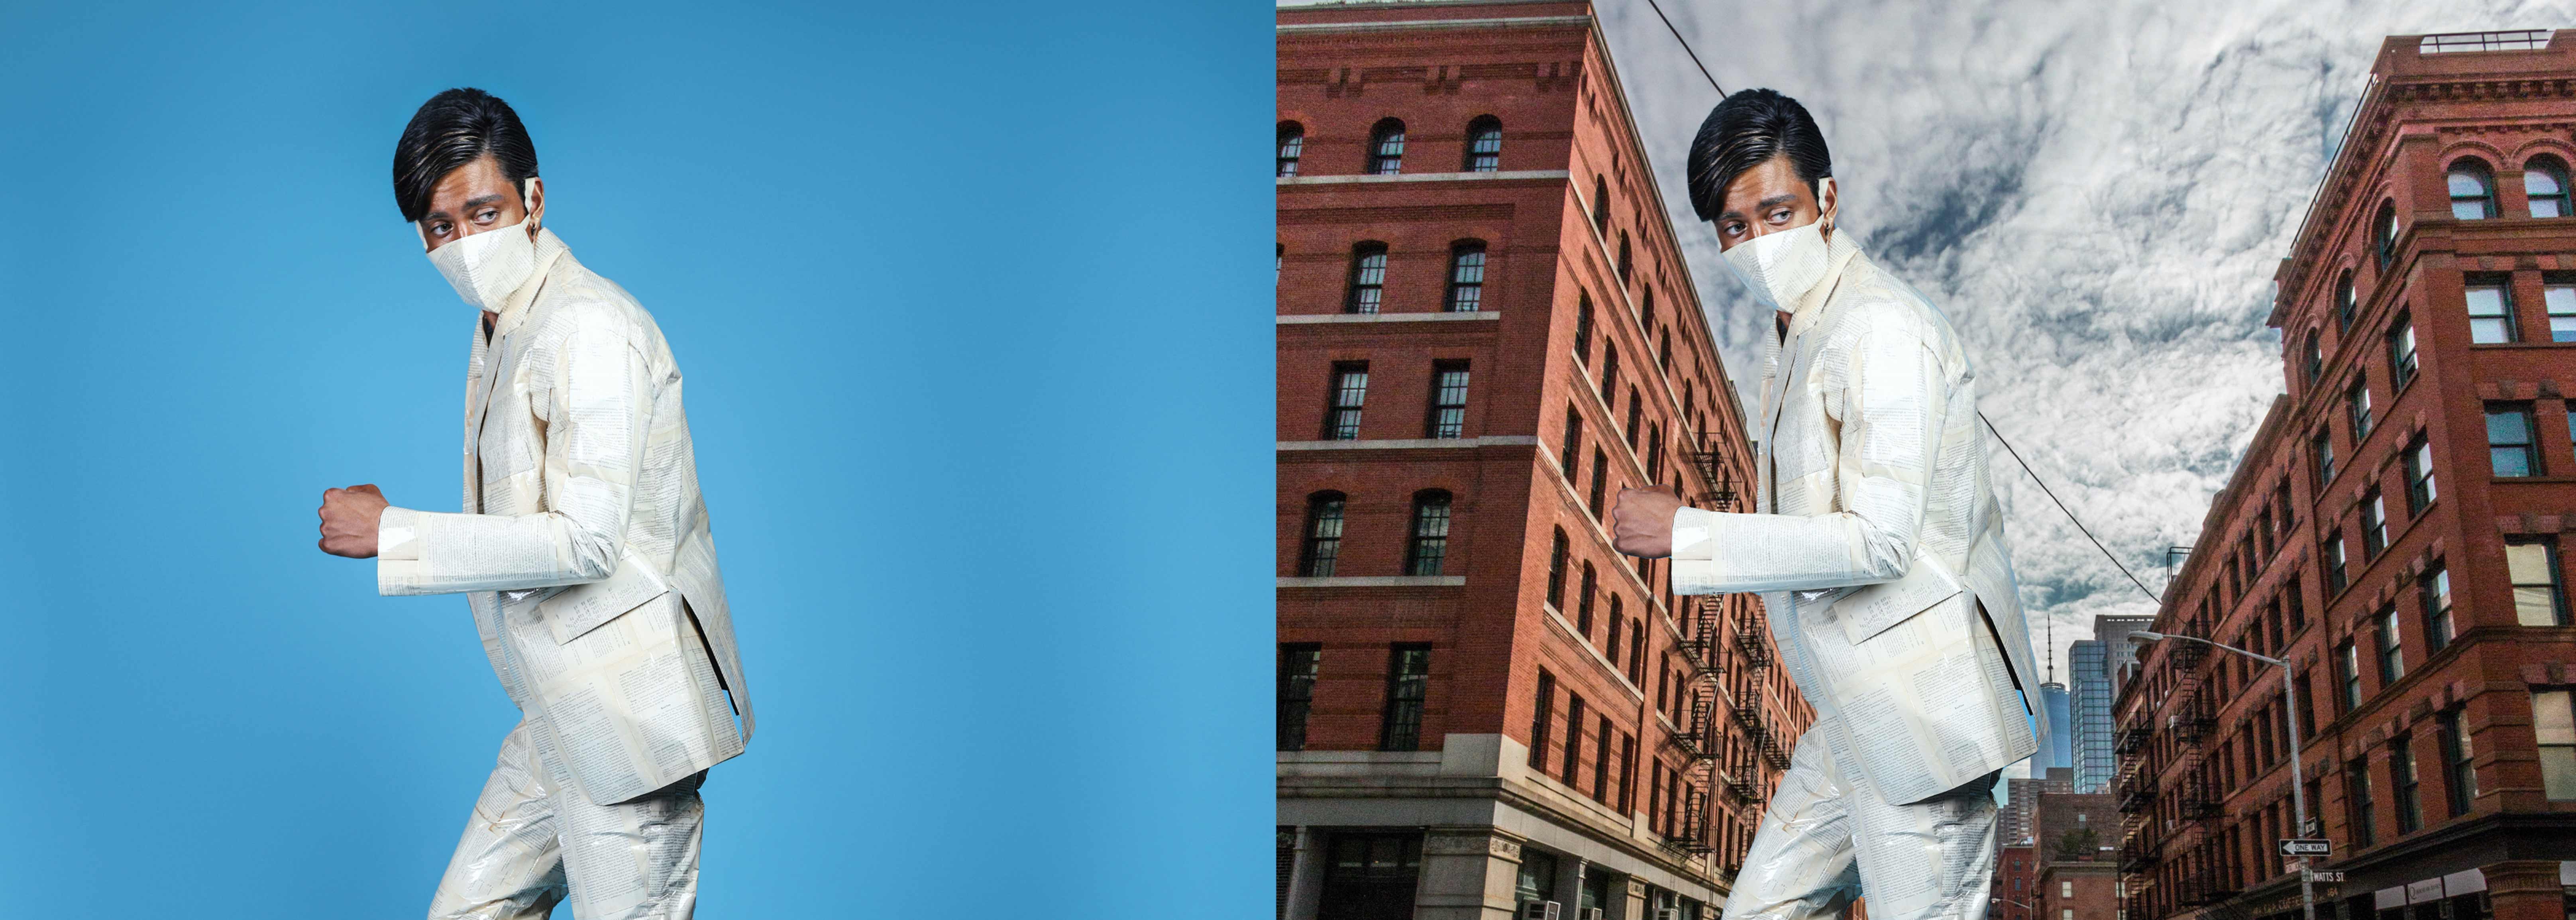
Select the dude, then mask him to reveal an alternate background in the photo.
Select Object
When the subject of the photo is not as obvious, you can use the Select Object tool to be more specific.
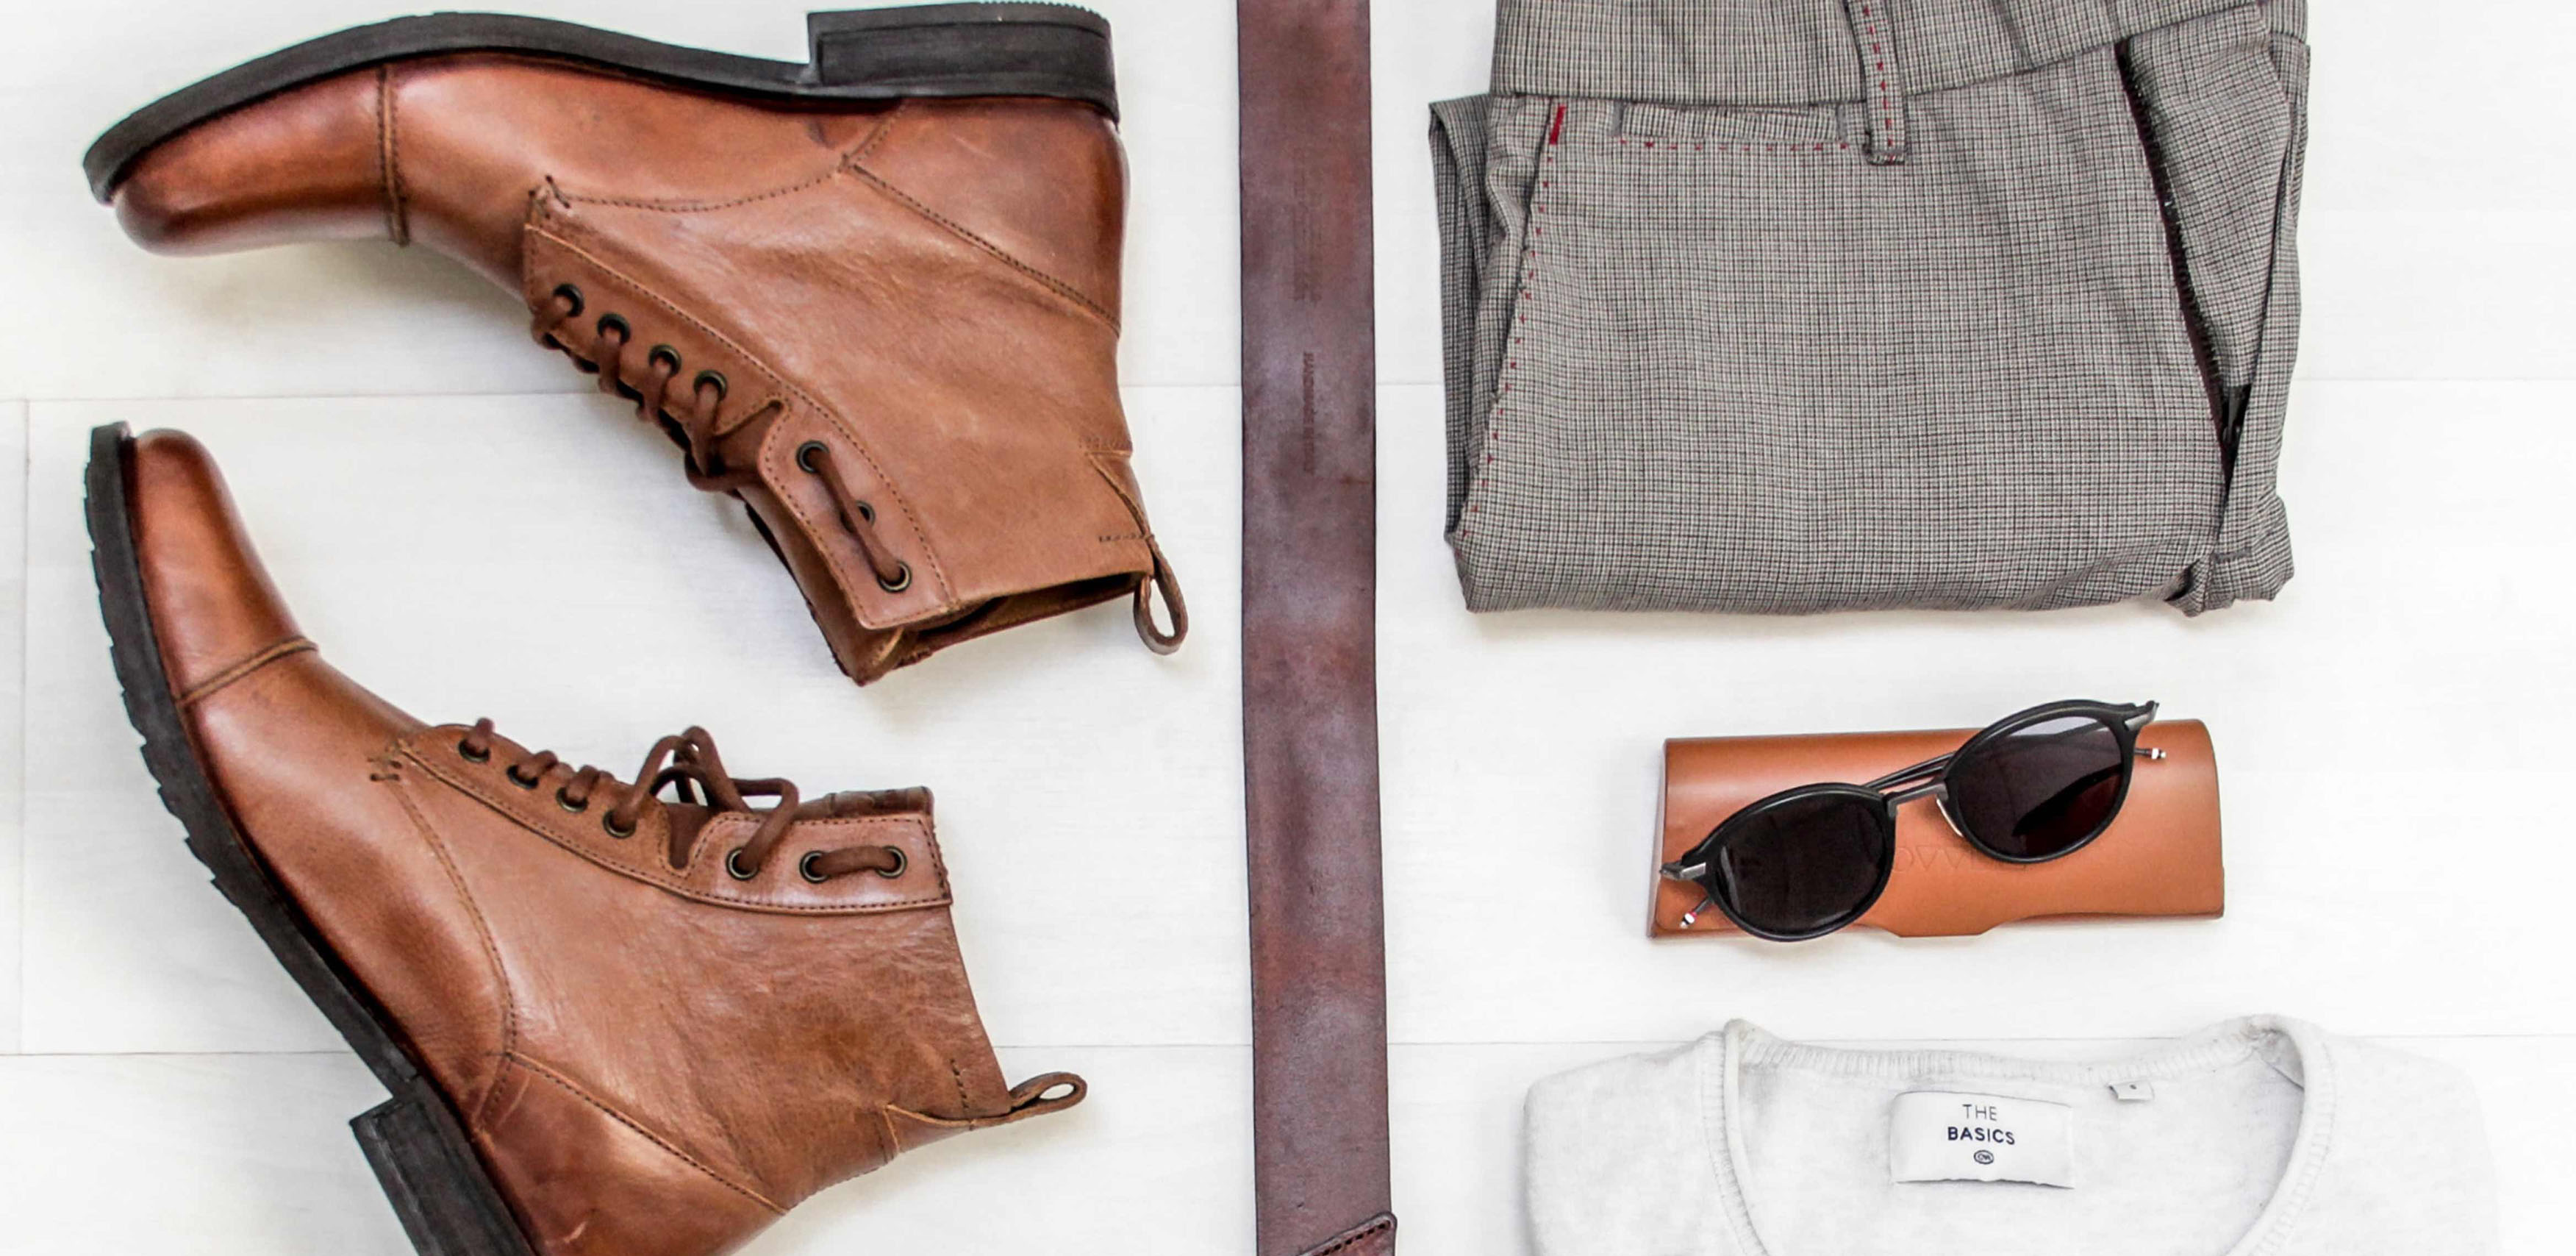
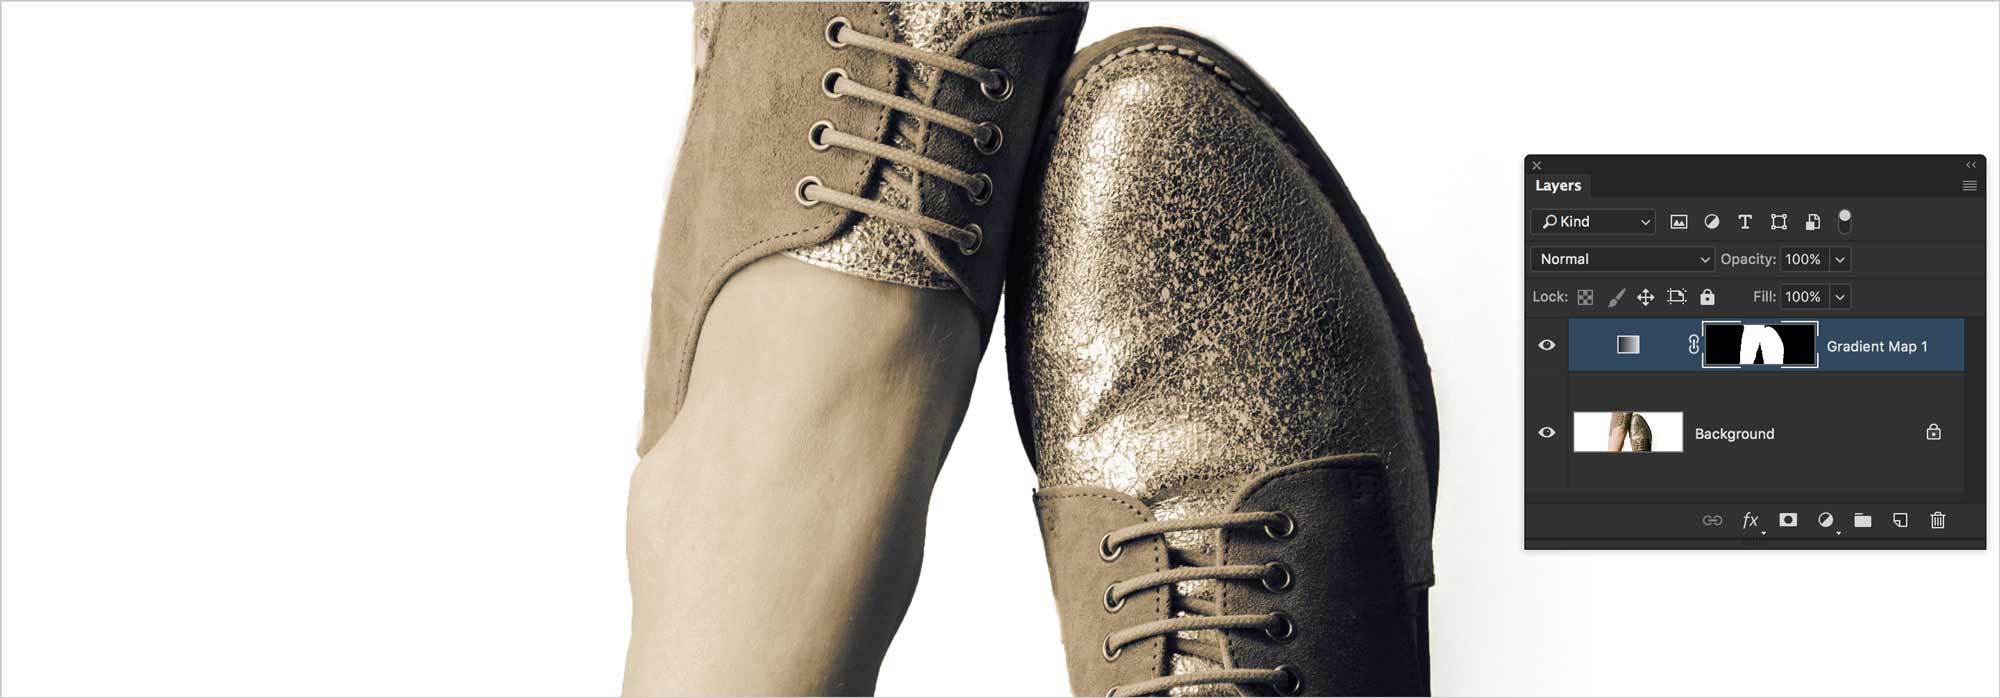
Once the boots are selected, we can change their colour.
Reversibility of Selections
If you’re attempting to select a very detailed object on a rather flat background, it would likely be simpler to select the background, then invert the selection. That’s the nature of selections in Photoshop. They’re simple to invert.
Save a Selection
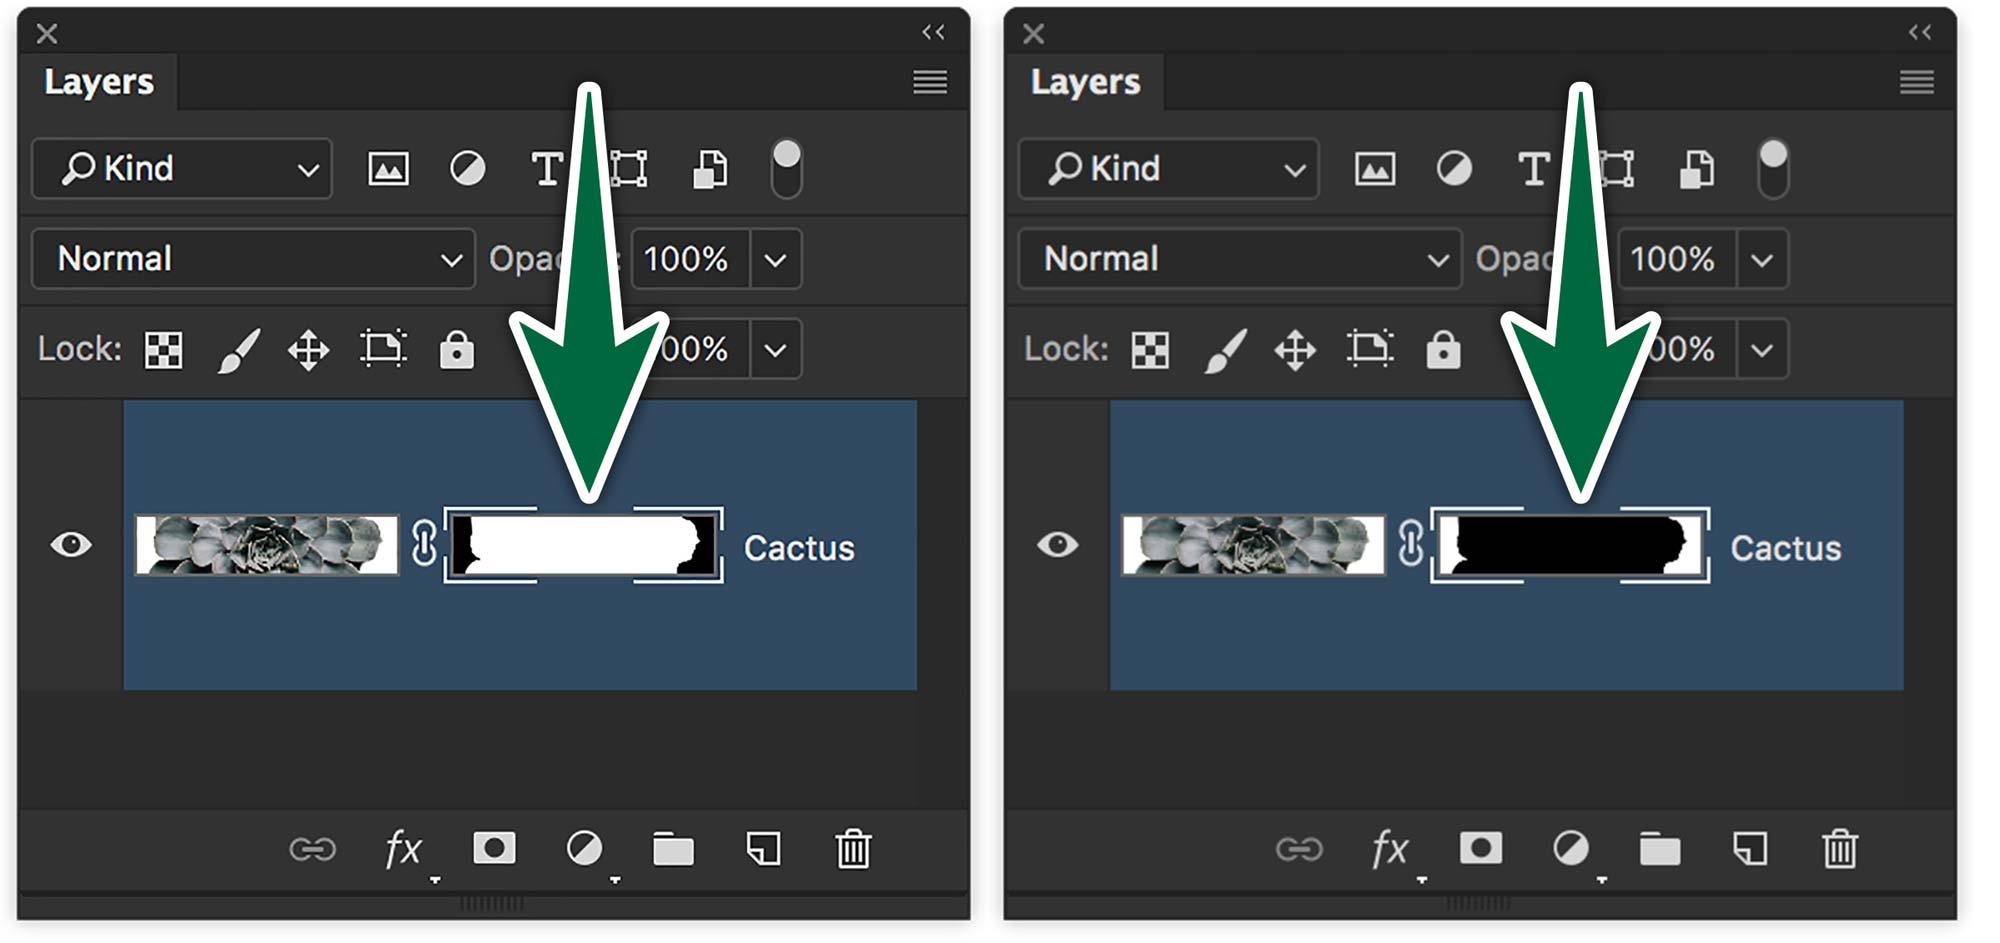
No matter the selection you create, you can use Select > Save Selection… to create an Alpha Channel. This is simply a saved selection. It doesn’t show on the canvas. It only appears in the Channels panel. It’s saved in your document even after it’s closed.
Any mask you create makes an Alpha Channel, which is saved in your Photoshop file. This includes the mask that comes with an Adjustment Layer.
Clipping Path
When you want to place an image of a hard-edged object in a page layout without its background, a clipping path is the way to go.
The Pen Tool takes centre stage in this lesson. We’ll use it to draw around an object to hide its background when it’s placed in a page layout. The benefit of a clipping path is that it has a sharp edge. It will cut out the object with as clean an edge as possible. Clipping paths are appropriate when the object to be clipped has a hard edge. If your subject has curly hair, a clipping path is not the way to go.
By the way, this process has nothing to do with layers. We’re going to draw a path around the object, then save it. We don’t delete the background pixels. They just get masked by the path once the image is placed in InDesign.
Clip the Clamp
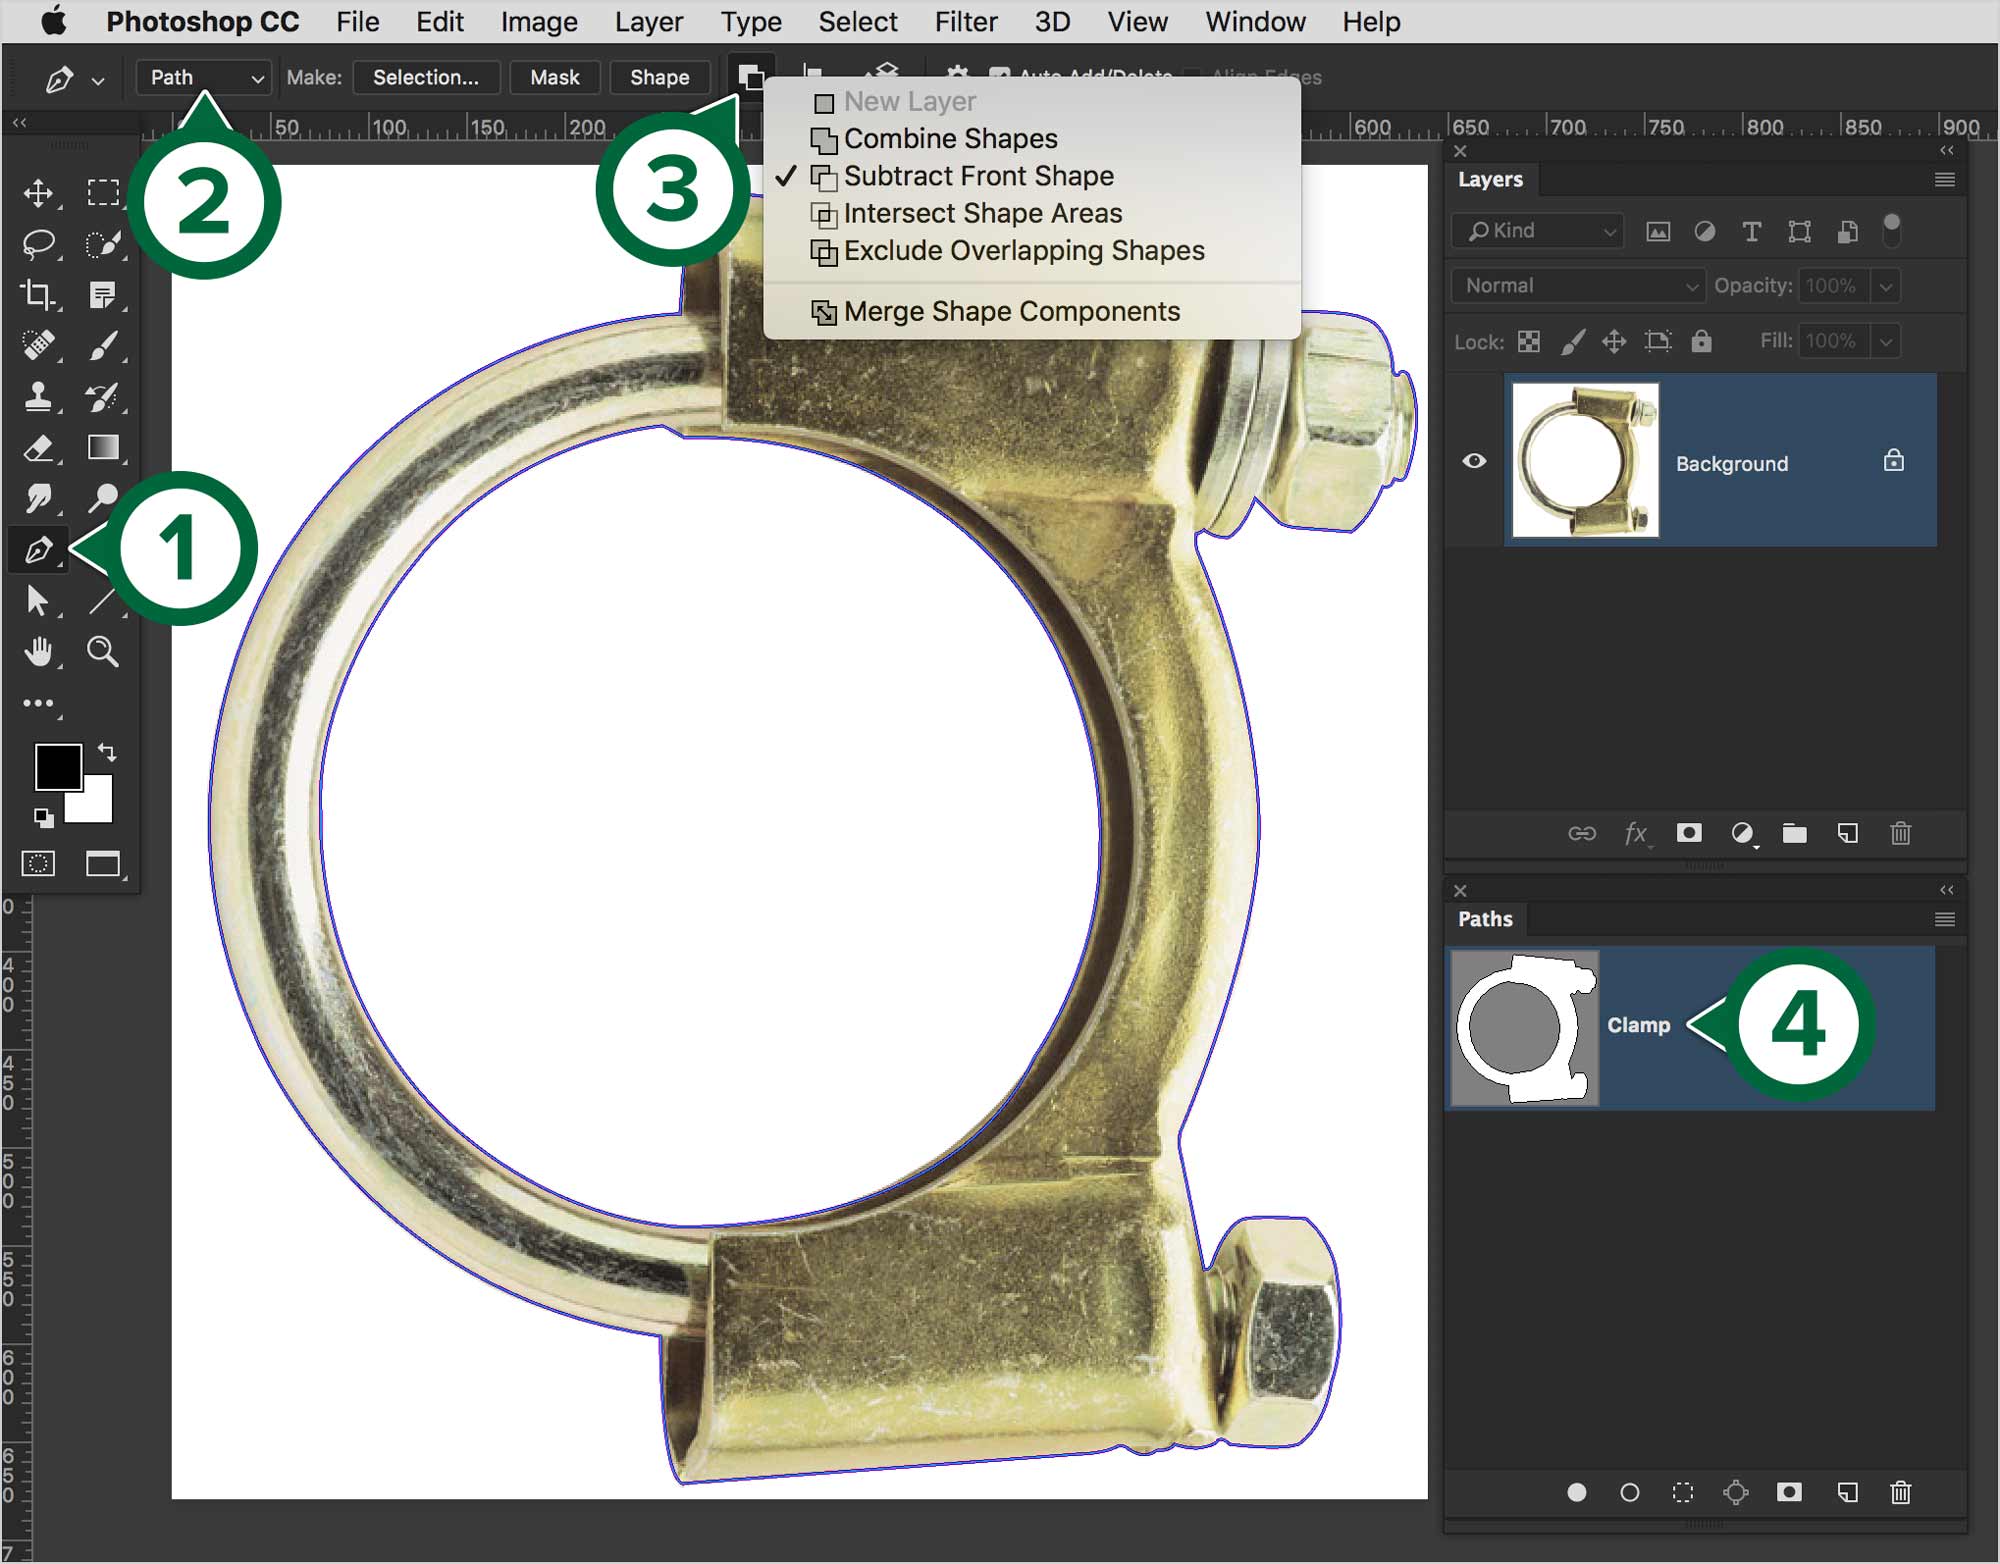
- Use the Pen Tool
- Set the mode to Path
- Set Path Operations as needed
- What's selected is white
Set the Pen Tool’s mode to Path and not Shape in the Control bar. Paths in Photoshop don’t print by default. It’s a path without a stroke. You can even turn on the Rubber Band effect like in Illustrator.
When you draw your path, use the same Pen tool technique you’d use when drawing in Illustrator. When your object has a hollow centre, like the clamp, make sure the Path Operations is set to Exclude Overlapping Shapes. This will make the paths panel look like the one above. The object needs to be white and the surrounding area grey in the panel.
Once you’re done with drawing the path, save it by double-clicking on it. Then, give it a meaningful name.
Save your image as a .psd file.
Place in InDesign
Once you get your image into InDesign, you can use its clipping path options to select which path to use in your document. The interoperability between Photoshop and InDesign really shines. Open the provided InDesign document, then go File > Place.
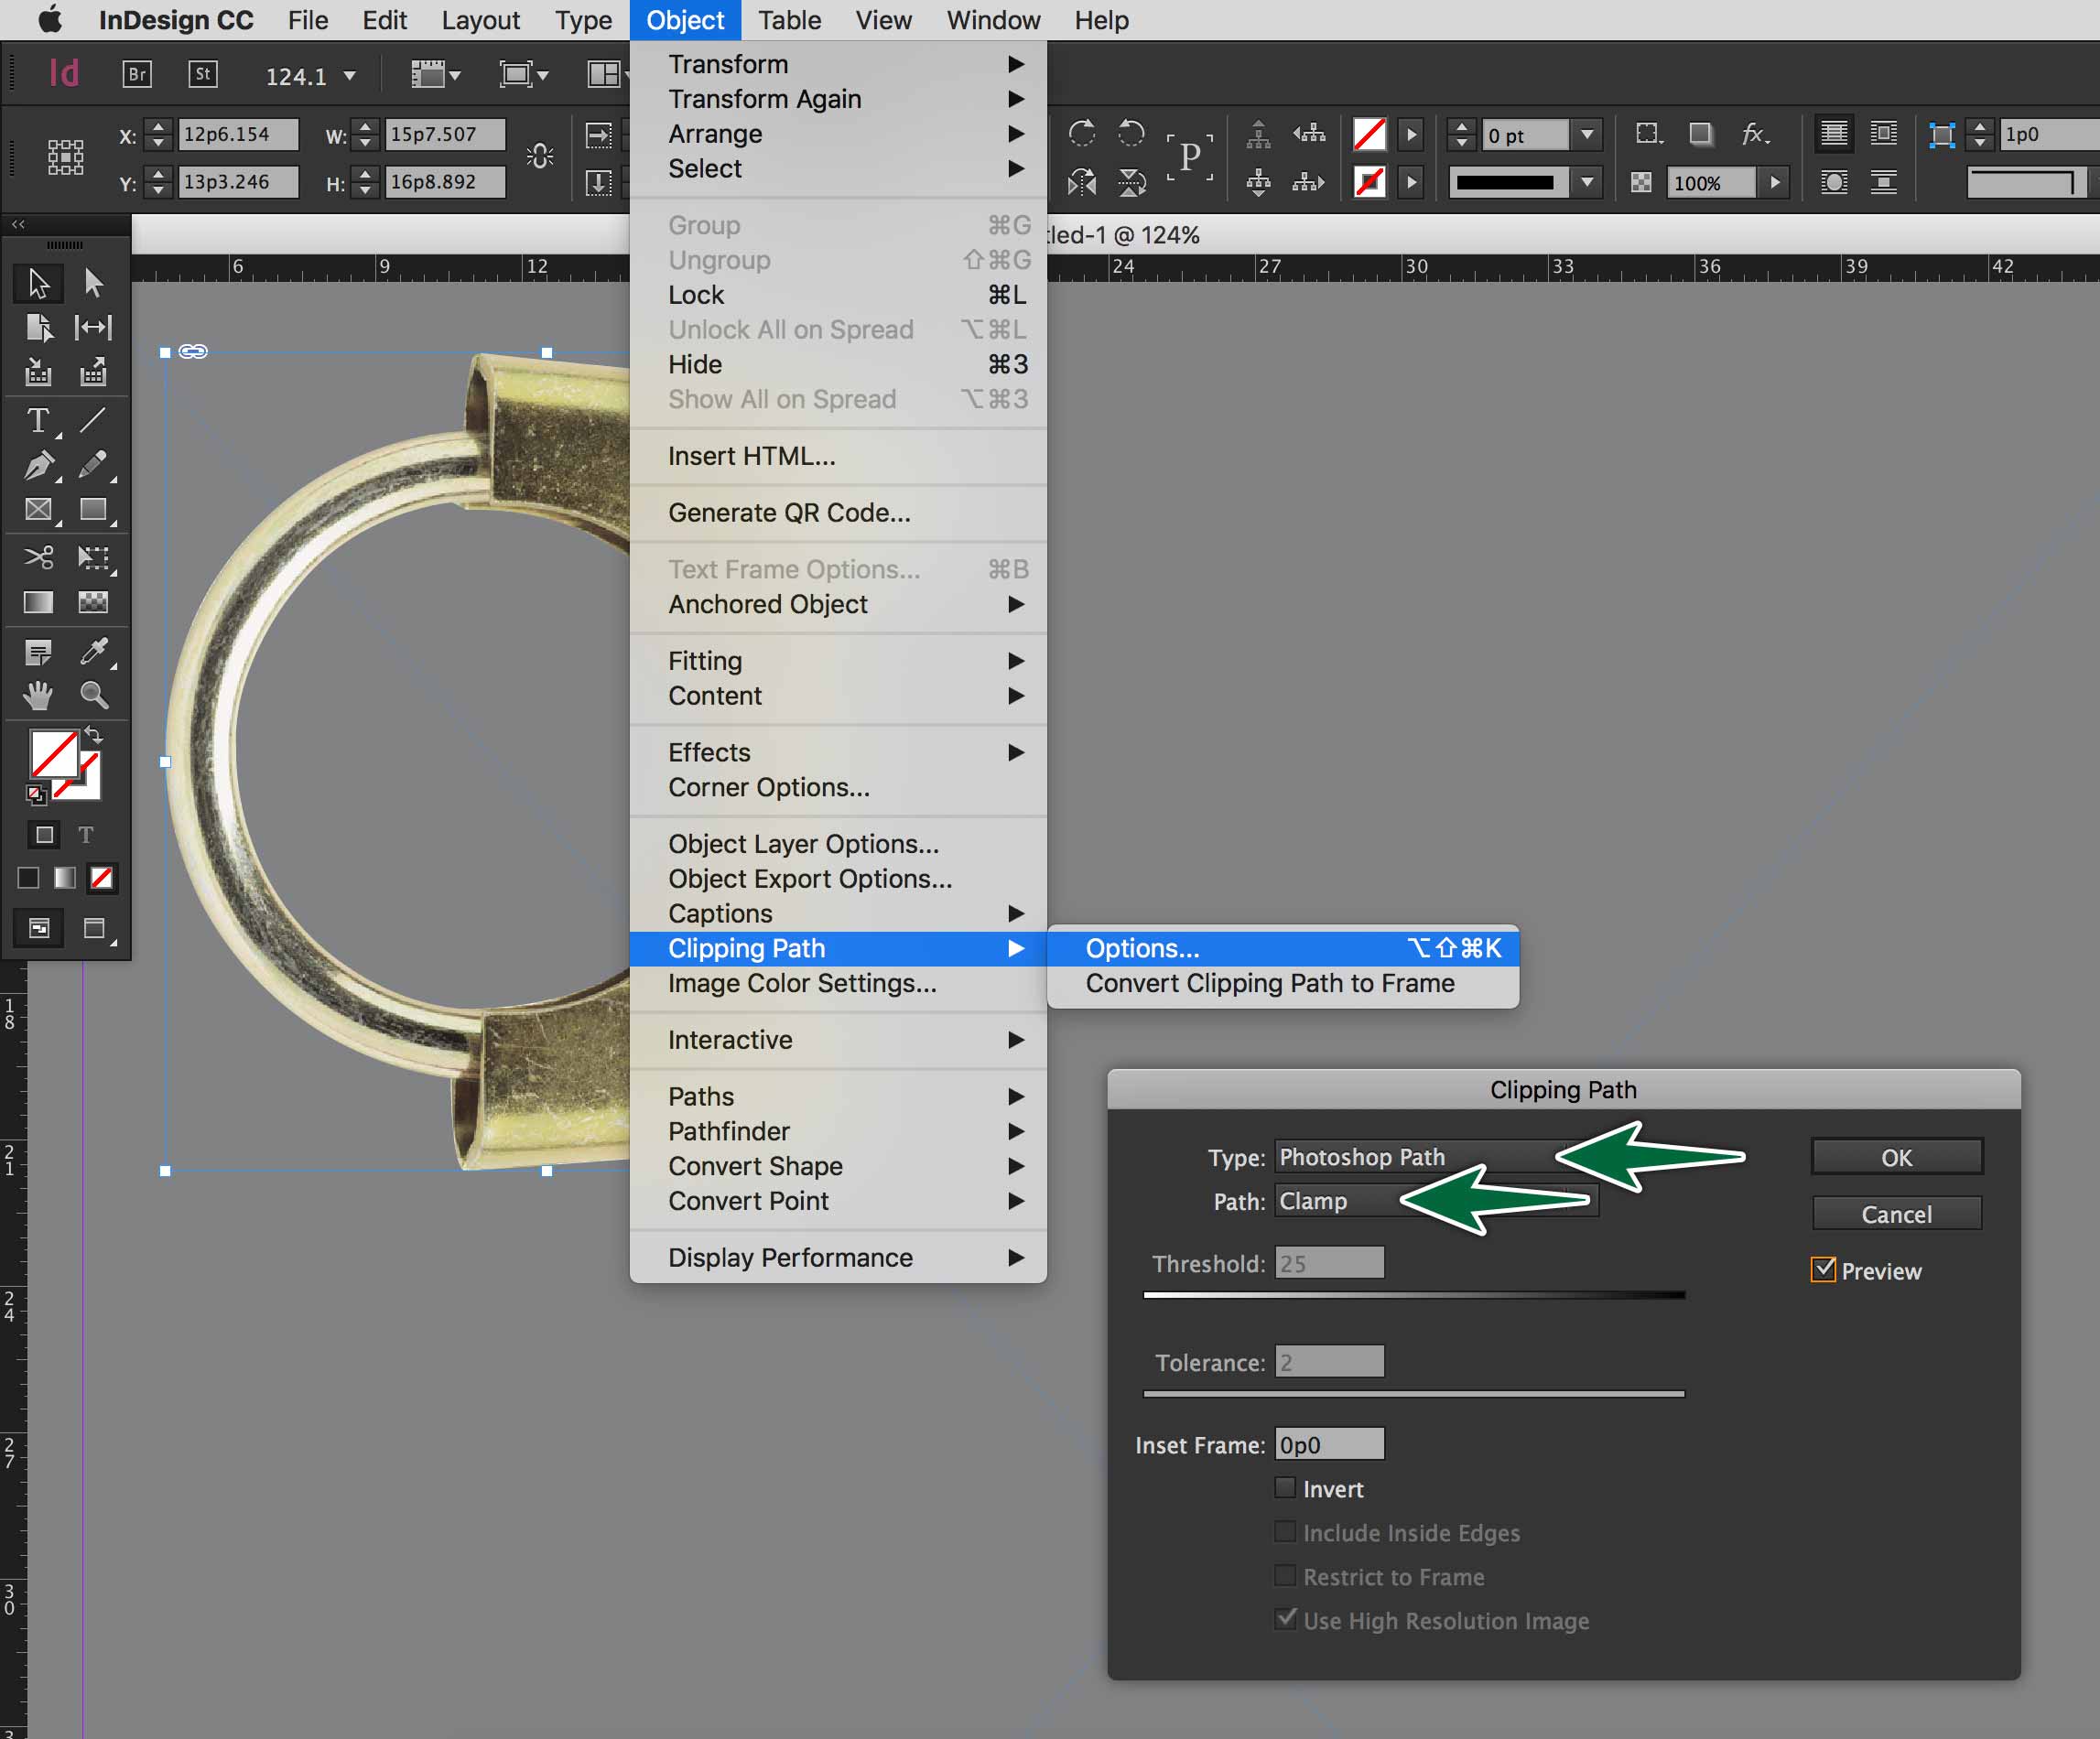
Select your image on the page, then go Object > Clipping Path Options…. Choose Photoshop Path from the dropdown. Choose the path’s name from the second dropdown. If you check the Preview checkbox, then you’ll see the background disappear on the page.
Edit Your Path
Once you have the job all done in InDesign, you may notice you’ve either cut it too close or too far from the object. You need to round-trip it from Photoshop to InDesign to fix it. Edit the path in the image. Save it.
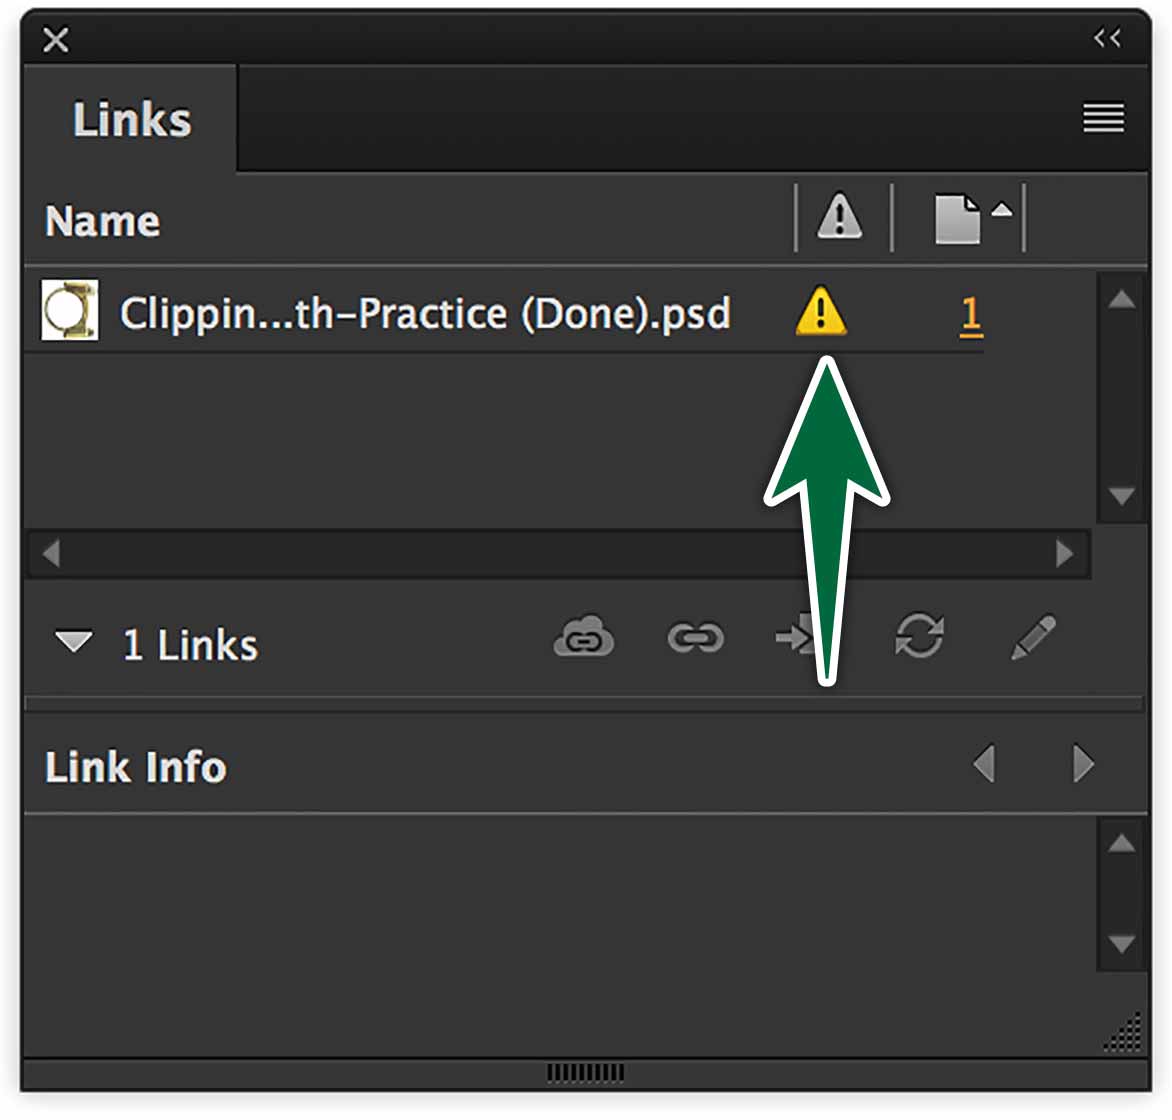
Go back to InDesign. Check your Links panel to make sure you’re looking at the latest version. If you see an exclamation mark like this, simply double-click on it to update it.
Formative Activity
Marquee Tool
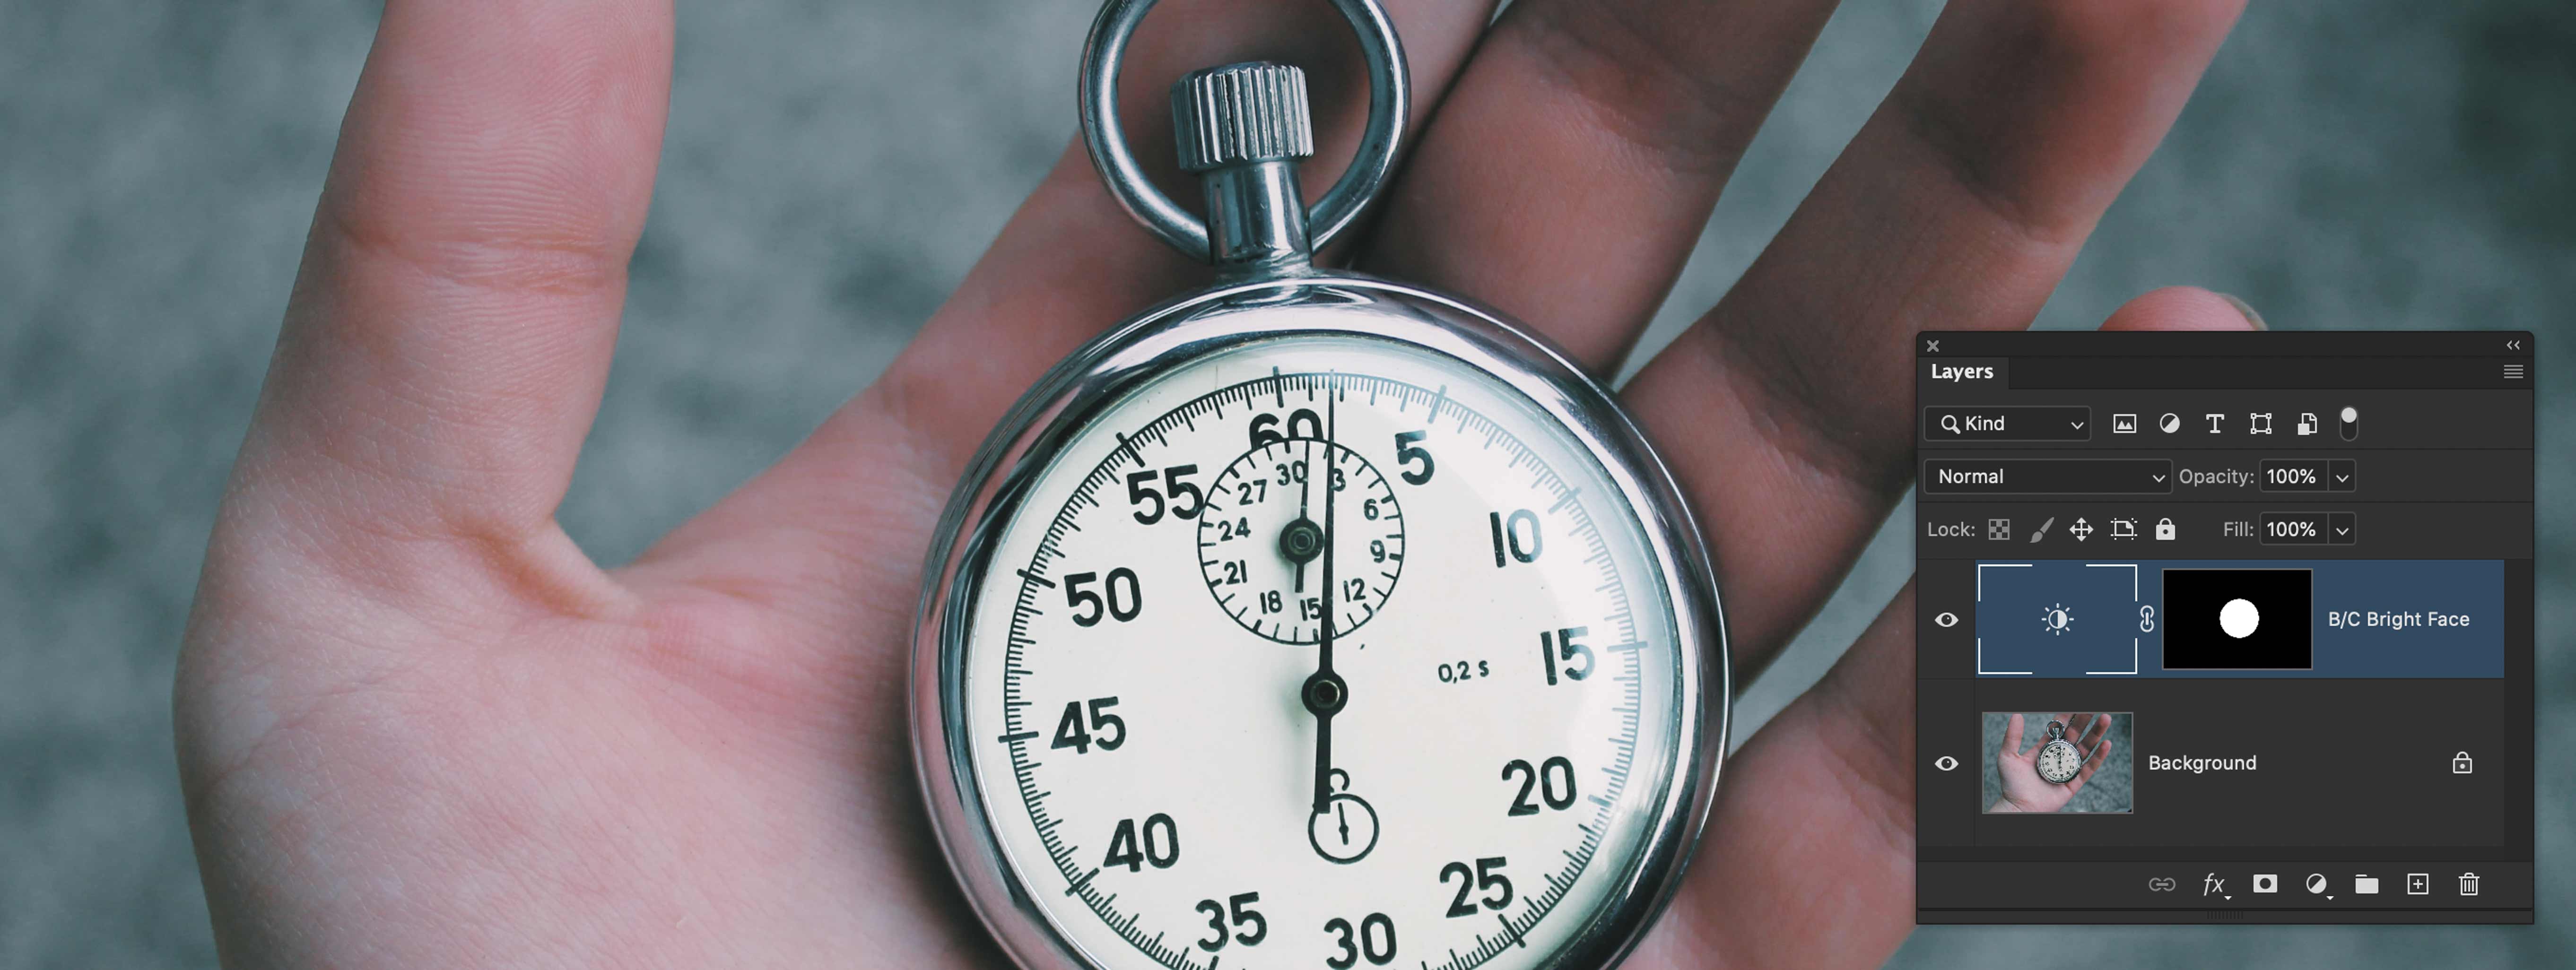
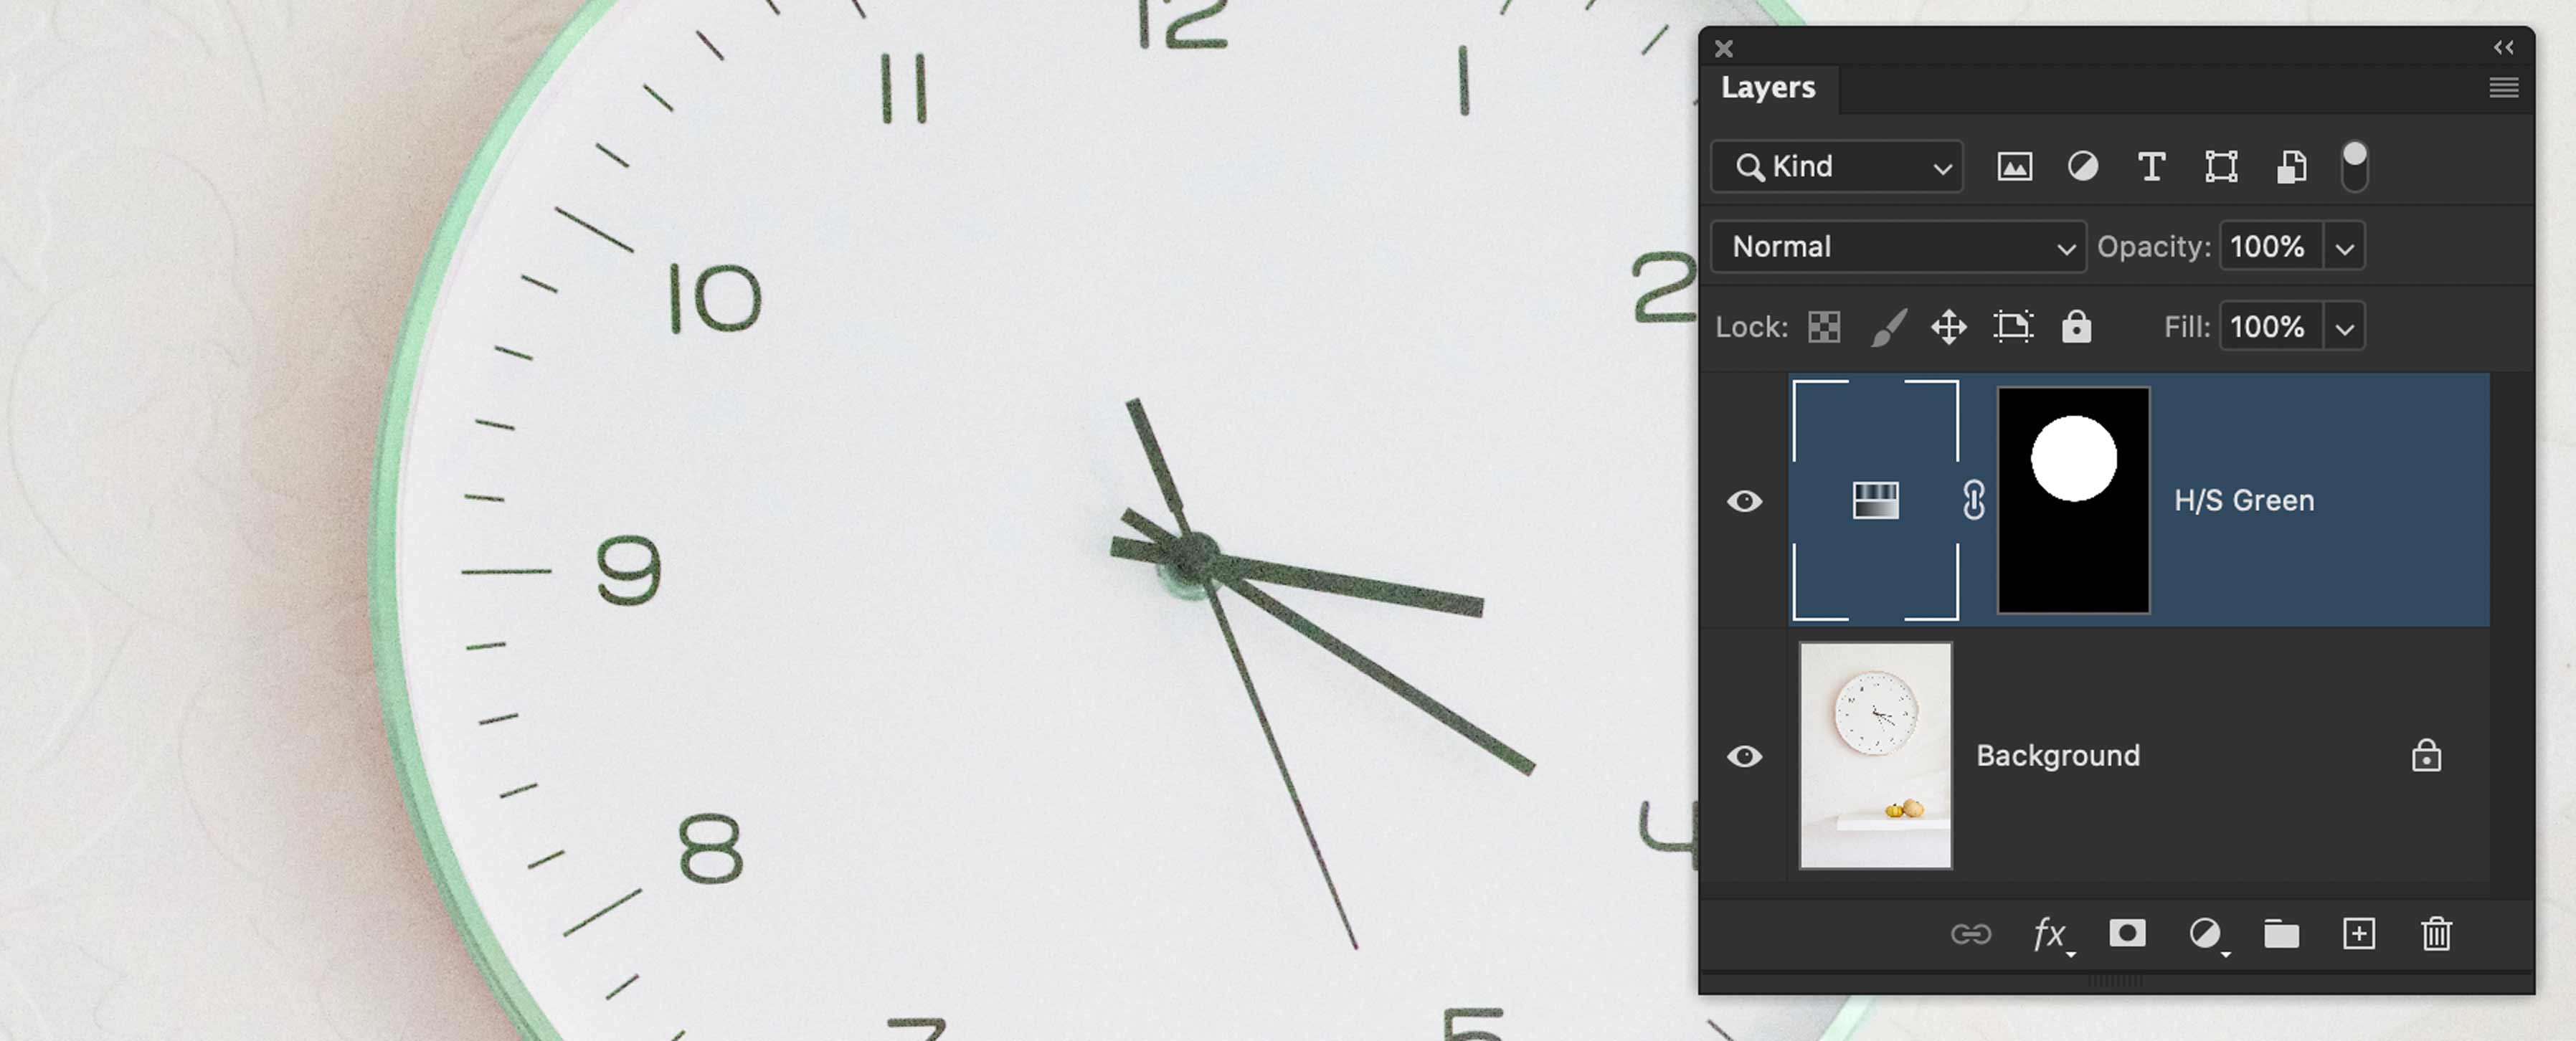
Use the Elliptical Marquee Tool on the clock image to select the whole clock. Once you’ve selected it accurately, add a Hue/Saturation adjustment layer to make it a different colour.
Save an close the image.
Lasso Tool
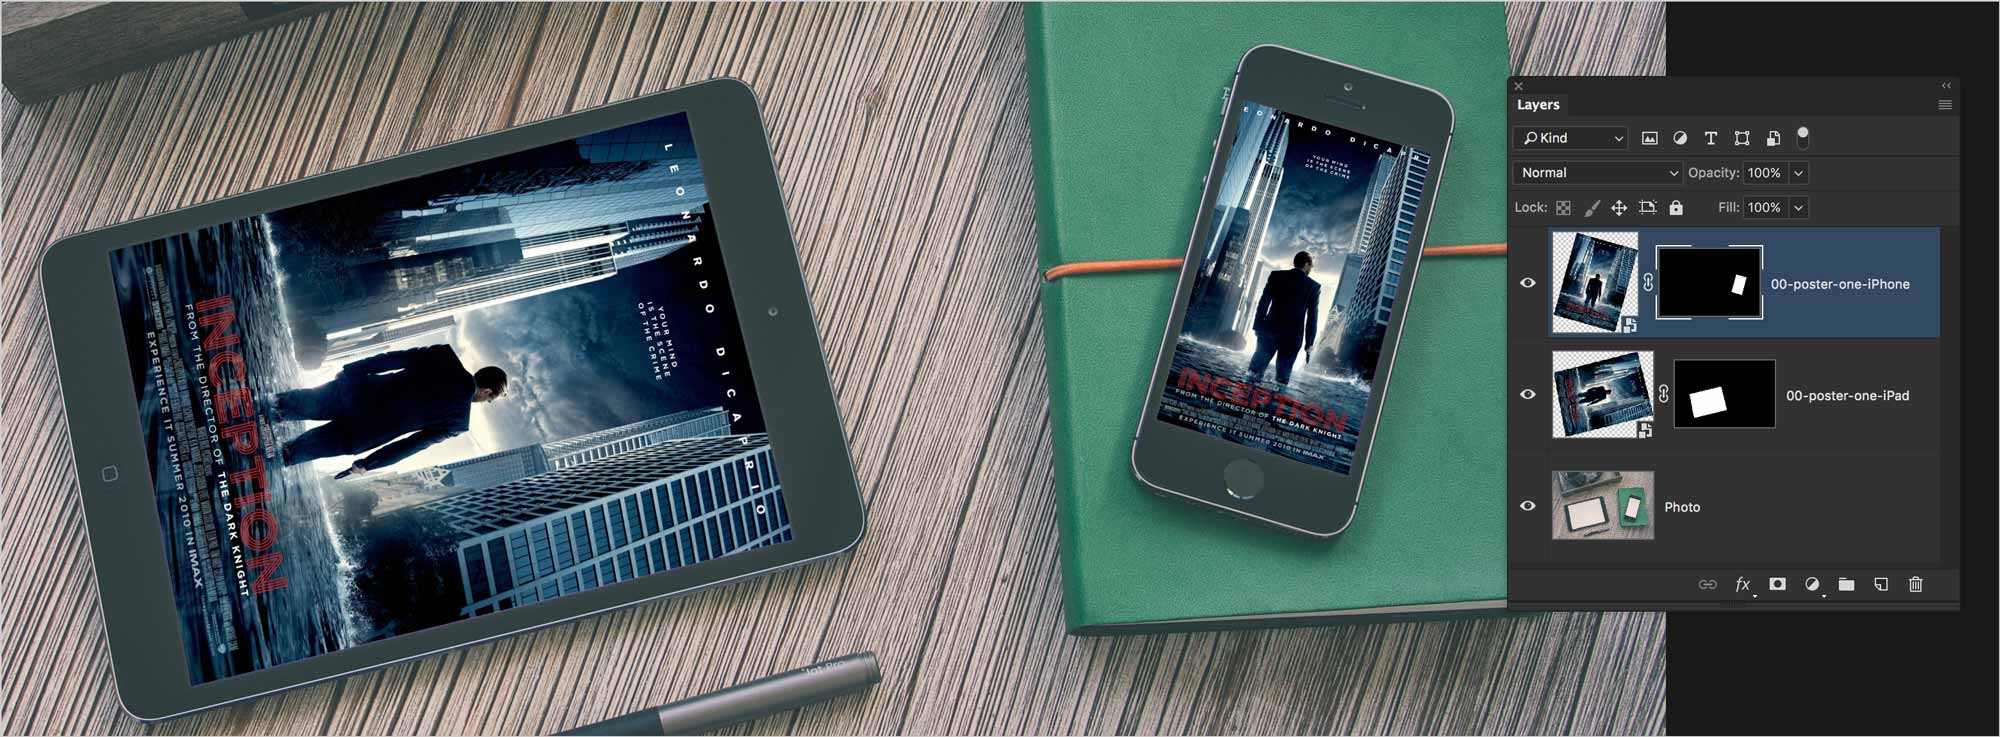
Use the Polygon Lasso Tool to select each of the device screens. Zoom in to start.
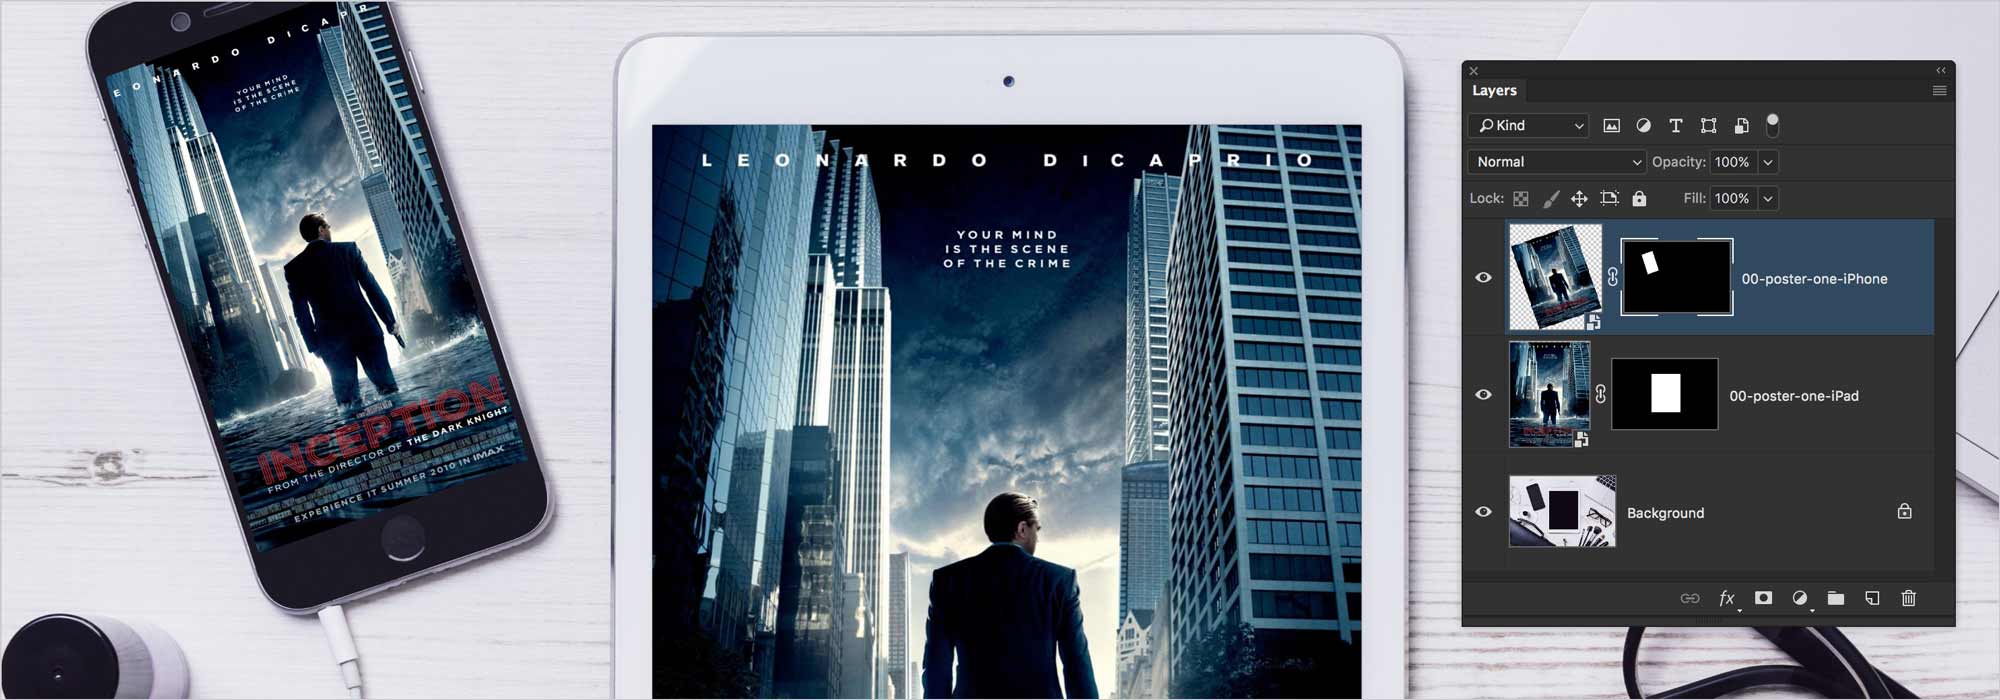
You can use the Hand Tool with the Space Bar to pan around the image. ⌘-plus and ⌘-minus works while you’re selecting. Once you’ve made a selection for one of the screens, add a Layer Mask to the appropriate poster graphic as shown above.
Quick Select
Use the Quick Select Tool to select her legs and her shoes. Once you have a clean, accurate selection, add a Hue Saturation adjustment layer to change the colour of the legs and shoes.
Colour Range
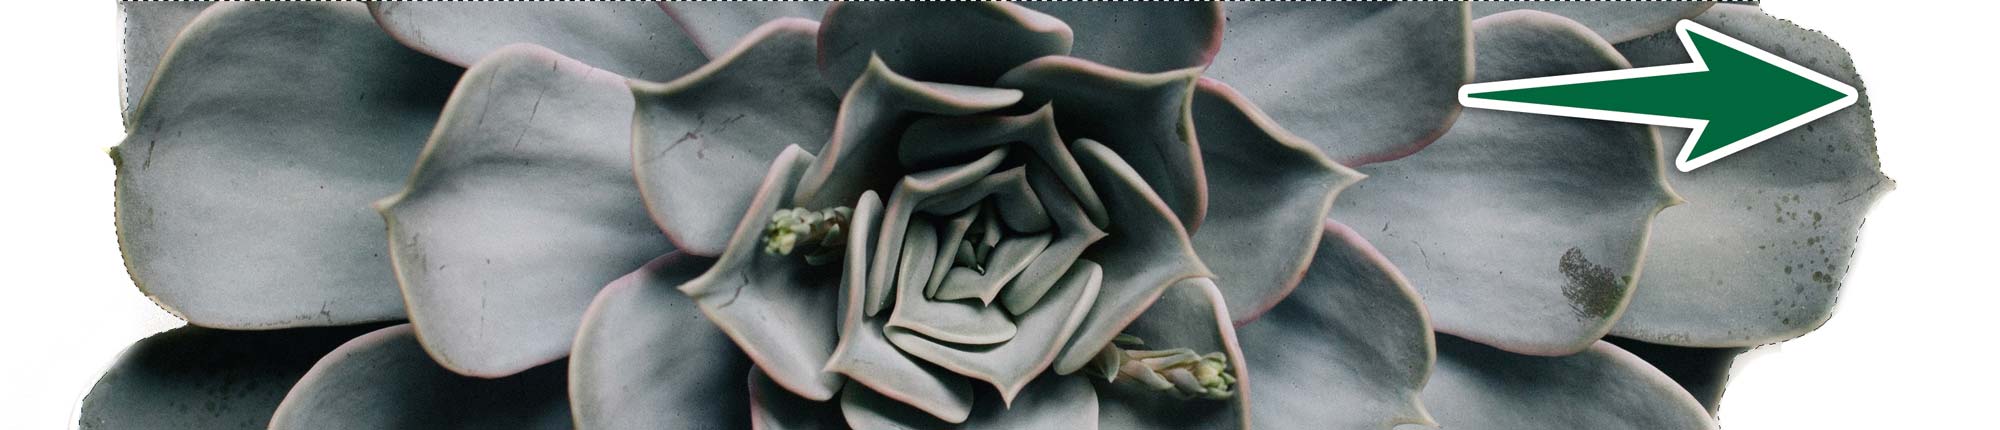
Use Select > Colour Range… to select the orange part of the van. We want to make the orange turn to yellow.
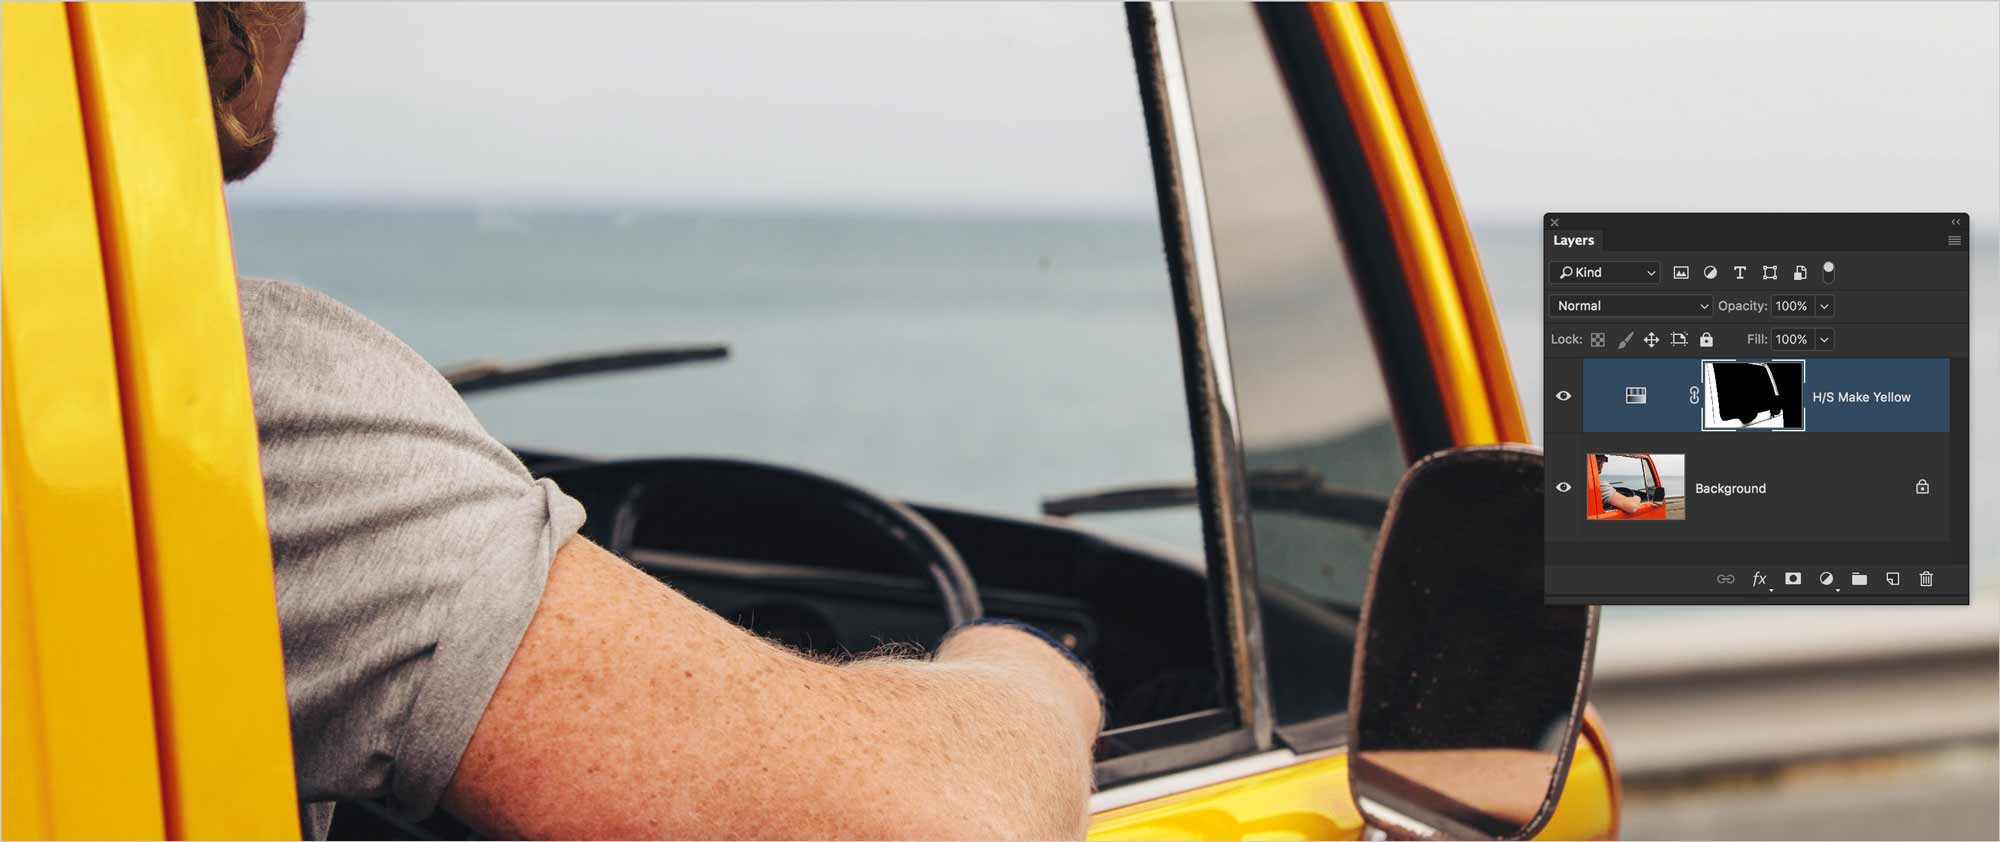
You’re not going to get it all with the Colour Range function. Add your Hue/Saturation Adjustment Layer to change the orange to yellow. Paint white or black on the mask to edit it. What’s white on the mask will become yellow.
Select Subject
Use the Select Subject feature to select the woman. Once it’s done, you can simply mask her. Feel free to refine the mask, or not.
Select Object Tool
Use the Select Object tool to select the camera. Add an Adjustment Layer to do something to it.

Select Focus Area
We’re going to mask the guy from the background using Select > Focus Area…. Once the preview looks good enough in the Focus Area dialogue, make sure Output is set to New Layer with Layer Mask.
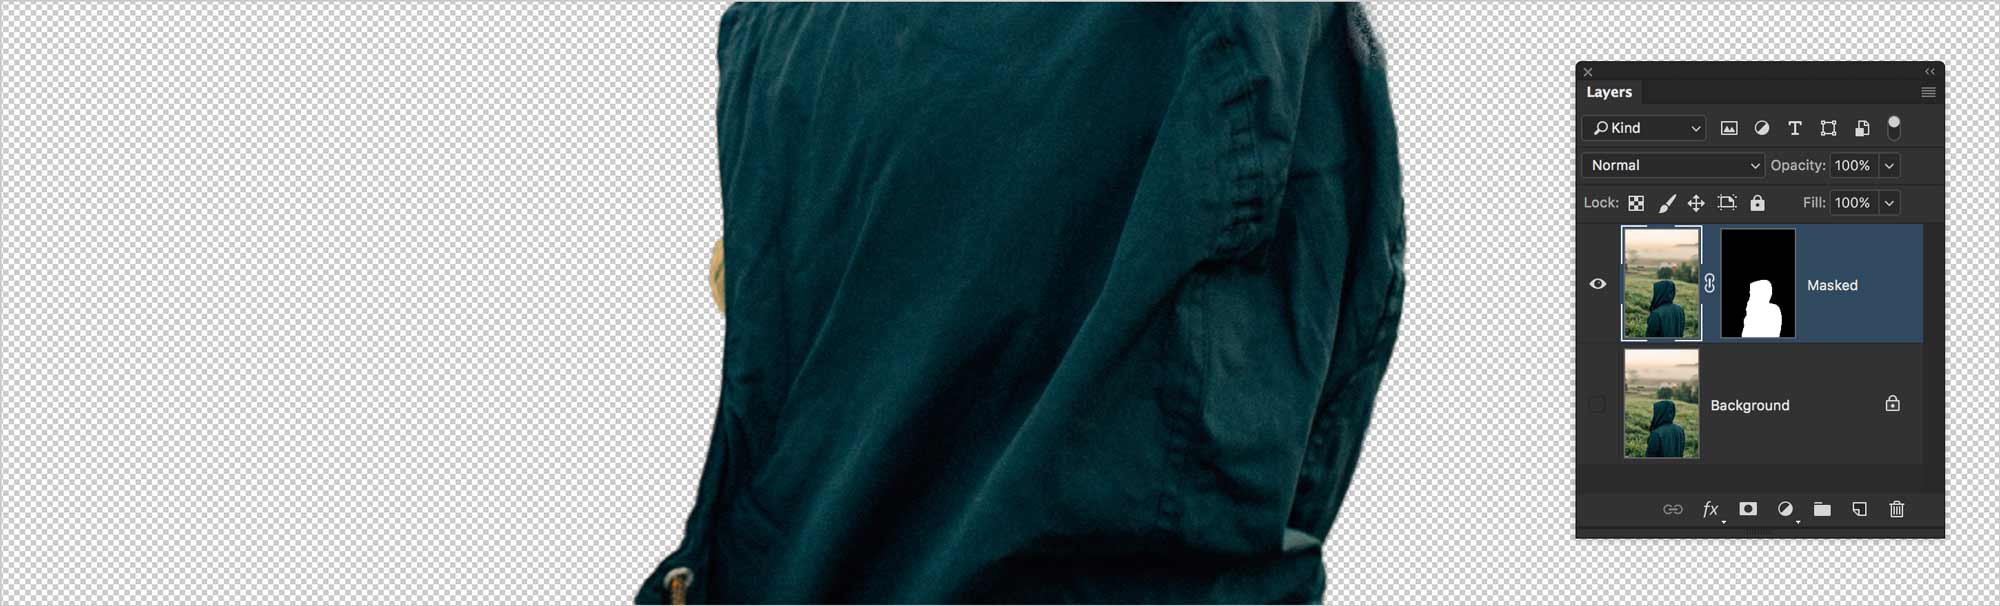
You can use Select and Mask… to refine the Mask.
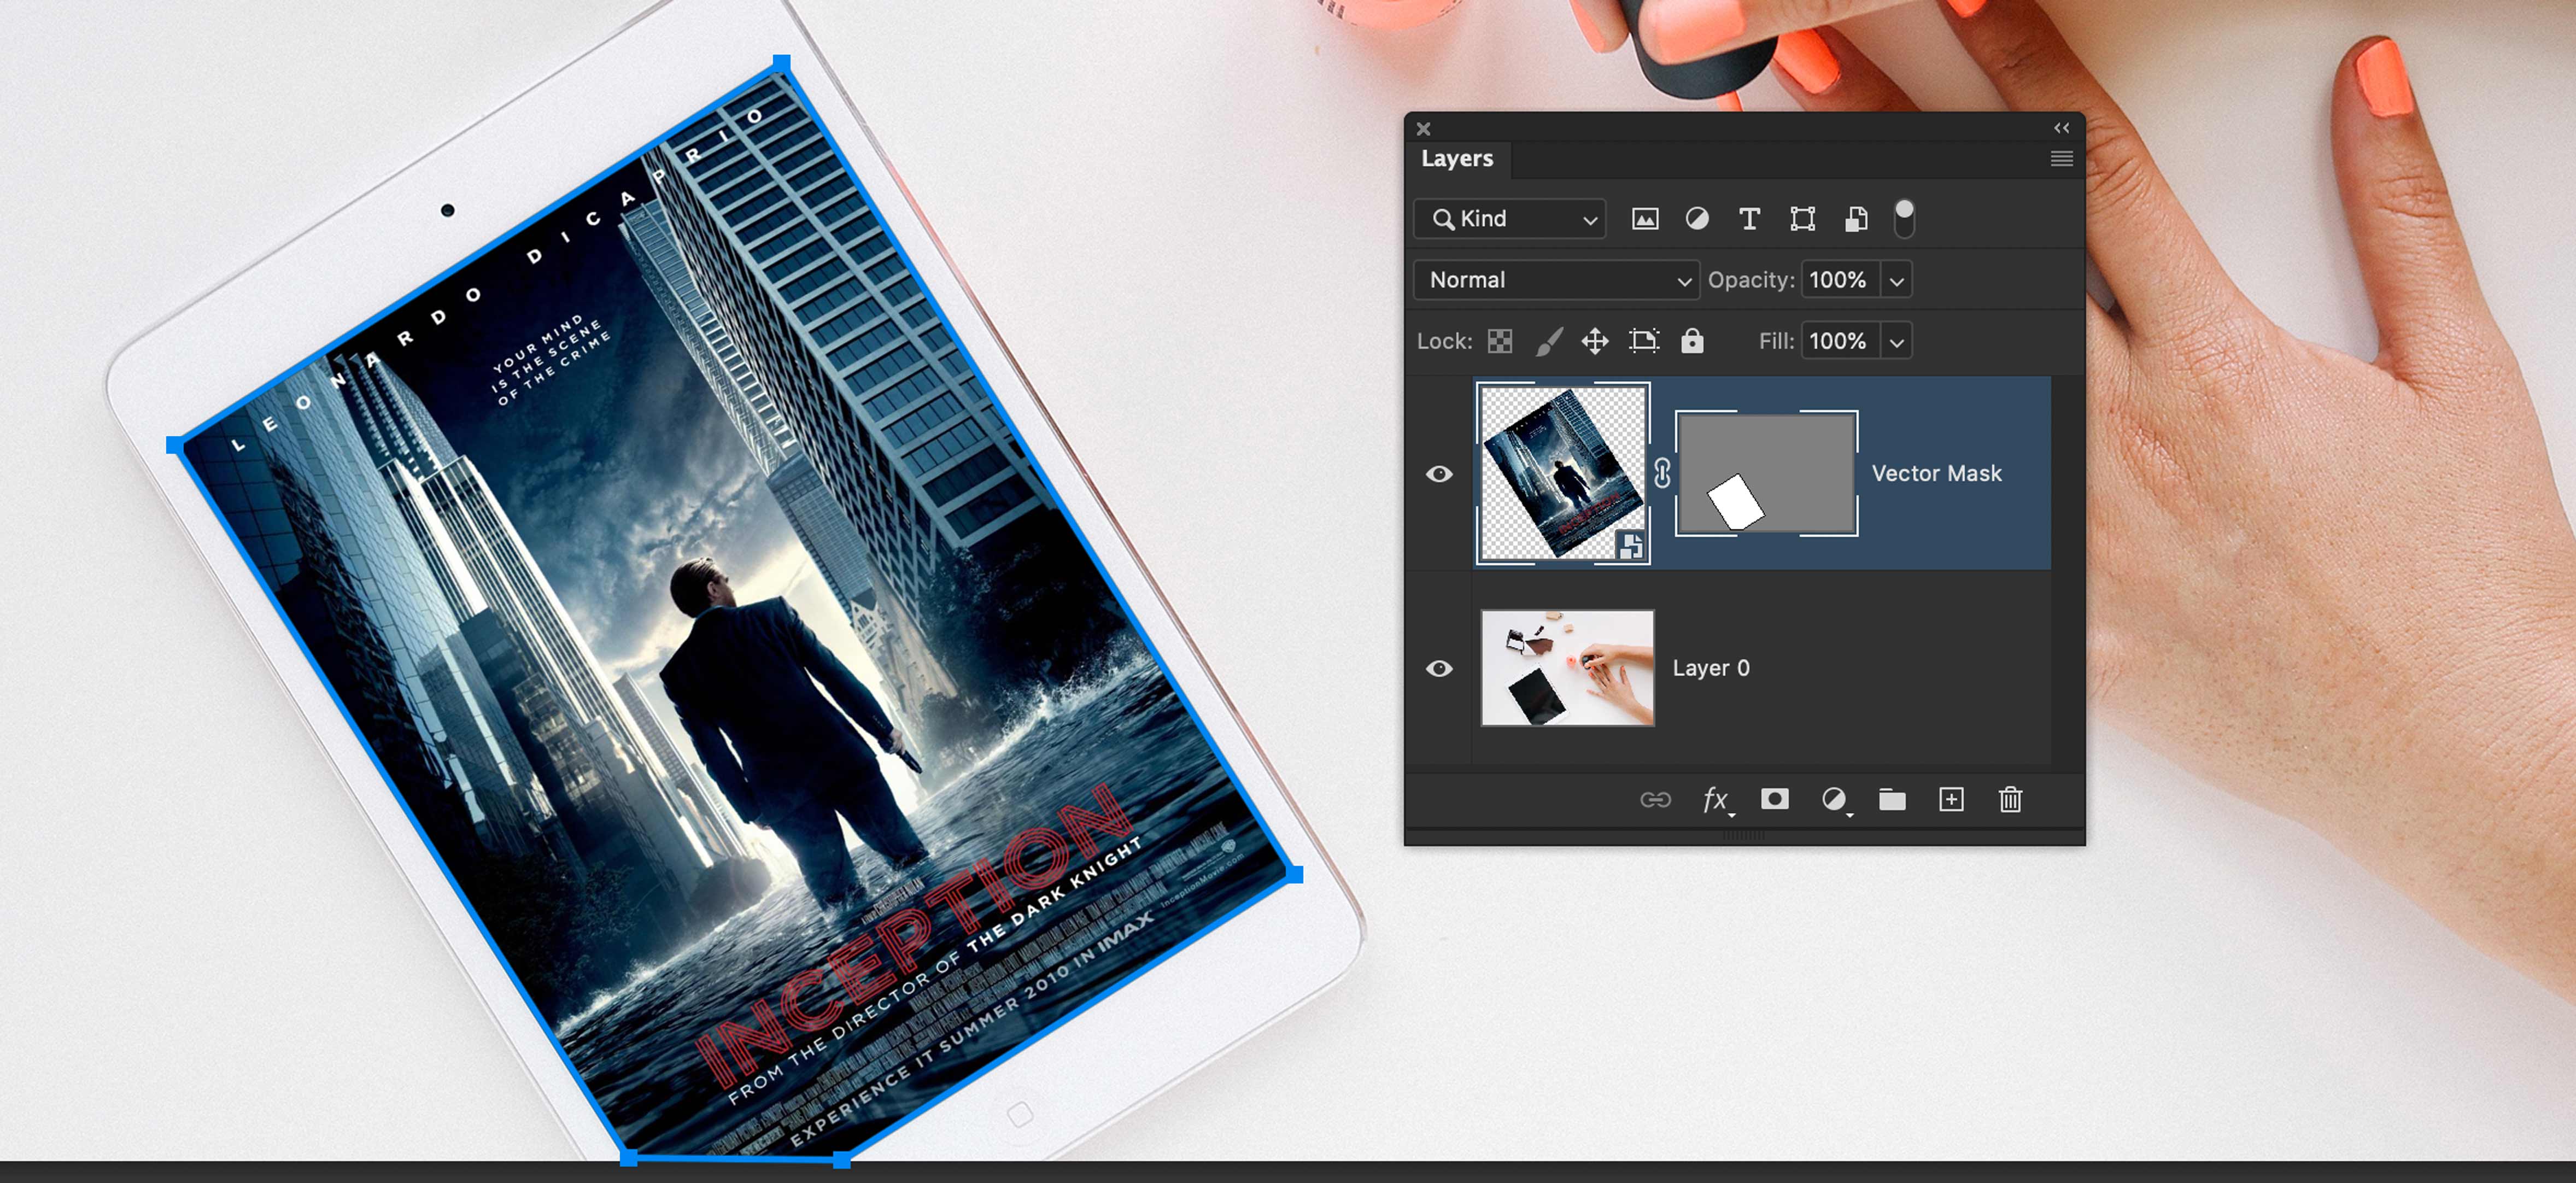
Vector Path
Use the Pen Tool set to Path. Draw around the screen. Target the poster’s layer, turn on its visibility. Go Layer > Vector Mask > Current Path. That’s it!
Clipping Path
Create a path around the cheese. Don’t forget to draw the void in the center.
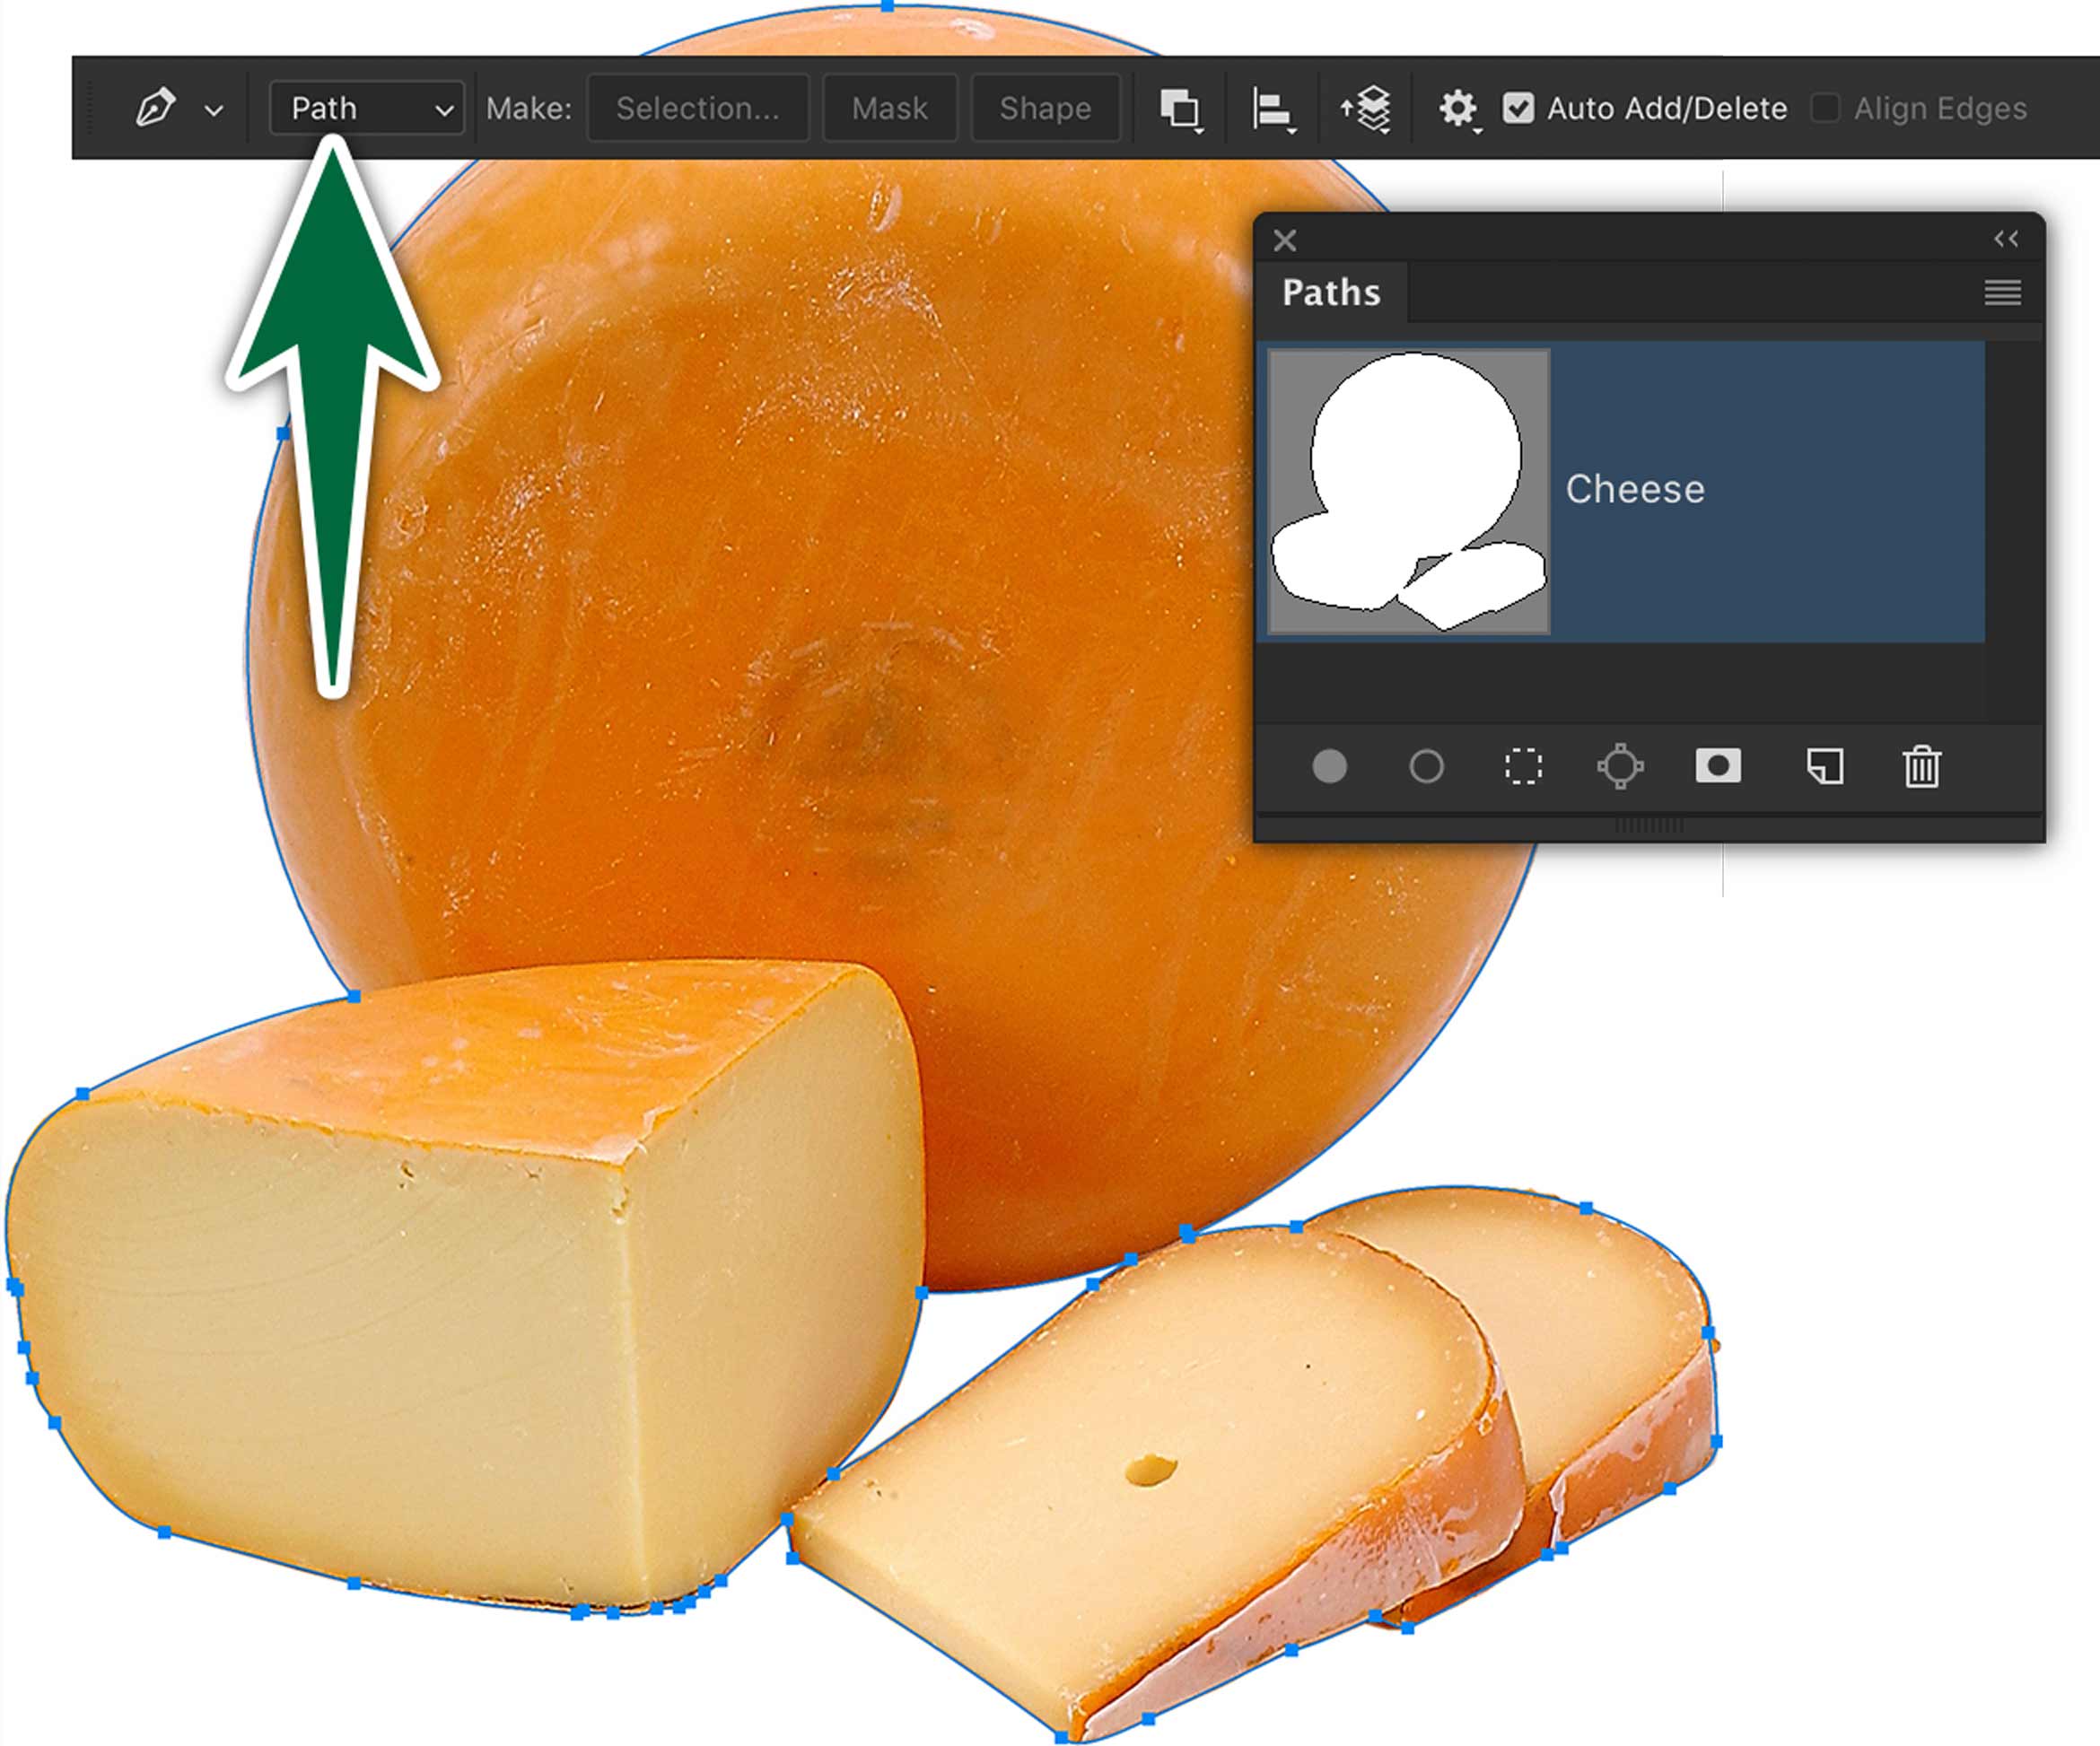
Make sure to name your path. Place the photo in the provided InDesign document. The white background should not show in InDesign.
Save and close the InDesign document.
Supplemental Links
- Adobe: Select with Marquee Tools
- Adobe: Lasso Tools
- Adobe: Select Colour Range
- Adobe: Select Focus Area
- Adobe: Quick Mask
