Topics
Layer Masks are used to:
- Erase (mask) areas of a photo.
- Select an area of a photo to apply an effect.
- Apply Adjustment Layers selectively.
- Combine photos in one canvas.
- …and much, much more.
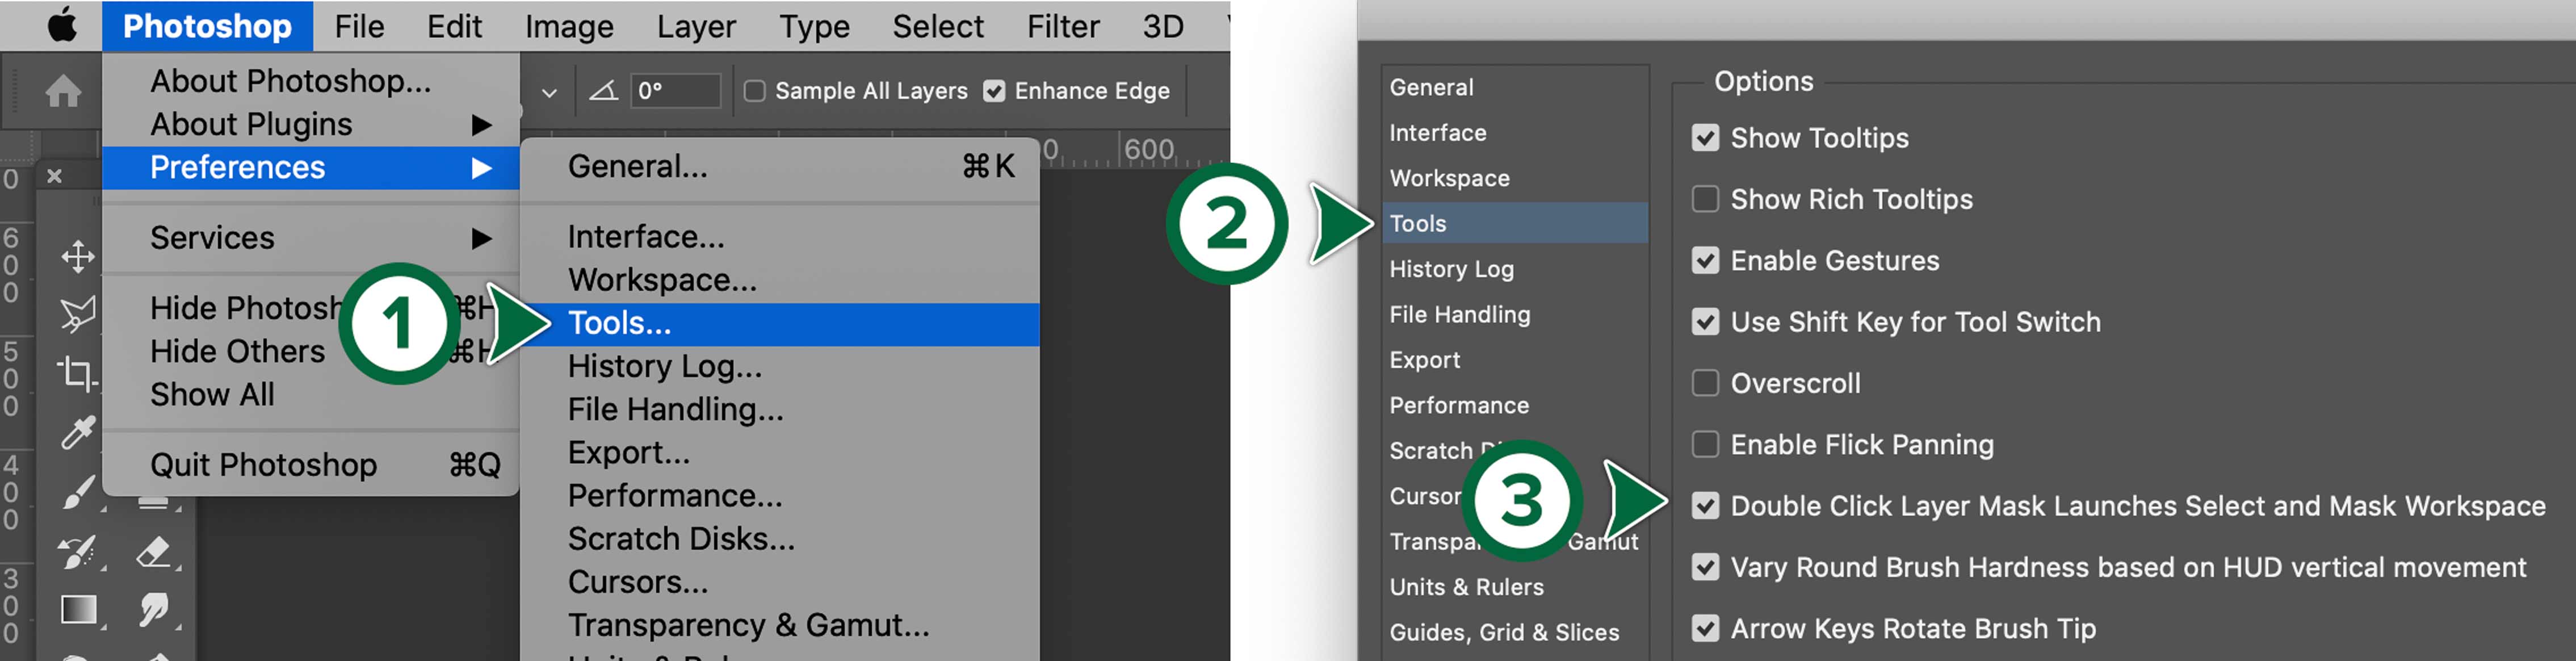
Change This Setting
Important Keyboard Commands
- d = Default colours in foreground/background swatches.
- x = Swap foreground/background swatches.
- ⌥-delete = Fill with foreground colour
- ⌘-delete = Fill with background colour.
- ⌘-a = Select all.
- ⌘-d = Deselect all.
- Shift-⌘-i = Invert selection.
Raster Layer Masks
A raster layer mask is a greyscale image, where darker pixels hide the underlying photo to increasing degrees. It works a bit like a dimmer on a light switch. The darker the pixels are on the mask, the less you can see the photo on that layer.
You can mask content by:
- creating a mask, then painting with black, white or grey.
- creating a selection, then creating a mask.
There are more techniques for creating masks, but these two will get you started.
Simple Mask
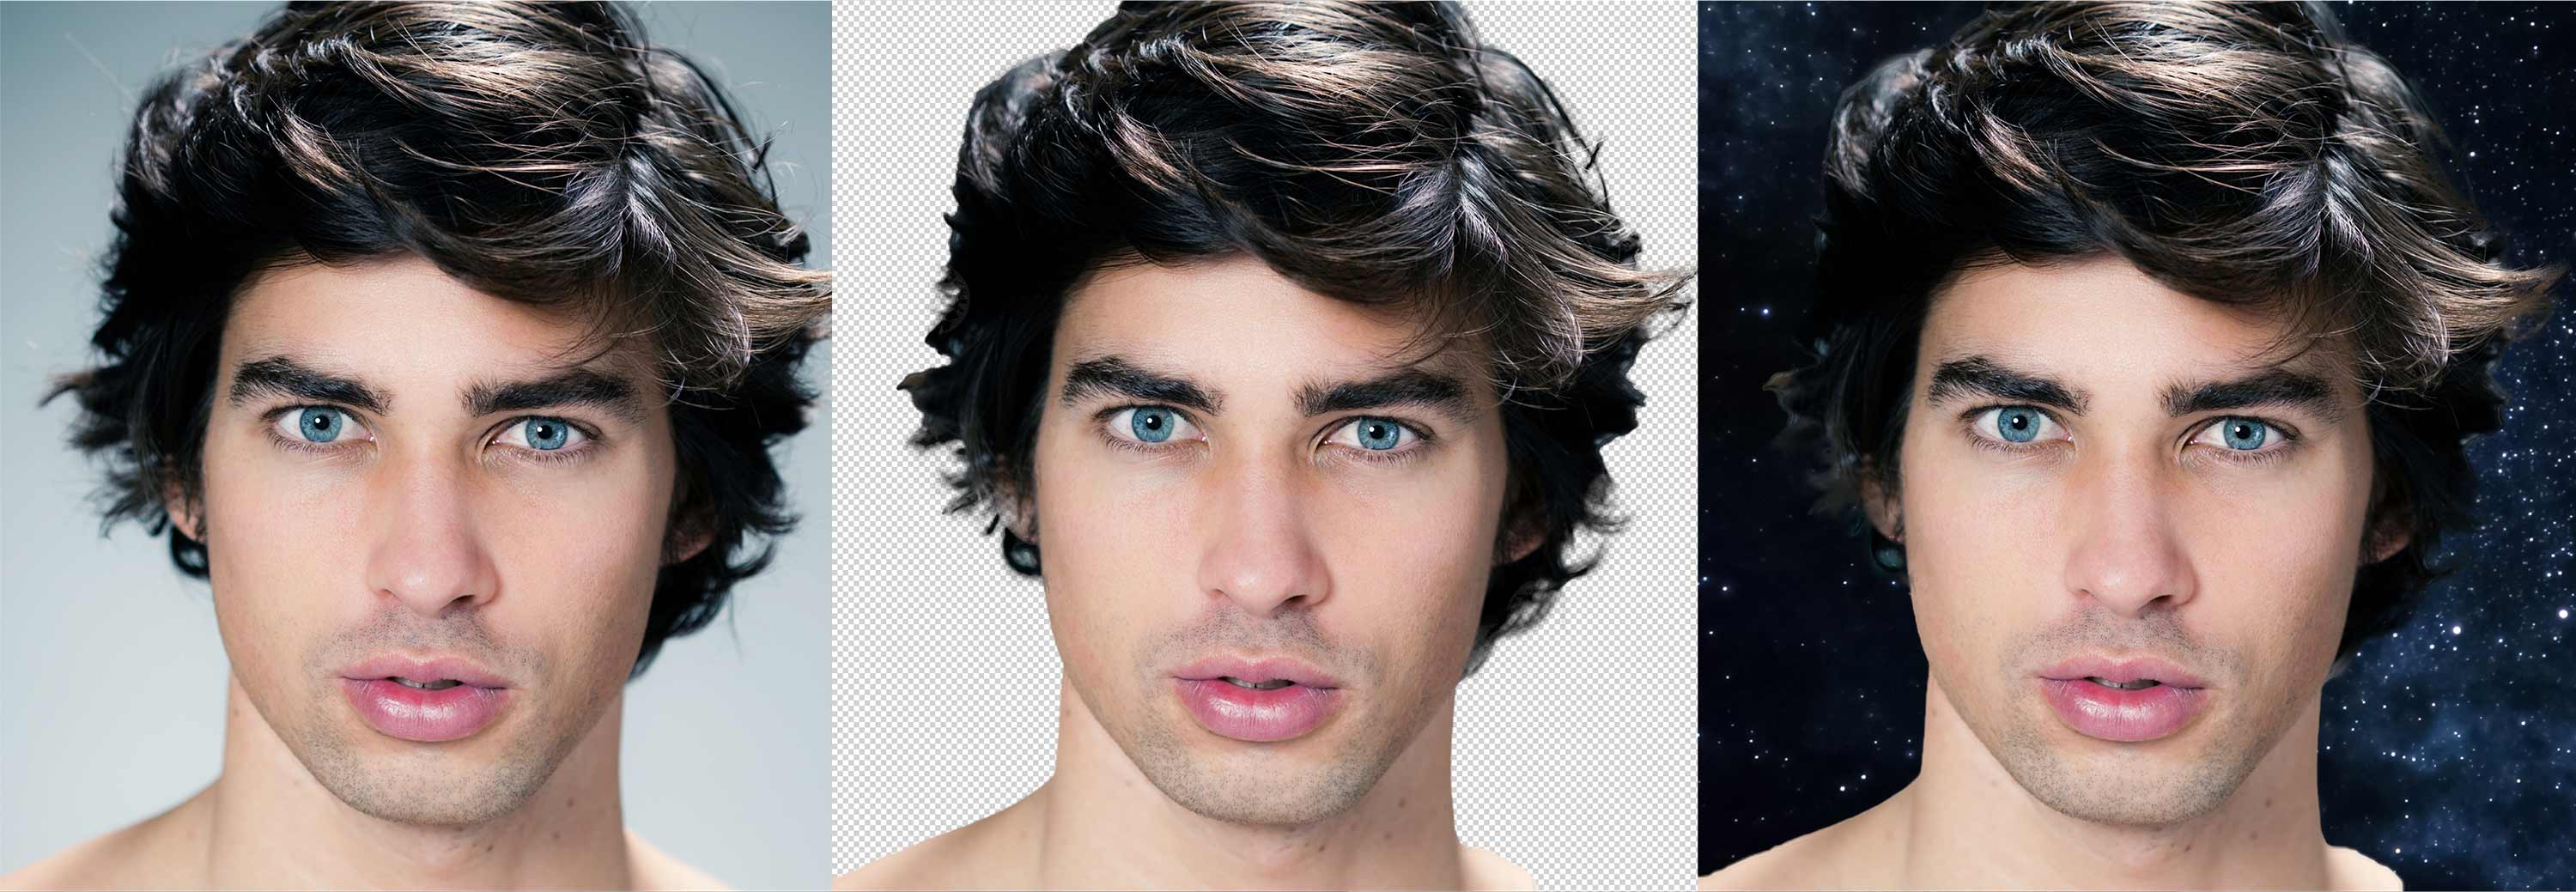
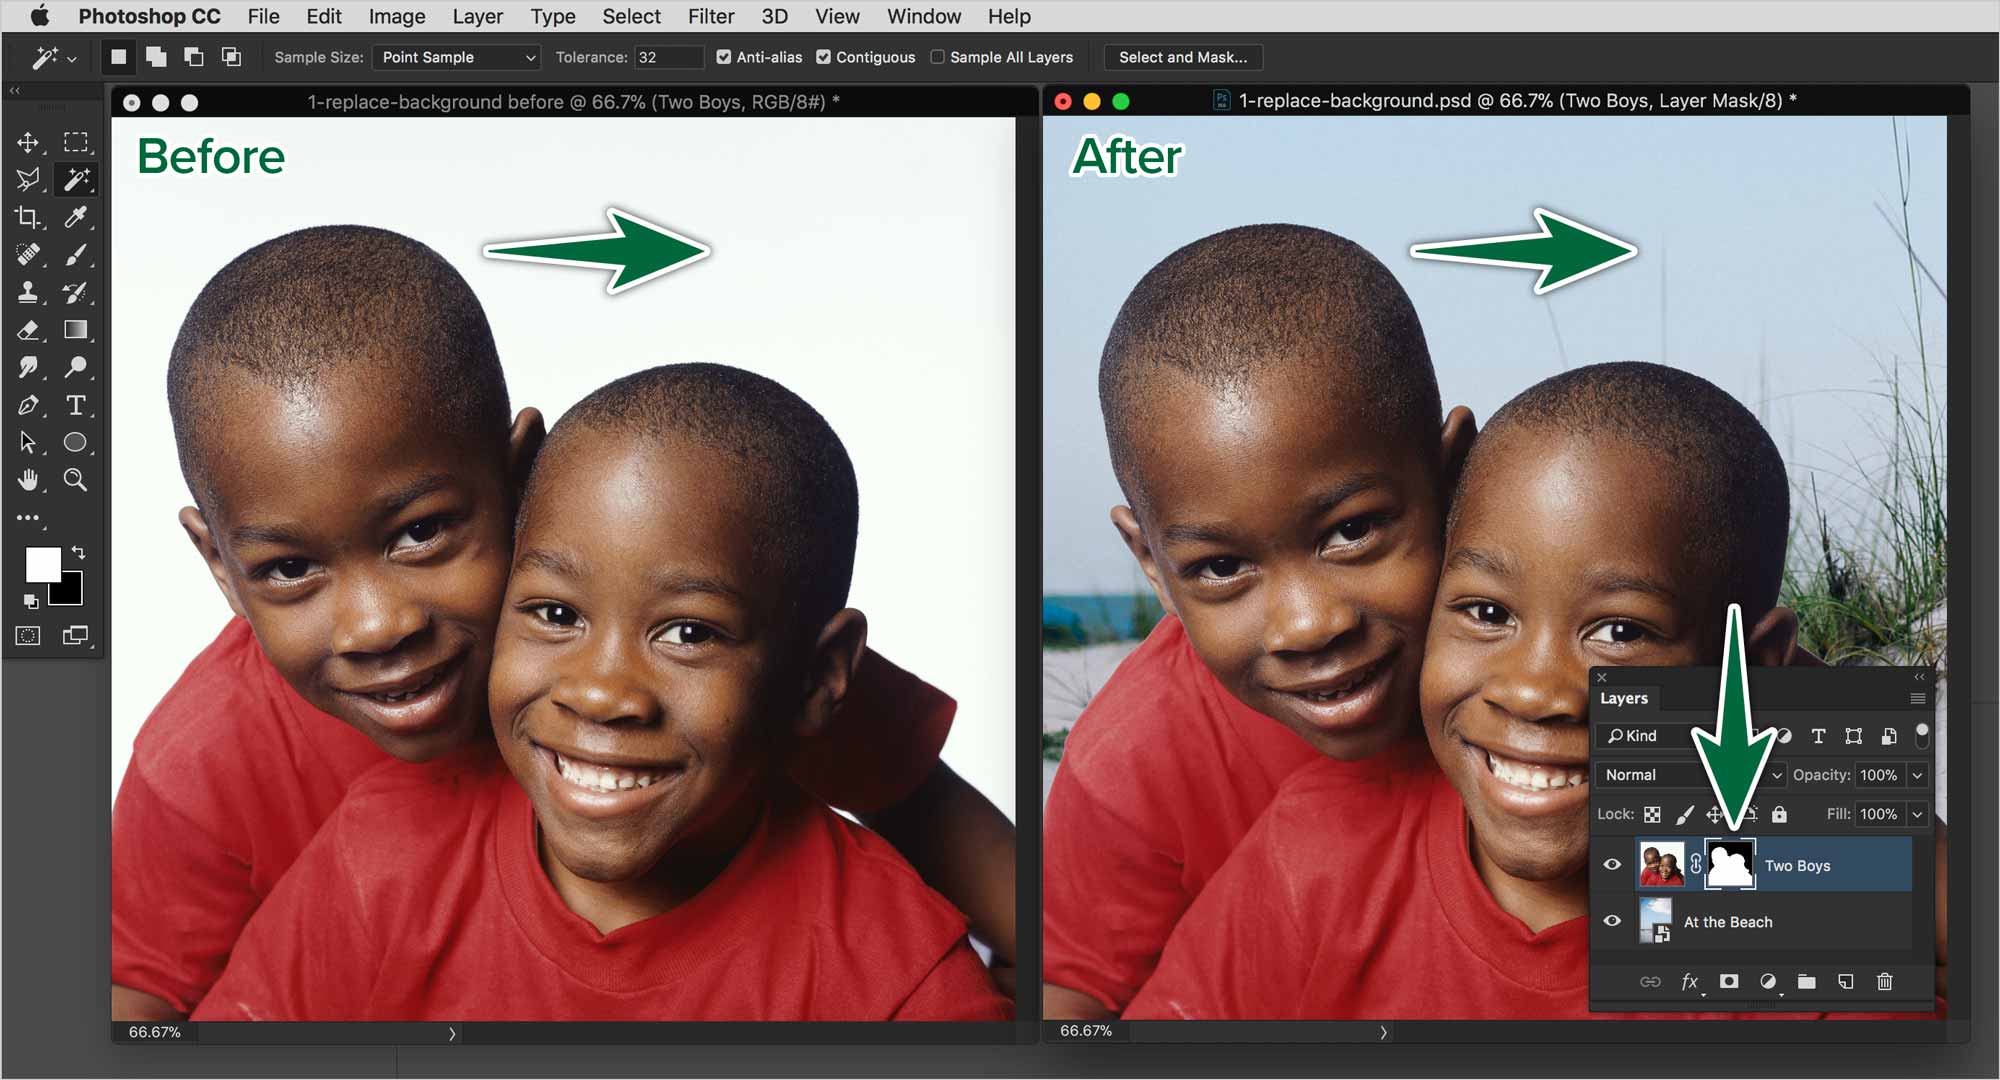
Lets start with replacing the background on a photo by hiding the original one to reveal the one on the layer below. In this case, we’ll change the background to a beach scene.
You can use Select & Mask to refine your mask’s edge. Simply double-click on the mask’s icon in the Layers panel to access it.
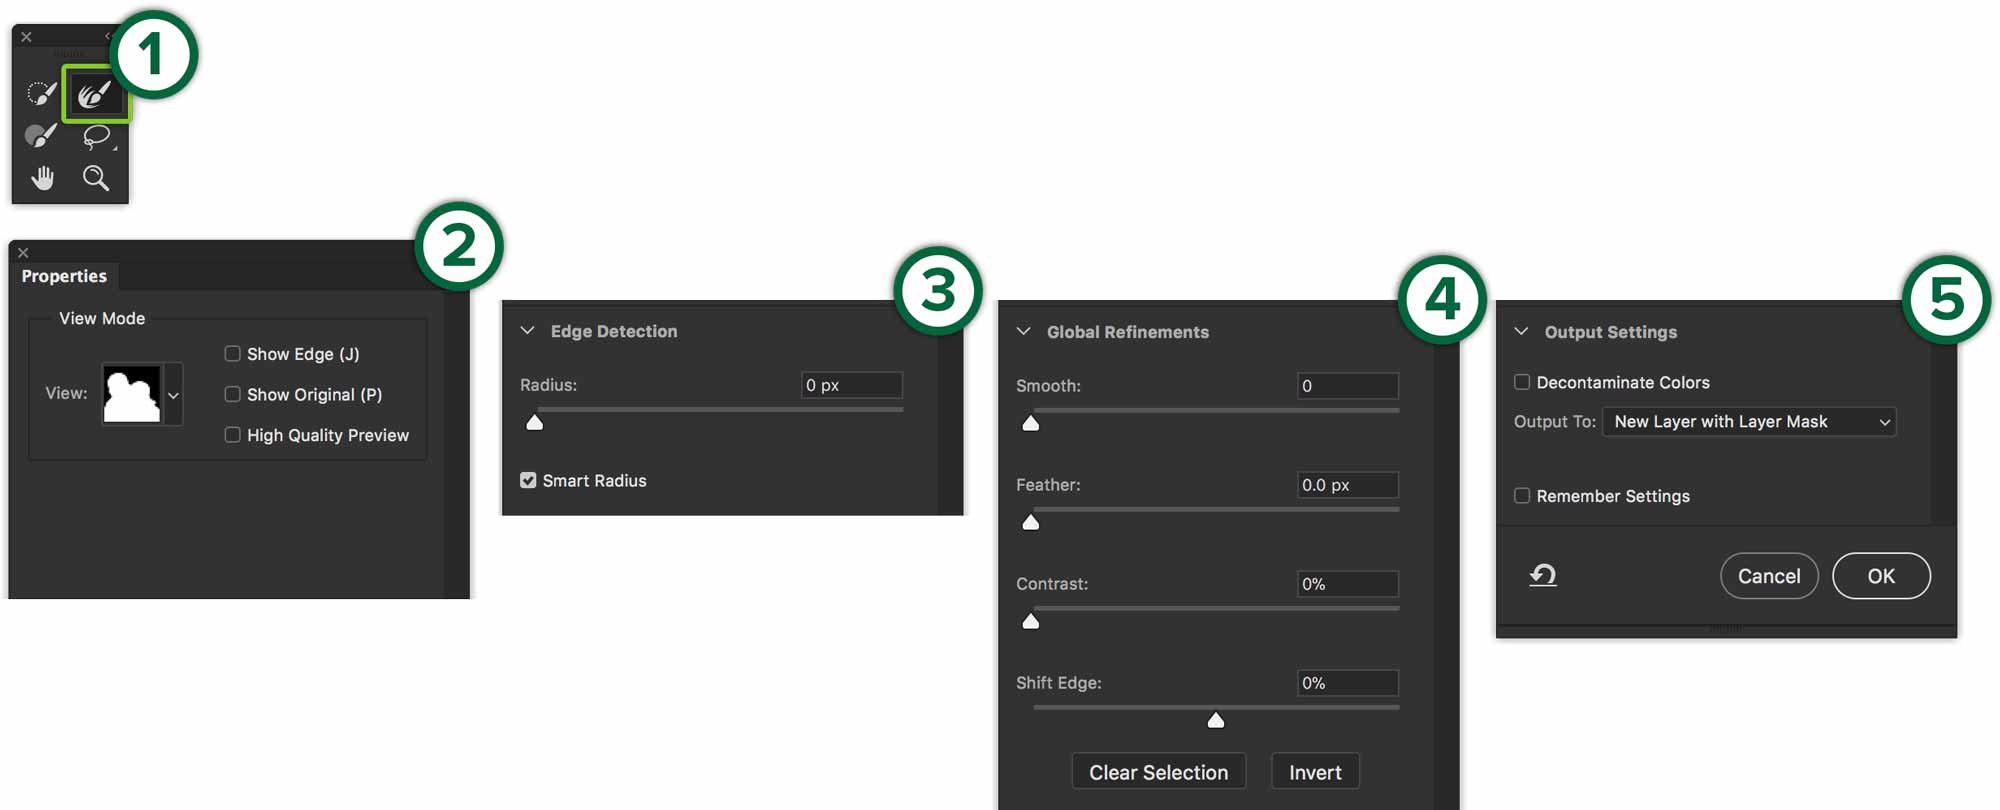
- Refine Edge tool
- Choose preview mode
- Set auto edge detection
- Sharpen or feather edges
- Set how to output new mask
Use the Refine Edge tool to paint along the edge. Photoshop will detect edges, then try to guess how to enhance the selection.
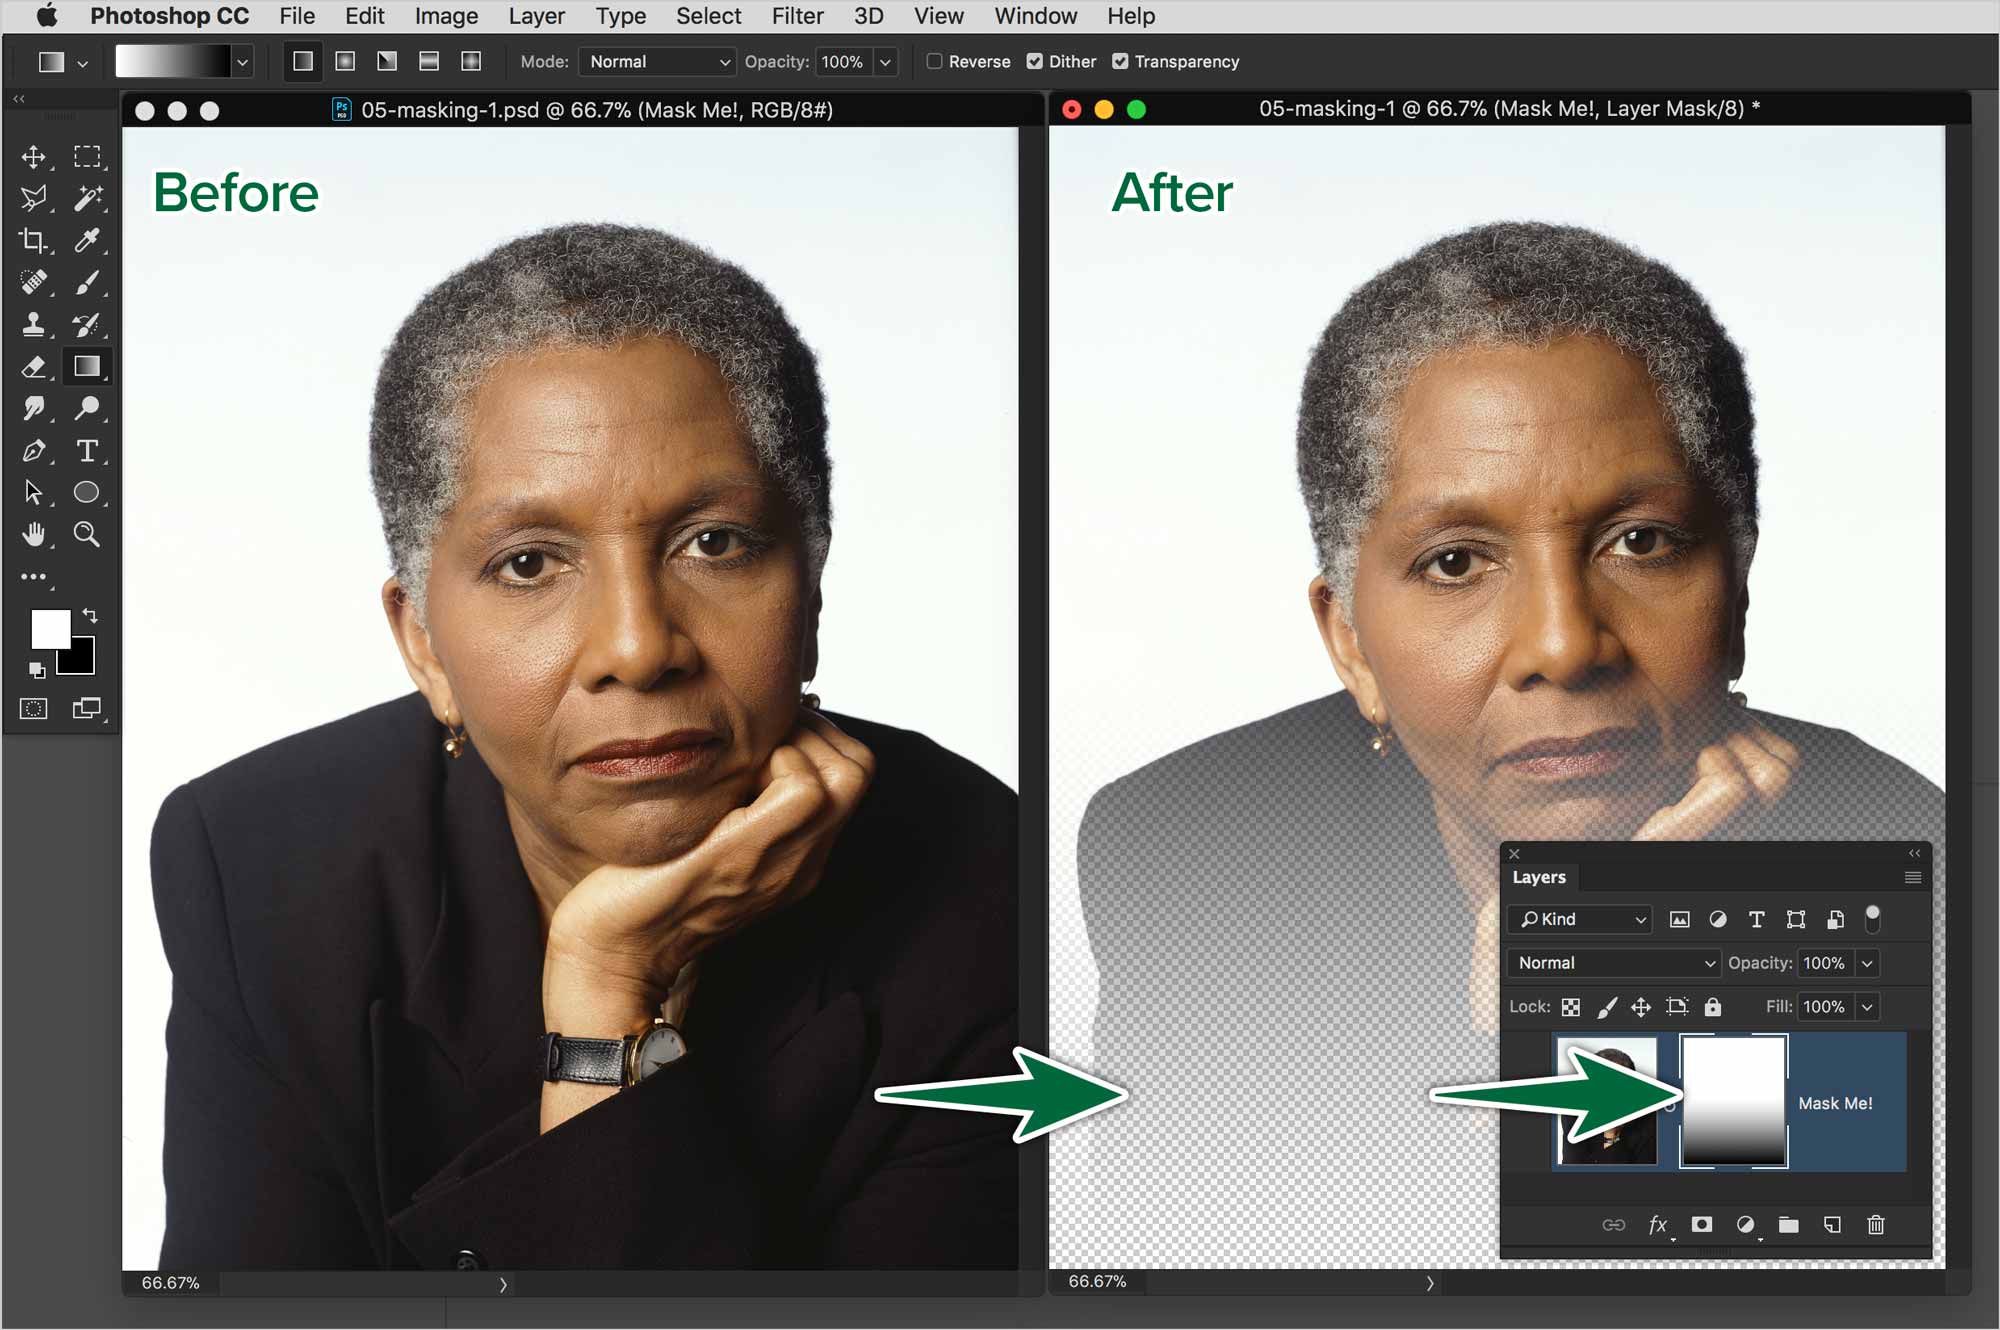
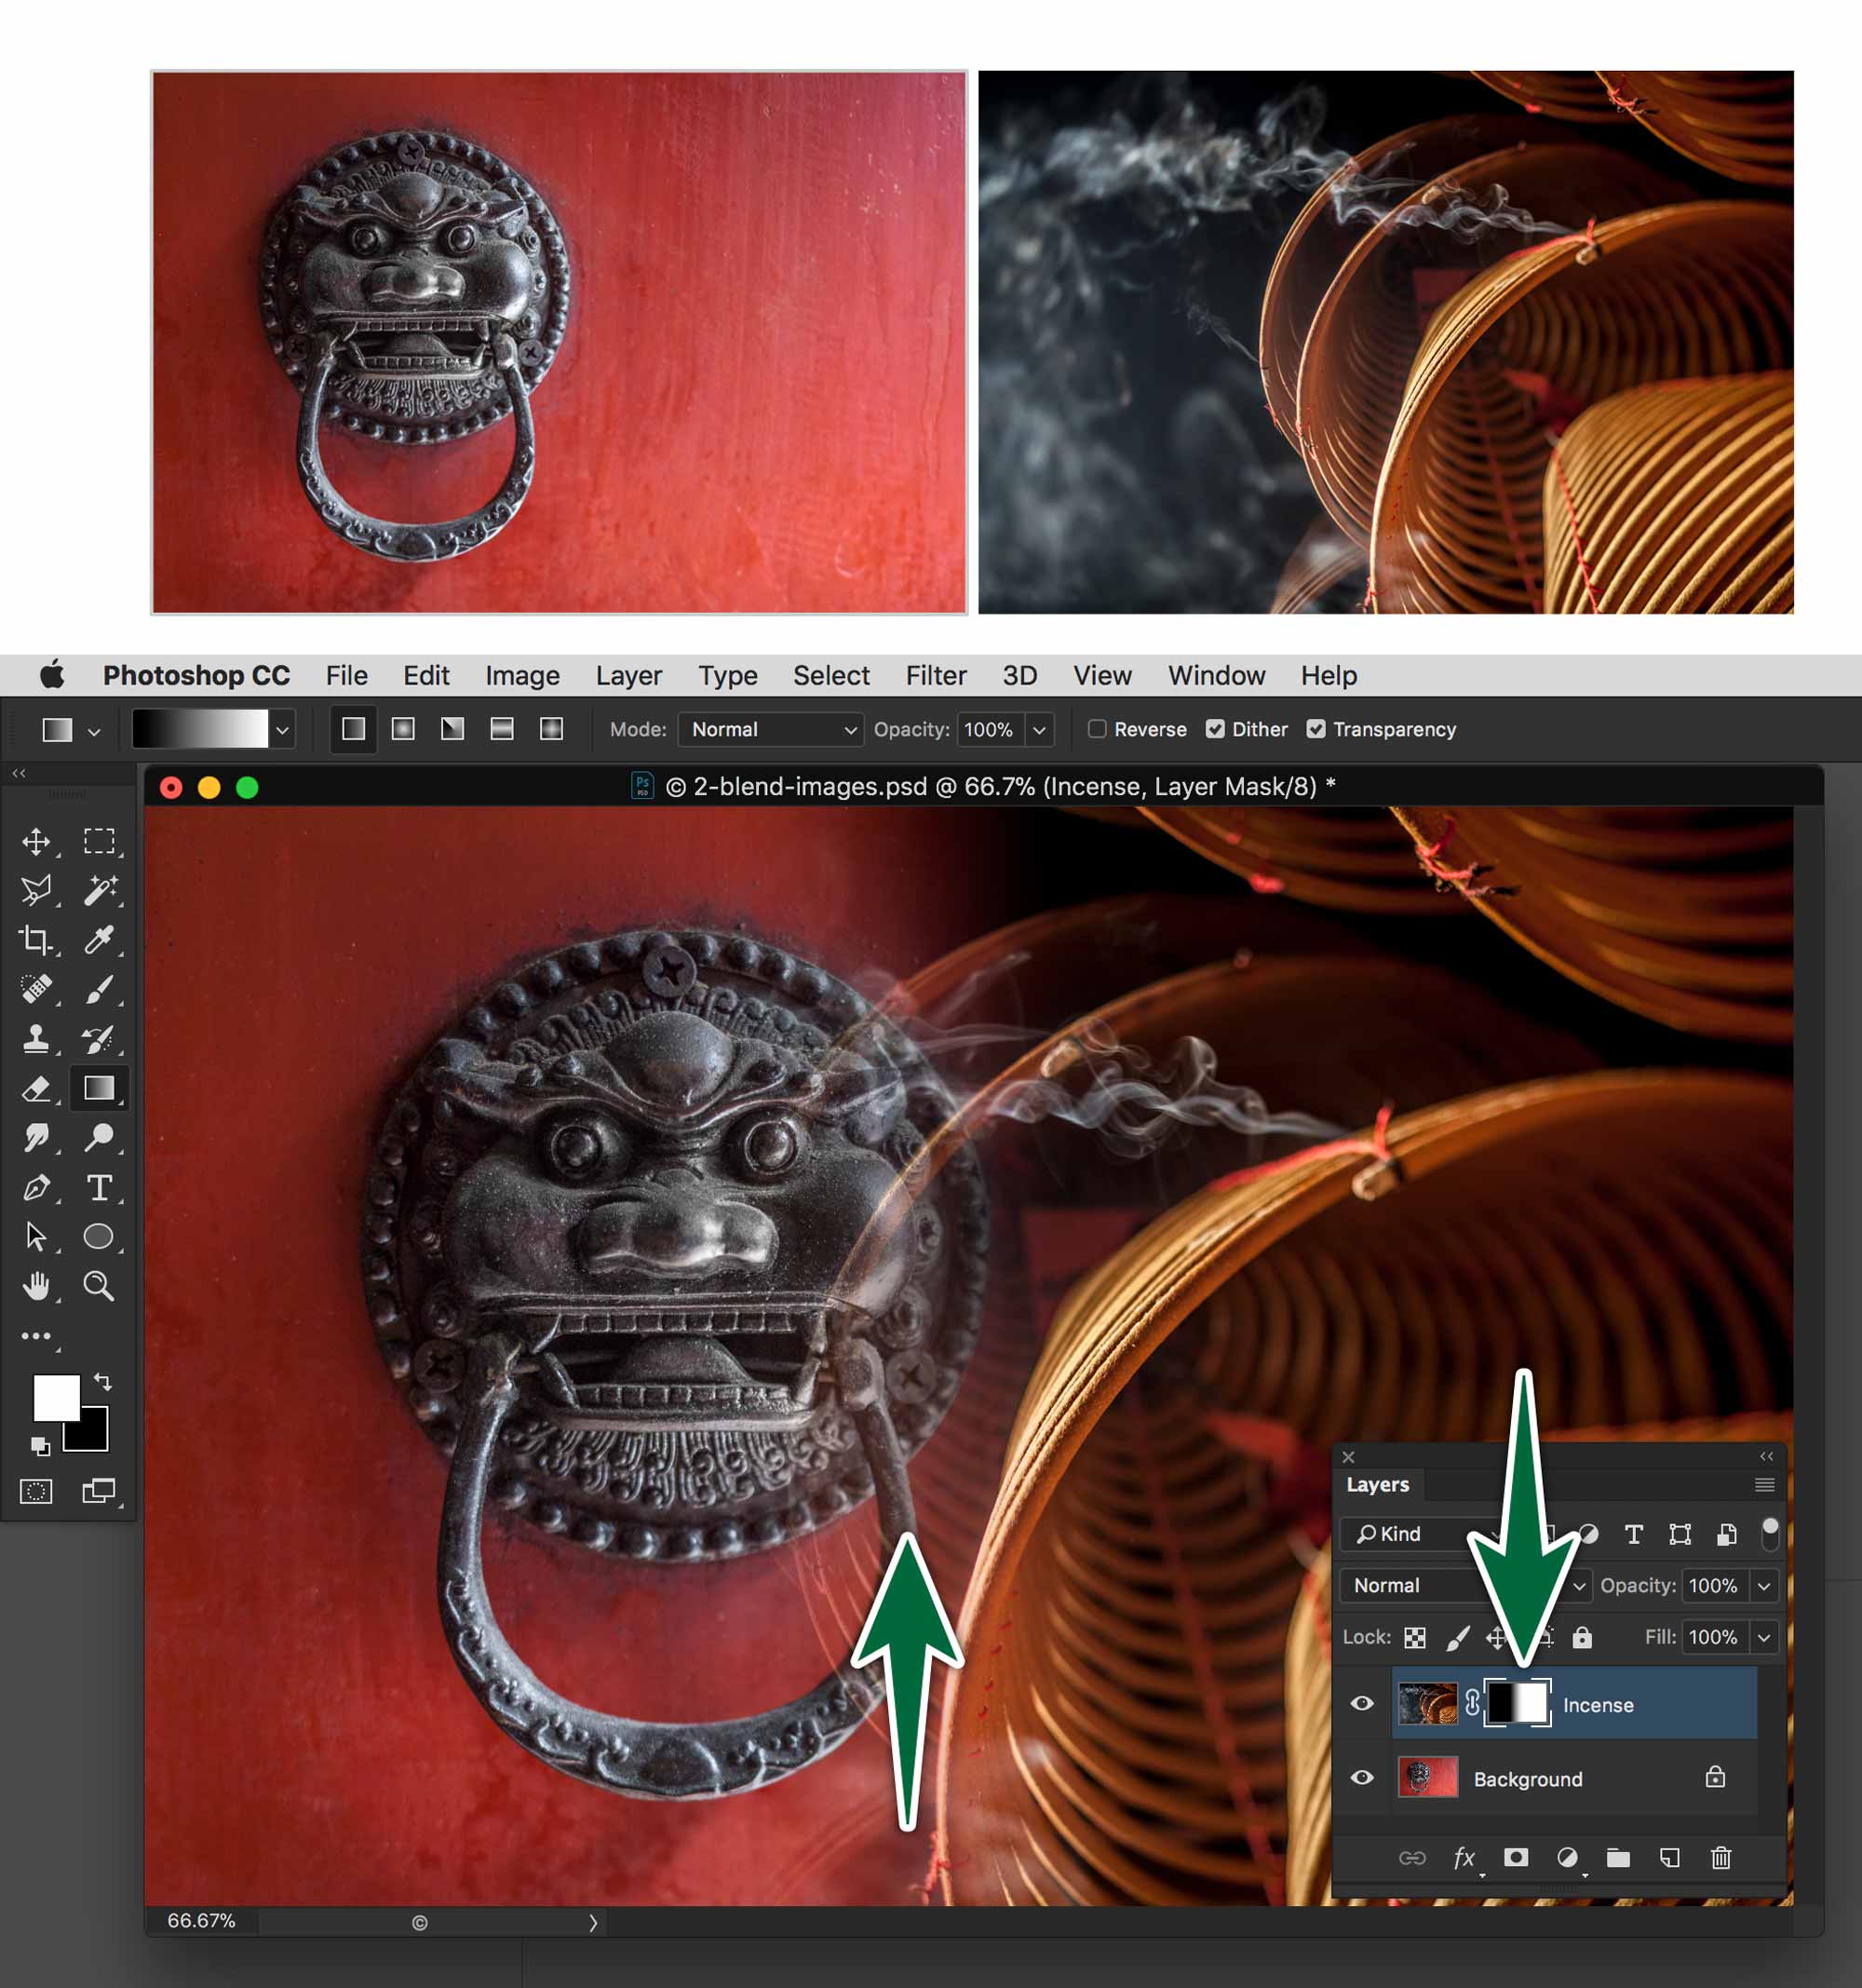
Masking to Blend Photos
We can also use masks to blend photos. We’ll use the Gradient Tool on the mask. Since black hides and white reveals, this will make the photo on the top layer gradually become transparent to partially reveal the photo below.
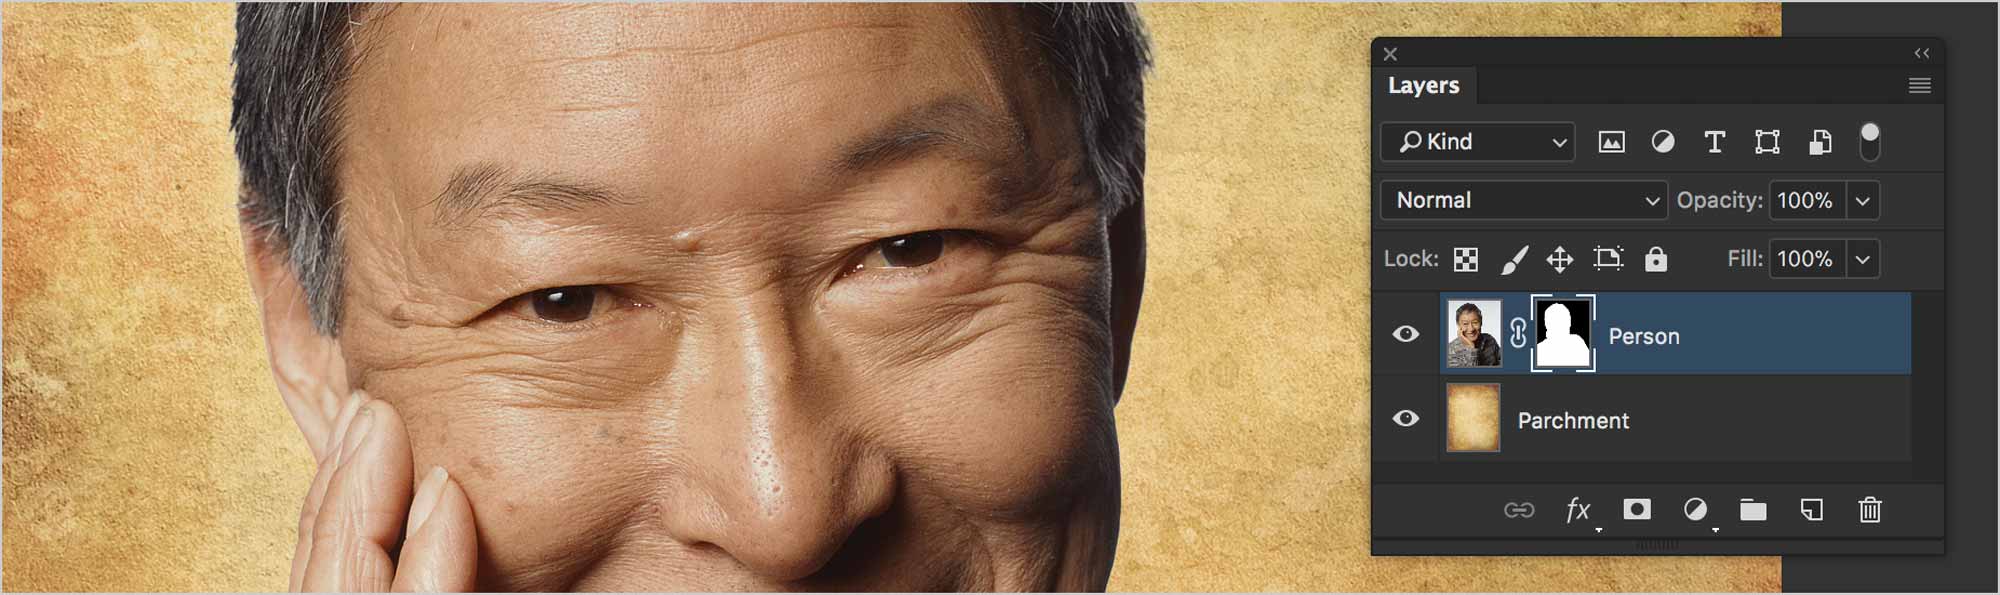
Masking with a Photo
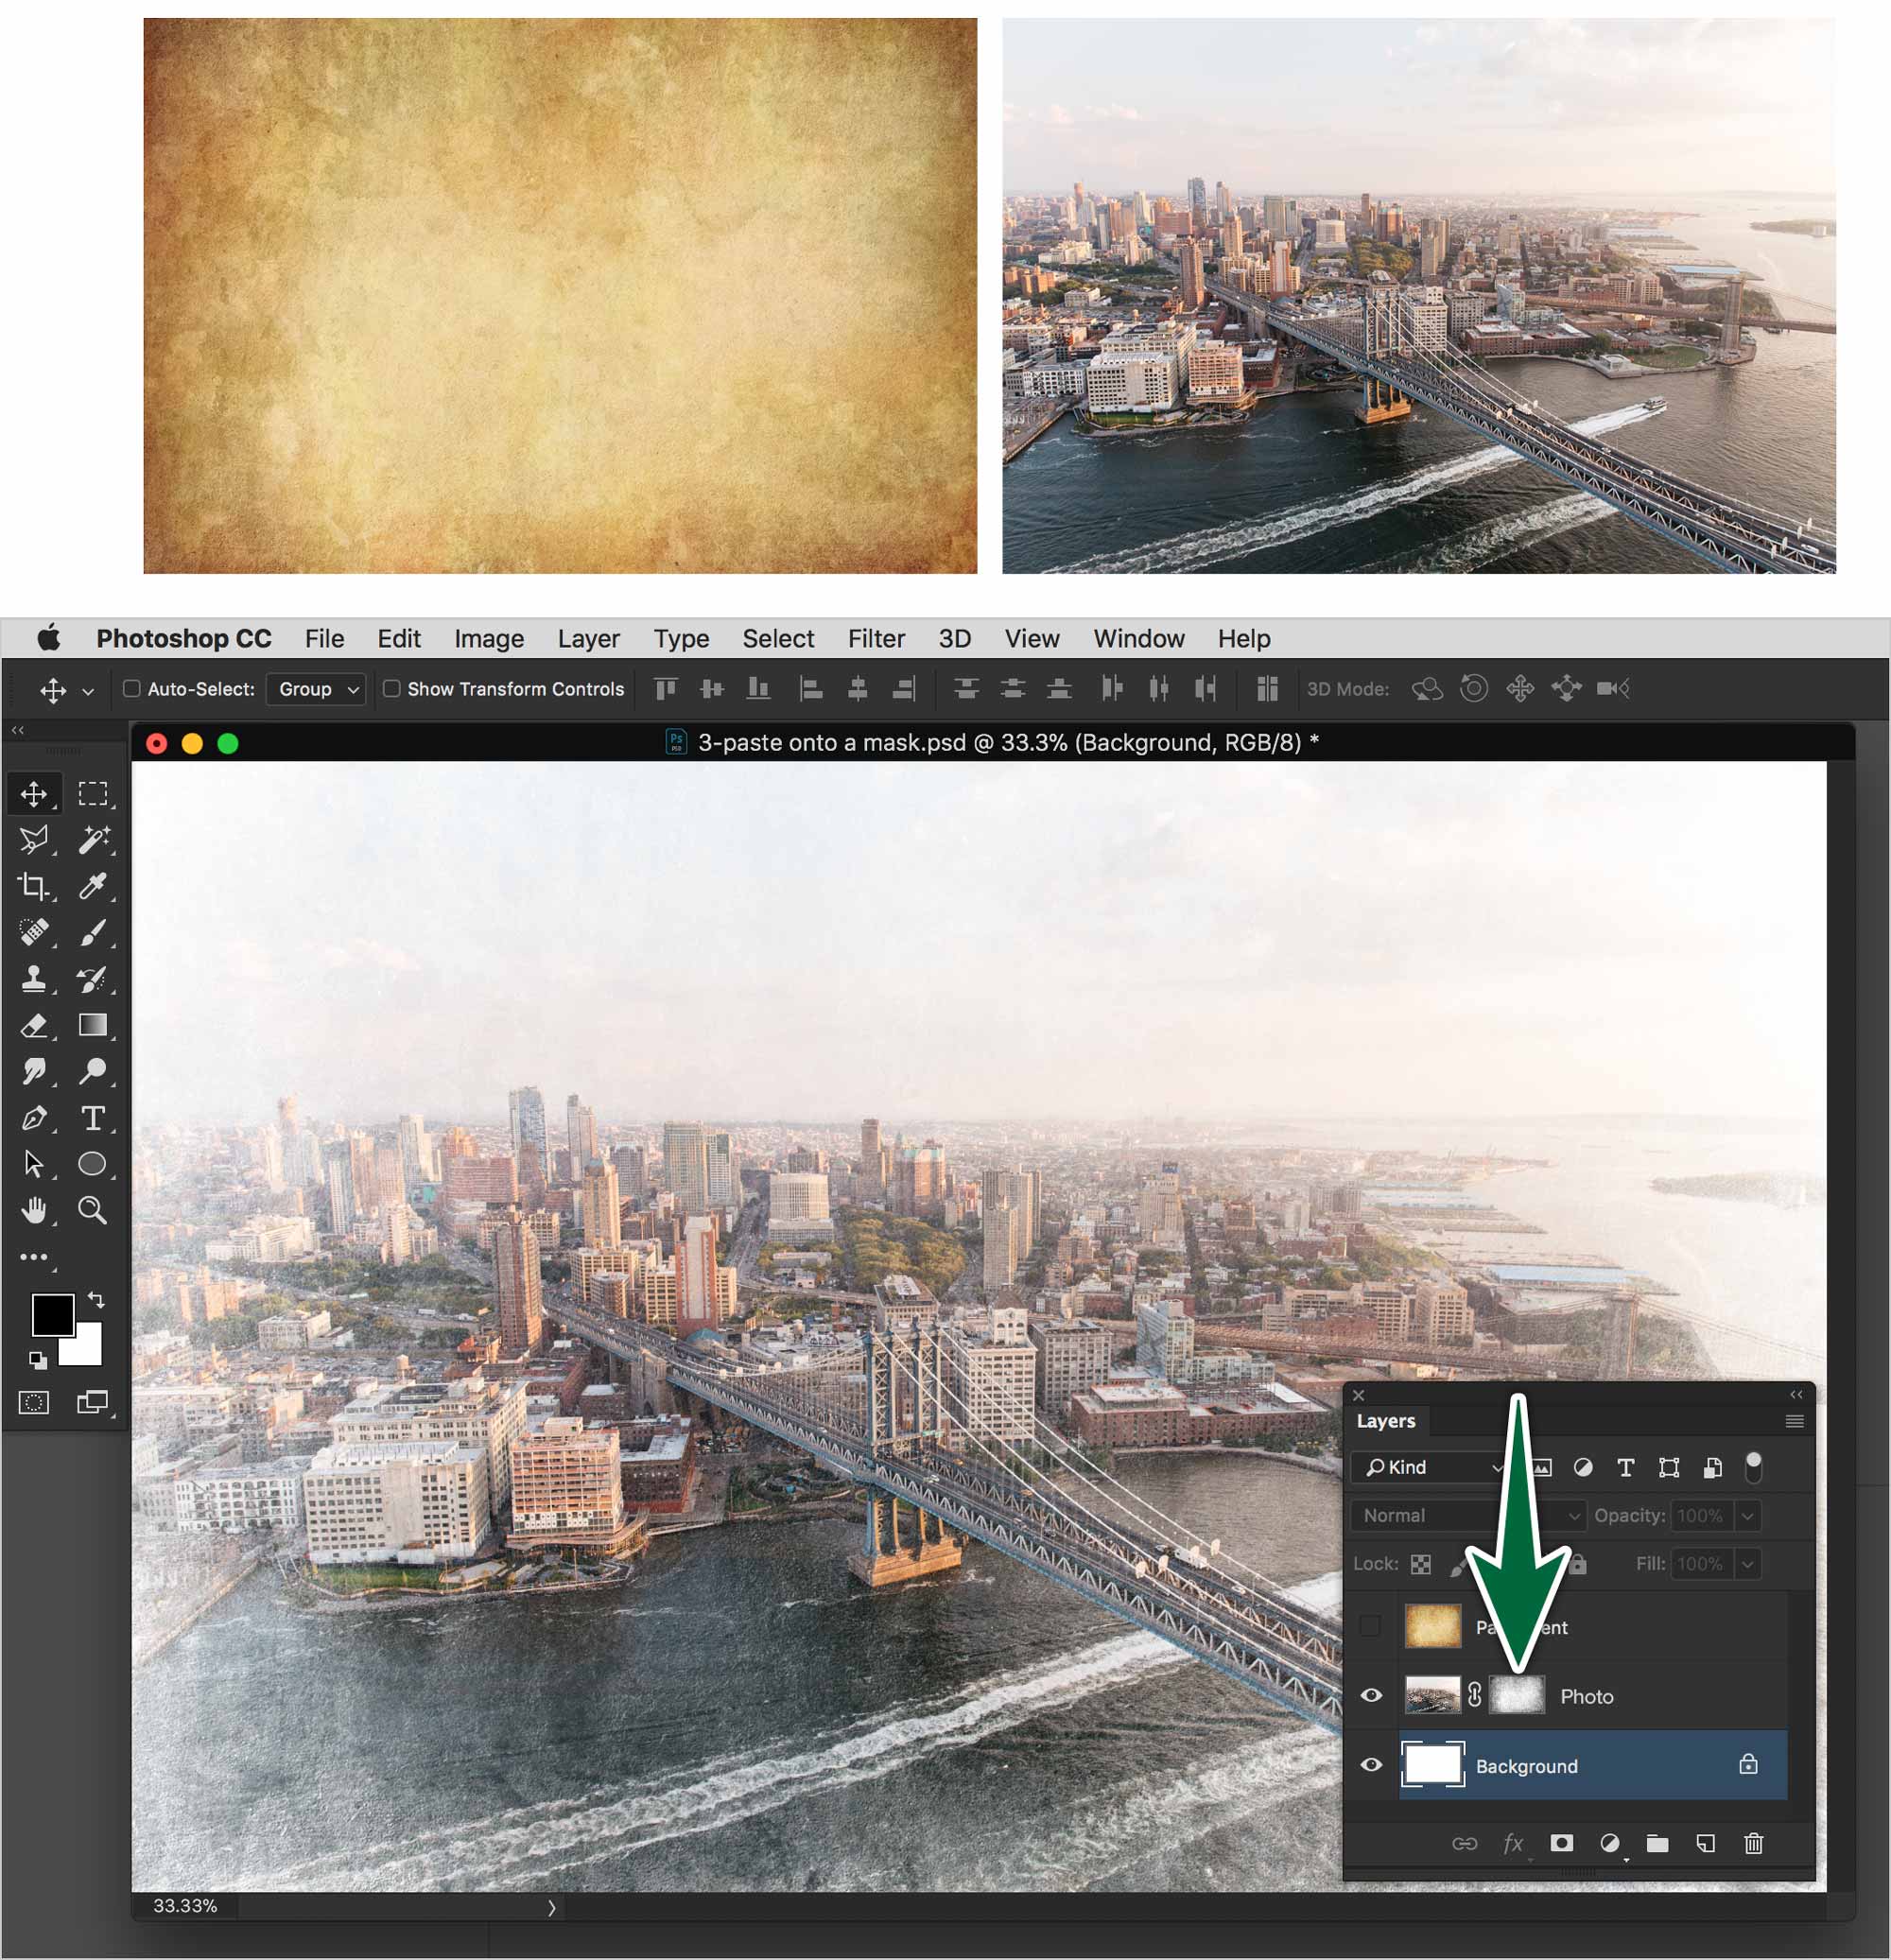
A Layer Mask is a greyscale image. Where the pixels are dark on the mask, they’re hiding whatever’s on the layer below. Where they’re light, they reveal what’s on the layers below. It stands to reason that if we paste a photo onto a mask, it will do the same, hopefully giving us interesting results.
Bonus Technique
We’ll use content from two stacked layers to take the best elements from each photo. In the end, everyone will have a smile on their faces. We’ll use Auto-Align Layers and Layer Masks to accomplish this. You’ll see; it’s pretty cool.
Formative Activity
Simple Mask
Mask the background.
Don’t Save As… or rename the file. Just Save, then close it.
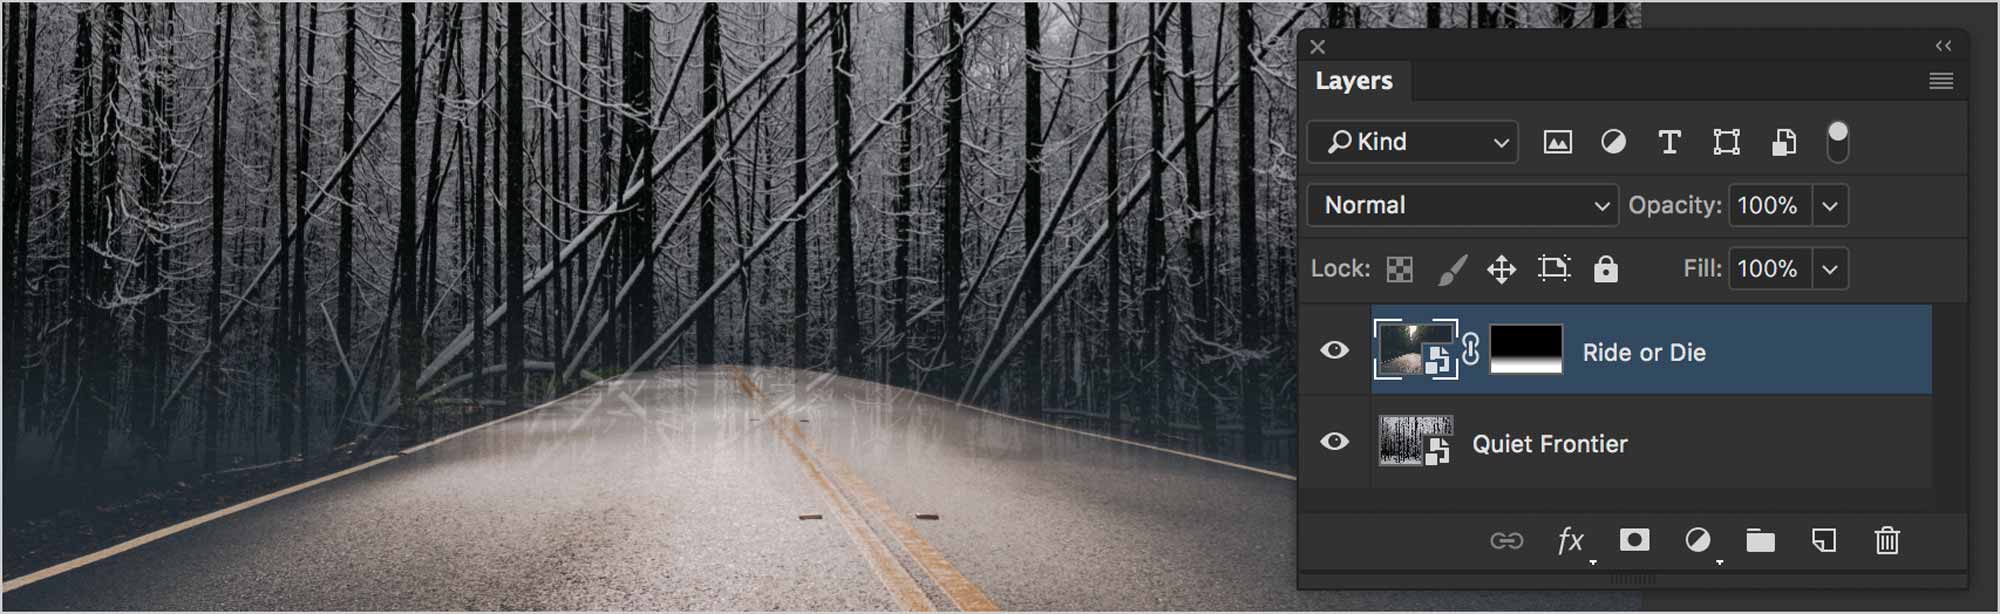
Masking to Blend Photos
Use a gradient on a mask to blend the road into the forest.
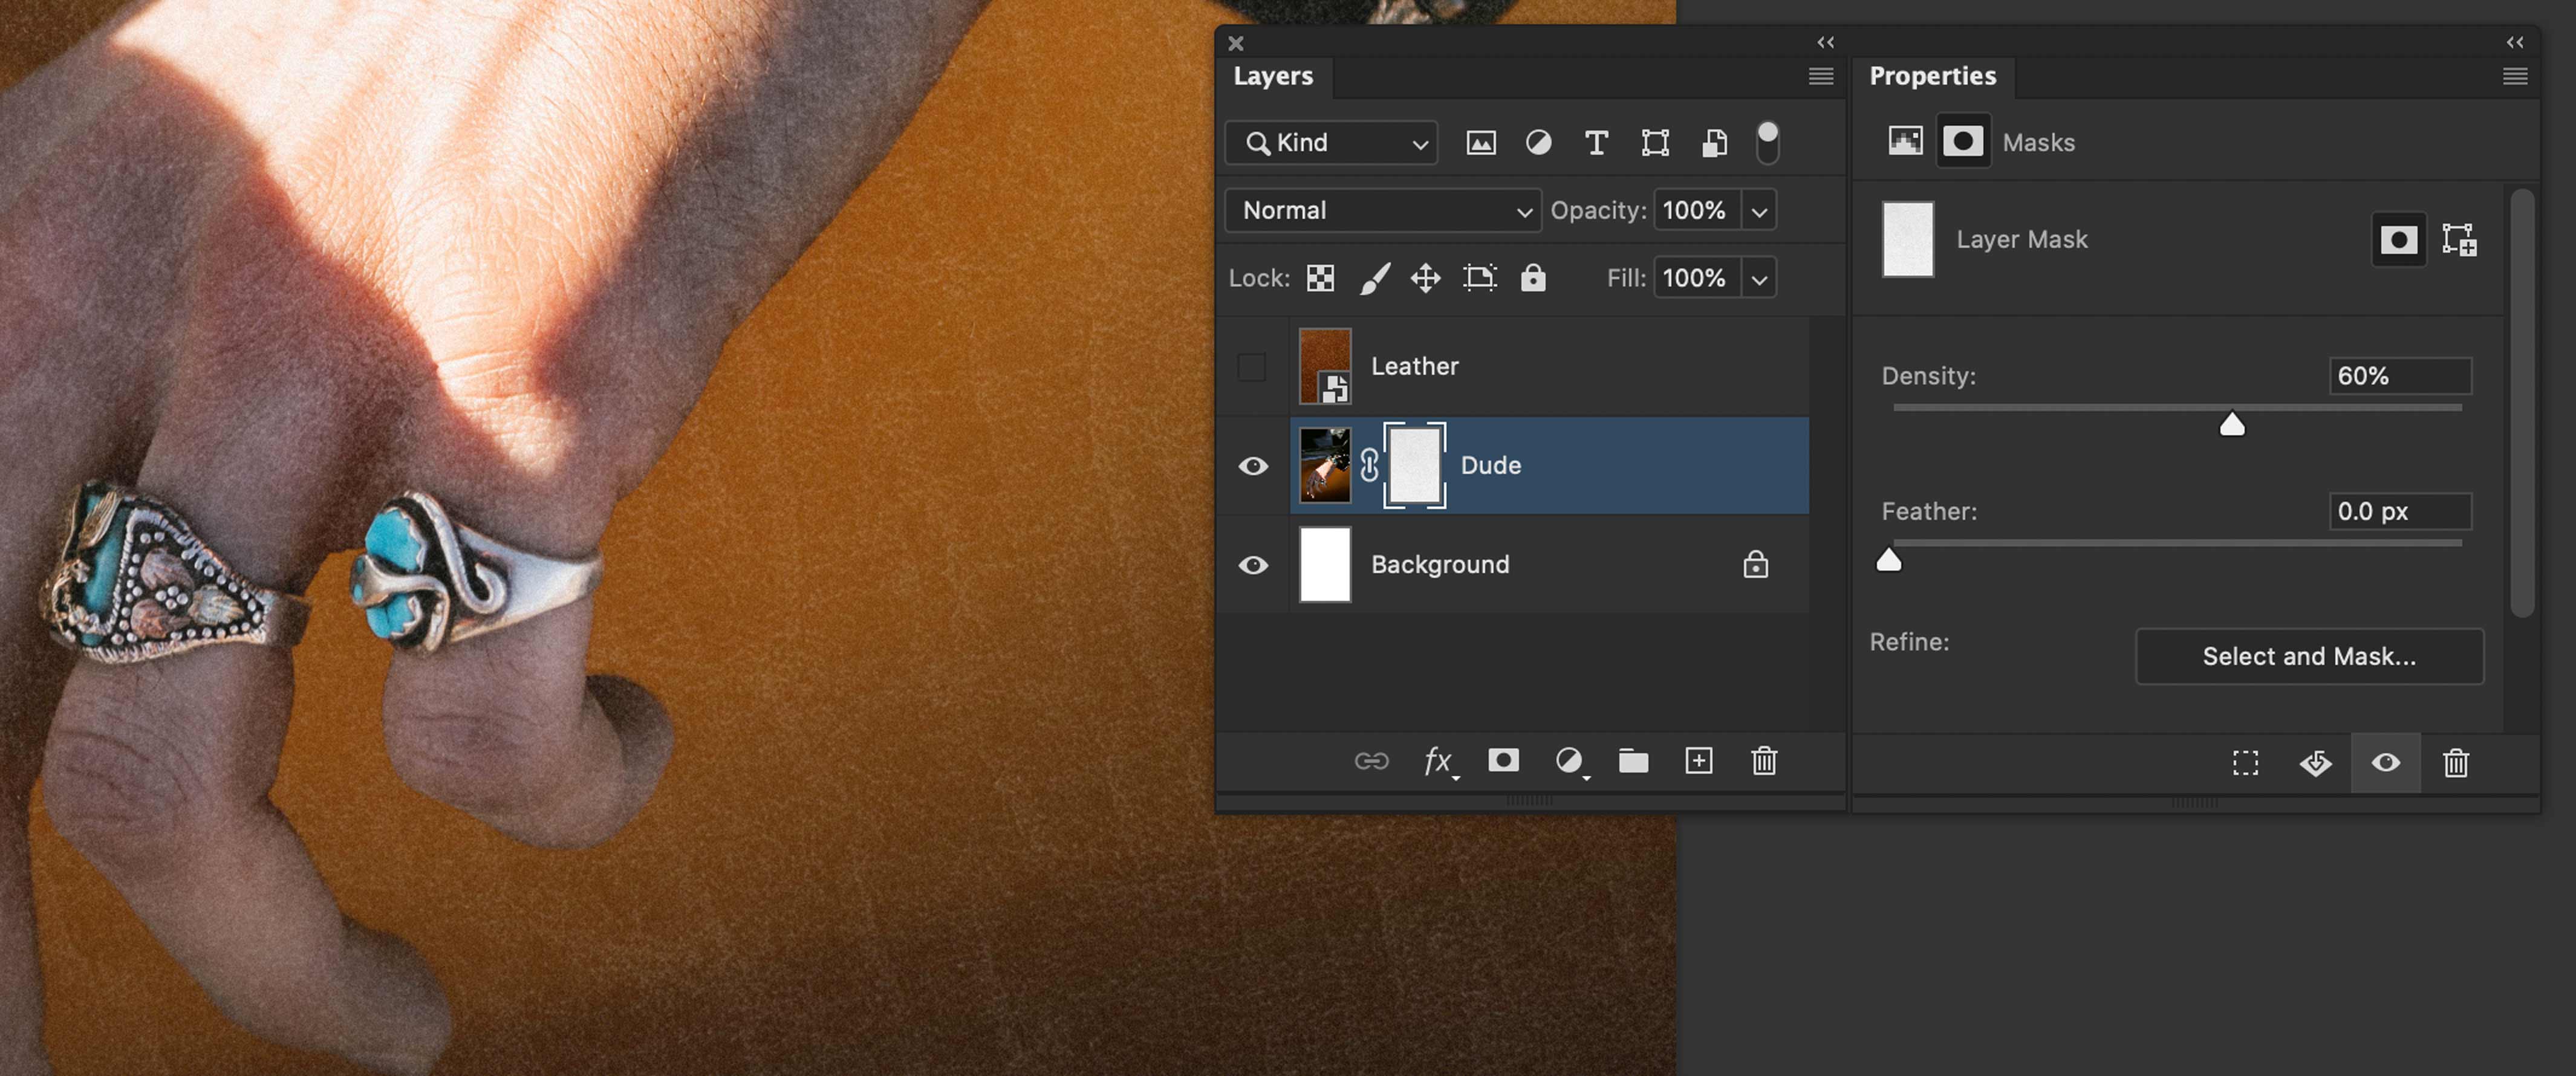
Masking with a Photo
Use the provided leather texture layer to mask the photo. Remember that ⌘-i inverts colours.
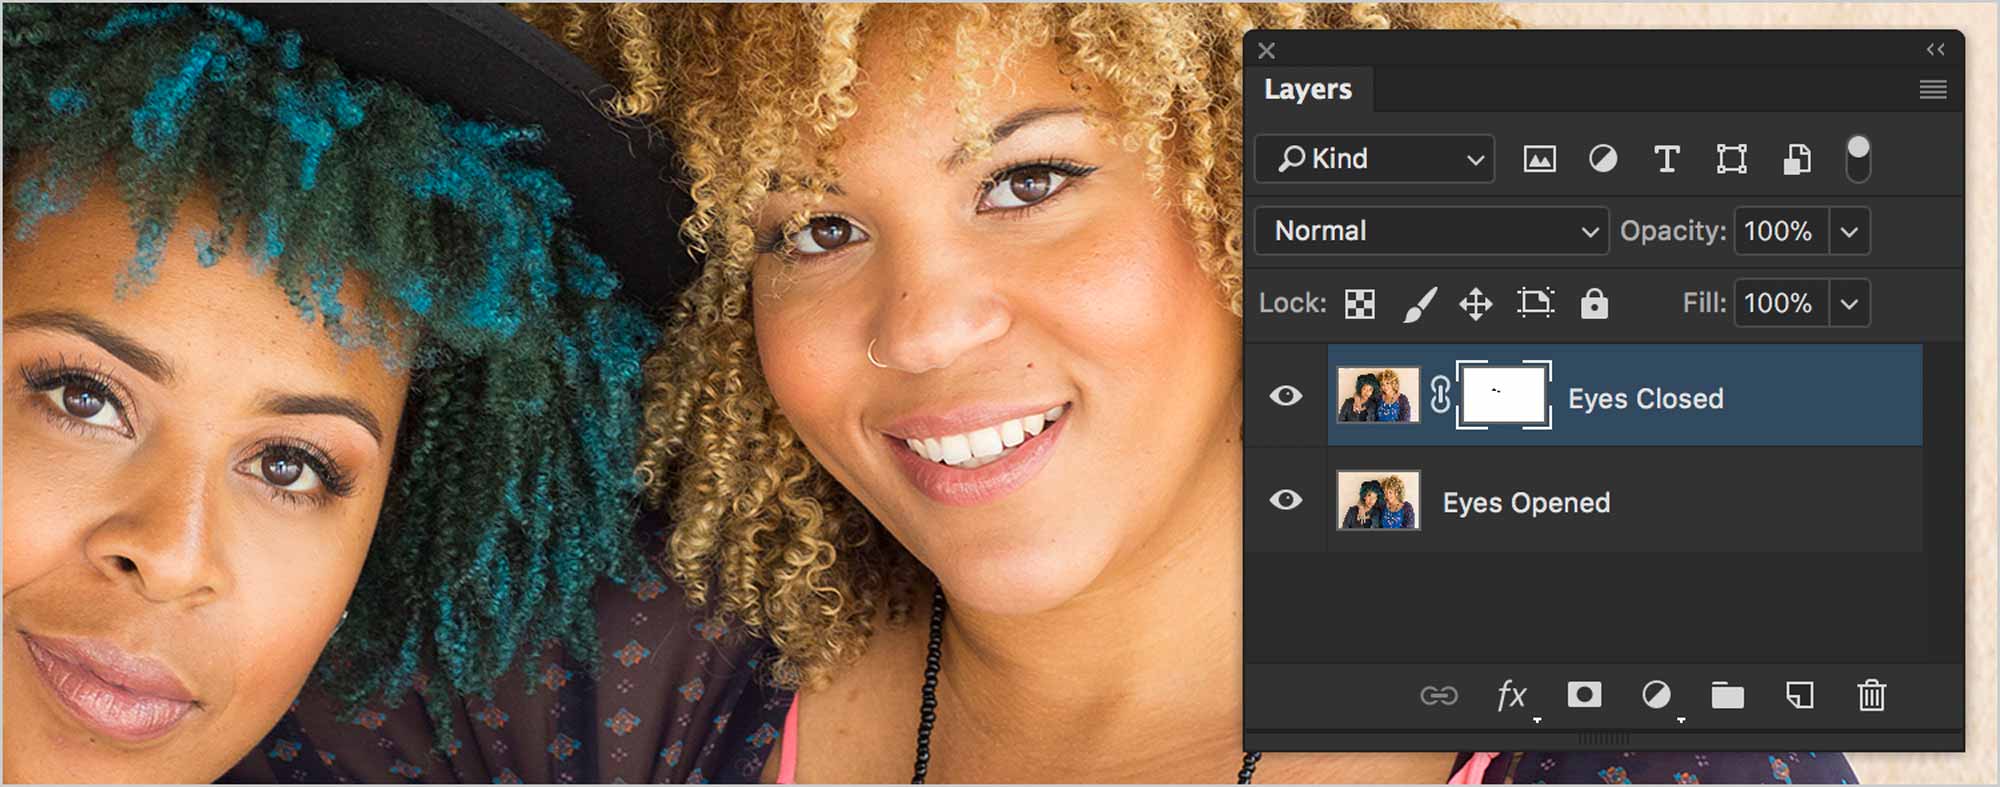
Fix Combined Photos
Using a layer mask, make the two woman’s eyes work best for the photo.
Select & Mask
Mask the background. Use the Select & Mask feature to refine the mask.