Topics
Illustrator Setup
Before we start to use Illustrator, we’ll take a quick tour of the interface, then adjust a few settings.
Our First Illustrations
In Illustrator, the most basic method for drawing is using the shape tools. You can combine ellipses, rectangles, polygons, stars and more to create any object you need.
In this unit, you’ll draw a series of icons in Illustrator with shape tools. The trick is to draw as few shapes as necessary, then repeat them so our drawing is as consistant as possible. These are the tools we’re going to use.
With these tools, you can simply click and drag to create a shape. However, if you use the following keys while dragging, you can either constrain proportions or drag from the center of shapes.
There are a few super-secret keyboard shortcuts you can use while dragging.
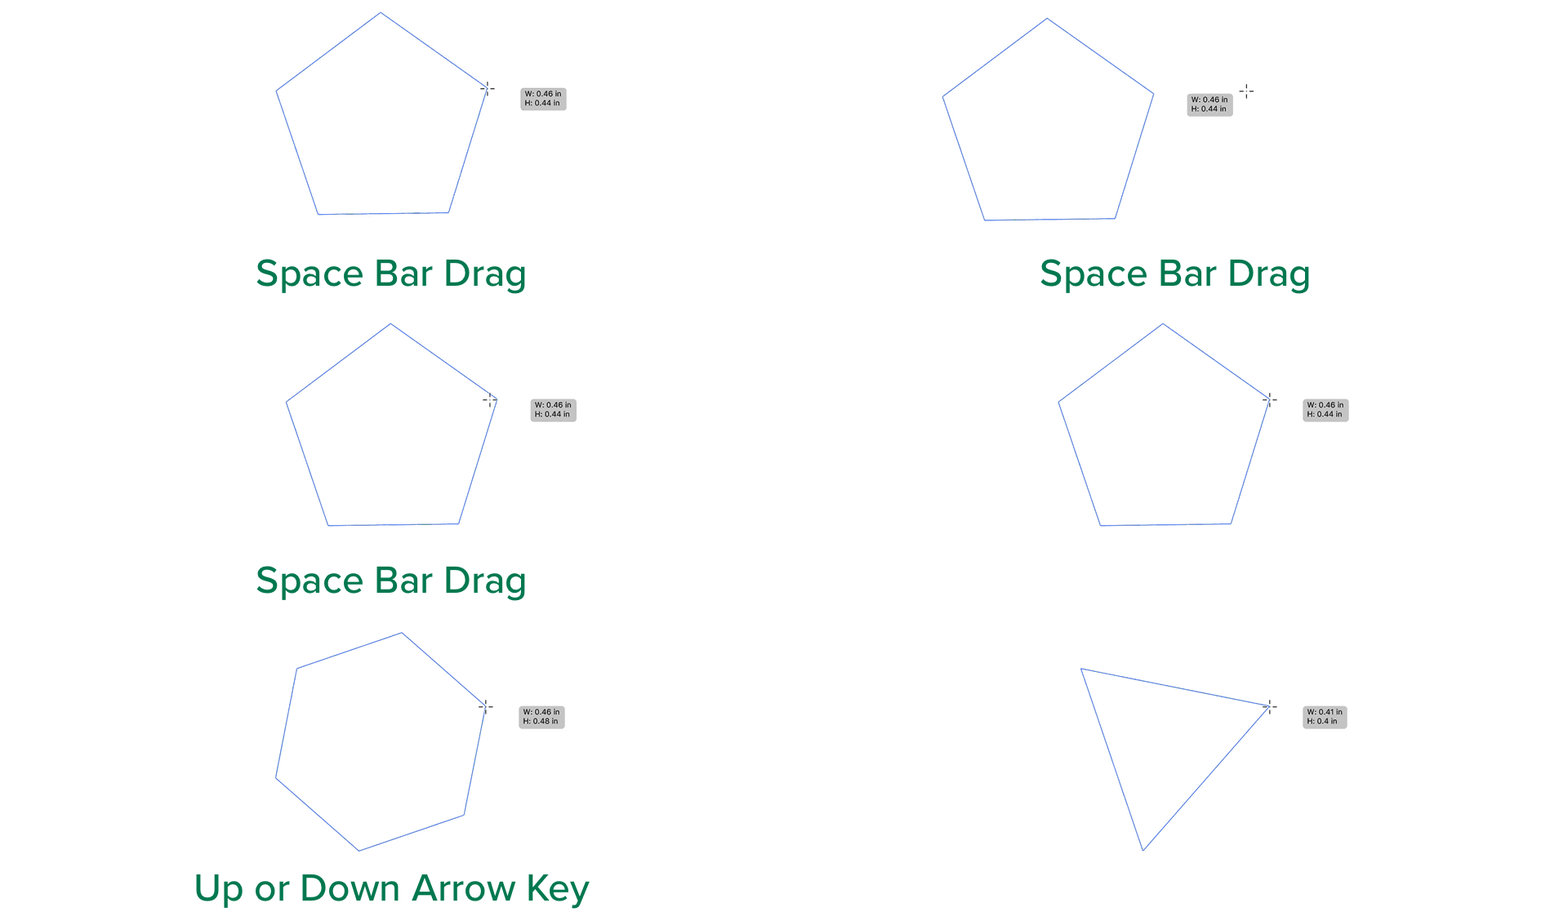
Use the Space Bar to reposition your shape. You can also use the Up or Down arrows to increase or decrease the number of sides on a polygon.
Drawing Stroked Paths
If you draw paths with a stroke on them, in addition to changing their stroke weight, you have the option to change the shapes of the corners or the ends of those paths.
You can even control whether the stroke sits on the middle, outside or inside of the paths.
Dynamic Shapes
Illustrator has the ability to customize the radius of a shape’s corners.
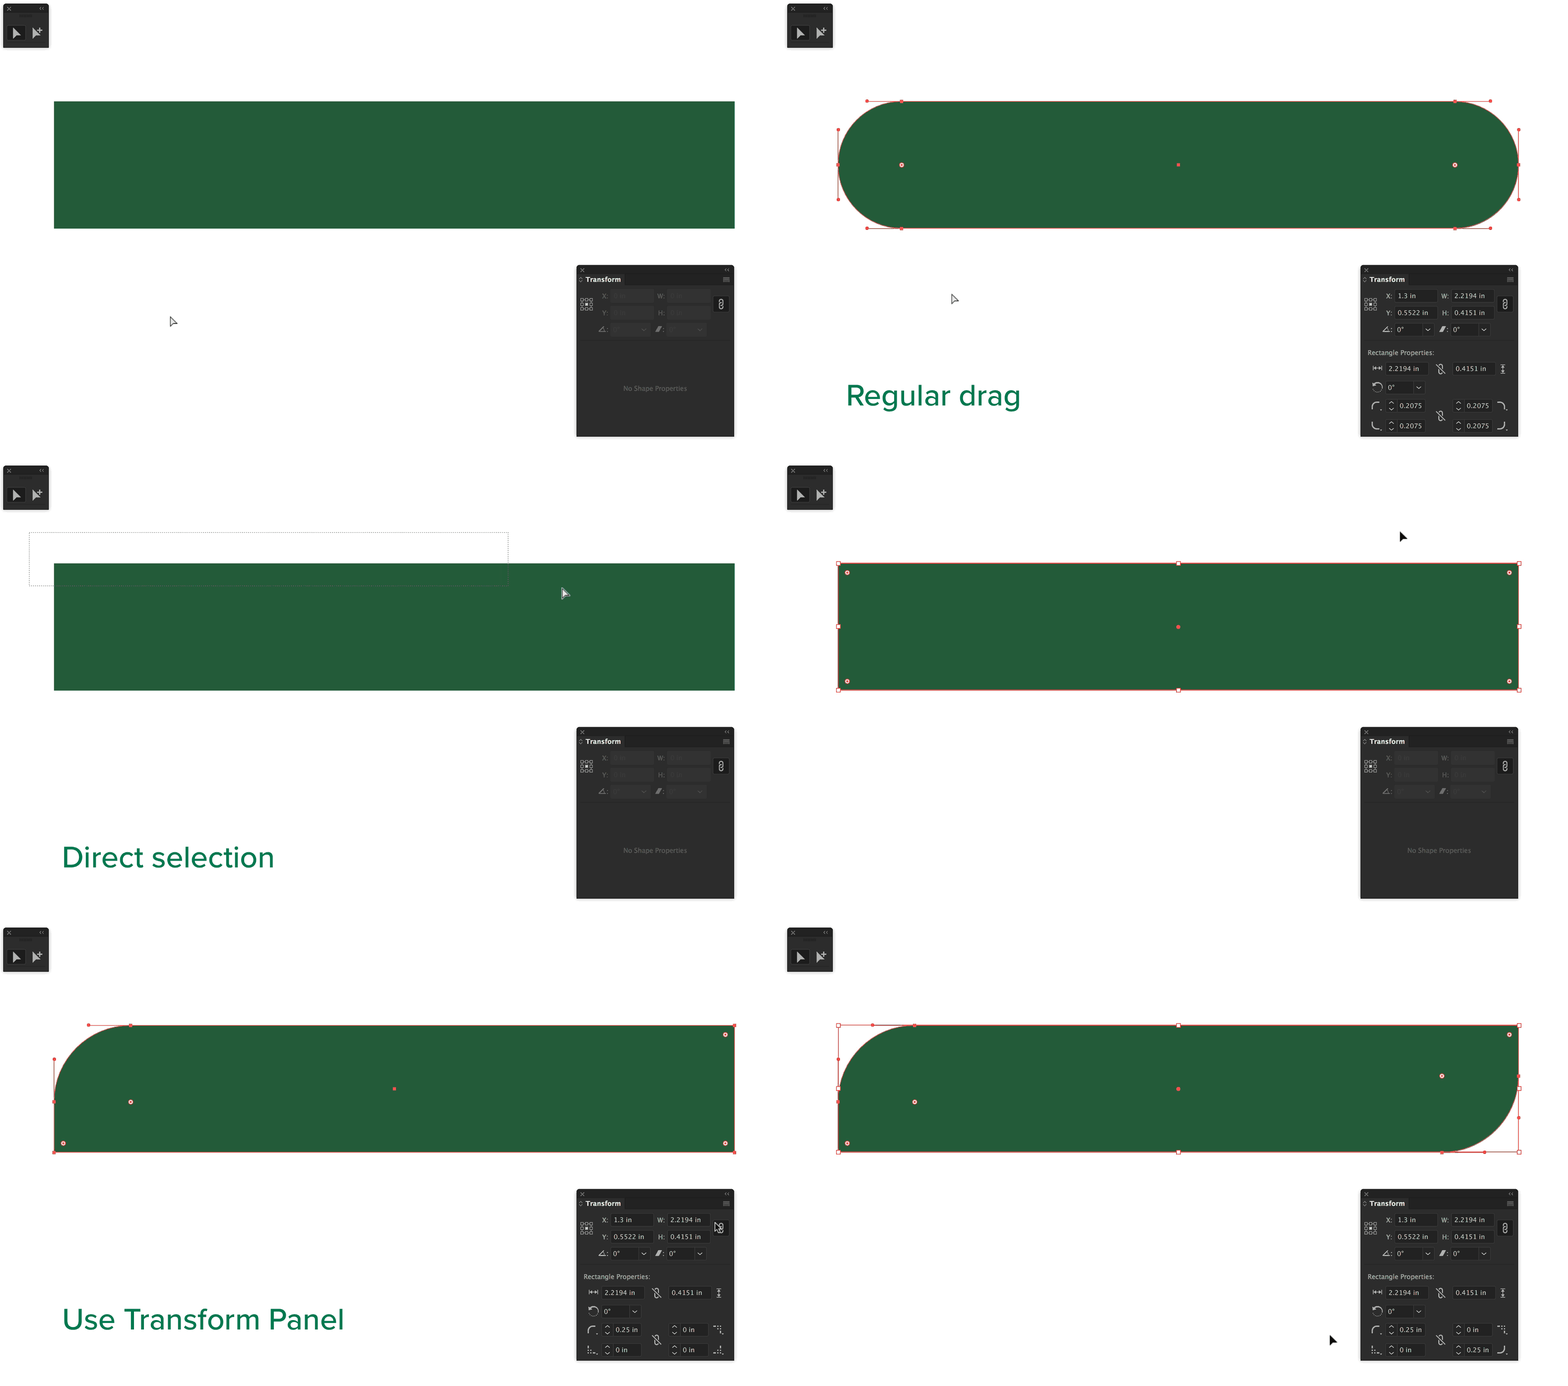
Simply drag the Corner Widget to edit the shape’s corner radius. Use the Direct Selection Tool to edit only selected corners. Alternately, you can edit corners more accurately using the Transform Panel.
Repeat Shapes
The ⌘-D keyboard shortcut repeats the last object move or copy you performed. You can also use a similar command to have shapes rotate around the perimeter of a circle.

If you Option-click using the Rotate Tool, you’ll be presented with the rotate dialogue. Enter a number that’s divisible into 360 to get even spacing. Once you’ve copied one shape, you can hit ⌘-D to repeat the shape around the cicle.
Direct Select Anchor Points
The Direct Selection Tool selects directly. That means that it only selects what you have clicked on within a single object.
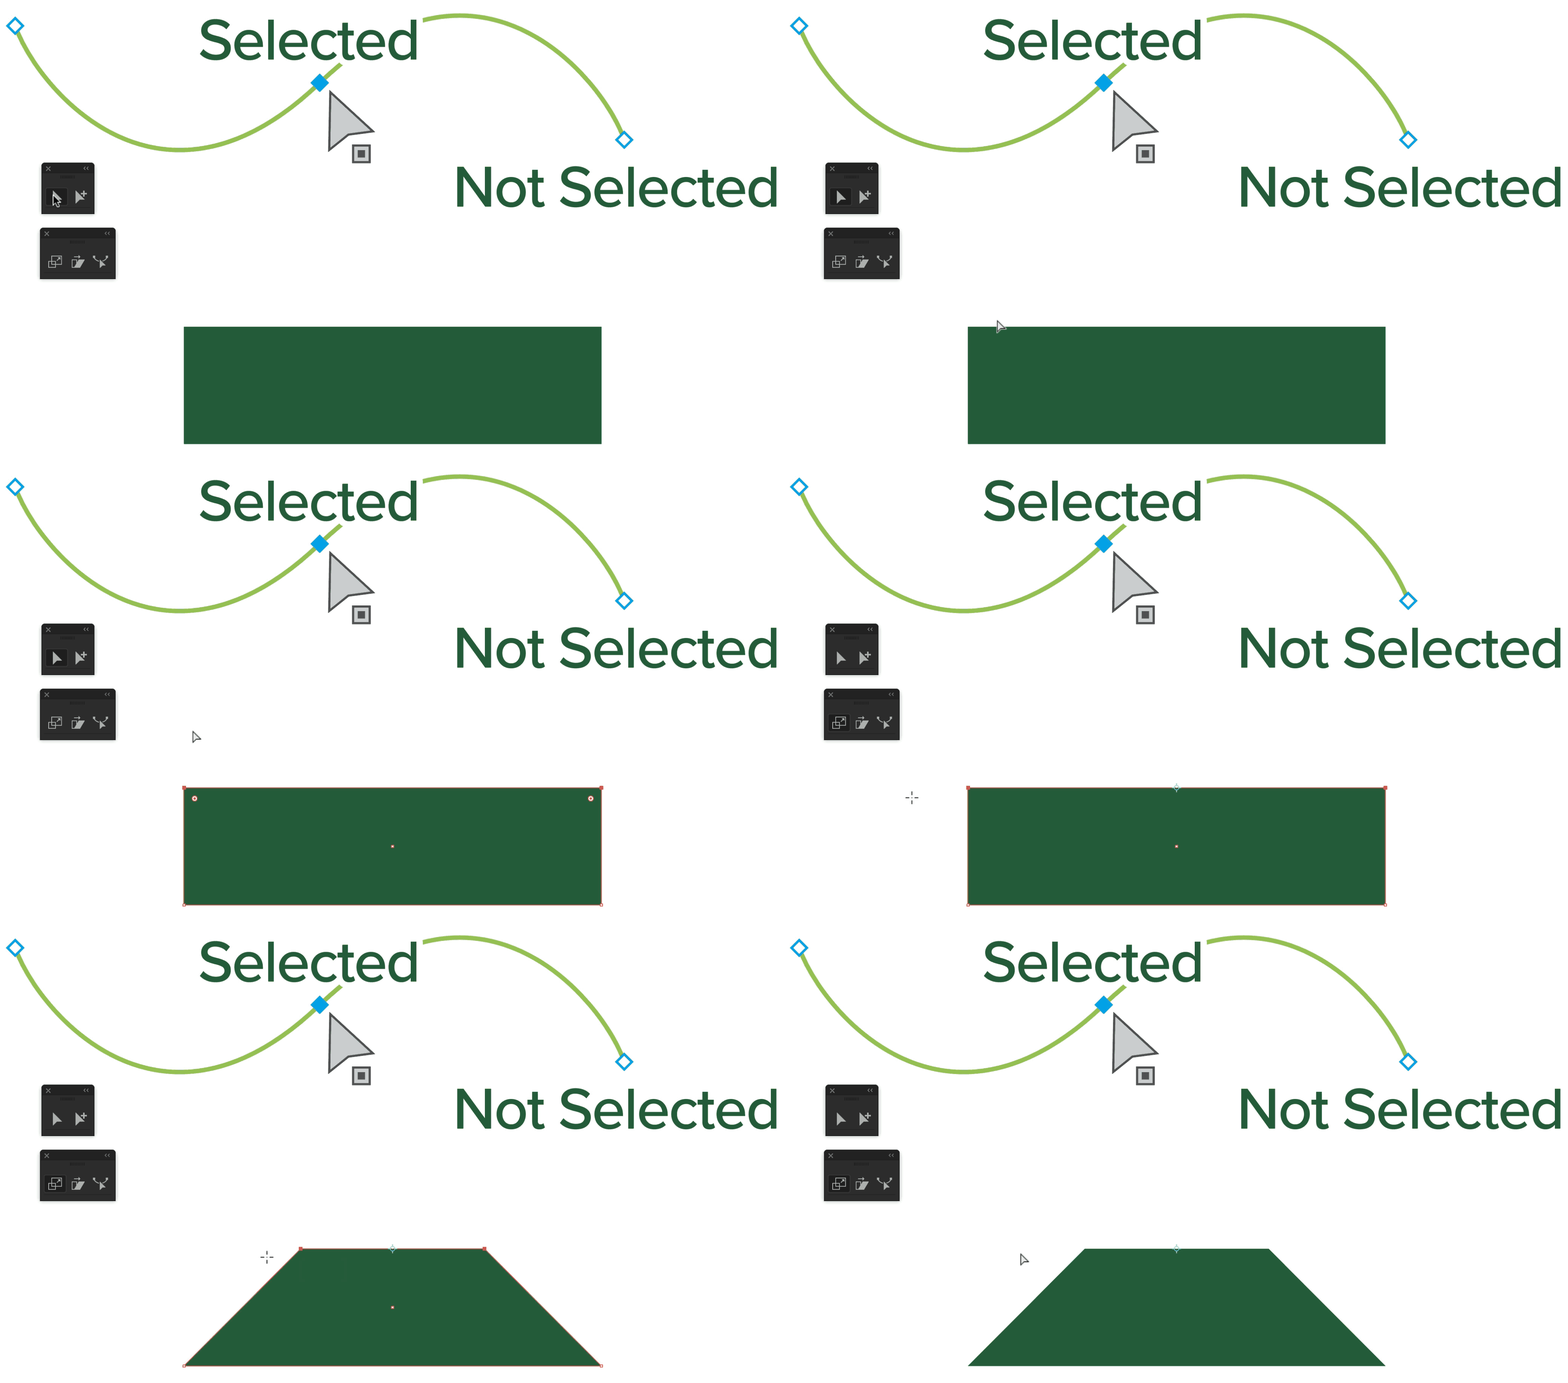
When you use the Direct Selection tool to click on one or more anchor points, only what you clicked on gets selected. If you move, rotate, scale from there, only those anchor points will be affected.
Drawing Modes
If you draw multiple shapes in Illustrator, the first one will be on the bottom and the last one will be on top of the stacking order on the page. That is, the final one covers up the ones you drew before it. This is Illustrator’s default behaviour.
This behaviour can be changed with the Draw Behind drawing mode. In this mode, each shape drawn is behind the last.
Shift-D cycles you through the three modes. Draw Inside automatically creates a clipping mask.
Align Tools
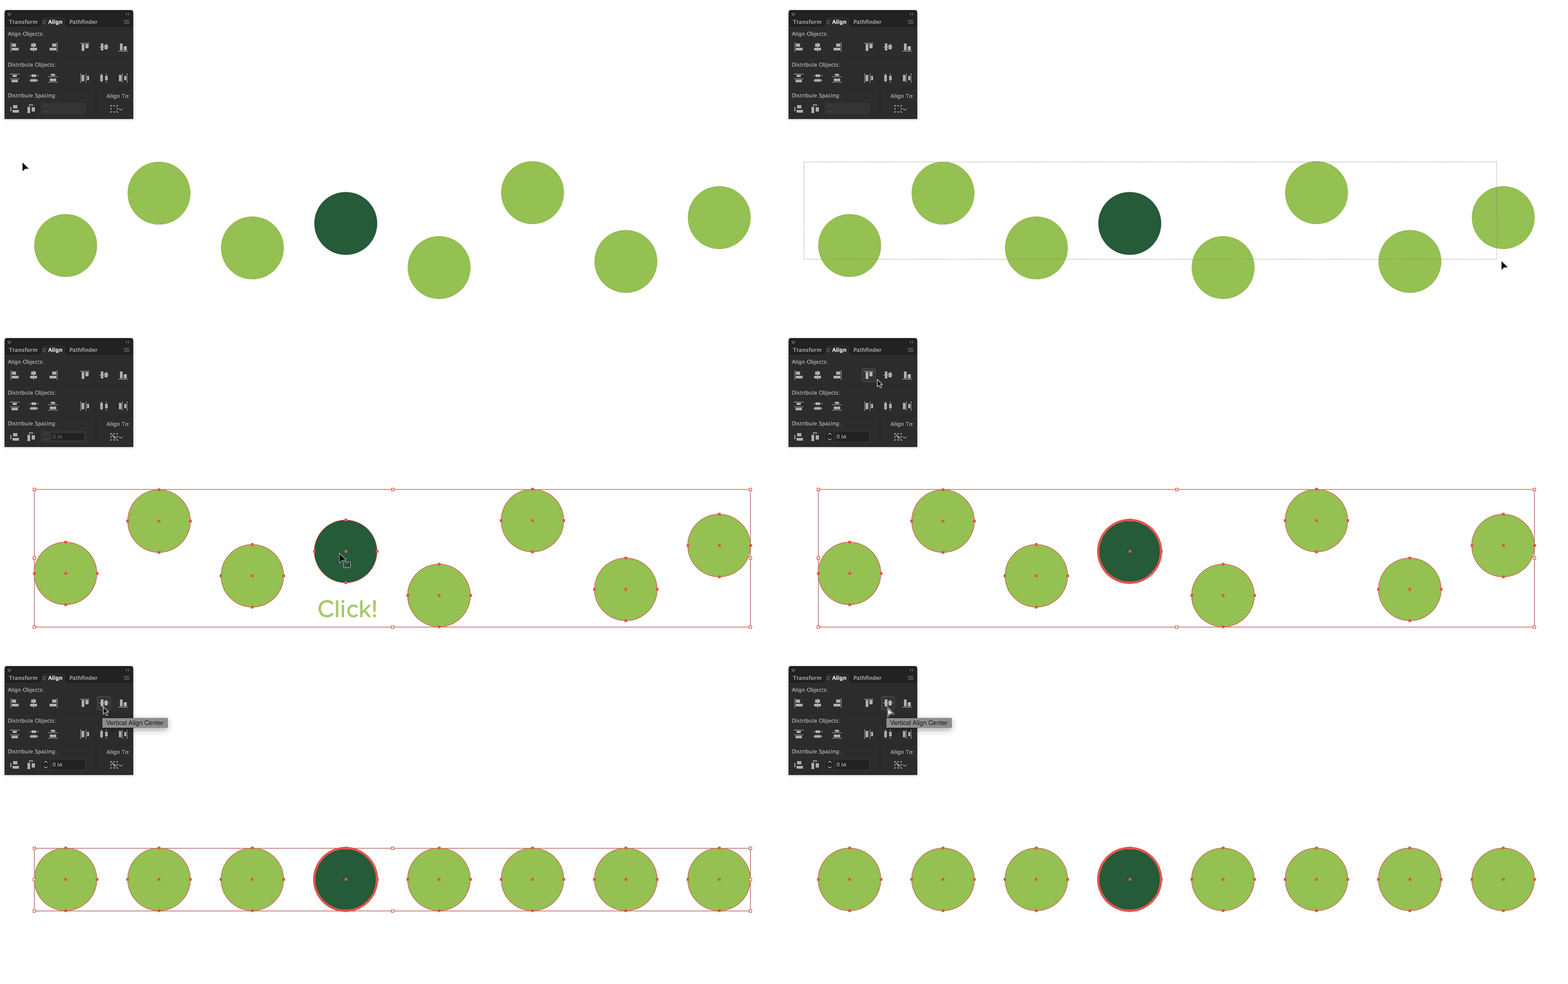
You don’t need to waste time aligning artwork in Illustrator. There’s an Align Panel devoted to helping you align items automatically.
There are two sections to the Align Panel: Align and Distribute. You can align obects relative to the Artboard or relative to the items you have selected. What’s really magic, is that you can align items to a Key Object.
Grouping & Ungrouping
Grouping items in Illustrator makes items move together. To group items, simply select them, then type ⌘-G. Grouping is hierarchical. That means that you can group items sequentially. They will then ungroup in the same order. You’ll be able to tell items are grouped from the Layers Panel. It will also read Group in the top-left corner of the screen when you select a group.
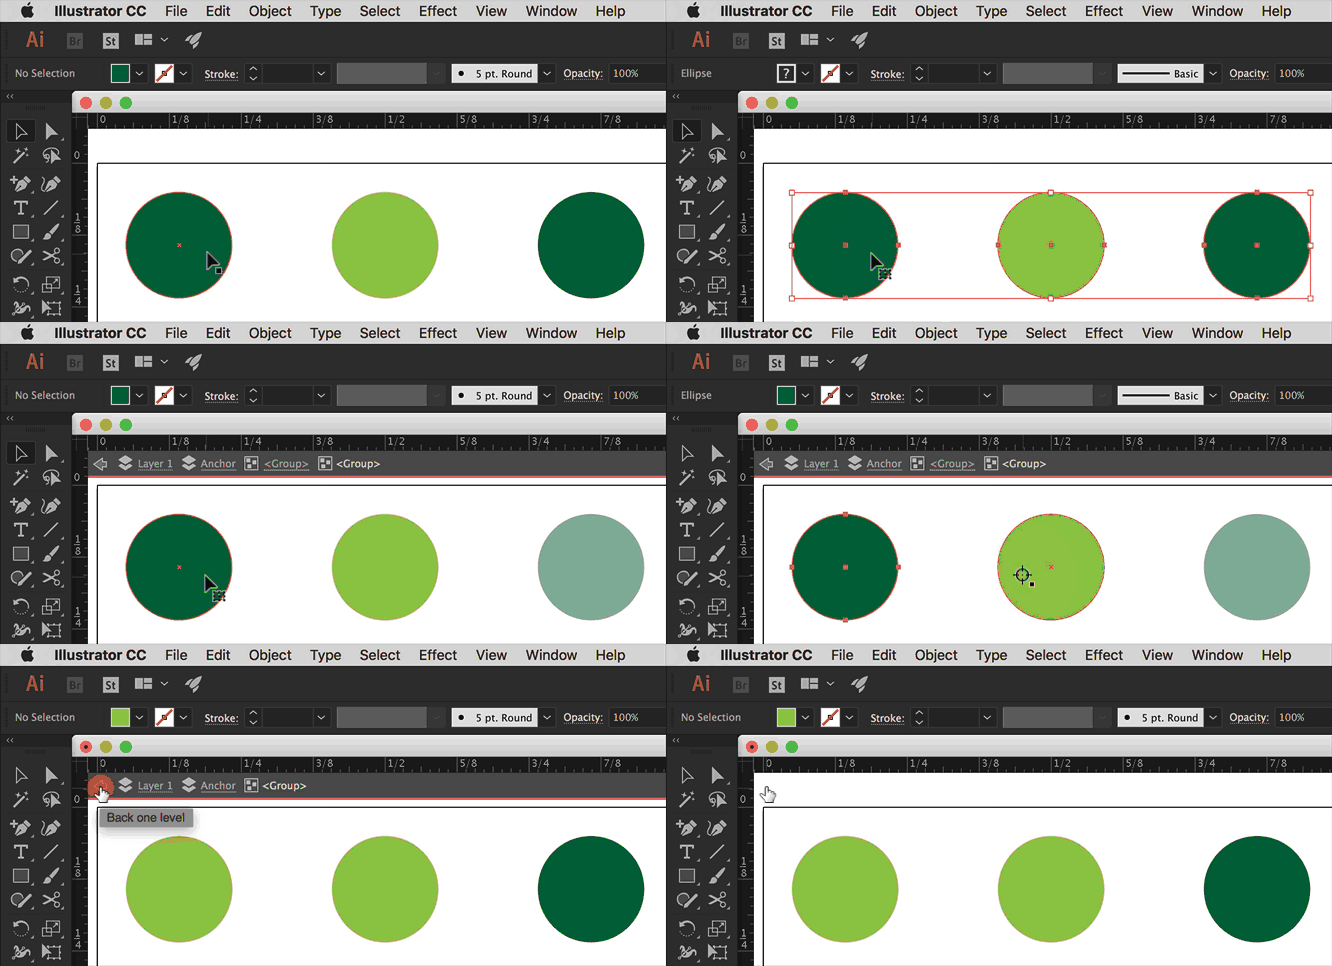
To ungroup, you can hit ⌘-Shift-G. Remember that if you grouped multiple times, you’ll need to ungroup multiple times.
You can select individual items in a group with the Direct Selection Tool. You can also enter Isolation Mode by double-clicking on grouped items. Isolation Mode is also hierarchical, as shown in the above image.
Compound Paths
A compound path is a combination of two or more shapes. Creating a Compount Path creates a hole in the bottom-most object. The upper shapes actually become holes in the bottom one. When you click on them, they’re actually empty.
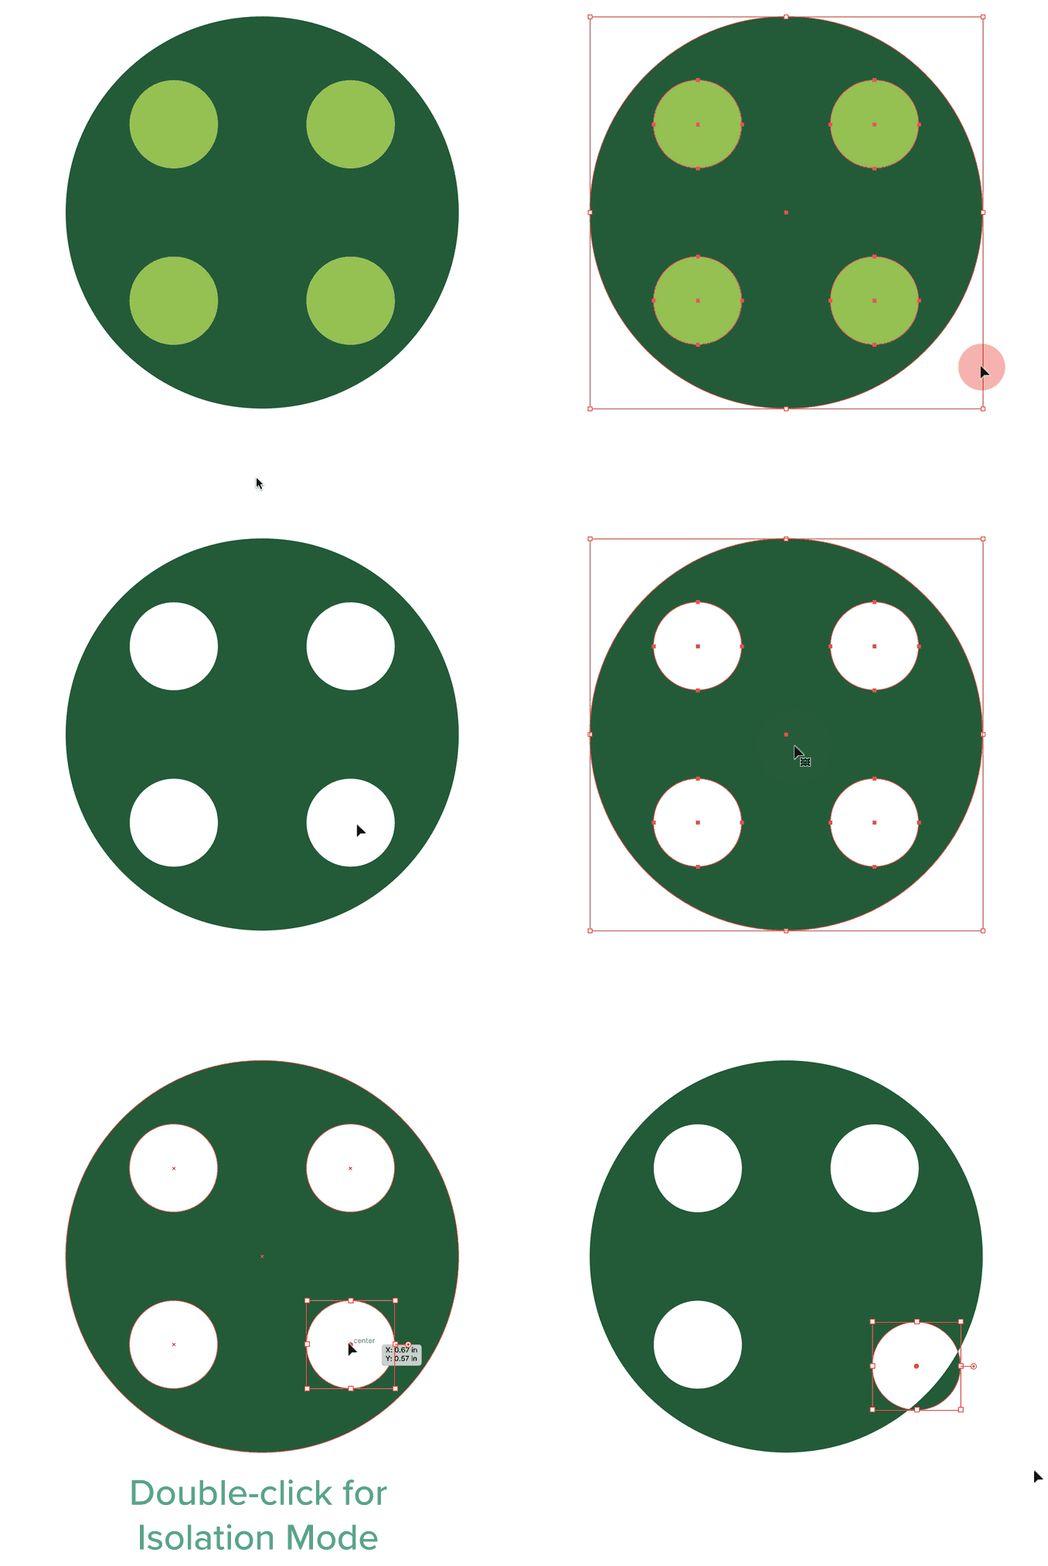
To make a Compound Path, you can use Object > Compound Path > Make.
If you double-click on a Compound Path, you’ll enter Isolation Mode. This allows you to edit the individual elements. So Compound Paths behave like grouped items. You can release a Compound Path with Shift-Option-Command-8. When you release a Compound Path, the top shapes take on the fill & stroke of the bottom-most shape.
Formative Activity
Use the provided document and the tools we’ve used today to draw the objects below.
Note: The handle & holes in the grater are Compound Paths.
There’s more than one way to draw some of these objects. As long as you use what we covered in class, you’ll be fine.
You’ll be graded on your proficiency using the shape tools to draw the provided objects.


