Topics
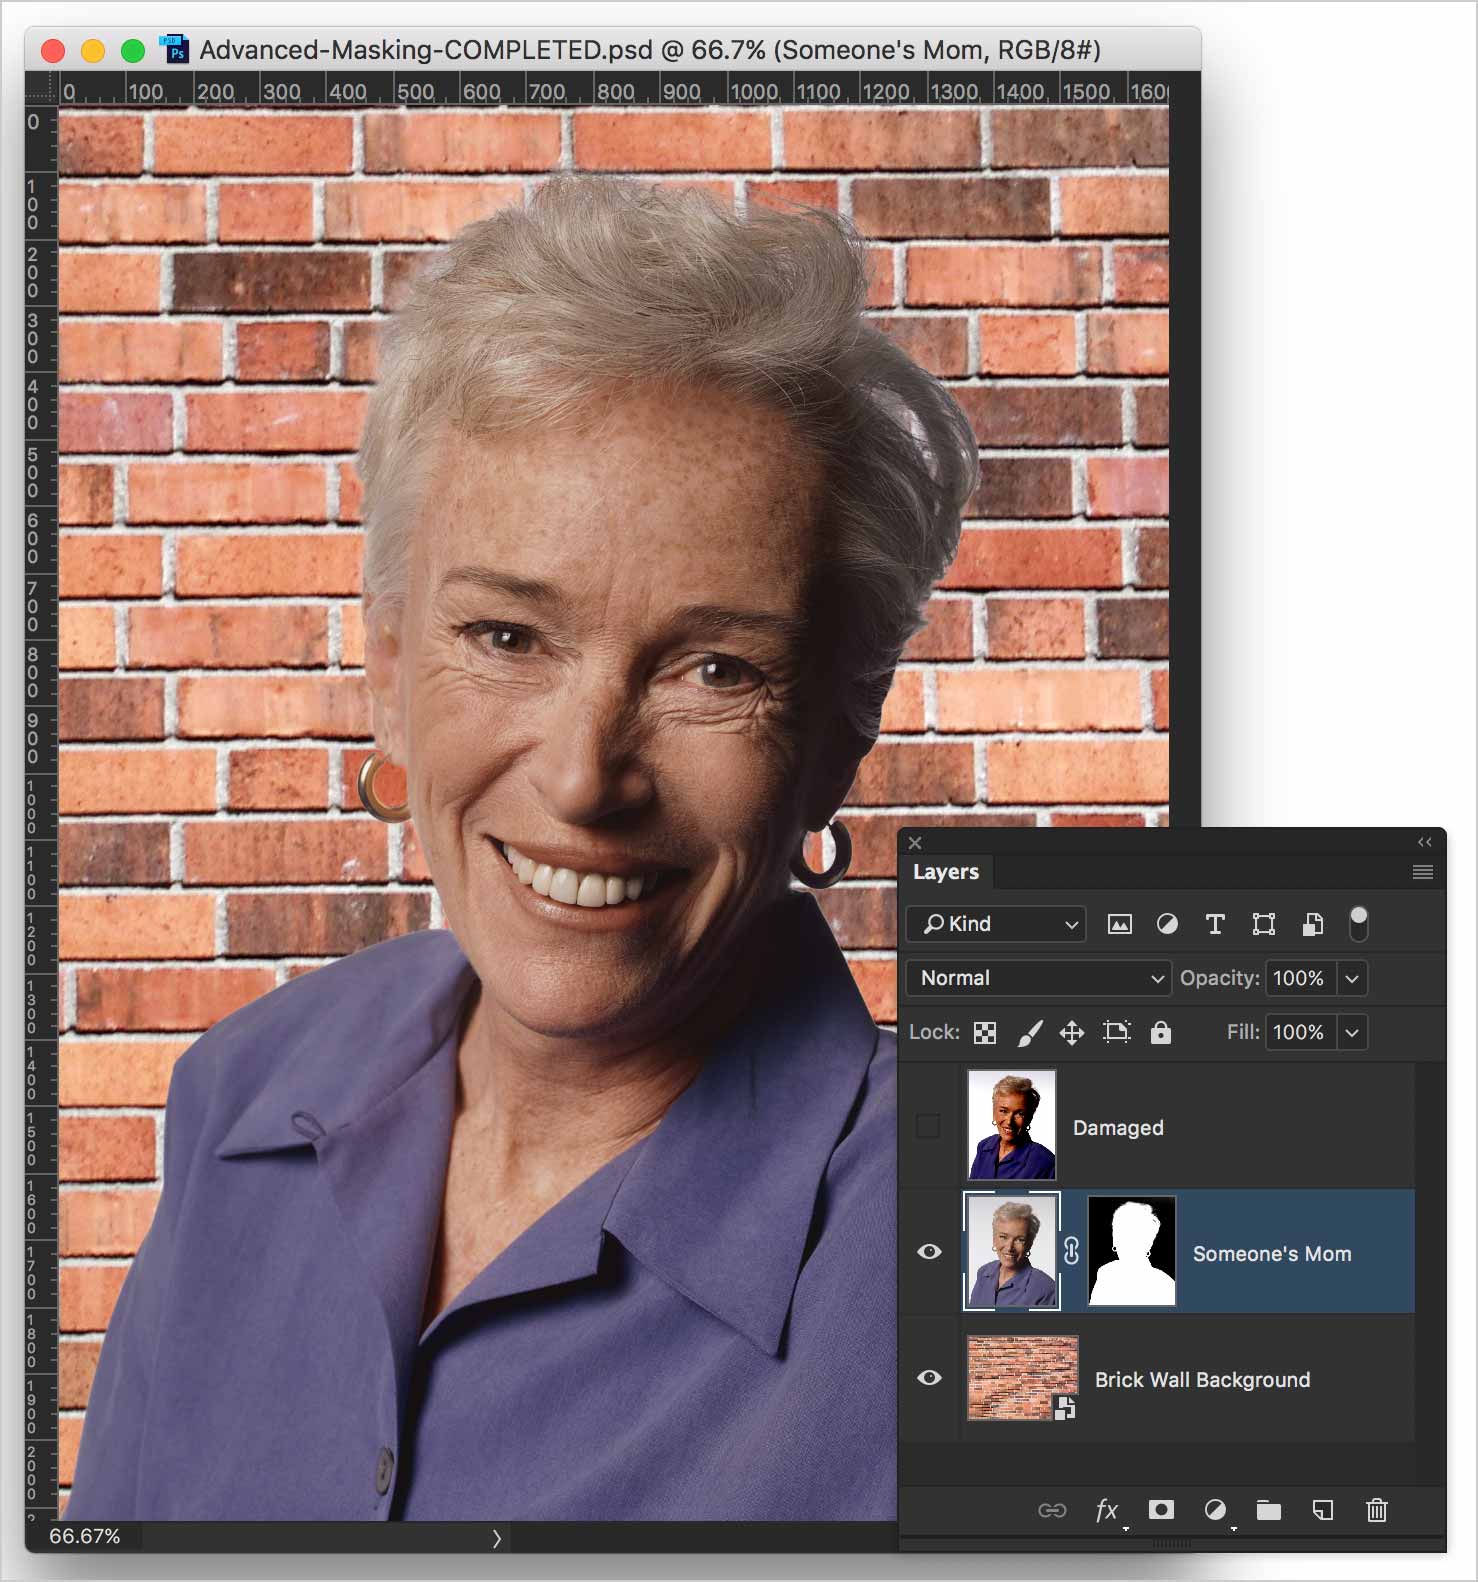
The goal of this assignment is to cut an object or person out of a photograph, despite very fine detail. A clipping path would be unmanageable and painting with the brush tool is plain ‘ol ugly.
One of the strengths of masking in Photoshop is that you can use the characteristics of the image to create a mask. By delving into the channels, we can use higher-contrast areas to mask even the most whispy hair.
Your Workspace
For this exercise, it’s best to clear the panels and only show the ones we want. To that end, hit Shift-Tab. All panels disappear except for the Options bar and tools. Now go to the Window menu, then select the Layers and Channels only.
Now go Window > Workspace to save the workspace. Name it Masking. Now every time you wish to do this type of work, simply select this workspace.
Manual Vs. One-Click Methods.
Considering that Adobe is automating many of these challenging tasks, we always want to compare what we can do manually versus what Photoshop can do automatically. We want to gauge whether it’s still worth going the long way, or just clicking a button in Photoshop.
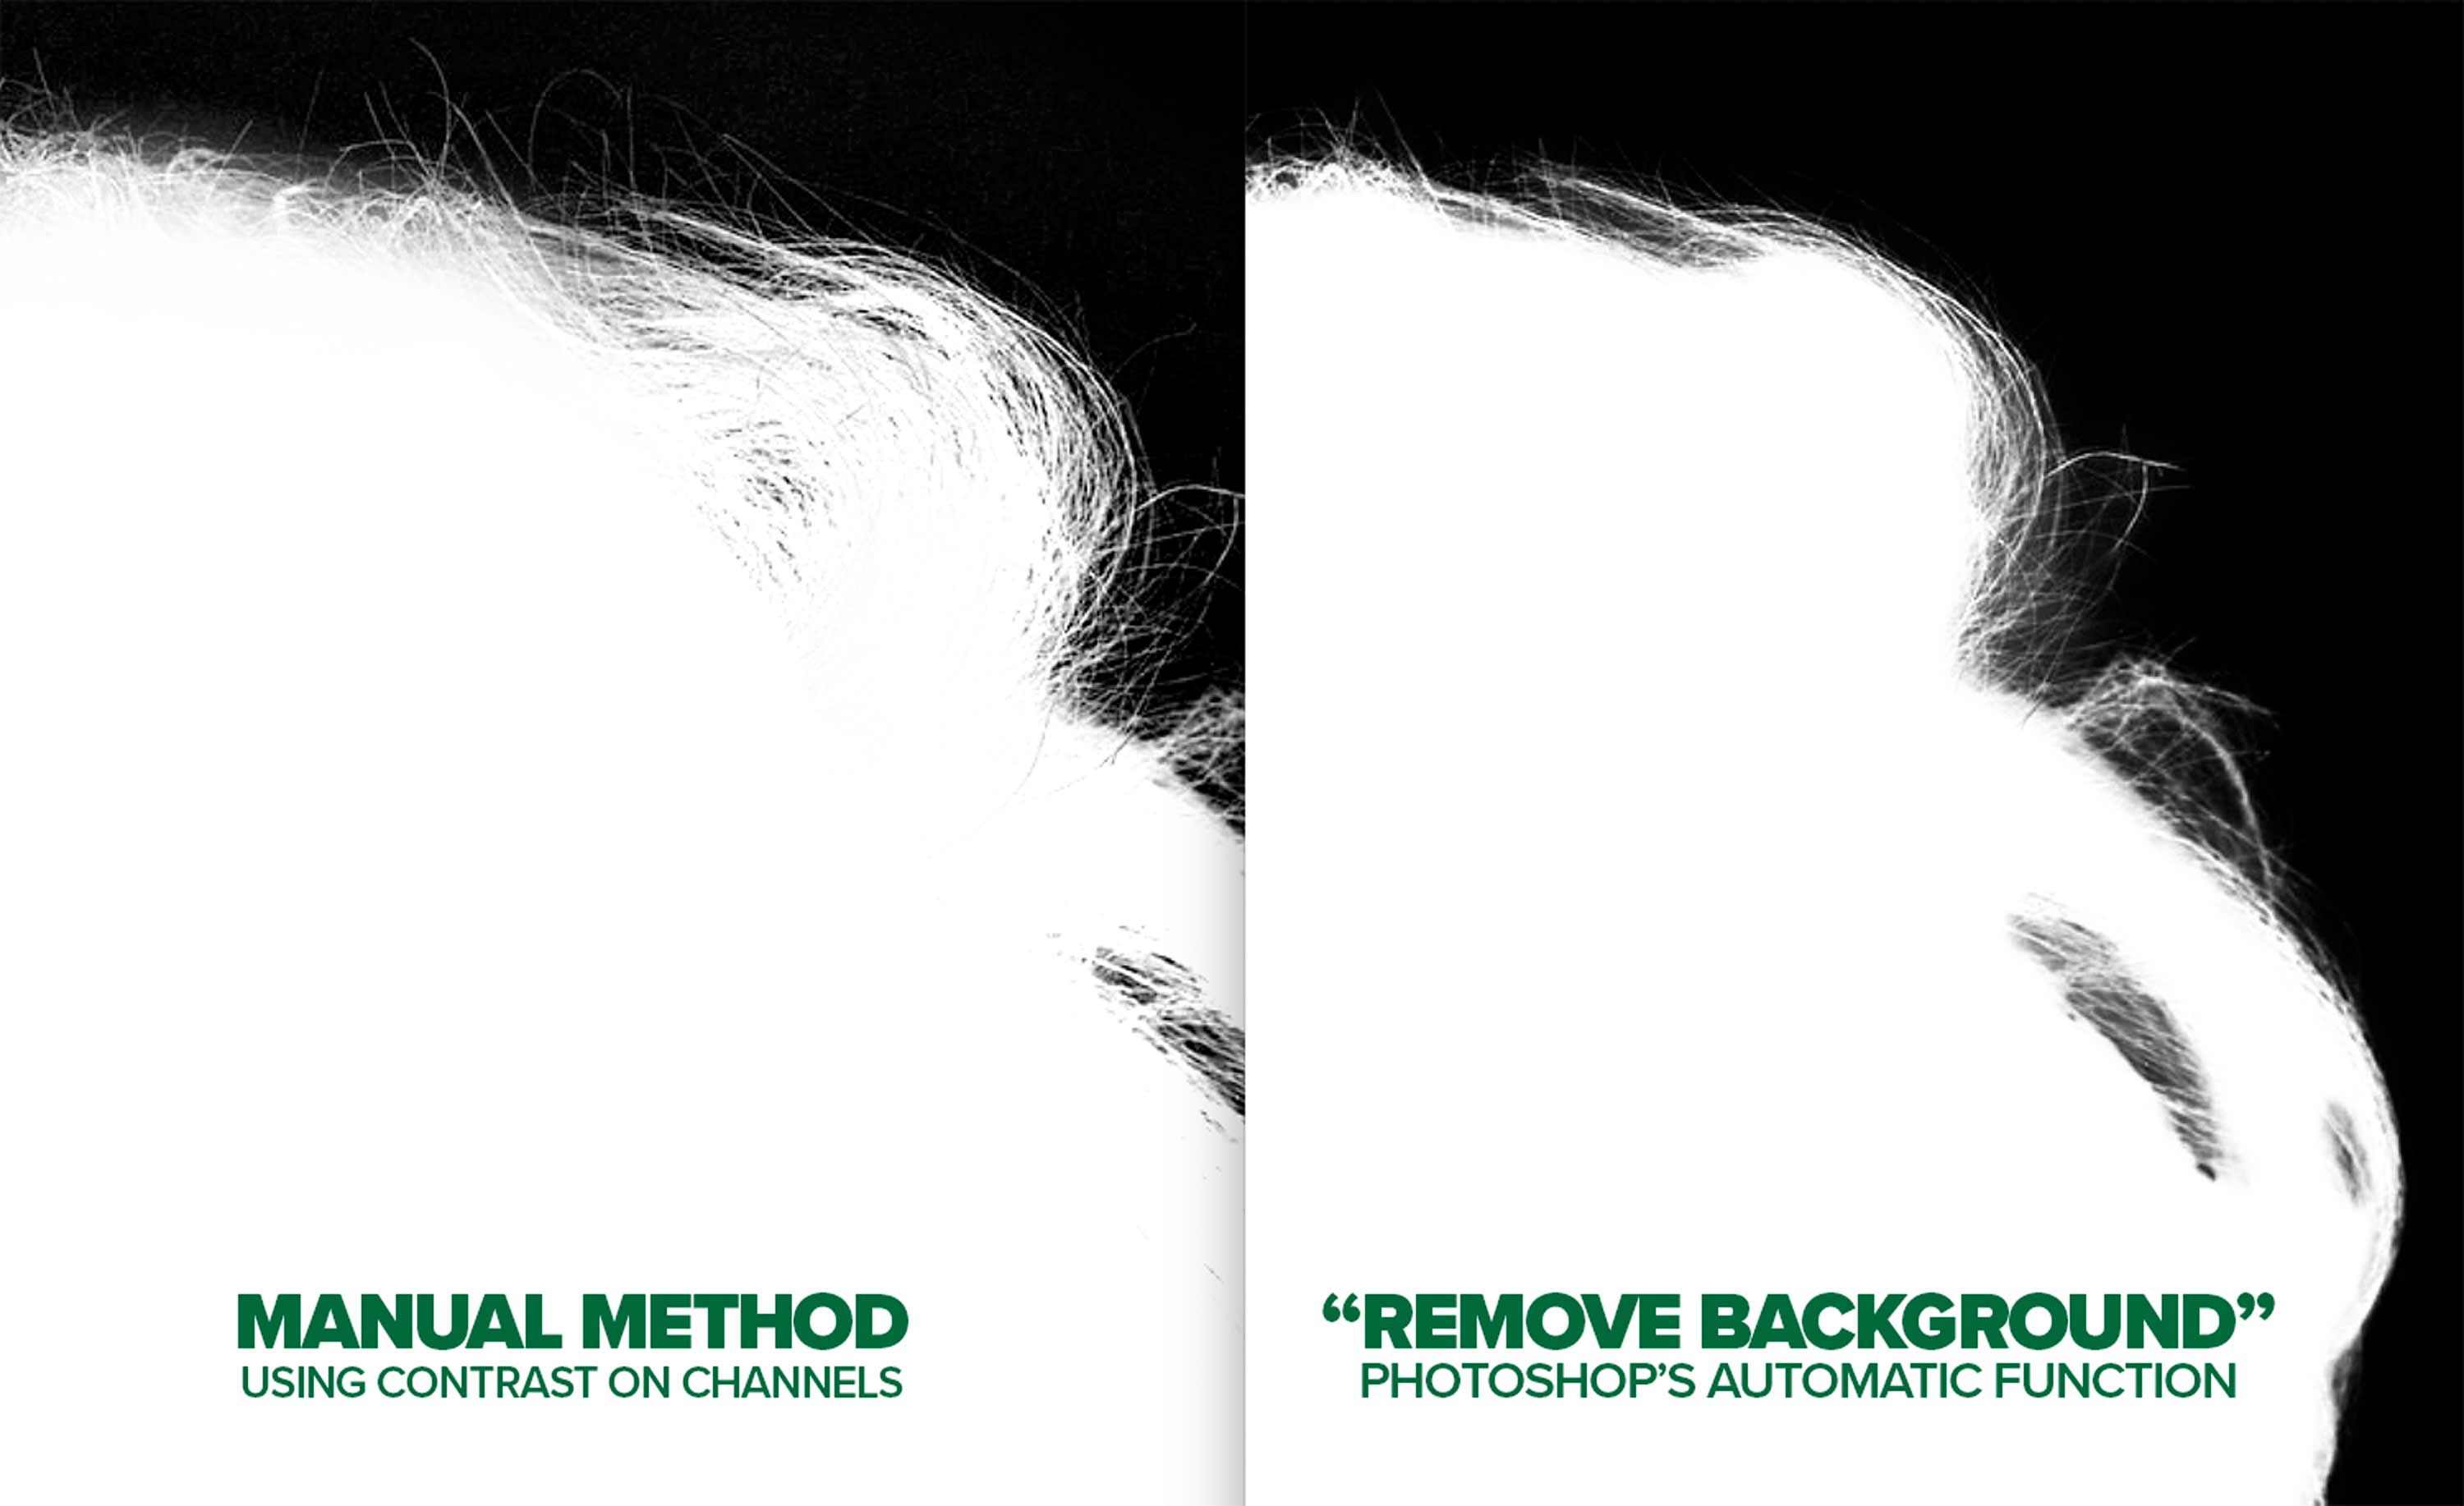
The above image proves that the automated method still has a way to go before it reaches the quality of a manual selection.
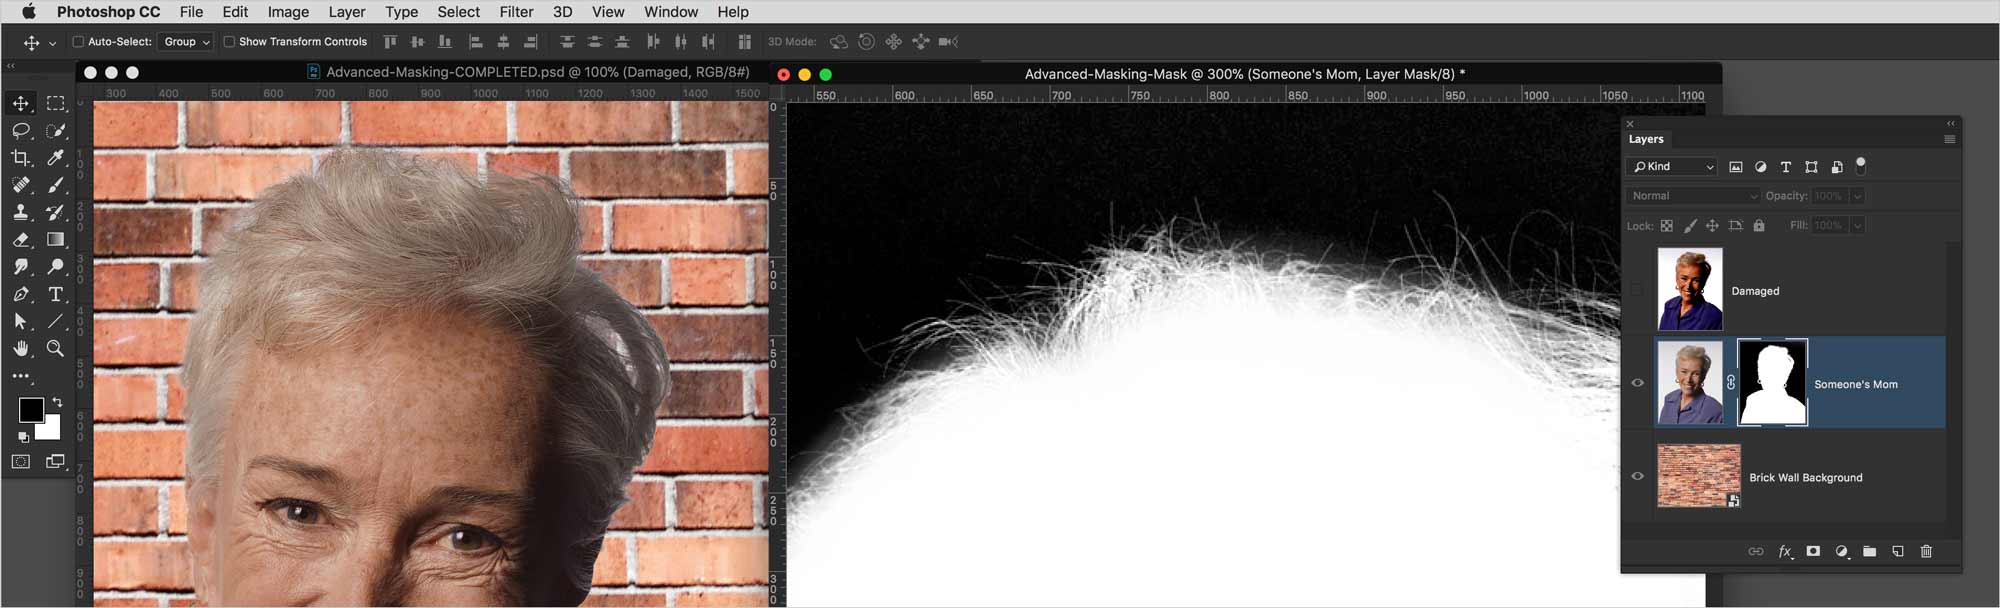
Layers
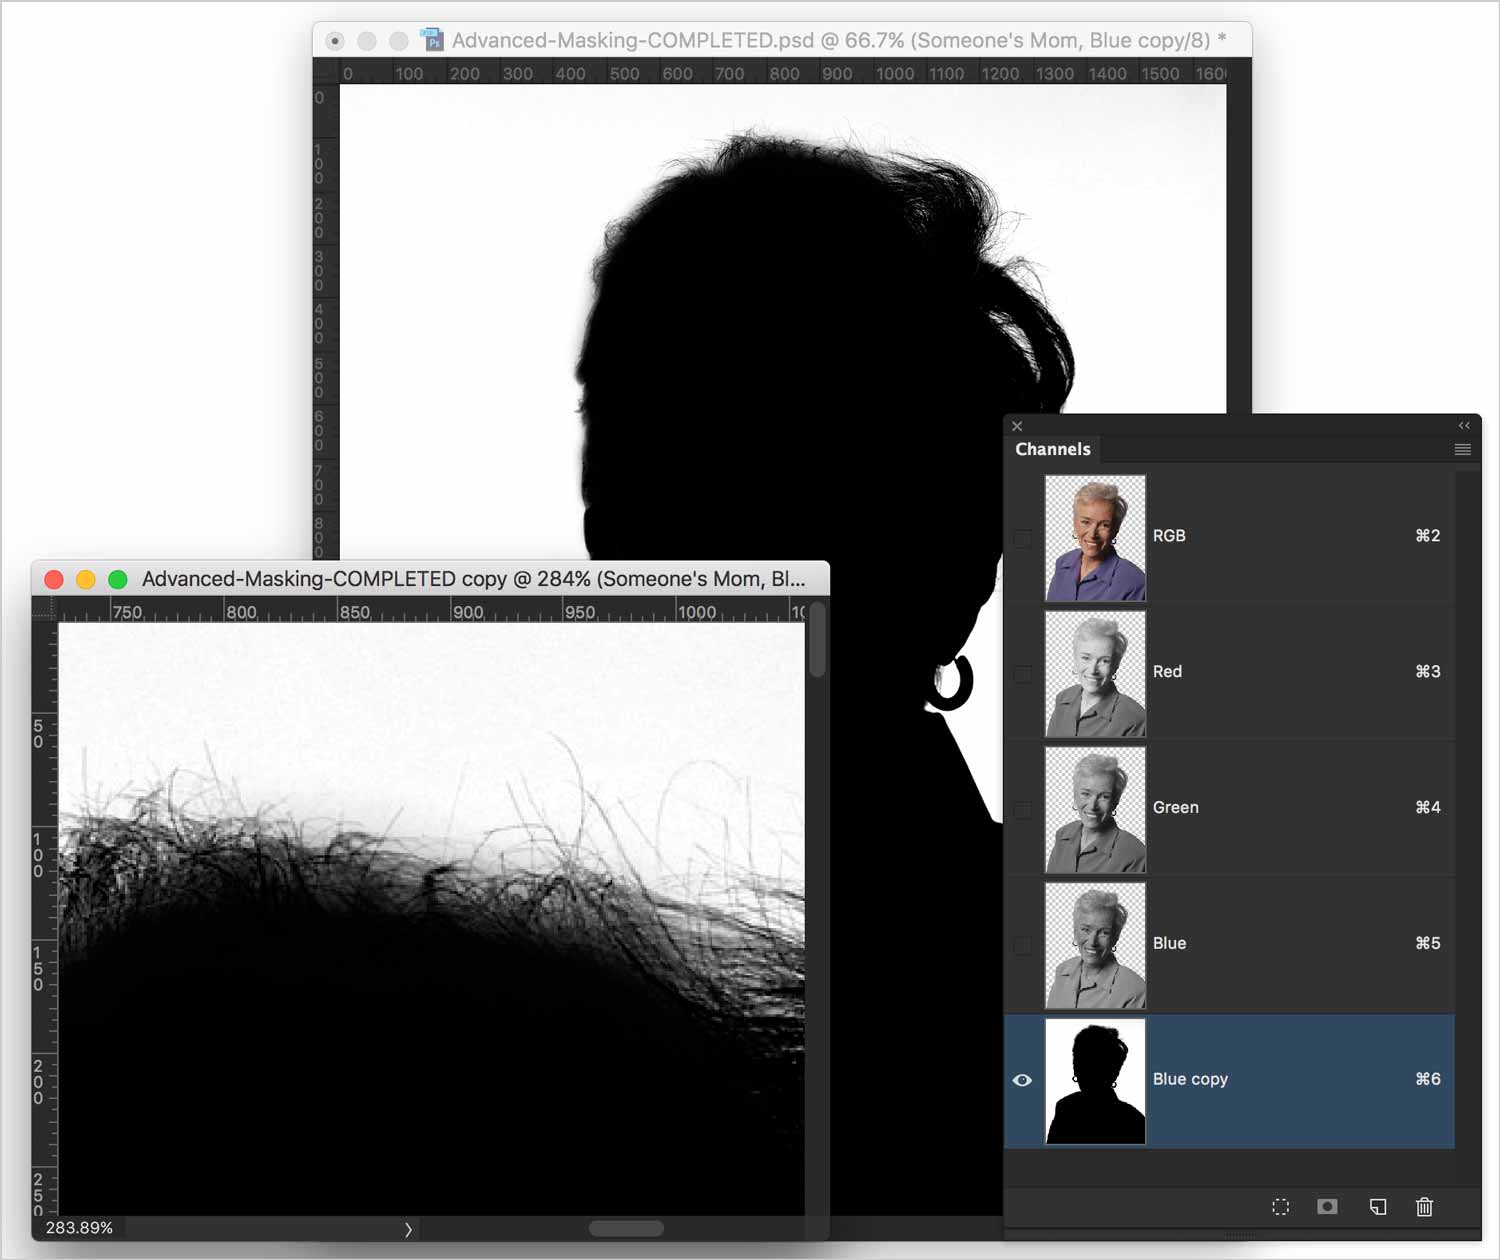
An Alpha Channel in Photoshop is a saved selection represented as a greyscale image. In the panel below, what’s white on the channel is selected. What’s black is deselected. What’s grey is a partial selection – kind of like onion paper. The lighter the colour on the channel, the more it’s selected.
The best way to start is to leverage the present content of the photo. We need to increase the contrast of the photo until we end up with the subject in solid white and the background in solid black (or vice-versa). The black and white version will be loaded as a selection which will be used in a mask.
Throughout this process, we’ll pay special attention to never touch the original layer.
The first step in the process is the simplest way to increase contrast. Simply duplicate the background layer with Option-⌘-J. Name it High Contrast. On the new Layer, go ⌘-L or Image >Adjustments >Levels.
Move the Black Point + White Point sliders inward until the subject gets darker. Stop before the background gets dark. We’re just trying to punch-up the subject a little. Click OK.
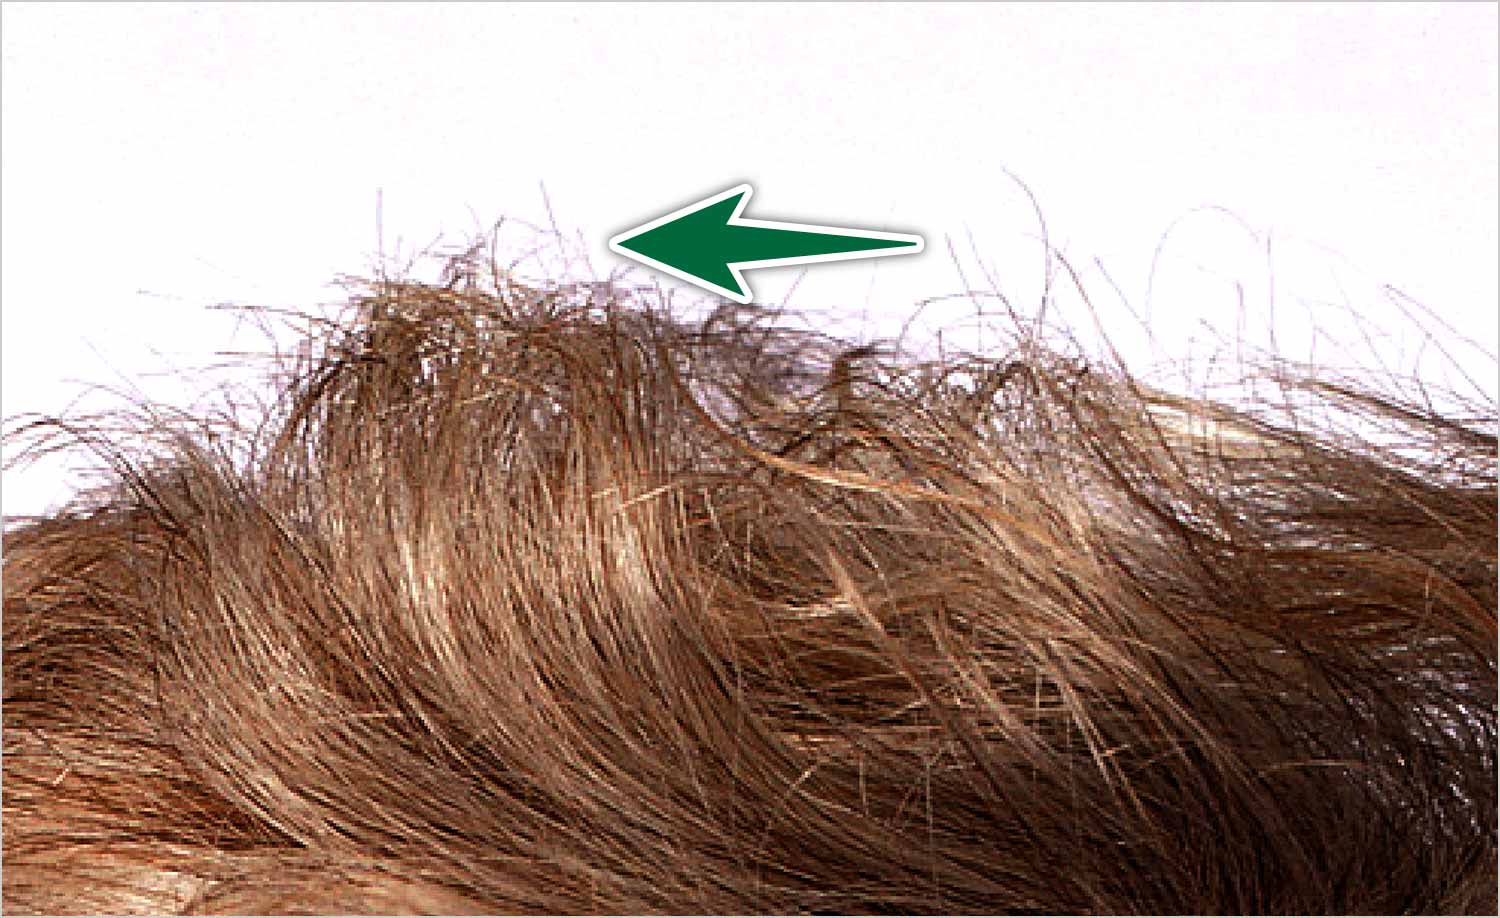
The result we want is getting the background as white as possible and her as dark as possible without losing any of the whispy hairs. Note that you can zoom while the Levels dialogue is open.
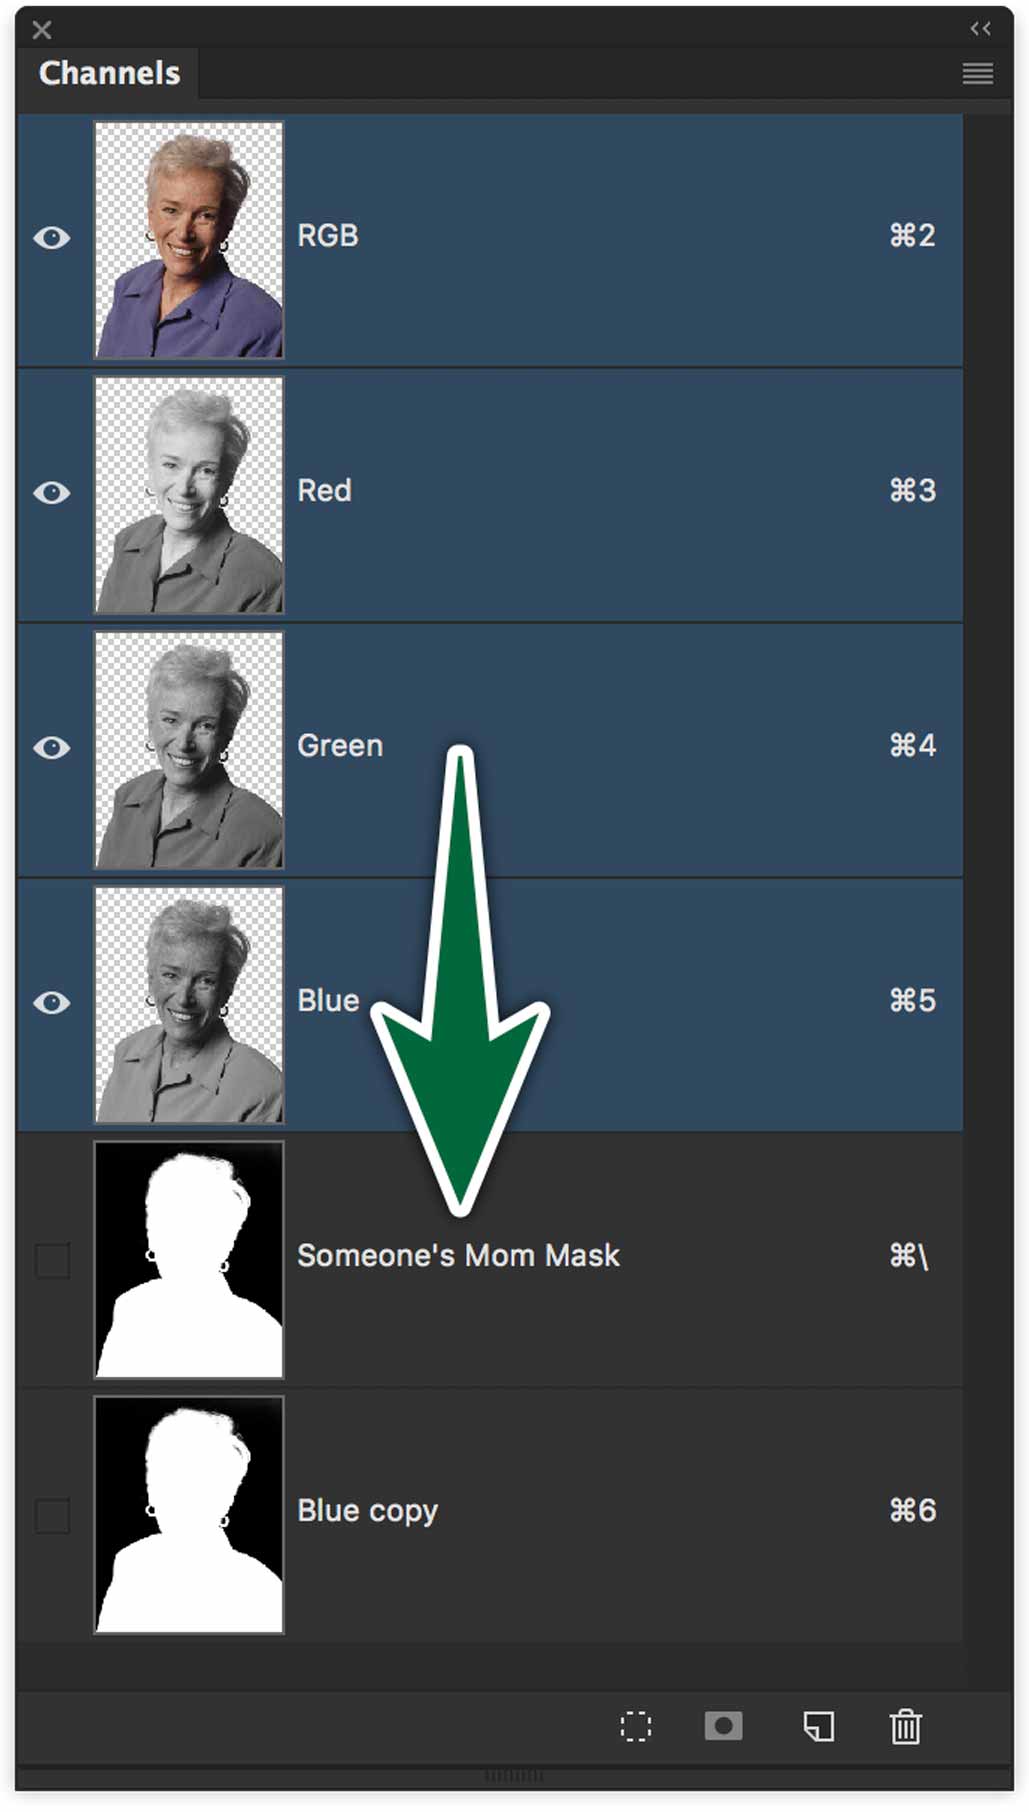
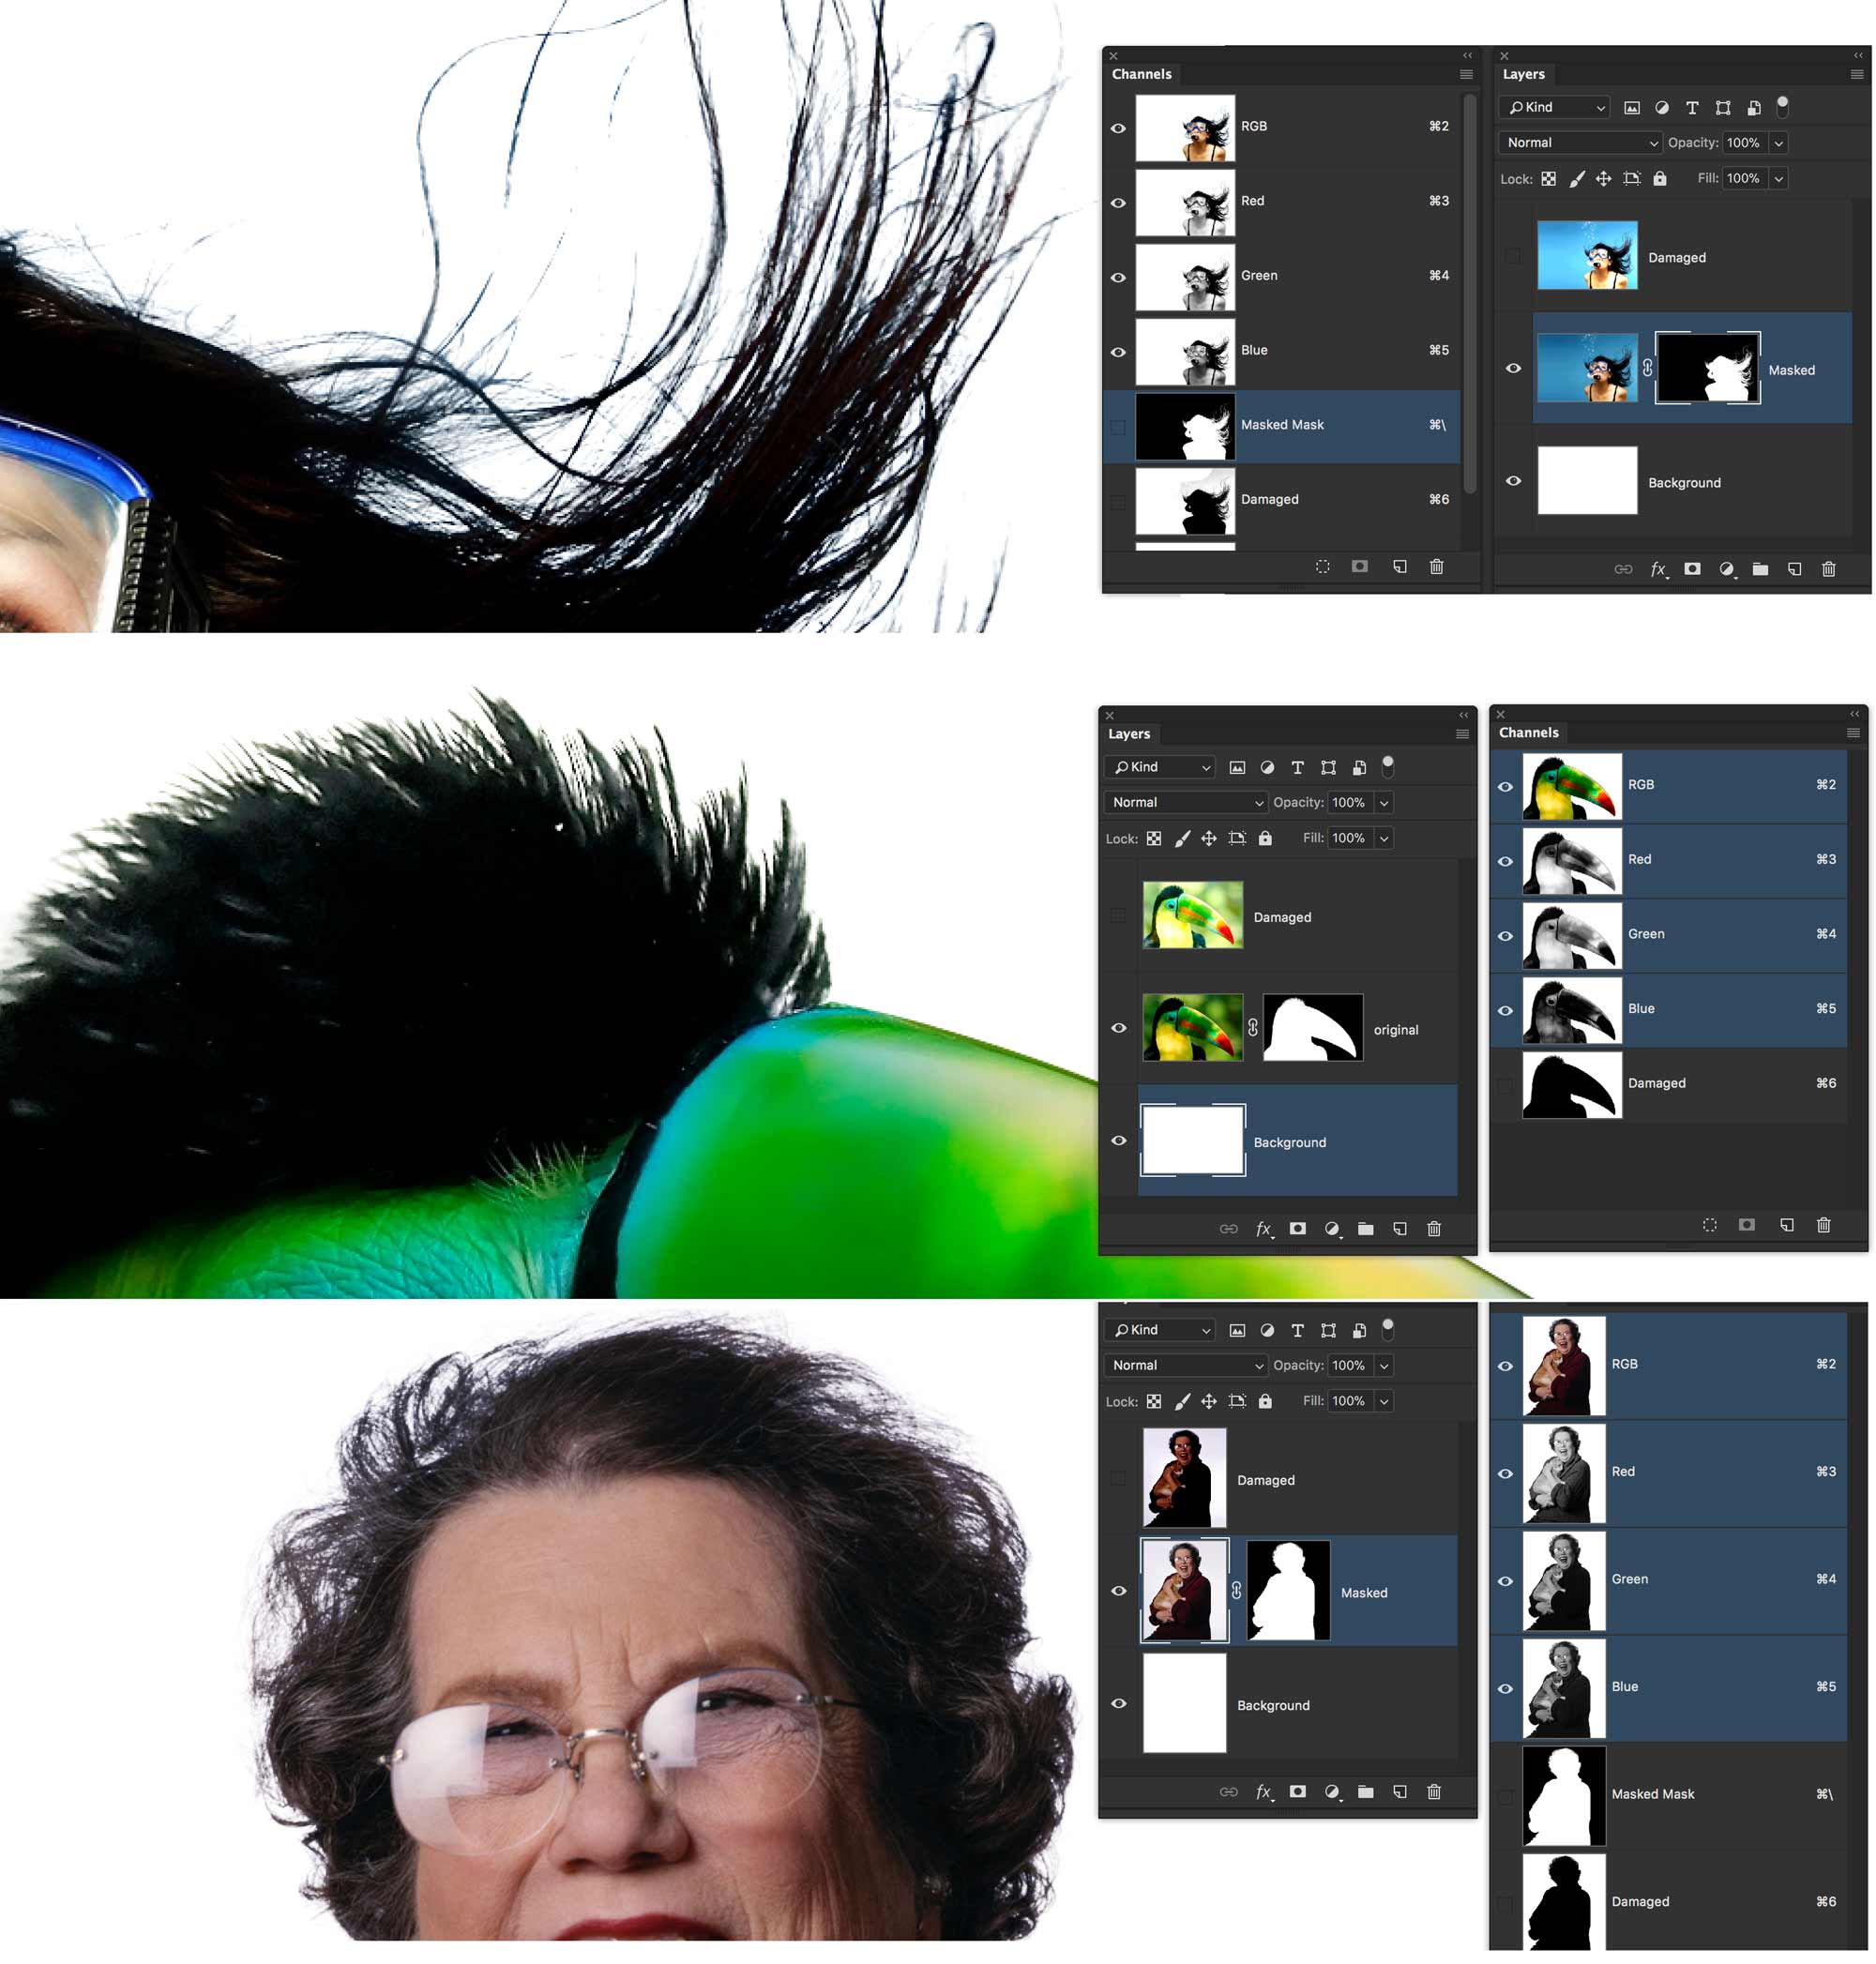
Channels
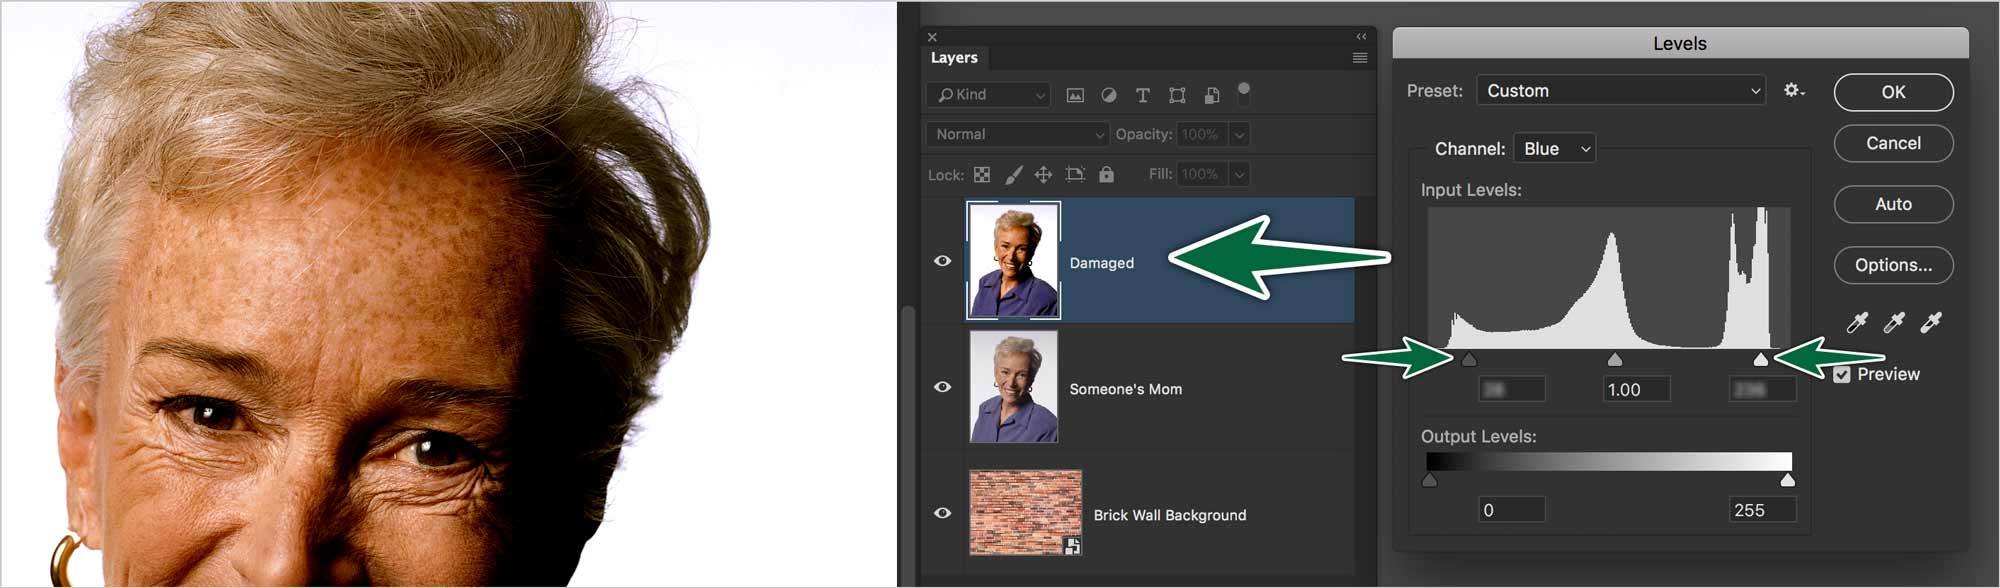
The Channels panel is where most of the magic happens. While still on our new darker layer, go to the Channels panel. Find the channel where the subject has most contrast with the background. The edges are what counts.
Duplicate that channel with a right-click. We’re going to kind of ruin this channel in the process, so let’s call it Damaged.
Once on this channel, we need to run Levels with ⌘-L. In this case, we want to be way more extreme. Bring the black + white point sliders in until we get the subject as black as possible.
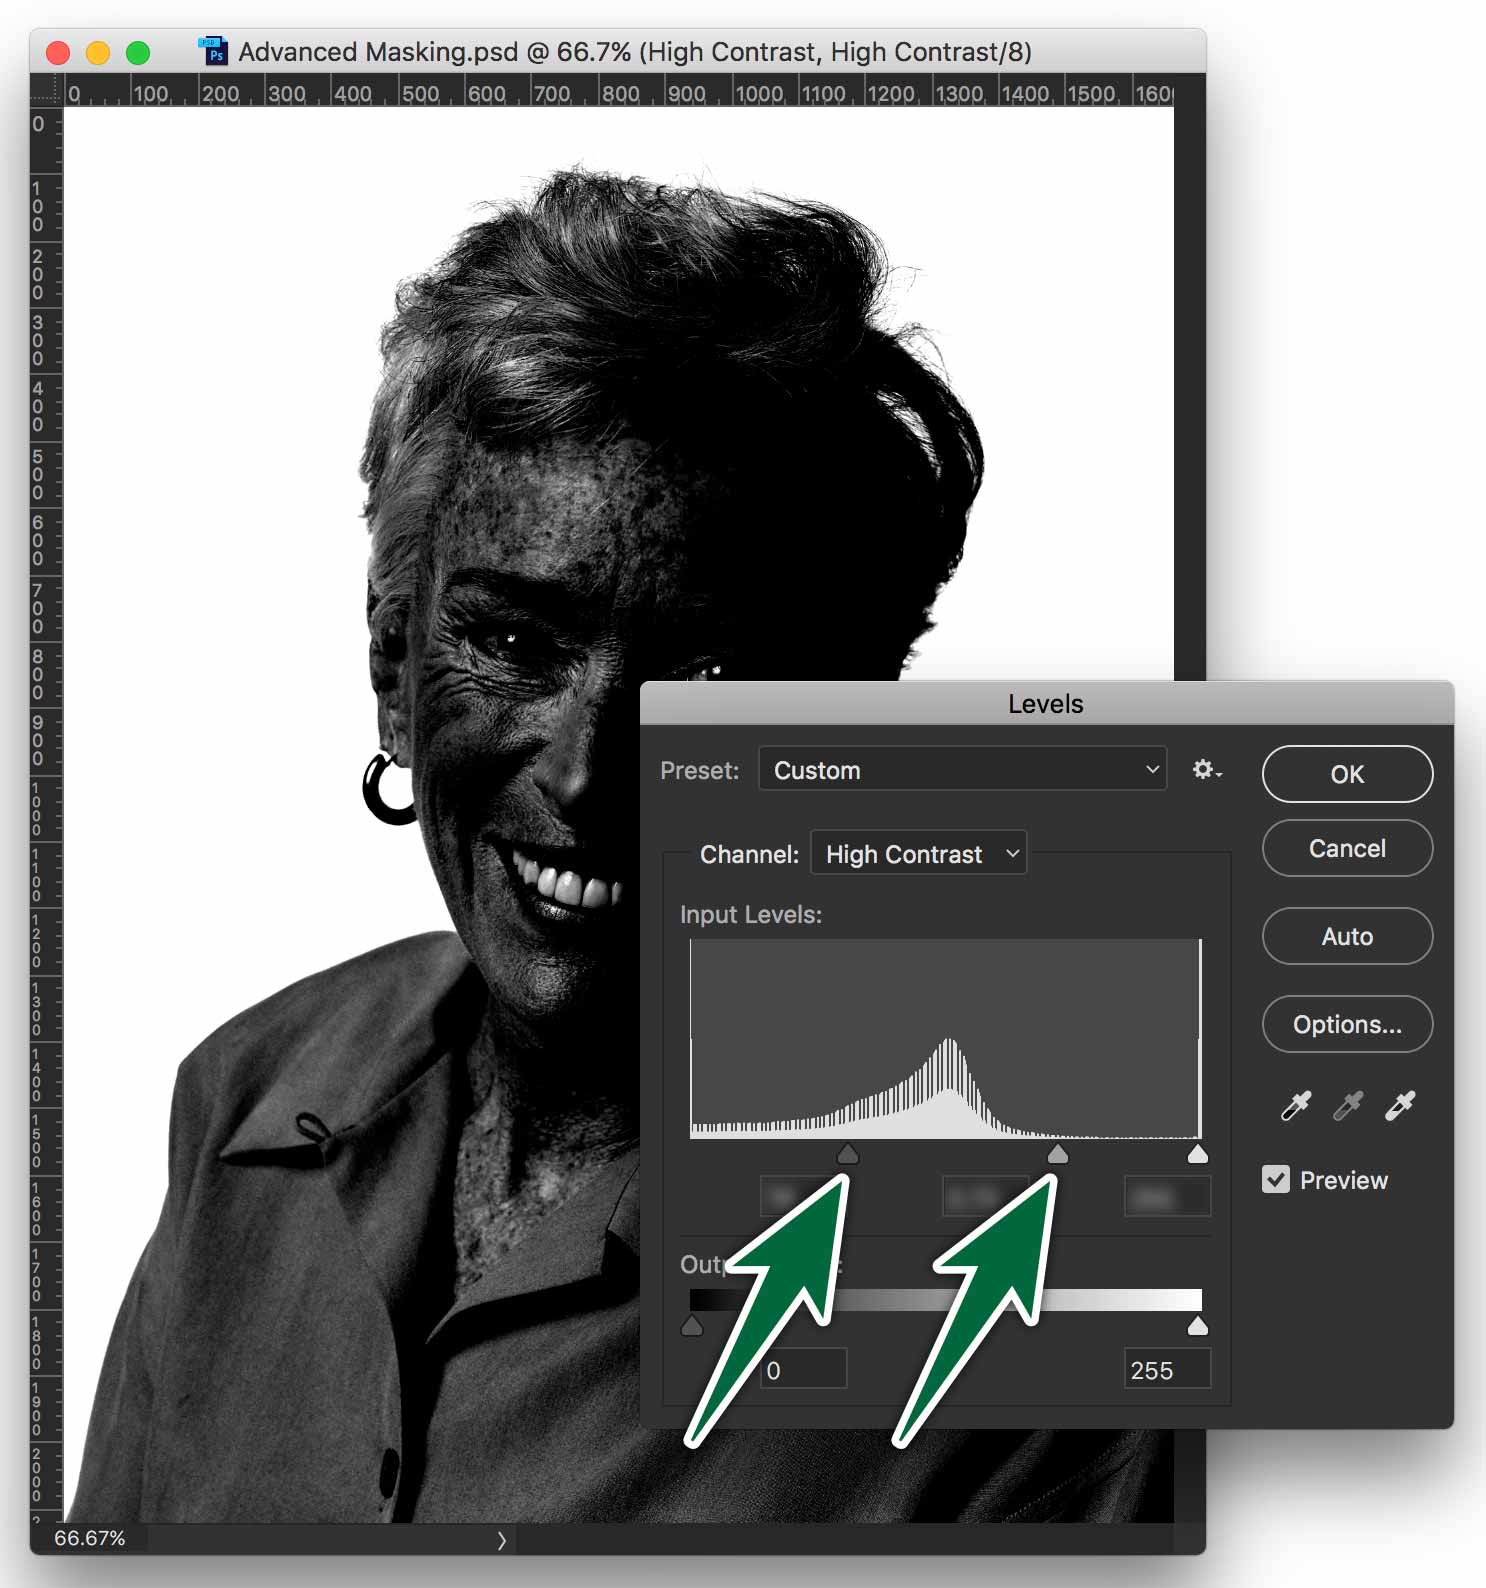
We want to stop with the Levels adjustments before we start to loose detail in the whispy hair, so zoom in to check before you accept.
Now we have a subject which is almost completely black. Some highlights probably still remain. We need to get rid of them. I simply use a big brush and paint with pure black. Make sure you stop before you paint over the whispy edges of the subject. Just fill in the center with black.
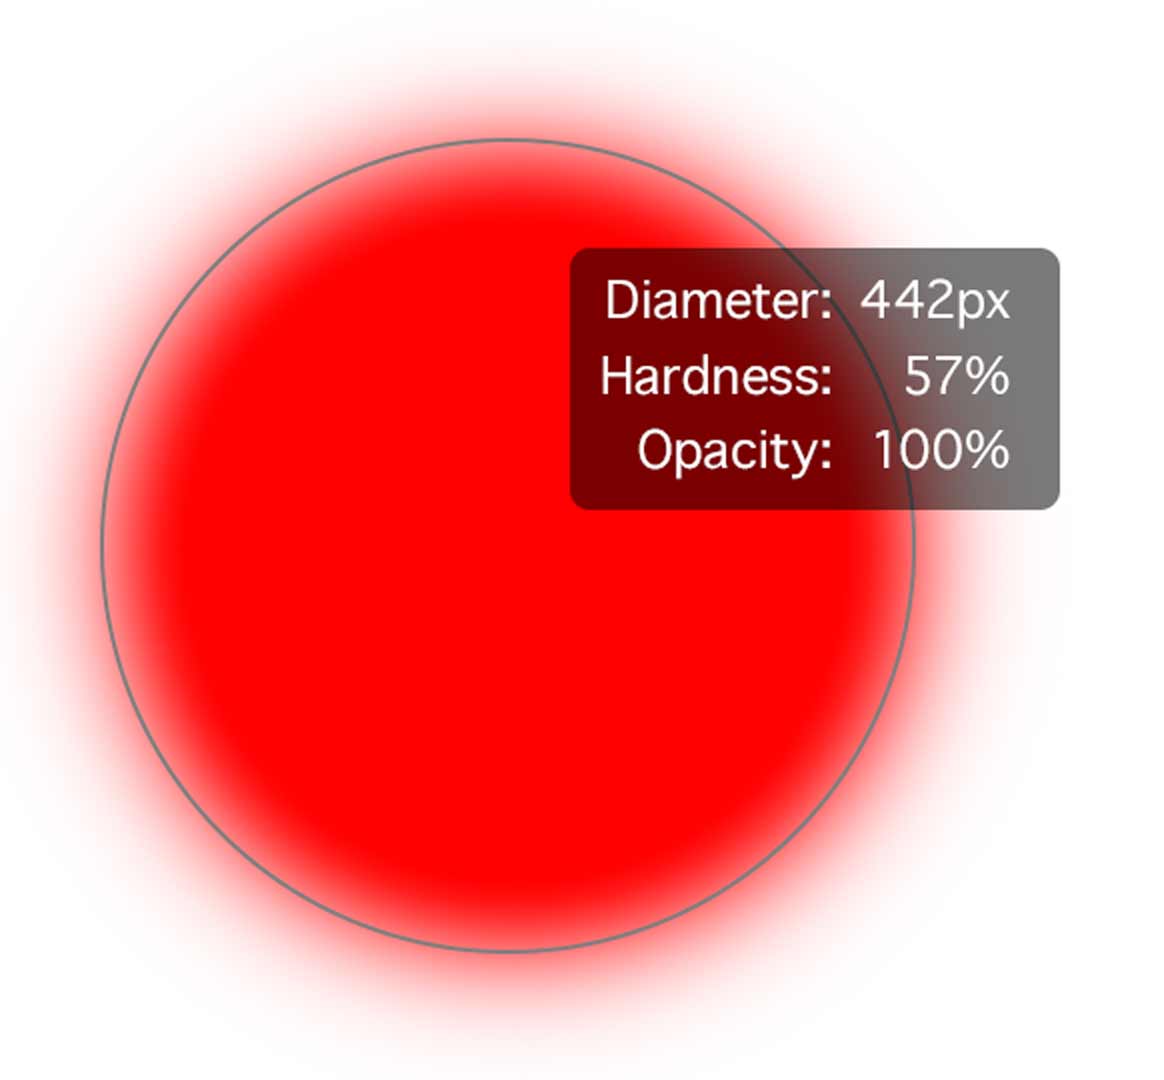
Use a soft-edged brush. Just be carefull when you get close to the edges. You don’t want to paint any black on the white background.
Wrap-up
By now, you should have a completely black subject, except for the areas where you can see through the hair.
Now we can go Select > Load Selection. From the dialogue, choose your new channel’s name. Click OK. You should see marching ants on your canvas.
- Go back to the layers panel.
- Turn off the visibility of the Damaged layer.
- Double-click on the Background Layer.
- Name it something meaningful. Click OK.
- Add a mask on this layer by clicking on the Add Layer Mask button at the bottom of the Layers panel.
- Voila!
With a contrasting layer behind your newly-masked subject, you may notice that there are some areas of the photo that are transparent and shouldn’t be. Simply go to the mask and paint them white.
You also have the option of running a Levels command on the mask. This can fine-tune it. But be subtle at this point.
You’re done!
Formative Activity
Mask the main subject in each of the provided images as accurately as you can.
The Process
- Duplicate main layer
- Run Levels
- Duplicate contrast channel
- Run Levels
- Paint black (or white)
- Load selection
- Create layer mask
- Optionally run Levels
For each image, create a new solid background layer. Choose a colour that works. Often, a dark colour brings out a halo effect in the hair of our subjects. This masking process does have its limits.
