Topics
Photoshop is fundamentally a pixel-based application, but it is very adept at working with vectors. In fact, there are really partial Illustrator capabilities built right into Photoshop. Vector shapes created in Photoshop print as well as those in Illustrator. The benefits of vectors is their accuracy and defined edges. They’re also infinitely tranformable in a non-destructive manner.
The tools shown above are similar to the ones found in Illustrator. They’re all vector tools.
![]()
-
The Move Tool is not a selection tool like in InDesign or in Illustrator. It doesn’t have anything specifically to do with vectors. It moves everything on a layer or layers linked together.
-
The Path Selection Tool does just that. It selects paths like the Selection Tool does in Illustrator.
-
The Direct Selection Tool is also like the one in Illustrator. It’s used to select individual anchor points.
Drawing Modes
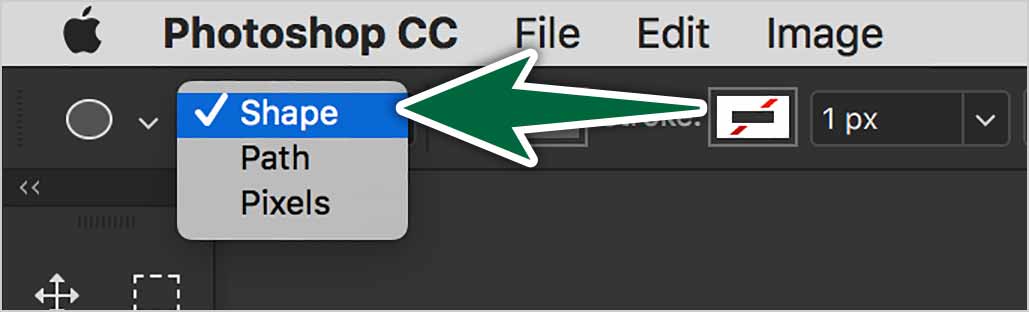
There are three shape mode described below. When you select either of these tools, the options bar has settings for them.
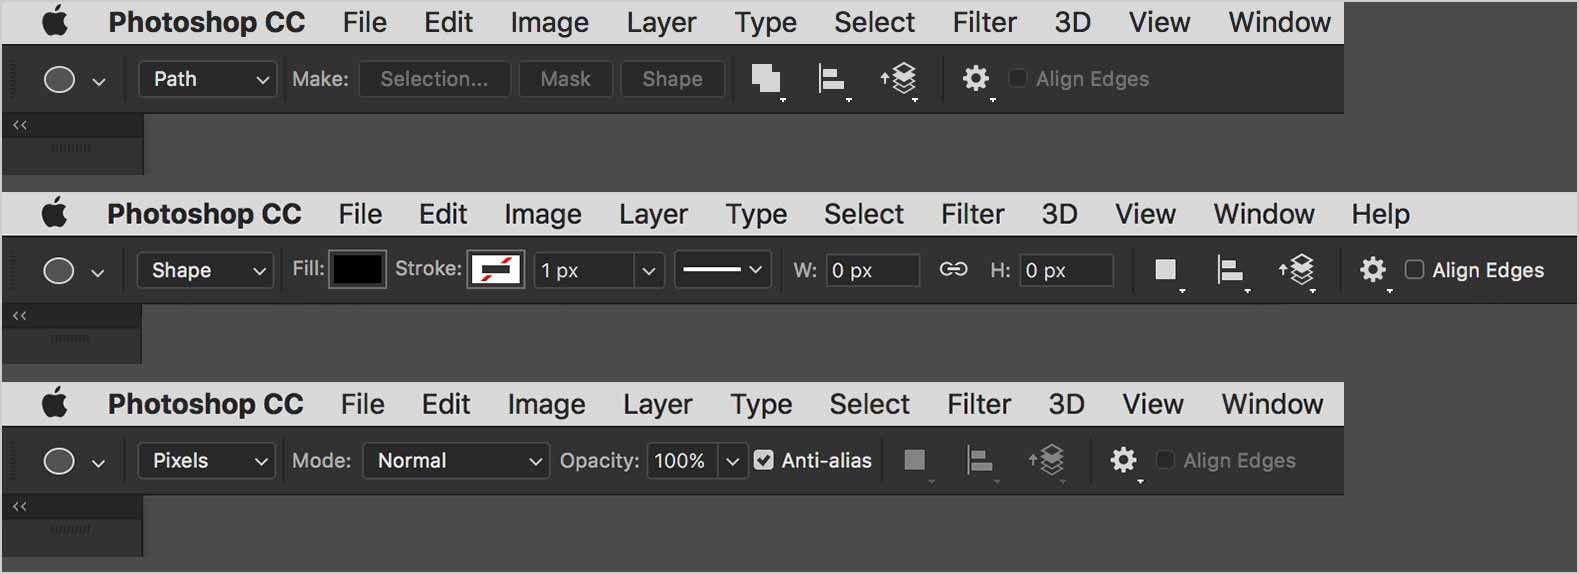
Shape Layers
Shape layers behave a lot like shapes in Illustrator. They’re created on separate layers. They can be created with the various shape tools or you can draw your own with the Pen Tool.
Vector shapes in Photoshop are made of two parts. There’s a fill layer which houses the colour and a vector mask which dictates where the colour appears.
Paths

Path mode draws a vector with no stoke by default. A path alone is not tied to a particular layer. An un-named path is called a Work Path. You can see them in the Paths panel.
You can use paths to create a mask. You can stroke a vector path with pixels or a brush. You can also fill a path with pixels. This is the type of path used to create a Clipping Path for use in InDesign.
Fill Pixels
![]()
You can use the shape tools in Photoshop to use fill pixels. They’re not vector, so they really have no place here. They’re Photoshop raster shape tools. They paint right on the current layer. There’s no vectors involved at all, so let’s stop talking about them.
Type is Vector!
Type in Photoshop is vector. It’s completely scalable non-destructively.
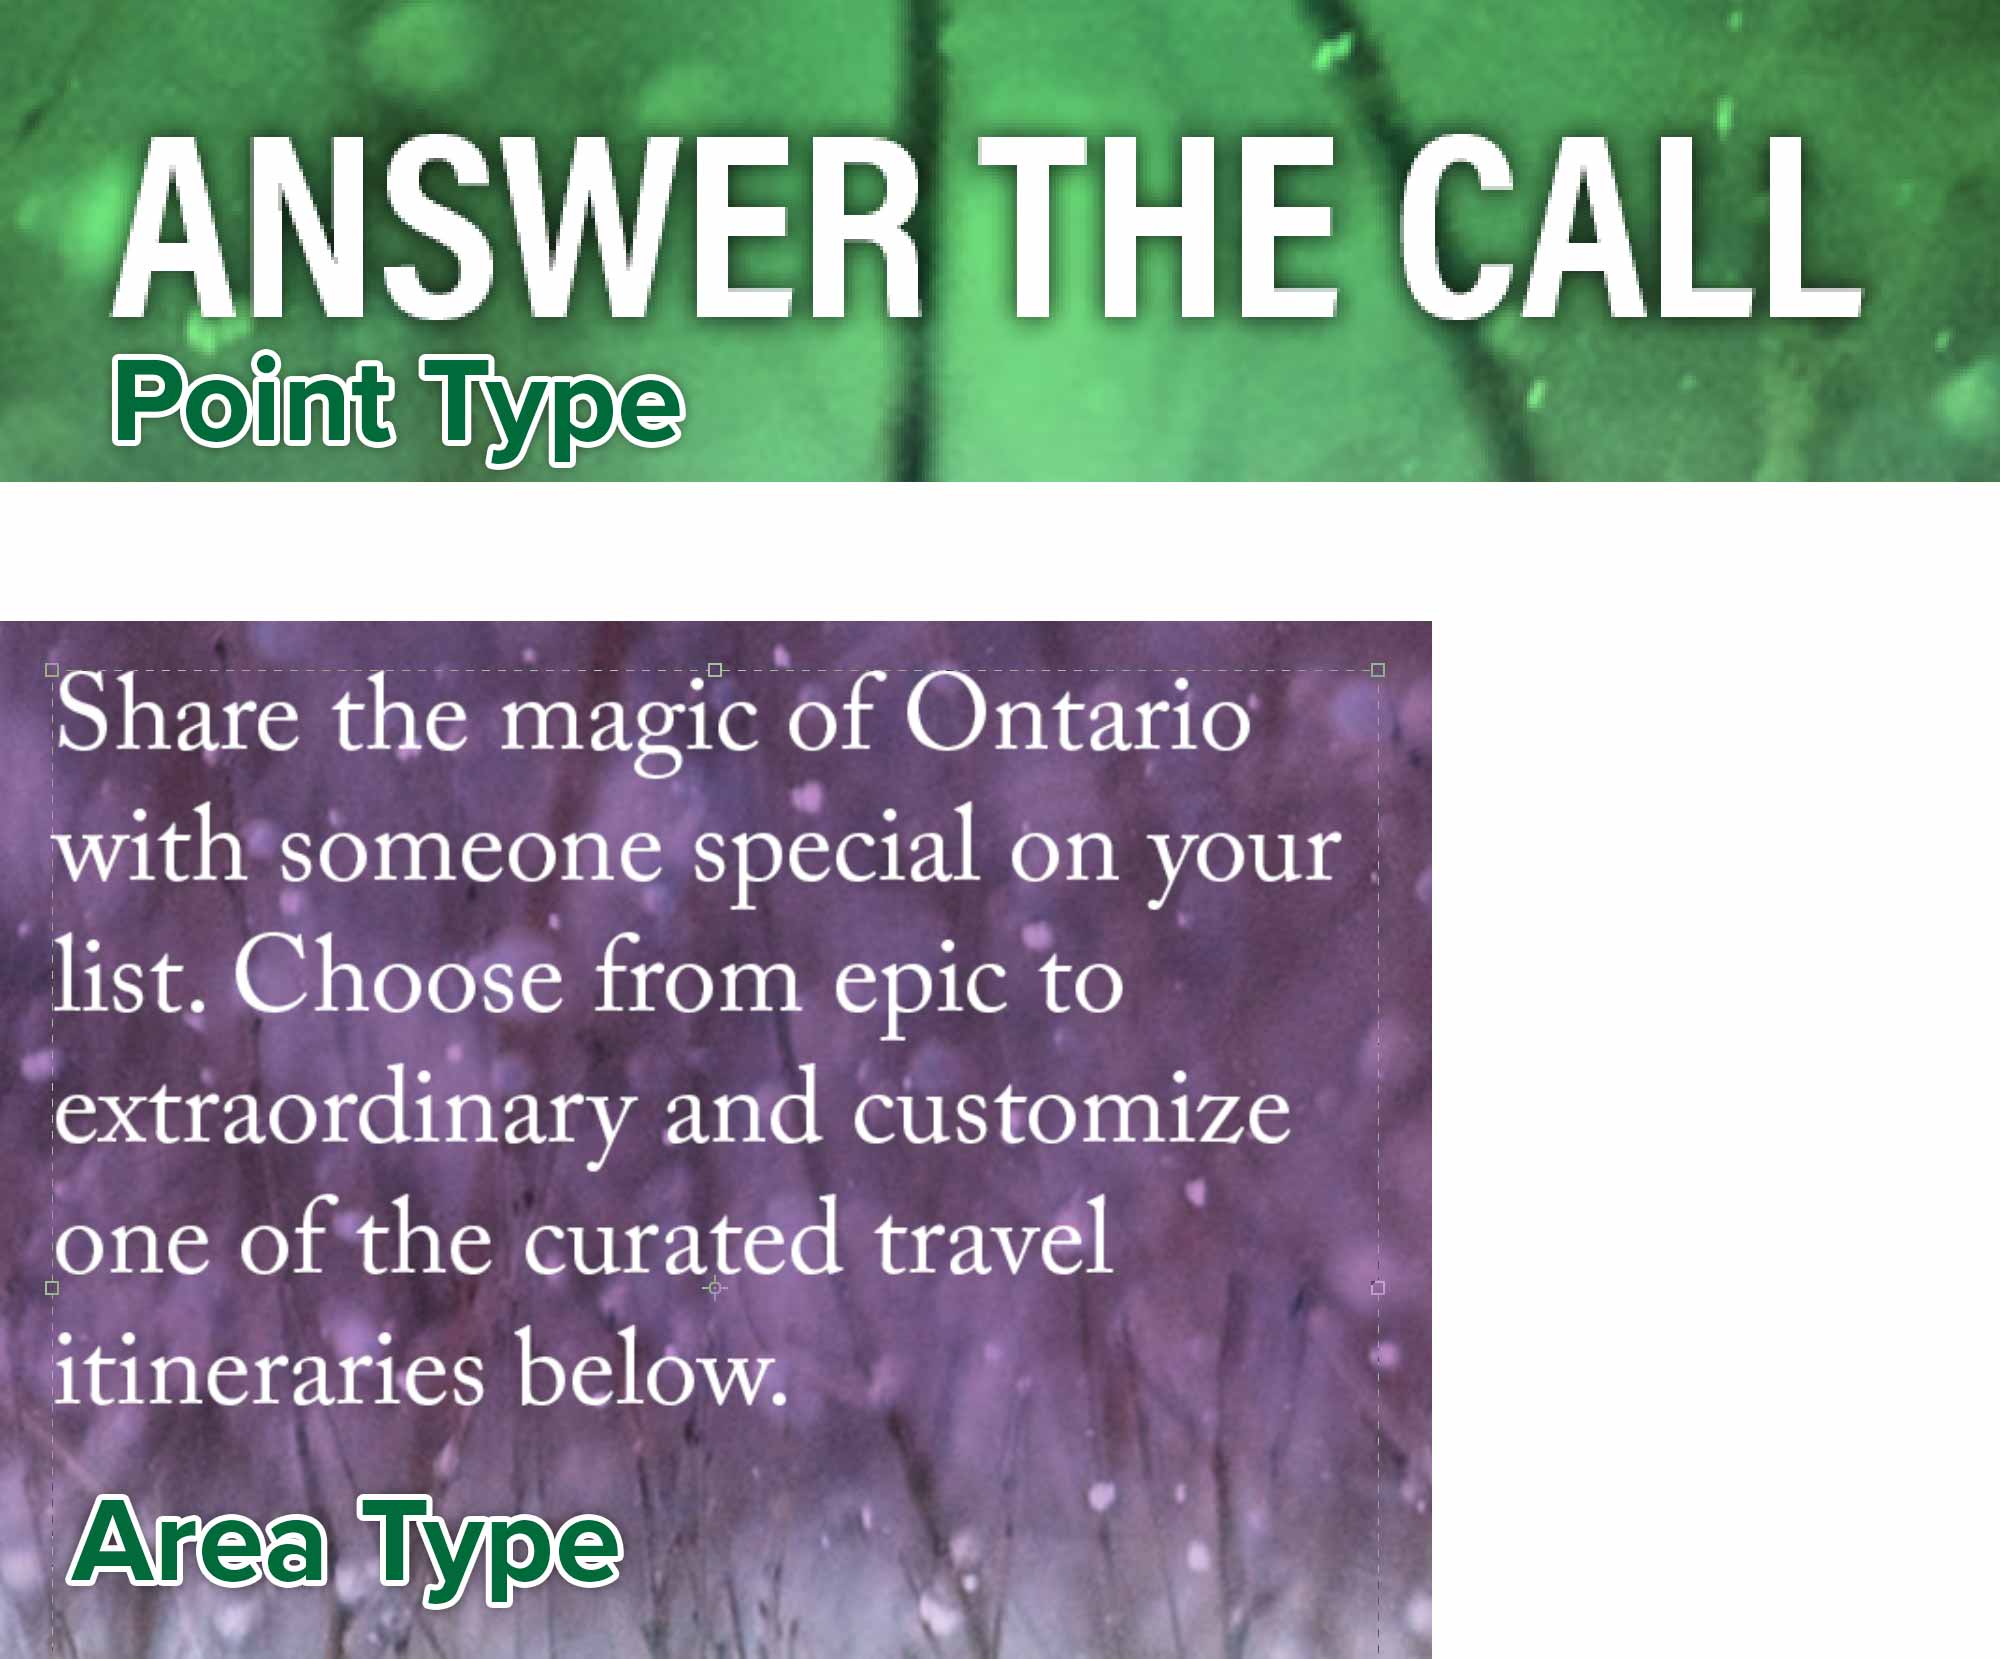
Make sure you default to Point Type. Most of the time, you just click and type with the type tool. The only time you drag a text box is when you have a paragraph of text.
Vector Shapes in InDesign
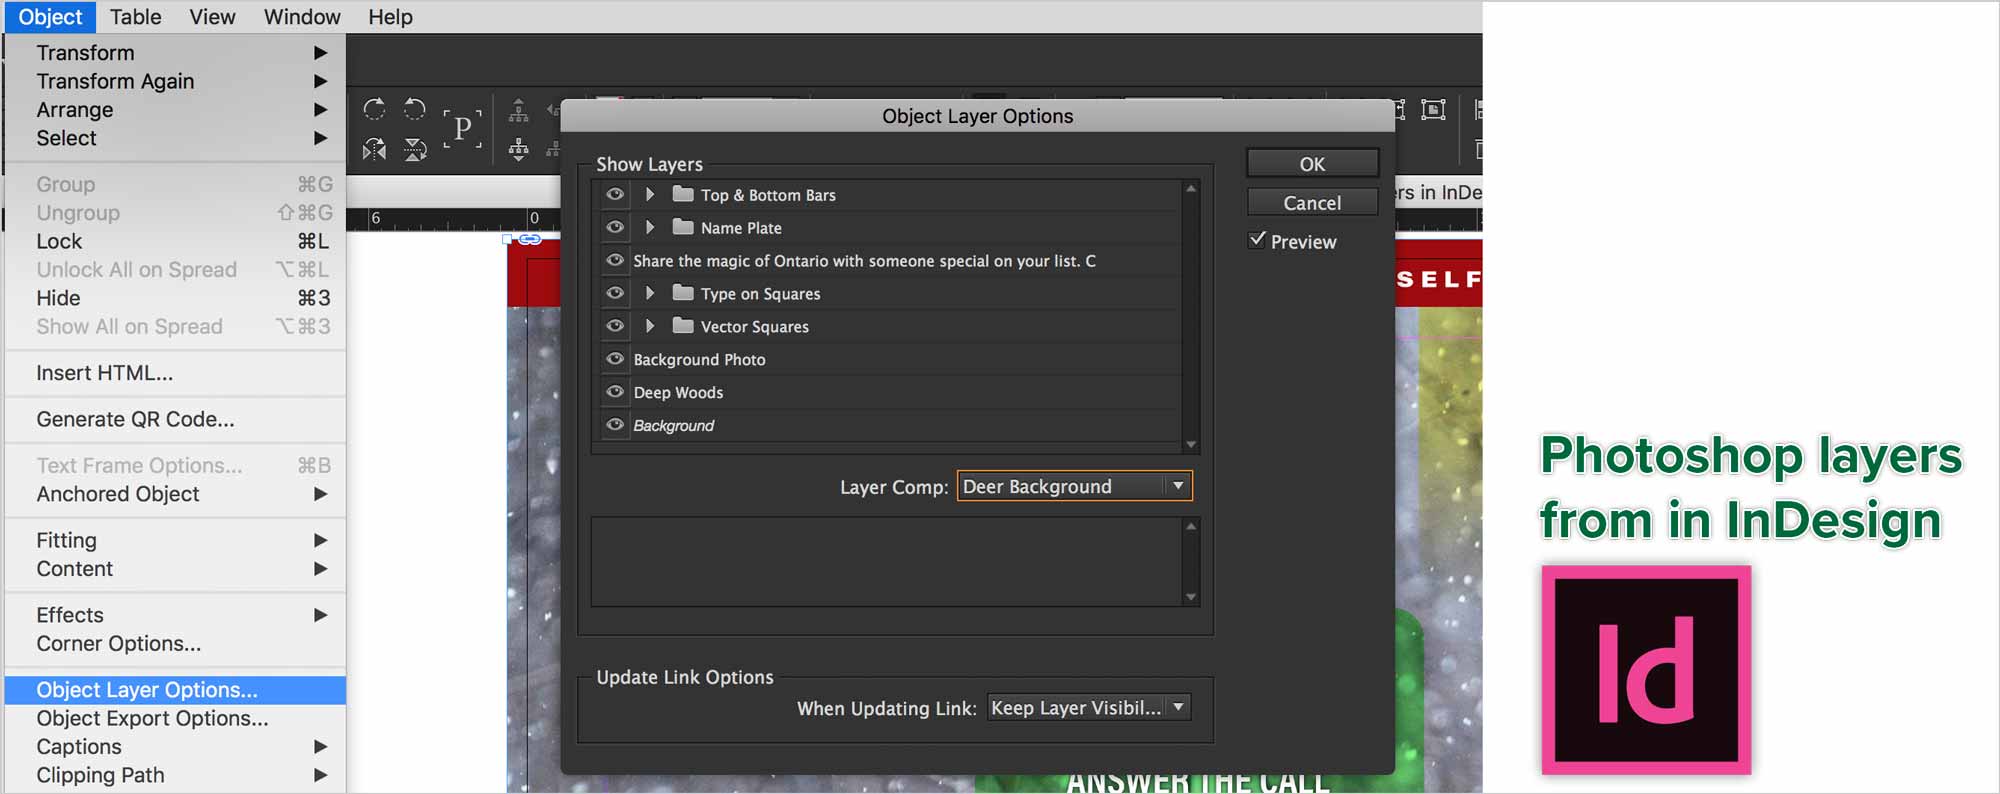
When you place a layered native Photoshop file in InDesign, you can turn its Photoshop layers on and off from within InDesign. Go Object > Object Layer Options… You can see all of your Photoshop layers and Layer Comps right in InDesign. Ahhhh, the Adobe goodness.
Printing
When printing from Photoshop to a PostScript printer like the ones we have our classrooms or at the Print Shop, you will be printing the vector shapes. This means they’ll be as sharp as the printer can print them.
Note that this won’t work on your inkjet printer at home, since it’s not a PostScript™ printer. All vectors are rasterized when printing on an inkjet printer. Always.
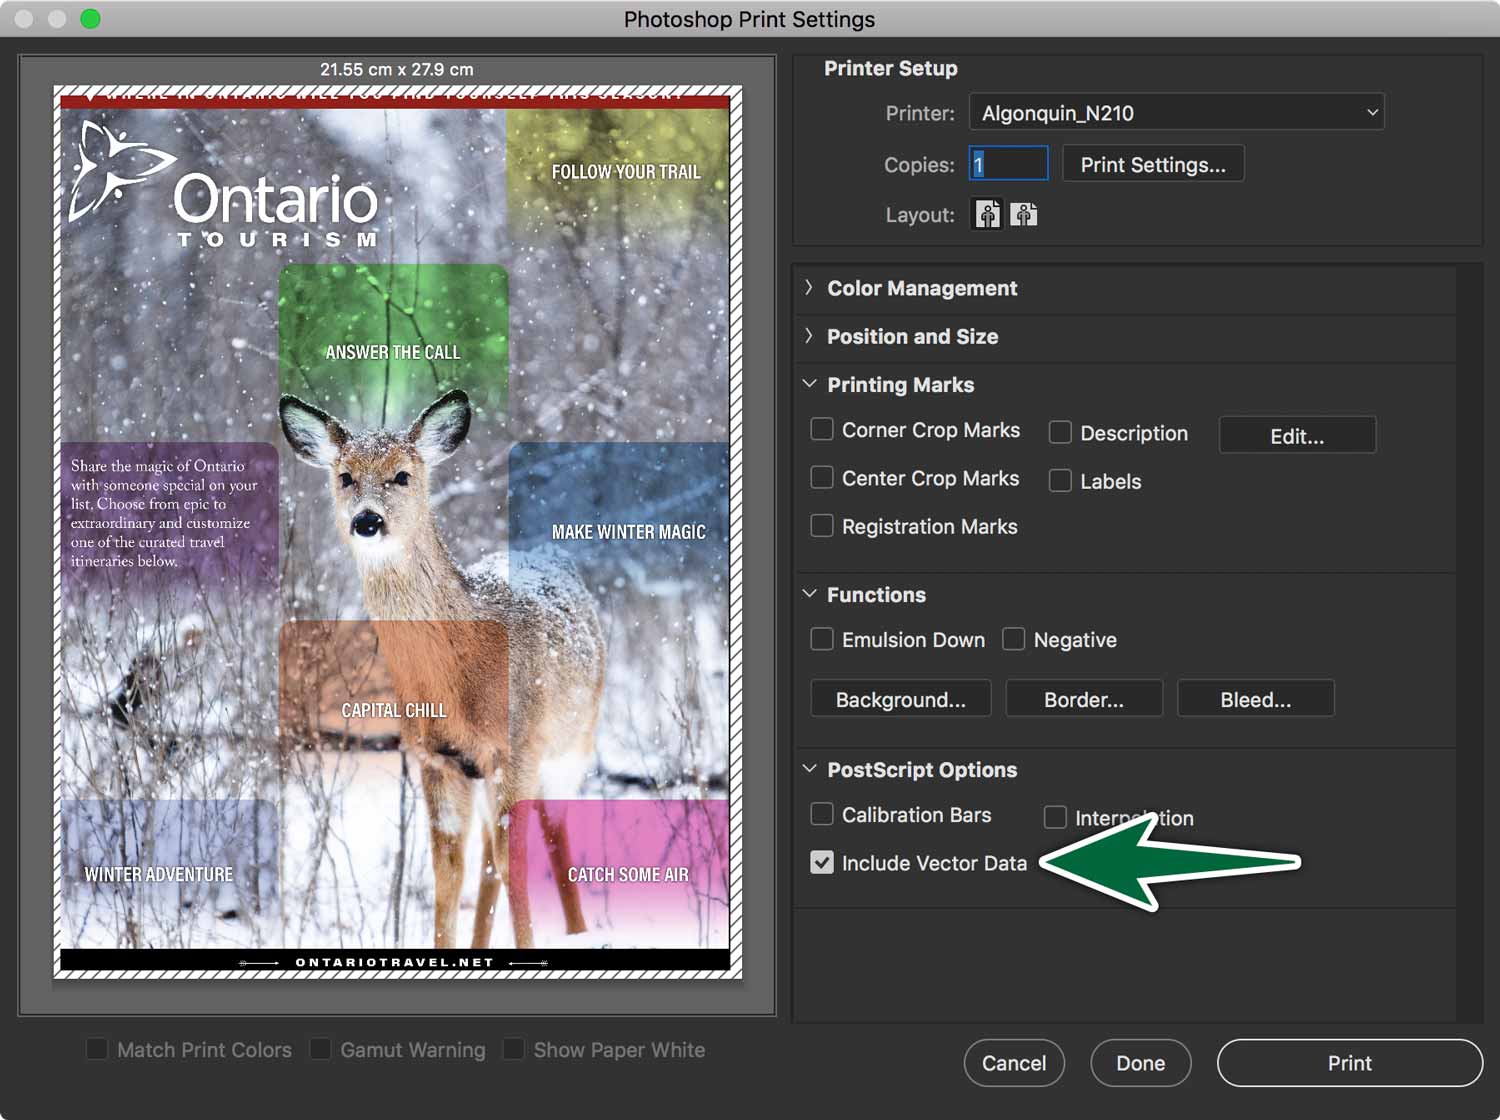
Printing a .psd from InDesign
When you place a layered Photoshop file which contains vector data in InDesign, vectors get rasterized when they print, which is really too bad. The trick to get around this is to save your native .psd as a Photoshop PDF file. Place that PDF if InDesign, then the vectors will print as vectors.
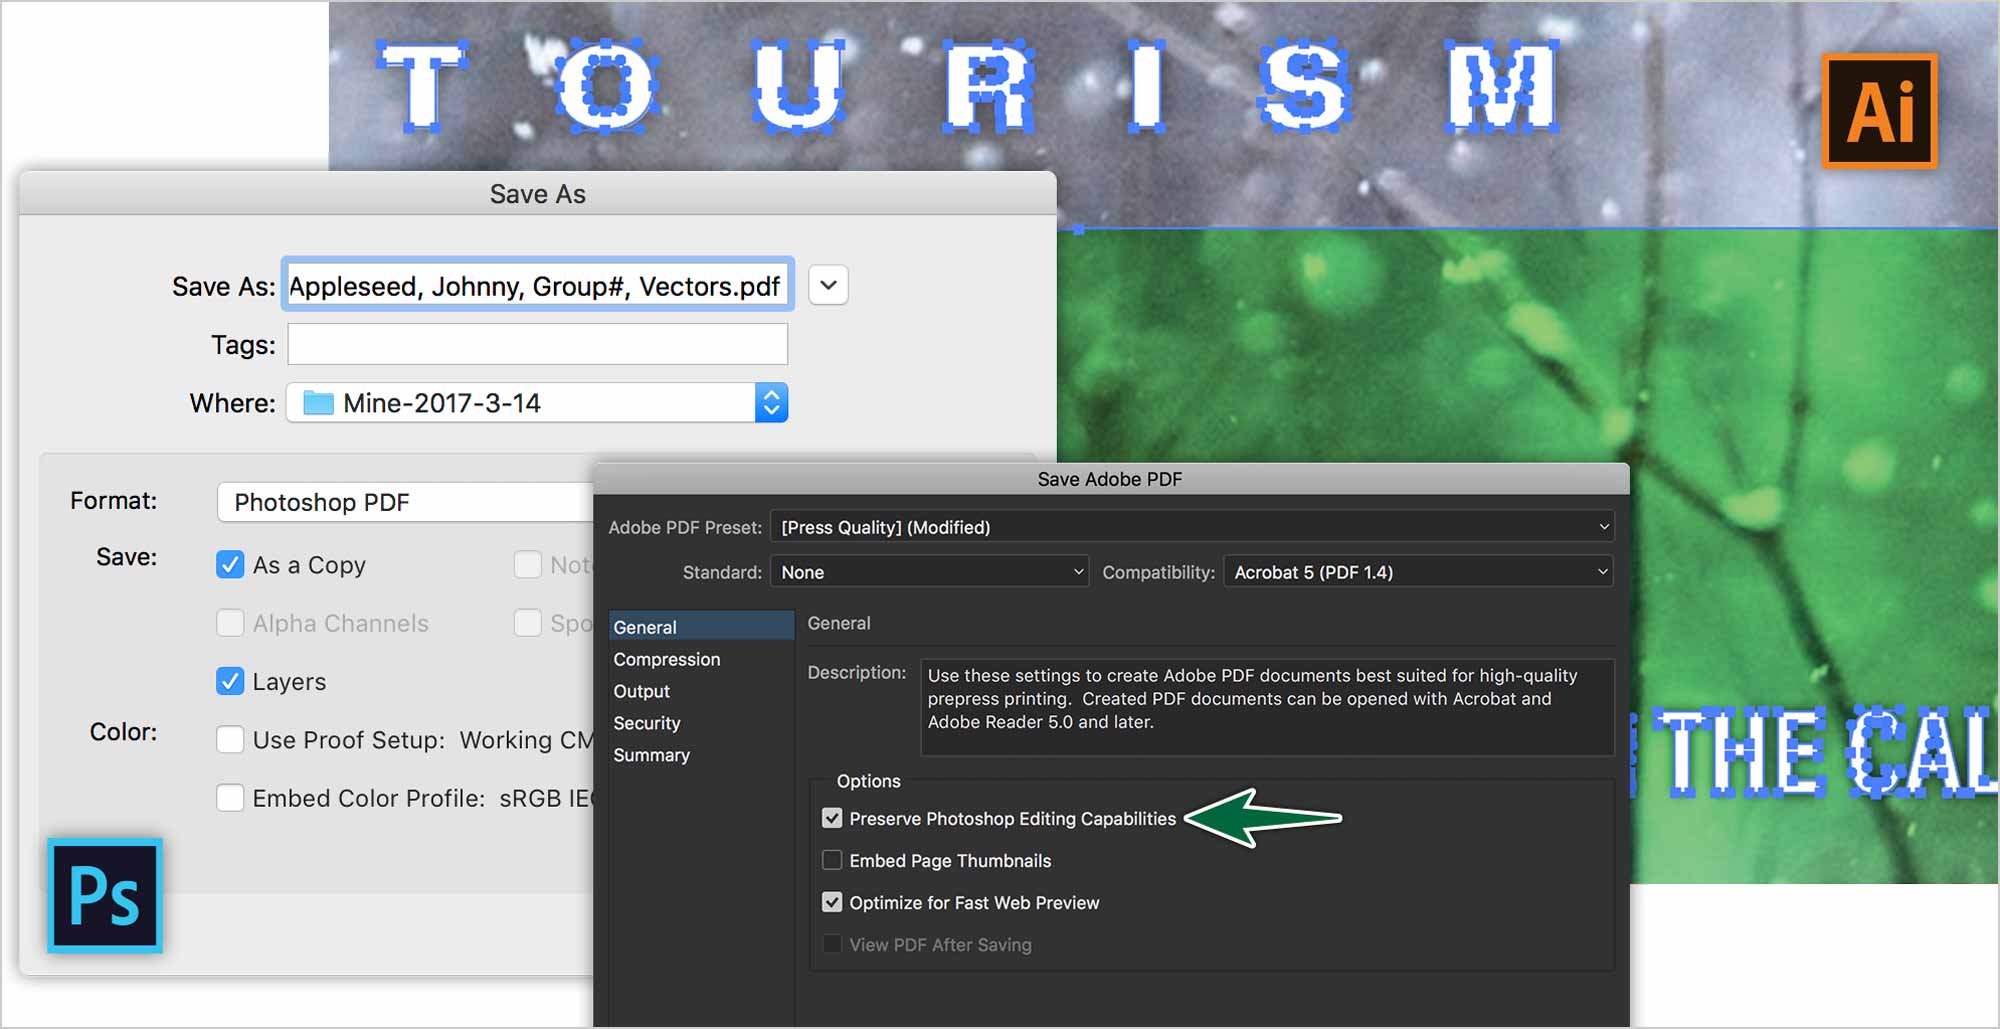
What’s shown above is the file saved as a PDF. As a test, the resulting PDF file was opened in Illustrator. As you can see, the vector shapes from Photoshop are selectable in Illustrator. This means that if they were printed on a PostScript printer, they’ll print as vectors, as clearly as possible.
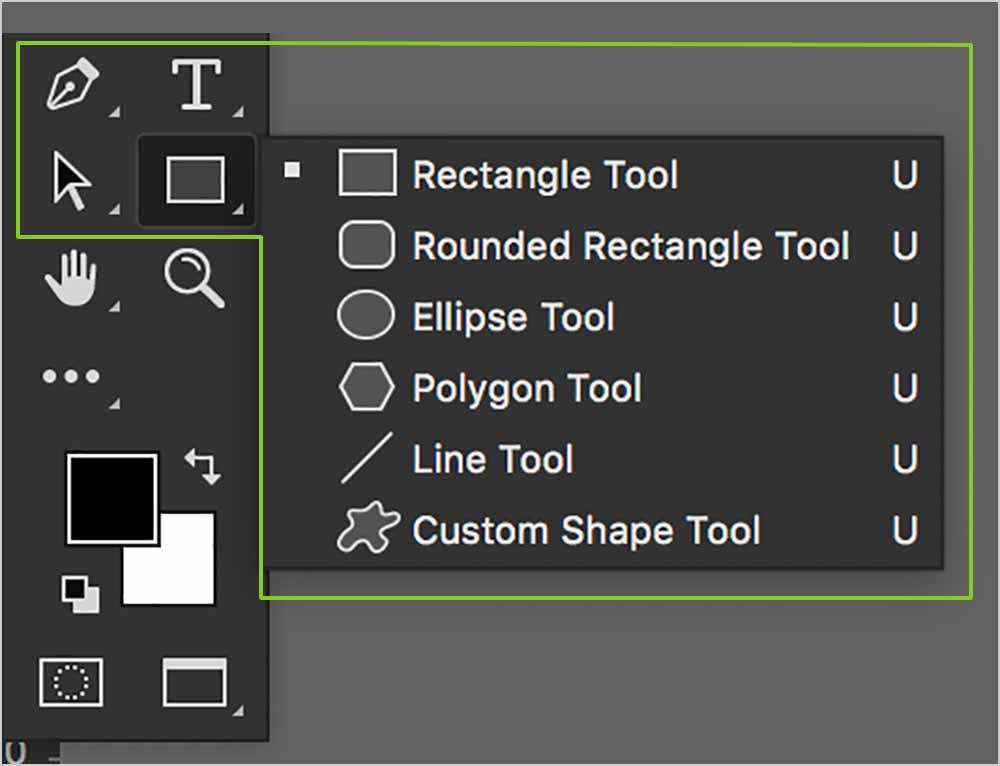
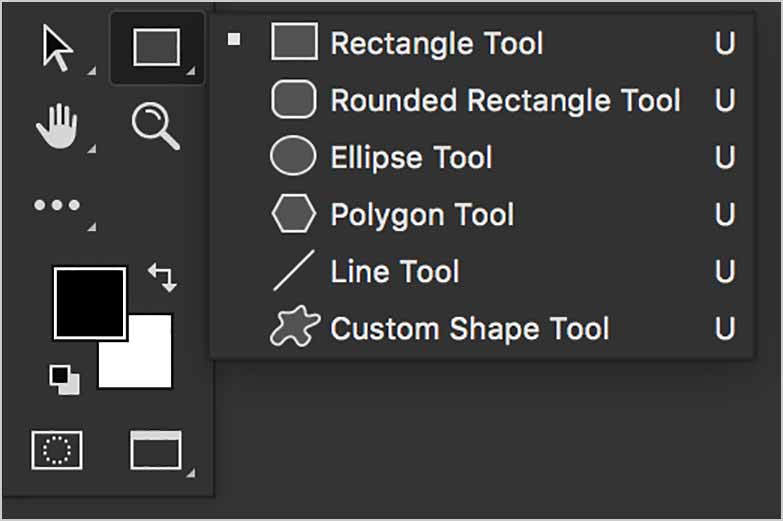
Vector Shape Tools
We’re going to focus on the five main vector shape tools, plus the Custom Shape Tool. The tools behave similarly to those in Illustrator. While drawing with them, you can Shift-drag, Option-drag and Option-Shift drag to constrain proportions and draw from the center.
The default behaviour creates a new layer each time you draw a shape. You do have the option to combine or intersect shapes as you draw, with options in the Control Panel.
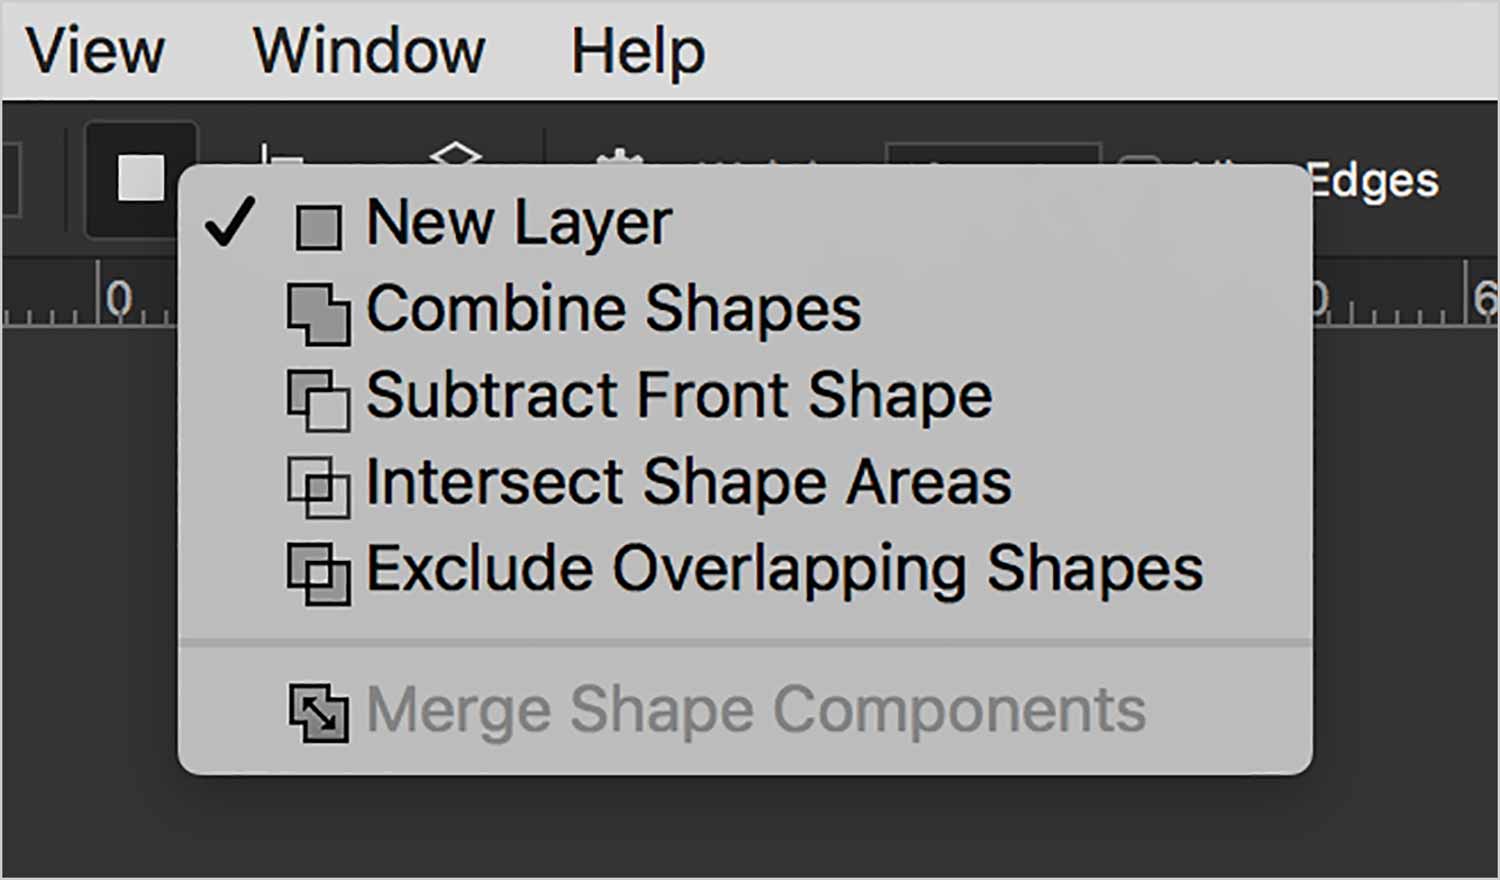
You do have the option to draw a shape while holding either Shift or Option. Shift draws shapes on the same layer. Option intersects shape out of the existing one on the same layer. Shift + Option together creates an intersecting shape on the same layer.
Our Practice File
Let’s create the layout below. It mixes photography with vector shapes and typography.

Vector Masking & Transparency
You can draw pixel-based layer masks on vector shapes. This will make them translucent.

Vector shapes can be feathered. Use the Properties panel’s Masks tab to edit the vector shape’s options.
Blend modes introduce beautiful raster/vector interactions. Experiment with blend modes on a vector shape on top of a photograph. You’ll see that the shape interacts naturally with the content underneath.
Custom Vector Shapes
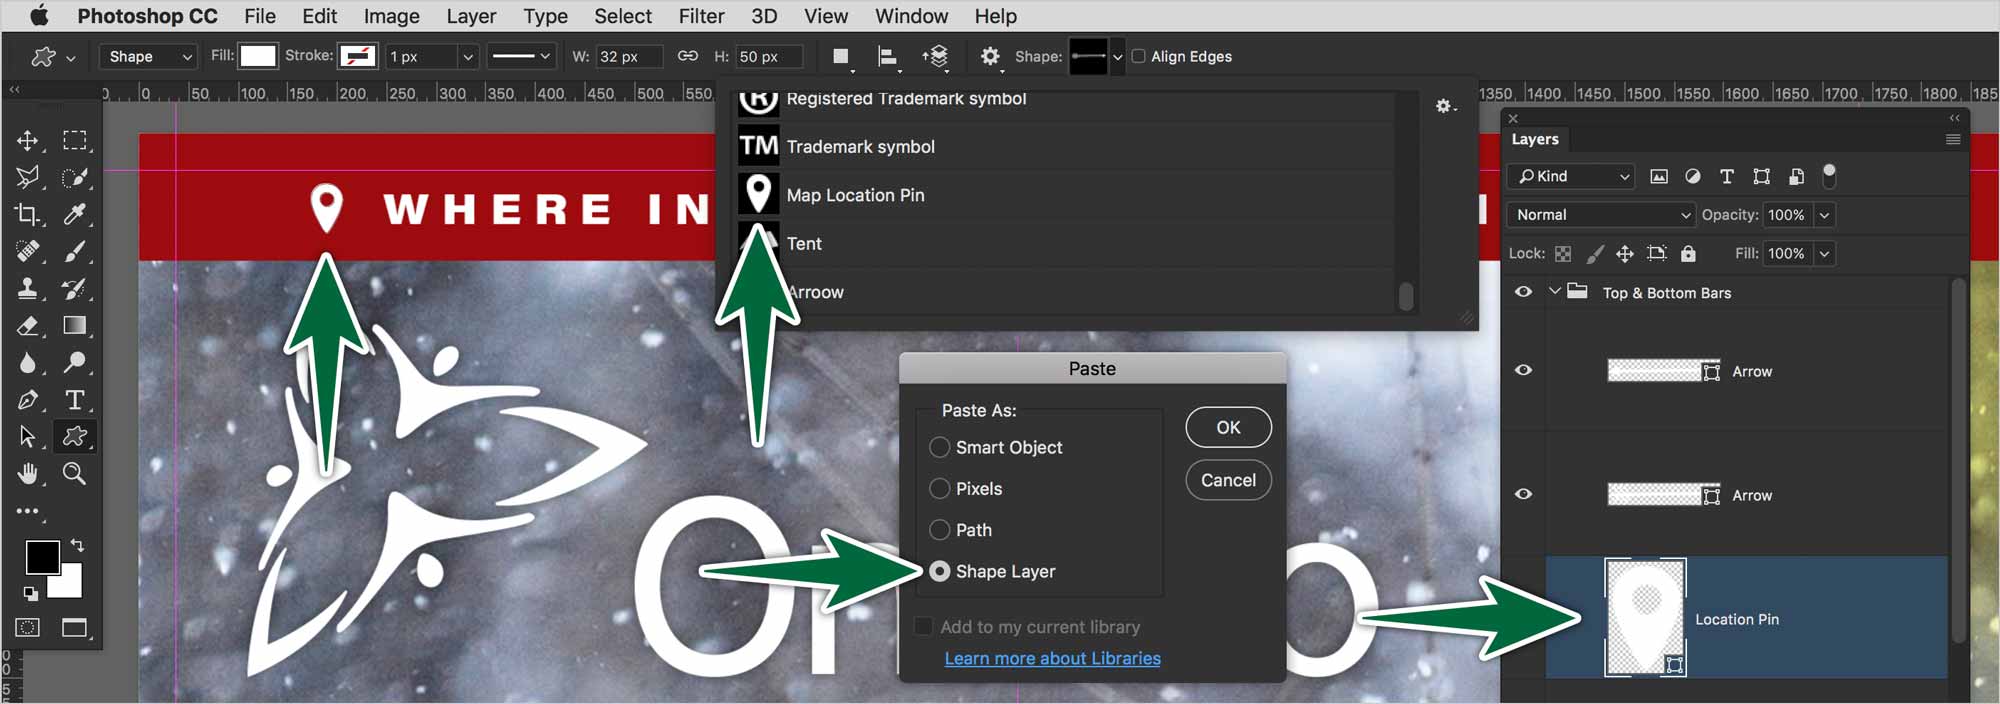
Use Illustrator to create your own shape. Paste it into Photoshop as a Shape Layer. Go Edit > Define Custom Shape. Name your shape. It will then be available to use with the Custom Shape tool.
Formative Activity
Go to Unsplash. Find a photo with a strong theme to use as a background for a magazine cover. The choice of theme is up to you.
To get your photo into the canvas, either drag the images’s icon into Photoshop from the Finder, or use File > Place Embedded…. Make sure to name all of your layers.
Make your own original design, don’t create one that looks like the practice file.
From there on in, the rest of the content must be vector. It needs to have:
- A logo as a Vector Smart Object (pasted from Illustrator as a shape layer)
- Regular vector shapes
- At least one custom vector shape
- Area Type & Point Type (Adobe Fonts only!)
This is the format for your exercise:
Notes
Combining solid vector shapes and photography can result in an overly heavy, bright, coarse design. Make sure you’re subtle with colours and type. Special attention to detail is in order here. Create a grid and stick to it. Once you’re done, without seeing actual guides, your grid should be apparent in your layout.
As for type treatment, choose one sans-serif and one serif from Adobe Fonts. Be conservative here. Better with a safe font selection than something too wild. Font families with multiple weights would come in handy.
