Topics
What Are Symbols?
A symbol is an object in Illustrator that acts like a container which contains artwork. If you double-click on a symbol, you enter Isolation Mode. This allows you to edit the contents of the symbol. You can actually replace them completely.
Each instance of a symbol is a proxy of the original, but it doesn’t make your file any larger. Even if you have hundreds of instances of a symbol in a document, there really is only one instance of that artwork in the file.
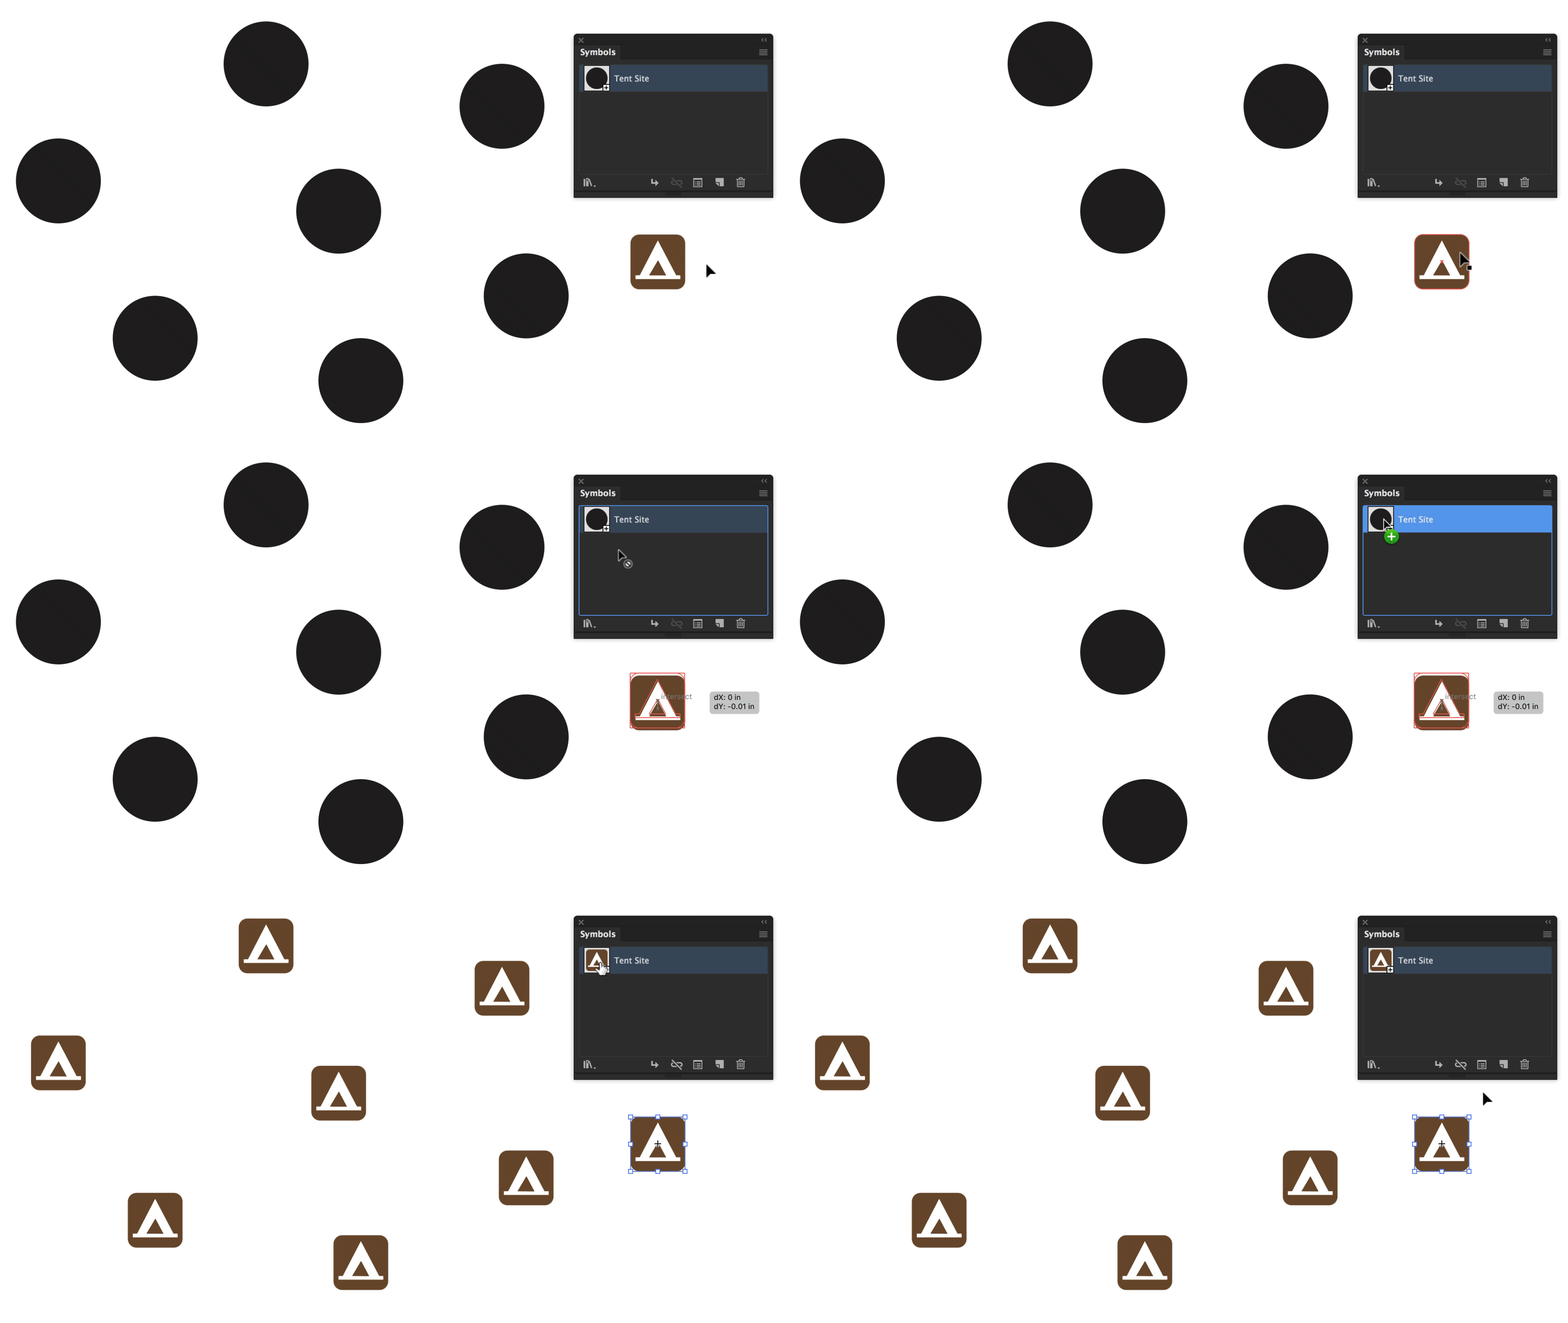
Another benefit here, is that you can edit the original Symbol and all of its dependant instances will update automatically.
What Are Dynamic Symbols?
With Dynamic Symbols, symbols can share a parent shape but different instances of the symbol can have dynamically modified appearances. If the parent shape is modified, symbol instances receive the new modification, but maintain their own modifications as well. Adobe
You an select parts of a symbol instance with the Direct Selection tool.
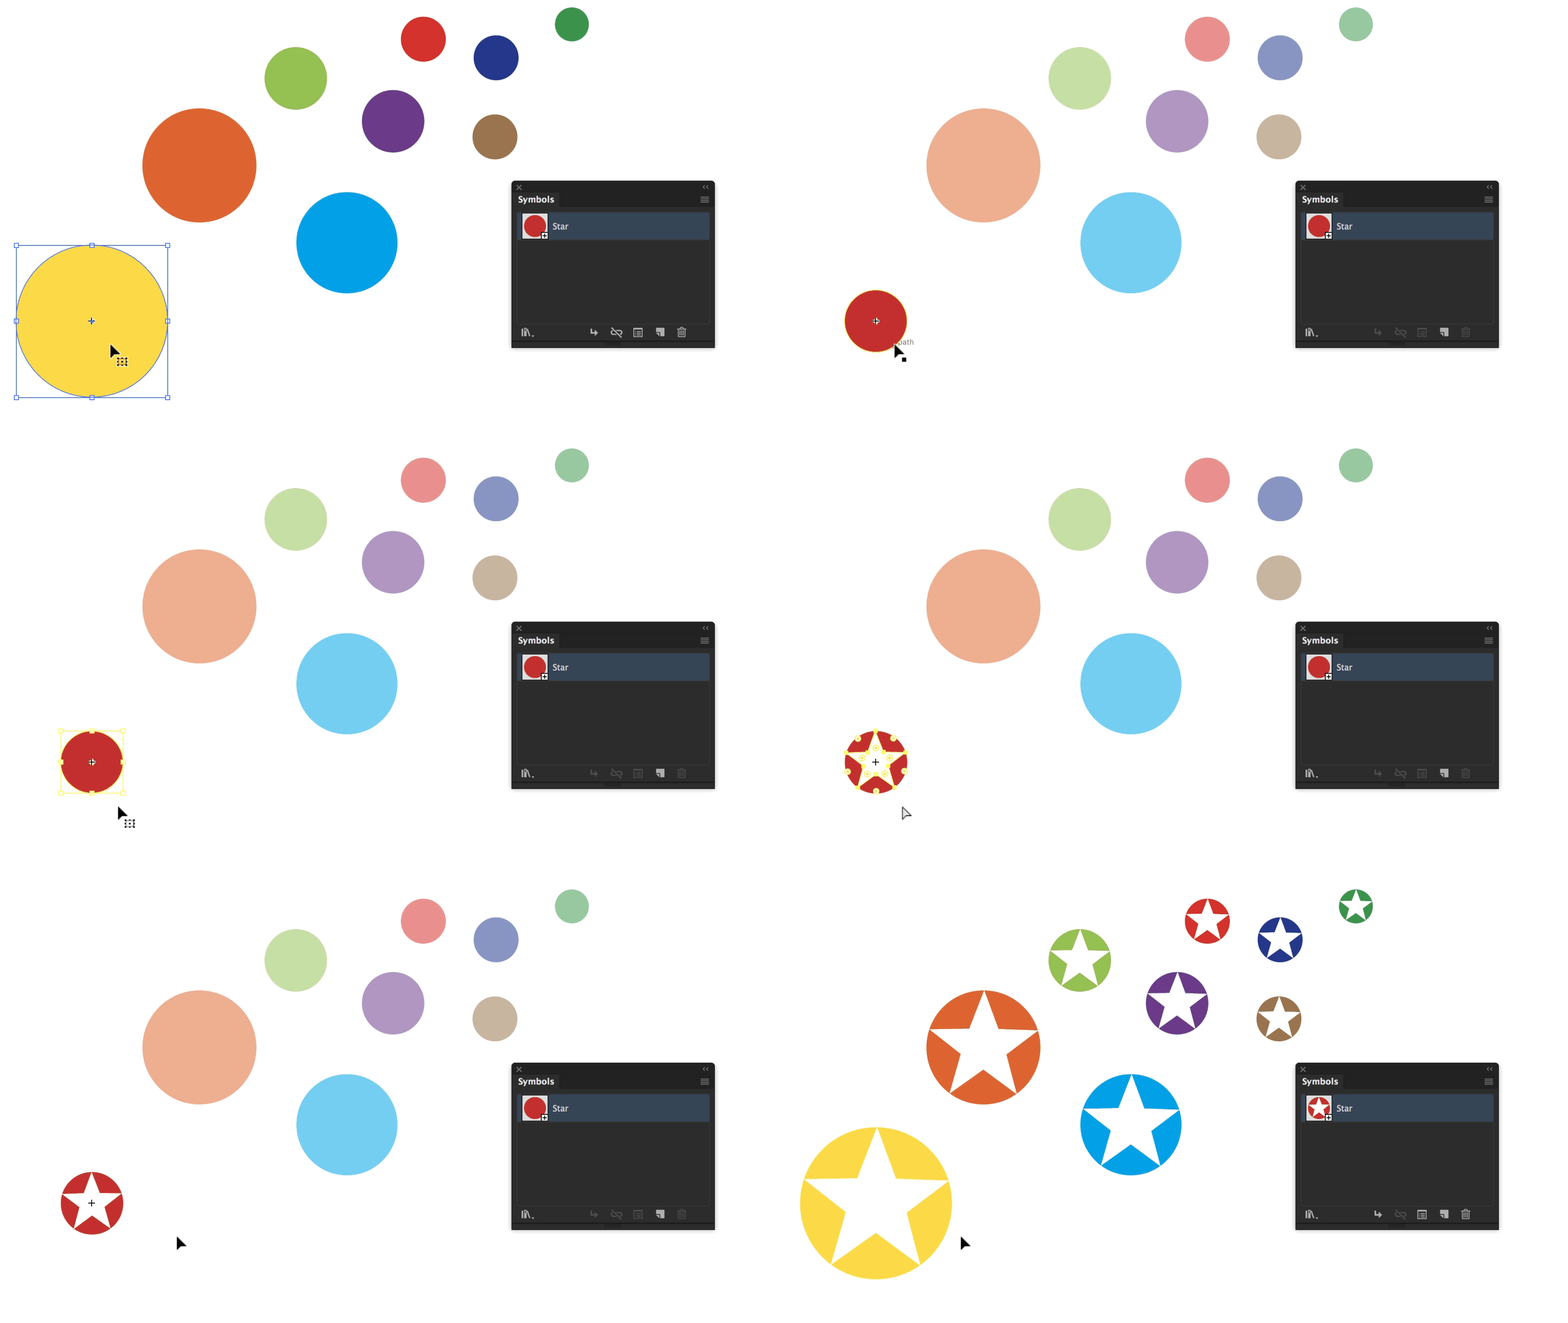
Note that the circles above retain their colours even when the star shape is added to the symbol because they are dynamic symbols. If these were Static Symbols, the colours of each instance could not even be edited.
What changes when you edit a Dynamic Symbol are only the properties that the instances had in common to start with. In the case above, if you change the colour of one of the instances, the others will not change because they didn’t have colour in common to start with.
Creating Symbols
To create a new symbol, select artwork. You can either:
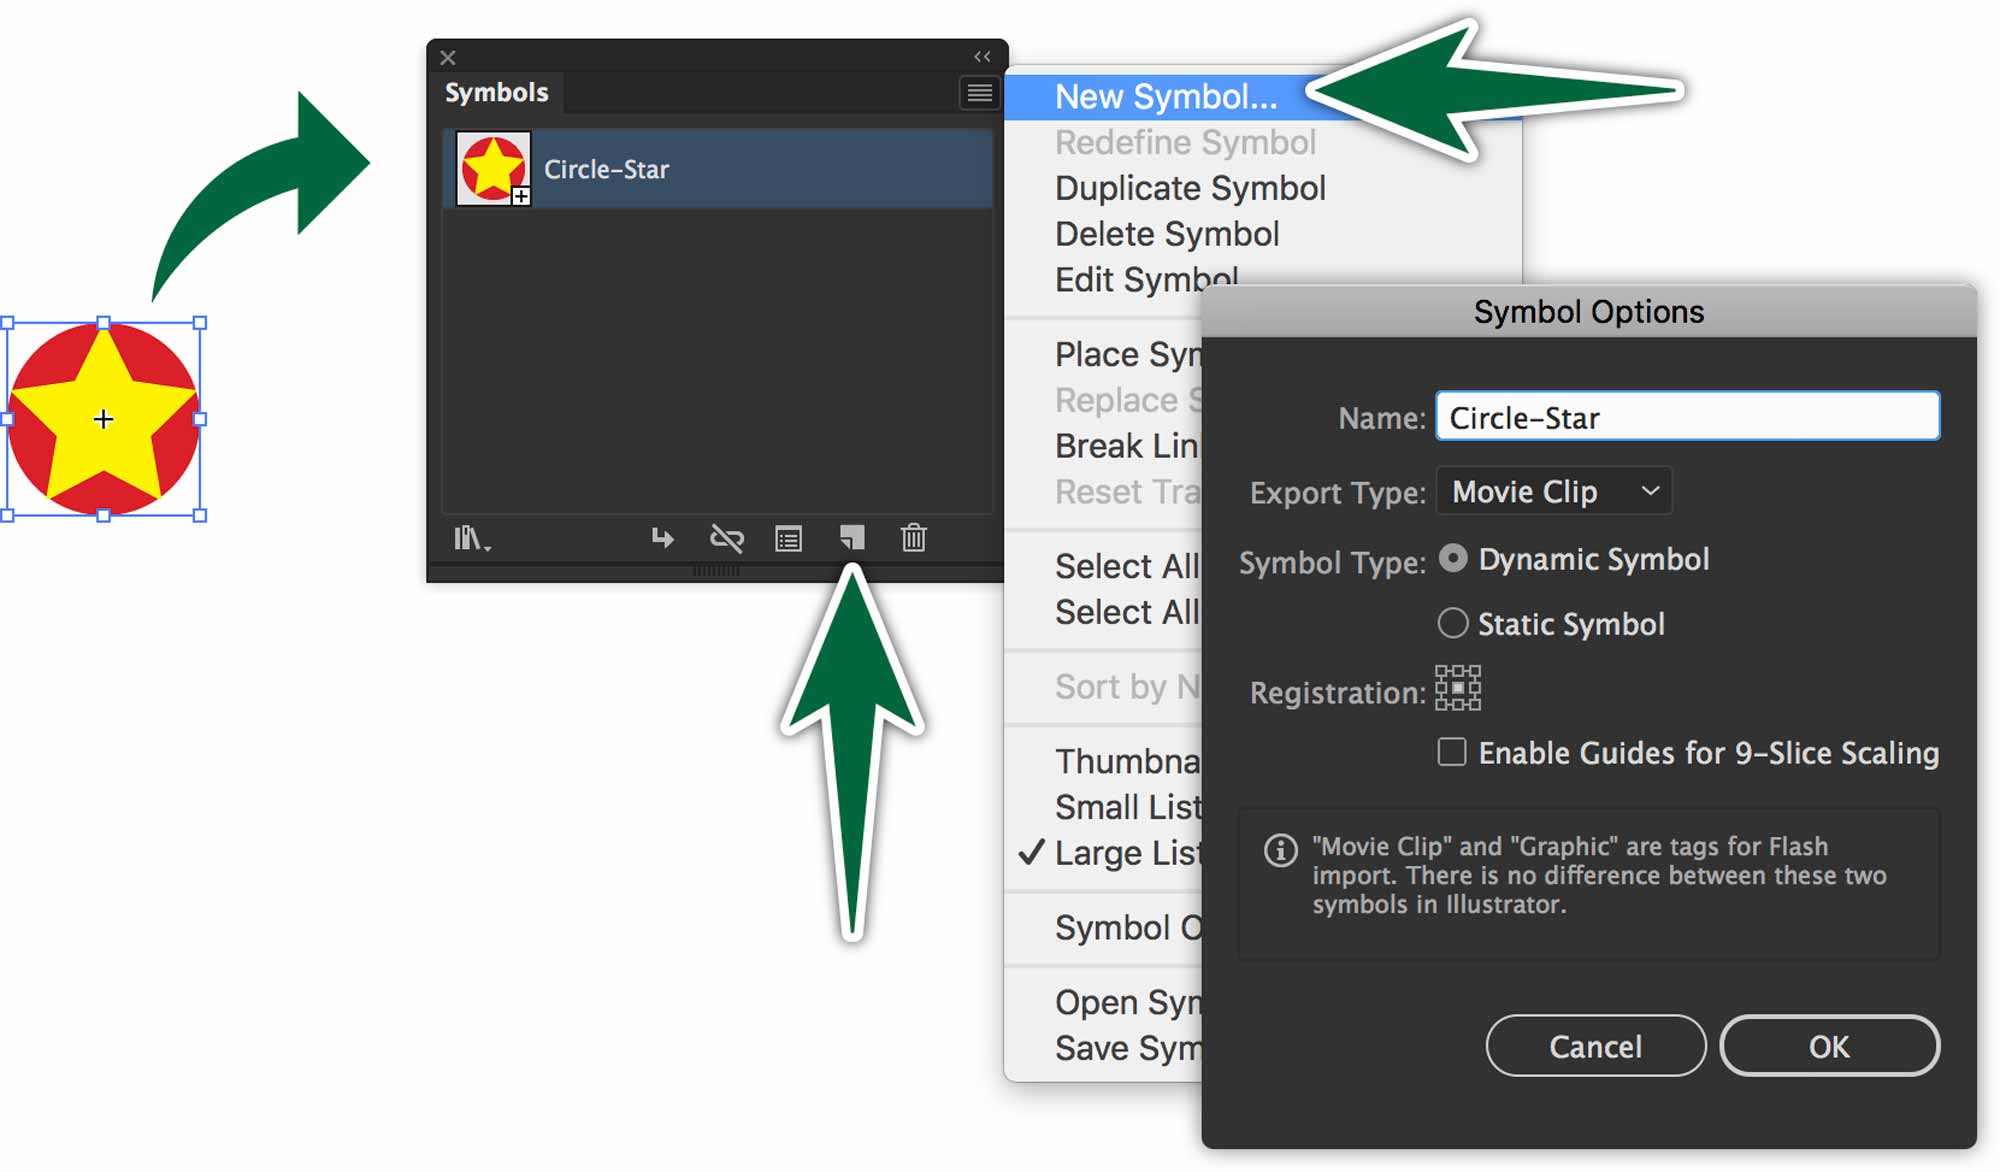
- Drag the artwork into the Symbols panel.
- Click the New Symbol button in the panel.
- Use New Symbol… from the panel menu.
Using Symbols
There are 4 ways to add a symbol to an artboard.
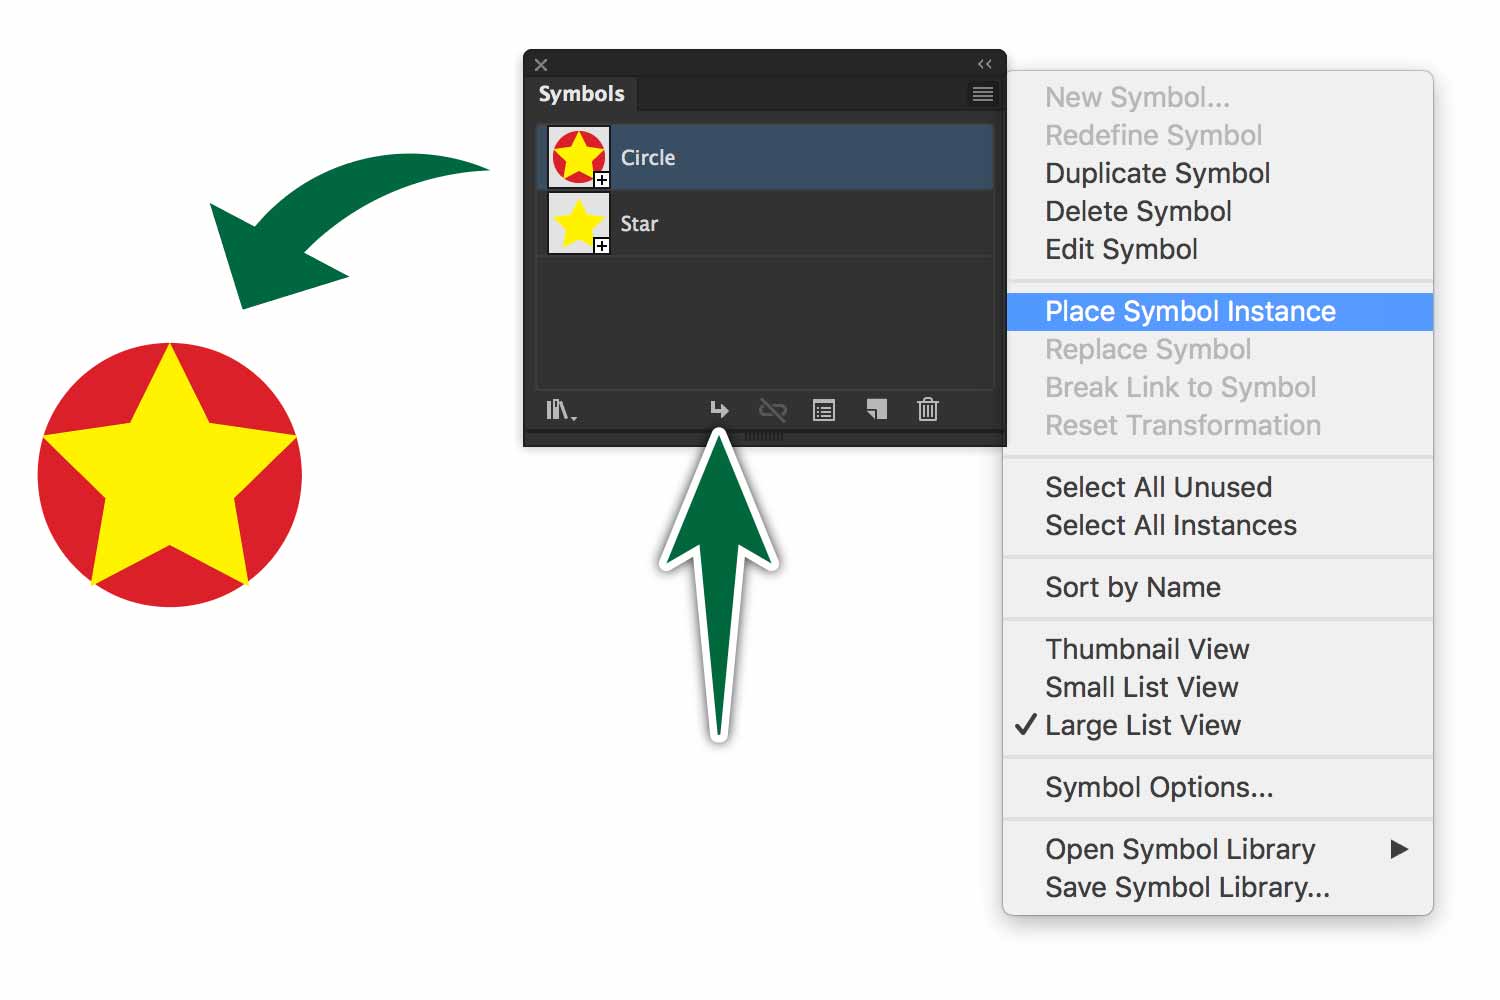
- Drag the artwork from the panel onto the page.
- Click on the arrow button at the bottom of the panel.
- Use the Place Symbol Instance command from the panel’s menu.
- Use the Symbol Sprayer tool to spray them onto the page.
Selecting Symbols
One of the advantages of symbols is that you can create hundreds of instances easily. The problem is that once you’ve done so, they become difficult to select because there are so many.

If you wish to select all instances of a symbol, click on one, then go Select > Same Symbol Instance. This will grab them all.
Editing Symbols
To edit a symbol, double-click on an instance on the page. You’ll enter Isolation Mode.
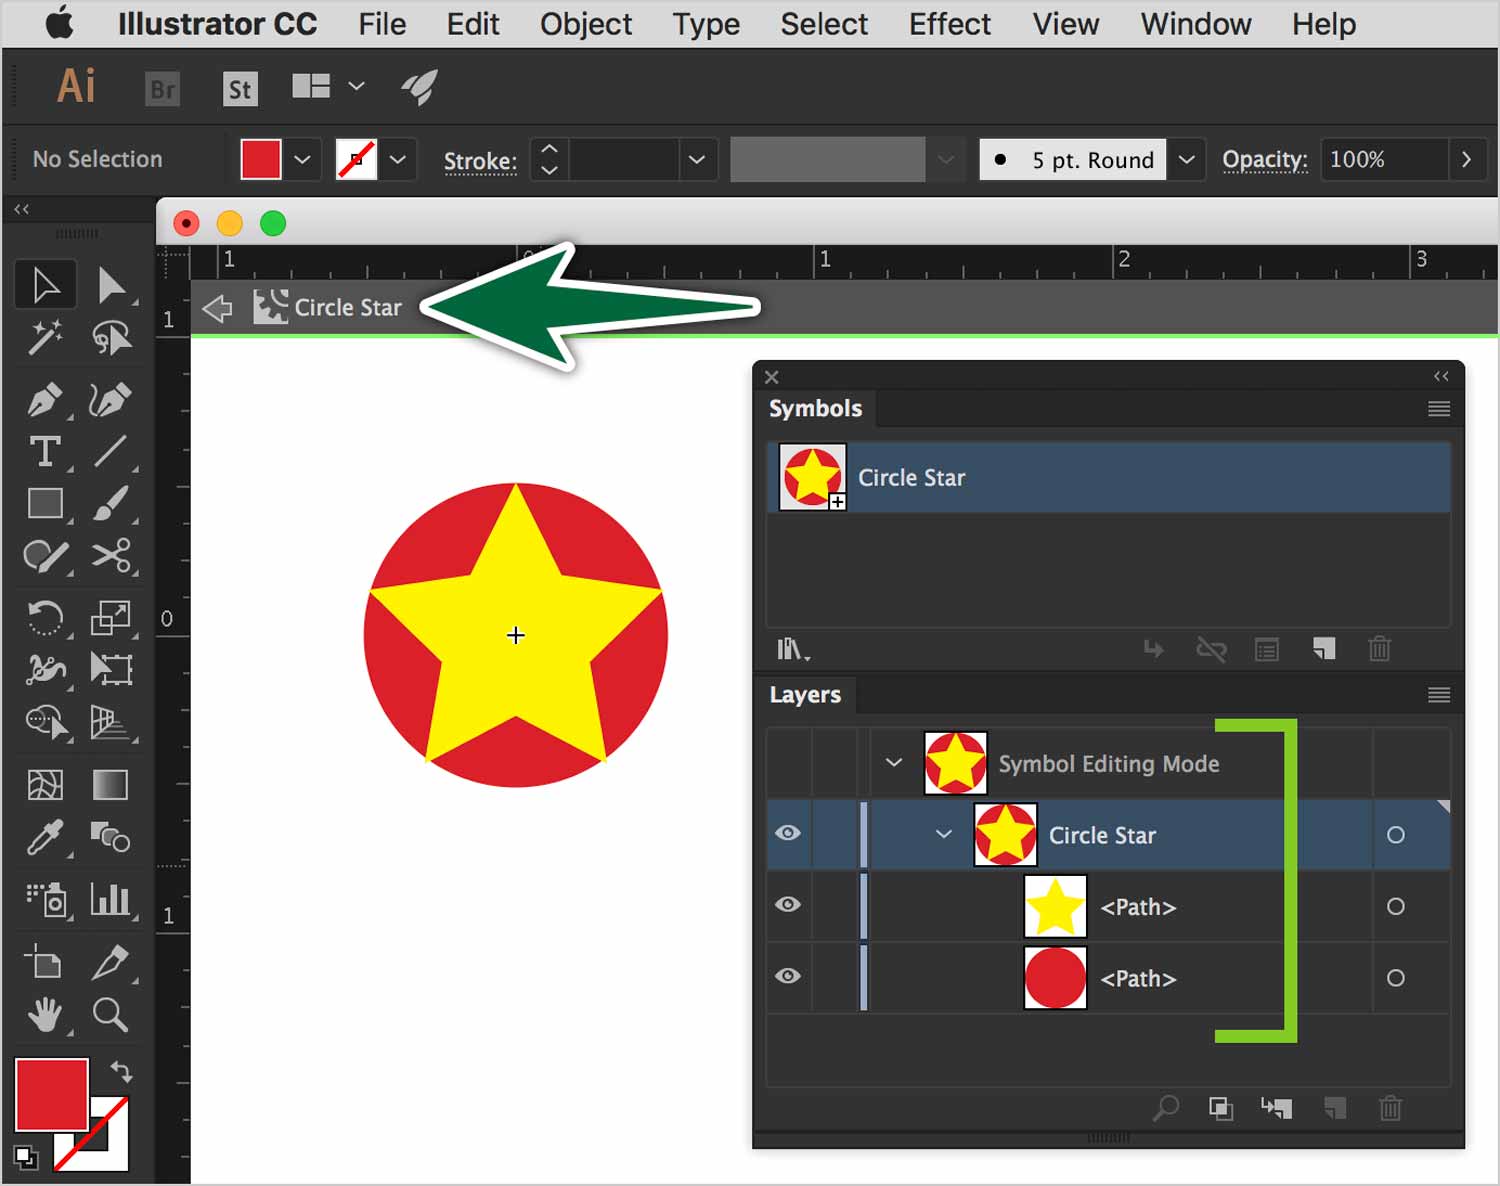
At this point, you see that you can see all the parts of the symbol in the Layers panel. This is similar to isolation mode with grouped art. When you’re in isolation mode, you can replace artwork within the symbol. Just draw whatever you want in isolation mode. When you exit, that will be the new symbol.
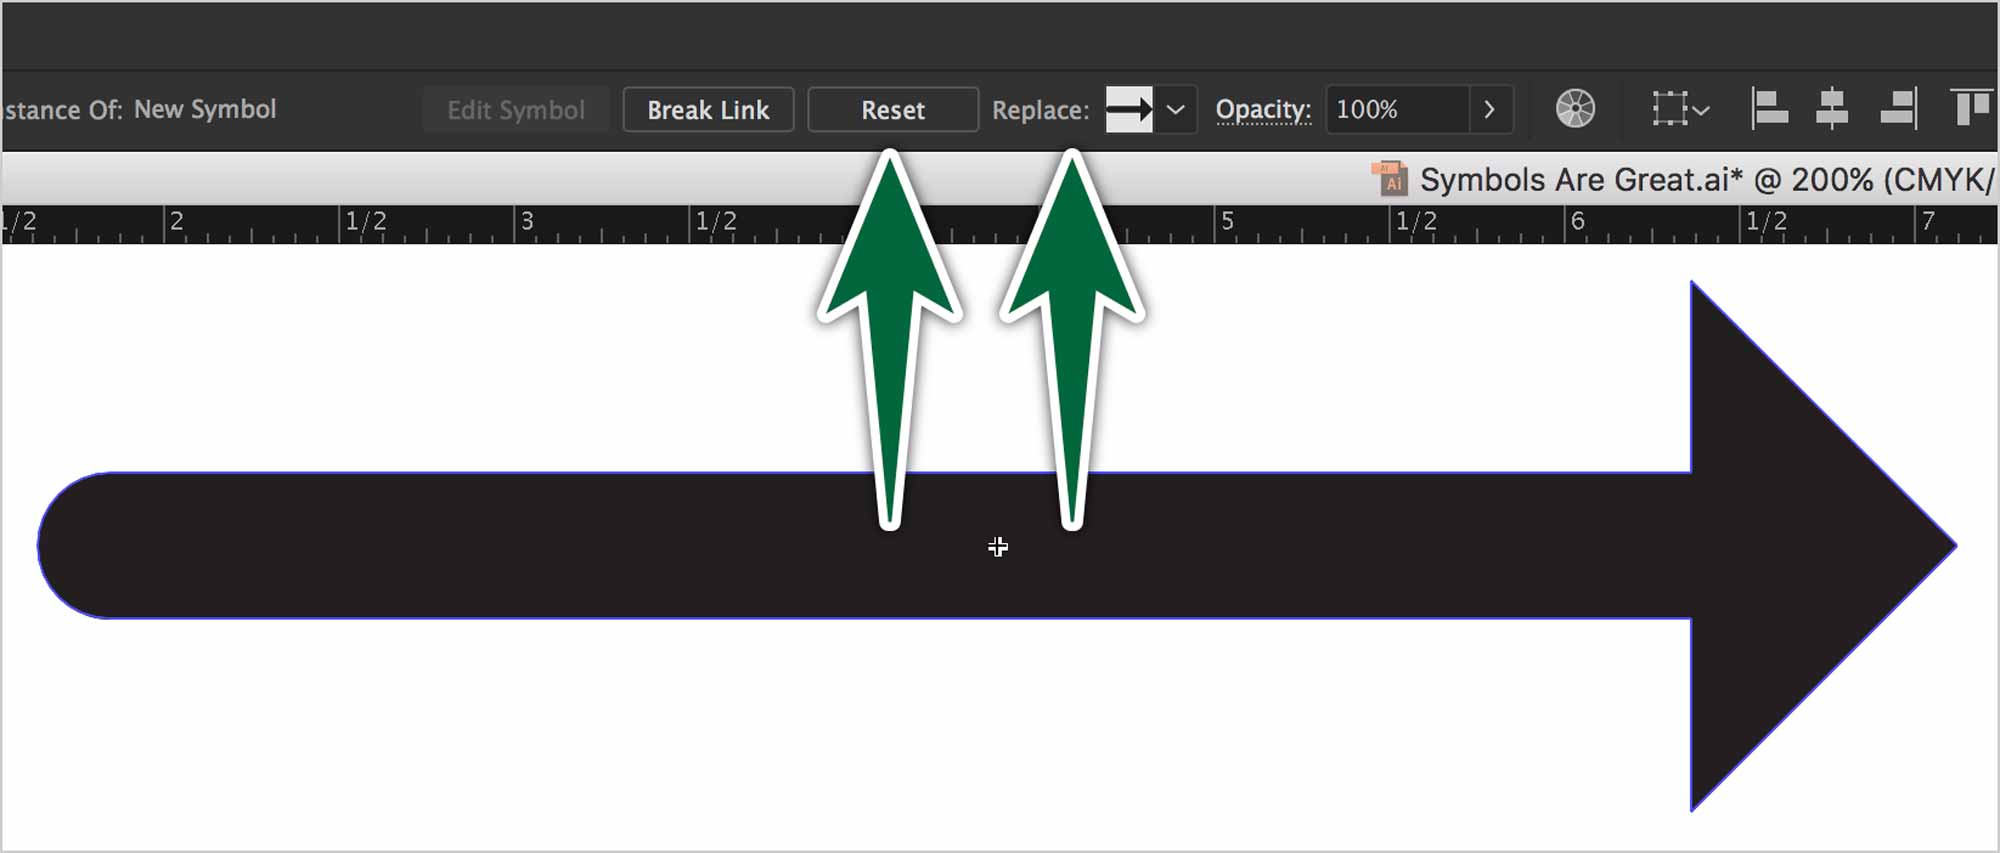
You can even replace a symbol by selecting it on the page, then use the Replace menu from the control bar.
If you need to edit the artwork of a symbol instance, you always have the option to expand it. That will make it regular vectors like when you initially built it. Avoid expanding if you can avoid it.
9-Slice Scaling
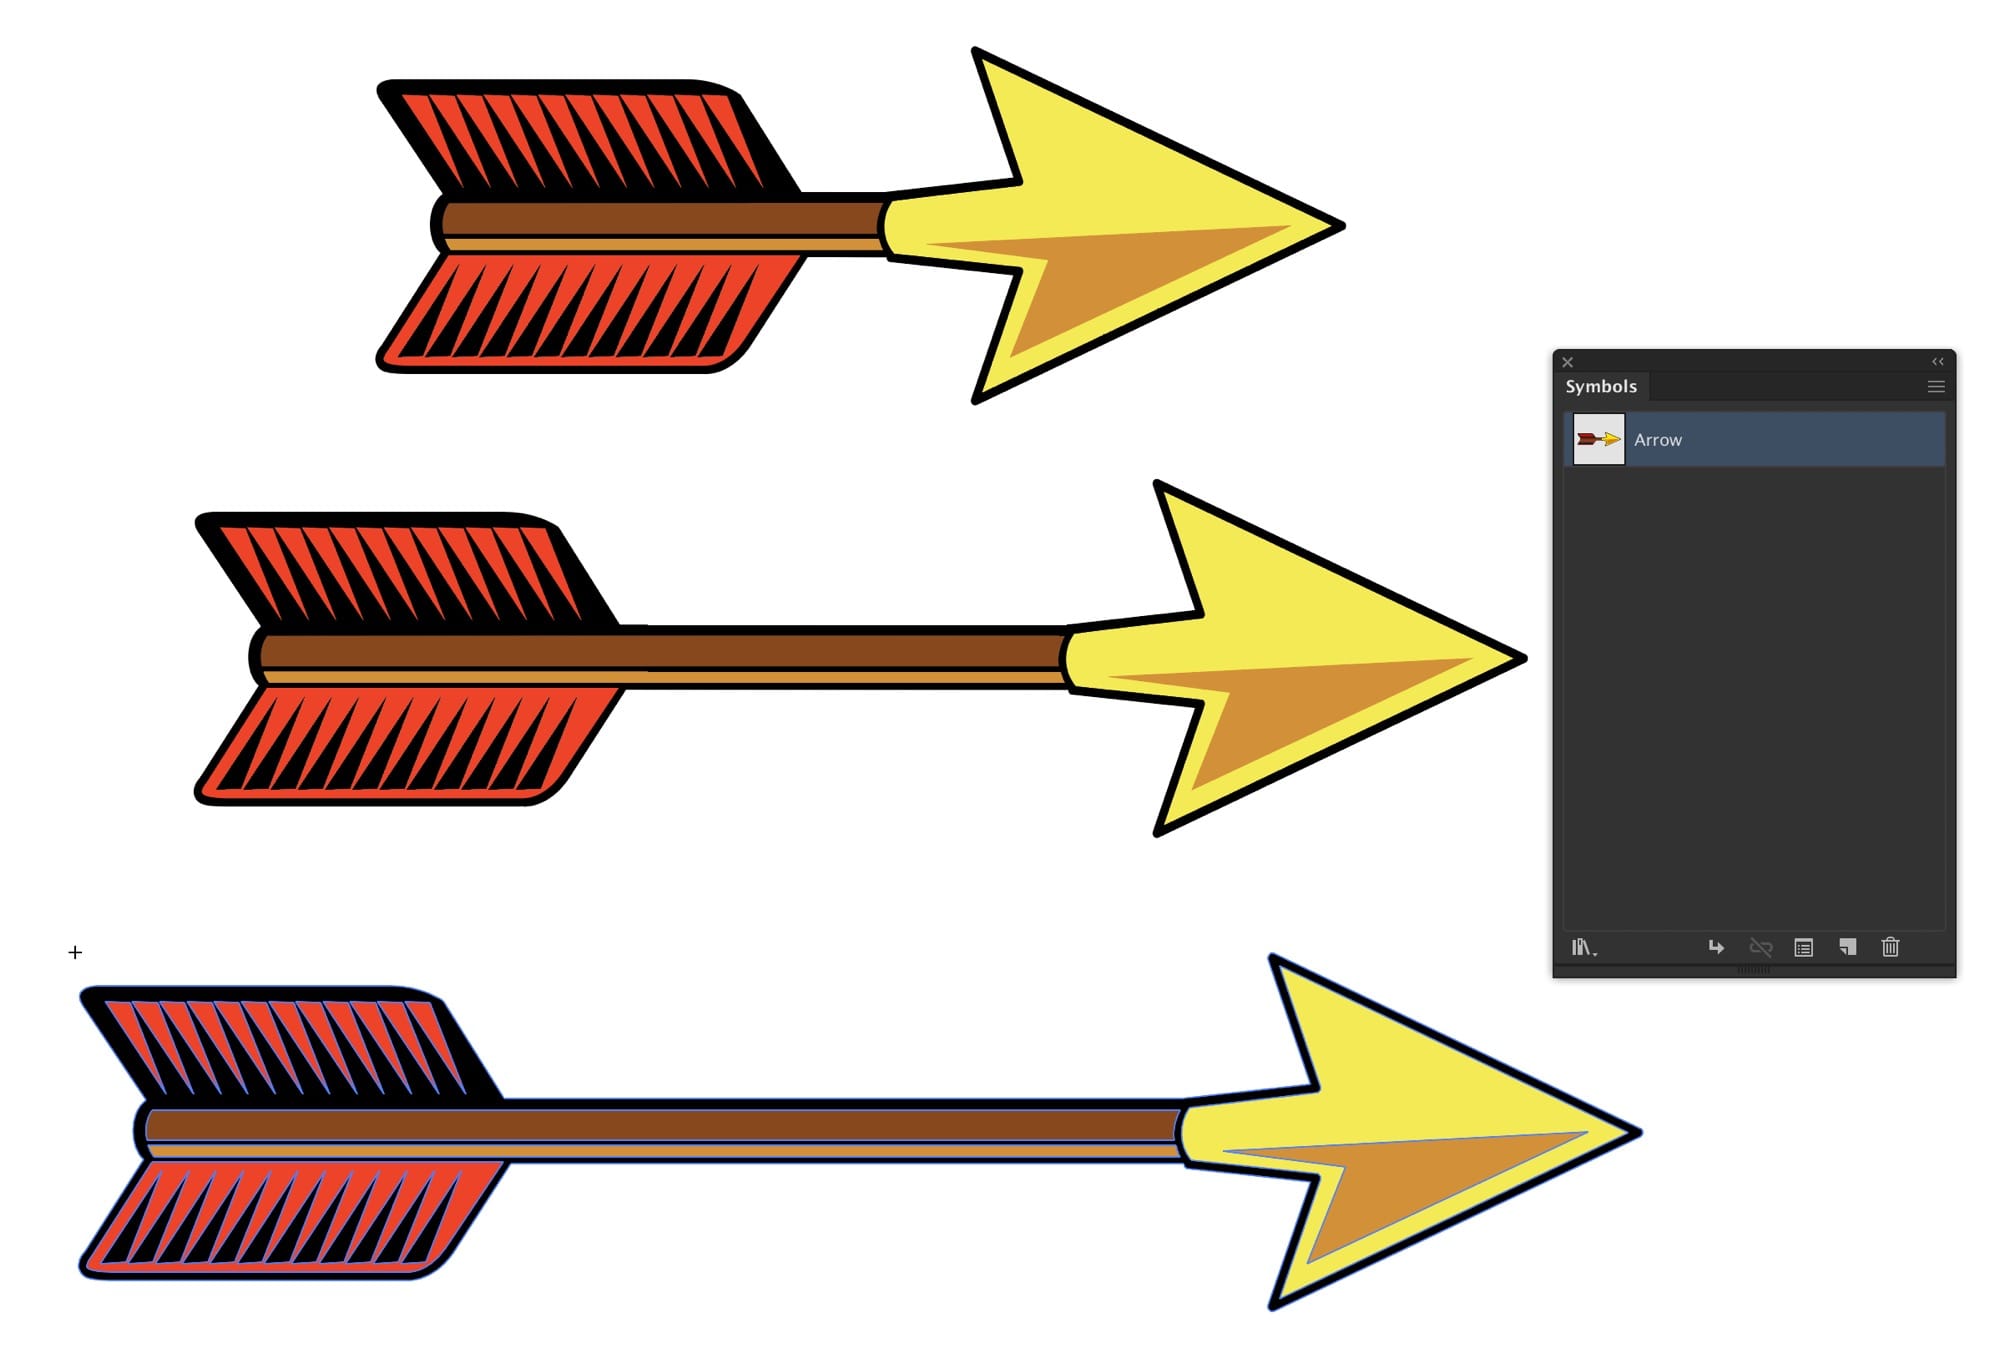
If you choose to use 9-Slice scaling when you create your symbol, the shape will scale where you dictate.
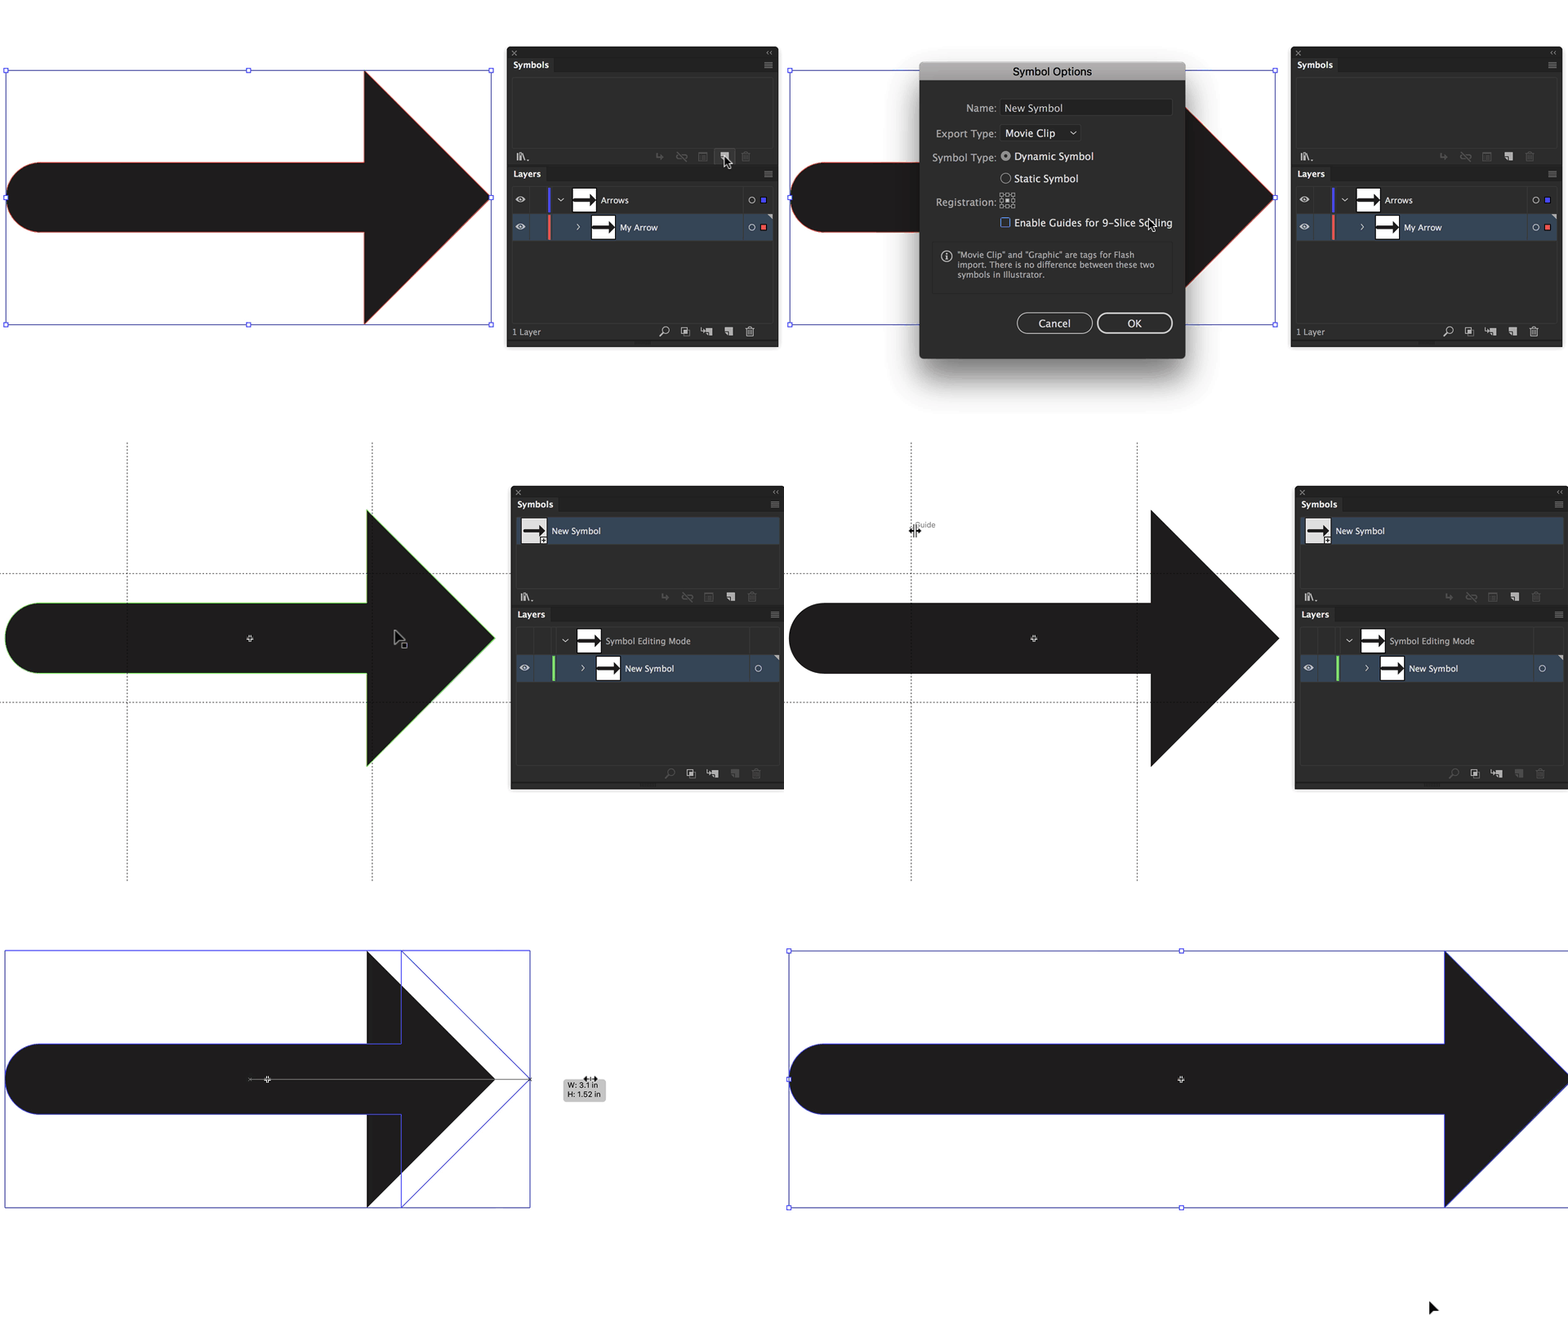
To edit where the art scales, double-click on it to enter isolation mode. Move the guides where you want them. Now, when you stretch the object, it only stretches between the guides. Symbols are worth creating for this use alone.
Spraying Symbols
You can use the Symbol Sprayer Tool to add many symbol instances at once. It’s a brush-type tool. It has a radius, which can be changed with either [ or ]. The longer you hold it, the more instances get sprayed onto the page.
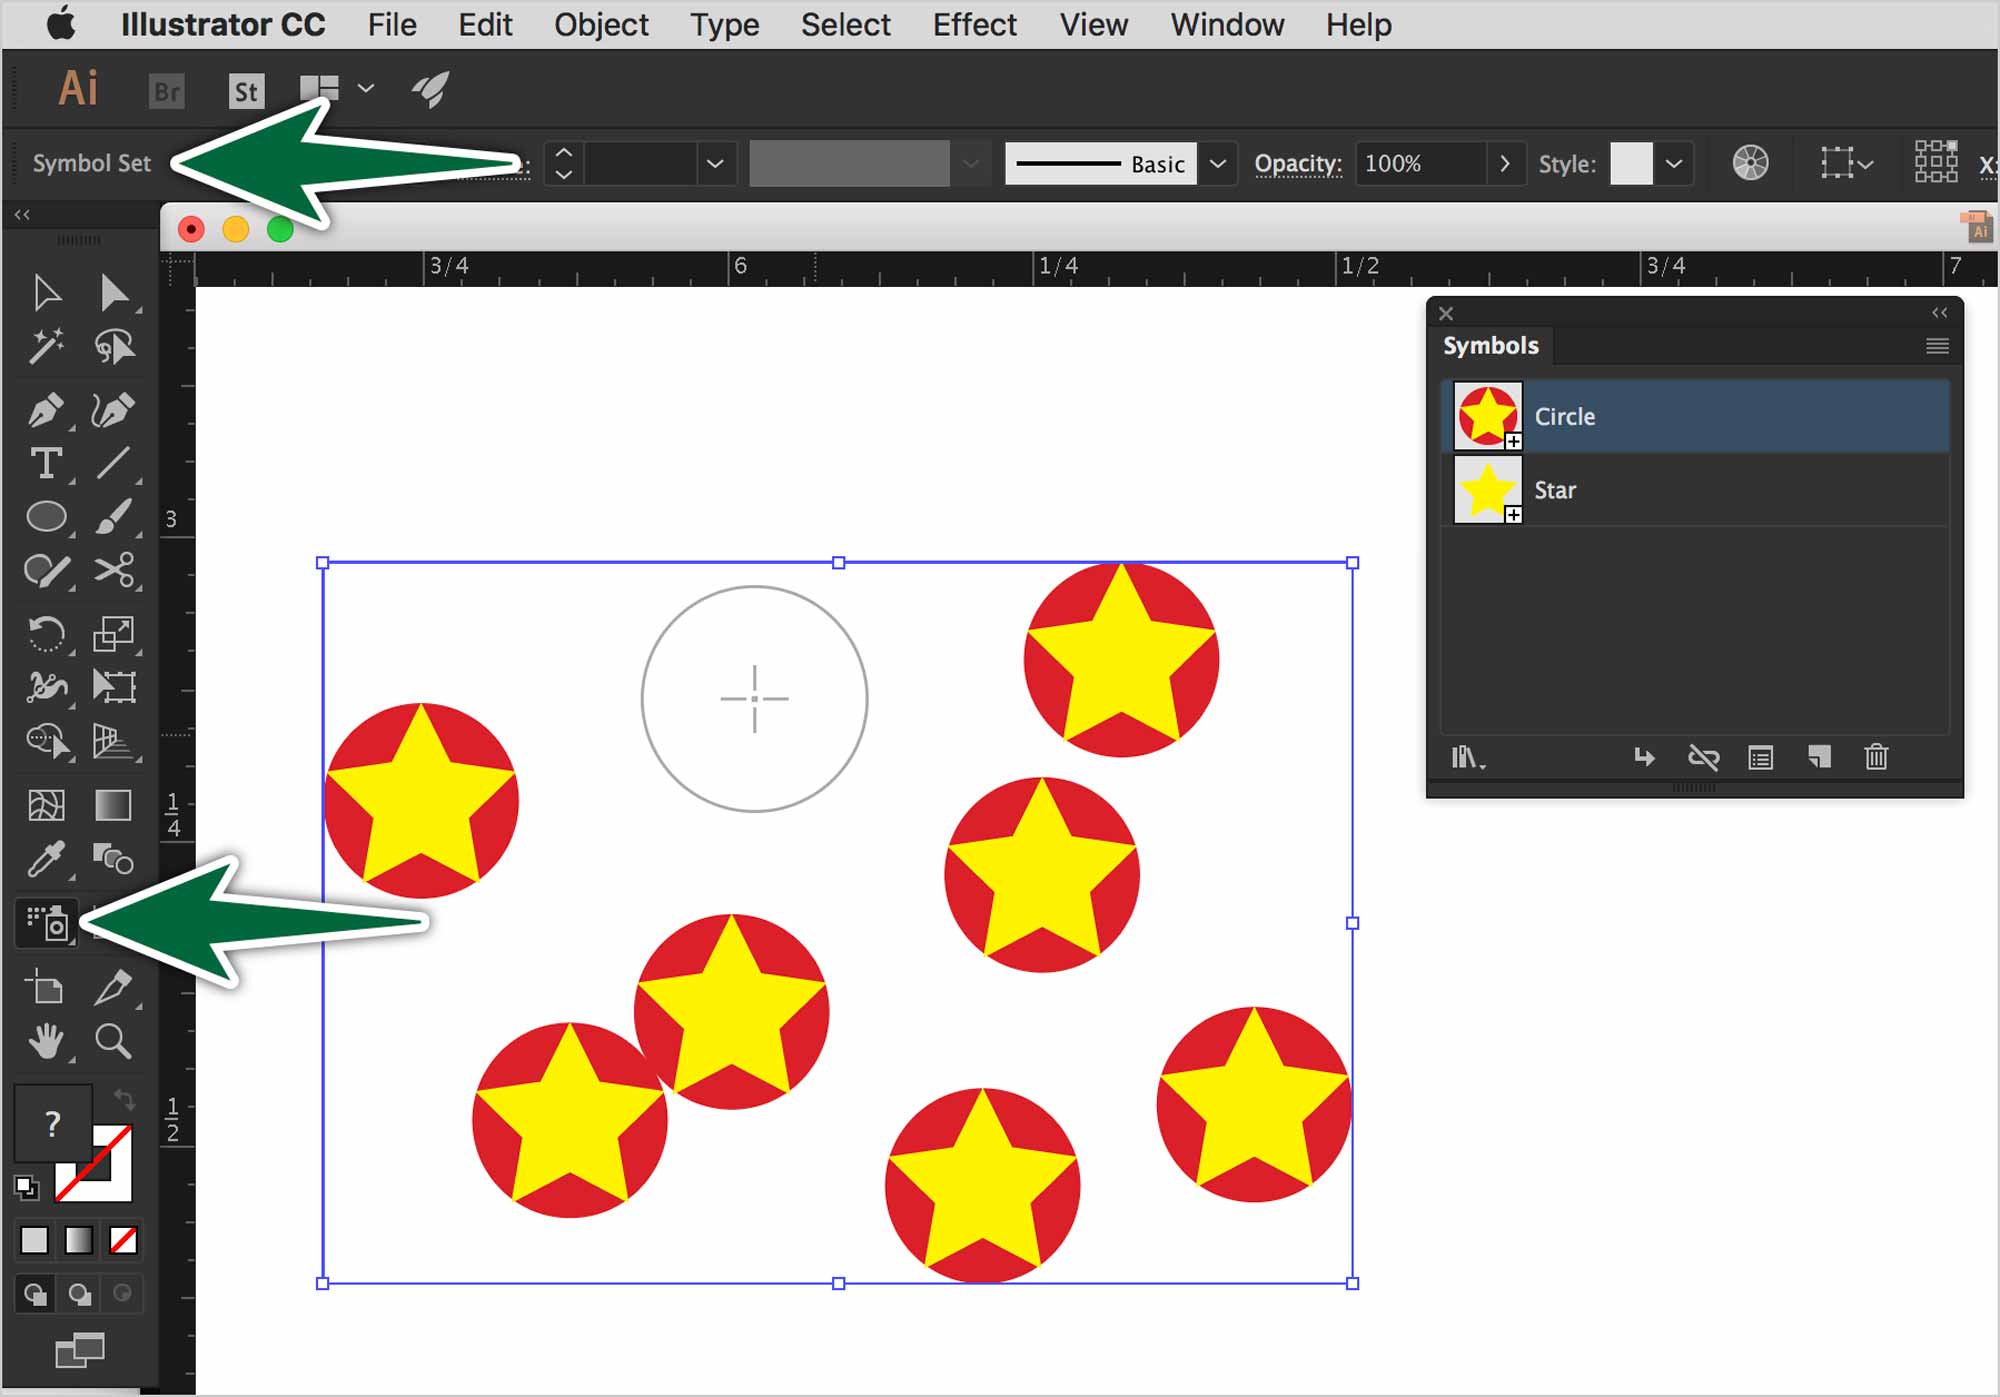
The result of spraying symbols is a Symbol Set. It’s a special kind of group in Illustrator. Note that the size of the brush doesn’t affect the dimensions of the symbols sprayed onto the page. The size of the brush is an indicator of the radius it will affect with the gallery tools.
Modifying Sprayed Symbols
Once you’ve created a symbol set with the Sprayer tool, you can modify it with tools in the Symbol tool gallery.
Each tool is self-explanatory. Maybe you should create a symbol to test each tool with. This is where the radius of the brush really makes a difference. These tools are very useful to create random looking artwork like a school of fish, clouds or grass.
There are options to the Symbol Sprayer tool. Just double-click on the Sprayer tool to see them.
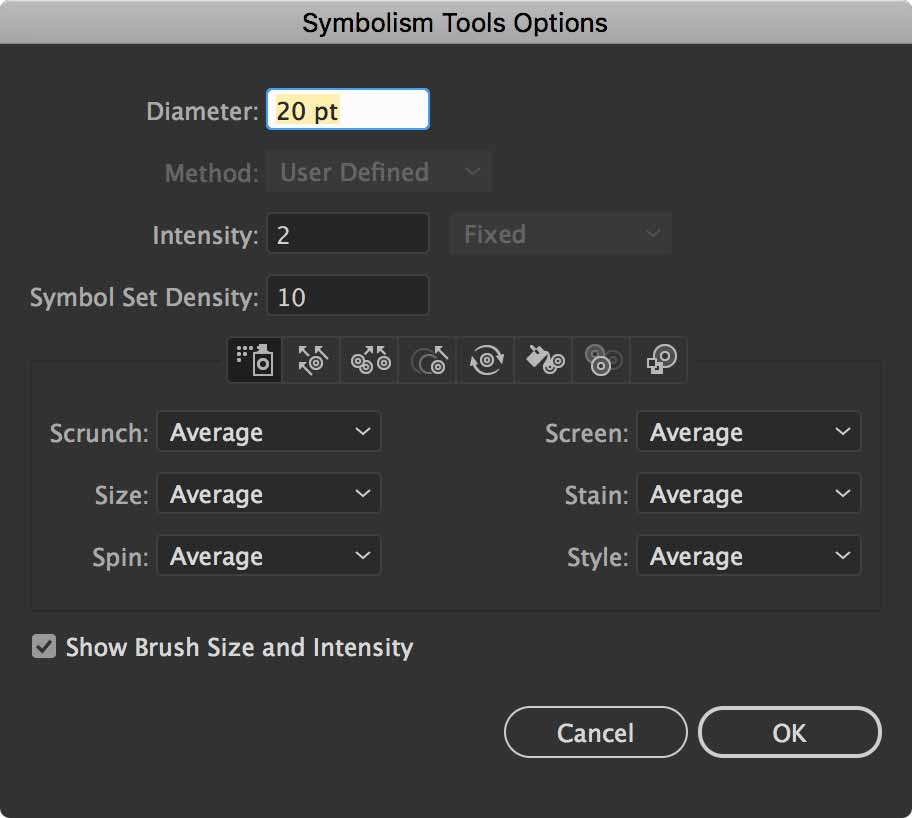
Most of the controls are related to using a pen tablet. You can have the Symbol Sprayer tool respond to the pen as you draw. The setting that concerns us is the Intensity setting. It dictates how quickly the symbols flow out of the tool as you paint.
As you spray, you can hold Shift or Shift + Option to have positive or a negative effect, like shrinking or growing the instances. Give it a go.
Formative Activity
Basic Symbols
Draw your own original symbols on the provided map. You should have an icon for:
- Camp grounds
- Picnic grounds
- A hospital
- Bicycle paths
- Walking paths
- Location markers (a dot or geometric shape)
- Mile marker (a triangular shape)

Make one of the icons a dynamic symbol. Change the colours of the instances. In my case, I changed the colour of the picnic grounds icons.
9-Slice Scaling
In the second instance, the arrow art has already been drawn for you. What you need to do is make it a symbol with 9-slice scaling. You want to make only the wood shaft scale, as shown.
Symbol Sprayer
Create a symbol from the provided artwork. Use the Symbol Sprayer to spray instances on the page.
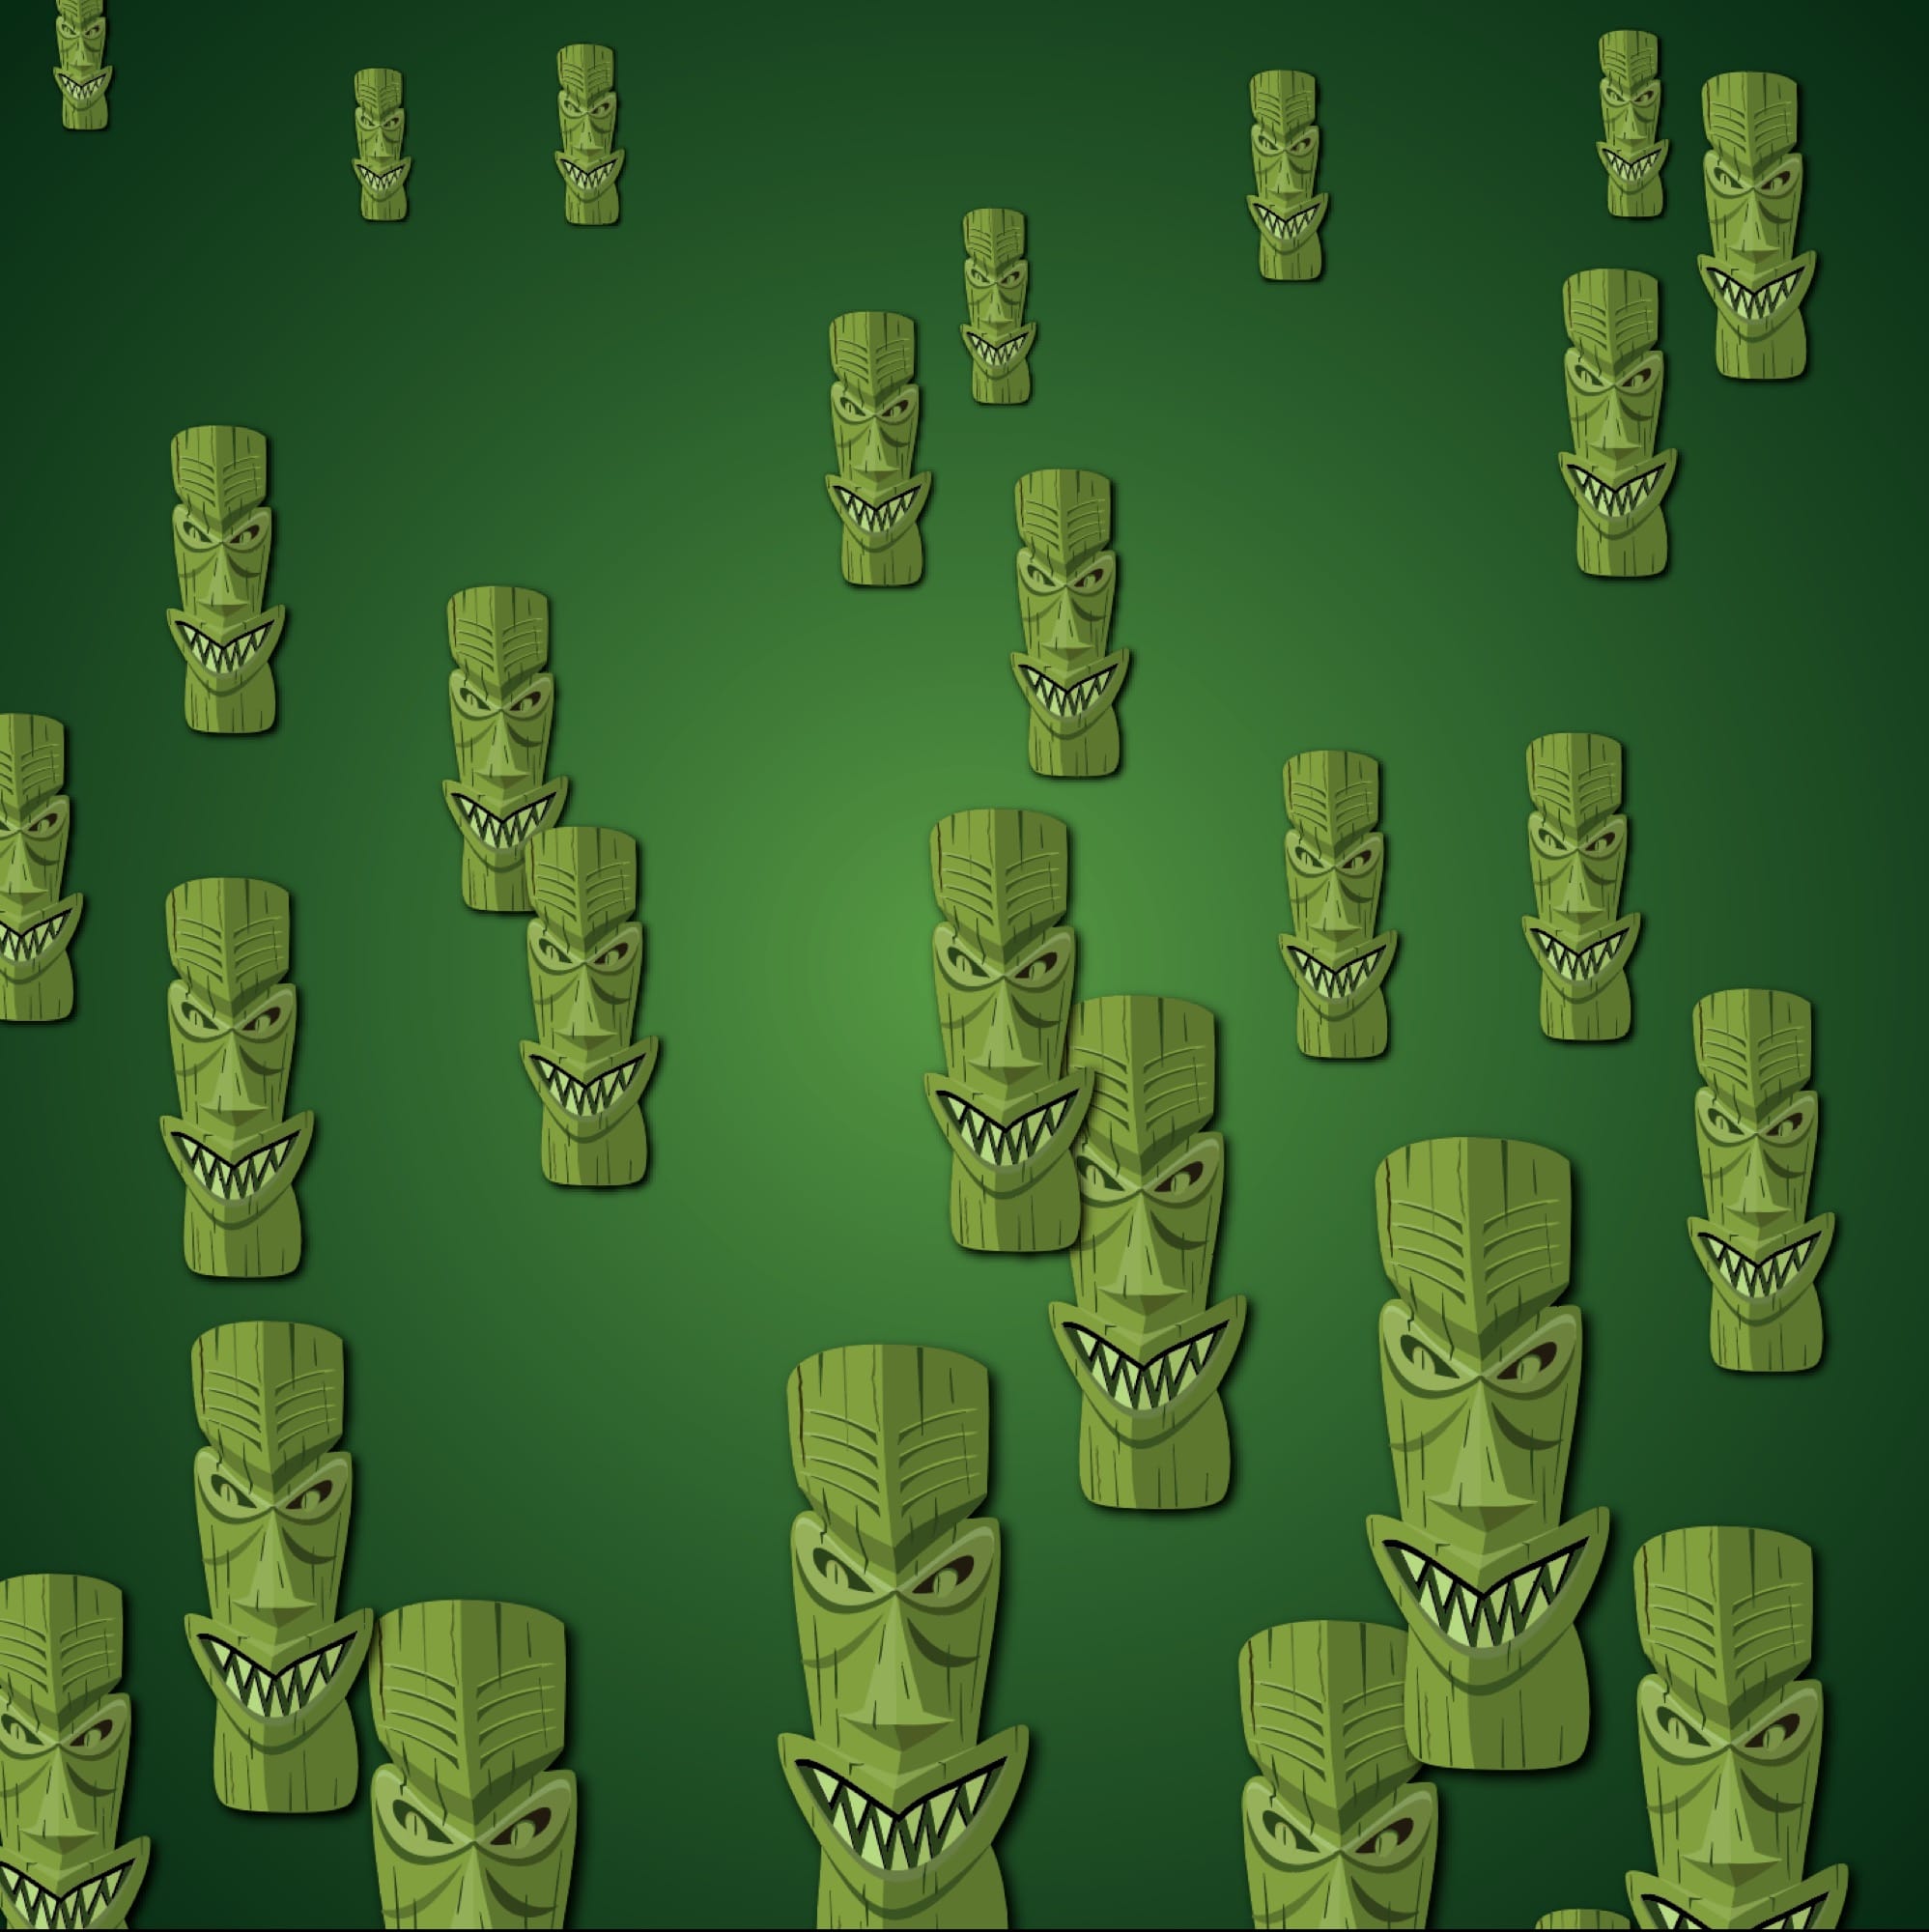
Use the Sprayer tools to create variations in their size, rotation, etc…
Supplemental Links
- Adobe: Symbols


