Topics
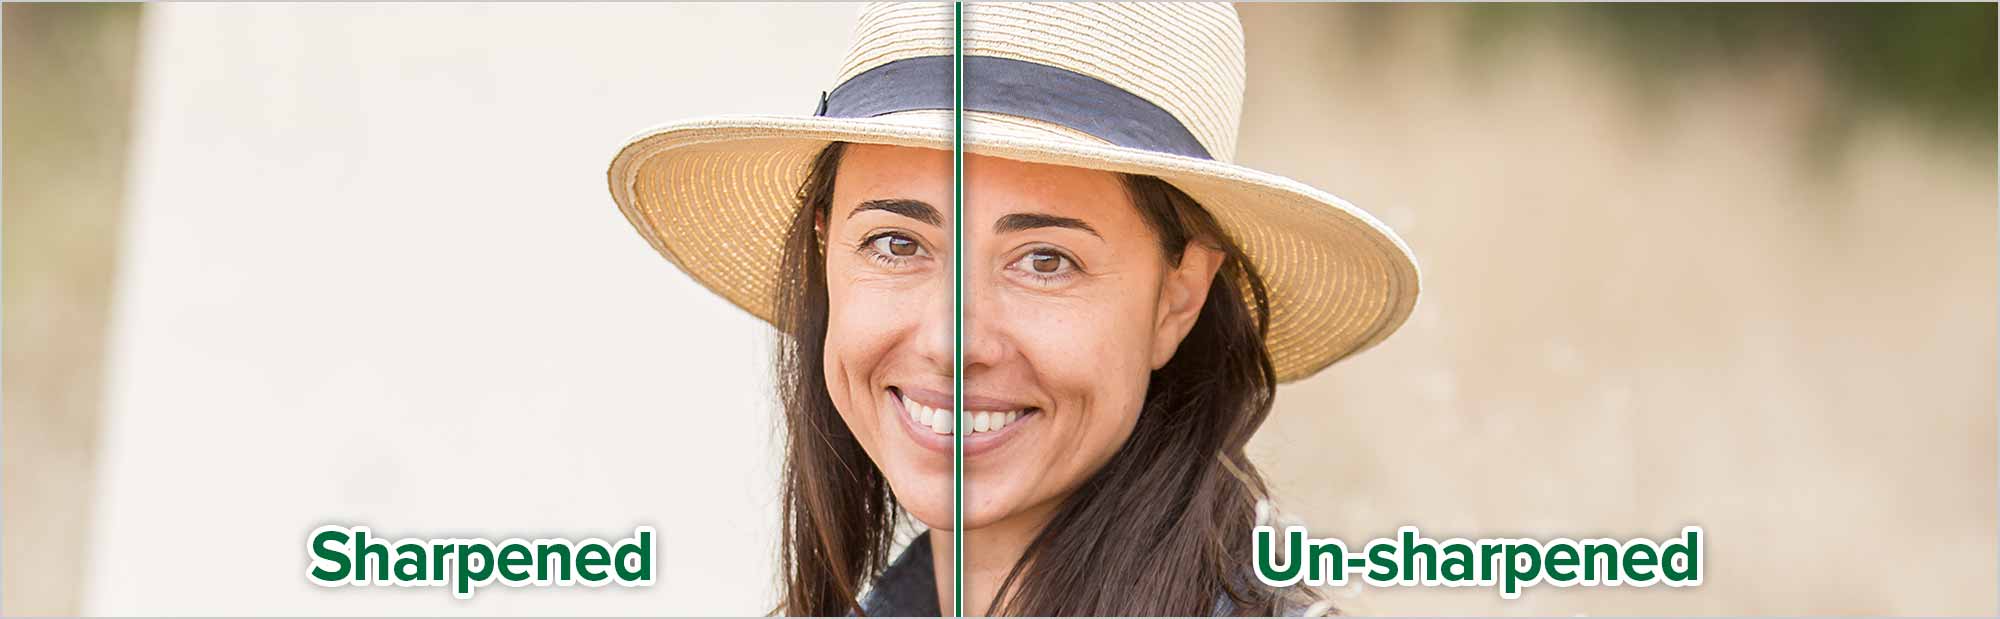
Sharpening
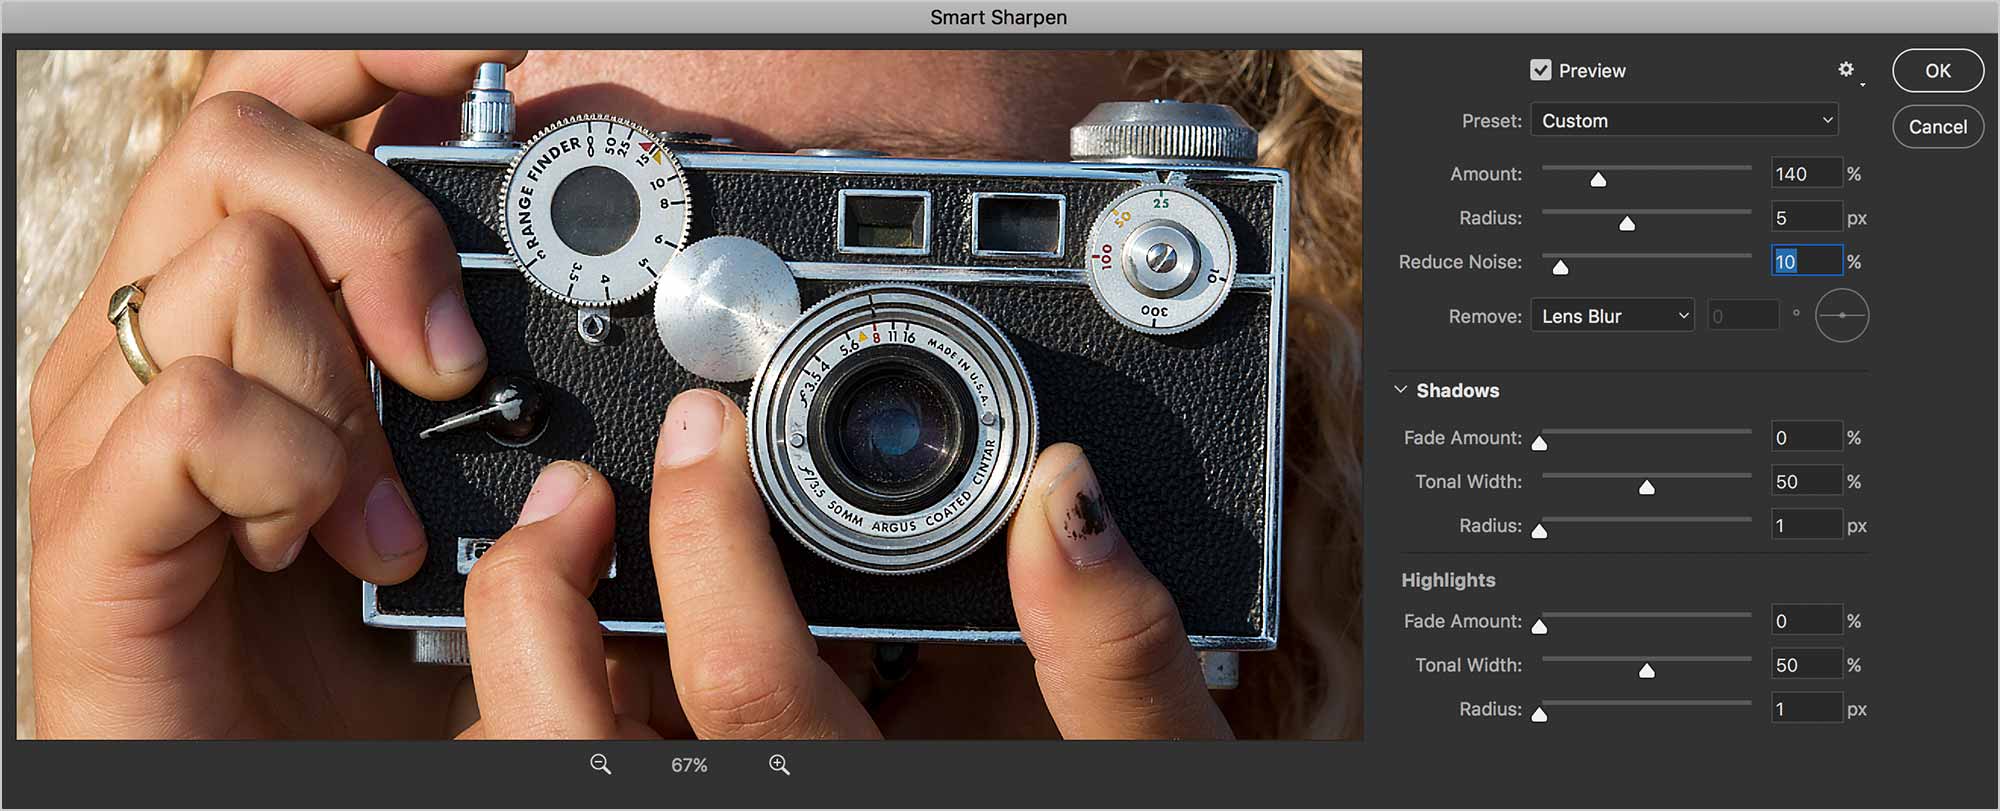
Smart Sharpen
The Smart Sharpen filter is a bit more intuitive than the Unsharp Mask filter. There are controls for highlights and shadow areas which give you more control.
Video tutorial on the Smart Sharpen filter.
This is what Adobe has to say about the its settings:
- Amount
- Sets the amount of sharpening. A higher value increases the contrast between edge pixels, giving the appearance of greater sharpness.
- Radius
- Determines the number of pixels surrounding the edge pixels affected by the sharpening. The greater the radius value, the wider the edge effects and the more obvious the sharpening.
- Reduce Noise
- Reduce unwanted noise while keeping important edges unaffected.
- Remove
- Sets the sharpening algorithm used to sharpen the image.
- Gaussian Blur: is the method used by the Unsharp Mask filter.
- Lens Blur: detects the edges and detail in an image, and provides finer sharpening of detail and reduced sharpening halos.
- Motion Blur: attempts to reduce the effects of blur due to camera or subject movement. Set the Angle control if you choose Motion Blur.
- Angle
- Sets the direction of motion for the Motion Blur option of the Remove control.
Sharpen with High Pass
This is a time-tested process for applying a non-destructive sharpening effect to a photo. It can also be applied to a selected area of a photo with the help of a mask.
Duplicate the photo’s layer. Make the new layer a Smart Object. Run Filter > Other > High Pass… on the Smart Object. Dial up the settings until you start to see colour through the grey. Back it off only until the colour is gone.
Click OK. Change the blend mode of the Smart Object to Overlay. Since you made the layer a Smart Object, you can double-click on the High Pass entry in your Layers panel to edit the High Pass settings after the fact.
Unsharp Mask
The Unsharp Mask filter increases contrast between neighbouring pixels. The radius setting determines the size of the area inside which the pixels will be compared. The Threshold settings determines how different the pixels need to be before they are affected by the filter. So, Threshold has a mitigating effect.
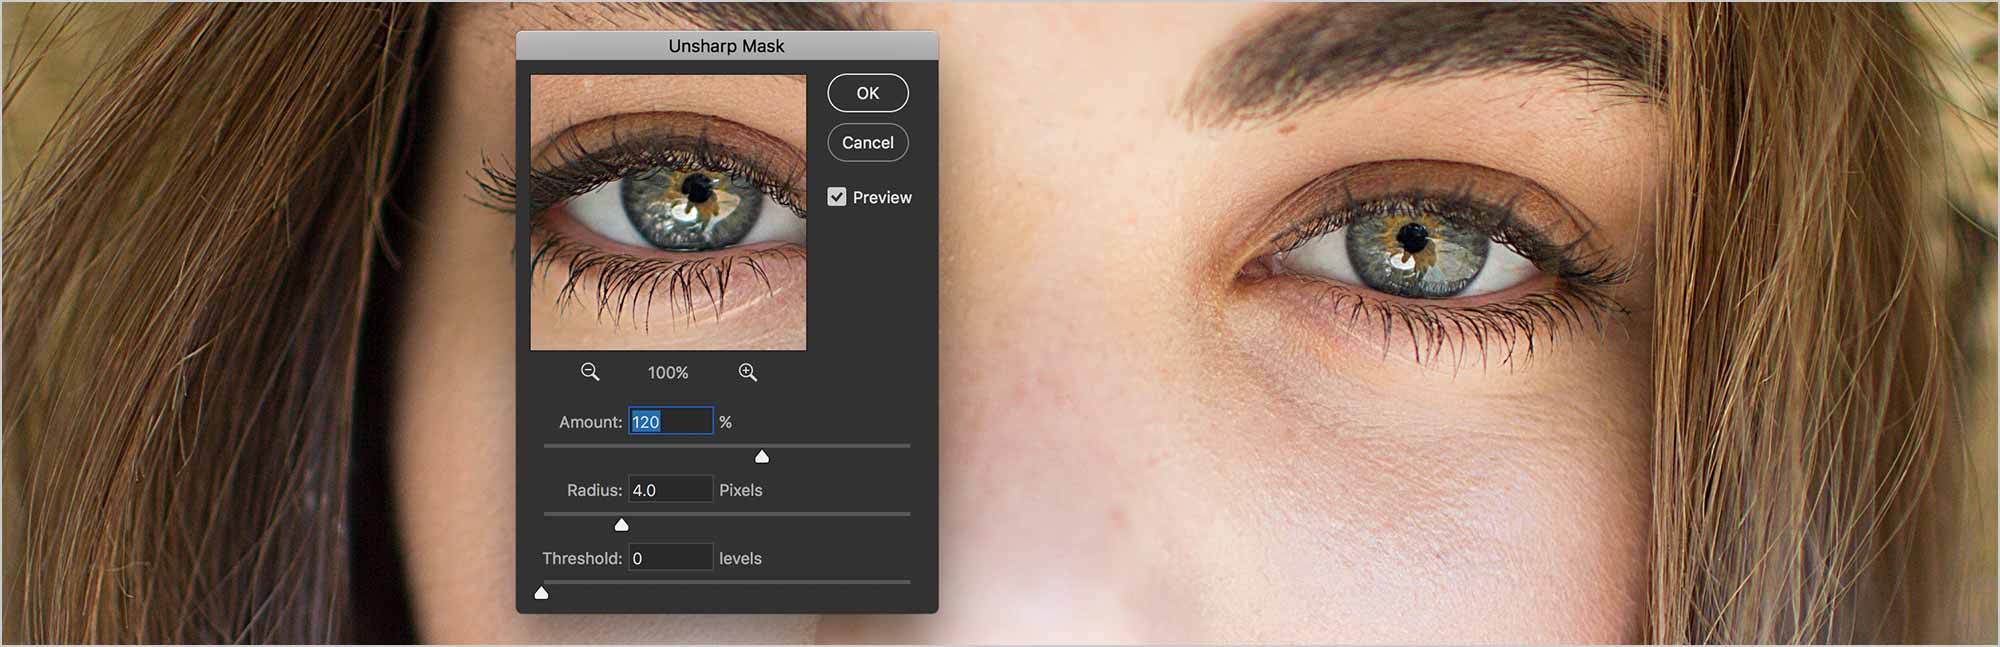
Only use this filter on a Smart Object or on a duplicate of your layer. A Smart Object is better.
Shake Reduction
Bluriness can be caused by either your camera or your subject moving as you take your photo. The result is a motion blur of your subject.
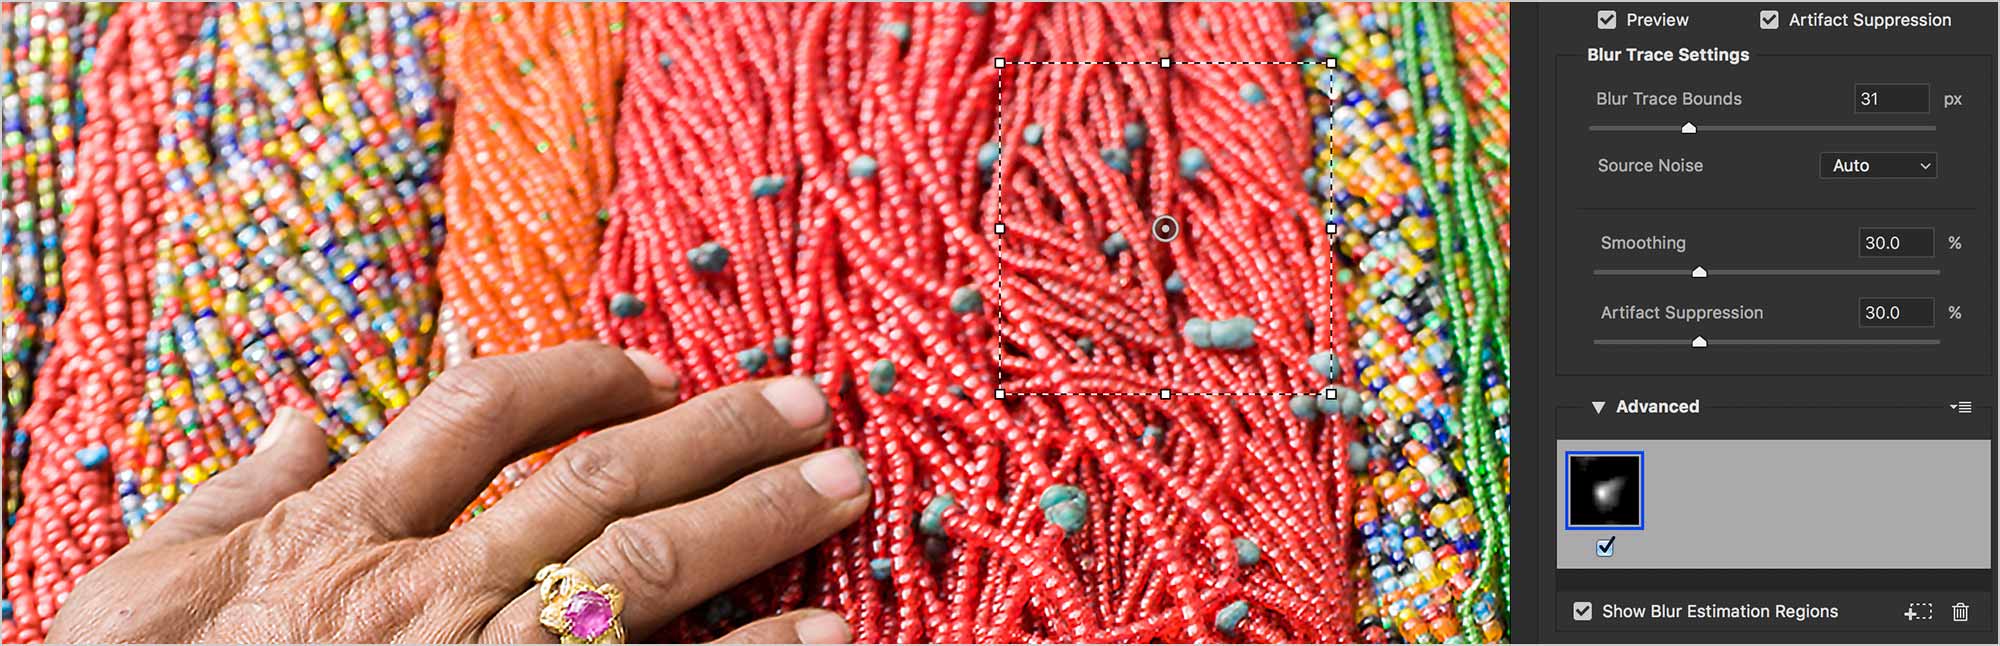
As usual, it’s best to convert to your layer to a Smart Object. Go Filter > Sharpen > Shake Reduction…. This is what Adobe has to say about the filter.
Blur Trace Bounds: The Blur Trace Bounds setting represents the bound size of the blur trace. You can adjust this value if necessary.
Source Noise: Photoshop automatically estimates the amount of noise in the image. If necessary, select a different value (Auto/Low/Medium/High).
Smoothing: Smoothing reduces high-frequency sharpening noise. You can move the slider to a value different from the default 30%. A low Smoothing setting is recommended.
Artifact Suppression: Sometimes, in the course of sharpening the image, you may observe some noticeable noise artifacts.
Blurs
More often than not, we want to sharpen a blurry photo. But sometimes, intentionally blurring a photo can add drama, motion or a short depth of field to your composition. We’ll explore all these effects and more in this exercise. There are a range of blurring tools available in Photoshop. The first we’ll look at is the Blur Gallery.
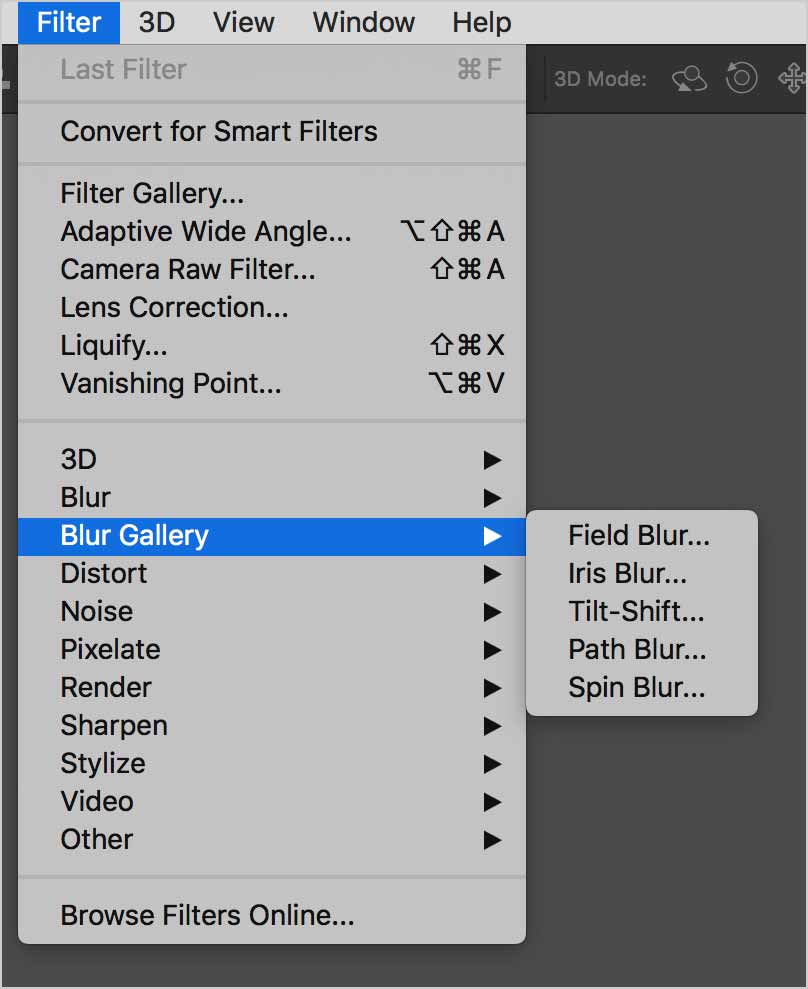
Blur Gallery
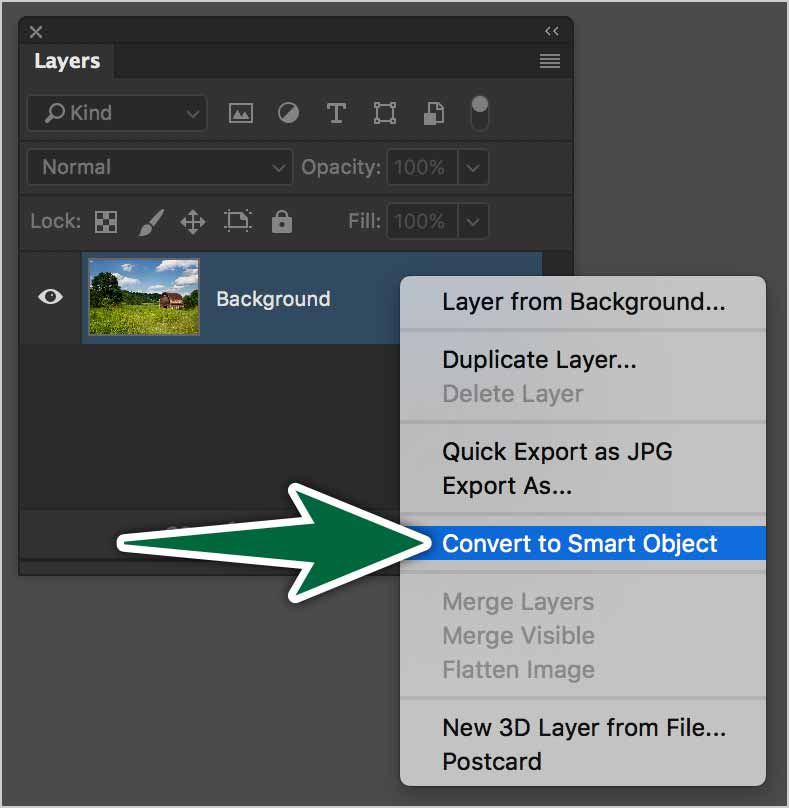
Before we apply any filters in Photoshop, we always want to ensure we’re working on a Smart Object. This will make it that the filters are non-desctructive. That means that the actual pixel data of the photo will not be touched. The filters on a Smart Object are kind of on their own layer, separate from the photo’s pixels.
Control UI
When you envoke the blurs from the Blur Gallery, you can control them either from the on-screen controls or from the Control Bar along the top of the screen. These are the on-screen controls.
Field Blur
It’s only logical that the photo is in a field, right?
The blur effect is linear. Adobe: Use Field Blur to build a gradient of blurs, by defining multiple blur points with different amounts of blur. Add multiple pins to the image and specify a blur amount for each pin. The final result is combined effect of all blur pins on the image. You can even add a pin outside the image, to apply the blur at corners.
Go Filter > Blur Gallery > Field Blur.
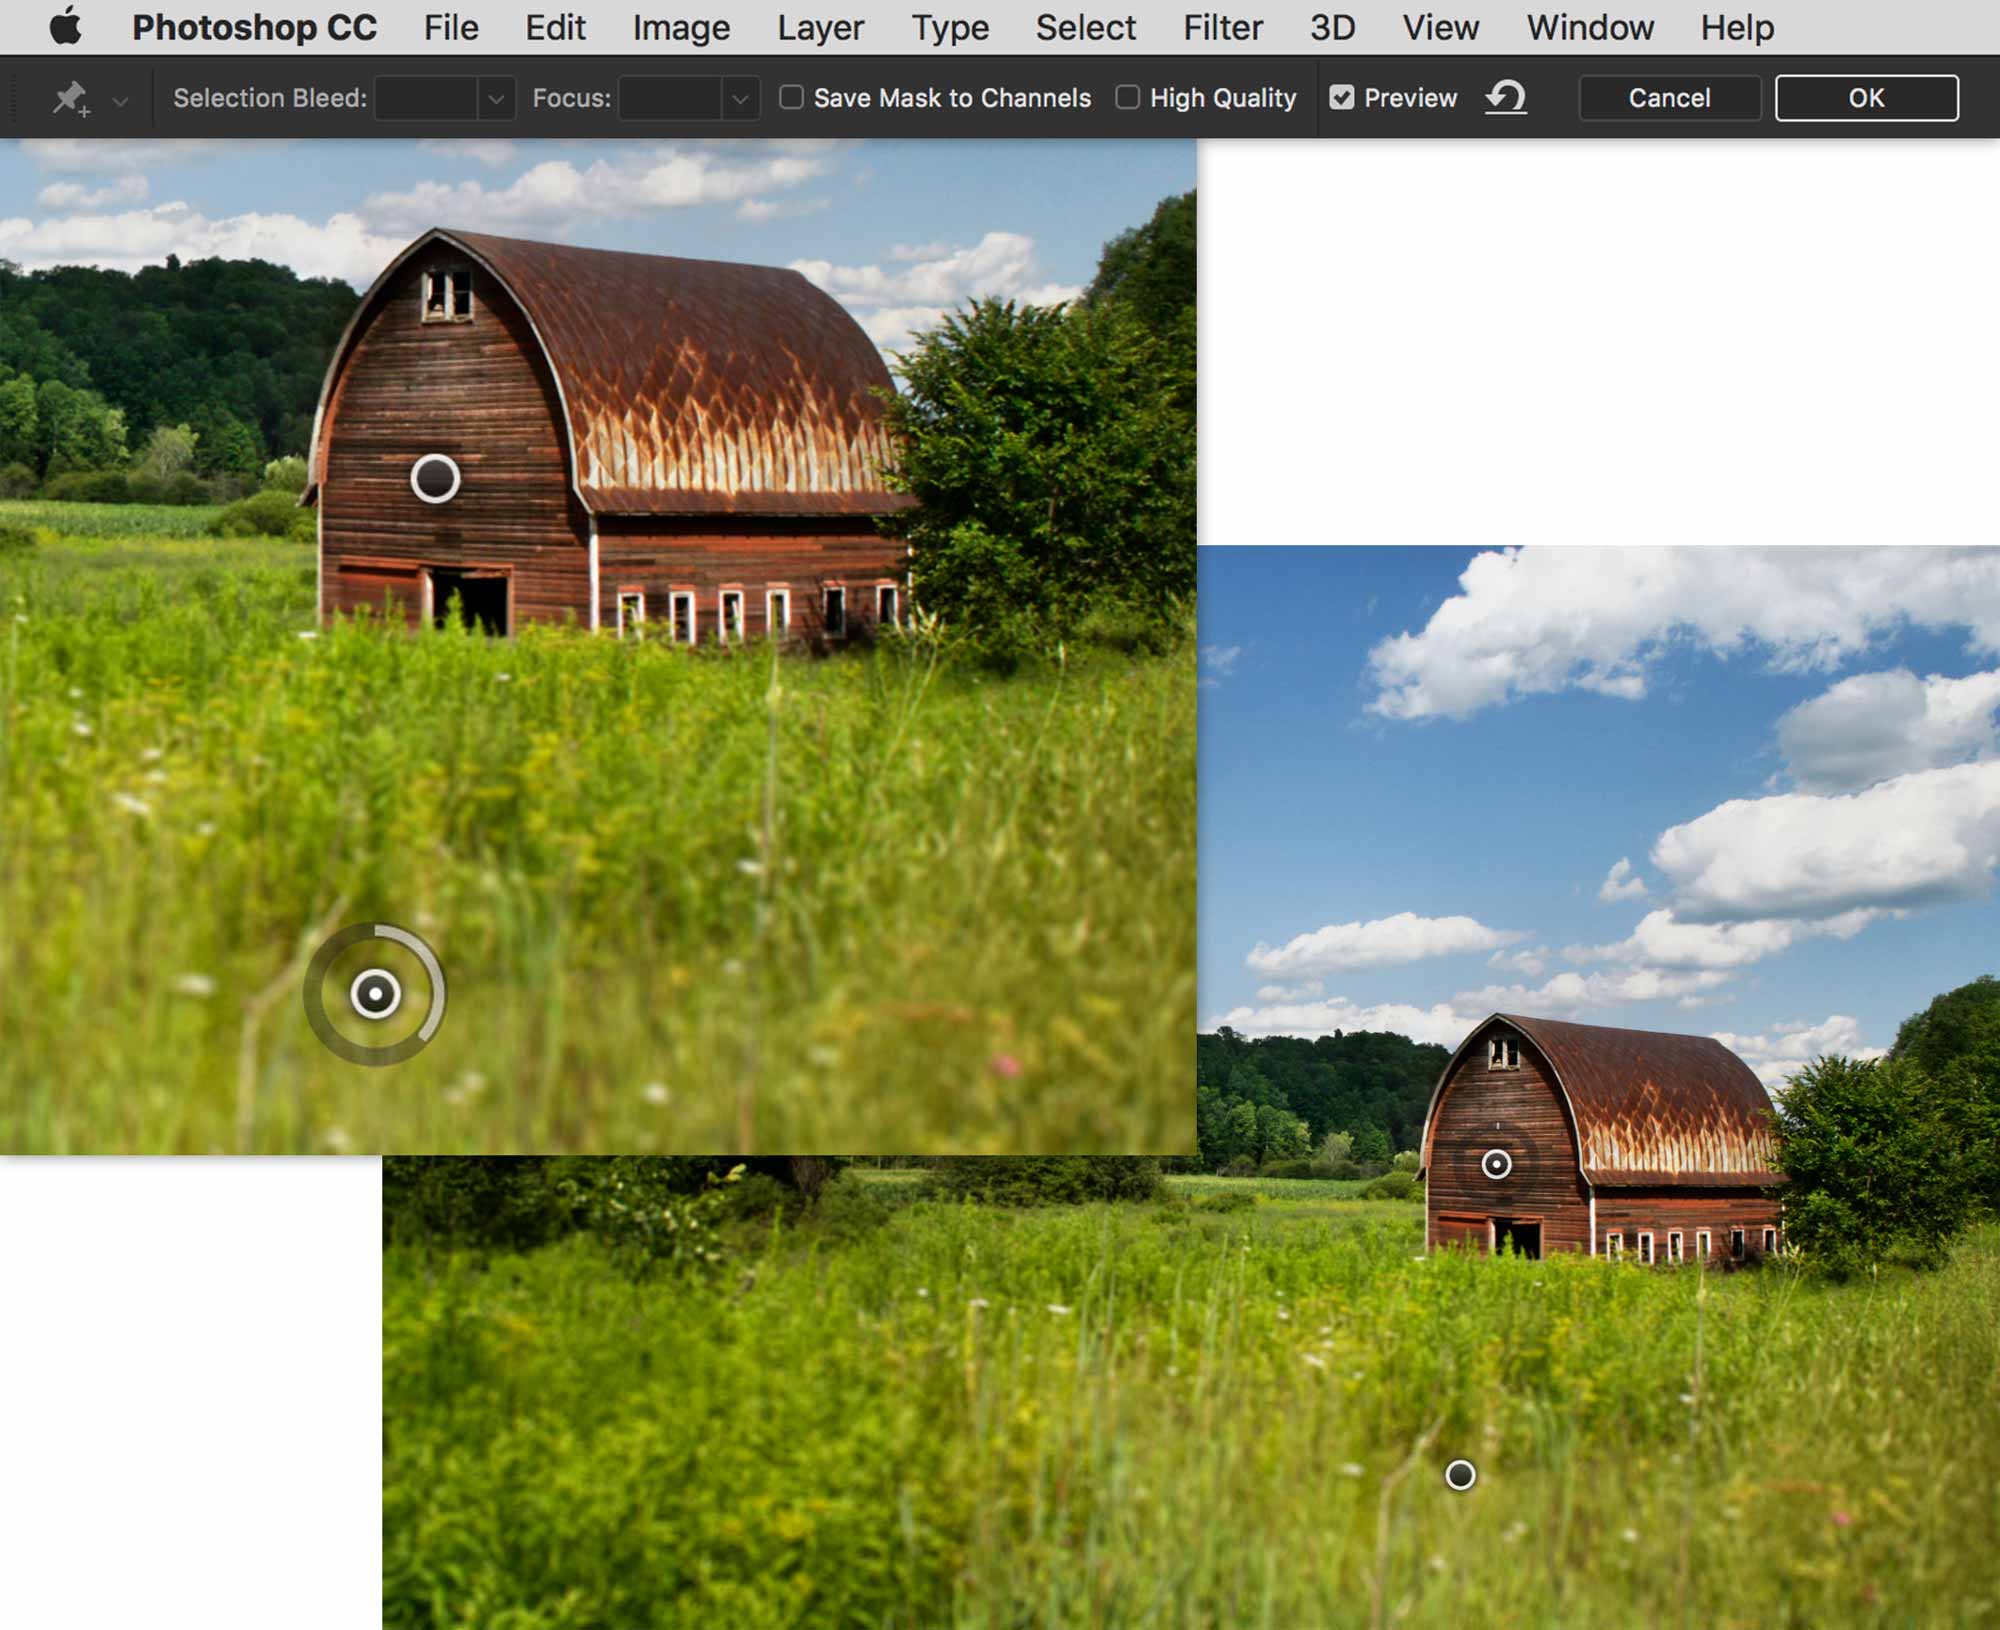
In the Control bar, you can opt to save the mask to your Channels panel, in case you wish to apply the mask to something else in your composition.
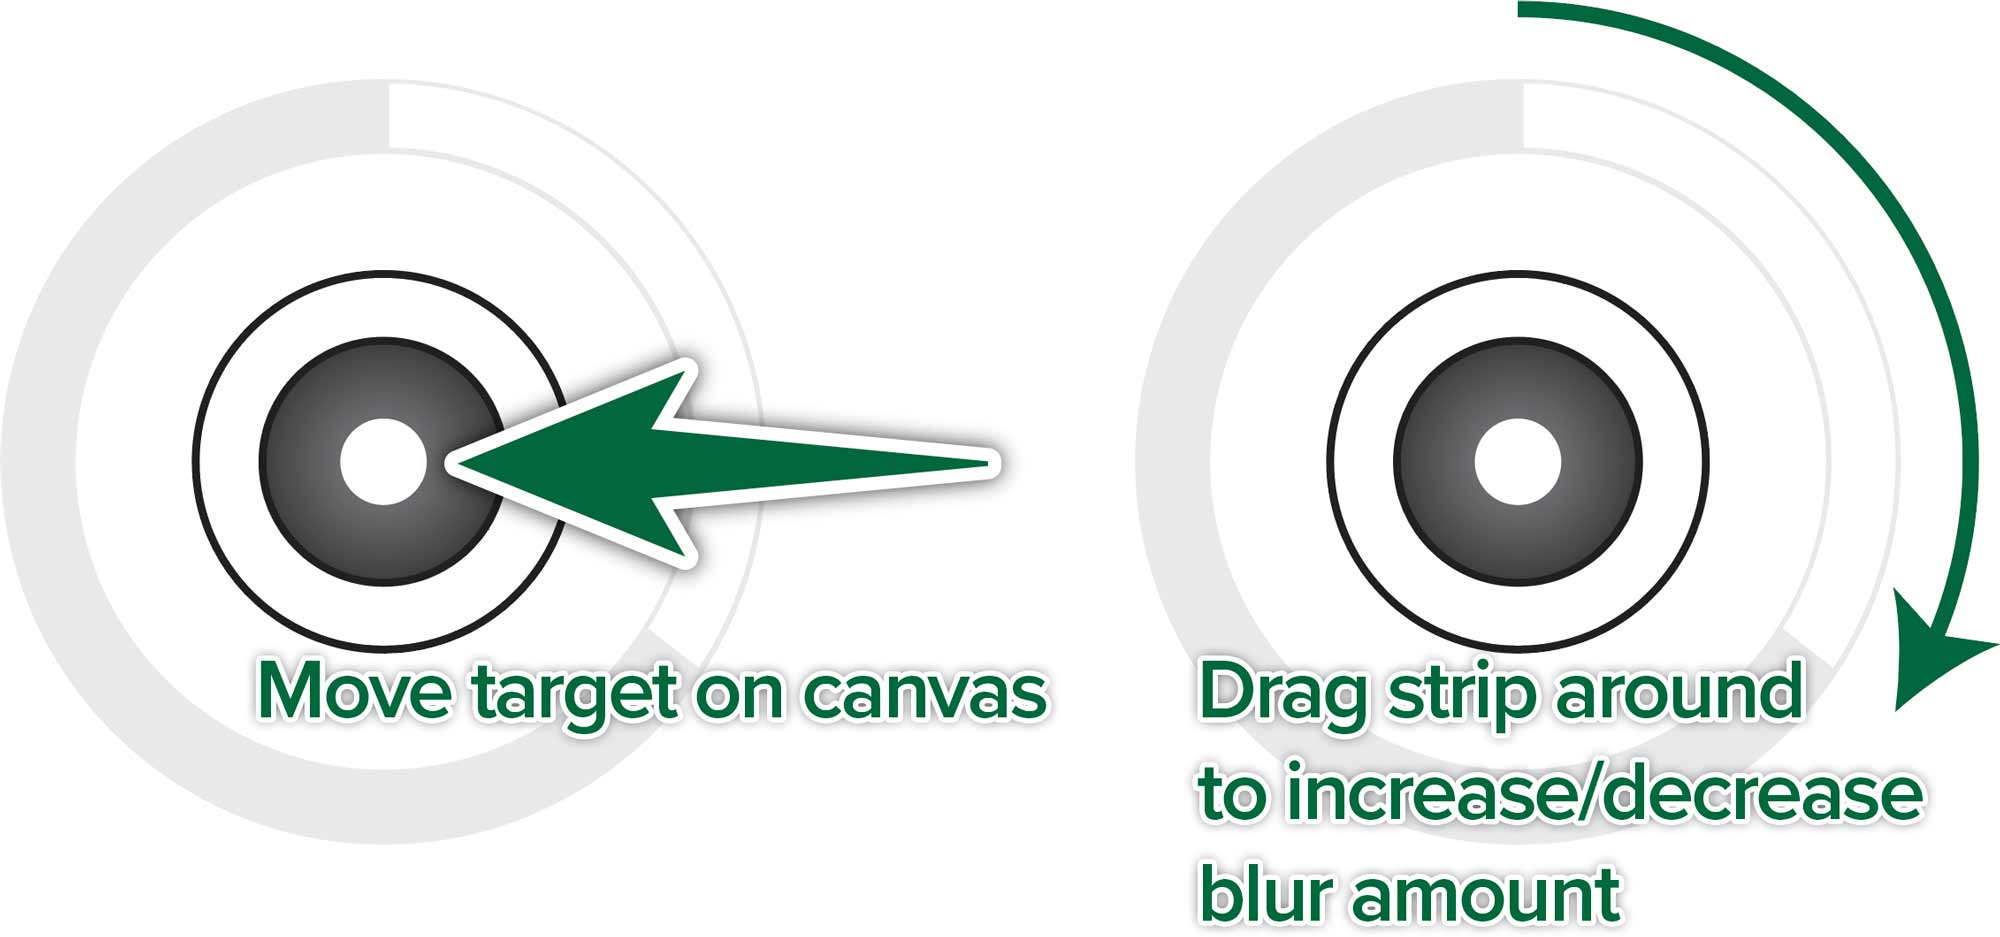
Iris Blur
It’s only logical that the photo has an iris in it, right?

The blur effect is radial. Adobe: Use the Iris blur to simulate a shallow depth-of-field effect to your picture, irrespective of the camera or lens used. You can also define multiple focus points, an effect almost impossible to achieve using traditional camera techniques.
Spin Blur
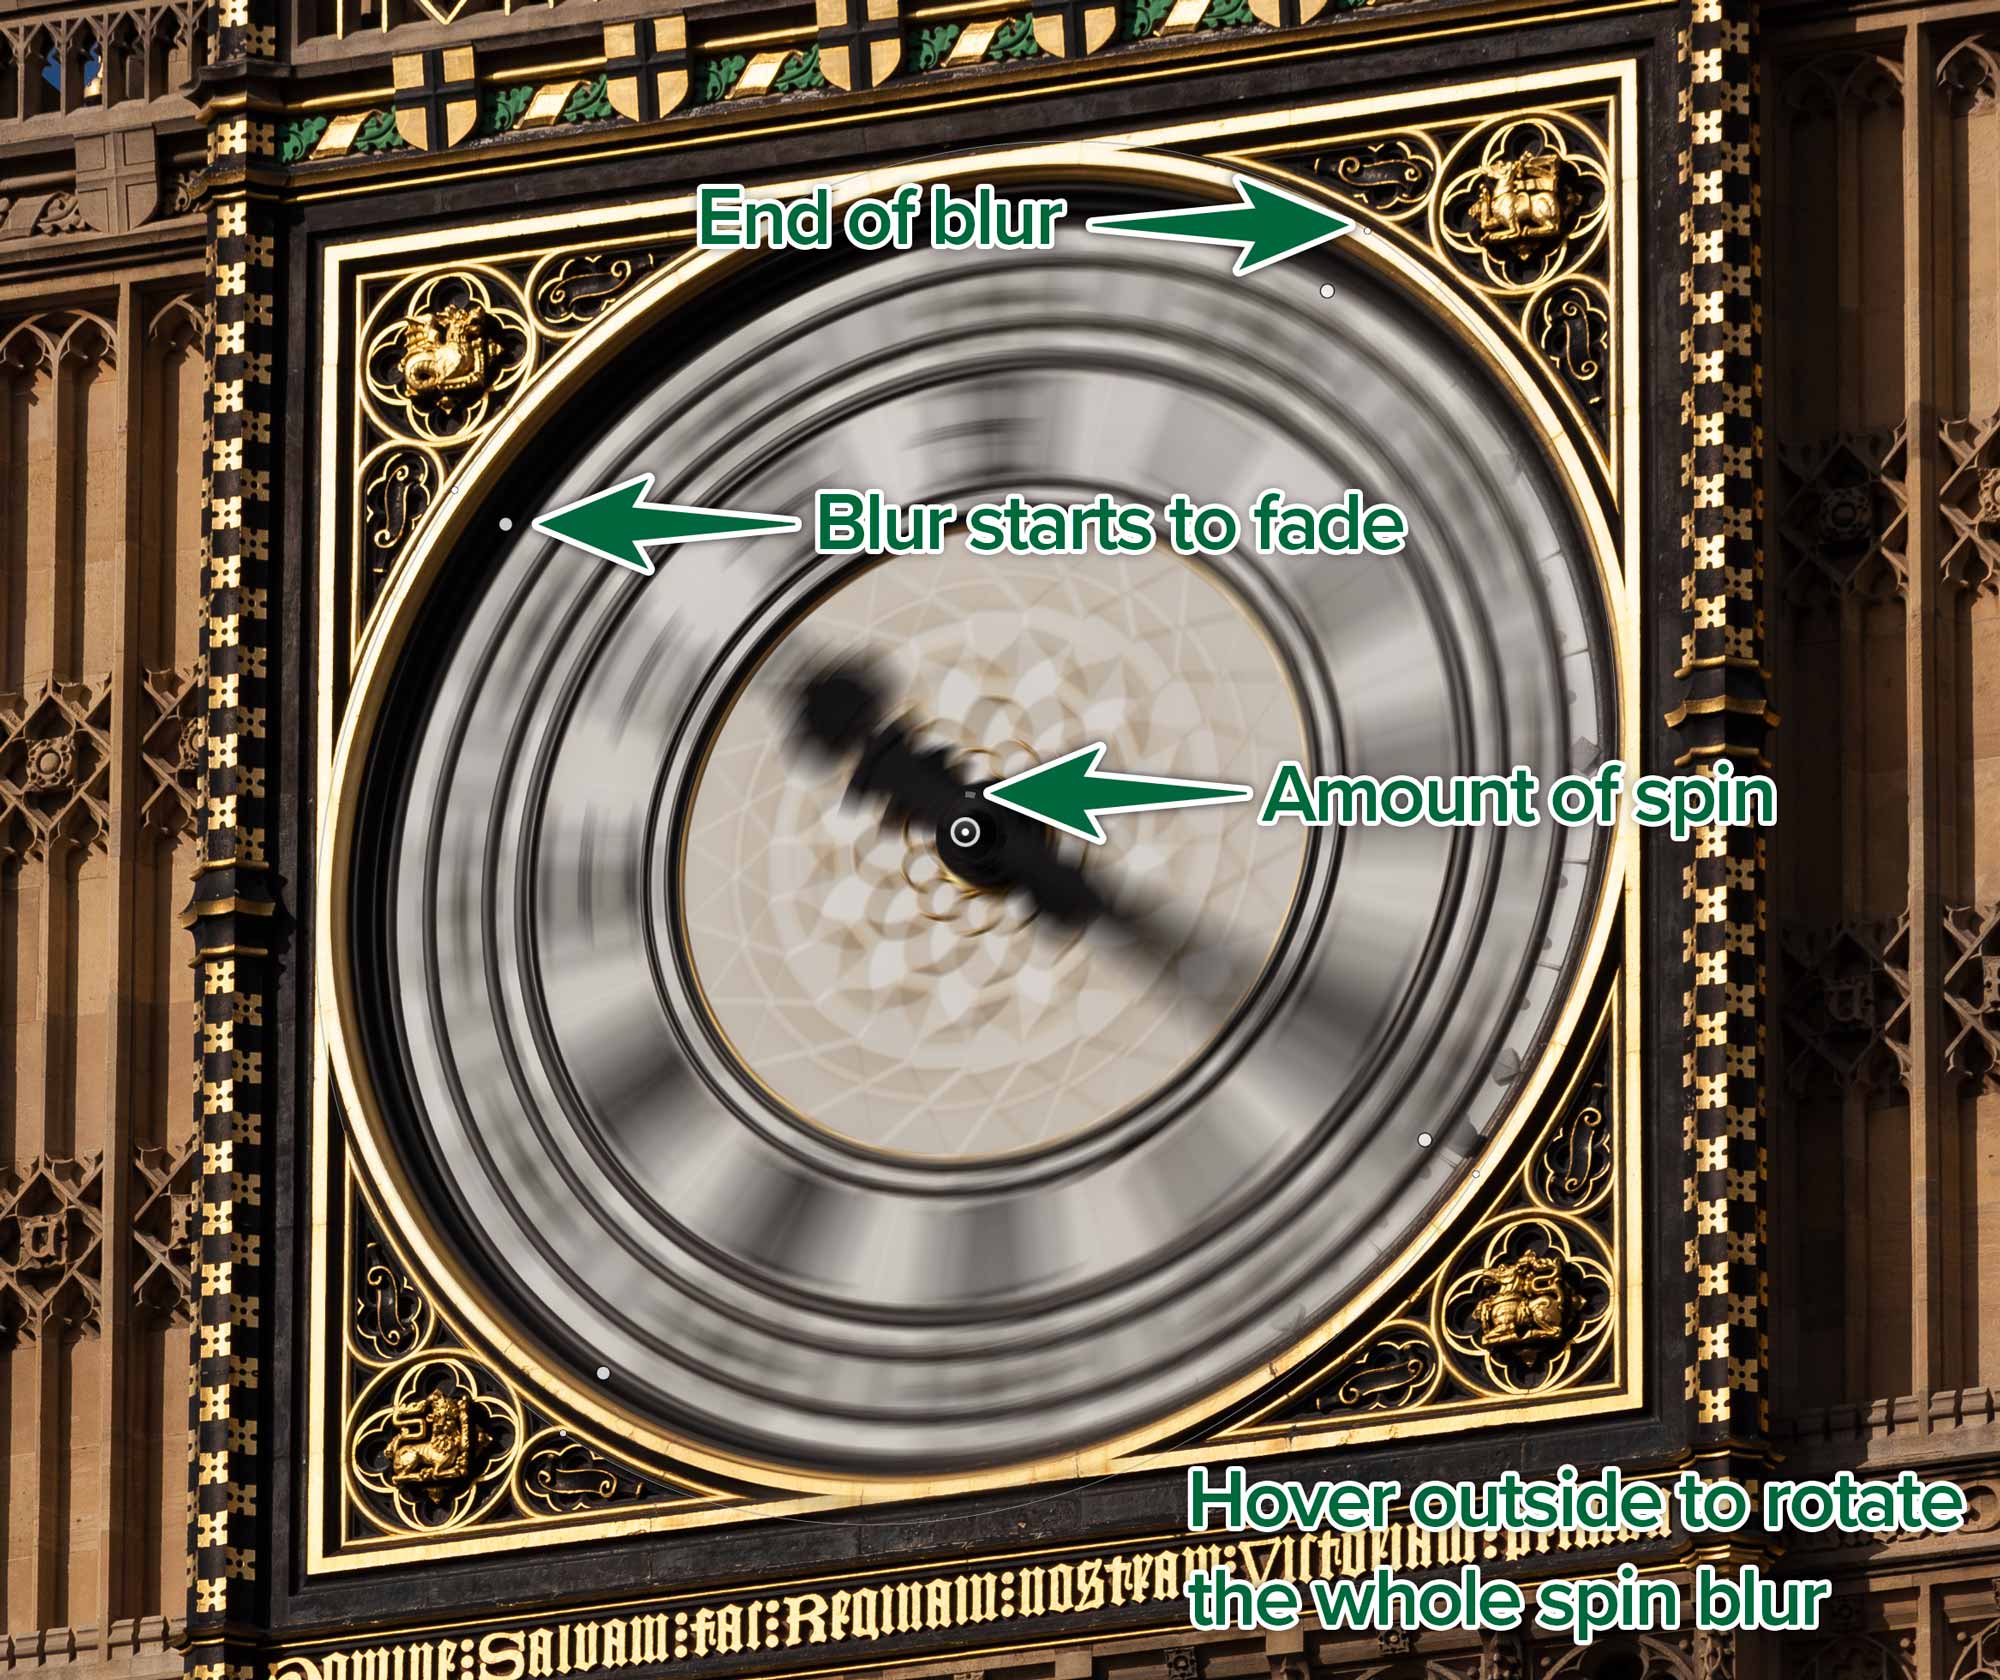
The blur effect is radial. Adobe: Using the Spin Blur effect, you can rotate and blur the image around one or more points. The spin blur is a radial blur measured in degrees. Photoshop lets you work with center points, blur size and shape, and other settings, all while viewing a live preview of the changes.
Tilt Shift Blur
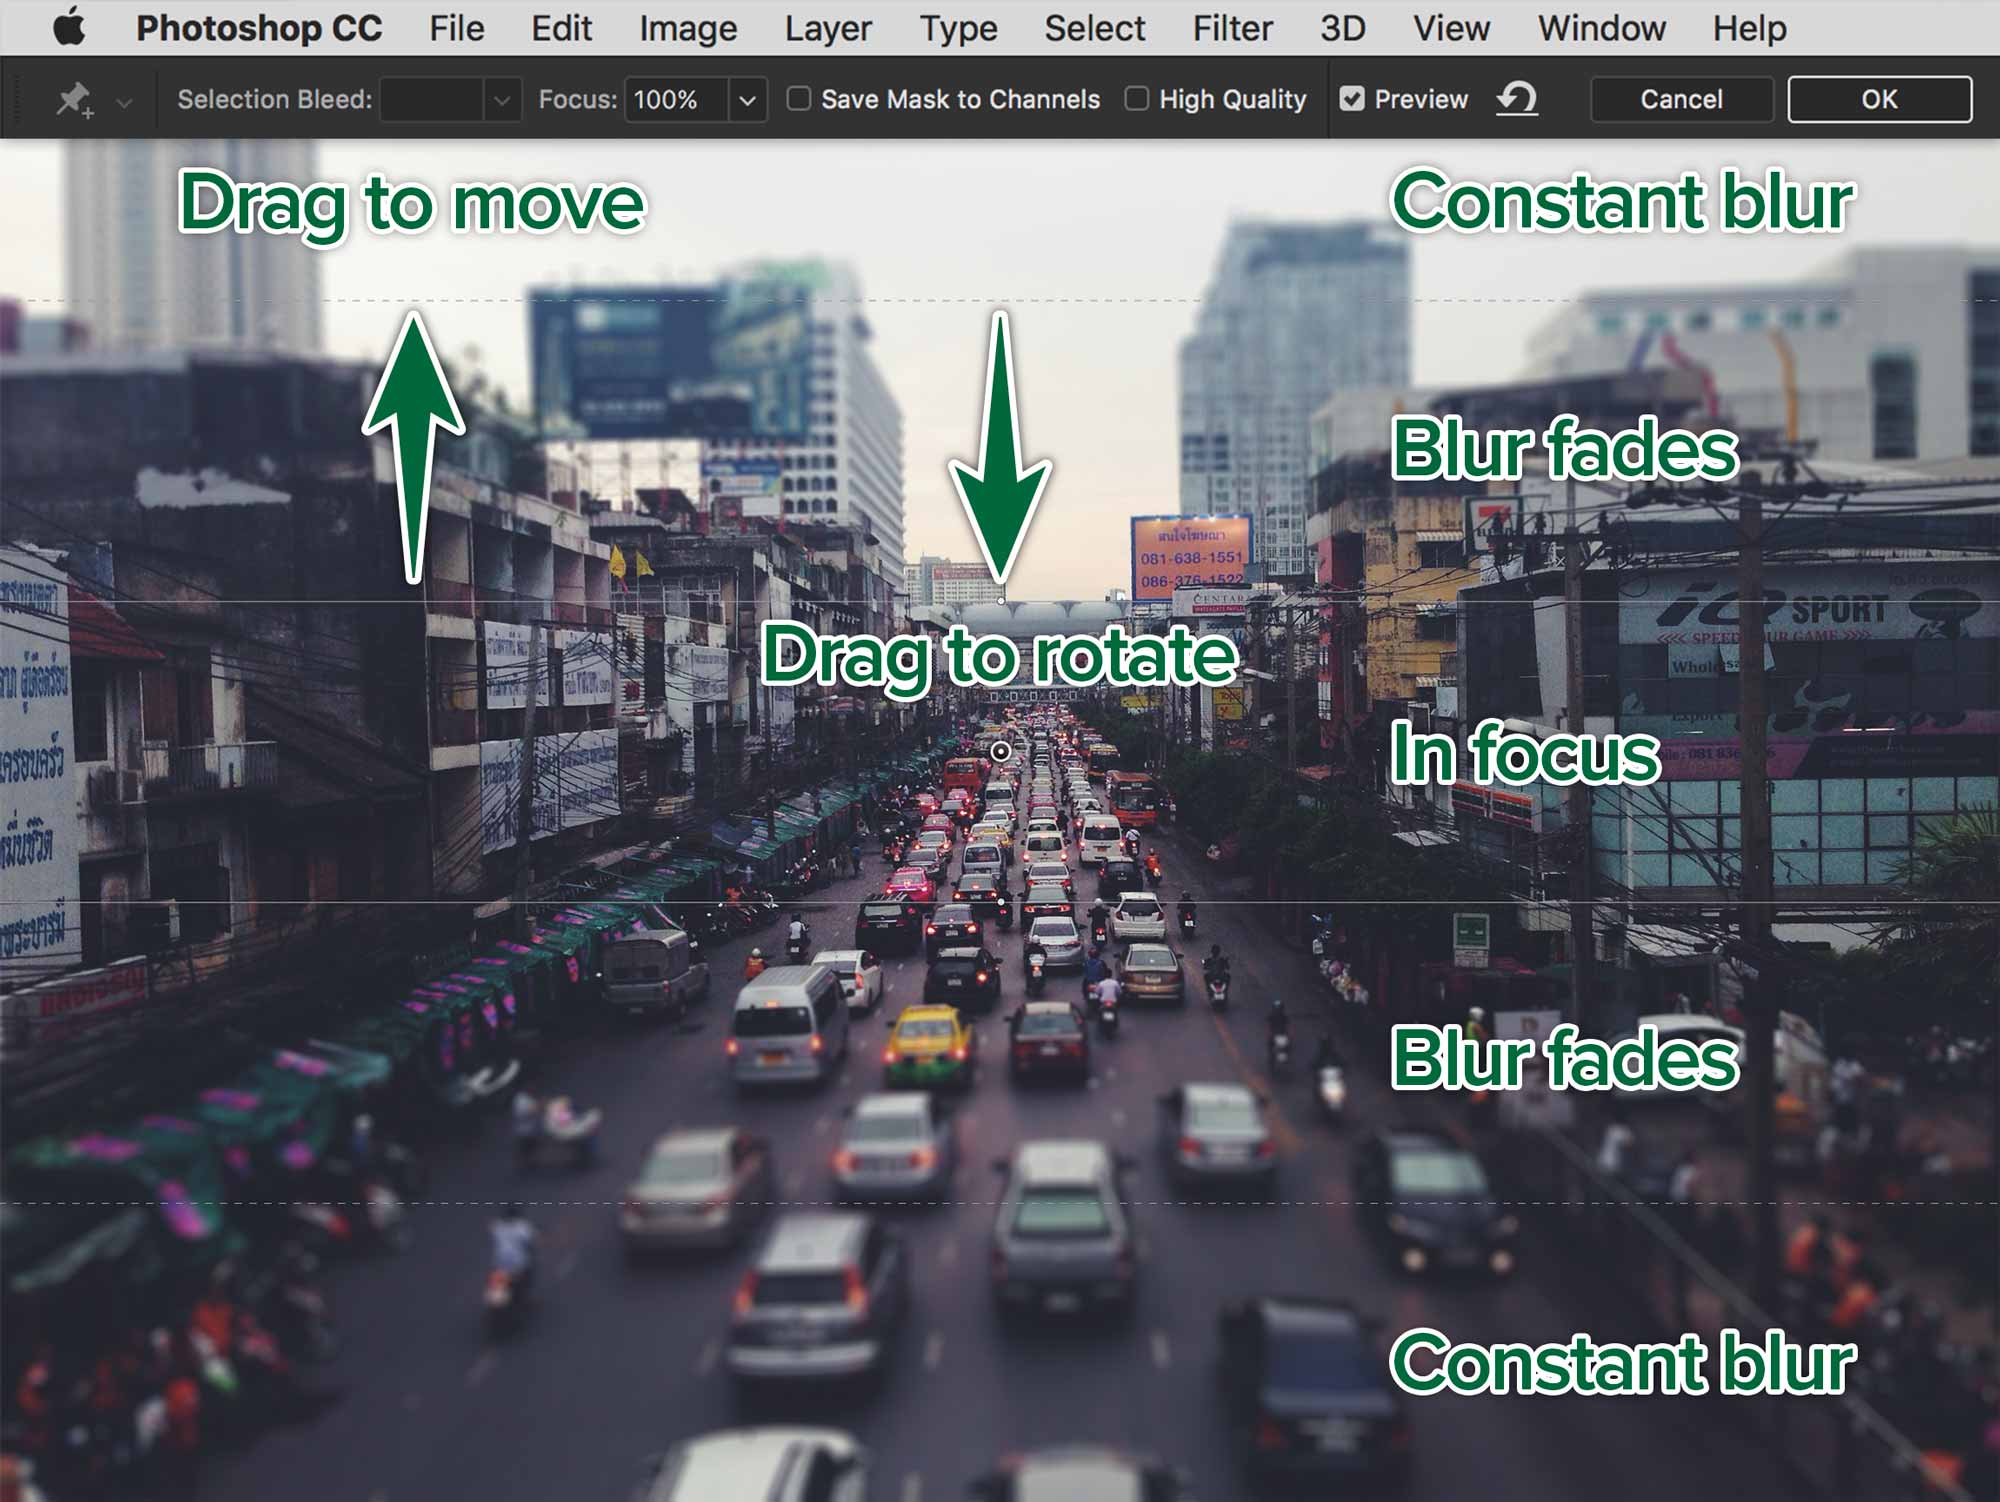
The blur effect is radial. Adobe: Use the Tilt-Shift effect to simulate an image taken with a tilt-shift lens. This special effect blur defines area of sharpness, and then fades to a blur at the edges. The Tilt-Shift effect can be used to simulate photos of miniature objects.
Formative Activity
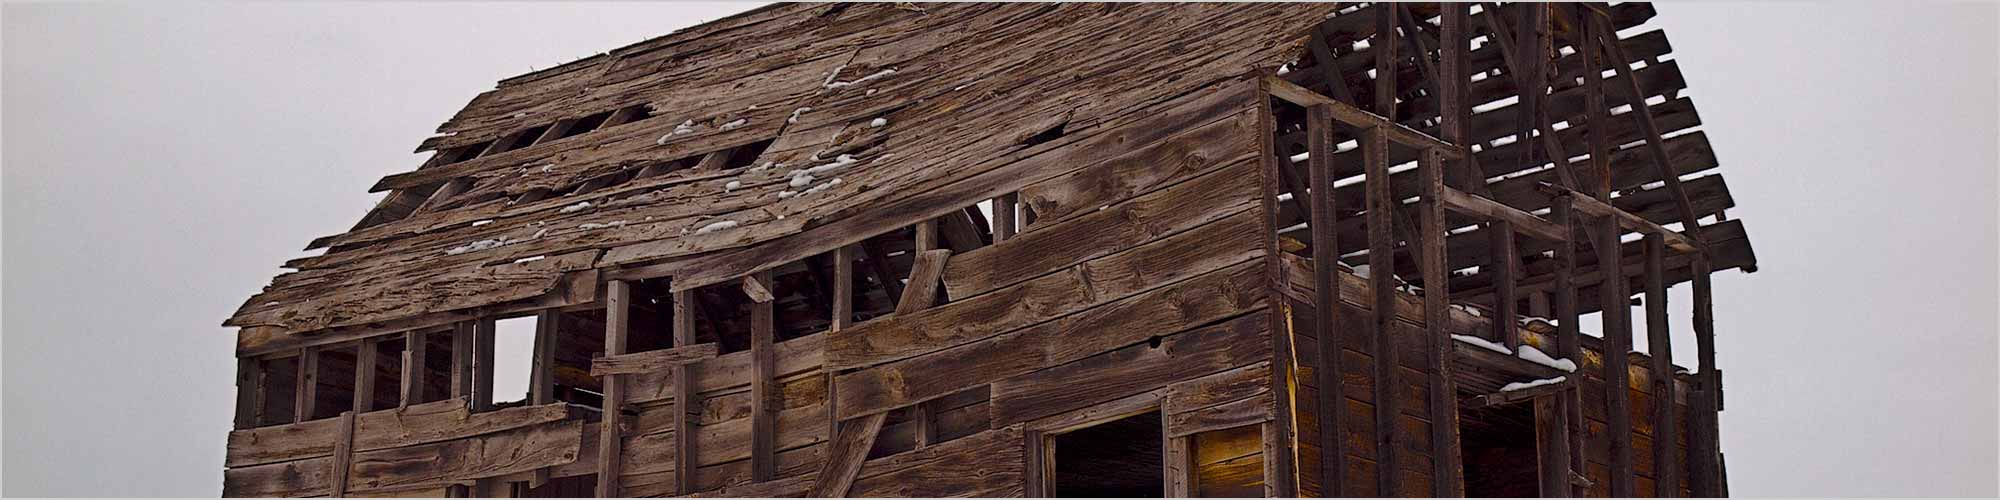
Sharpen
Sharpen the provided images with the techniques listed below. Be sure you Convert for Smart Filters at the outset.
Smart Sharpen
Sharpen with High Pass
Unsharp Mask
Shake Reduction
Blurs
Apply blurs from the Blur Gallery as shown below. Be sure you Convert for Smart Filters at the outset.
Field Blur
Iris Blur

Spin Blur
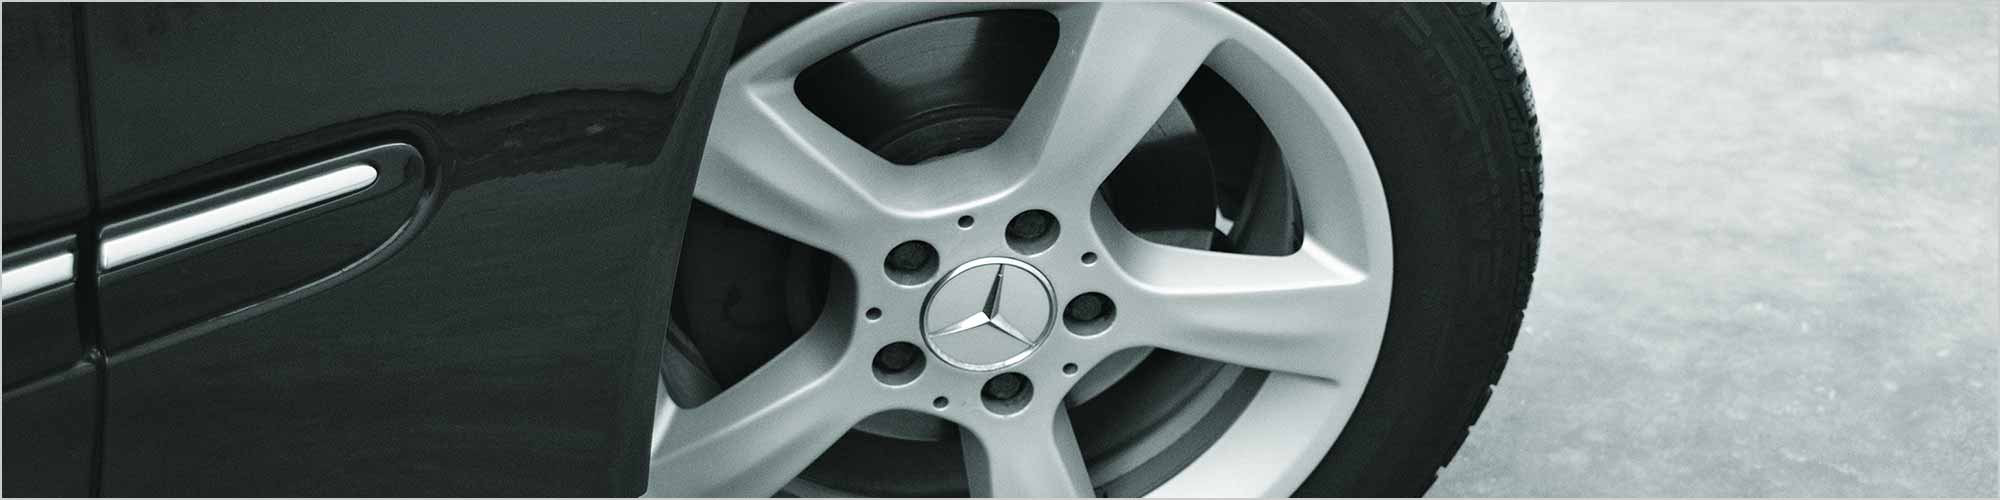
Once you’ve used the Spin Blur filter, you’ll need to paint out regions on the filter’s mask. You want to make sure you don’t blur the fender or the ground.
Tilt Shift Blur