Topics
A Gradient Mesh is a tool which allows you to add colours to your artwork in various directions and intensities. It’s more versatile and more intricate than a regular gradient. You can see some pretty amazing examples here.
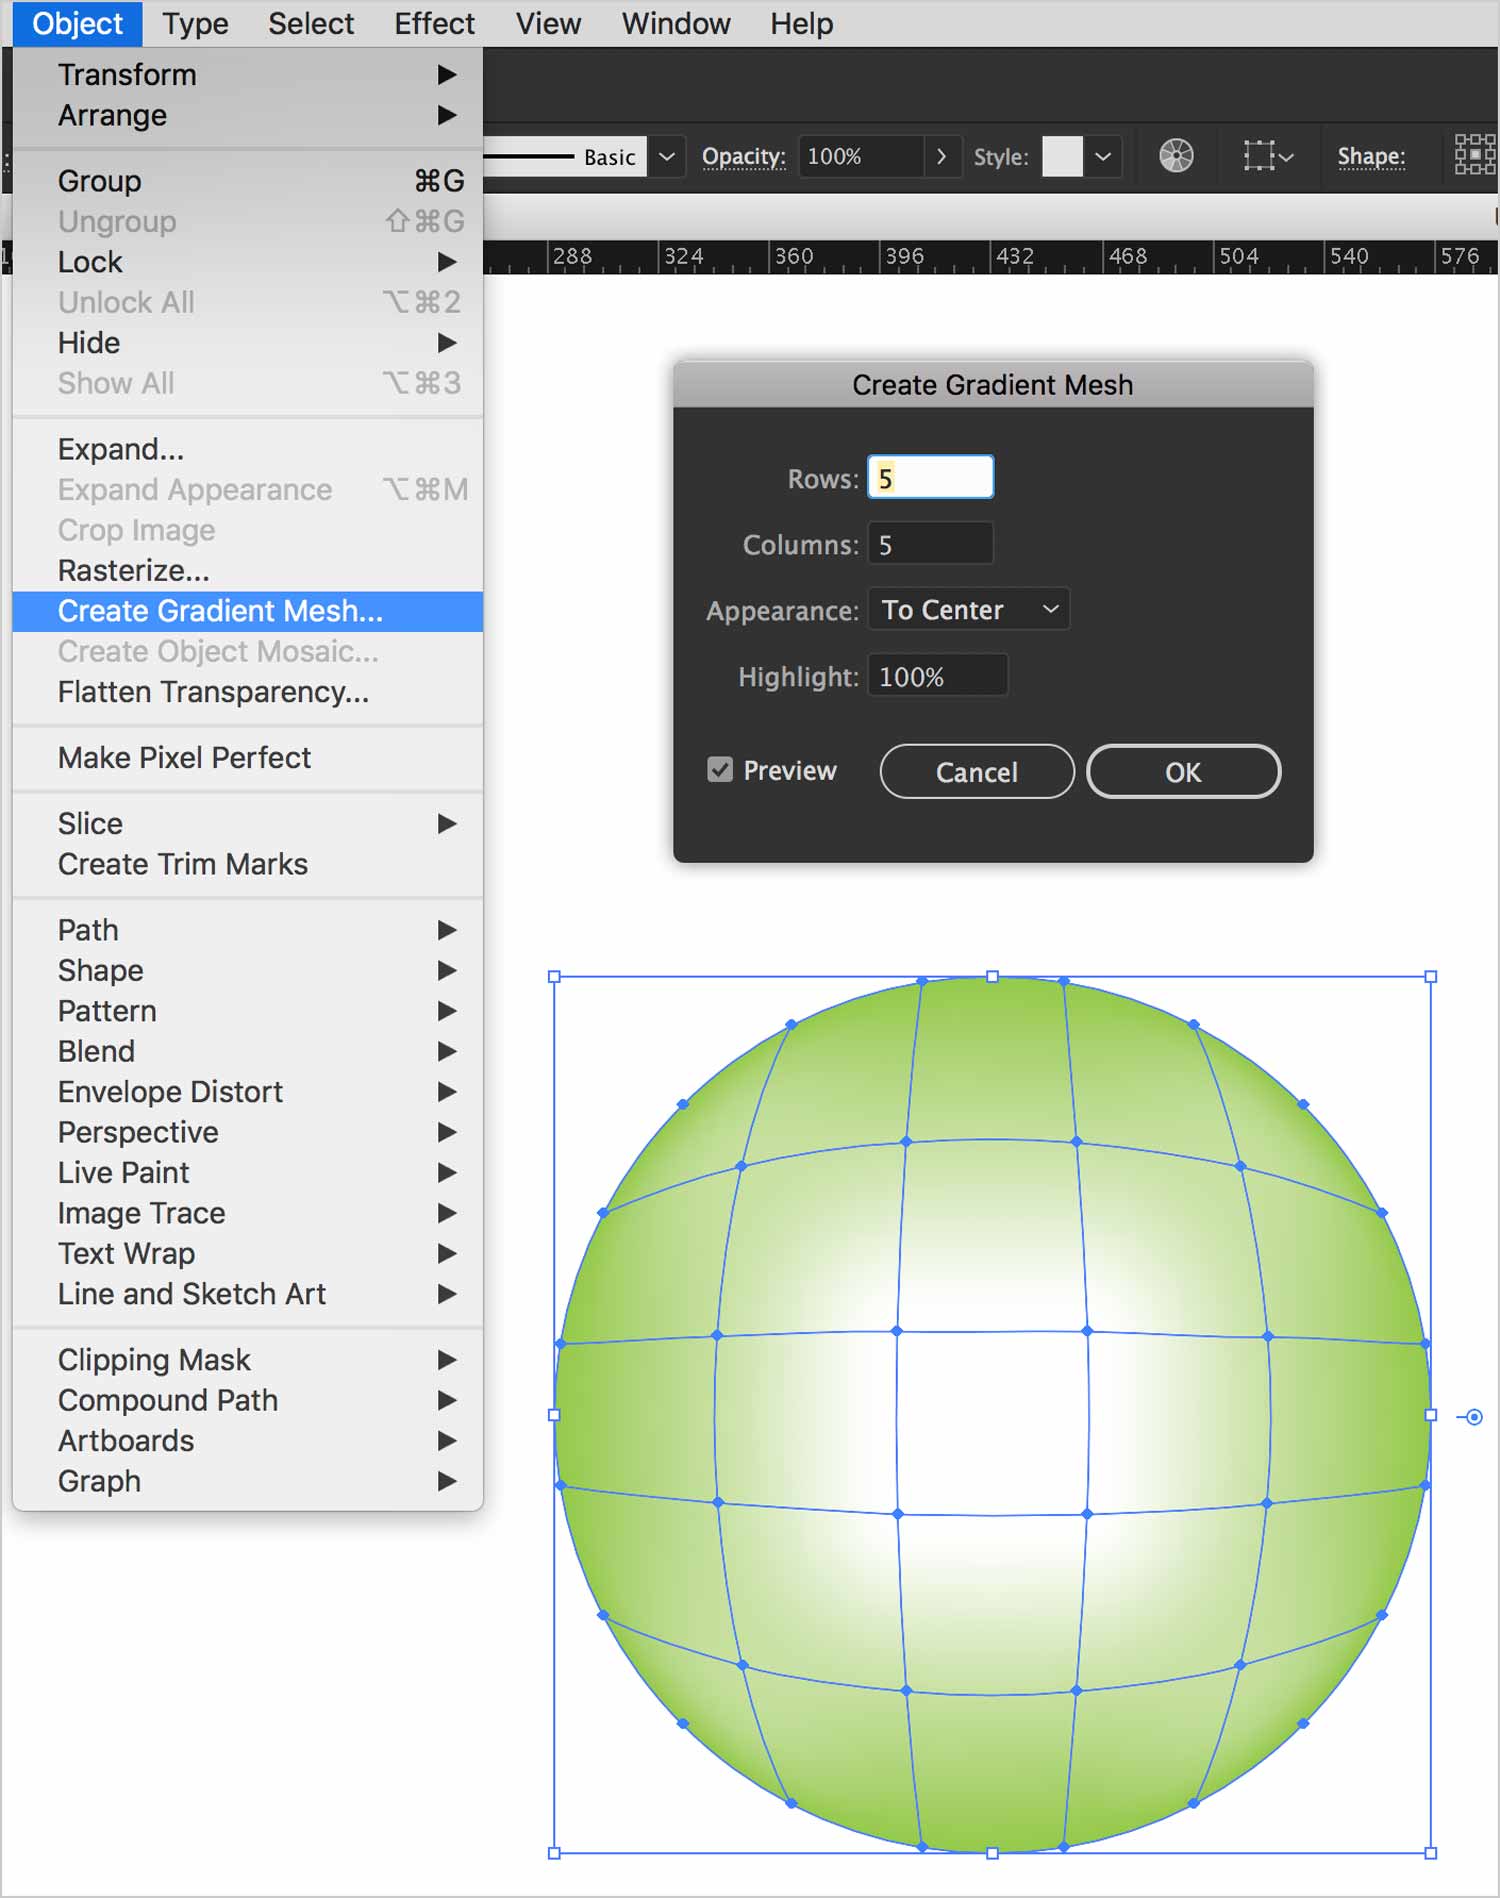
If you’re starting out with Gradient Meshes, it’s best to use Object > Gradien Mesh. Then you can choose options. This makes your mesh structure a lot easier to control.

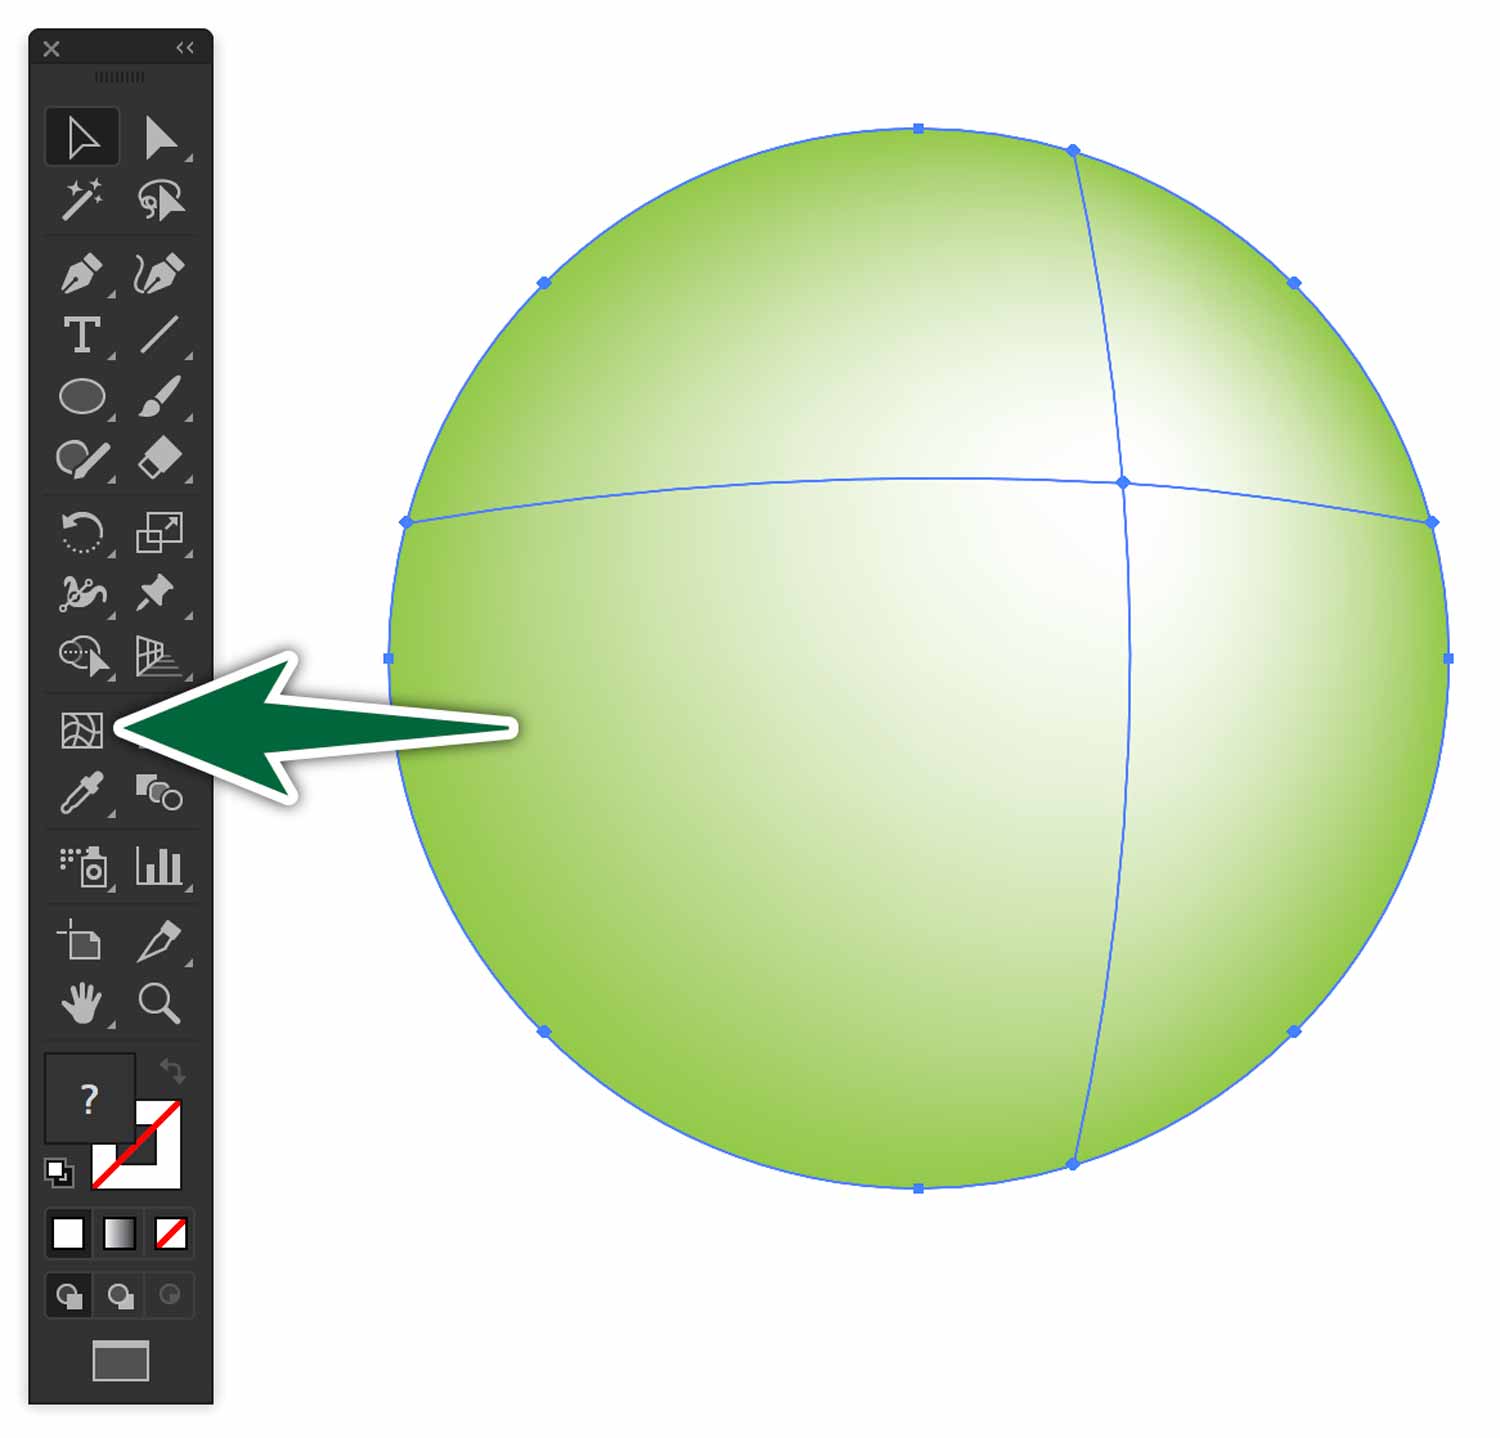
The other way of creating a Mesh is to click with the Mesh Tool on a selected shape. This converts it to a Mesh Object. There’s a difference between clicking on the edge of the object’s shape and clicking on its surface with the Gradient Mesh Tool. Go ahead and give it a try.

Drawing Meshes
Drawing a sphere:
- Draw a circle, then use Object > Create Gradient Mesh.
- Use your Direct Selection tool to select one anchor point on the circle. Change its colour to make it look like a sphere.
- You can also Shift-click with the Direct Selection tool in order to affect multiple Mesh Points.
Drawing a square:
- Create a square, then click on its edges with the Gradient Mesh tool to add Mesh Points.
- Recolouring these points doesn’t really look good. You can see how Mesh Points can easily get out of control.
We have the choice of applying colour to a whole Mesh Object, or you can use the Direct Selection tool to affect only selected anchor points.
When you select an Anchor Point with the Direct Selection tool, the Control Handles which appear show you how far out the new colour will go. The longer the Control Handles, the larger the coloured area.
You can affect Control Handles individually with the Convert Anchor Point tool.
You can click with the Mesh Tool to add Control Points. You can Option-click on them to remove them.
Meshes & Irregular Shapes
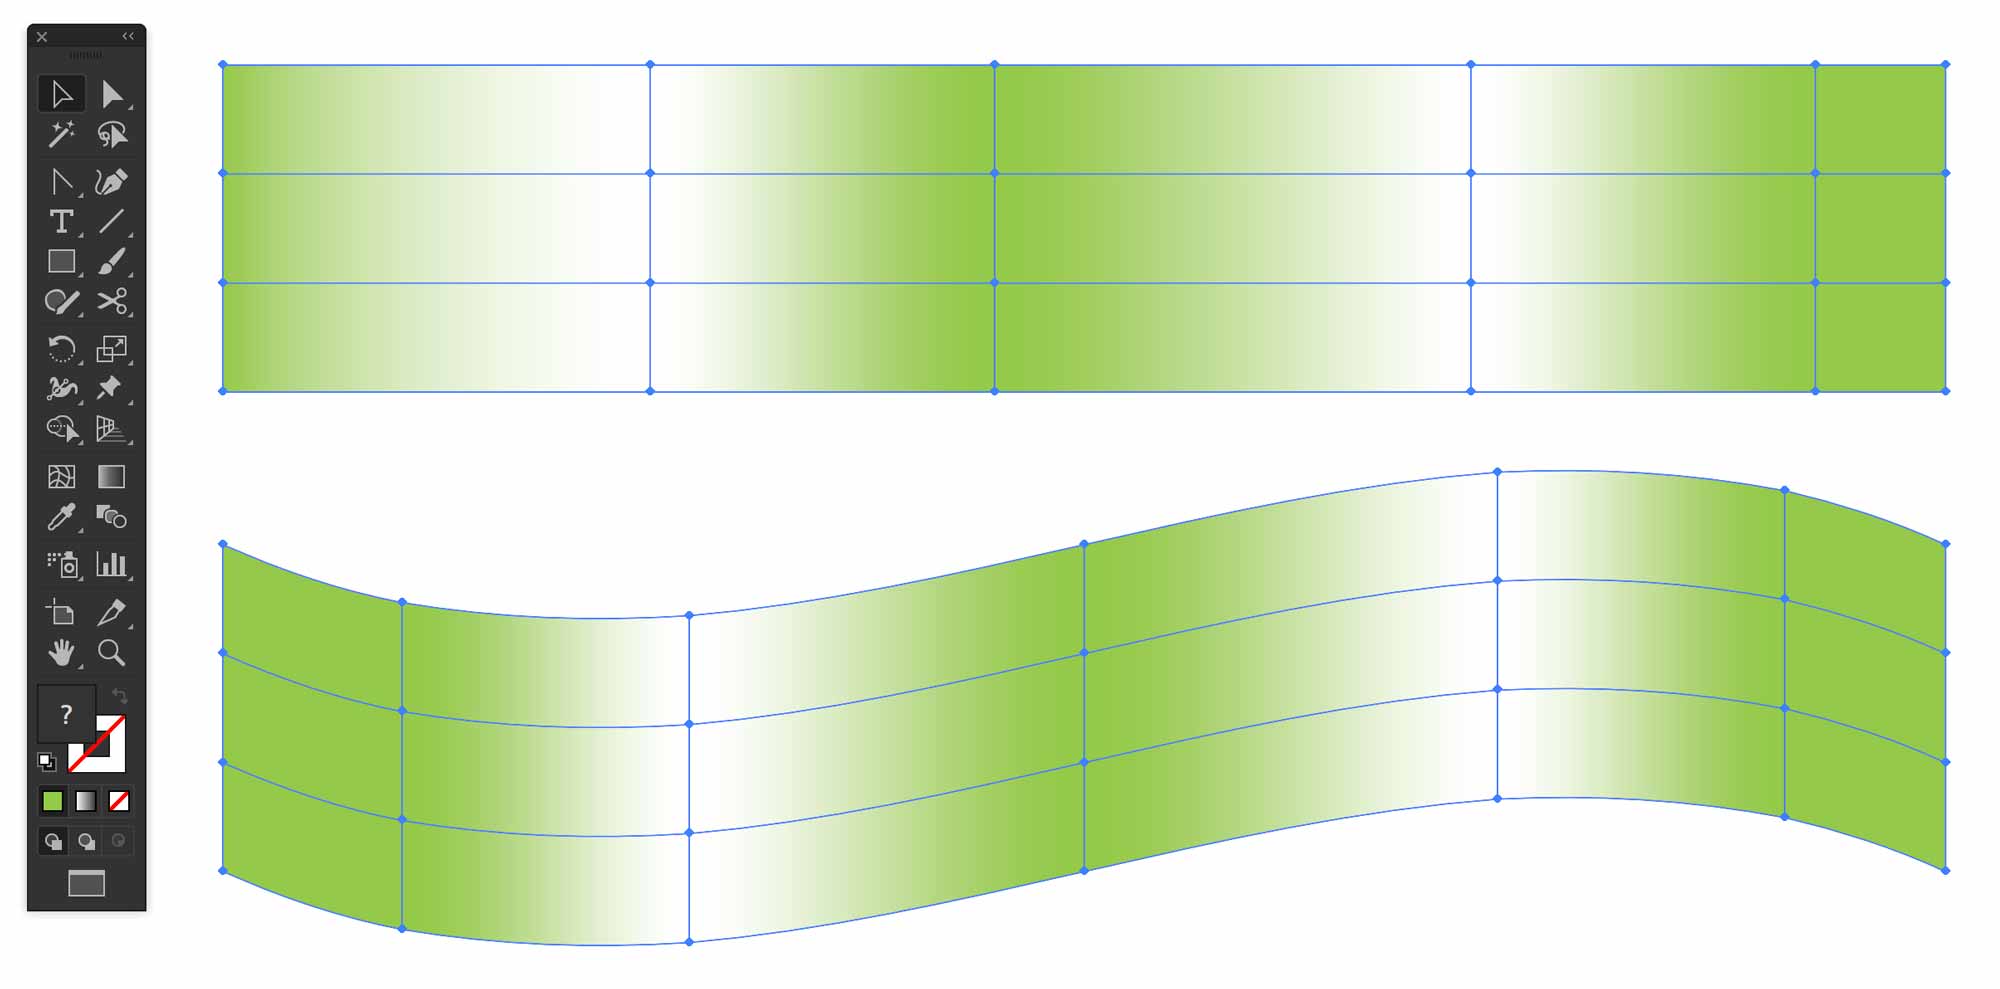
If you create irregular shapes like as shown below, the gradient mesh will be very difficult to control within that irregular shape. Better to create a simple shape, apply your mesh, then re-shape your object with something like Envelope Warp. All you need to do is expand it. So…
- Draw a long rectangle.
- Add a Gradient Mesh to it.
- Use Envelope Distort to warp it.
- Expand the shape.

Then your Gradient Mesh will better follow the profile of the shape.
Formative Activity
Create Gradient Meshes
We’ve practiced building basic shapes and applying Gradient Meshes to them. Now, let’s create more photo-realistic artwork with meshes. We’ll create meshes on the soccer ball to create detailed, realistic lighting effects.

As you add gradient meshes on individual shapes, it will be useful to lock others, so you don’t affect them. Use ⌘-2 to lock a selected object. Use Option-⌘-2 to unlock everything.
Once you’re done, save and close the image. We’ll move on to your assignment.


