Topics
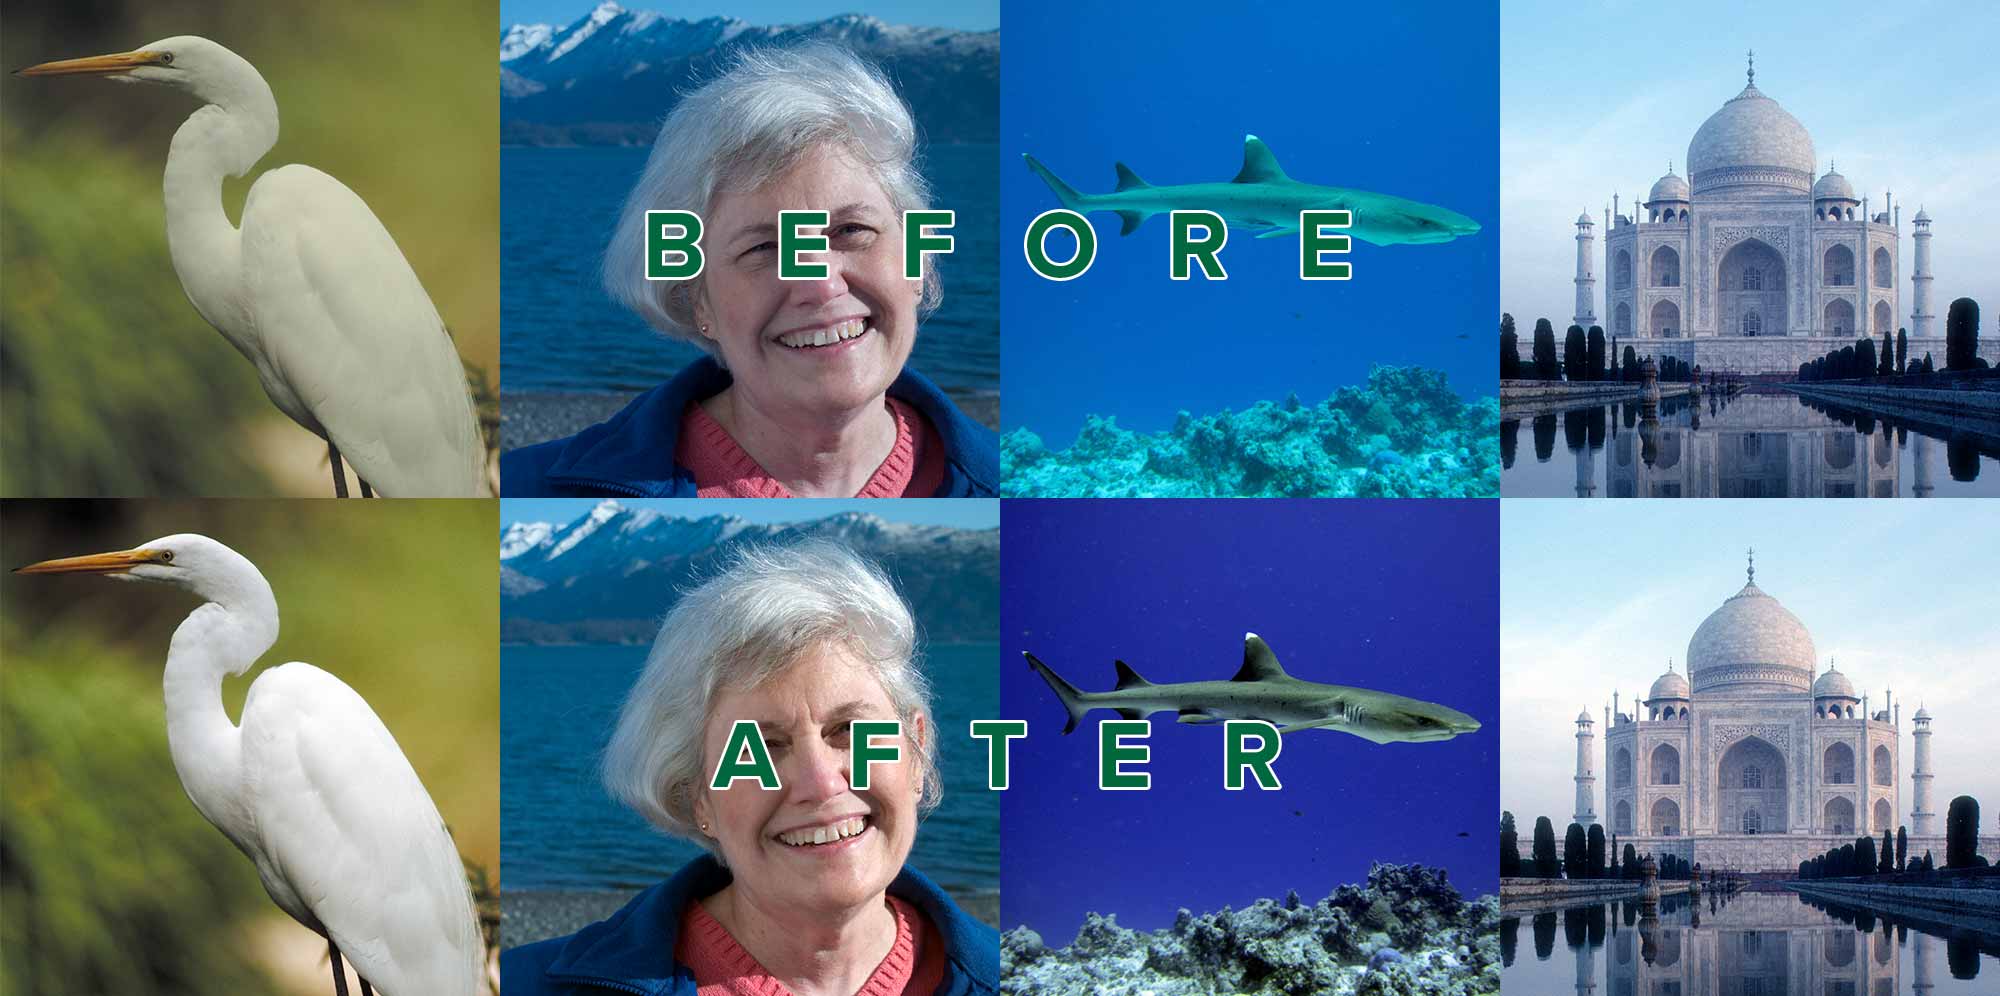
If you ask a thousand designers for their colour correction techniques, you’d likely get a thousand different techniques. A large majority of them involve a lot of guesswork and subjective adjustments.
The Fab Five
The five properties to address in colour correction:
- Tonal range: Adjust the lightest and darkest areas of the photo.
- Colour casts: Adjust mid tones to ensure they are indeed neutral (no colour casts).
- Contrast: Optimize contrast in key areas of the photo.
- Blur: Apply sharpening as needed.
- Sharpen: Sharpen non-destructively
Levels
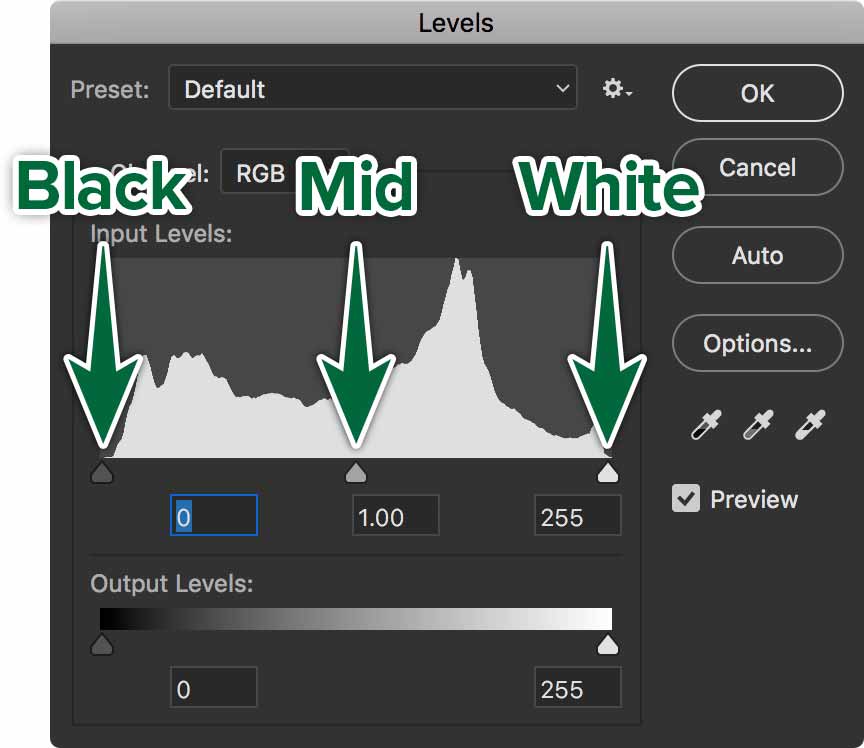
Moving the White Point or Black Point to the centre increases the contrast. Moving the mid point re-maps the mid tones of the image.
The Output levels are not used in colour correction, but they can be used to compensate for the lack of tonal range in a specific output device.
Ensure that you do not make too drastic changes within the Levels dialogue. This can cause banding (posterization).
The Eye Dropper tools within the Levels dialogue is used to set the light, mid and black points in the image. Simply select one of the tools and click in the corresponding area of the image.
As an option to using Threshold, holding ALT/OPTION after selecting the White/Black point adjustment tool will toggle Clipping preview and the Red pixels are the ones to target.
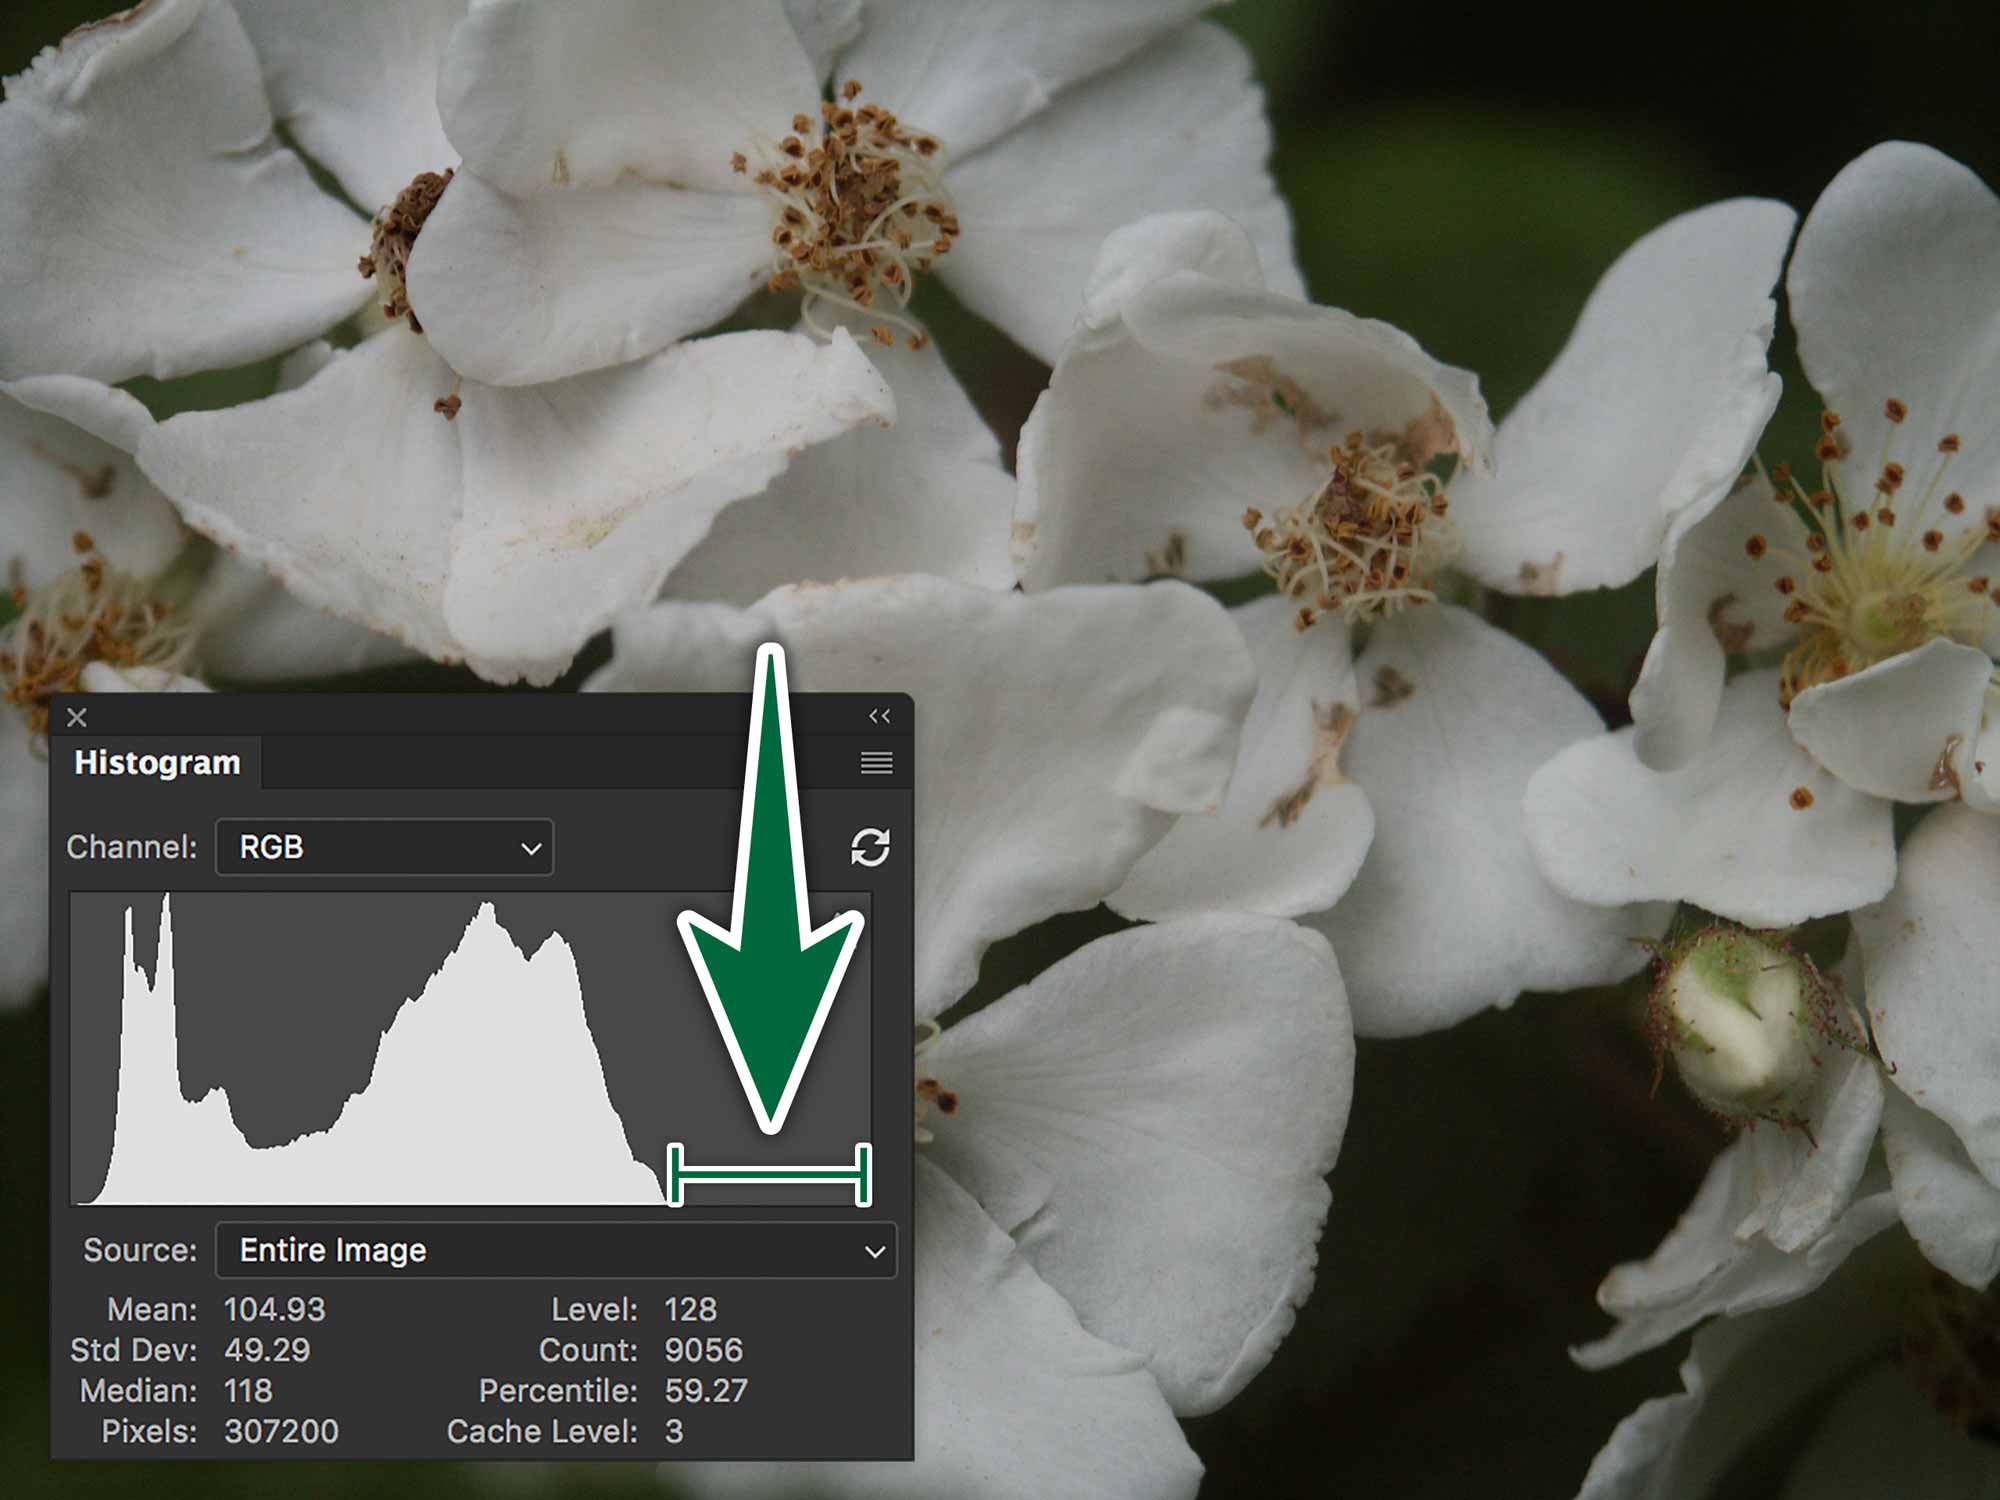
Set White Point
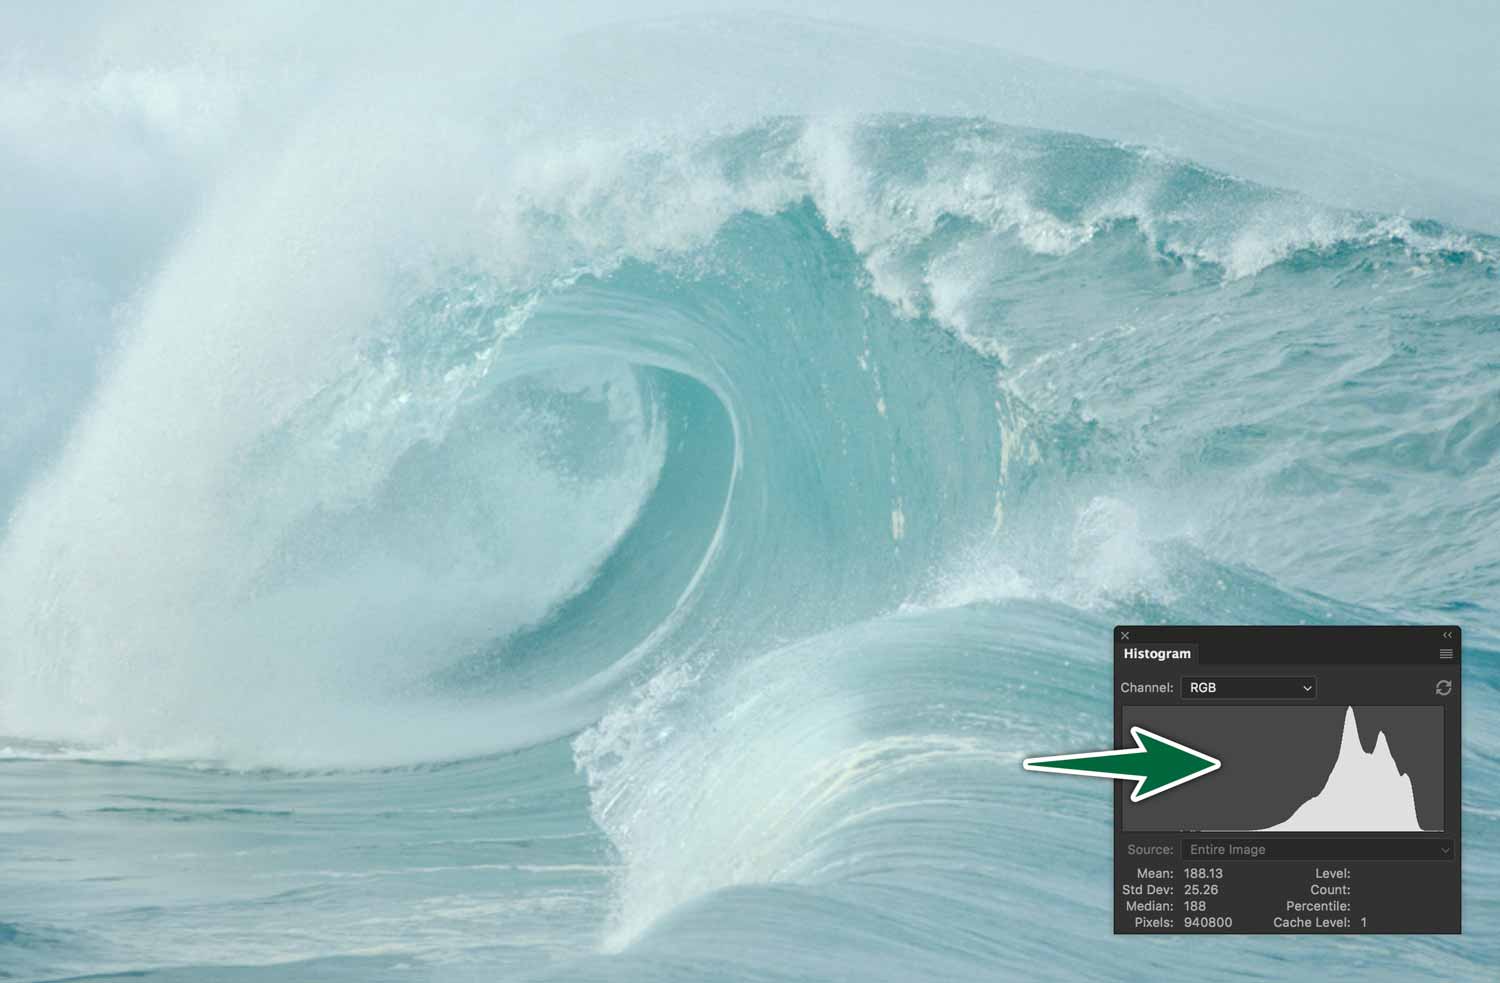
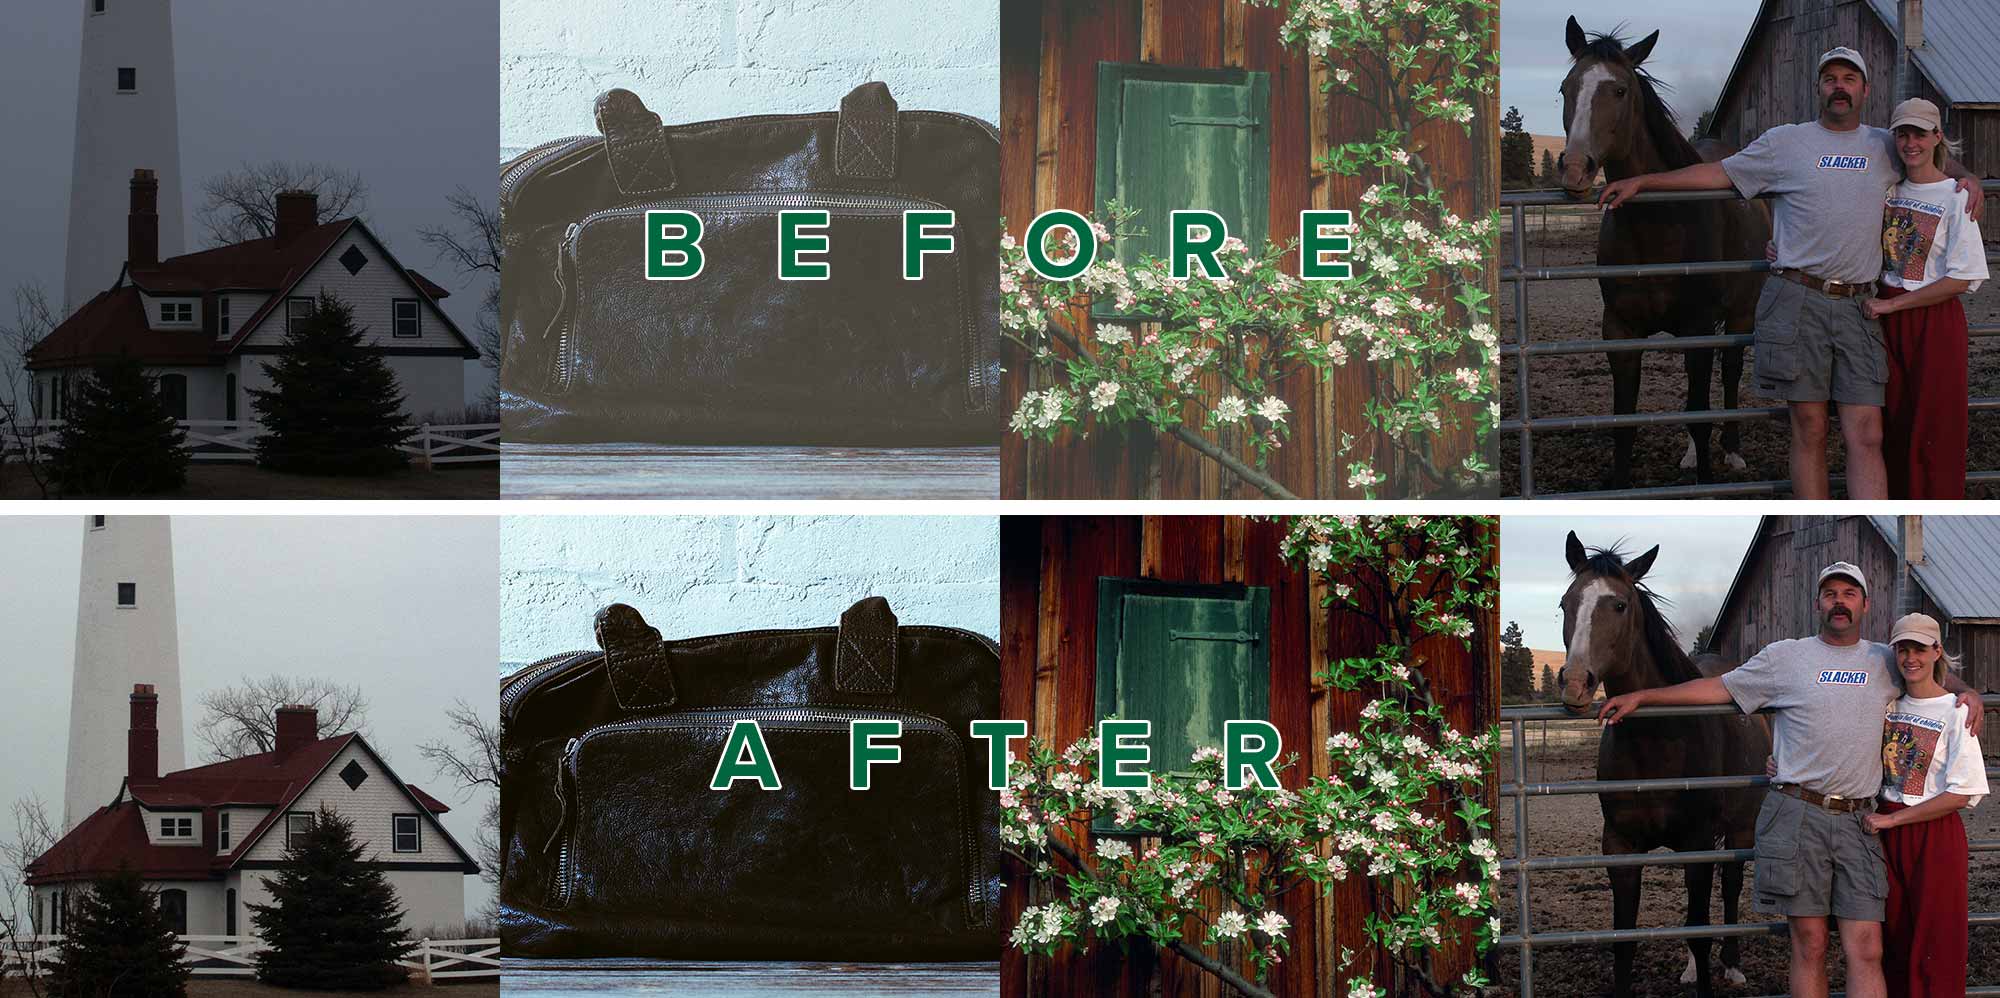
In the image below, you can see that whites are not actually white. That’s what we need to correct. You don’t need to guess at this. You can see the span indicated in the histogram that there’s a whole range of white missing from the photo.
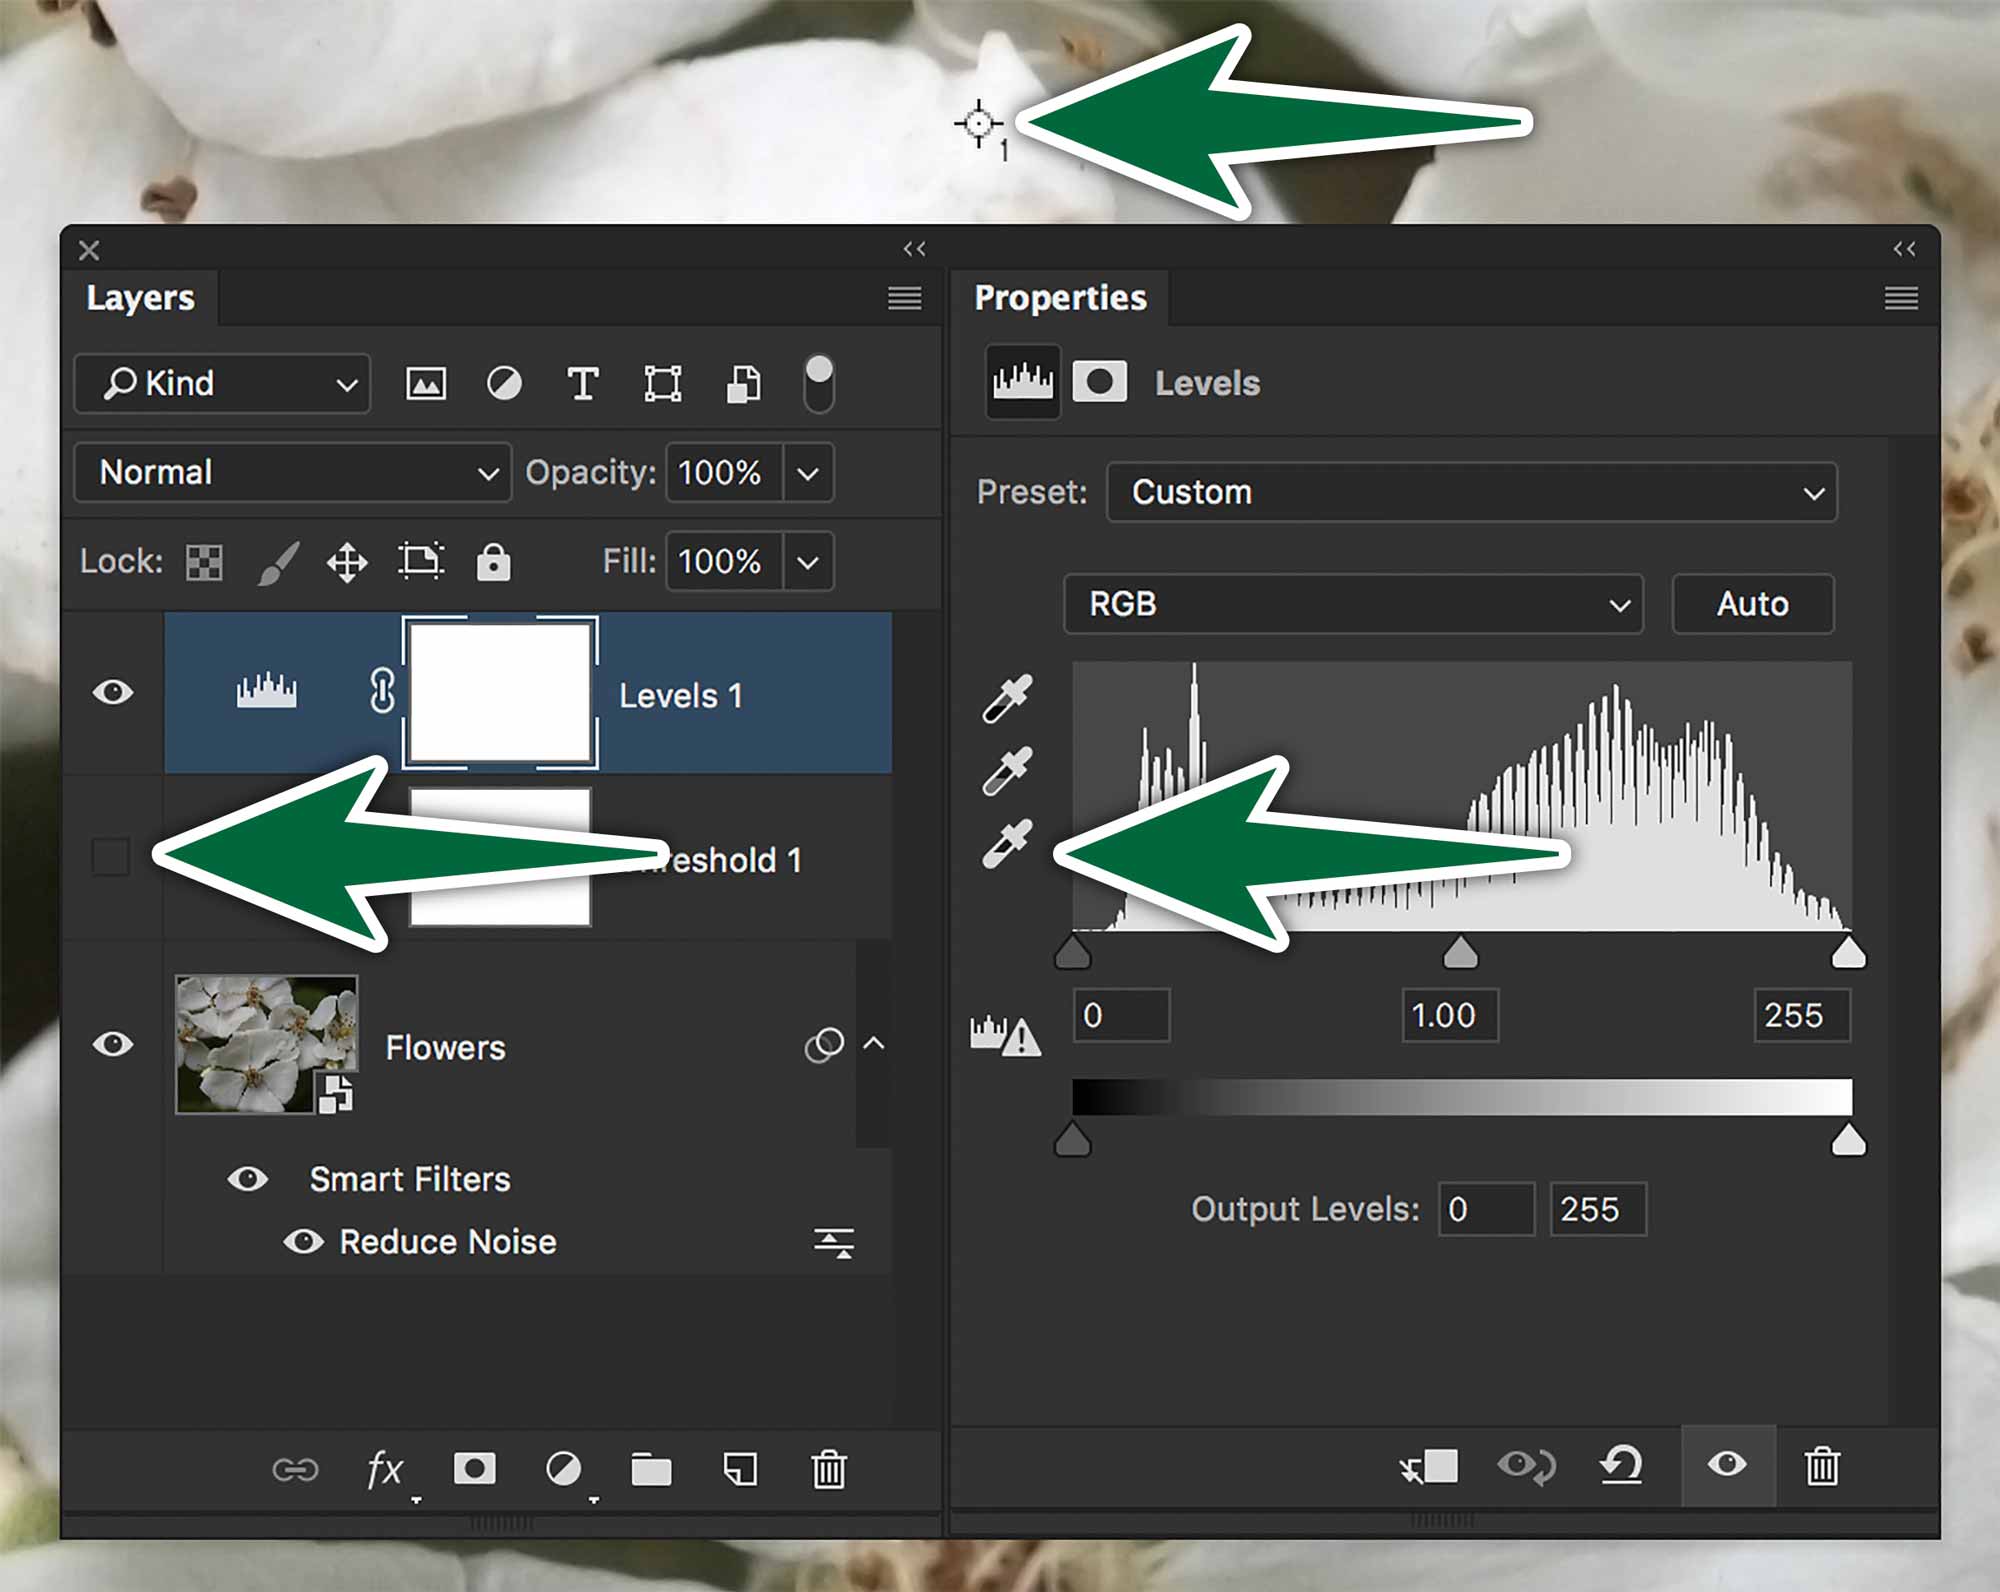
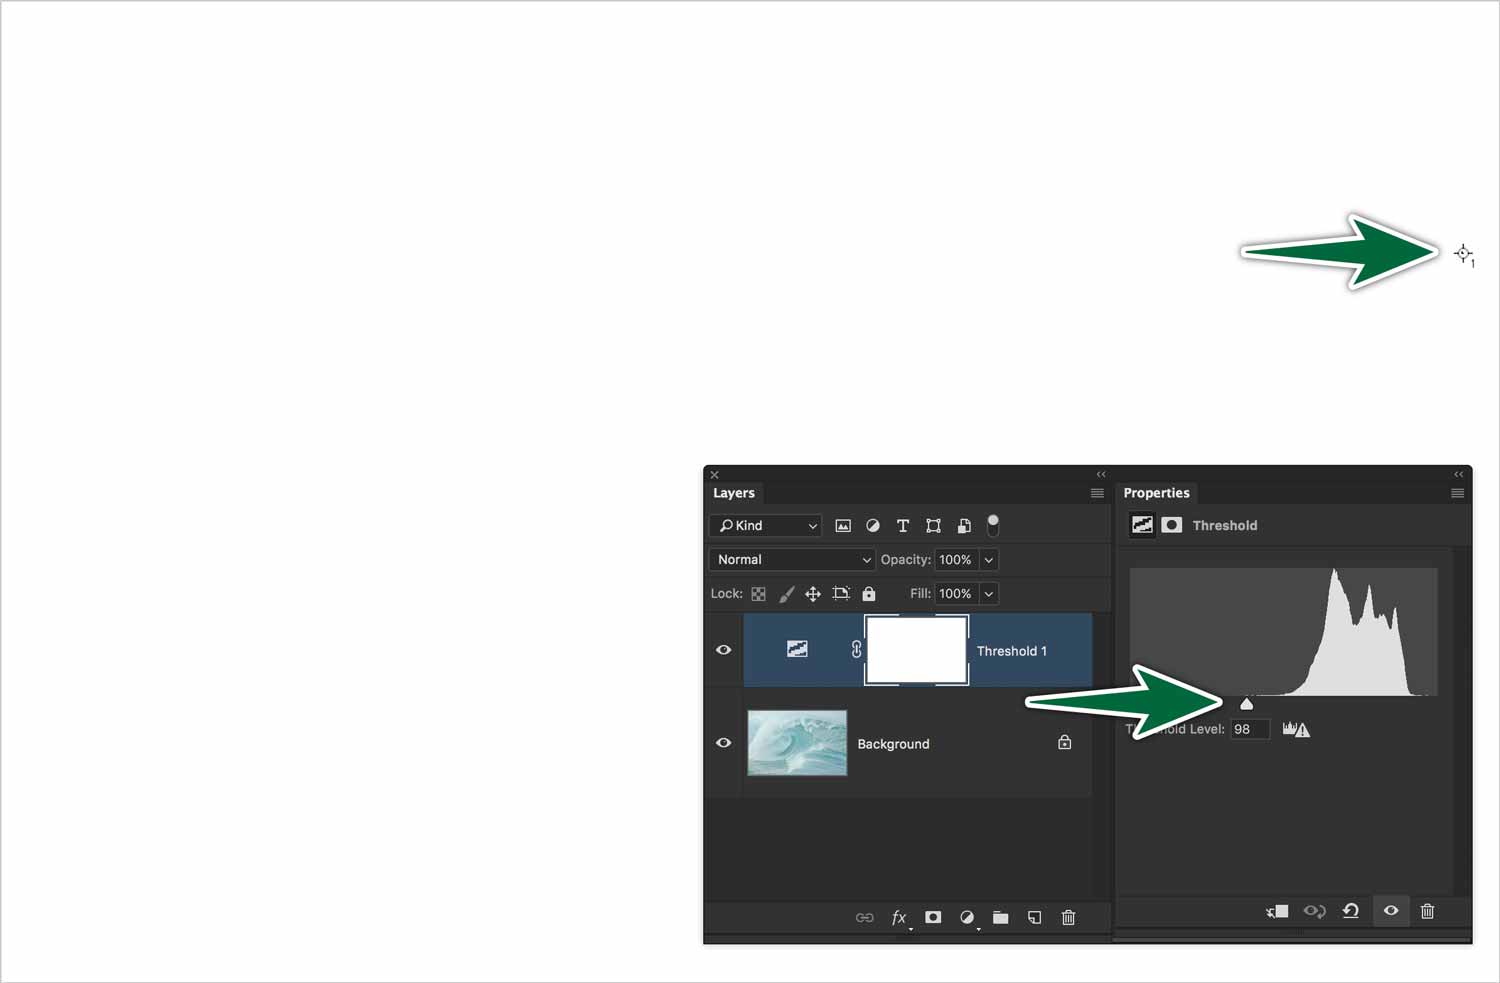
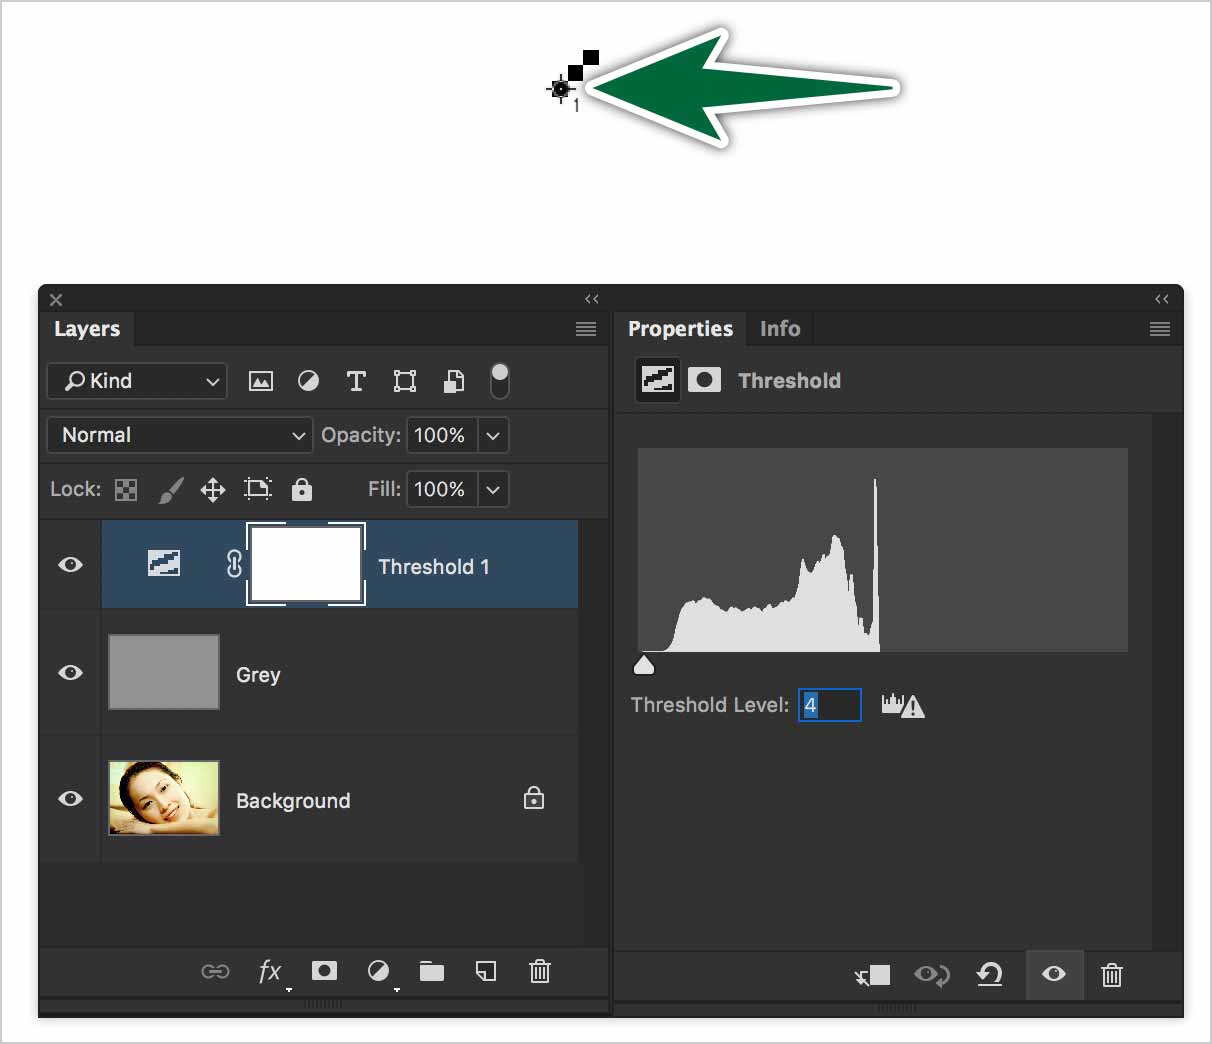
The first step is to find the current whitest pixel. Use a Threshold Adjustment Layer. Move the slider from the right towards the left until a white pixel apears on the screen. You should zoom in to find the actual whitest pixel.

The numbers for the marker we put down should be 255, which would indicate a totally white white. White is 255 of 255. Black is 0/255.
Now that we have identified the current lightest pixel (white isn’t actually white) we’ll use a Levels Adjustment Layer to make it actually white (255 of 255) without guess-work.
Set Black Point
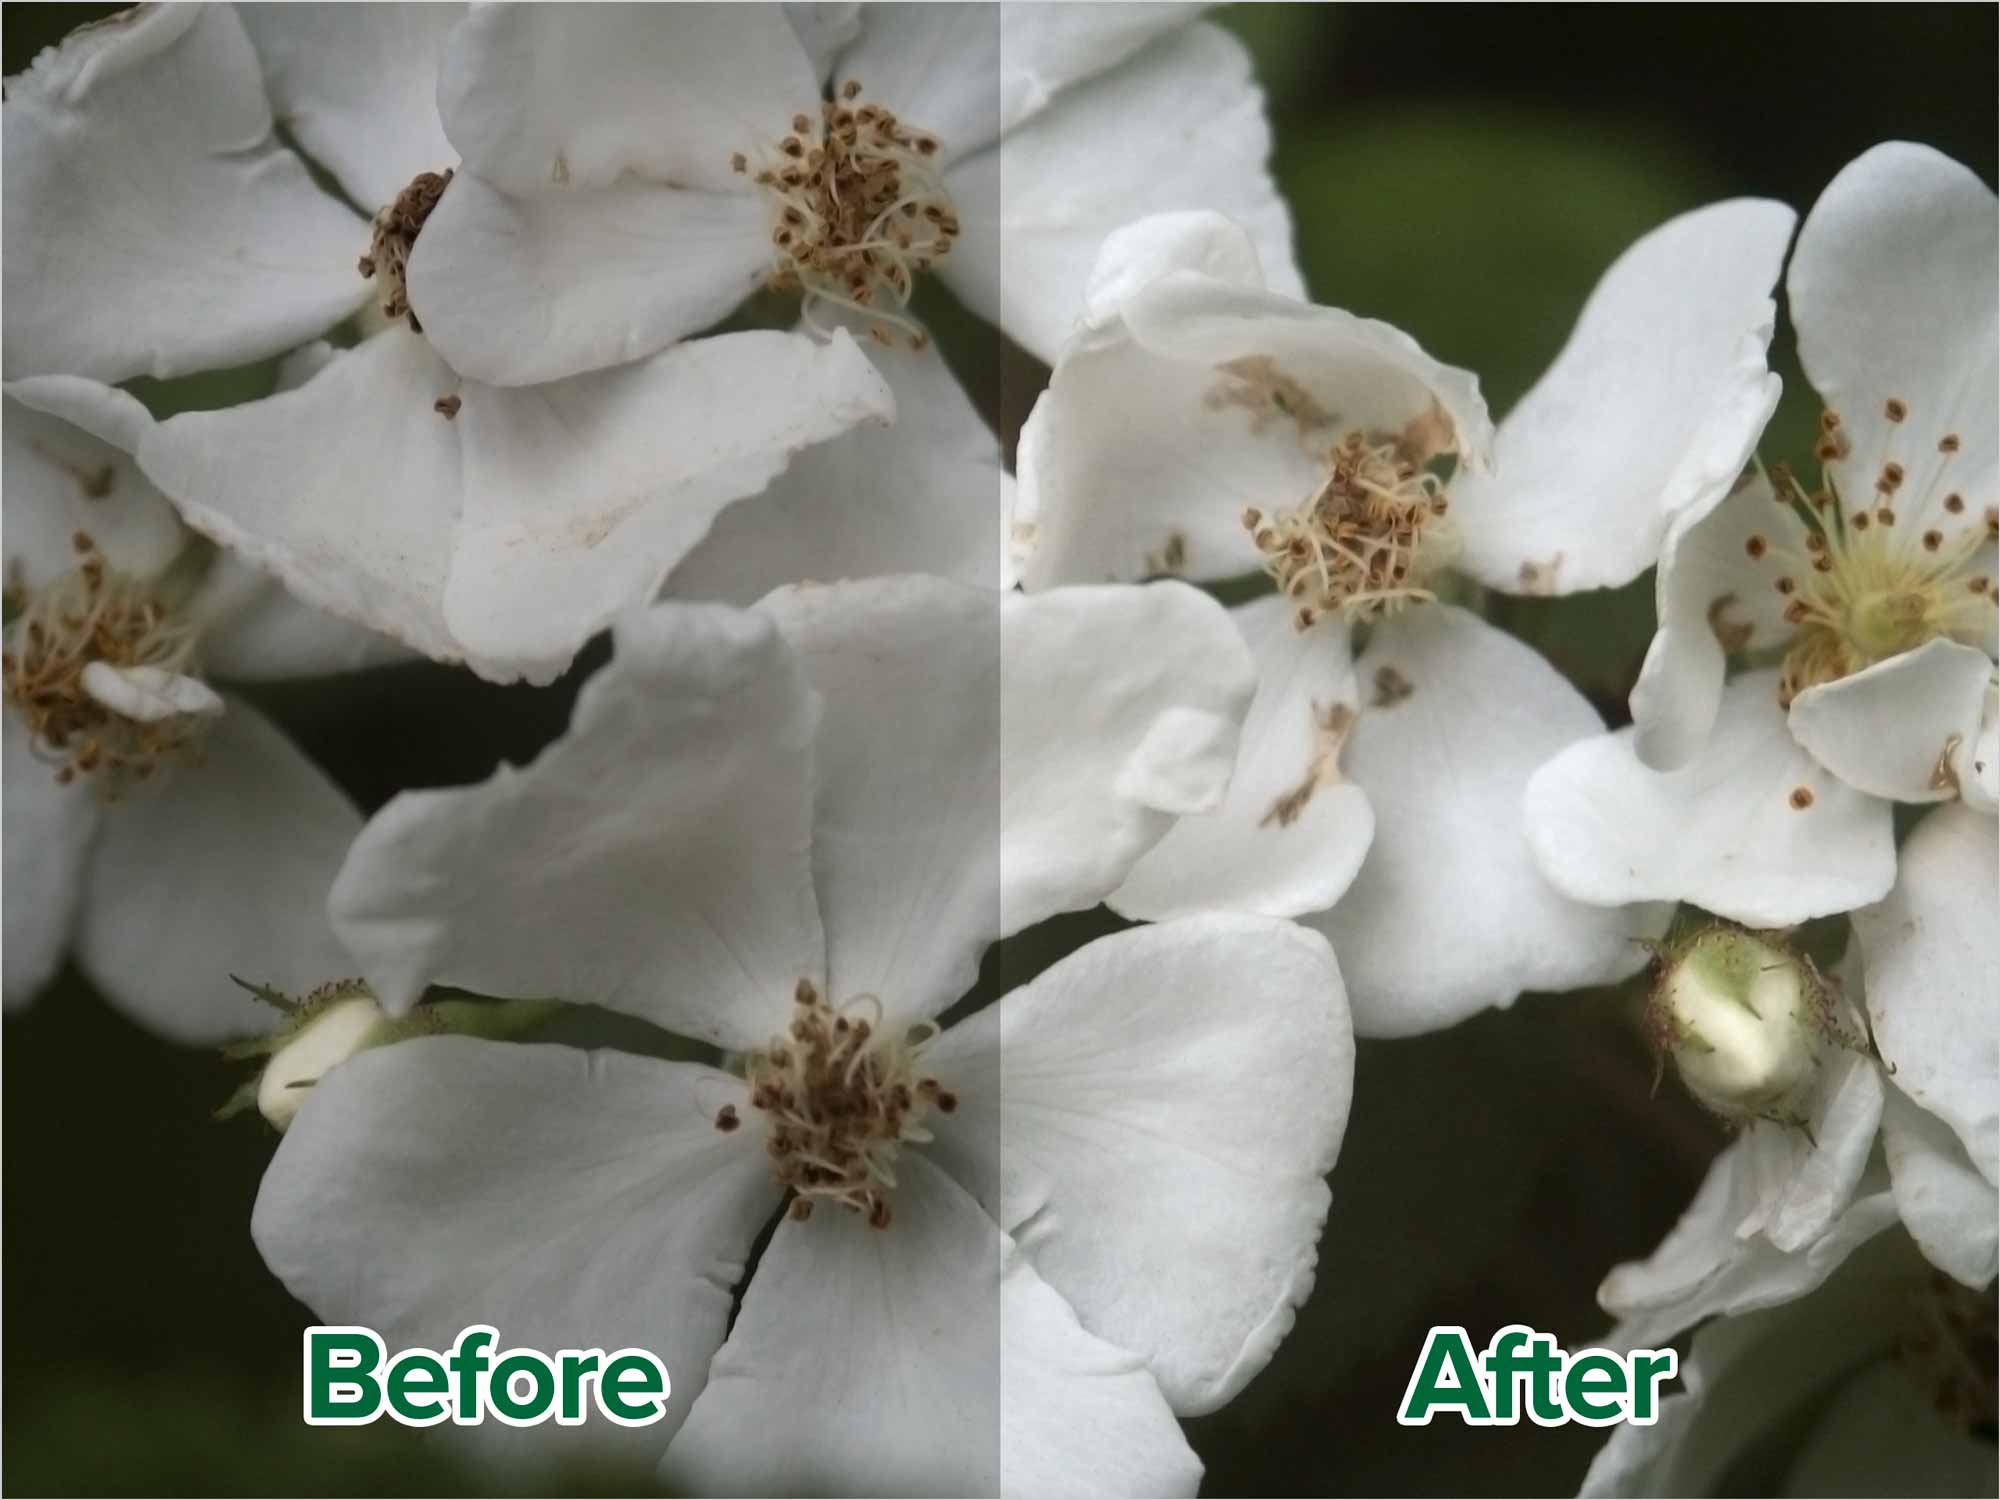
When you find a washed out photo, it often means that blacks are not actually black. We’ll find the current darkest pixel in the photo. We’ll make it black, which will pull all the other pixels in a darker direction.
In the image below, you can see that the histogram is shifted way over to the right. That means that the darkest colours in the photo are nowhere near black. We need to correct that.
Before we can set a new black point, we need to find the current darkest pixel in our photo. The problem is that this darkest pixel isn’t actually black.
The first step is to find the darkest pixel in the image. We use a Threshold Adjustment Layer to do so. Add a Threshold Adjustment Layer. To find the black point, move the slider all the way to the left, then gradually move it towards the right, until a black pixel appears on the screen. You may need to zoom in to see the very first pixel.
Mark that pixel with the Eye Dropper tool by shift-clicking on it. This will leave a marker, as shown above.
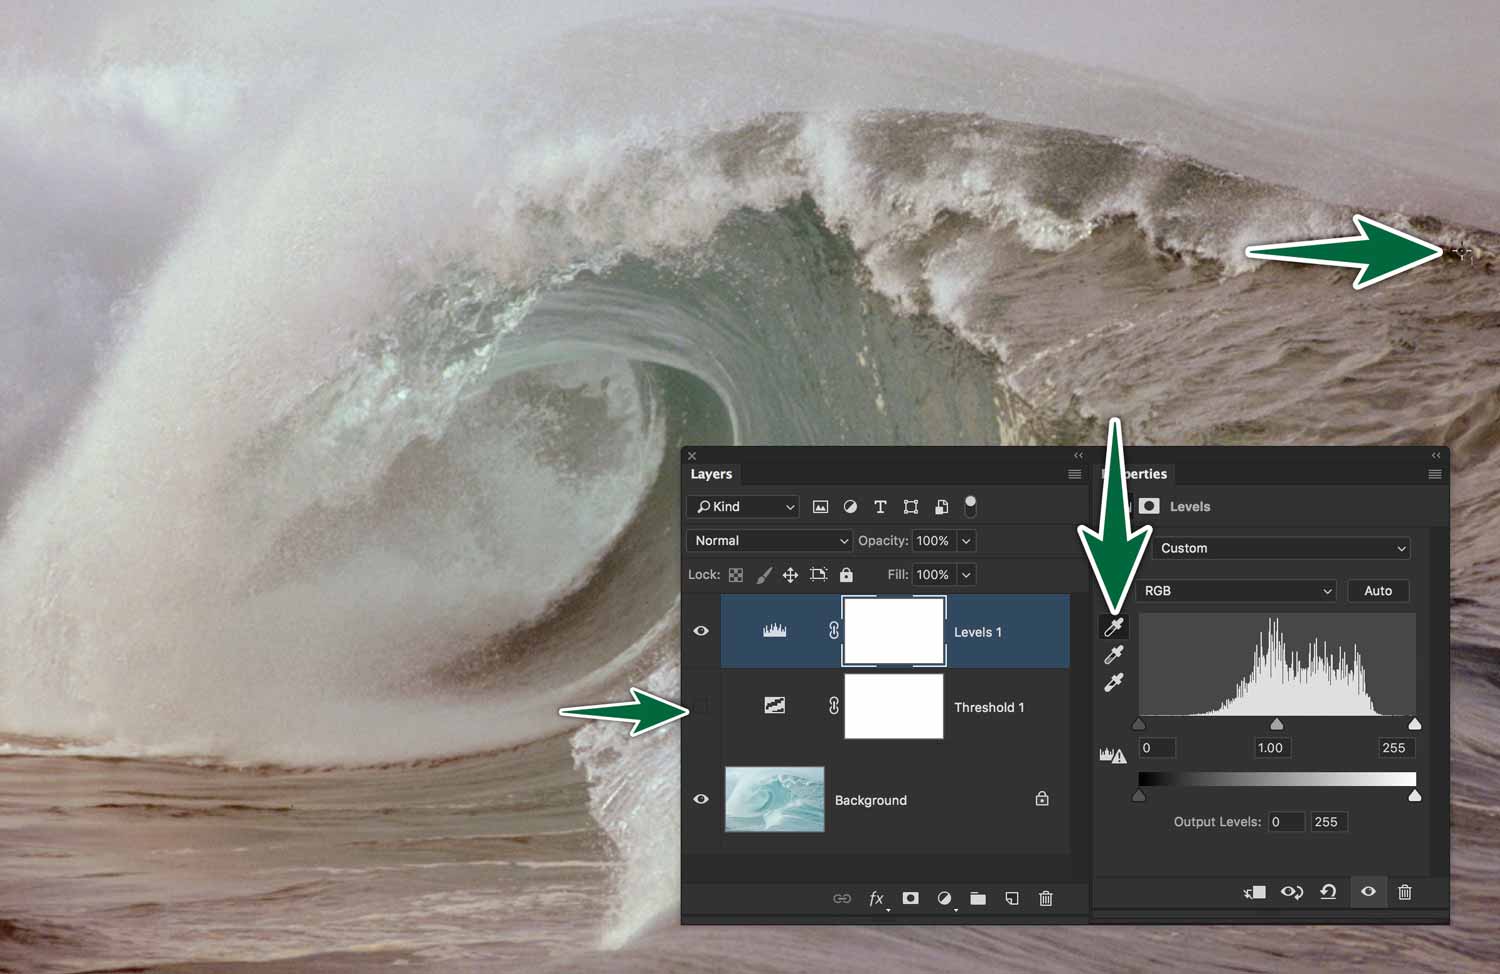
Now, we’re ready to set the black point. We can hide the visibility of the Threshold layer. Add a Levels Adjustment Layer. Use its Black Point tool to click on the marker you placed on the image. This will shift the histogram as shown above.
The pixel we orginally marked was not black. Now it is. You can test this by zooming in on the marker, then sampling it with your Eye Dropper tool.
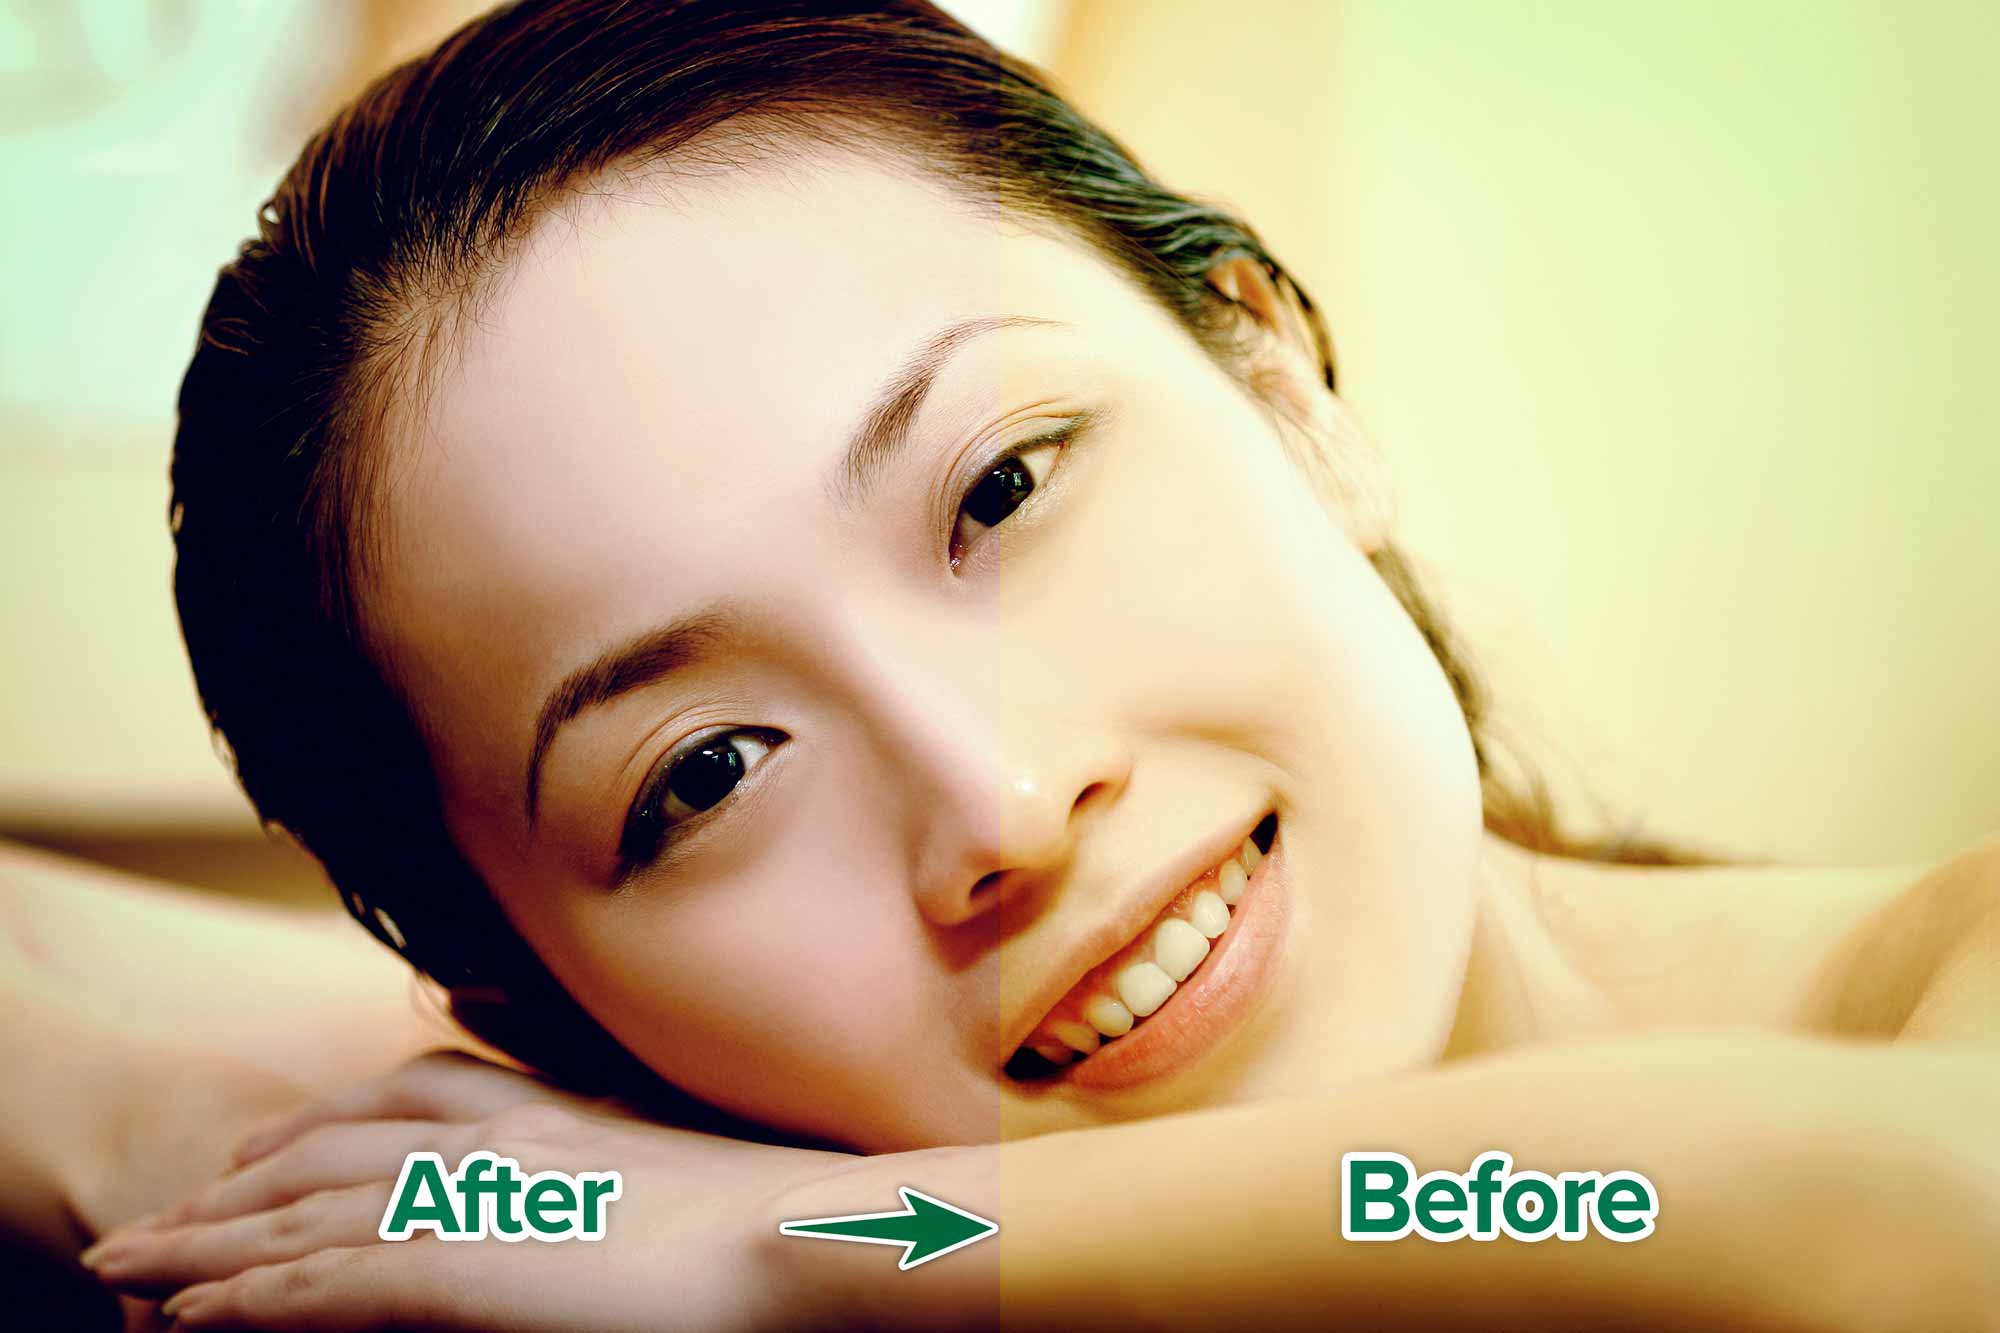
Remove a Colour Cast
A photo taken in an brightly coloured environment can often cause a colour cast on the subject. We want to neutralize this effect. The first step is to determine what colour the cast is. For this, we’ll use a cool little layers trick.

Start by adding a new empty layer on top of the photo. Fill it with 50% grey. After you’ve filled the layer, switch the blend mode to Difference in the Layers panel.
Now on a new Threshold Adjustment Layer, drag the slider from left to right until a black pixel appears. Mark it with a Shift-click of the Eye Dropper tool.
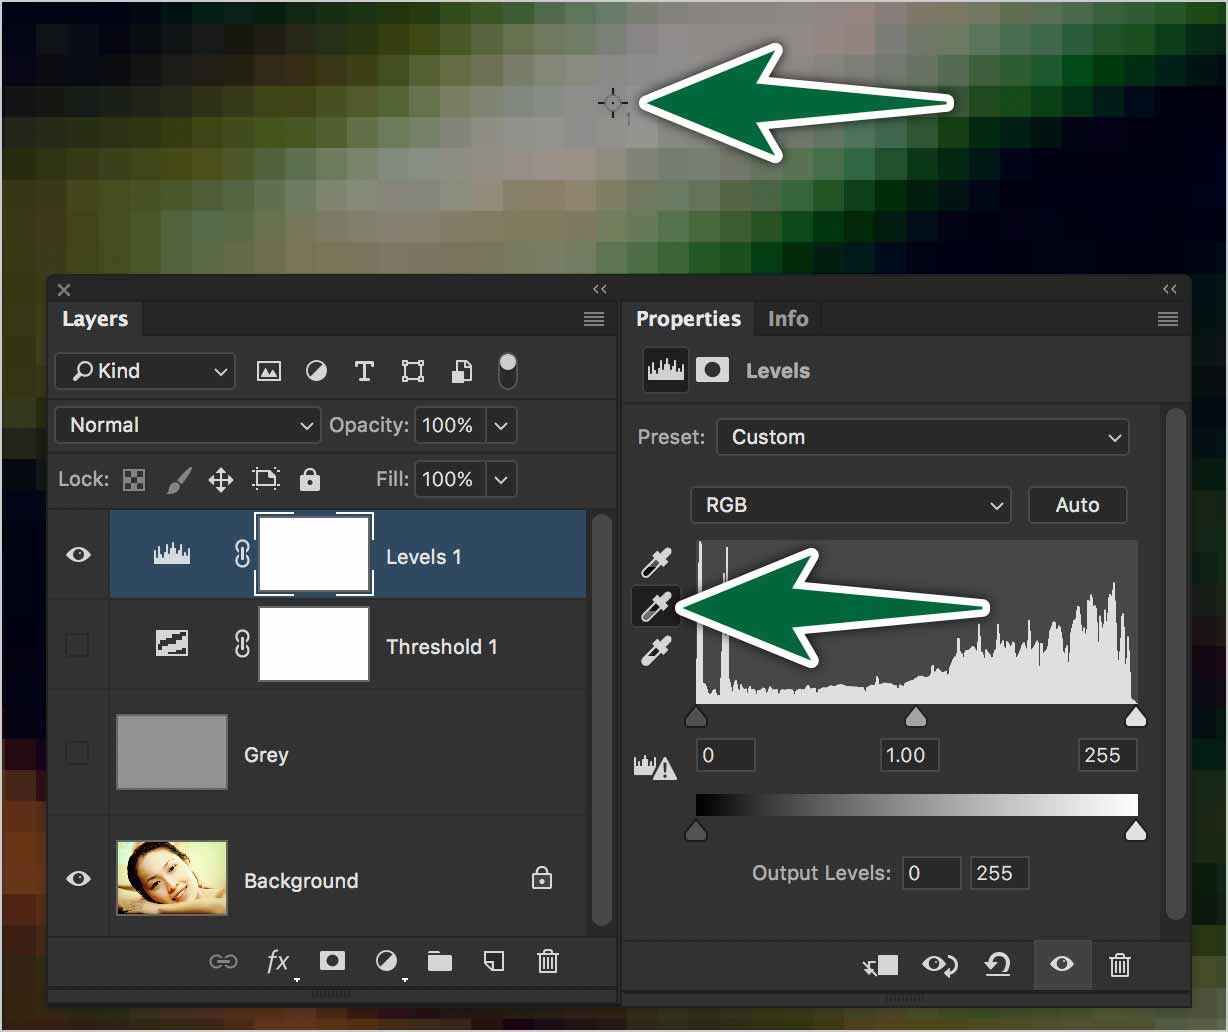
Add a Levels Adjustment Layer, then use the mid-point eye dropper to click on your marker. You can clearly see that the pixels in the area are not a neutral grey, but rather greener.
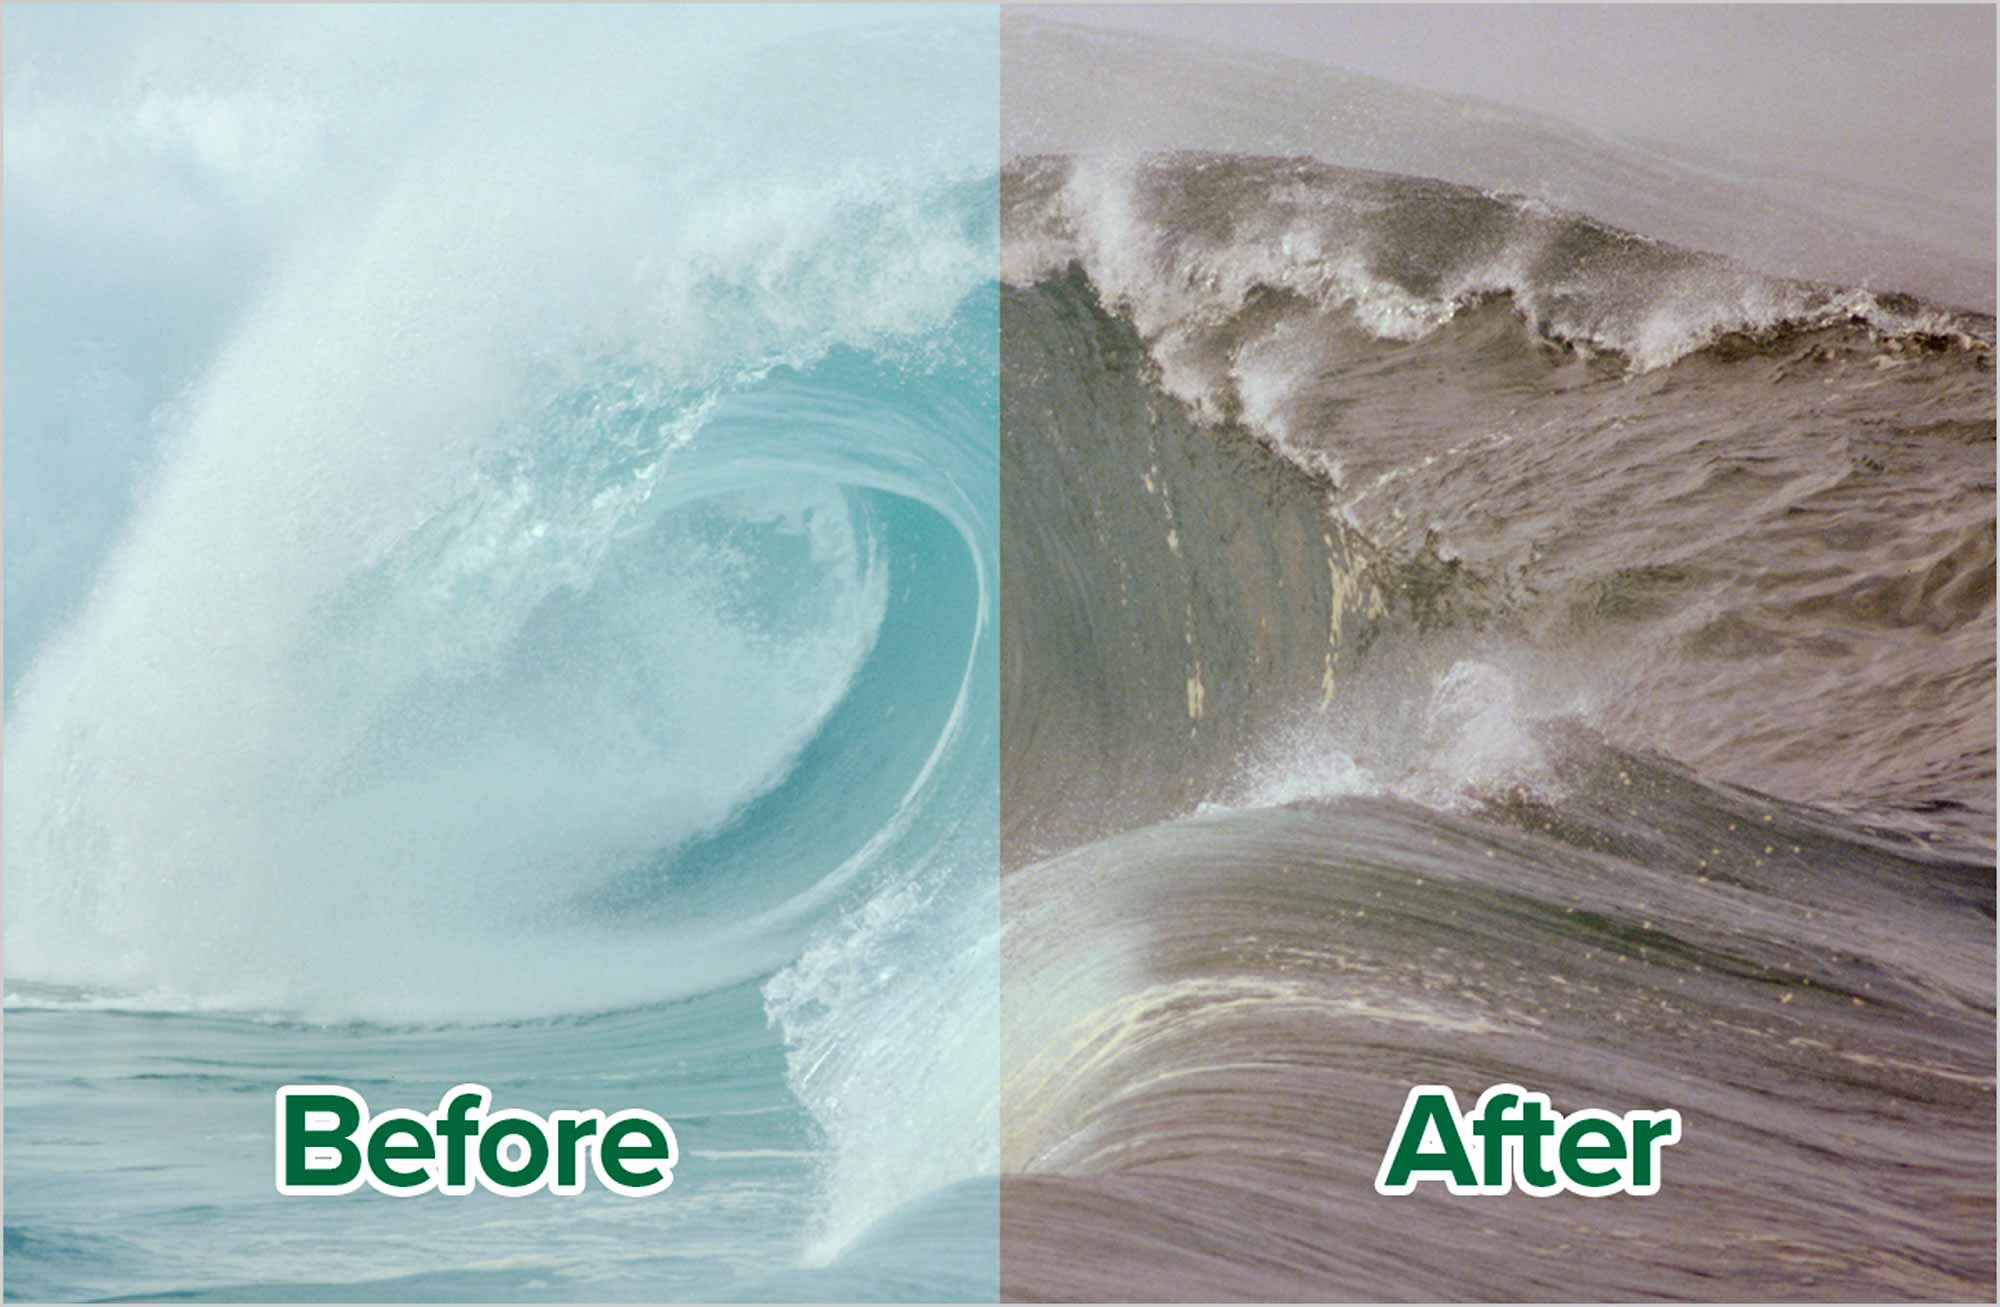
From close up you’ll see a slight shift in colour. Zoom out and flash the Levels layer on and off to see the difference. The key here is that there was no guess-work in the process. It’s all done by the numbers. Just follow the steps and you’re get the results.
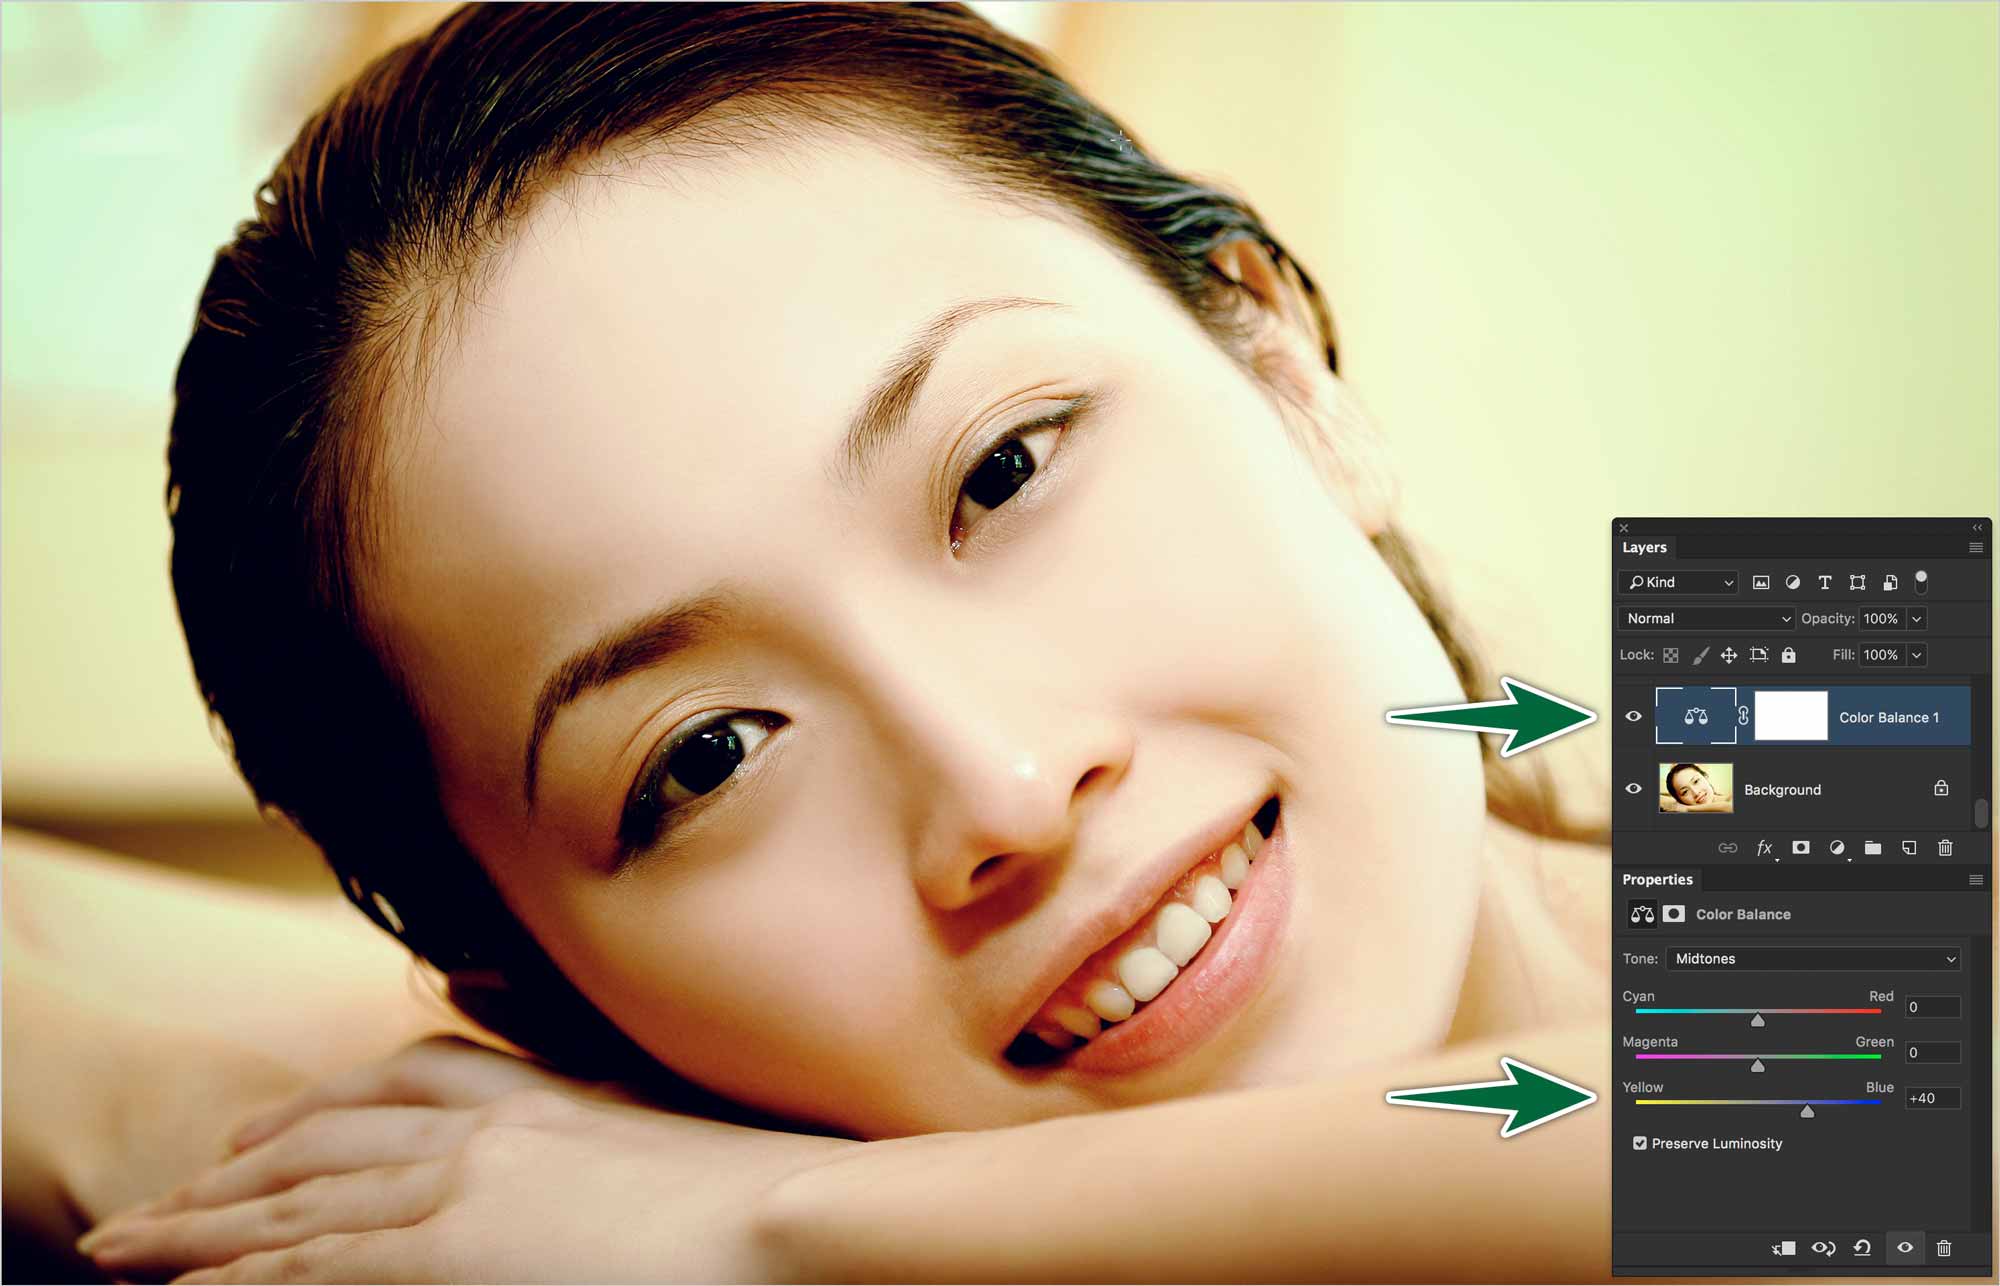
That said, if you want to make further manual adjustments, you can use a Colour Balance Adjustment Layer. In this case, we know that the photo had a yellow colour cast. We used the Colour Balance Adjustment Layer to slide away from yellow to make the correction.
Do It For Me
Now that we know how the fundamentals work, let’s see if Photoshop can cut to the chase and do all this for us. Introducing the Auto Levels feature.
To have Photoshop correct your image for you automatically, add a Levels or a Curves adjustment layer. Option-click on the Auto button in the Properties panel.
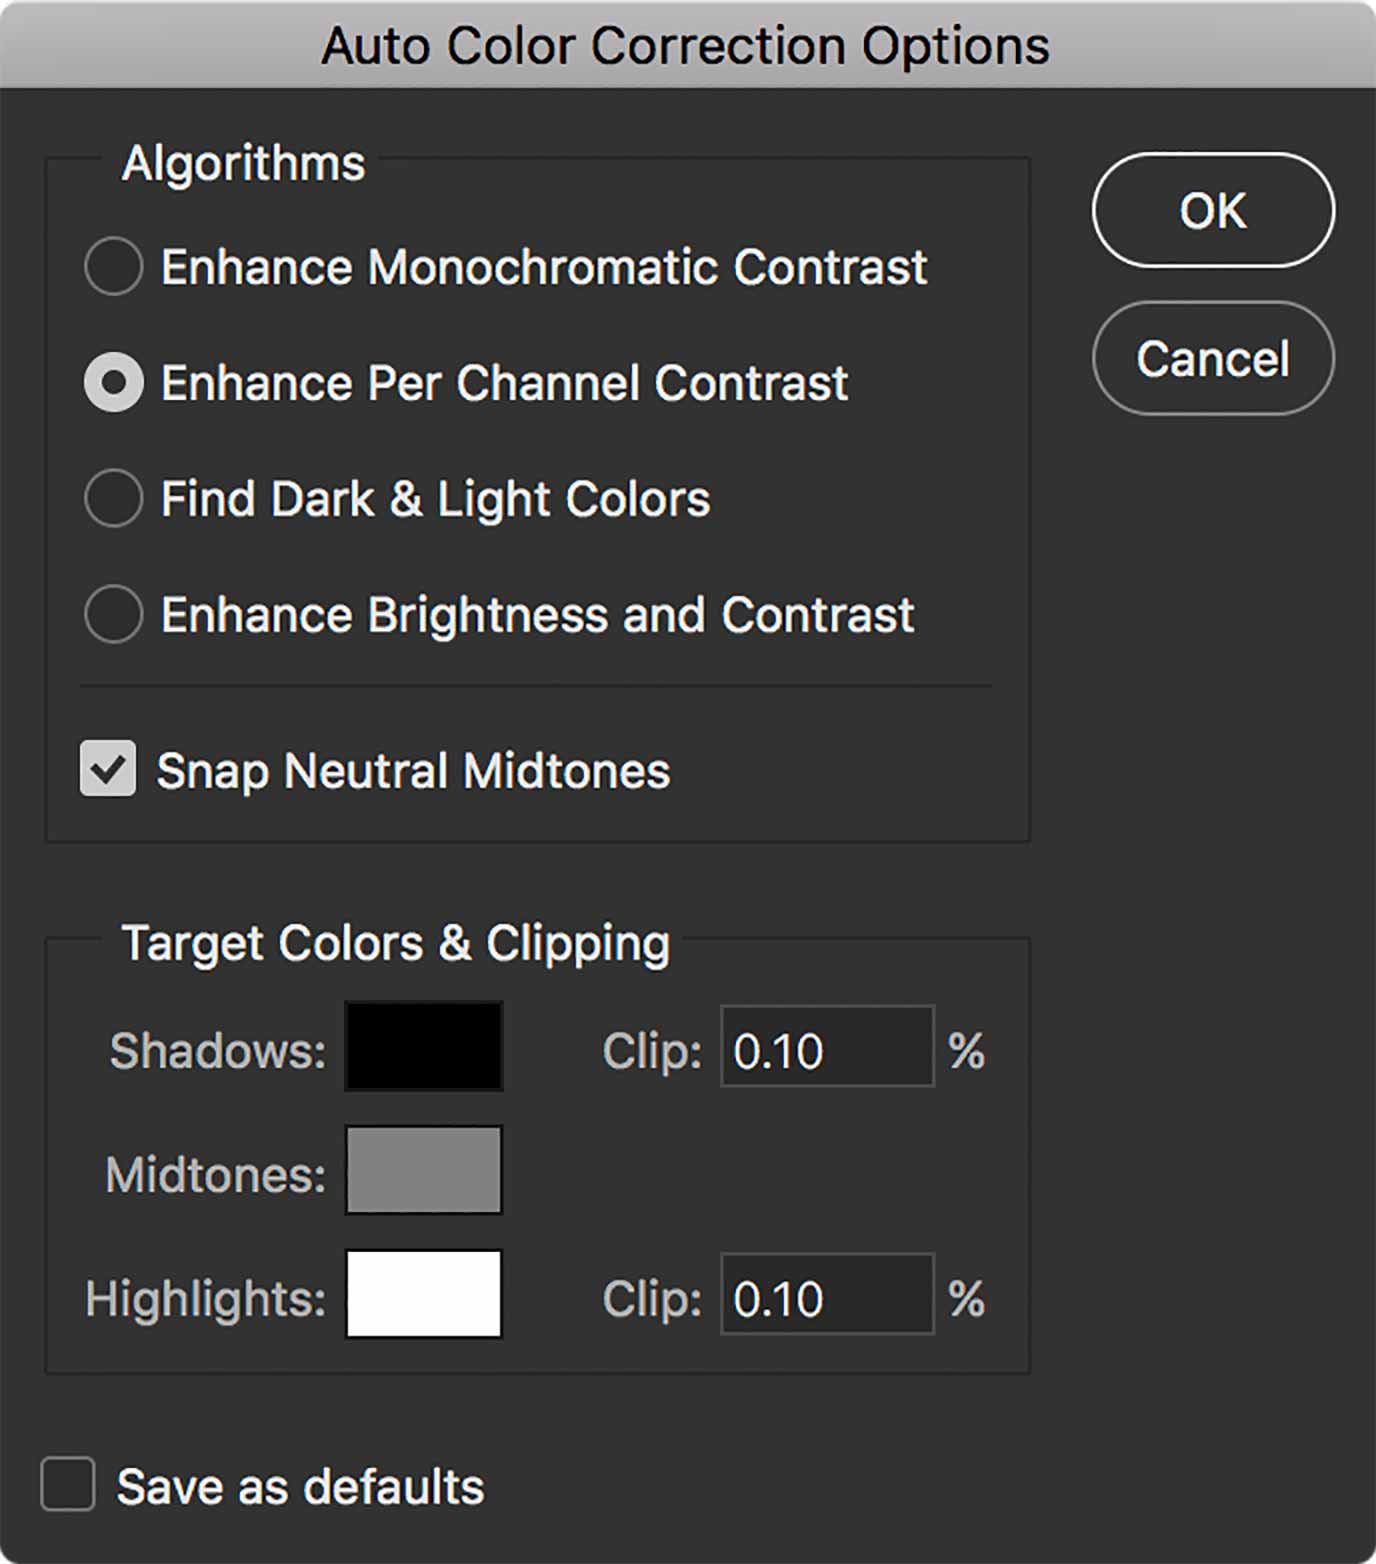
Photoshop has algorithms built in to analyse your image and make corrections in four different ways. This is what Adobe has to say about the four algorithms:
- Enhance Monochromatic Contrast:
- Clips all channels identically. This preserves the overall color relationship while making highlights appear lighter and shadows appear darker. The Auto Contrast command uses this algorithm.
- Enhance Per Channel Contrast:
- Maximizes the tonal range in each channel to produce a more dramatic correction. Because each channel is adjusted individually, Enhance Per Channel Contrast may remove or introduce color casts. The Auto Tone command uses this algorithm.
- Find Dark & Light Colors:
- Finds the average lightest and darkest pixels in an image and uses them to maximize contrast while minimizing clipping. The Auto Color command uses this algorithm.
- Snap Neutral Midtones:
- Adjusts midtones so that colours that are close to neutral are mapped to the target neutral colour. This can remove a colour cast.
When setting White/Black point, or Per Channel Auto a good way to reduce any colour shift is to set the adjustment blend mode to Luminosity. This keeps the Shadow/Highlight correction but ignores the hue shifts.
Sharpening
As soon as you resize a photo out of your camera or a scan, the re-mapping of the pixels on the canvas will cause blurriness. We want to gently sharpen the photo. If we sharpen too much we’ll get a halo effect in high-contrast areas, which we want to avoid.
Sharpen with High Pass
We’ll use Smart Objects with filters to gently sharpen the image in a non-destructive way. Start with duplicating the layer you wish to sharpen.
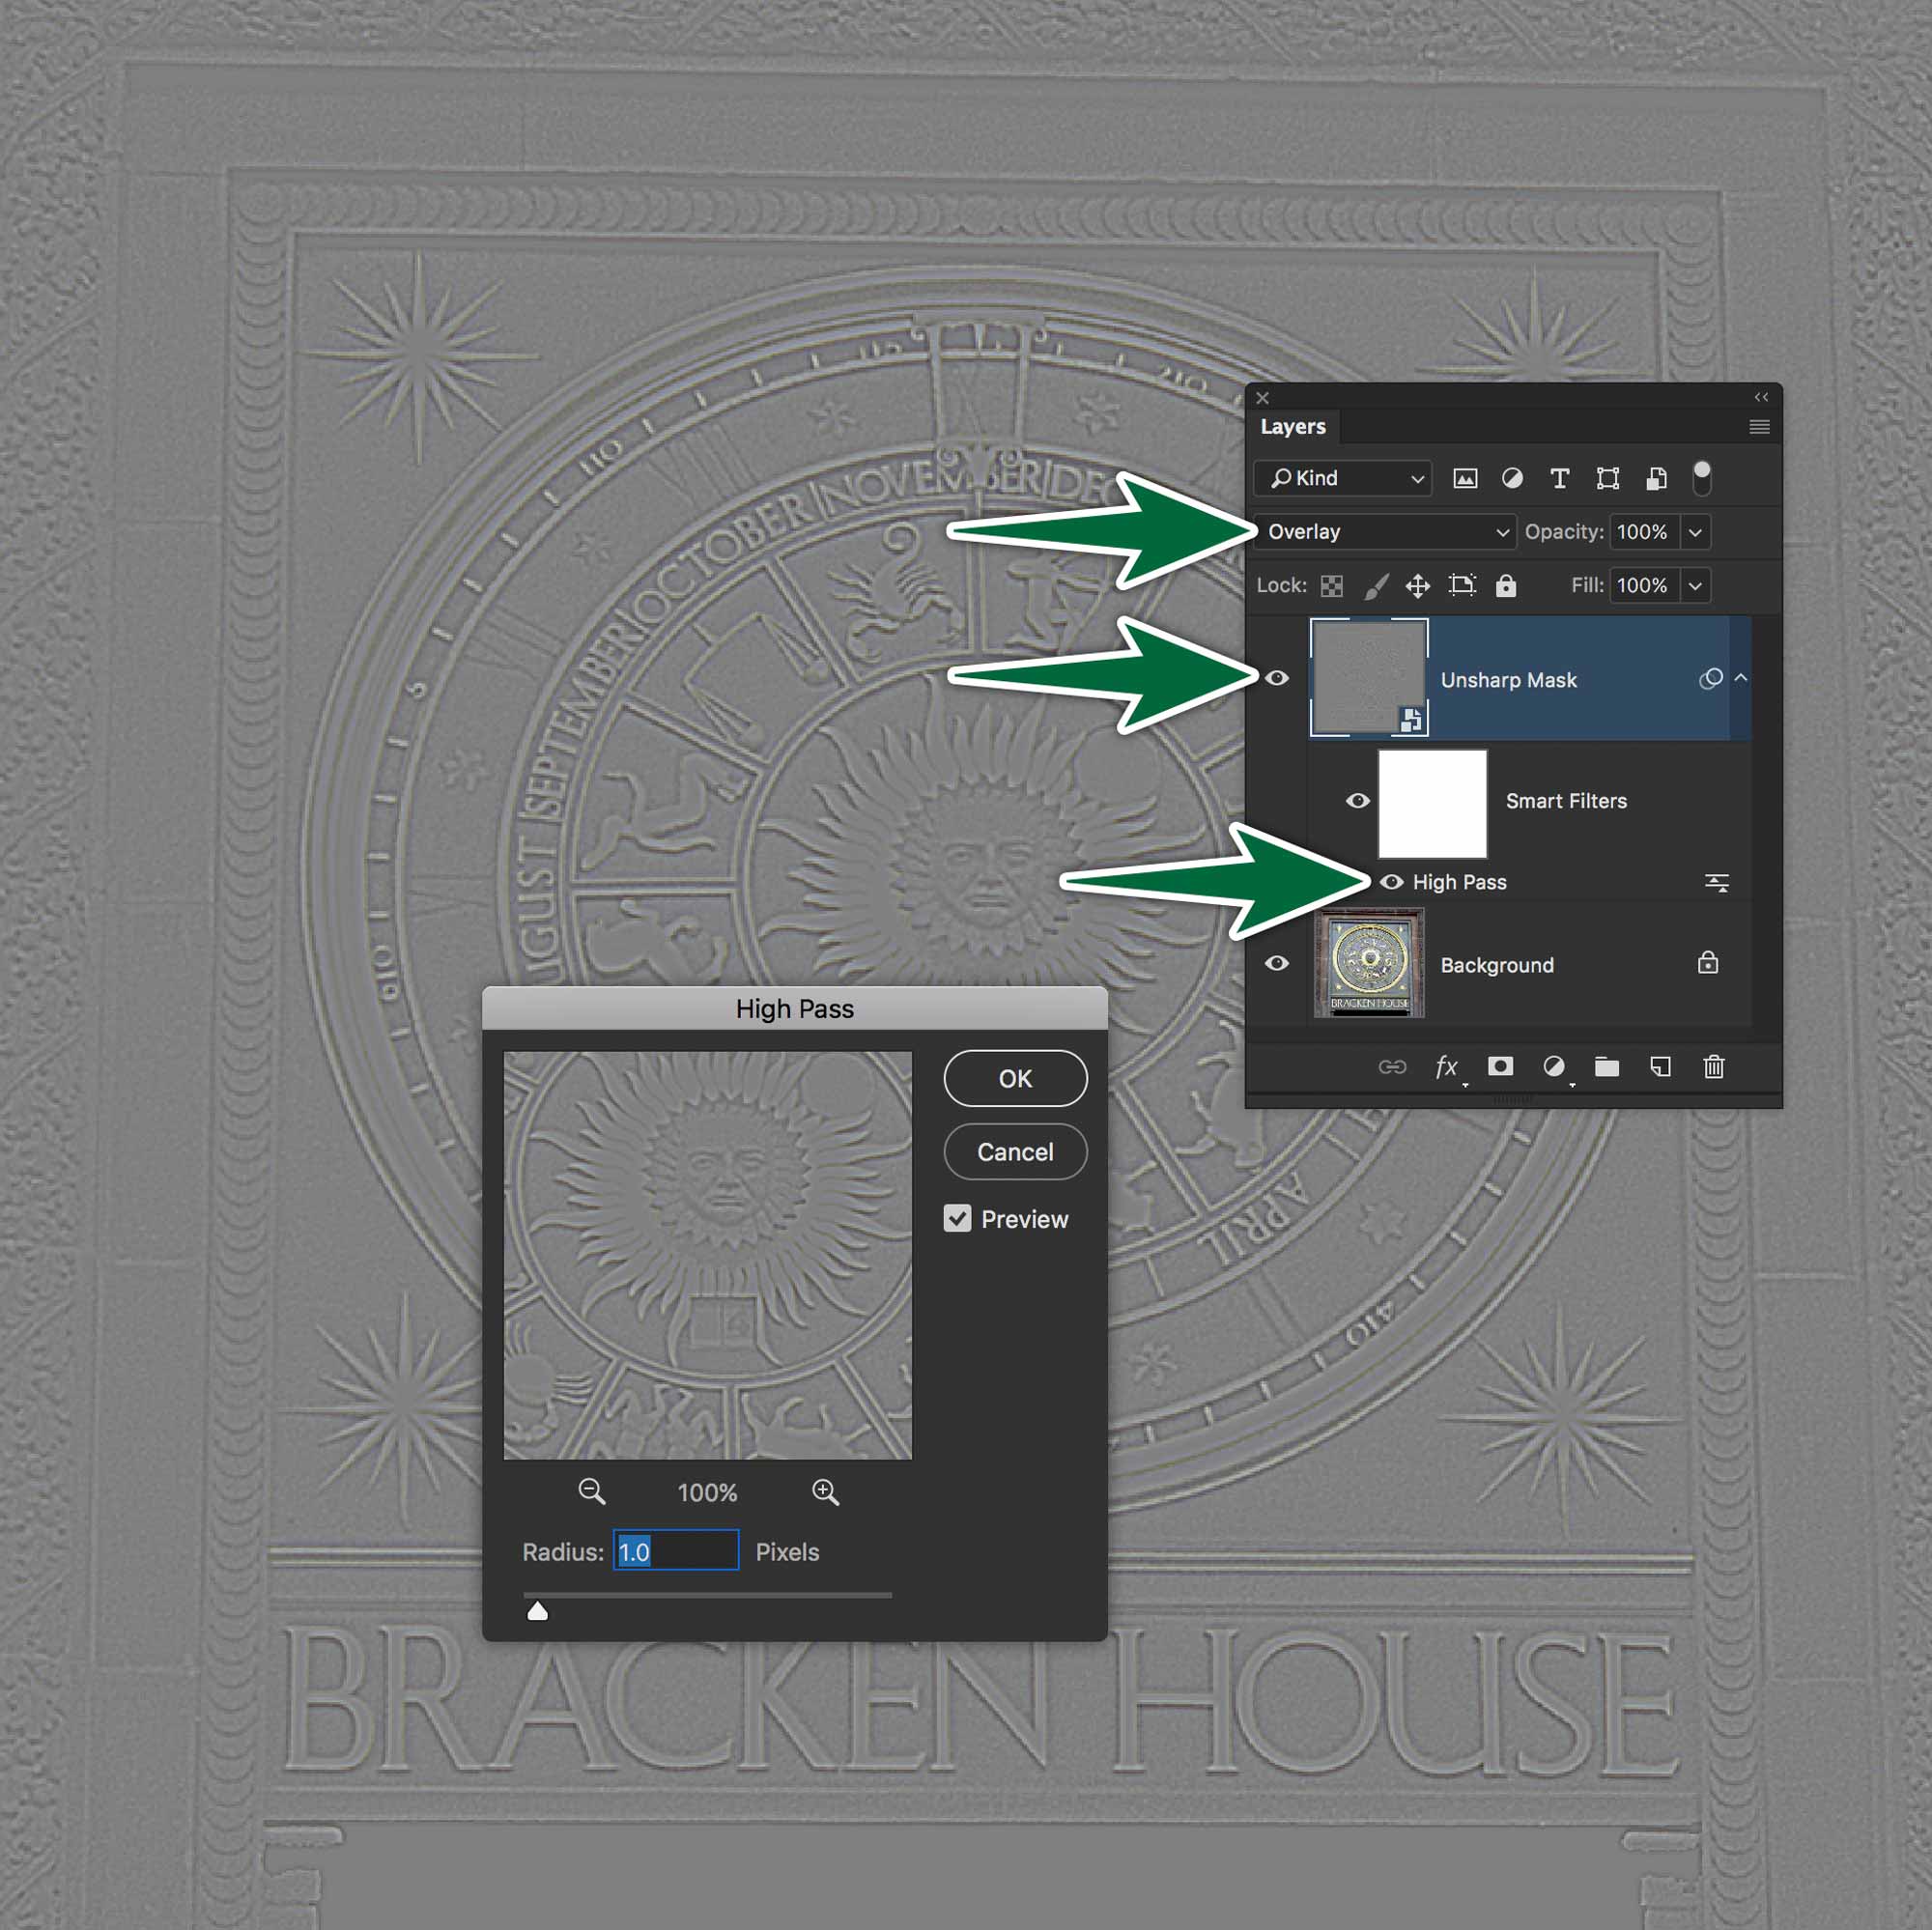
The first steps are to duplicate the background layer, then convert it to a Smart Object. Now, go Filter > Other > High Pass… Keep cranking up the value, then back it off before colour starts to show through the grey.
Set the grey layer to blend mode Overlay. Double-click on the High Pass filter in the Layers panel if you need to edit the results.
Sharpening with Unsharp Mask
When sharpening an image, you should ask a few essential questions:
What is the purpose of the image? Will it be used in print, on the Web? Will it be archived? Will it only be used once, or over and over again in corporate publications? At what size will this image be reproduced? Should you edit individual channels or the whole image globally?
Sharpen: Unsharp Mask
The Unsharp Mask filter is our go-to, most versatile sharpening filter. The terminology is a bit un-intuitive, but it really works well. There are no magic numbers for the Unsharp Mask filter. You have to make a decision on the values to enter.
Above is a test image I created to demonstrate how the Unsharp Mask filter works. I’ve over-sharpened it on purpose. The file is in the downloads folder. It’s useful for getting a grasp on what the three Threshold variables do to an image. Play with this to try to wrap your brain around it.
Amount
The sharpening illusion depends on a light/dark halo effect. The Amount value determines the intensity of the halo, but not its width. High Amount values cause very high contrast halo effects which are more harmful to the image.
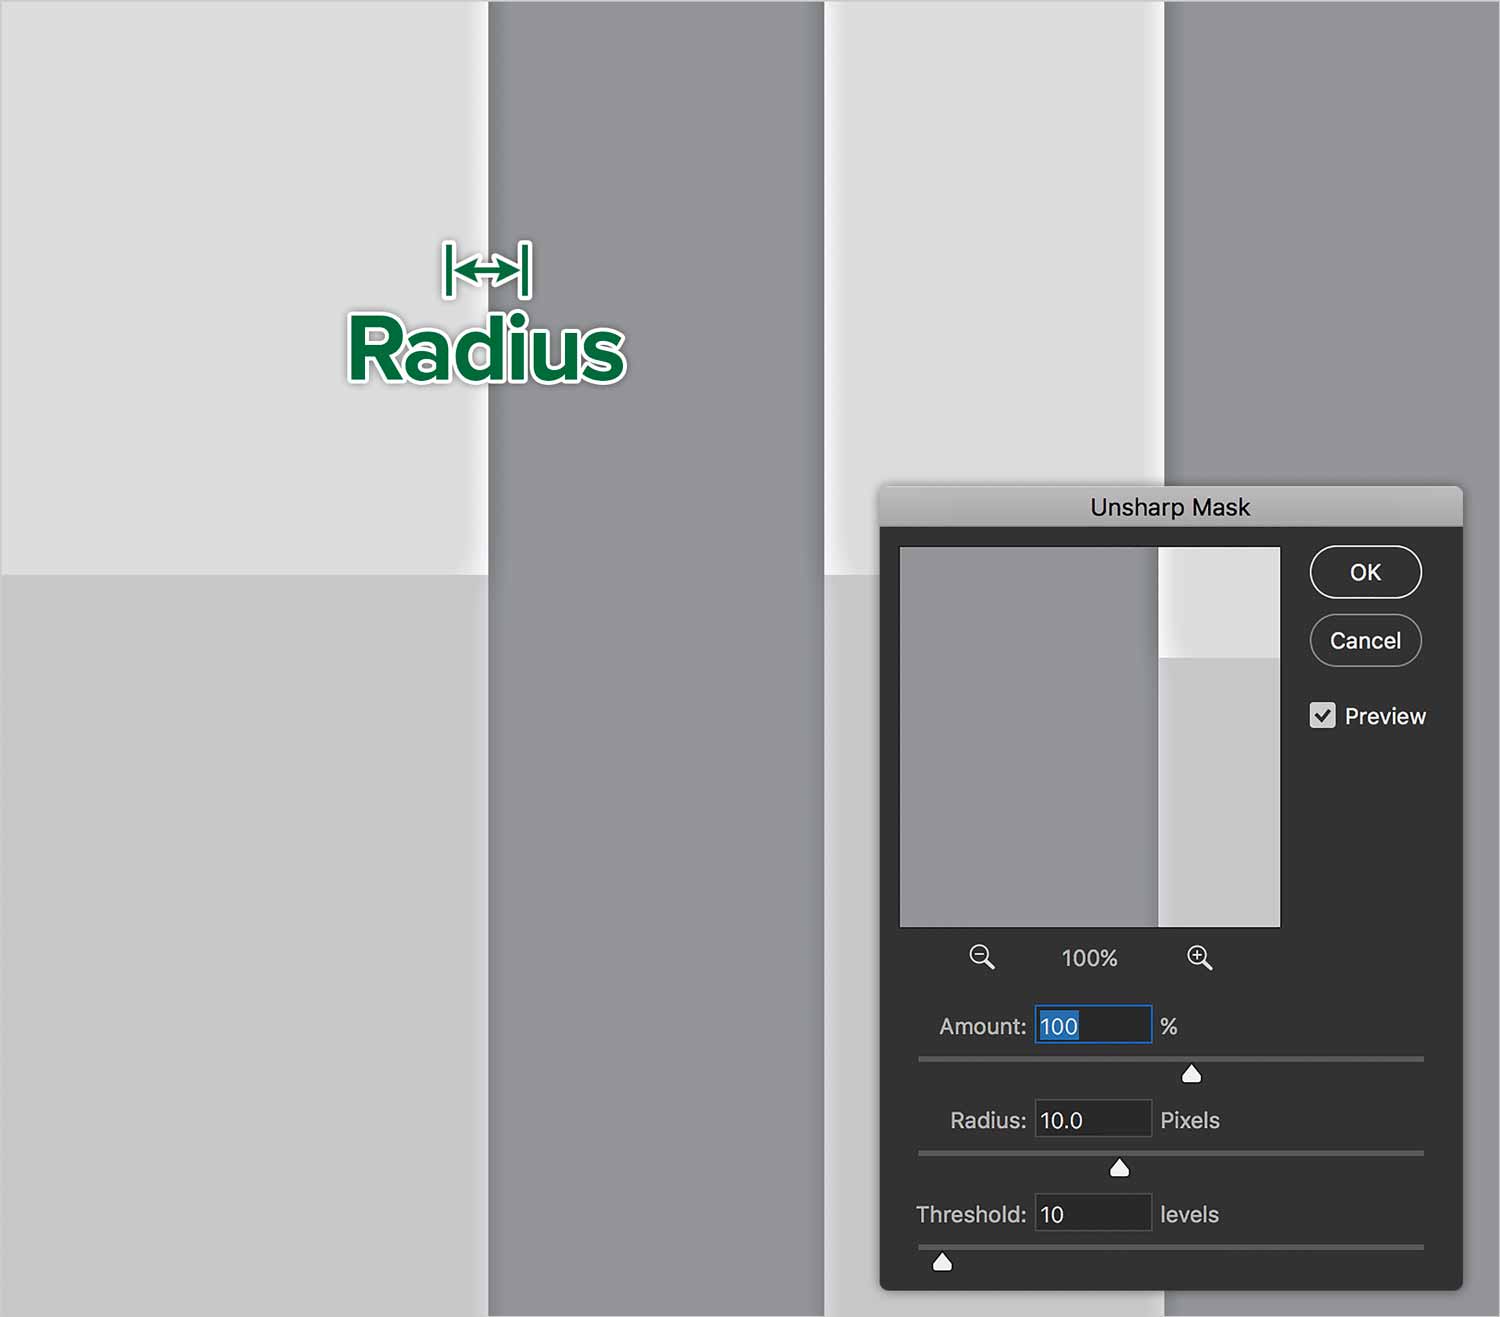
Radius
The Radius setting controls the width of the halo. The wider the halo, the more obvious the sharpening effect. Radius is your first setting, because it is most dependant on the content of the photo. You should try to keep this value between 0.5 and 1.5. The less detail in your image, the higher the Radius number can be.
Threshold
Threshold acts as a damper to the two other variables in UnSharp Mask. Threshold really says don’t sharpen until there’s this much difference between the shapes. Threshold tells Photoshop how far apart two pixels’ tonal values have to be before they are affected by the filter.
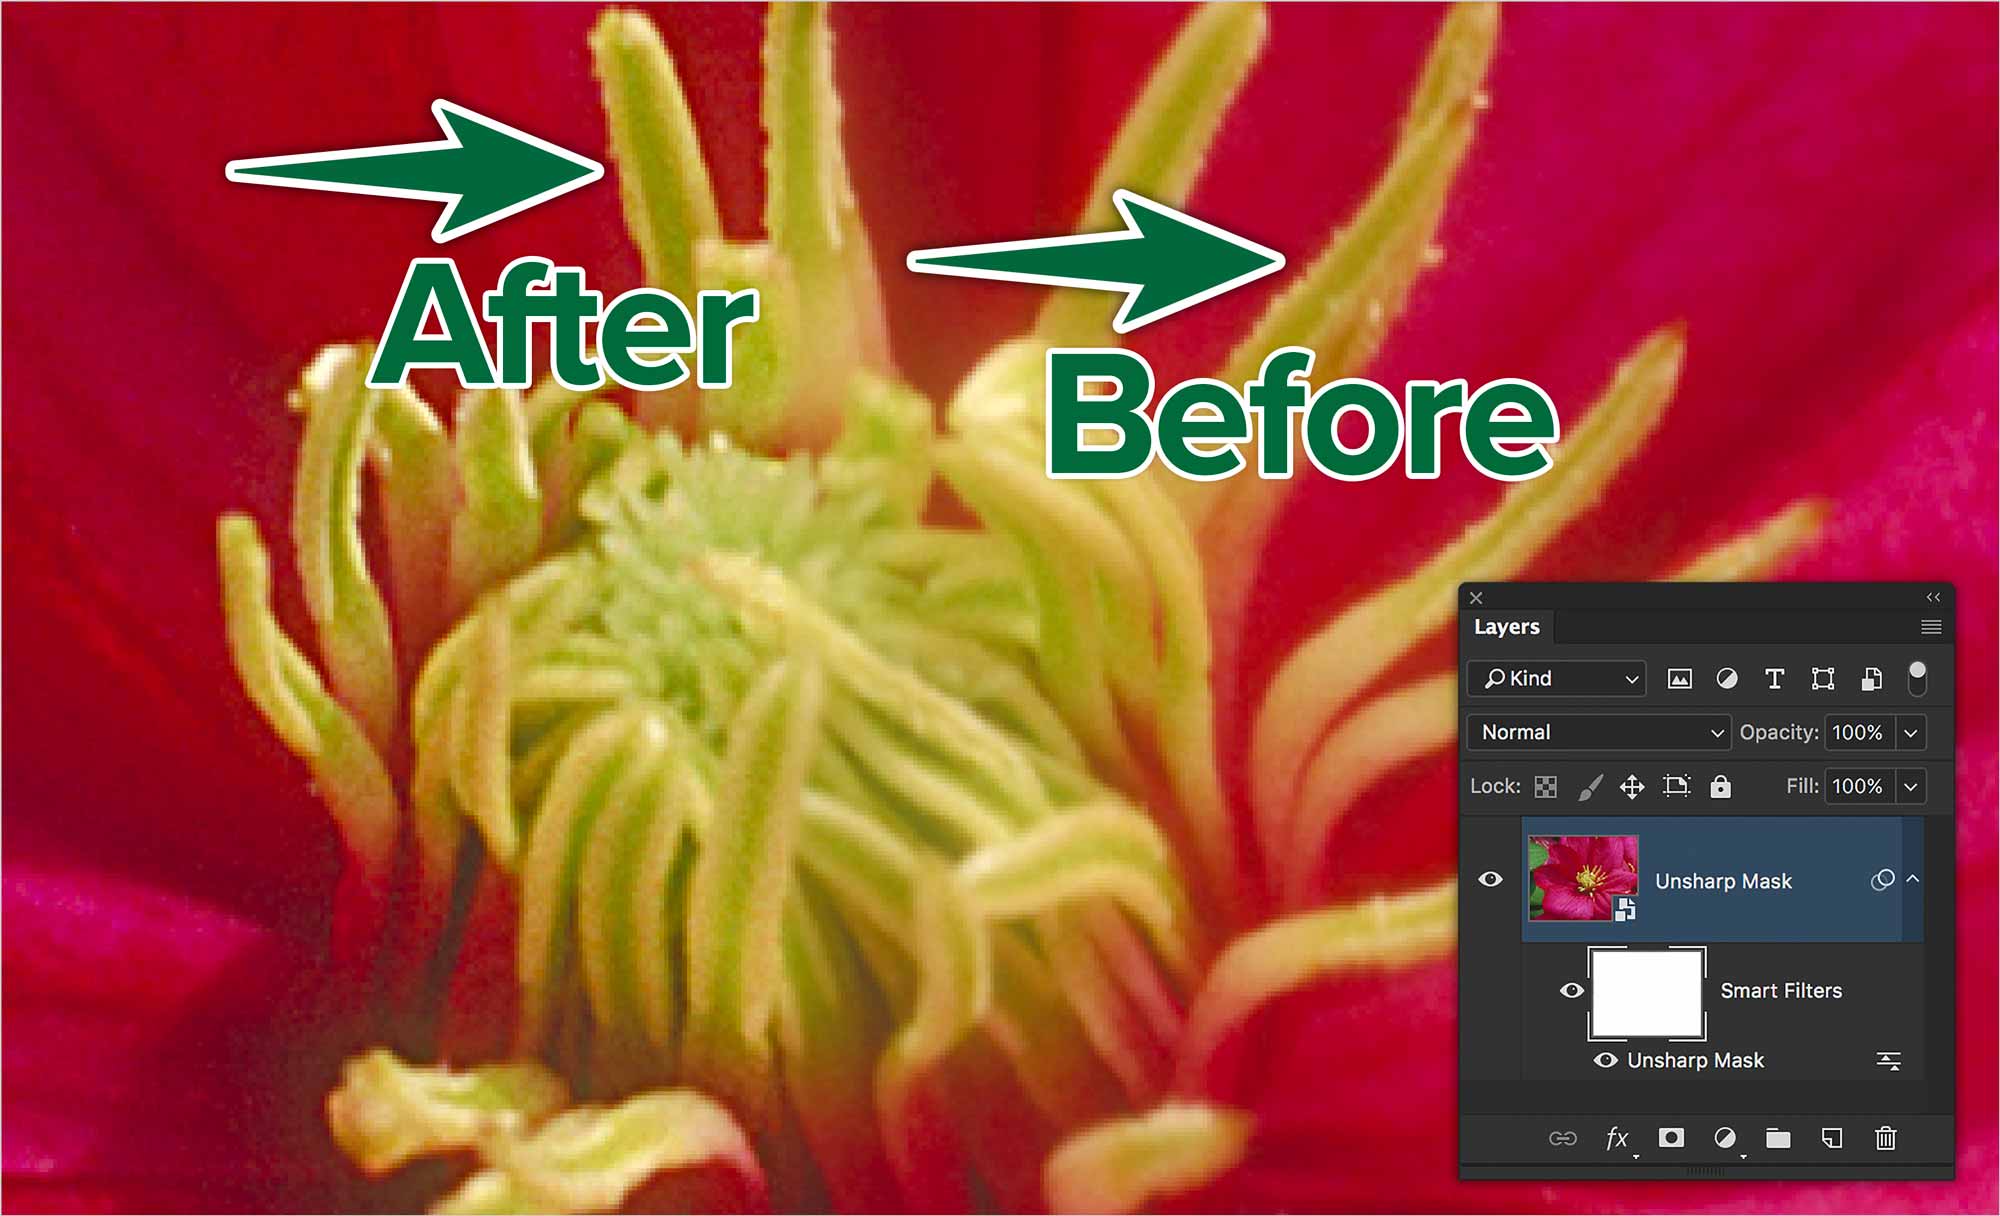
In the flower image above, the sharpening is quite subtle. You can see the sharper pixels on the yellow stamen of the flower.
Remove Noise
You’ll often get noisy images in low-light high ISO value photos. No matter the cause of the noise, we need a non-destructive method for removing it.
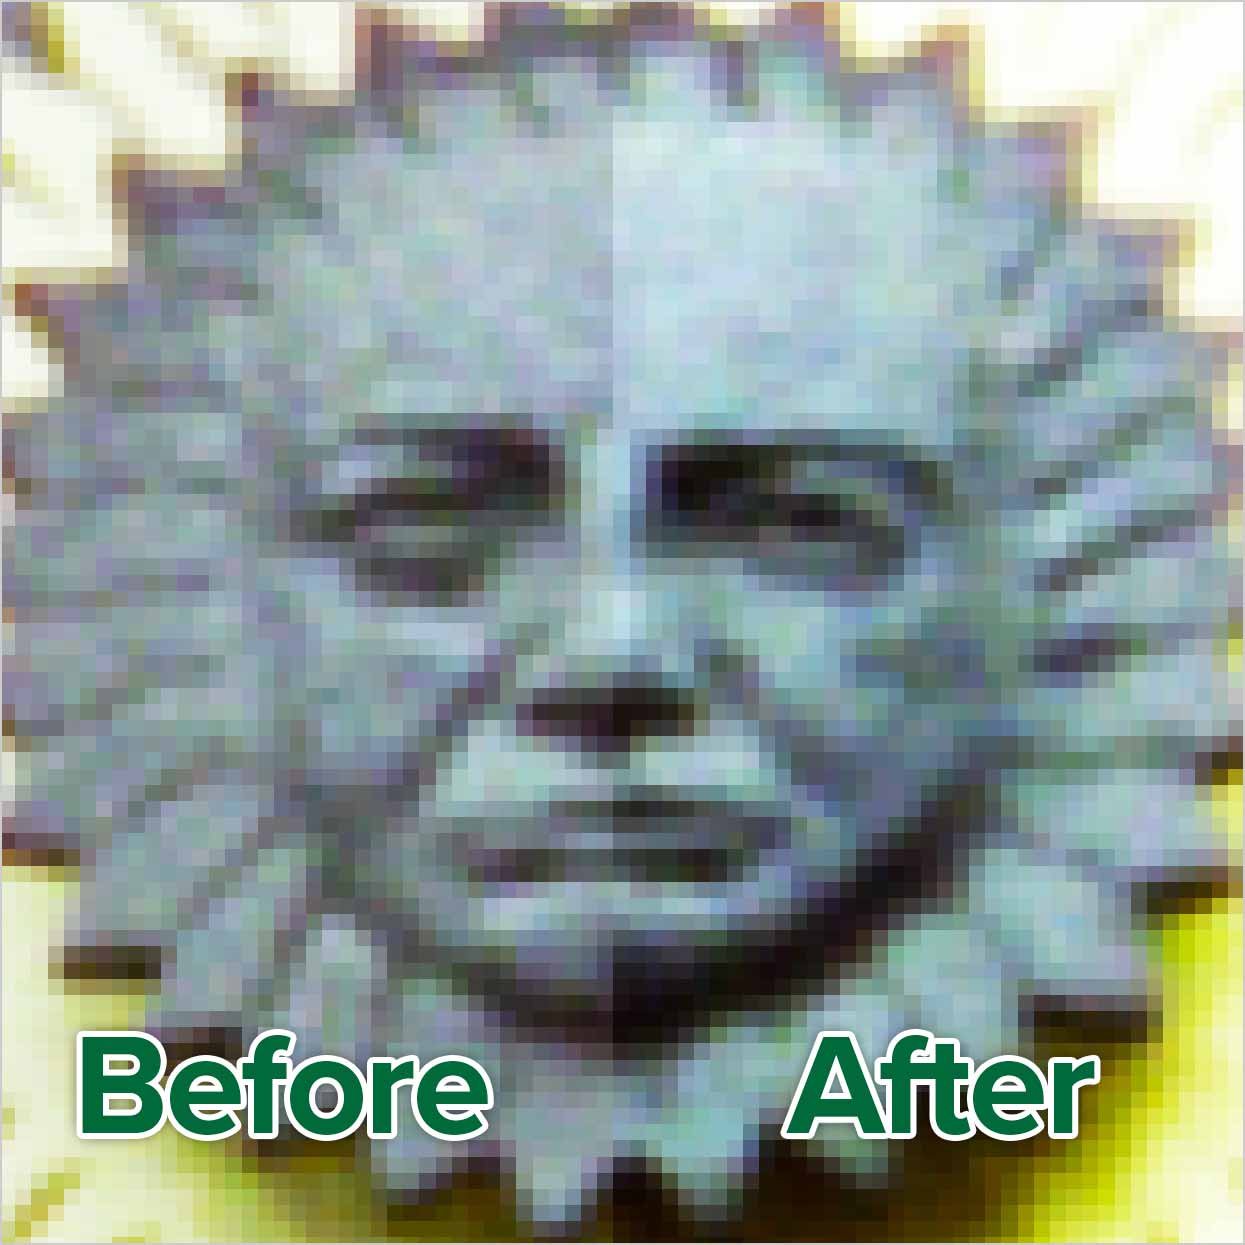
What we have below is a noisy wedding photo. You can see that the left side of her face is fixed. It looks a bit blurry, but I’m zoomed in really close.
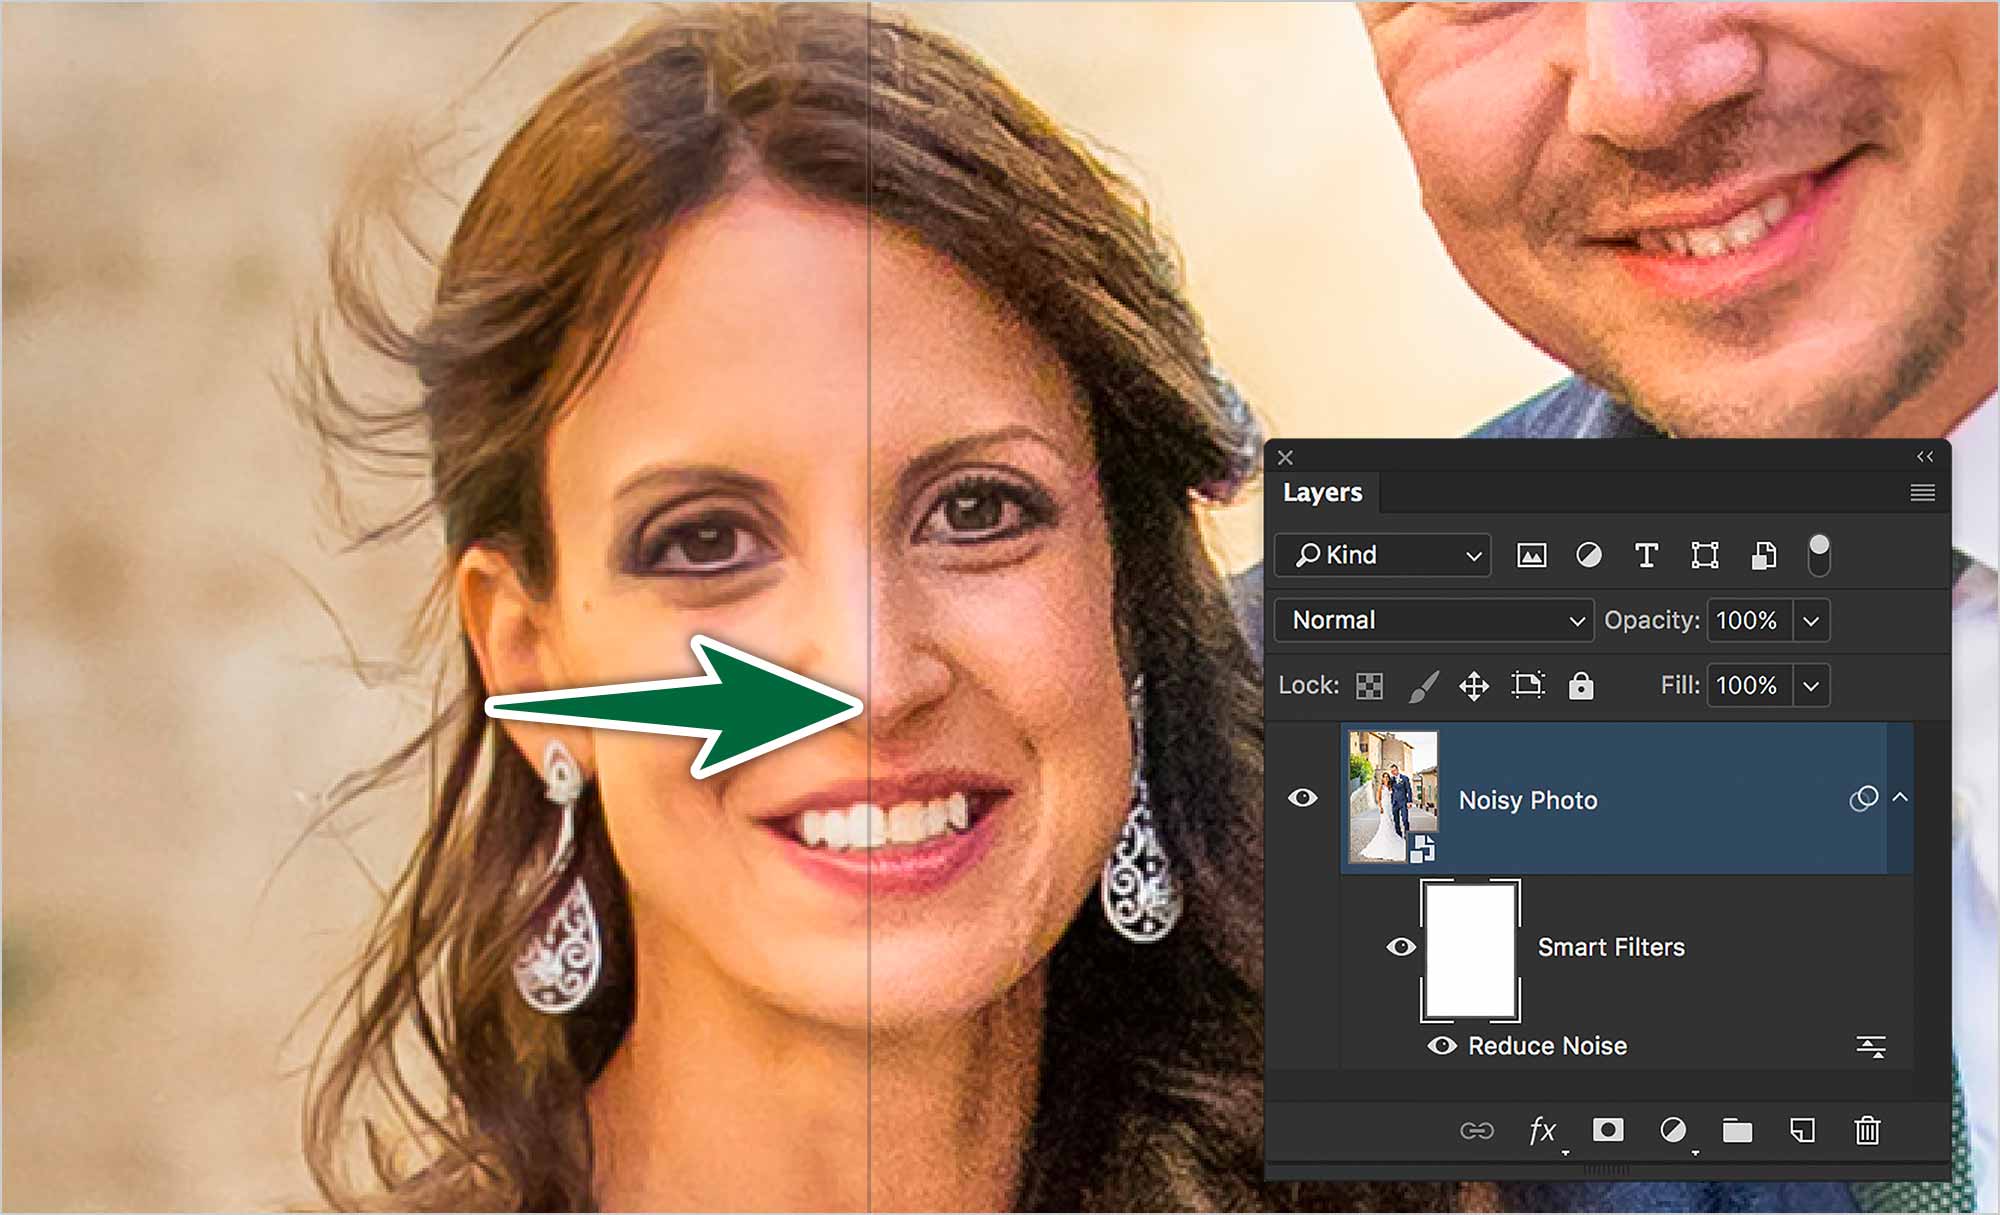
The simplest way to get rid of noise is to use the Reduce Noise filter on a Smart Object layer. Go Filter > Noise > Reduce Noise…
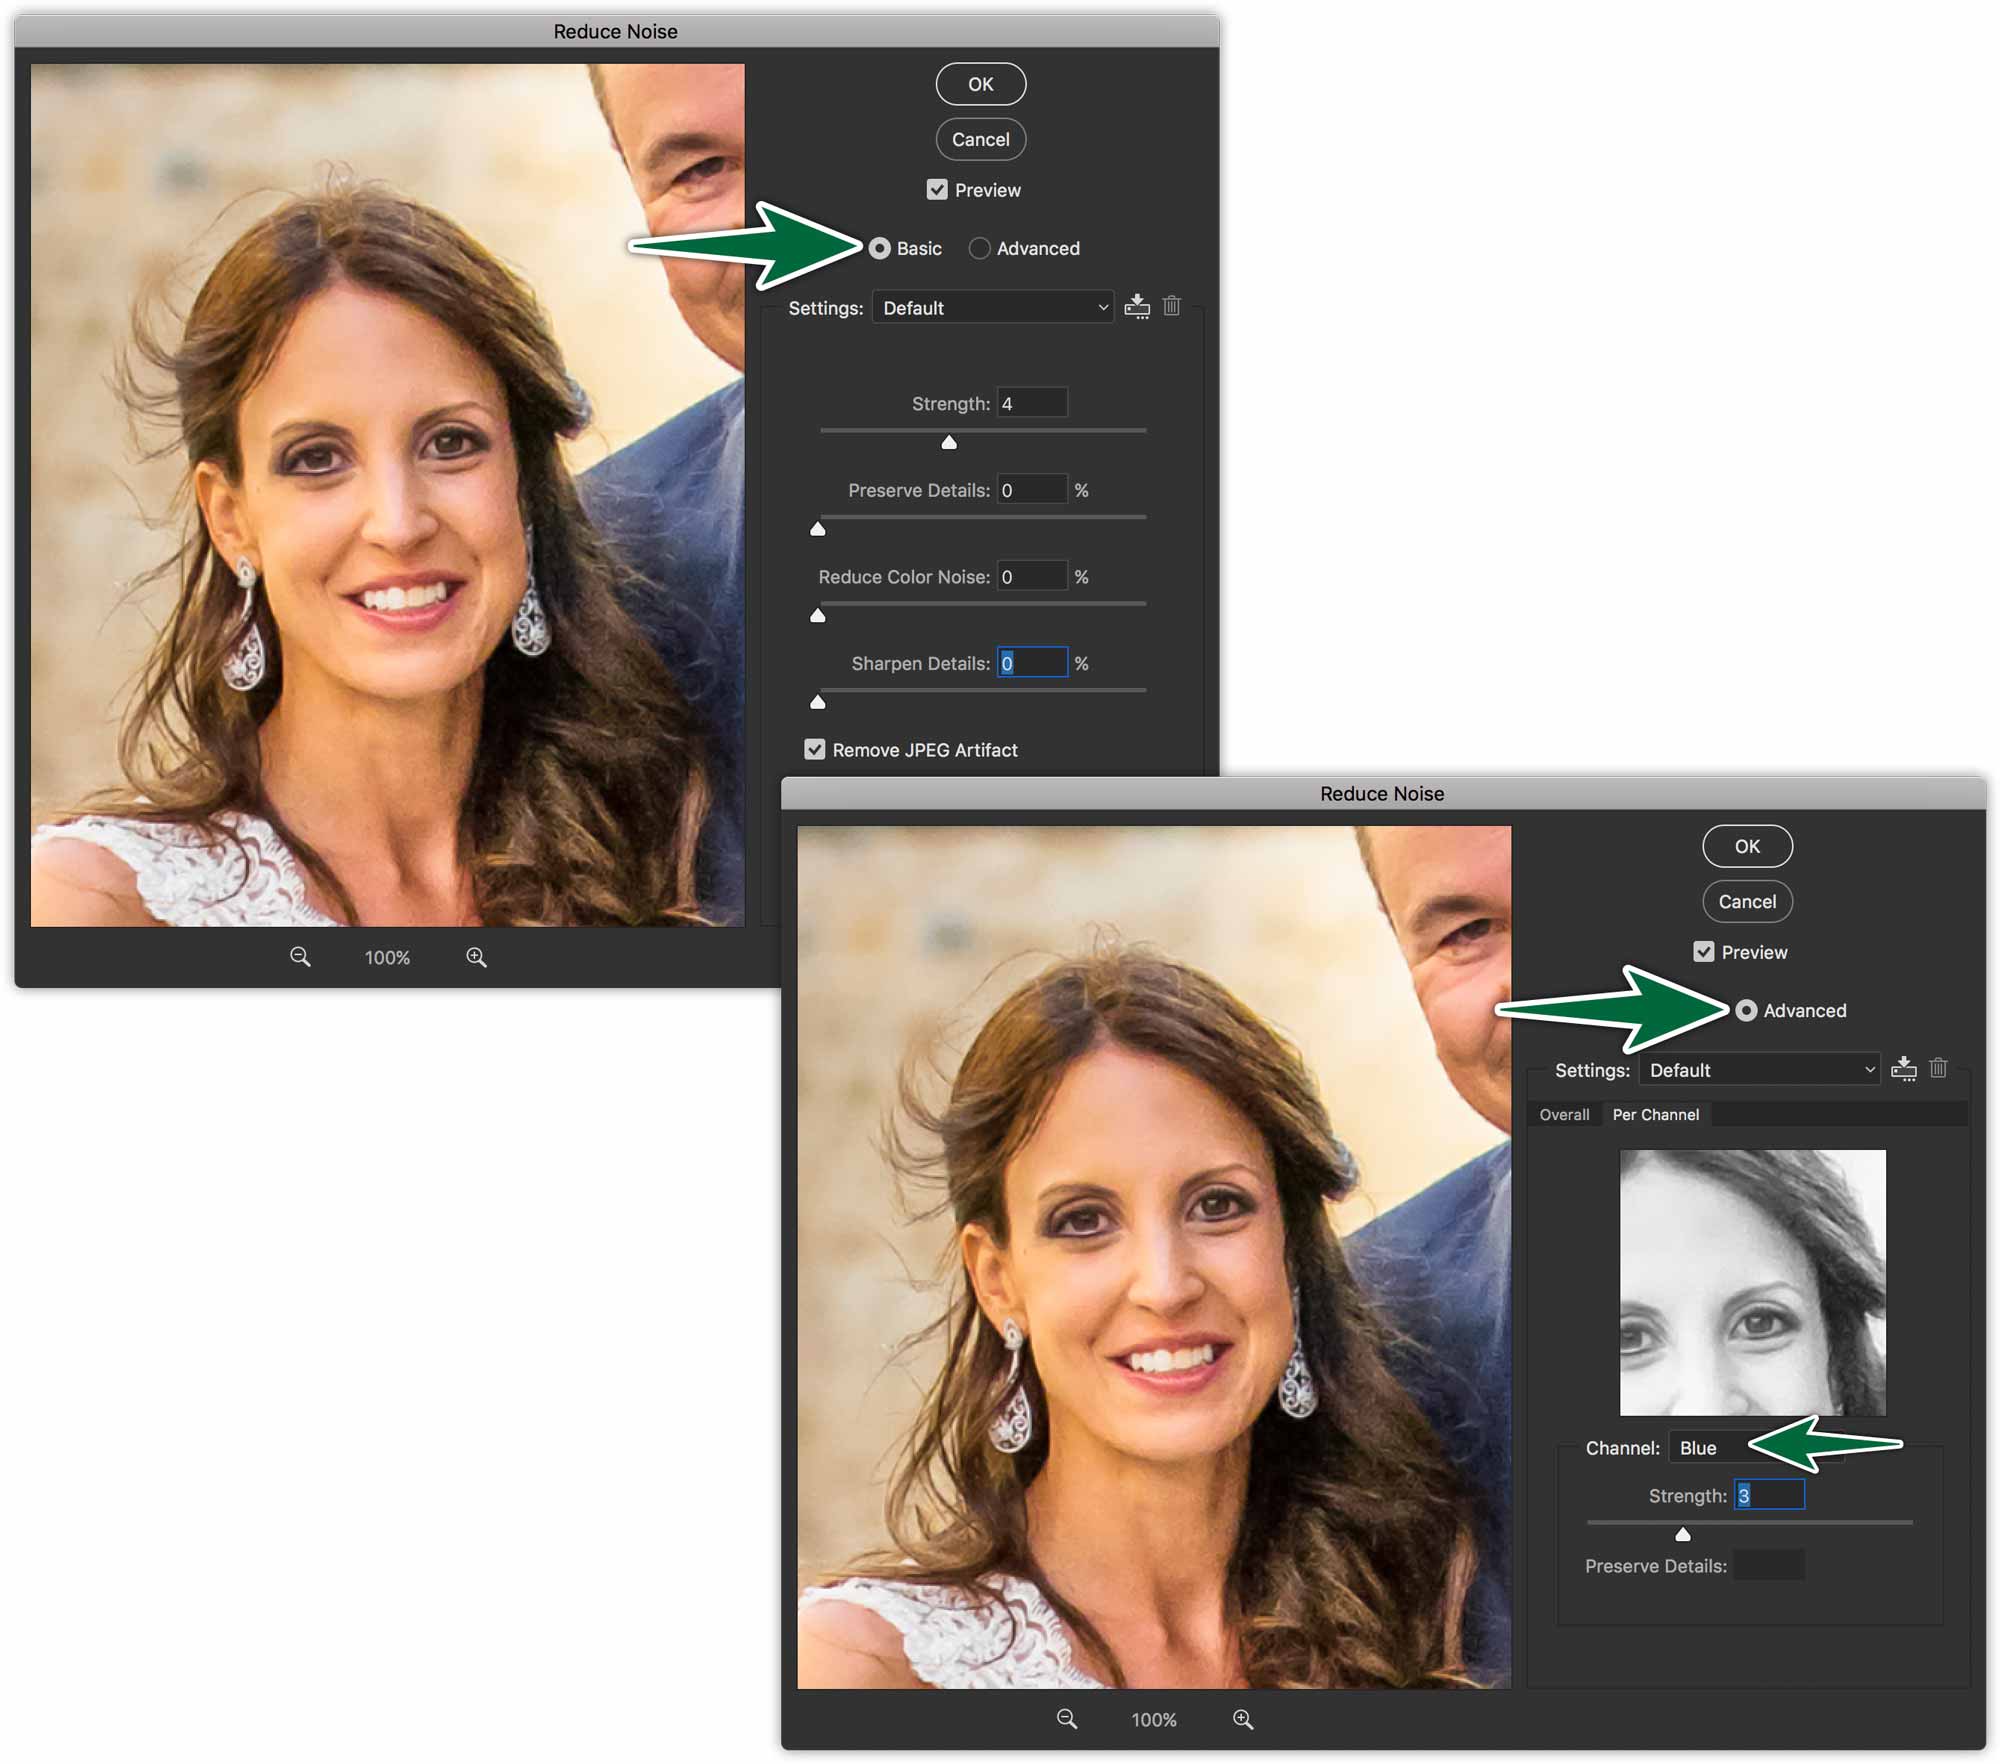
The Reduce Noise filter has two modes: Basic & Advanced. The basic settings are:
Strength: This basically blurs your image, so you want to go easy.
Preserve Details: Looks for detail areas and doesn’t reduce the noise as much there.
Reduce Colour Noise: Colour noise is the red, green and blue pixels you sometimes see when you’re zoomed really close into a photo. This reduces that.
Sharpen Details: This is pretty much the reverse of Preserve Details. It increases the contrast between pixels in detail areas.
These settings really depend on the amount of detail in your photo. Start by increasing the Strength setting. The danger is that it makes your photo blurry. If it does, adjust the other settings until you’re satisfied.
The true test is to use the photo. If it’s meant for print, do a test print. If it’s meant for the screen, post it. If it needs further adjustment, go back to your layered Photoshop file and make adjustments.
Formative Activity
Follow the instructions in the provided folder to process each photo.
Manual Colour Correction
Do these manually. We’ll need to see Threshold layers in each of your files marking the black and/or white points. You’ll also have a Levels adjustment layer for the actual corrections.
Auto Colour Correction
Complete the provided images using the Auto command. In this case, you should finish with only one Adjustment Layer.
The Sharpening
Sharpen the provided photos using the High Pass process.
