Topics
There are many great reasons for using Acrobat forms rather than paper forms. First of all, they’re more ecological. It’s a great idea to make Acorbat forms part of a paperless workflow. Respondents don’t need to copy or fax forms. The recipient of the response data gets information which is manipulated much more easily. These are all great benefits of working digitally rather than with paper.
You can use Acrobat forms for such things as:
- Identification
- Permissions
- Co-op applications
- and much, much more…
Formative Activity
The Acrobat Forms Workflow
We create forms from existing documents. Acrobat cannot create a form from scratch. You can use applications like Microsoft Word, Excel, or Adobe InDesign. These applications have functions to export a document as a PDF, which can then be converted to a fillable form. You’ll need to explore your application of choice to learn how to produce a PDF document from your native form document.
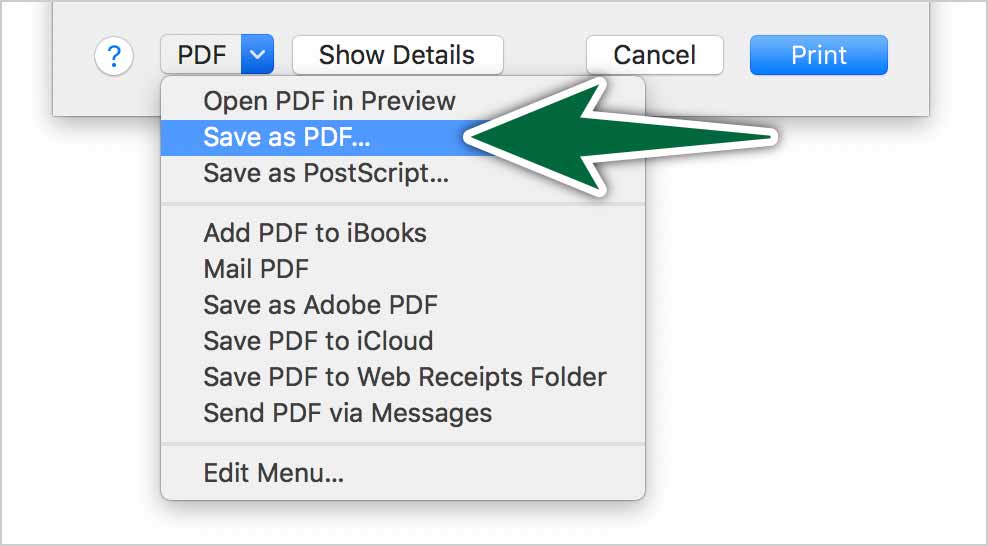
If you’re on a Mac, you can create a PDF document any application using the Print dialogue. There’s a menu at the bottom-right corner which includes a PDF creation option.
You can even scan a paper form, then have Acrobat convert it to a PDF form quite efficiently. The key is to have a well designed form to start with.
Form Content & Design
Acrobat can create your form automatically using the wizard. To ensure it guesses your intentions correctly, you’ll need to:
- Design your form with clear, specific questions.
- Draw clear field elements.
- Draw circles where radio buttons go and squares where checkboxes go.
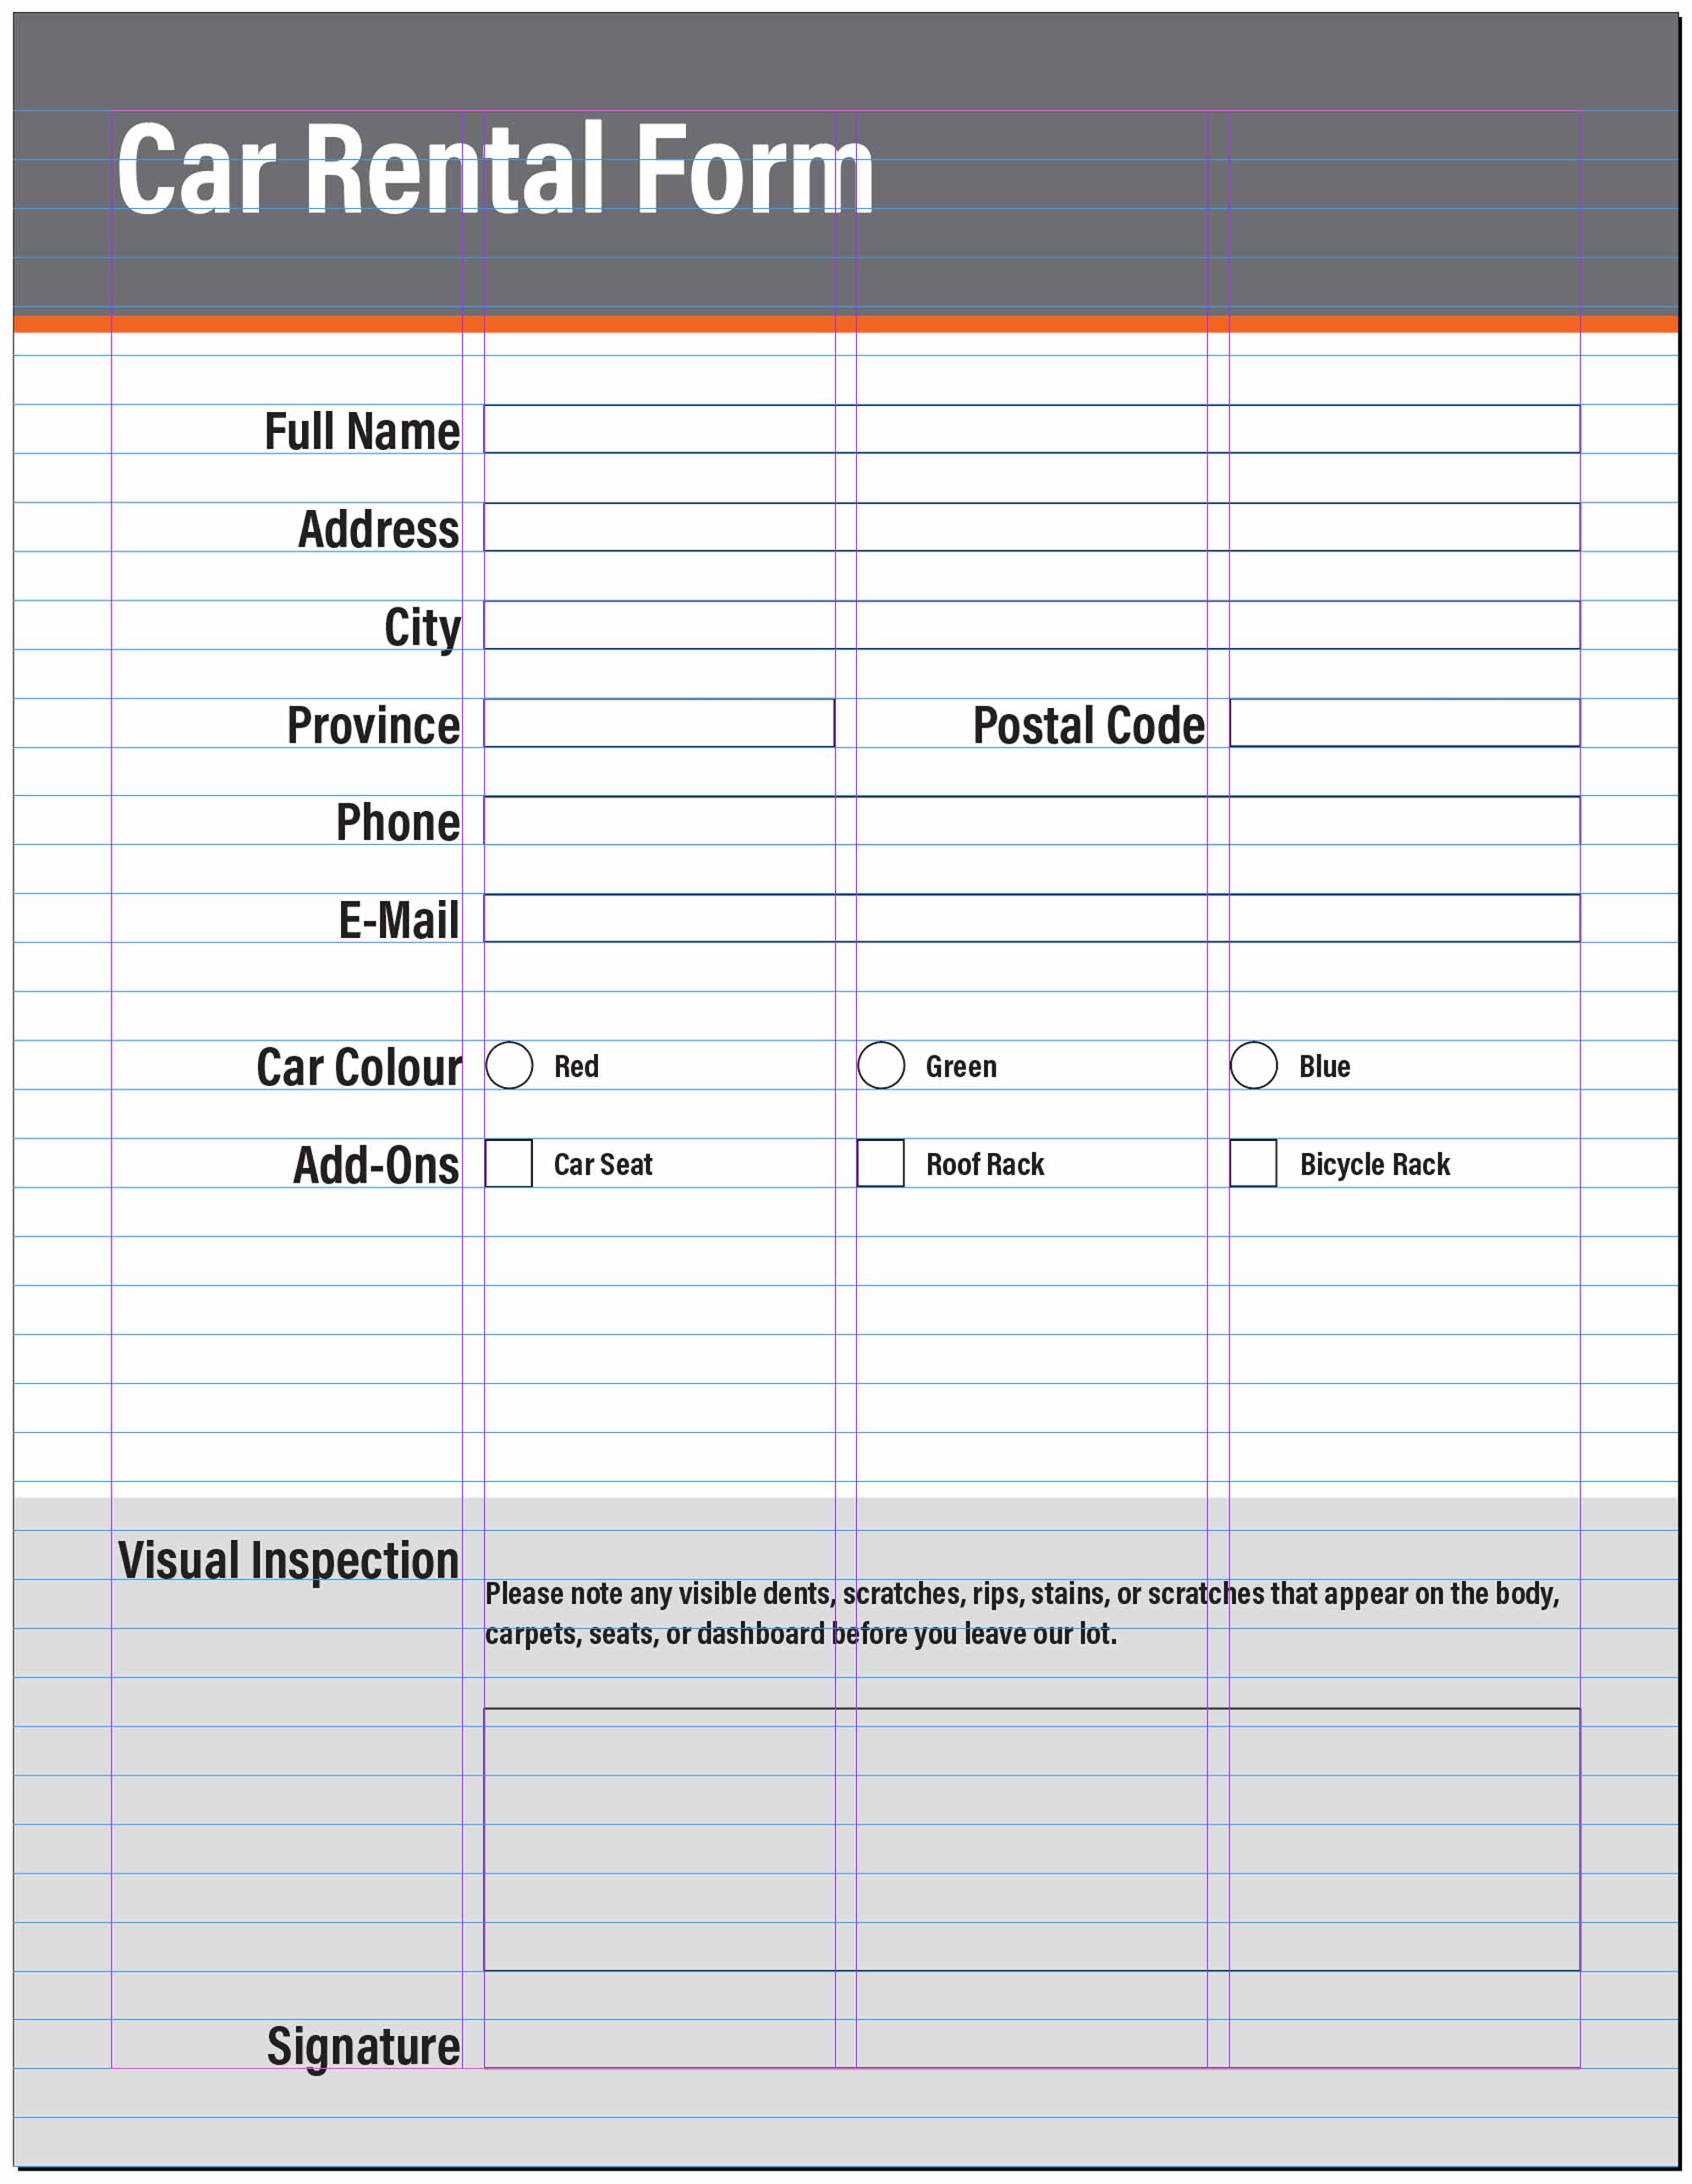
A well designed form consists of two major factors. The first is related to the text. It’s very important to ask specific questions. Be accurate with your words. As an example, don’t ask only for a person’s name. Ask for their first and their last names in separate fields.
The second factor in good form design is the layout of the page. The visual relationship of the labels to the fields should be very clear. Here, alignment and proximity matter. White space is also important. Leave a lot of room between elements on the page.
Acrobat Tools
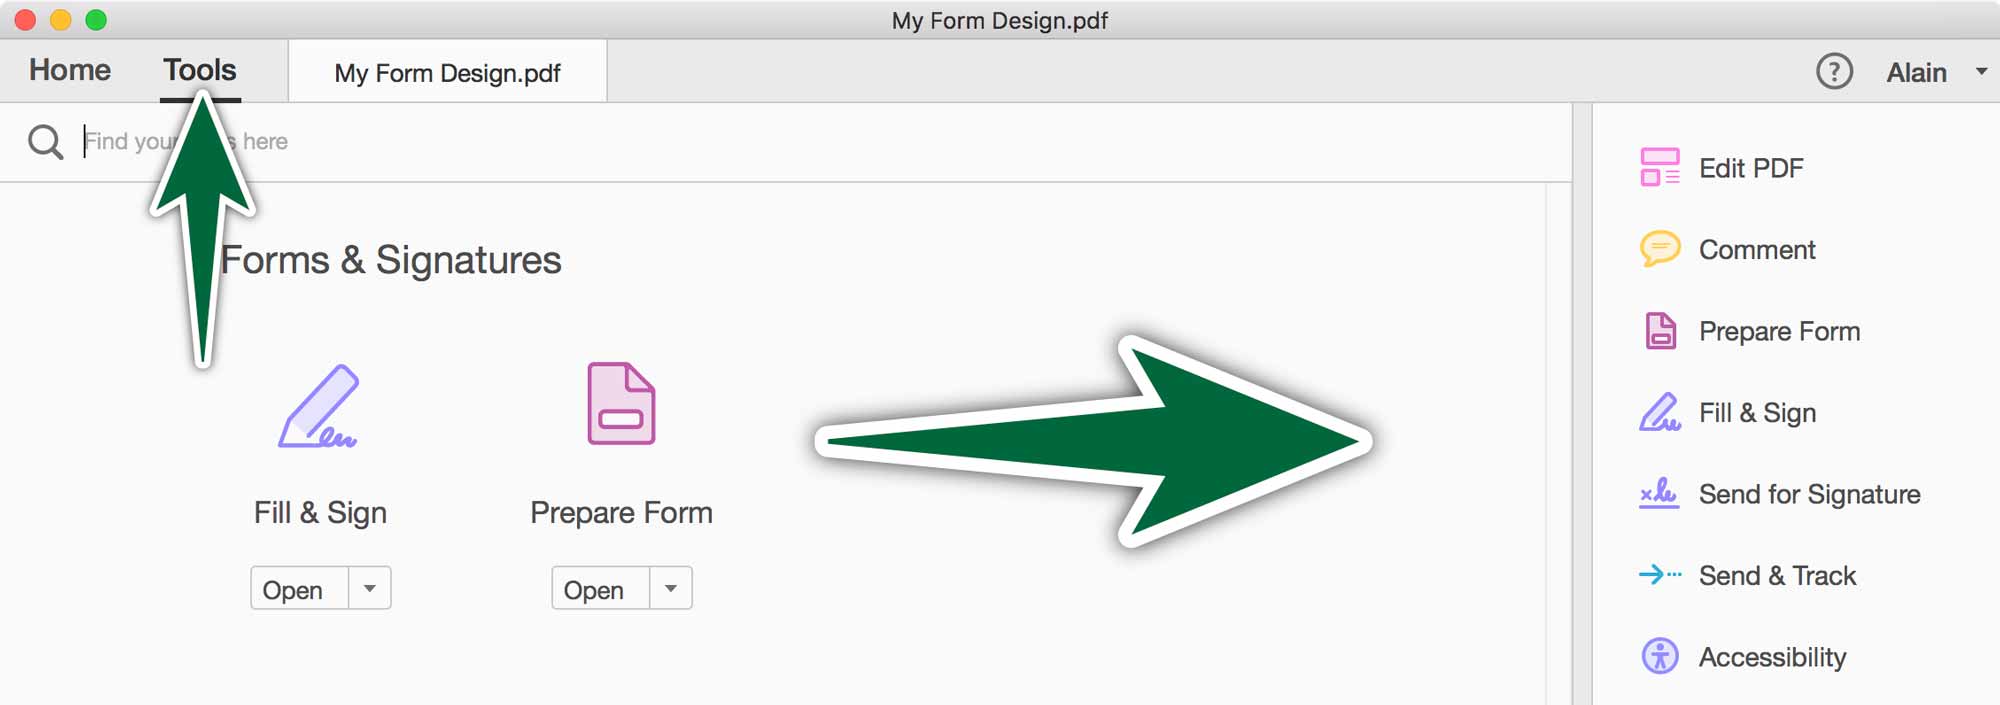
Before we create our PDF form in Acrobat, we’ll start by adding the Prepare Forms tool to our Tools panel. Click on the Tools tab, then search for the Prepare Forms tool. Once you’ve found it, drag it to the panel on the right. Voilà! You’re done.
The Wizard
Now we’re ready to convert our static form design to a fillable PDF form. If you’ve designed your form using clear, specific questions and form fields, it’s likely the wizard will do a large majority of the work for you. You need to have created visual clues for Acrobat to detect where you intend to have fields.
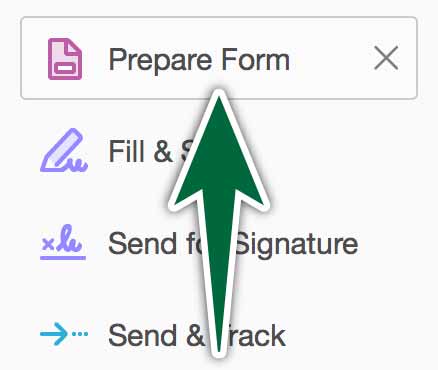
Click the Prepare Form button in your tools panel. You’ll be given the choice of input. Do you want to prepare a form from:
- the document you have open?
- choose another document?
- scan a document to convert to a form?
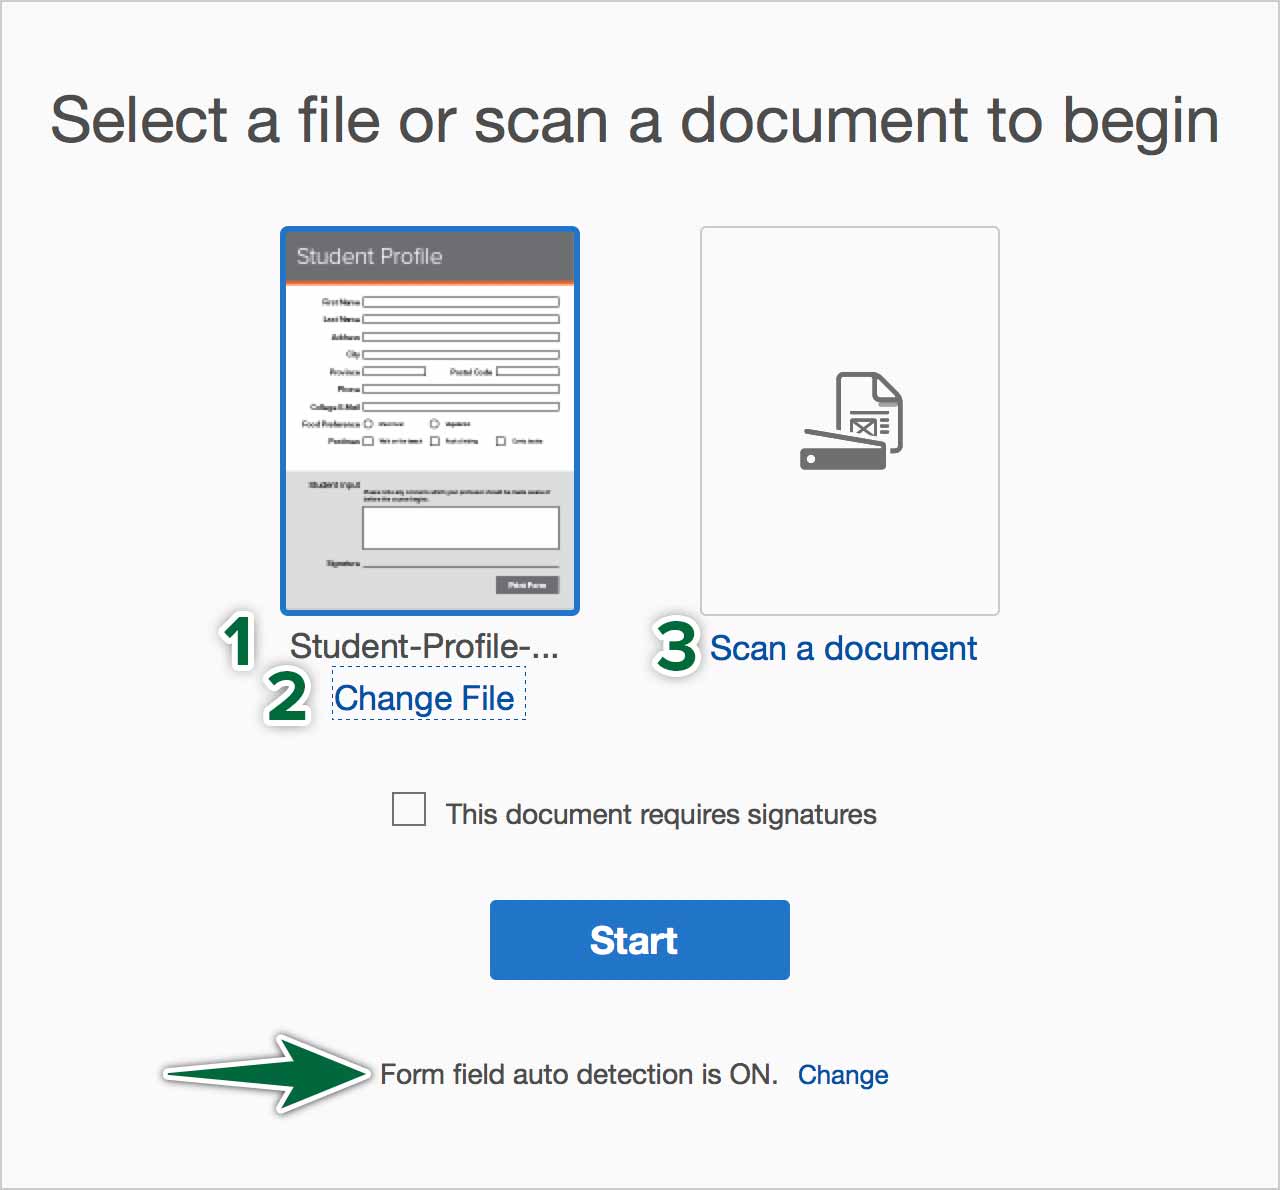
If you want Acrobat to create the form automatically, you’ll need to ensure Form field auto-detection is set to ON.
If you’ve designed your form well, it will even create the field labels for you. As you can see in the image above, we only have a bit of clean-up to do to complete our fillable form.
Editing Acrobat Form Fields
You can draw new fields on a form manually using the field creation tools. These appear along the top edge of your document when you click on Prepare Form in your Tools panel.

Each field type comes with many options in the respective Properties dialogues. These are some important items to note:
A series of check boxes allow for multiple selections, while radio buttons are meant for exclusive choices.
A text field can be made to accept only one line of text or multiple lines of scrollable text.
Avoid the List of Choices input. It’s a usability nighmare. Use a dropdown list instead.
When you create radio buttons, you need to give them identical names. They get created as a group. In the button’s Properties > Options field, you can give an individual radio button its name.
When there’s a finite list of options for a field, it’s best to use a dropdown list. They ensure the respondent is limited to the provided answers.
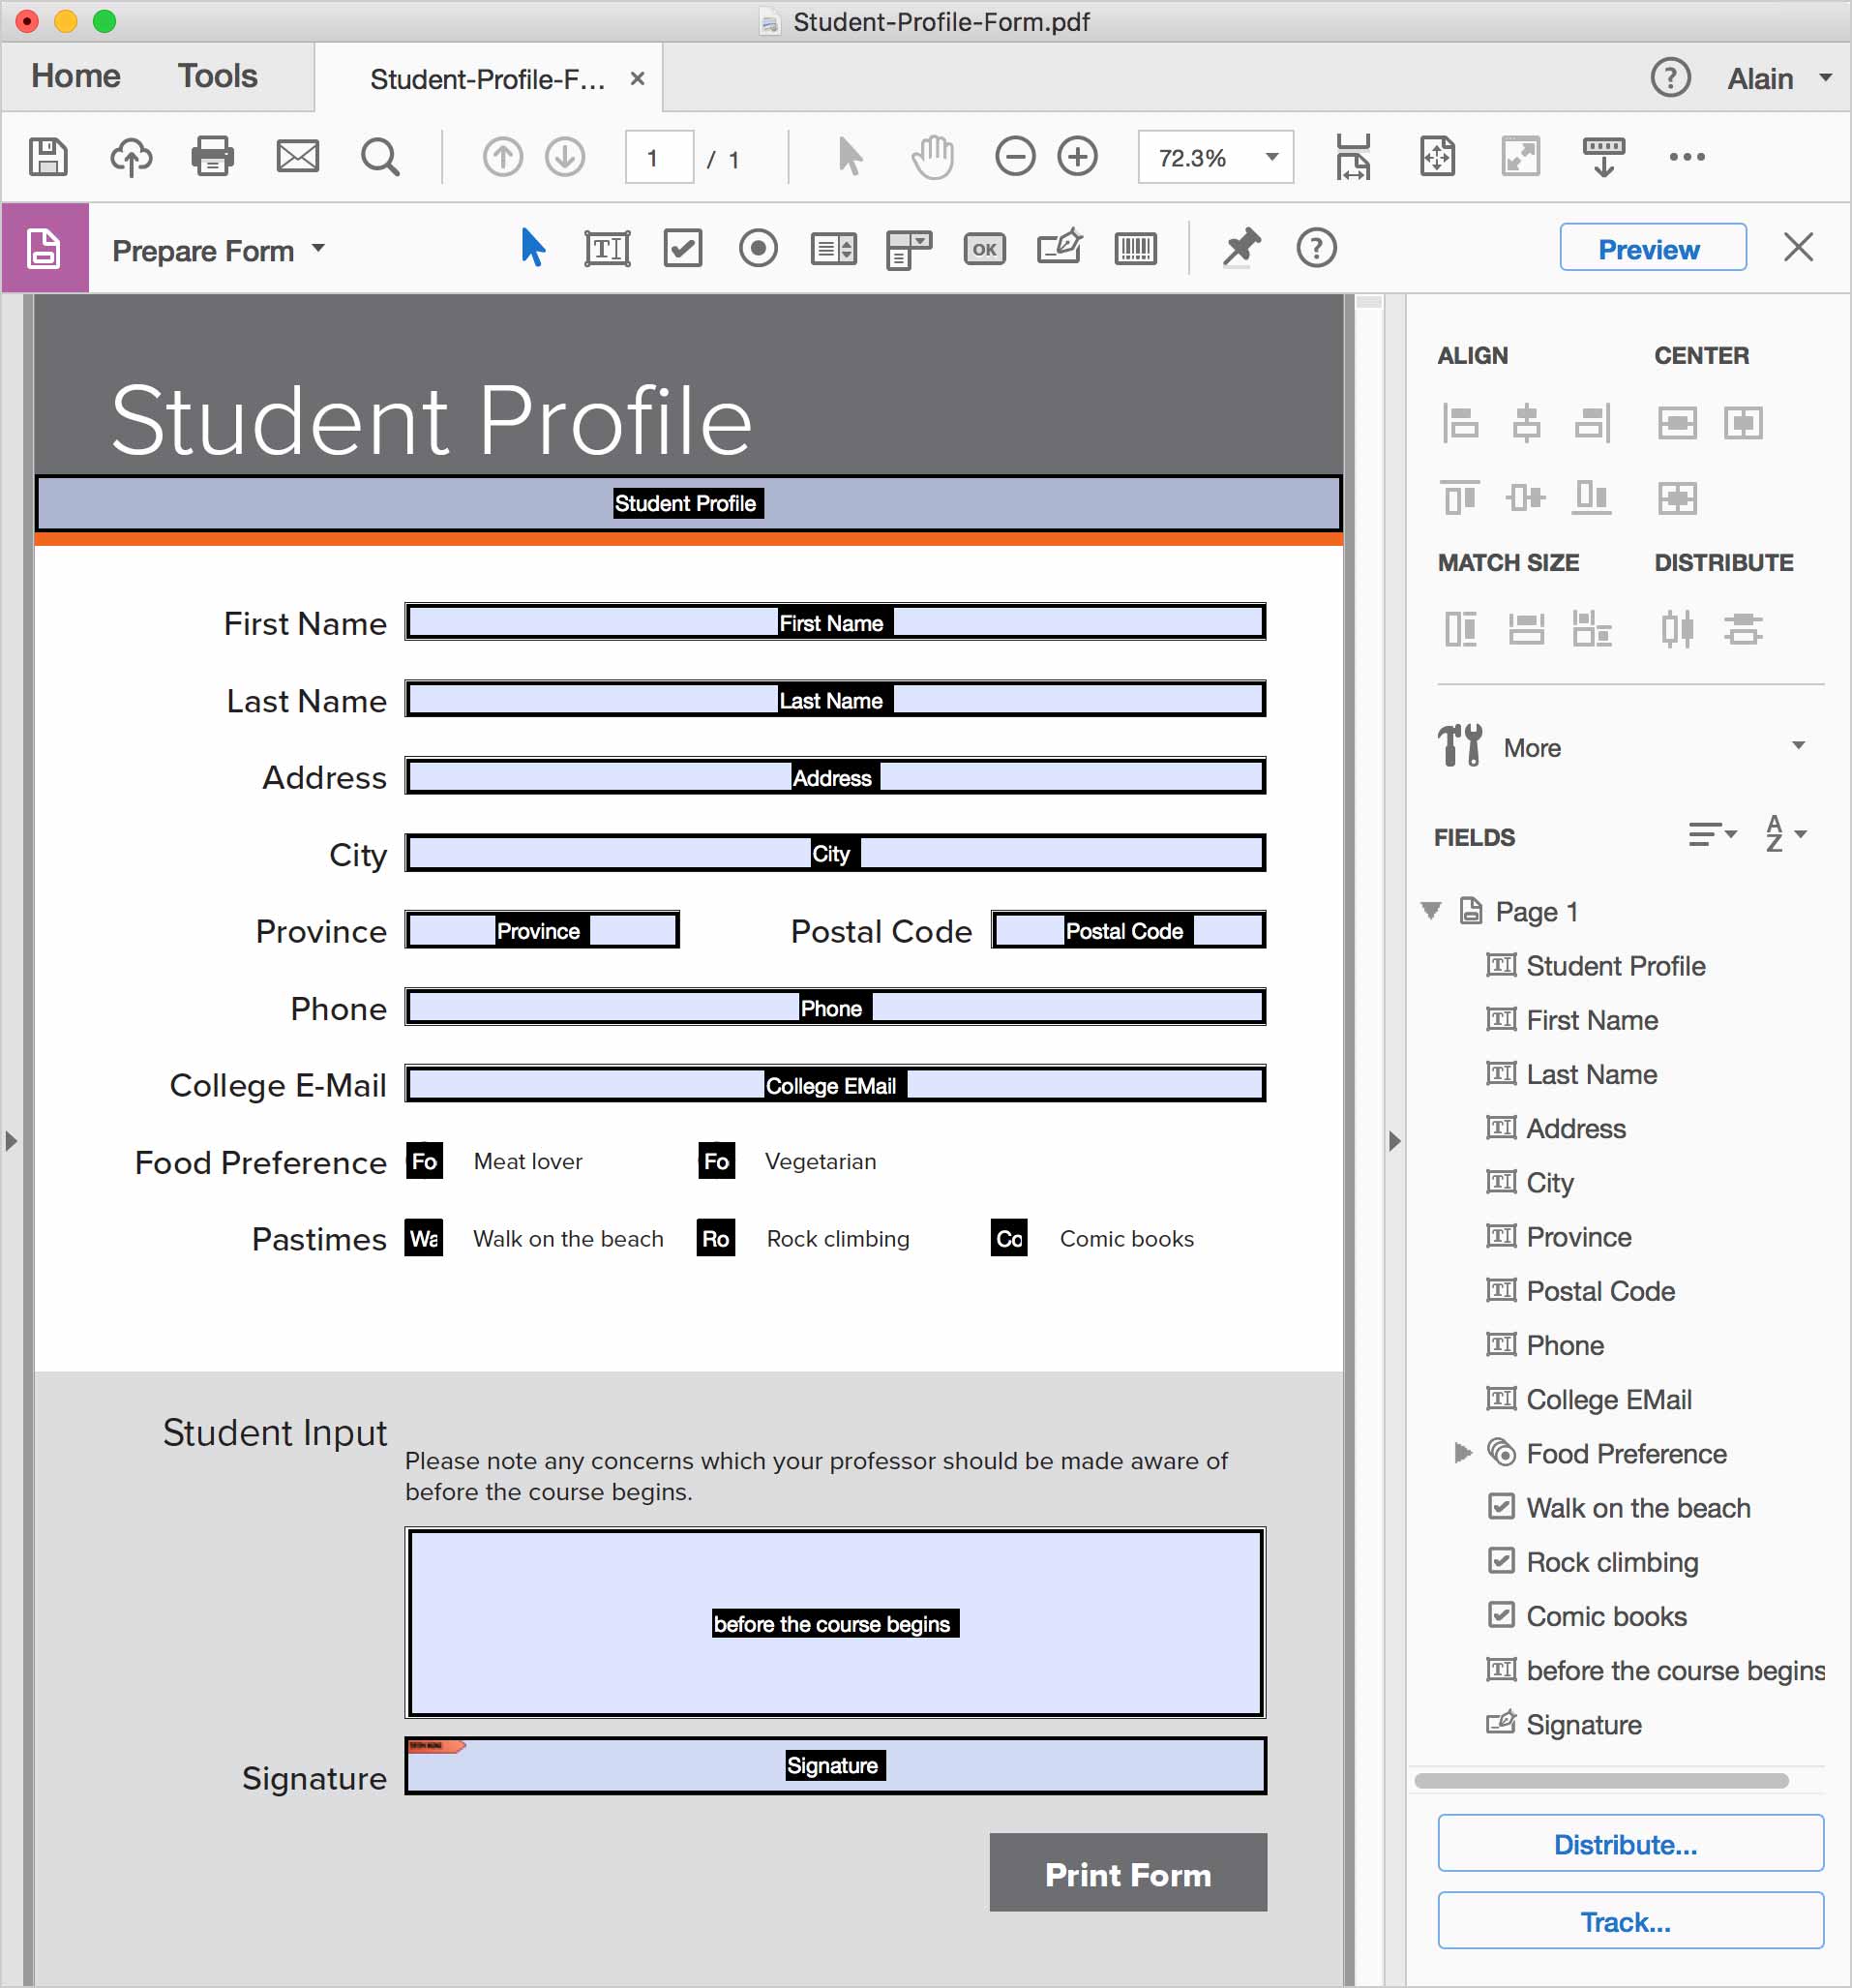
We need to make sure each form field is named and works the way we want. The Fields pane lists the fields in your form, with their types. In this case, most fields are text fields. The Food Preference item is a Radio button group. The Walk on the beach item is a checkbox.
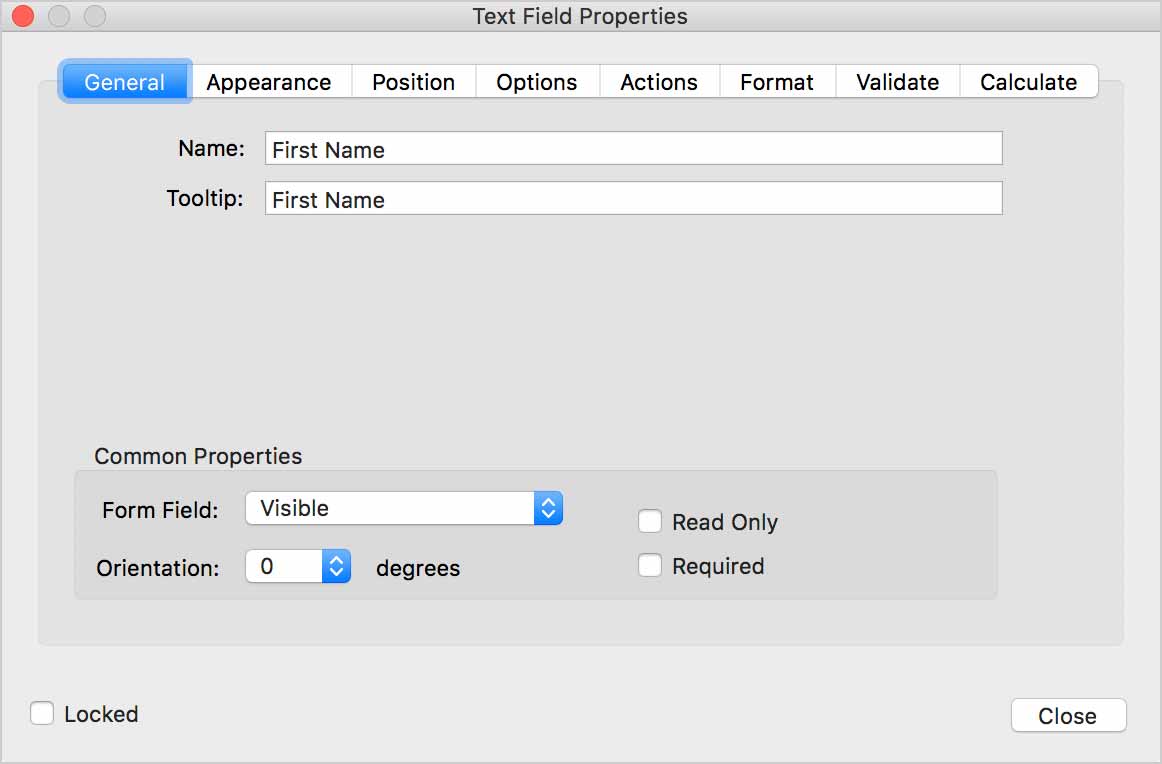
You can edit each field by double-clicking on it to access its Properties dialogue. These are a few important options:
- Name the field with a unique name without spaces nor special characters.
- You can make the field a mandatory one, so the respondant has to fill it before the form can be sent.
- Set the appearance of the responant’s text. You can optionally make the text scale to accomodate more text than the field can hold.
It’s important to name fields with unique, meaningful names as you create them. Note that fields with the same name act together. This means that if you type in one field, the result will appear in all the fields with the same name.
Text Field Restrictions
You can edit a form field to have it only accept a certain type of data. Double-click on a field, then go to the Format tab. It’s best to use minimal requirements here to not frustrate the responent.
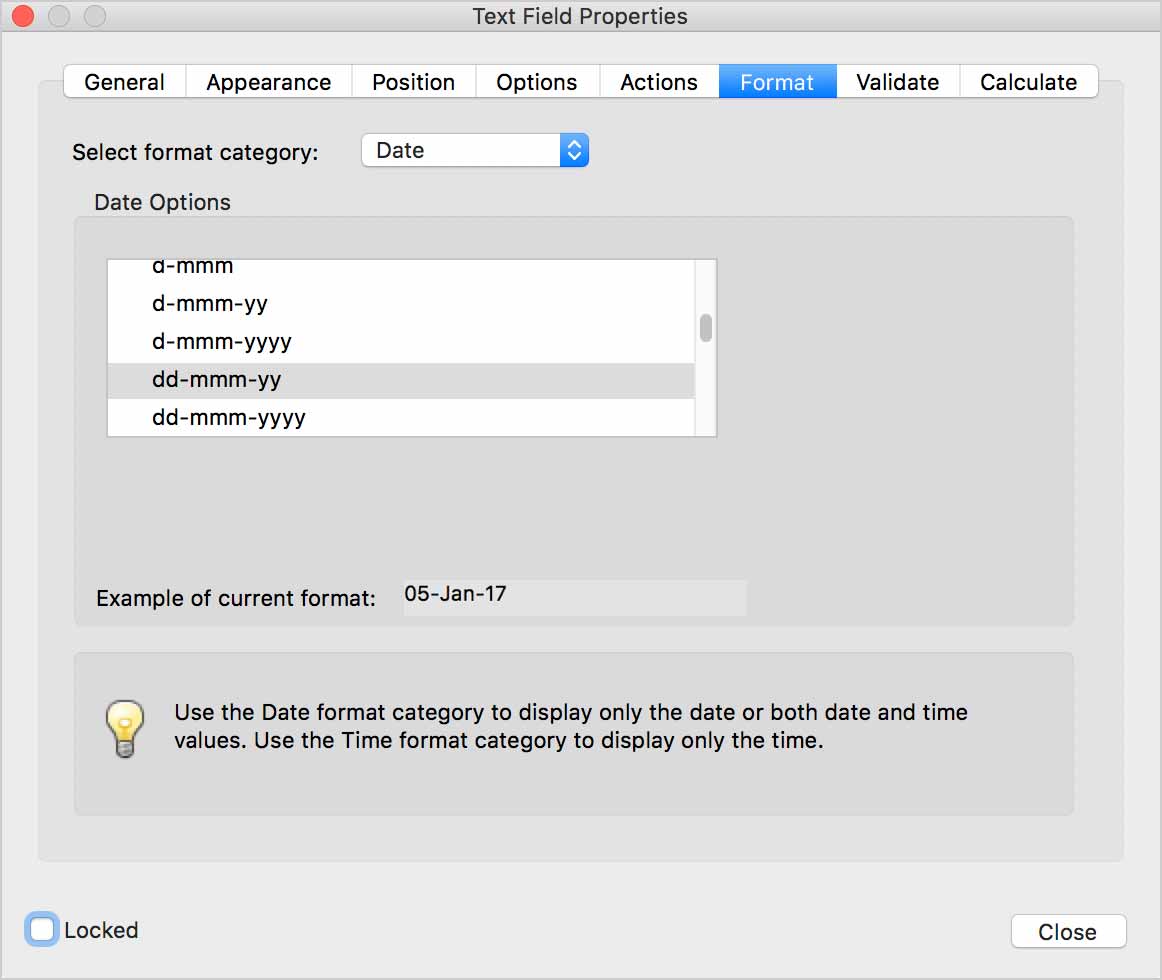
Here, you could do something like ensure that respondents enter a date properly. In this case, a date needs to be typed in the dd-mmm-yy format.
Creating Buttons
Buttons are used to perform an action like resetting the form or navigating to the next page.
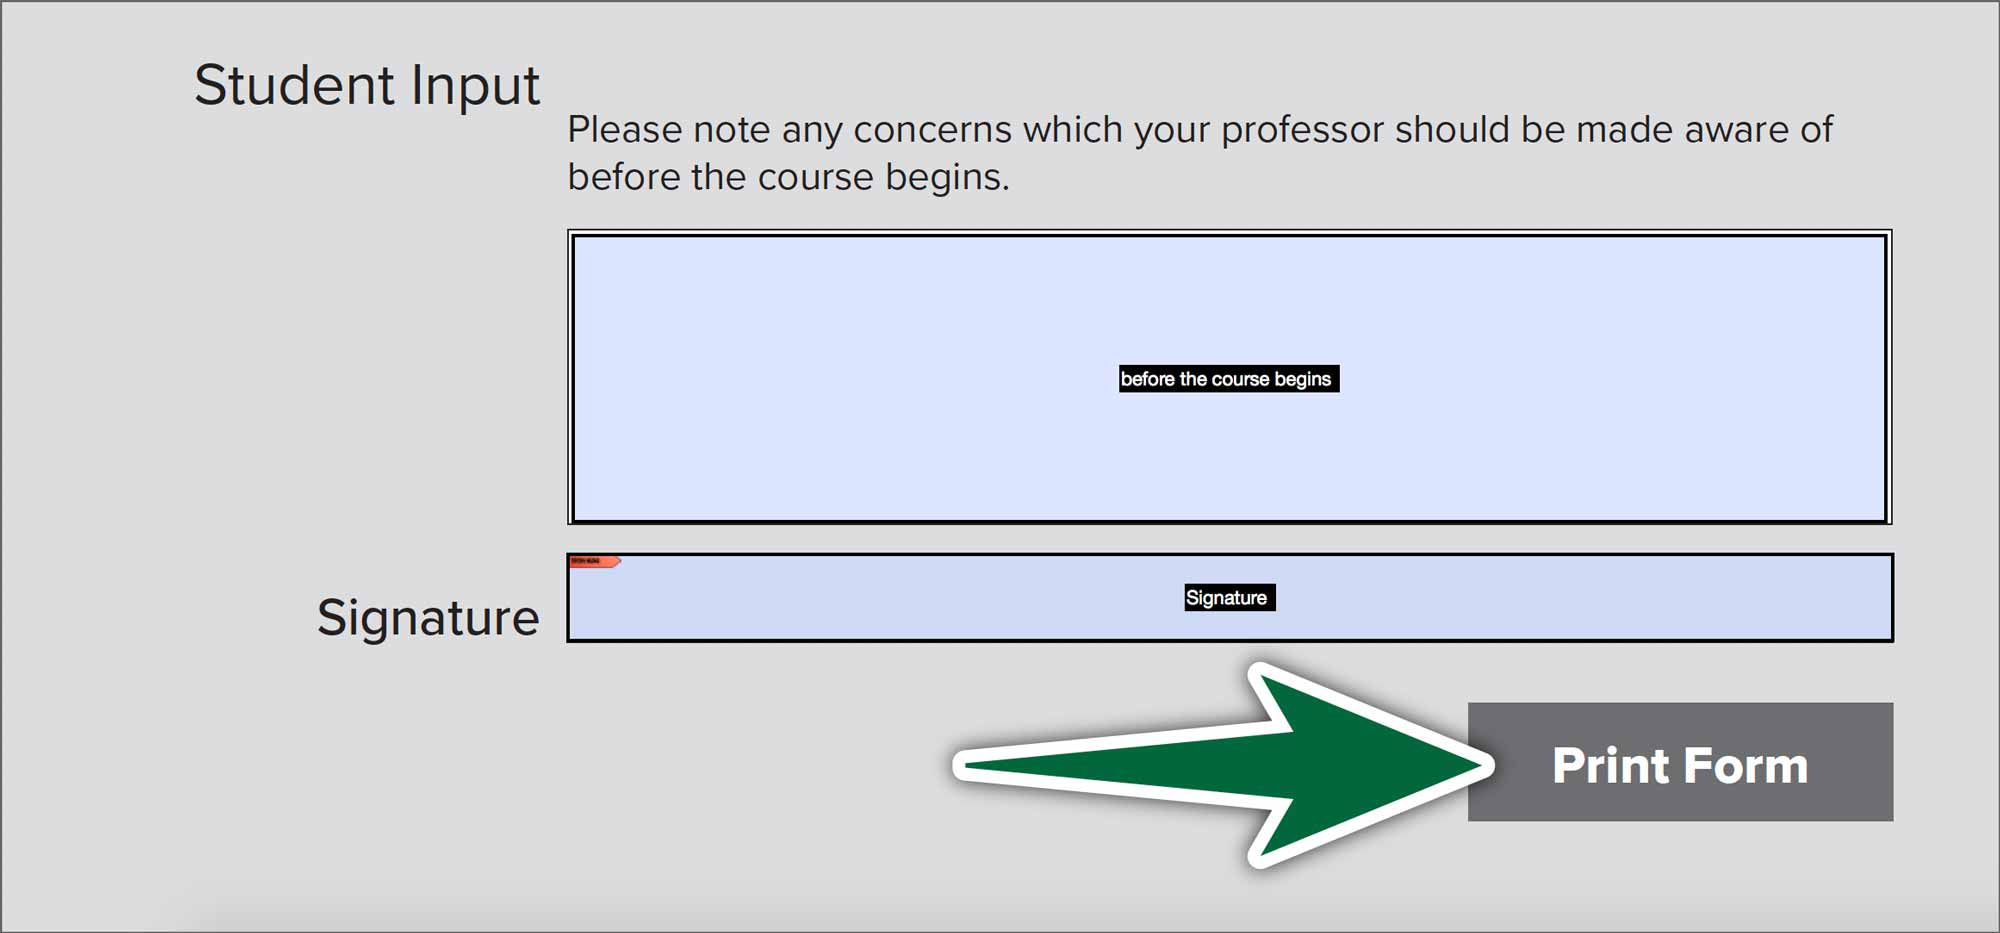
You can set a button to show on screen but not print. It is, after all useless to have a button printed on a piece of paper.
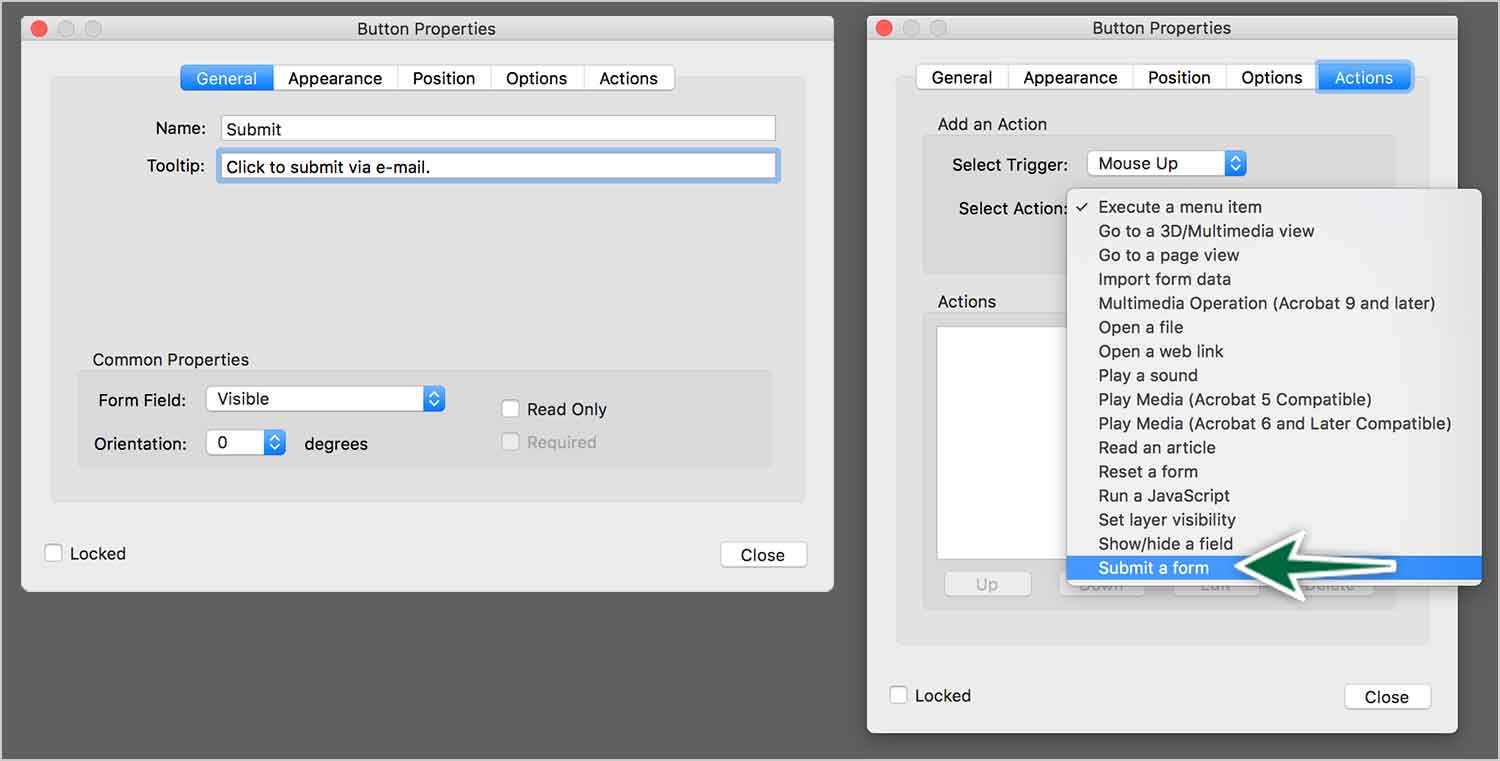
A form action is needed to make the button do something. Go to Properties > Actions. Make your button take action on Mouse up. You can choose from the dropdown menu of actions, or you can choose Execute a Menu Item…. This allows you to attribute any menu item to the button. Very powerful…
Barcodes
![]()
Barcodes are added to the form. Once the form is completed, the respondents’ data is stored in the barcode. The code can be scanned to collect all the data from a paper form. This requires specialized document scanners and software. This is of very limited use without a significant financial investment.
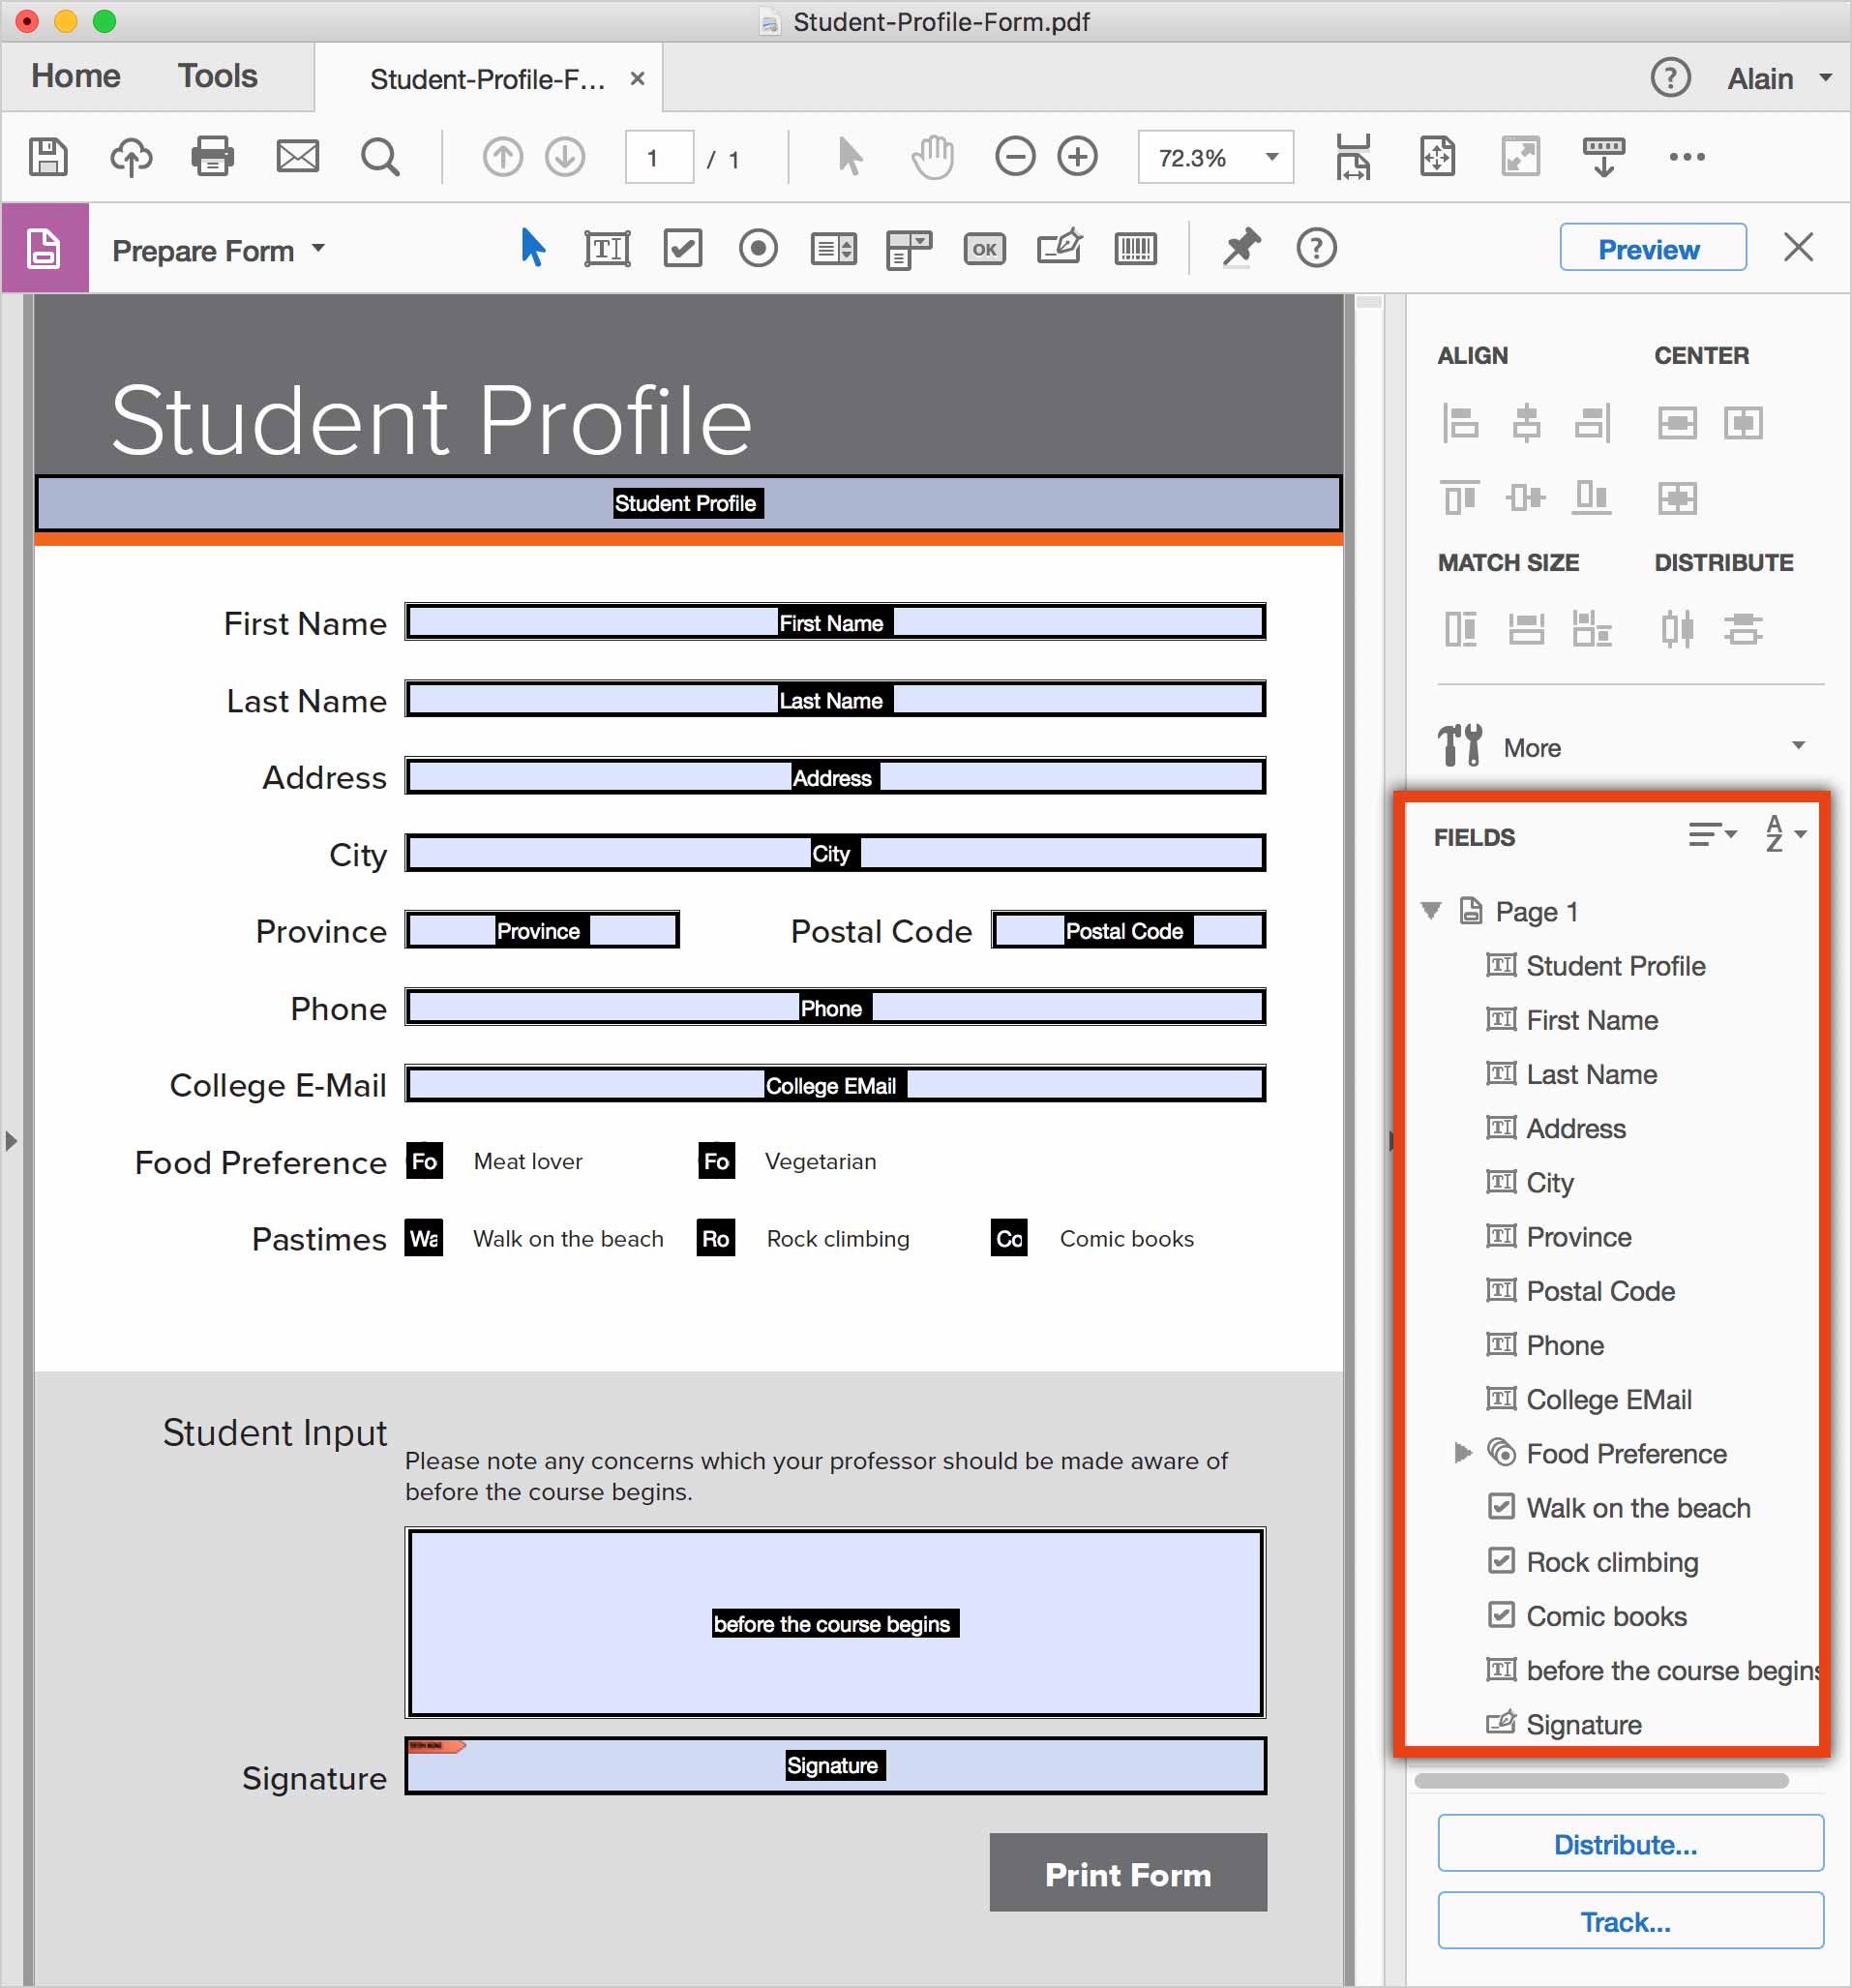
Tab Order
You’ve probably already noticed that you can use the Tab key on your keyboard to move from one field to another in a form. As the author of the form, you can intentionally set the tab order.
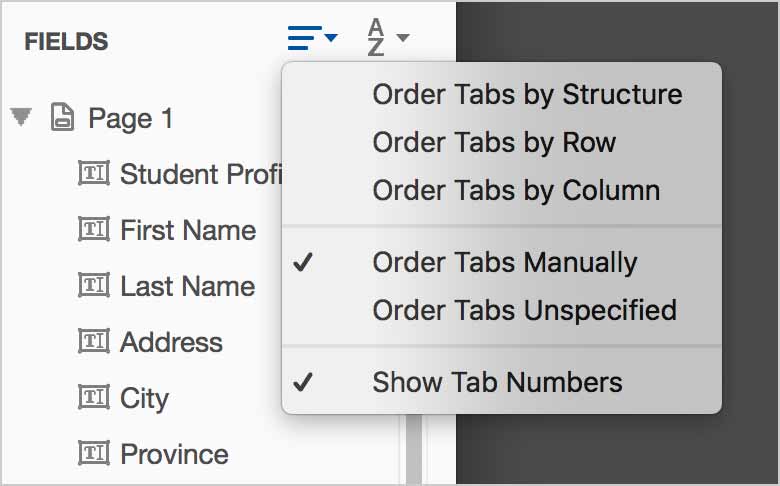
To change the tab order, you can drag field names up and down the list in the tools panel on the right.
Signing Acrobat Forms
Once the recipient has filled out the form, they can sign it digitally. They don’t even need paid software to do this. Signing functionality if free for all users.
Signatures are useful to receive confirmations or approvals for the form. This really completed the paperless Acrobat workflow.
Easily Sign any PDF File
The first, most universal method of signing forms is to use the Fill & Sign tool. This is available to any user who has Acrobat DC Pro or Acrobat DC Reader, so it’s a free solution. This option offers no tracking of documents.
The workflow in this case is to e-mail the form to recipients. They’ll sign them, then send them back via e-mail. This is less convenient when you have large numbers of recipients.

This tool gives you the option to sign or initial the document. You have the choice of:
- Typing your signature with one of the provided script fonts.
- Drawing your signature with the mouse. Awkward!
- Using an image. You’ll need to get an image of your signature.
It’s a good idea to do a Save As… command to save a copy of your signed form. Once a form is signed, the responses can no longer be edited.
You want to ensure that your PDFs are usable by all recipients. Some won’t have Adobe Acrobat software on their computers. As good practice, you can provide a link to https://get.adobe.com/reader on your form or in an e-mail.
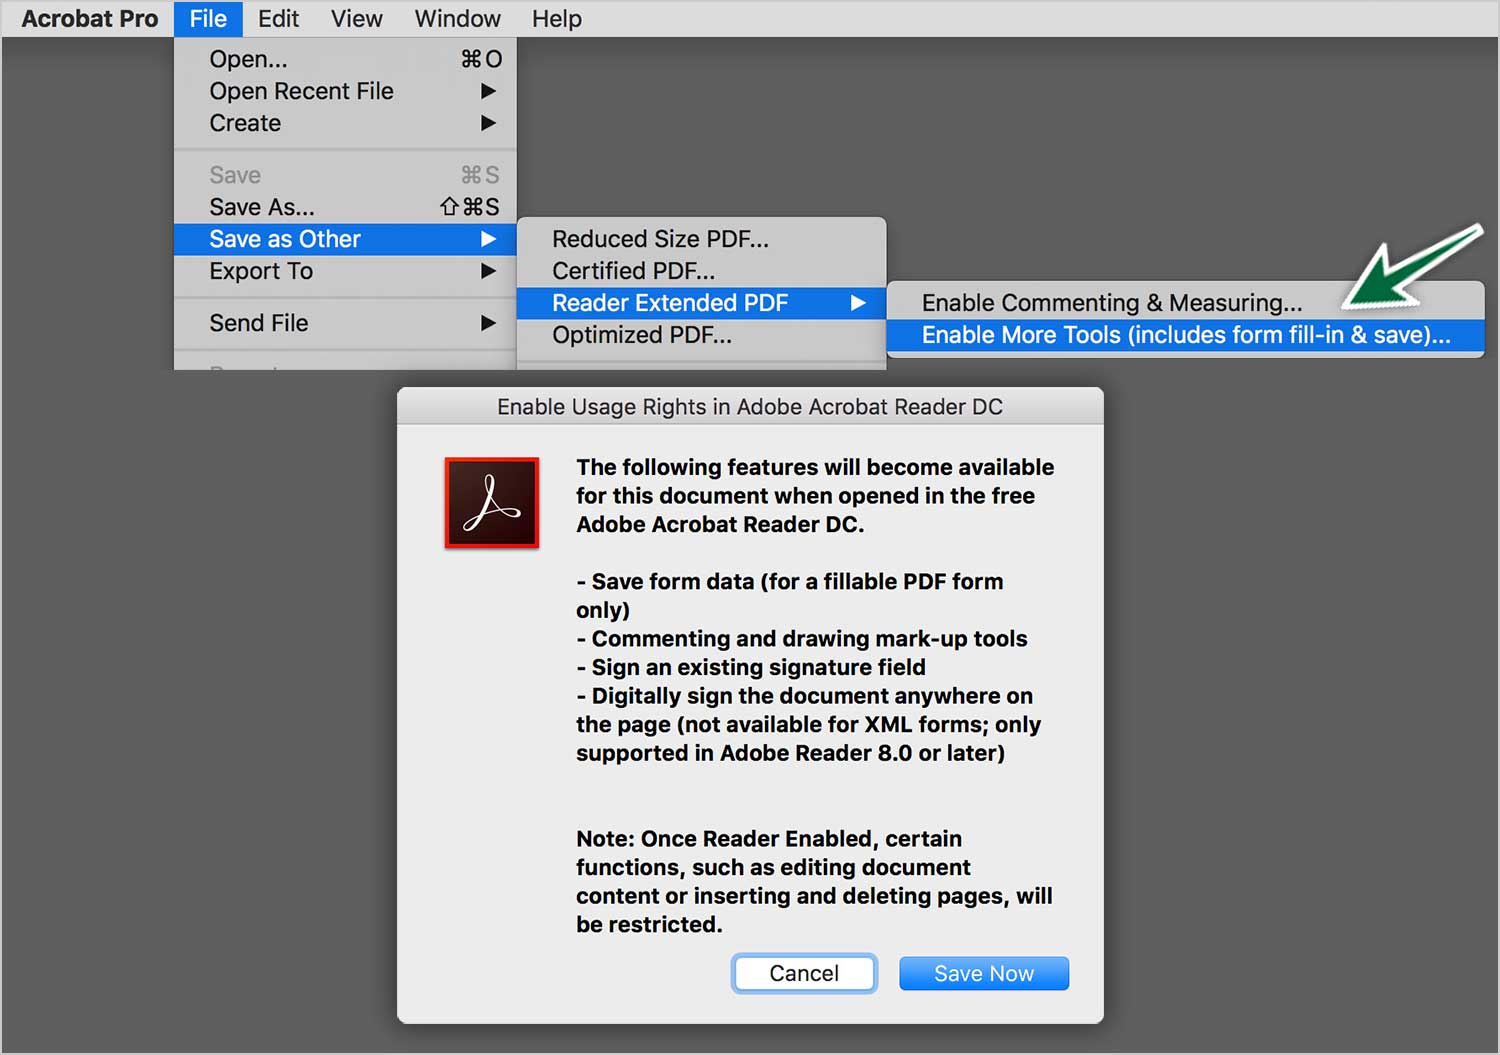
If you’re not guaranteed that recipients will have the latest Adobe Acrobat software, you can enable this in most versions. Go File > Save as Other > Reader Extended PDF > Enable More Tools … The resulting dialogue explains the details. Make sure you save a copy, because this new one is less editable.
Send for Signature
If you want to gather signatures in a more automated way, you can use Send for Signature. This allows you to send any PDF file, then even attach other documents along with it. The recipients don’t even need to have any Adobe software installed. They’ll receive an e-mail notification, then sign the form right from their browser.
As the sender, you can track the form by clicking Manage Form. The rest of the work is done in a browser. All your managed PDF files stay at documents.adobe.com.
Digital IDs
If you require more secure signatures, you can use a password protected one called a digital ID. To use this, you’ll create a field with the signature tool.

When the field is clicked on by the user, a dialogue appears asking for a digital ID. The user will need to go through the process of creating an ID. Once this is done, they’ll be able to sign documents securely in the future.
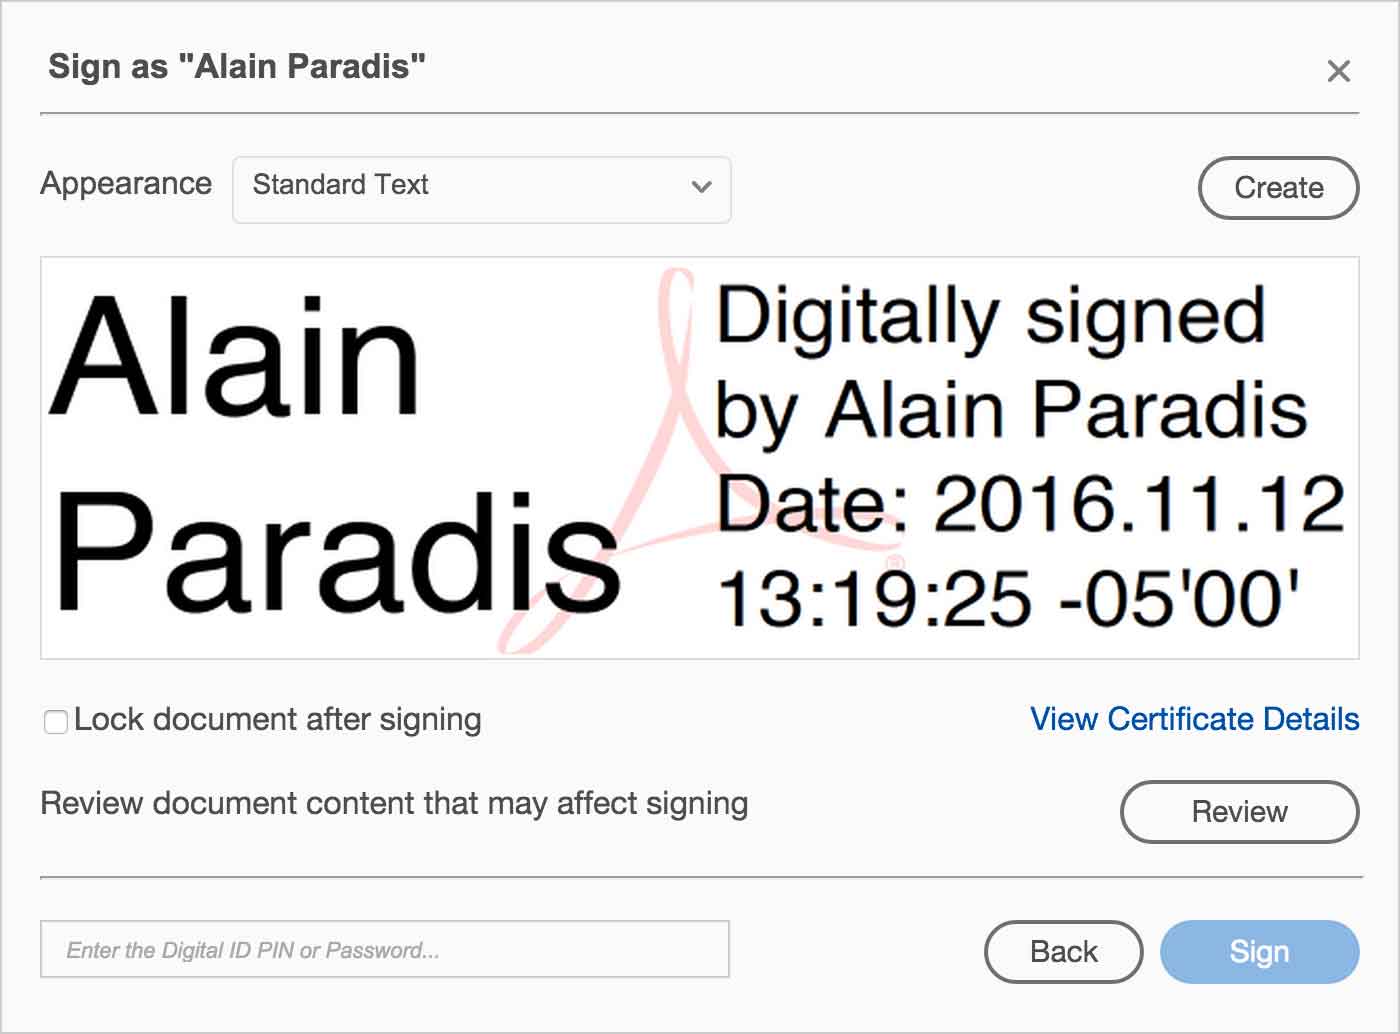
Once this is done, you can create a signature image and sign forms in a very secure manner. As the signatory, make sure you create a strong password, then save it in a password manager application.
Collecting PDF Form Data
If you have a large group of recipients filling out forms, it’s possible to collect the data in a spreadsheet. Acrobat DC Pro and a spreadsheet application is all you need.
The basic workflow for sending forms to be signed relies on the recipient to send it back to you via e-mail. This may not be completely reliable. There is a way to resolve this.
You can add a Submit button to your form using the Button tool.
The form’s author will receive .fdf files which can be combined into a spreadsheet using Adobe Acrobat.
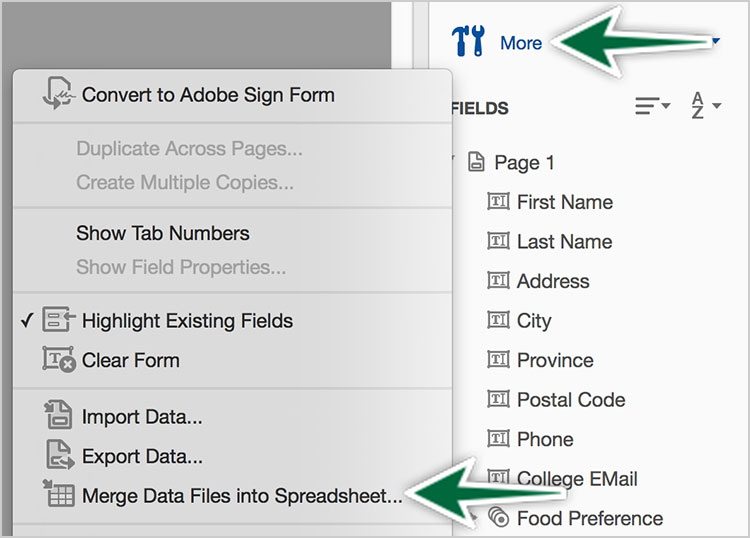
From here, it’s up to you, the author to use the received data as you see fit.