Topics
Curvature Tool
![]()
Adobe’s Curvature Tool Support Page
The keyboard shortcut for the Curvature tool is Shift-Tilde.
The Curvature Tool is nested under the Pen Tool. In fact, you could say it’s a new, improved version of the Pen Tool. It allows you to easily create smooth or corner points as well as convert them.

The Curvature Tool allows you to click from one point to another. The Rubber Band function shows you where the path will land before each click. Default paths have smooth points. To get corner points, either Option-click or double-click. The Escape key drops the path.
Shape Builder Tool
![]()
Adobe’s Shaper Tool Support Page
The keyboard shortcut for the Shape Builder tool is Shift-M.
With the Shape Builder Tool, you can drag across shapes to either unite them or subtract them. Simply drag across multiple overlapping shapes to unite them. Option-drag to subtract them.
The Shape Builder tool has options. To access them, simply double-click on the tool. See Adobe’s support page for details.
Shaper Tool
![]()
Adobe’s Shaper Tool Support Page
The keyboard shortcut for the Shaper tool is Shift-N.
The Shaper tool allows you to draw simple geometric shapes by drawing with the mouse. You draw with the mouse. When you drop the mouse, the shape will become a clean vector shape. The tool was kind of made to be used on a tablet running a full version of Windows. You could draw with your finger.
If you draw two overlapping shapes, you can erase intersecting parts by scribbling. When you scribble, the resulting shapes becomes a Shaper Group. The shapes are all still there. They just have no fill or strokes on parts of them.
If you double-click on the group, you enter Isolation Mode. You can then move the individual shapes around.
Once you’ve drawn multiple overlapping shapes, you can click on them with the Shaper Tool to enter Face Selection Mode. At this point, you can edit their colours.
When you’re in Face Selection Mode, there’s an arrow icon on its edge. If you click it, you enter Construction Mode. You can then select any of the individual shapes to edit them.
You can remove one of the shapes from the Shaper Group by dragging outside the rectangle.
Blob Brush
![]()
Adobe’s Blob Brush Tool Support Page
The keyboard shortcut for the Blob Brush is Shift-B.
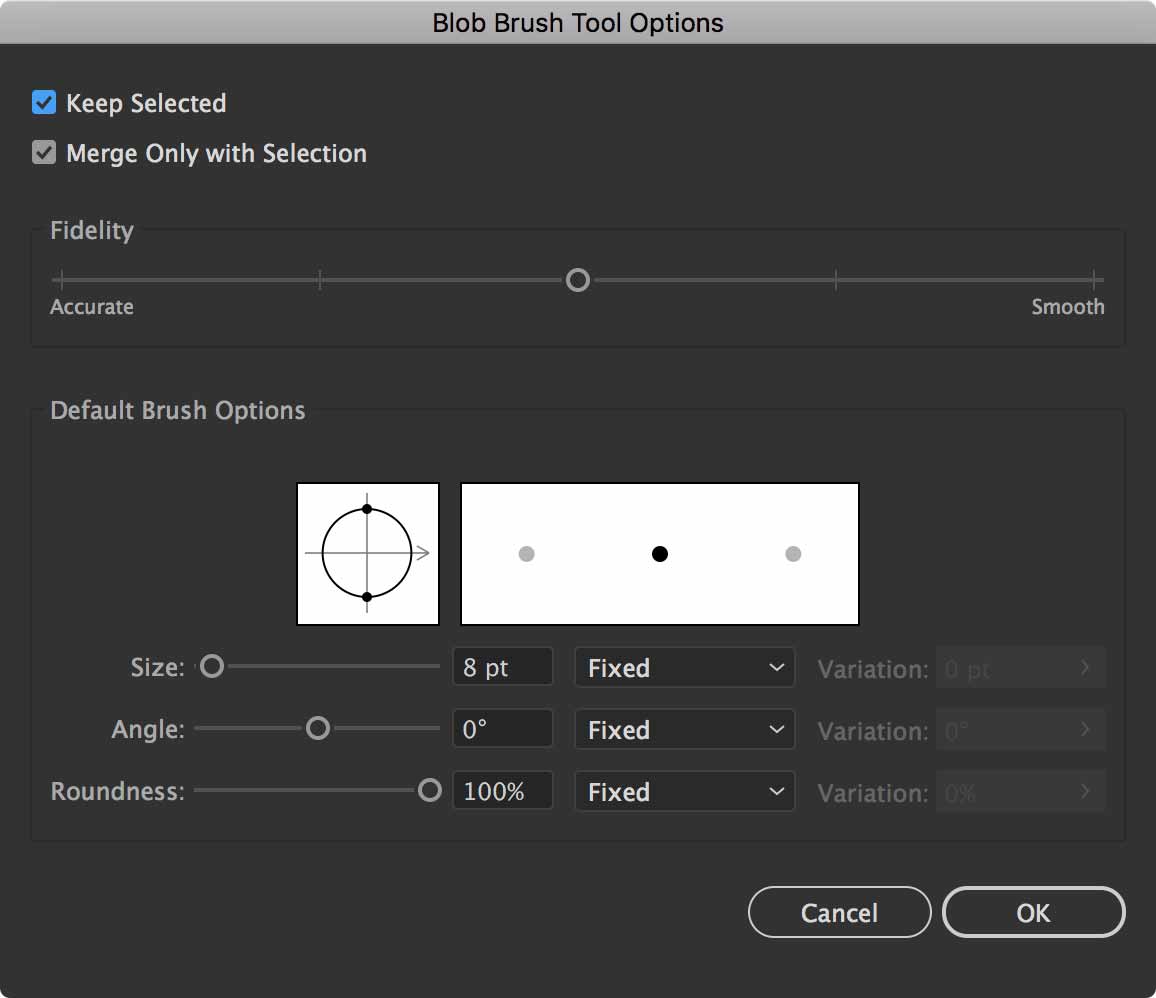
With the Blob Brush draws fills whether you draw with a fill or a stroke. Shift-dragging constrains proportions. You can use the Eraser Tool to carve into the Blob Brush shape.
You can double-click on the Blob Brush tool for settings.
If you deselect what you’ve drawn to date, then draw again, it starts a new shape.
Pencil Tool
![]()
Adobe’s Pencil Tool Support Page
The keyboard shortcut for the Pencil tool is N.
The Pencil Tool was really not useful before it was re-engineered a few years ago. You can draw quite well, even when drawing with your mouse.
There are useful settings for the Pencil Tool. Simply double-click on the tool to access them.
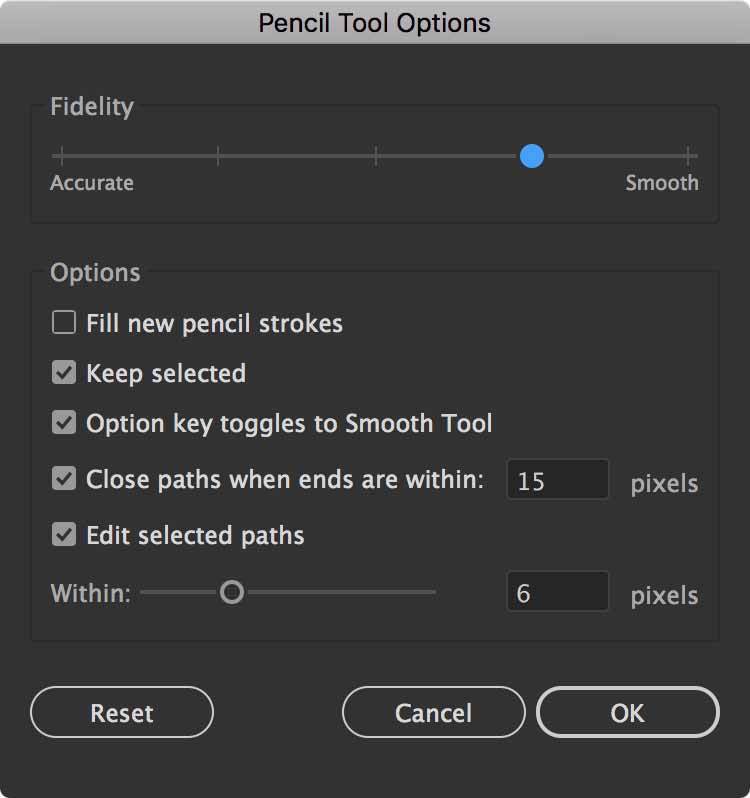
Fidelity refers to how closely the resulting path resembles what you actually drew. It’s really useful whether you’re drawing with a mouse or a pen tablet.
Keep selected makes it that the path you just drew stays selected. When you combine this function with Edit selected paths, it allows you to add to existing paths as you draw.
After having drawn a path, if you brush along it, it will re-shape itself. You can massage lines into place by repeatedly brushing them. …really helpful.
The Pencil Tool Gallery
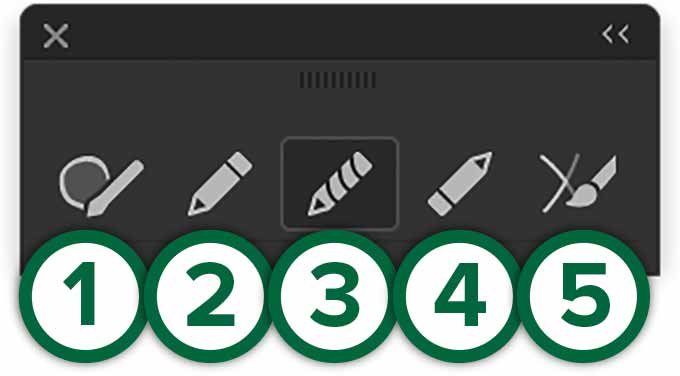
- Shaper Tool, 2. Pencil Tool, 3. Smooth Tool, 4. Path Eraser Tool, 5. Join Tool
Pencil Tool Options
Before you draw with the Pencil Tool and a mouse, it’s a good idea to double-click on the tool to access its options.
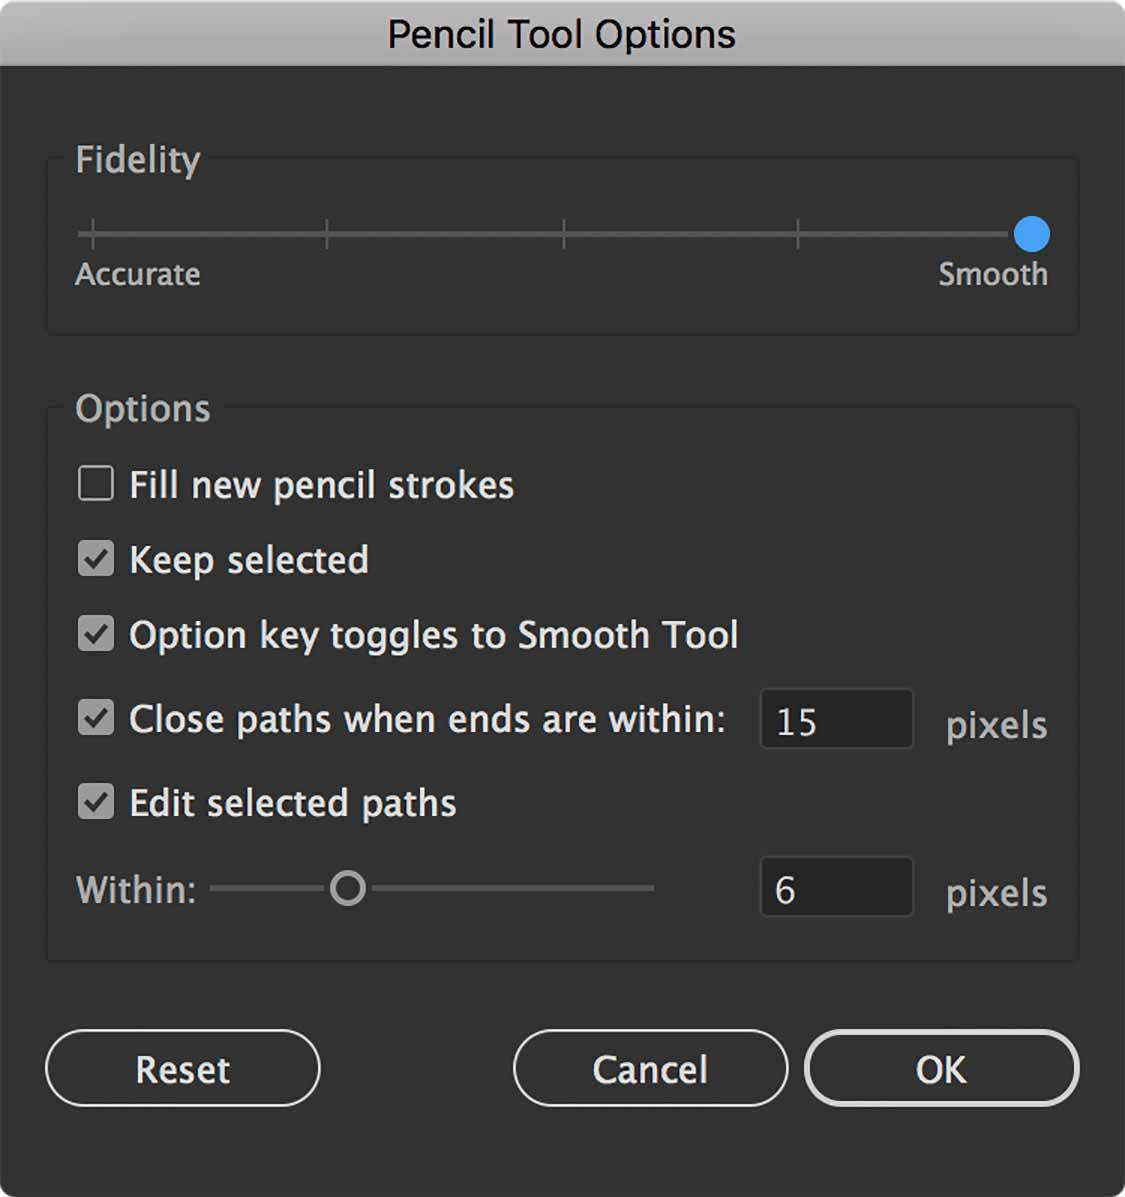
We’ll want to increase its smoothness because drawing with a mouse usually creates pretty bumpy results. Test the results of using a smoother setting. Is it too inaccurate for you? If so, dial it down. Find the settings that feel right for your drawing style.
Shift-dragging with the Pencil Tool constrains paths to 45º angles. If you hold the Option after you’ve clicked with Pencil Tool, it will create straight paths as you drag without constraining to a specific angle.
Variable-Width Paths
Applying variable-width paths to your artwork gives it a more fluid appearance. The tool is very adept at tapering the width of the stroke. The controls are very precise and easy to use.

Draw a path with any tool in Illustrator. Use the Width Tool – Shift-W. Hover your cursor over the path. A diamond shape will appear called a Width Point along the path. Your cursor will have a + on it. Furthermore, if you have Smart Guides turned on – ⌘-U – you’ll see a label next to your cursor with the weights of the stroke. It even displays the weight on either side of the path.
Now click and drag up or down. The width of the stroke will grow where you’re dragging.
A Width Point is not an anchor point. It doesn’t affect the structure of the path. It only affects what the path looks like. To proove this, type ⌘-Y to switch to Outline Mode. You’ll see that your variable-width stroke still has the original, straight path.
When you apply a variable width, the weight displayed in the Stroke panel is the widest part of the path.
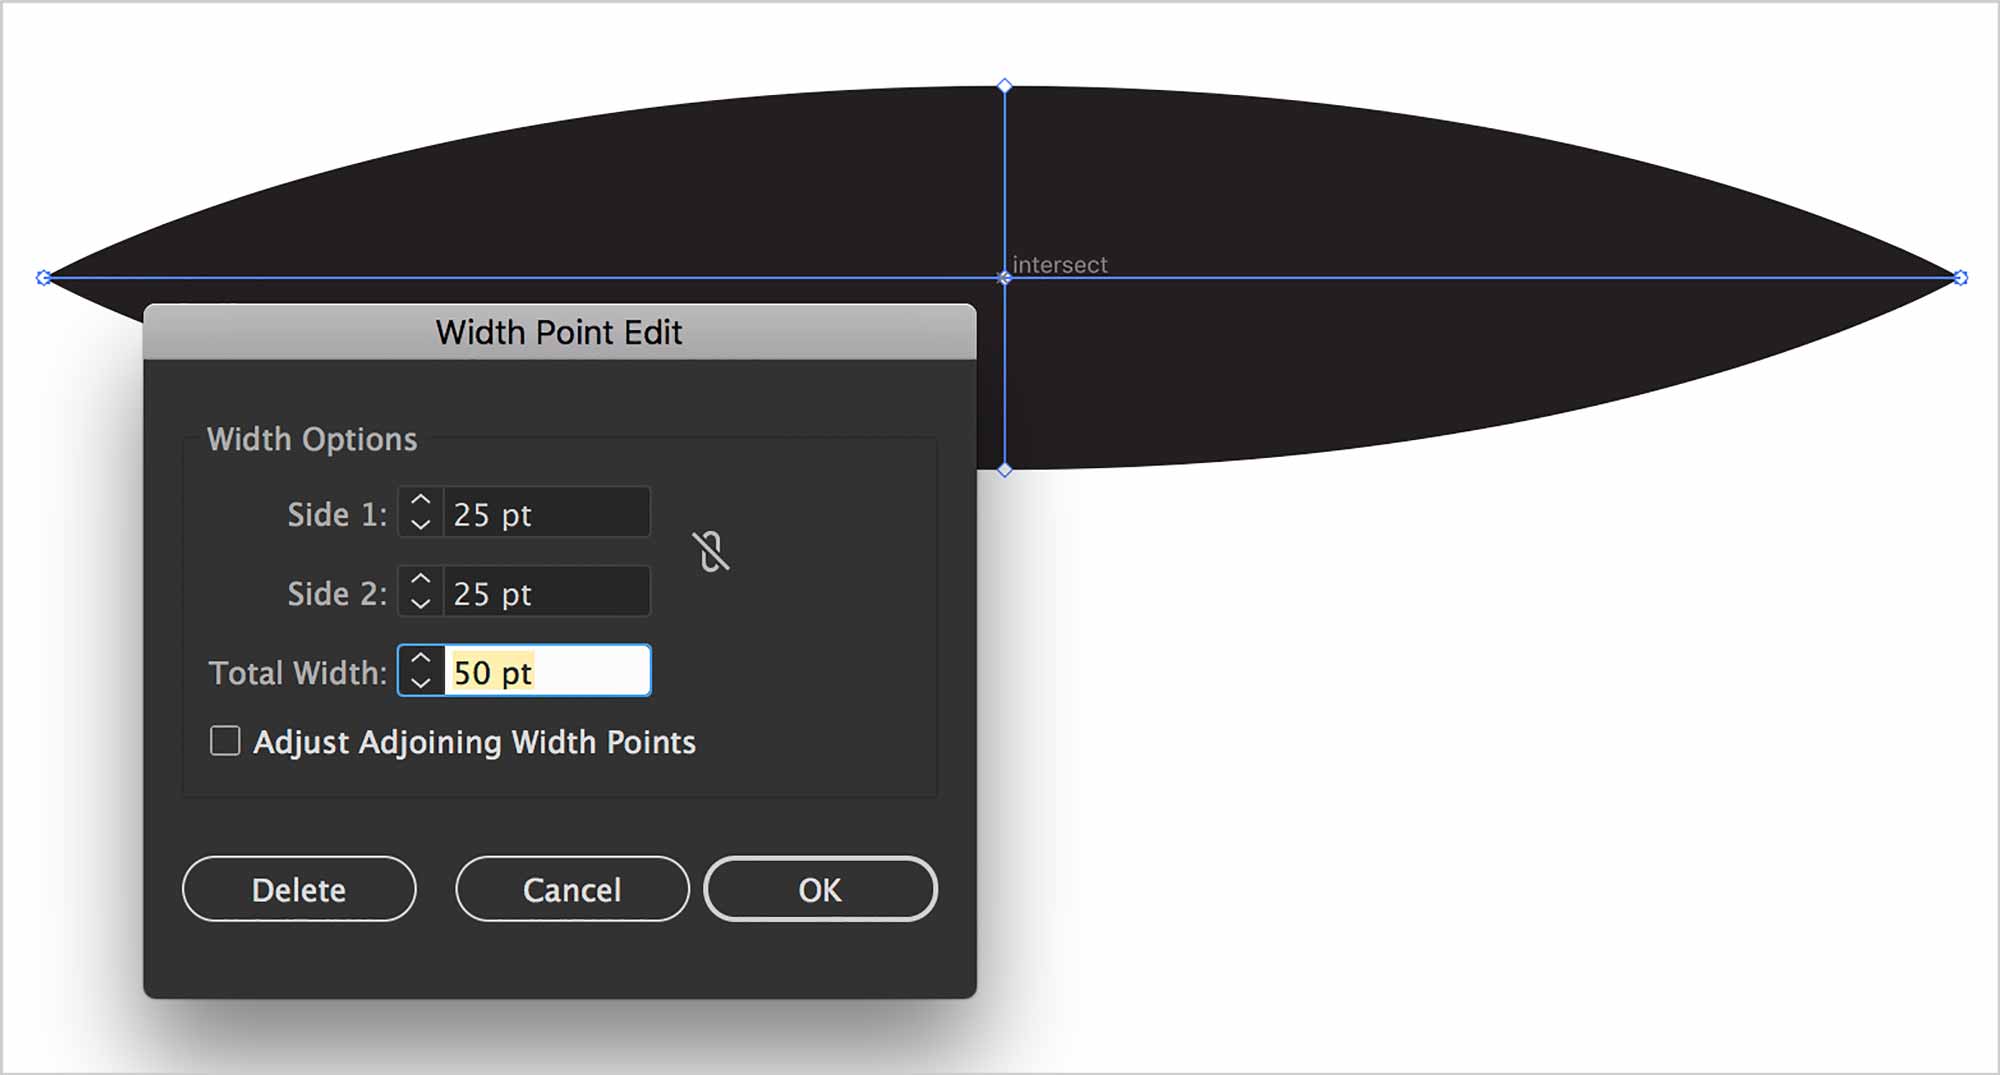
Editing Variable Widths
If you double-click on an existing Width Point, a dialogue will appear with weight options.
If you want to make a variable-width stroke bigger on one side of the path than the other, you can option-drag on the width point. Only that side of the path will be affected. You can drag the width point along the path. It re-adjusts the tapering automatically. You can adjust them proportionally by holding the Shift key.
To delete a width point, you can double-click on it, then hit the Delete button in the dialogue. A second option is to click on a width point with the Width Tool, then simply hit the Delete key.
Drawing with variable-width strokes is a bit different than usual drawing in Illustrator. Usually, we have a tendency to close our paths. That is, we draw back to the original anchor point. When using variable-width strokes, this can sometimes look wrong. It’s sometimes better to draw separate, open paths.
If you have multiple strokes you wish affect at once, you can style one. Switch to your Eye Dropper Tool. Hold the ⌘ key to temporarily switch to the Selection Tool. Click on another path. Let go of the ⌘ key, then click on the styled path to eye dropper it.
Width Profiles
Illustrator has a libary of profiles. You can access it from the Control bar. You can also access them from the Stroke panel.

- Add to Profiles, 2. Delete Profile, 3. Reset Profiles
Unlike other panels in Illustrator, which are document-specific, the Variable-Width Profiles panel is a Library. So it applies to all documents. If you create a profile in one Illustrator document, that profile will be available in all of your Illustrator documents.
Likewise, if you reset the profiles, it will delete all custom profiles. They’ll be gone forerever, with one exception. The only way to get them back would be if you have a stroke with that profile on it. You could re-add it to the menu.
If you apply a Variable-Width Profile to a path, then save those attributes as a Graphic Style, the variable-width attributes will get stored in that style. This helps during client revisions. If an edit to a variable path width is needed, all you need to do is edit the Graphic Style. All your artwork with that style will change.