Topics
Before we get started, we’ll set up our panels. Hit Shift-Tab to hide your panels. Go to the Type menu, then check Paragraph Styles and Character Styles. Stretch them so they’re longer, then dock them to the edge of your screen.
Nested Styles
Nested Styles are Character Styles which are applied from inside a Paragraph Style based on text delimeters. Nested styles apply Character Styles until they run into a delimeter you establish in the Paragraph Style’s settings.
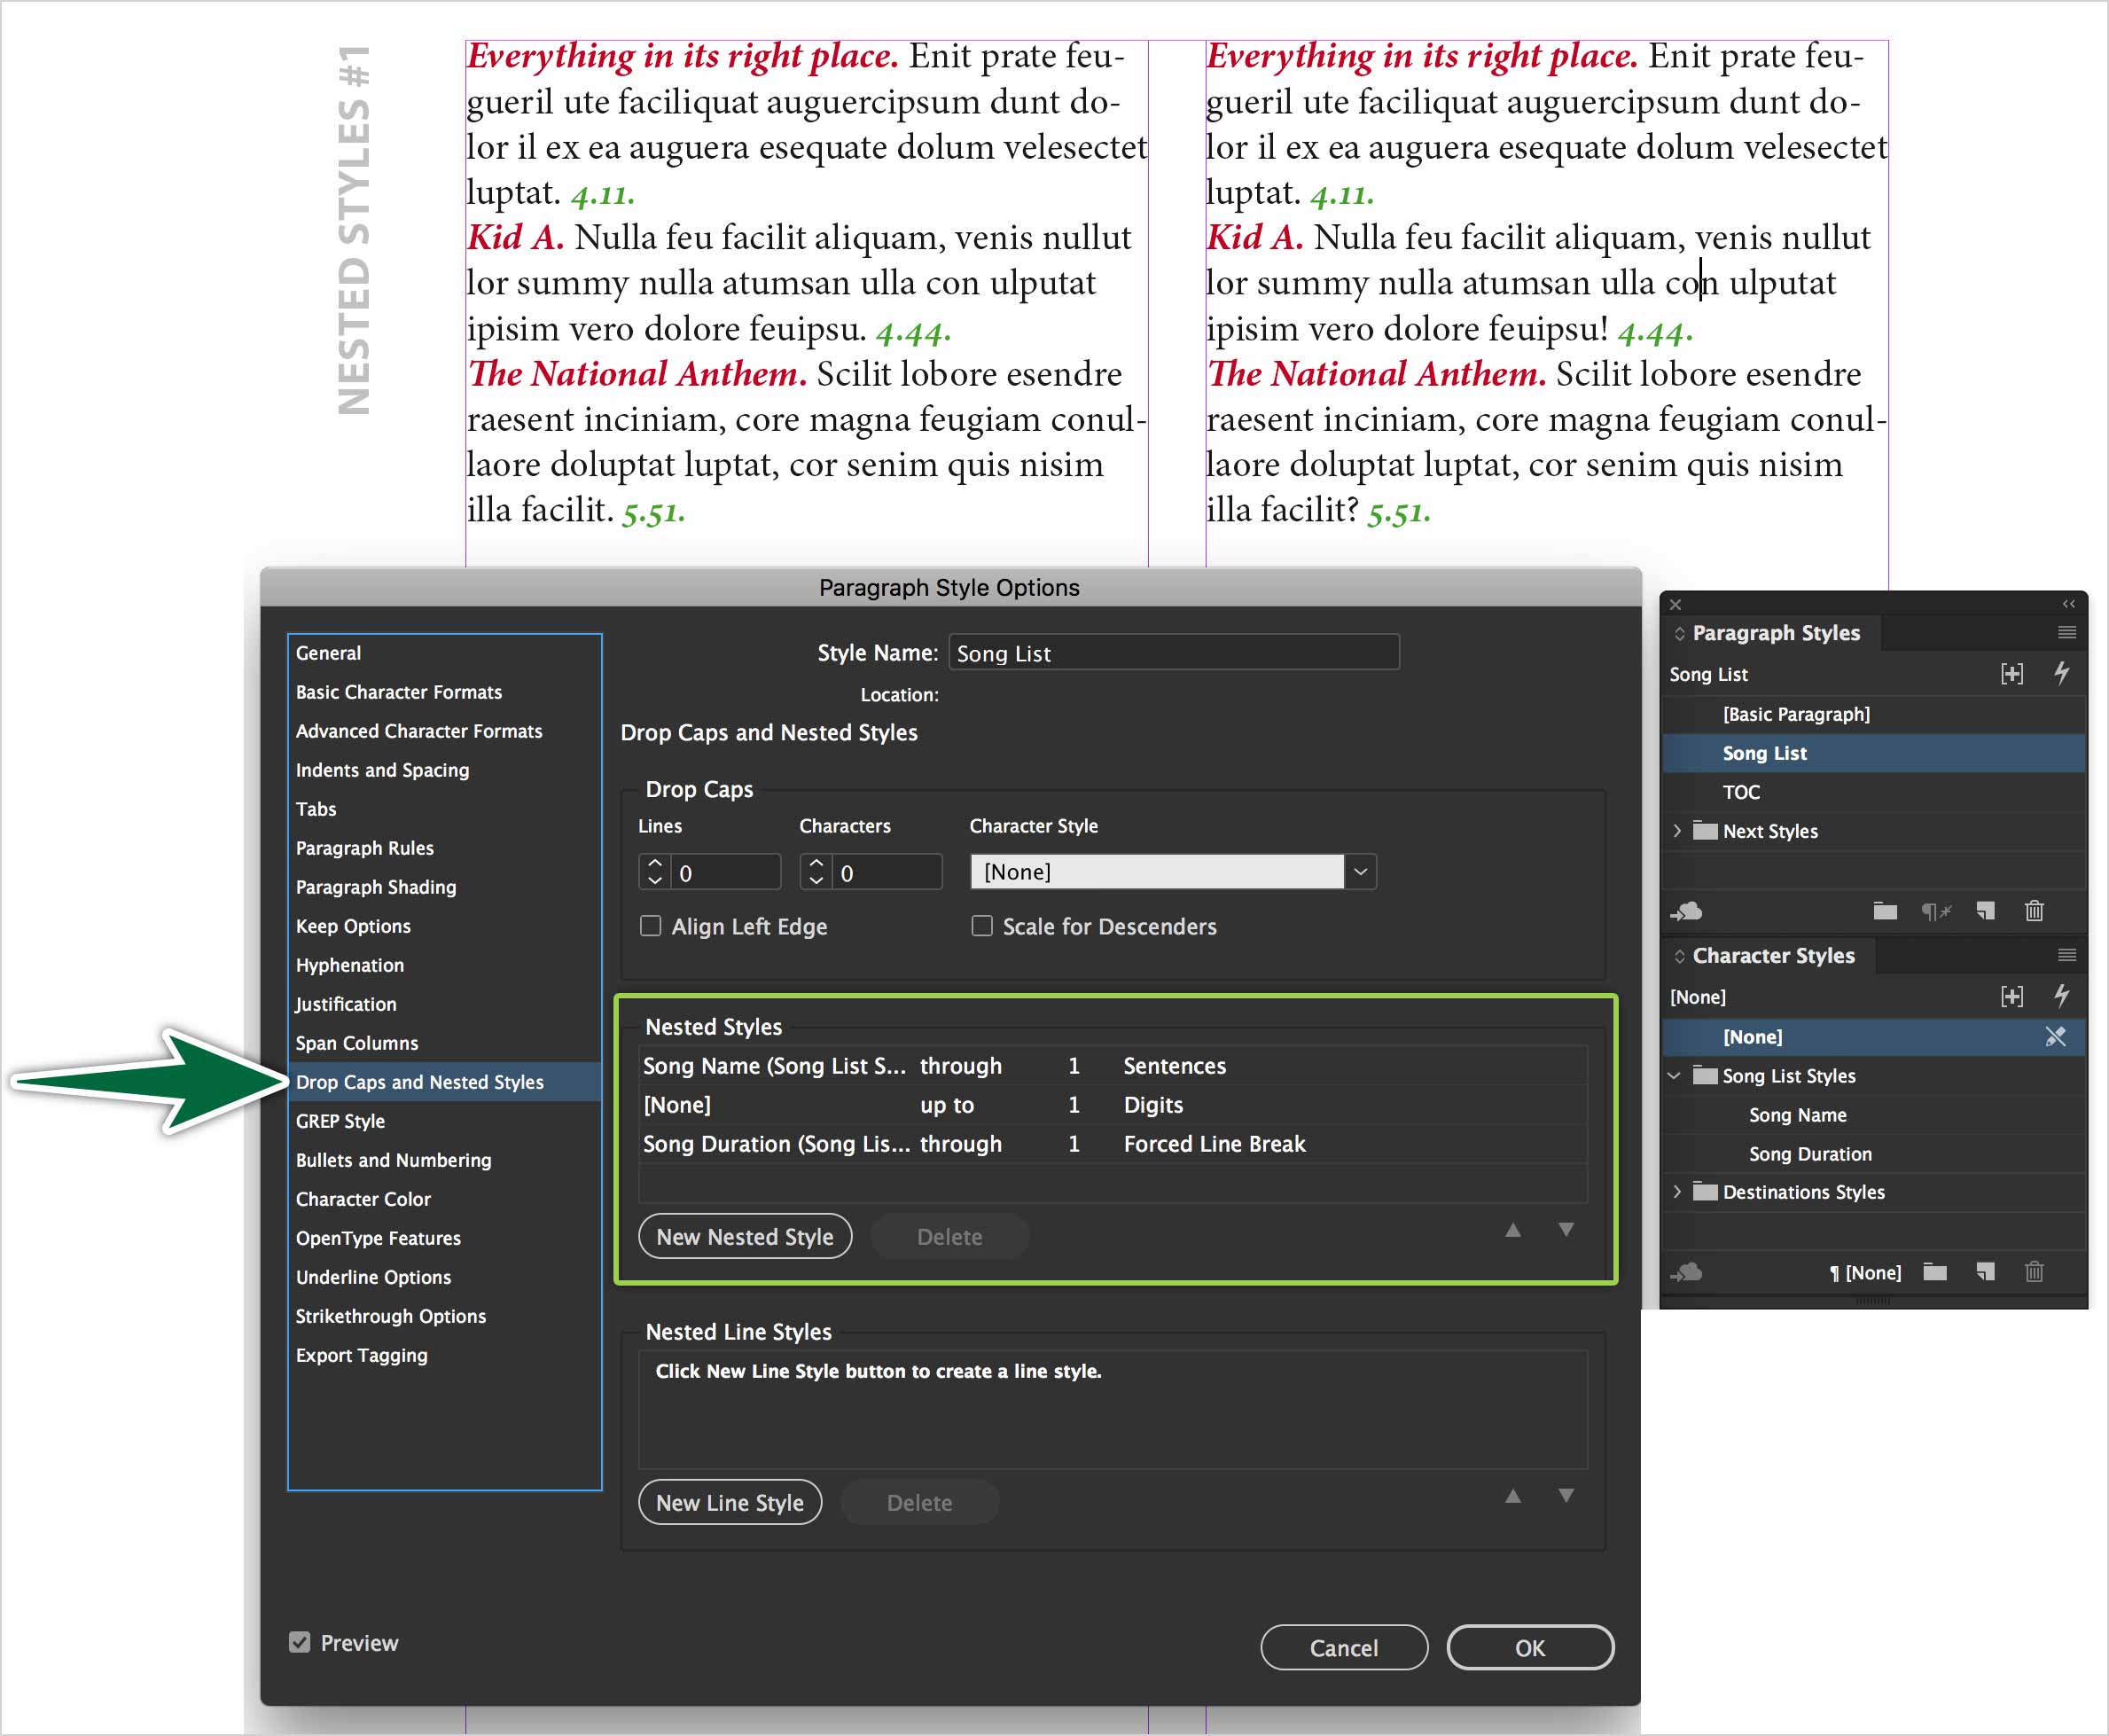
To create Nested Styles, you first create a Paragraph Style. Go to the Drop Caps and Nested Styles tab. Create a new Nested Style there. The key to nesting is using the text to delimit the styles. You can do something like:
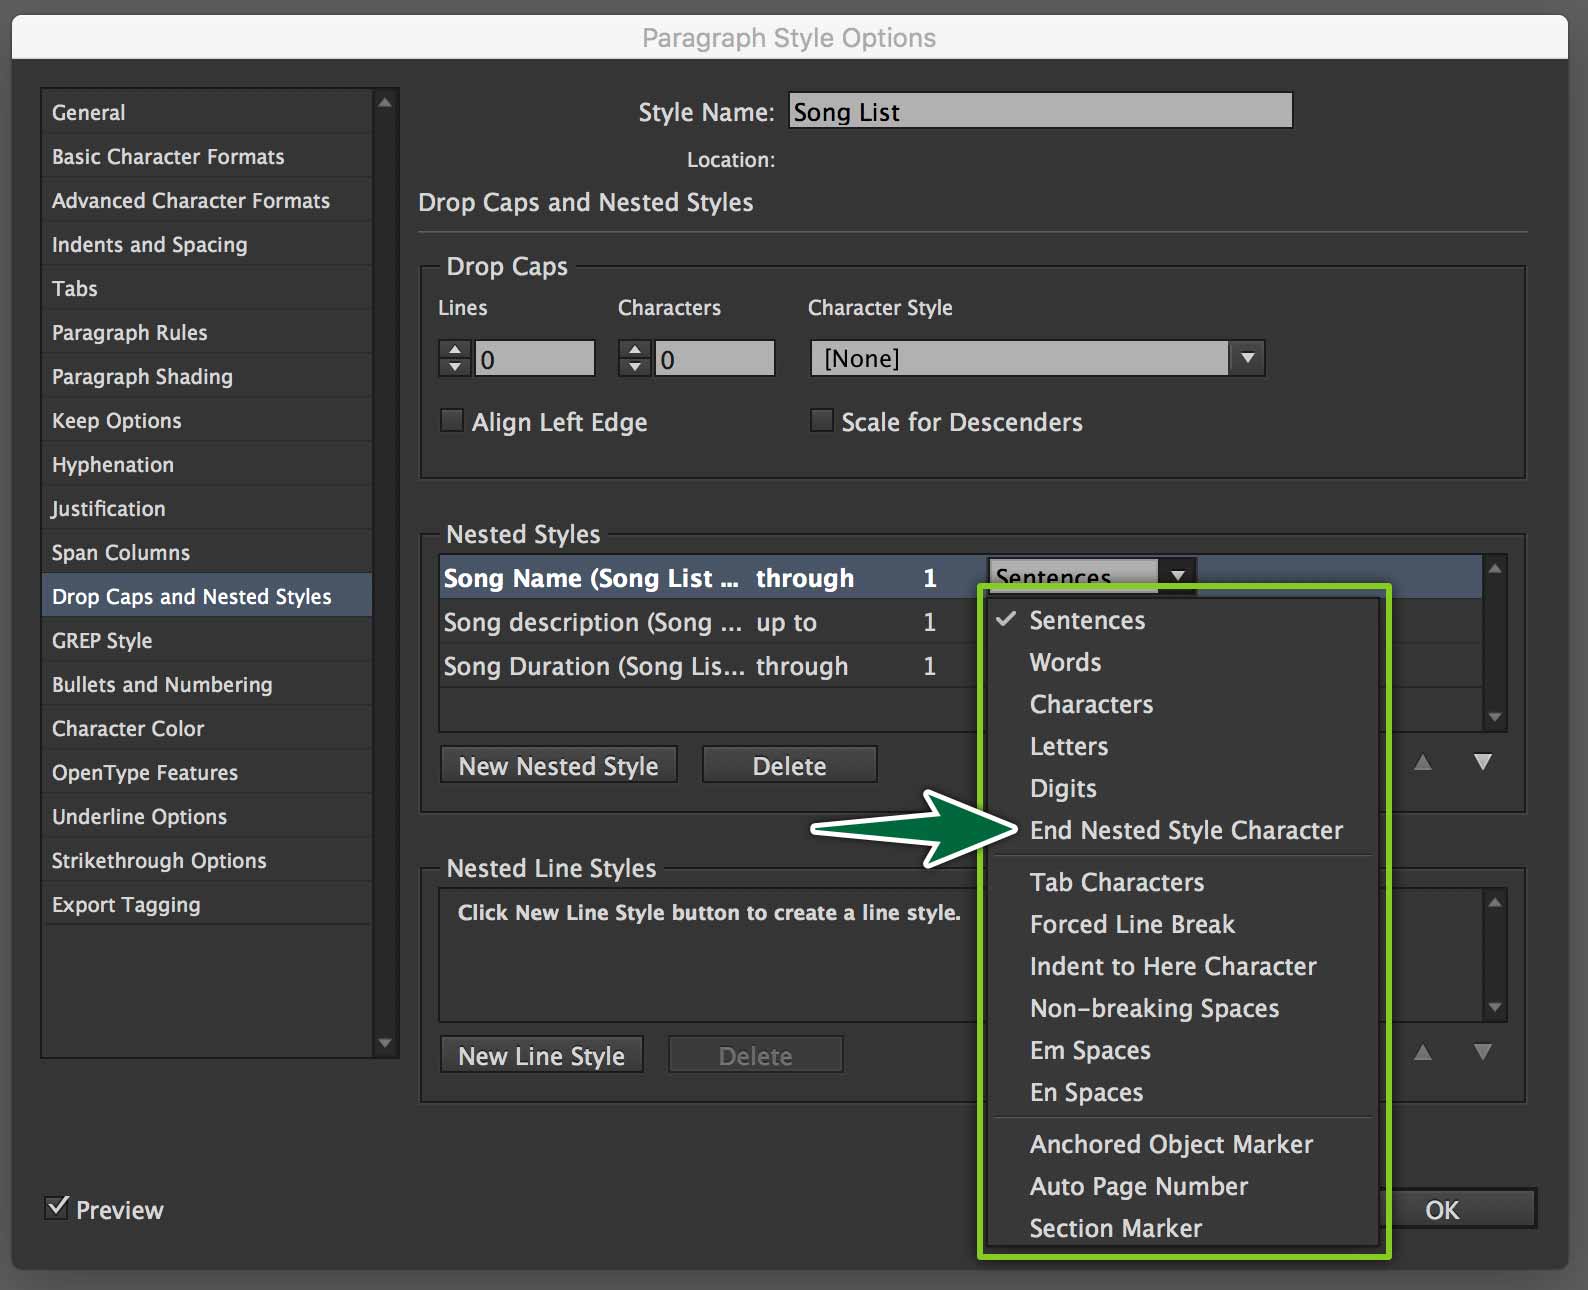
Apply Character Style x through the first sentence.
In this case the style simply gets applied until the first period glyph or exclamation mark or question mark. Then, you could:
Apply Character Style None up to 1 digit.
This will make the style stop when it bumps into a number glyph.
Apply style z through 1 forced line break
This will apply the style until it encounters the end of the paragraph.
Notice that you can choose to apply the style either Through or Up To the delimeter. This is pretty handy.
All this is done inside the Paragraph Style. The Character Styles get applied according to the rules that are established in the Paragraph Style.
If you don’t have a delimeter to use in your text already, you can add one manually. That’s what the End Nested Style Character is for.
For this to work, you need to enter the special character in your text. To do so, place your cursor where you want the character, then right-click.
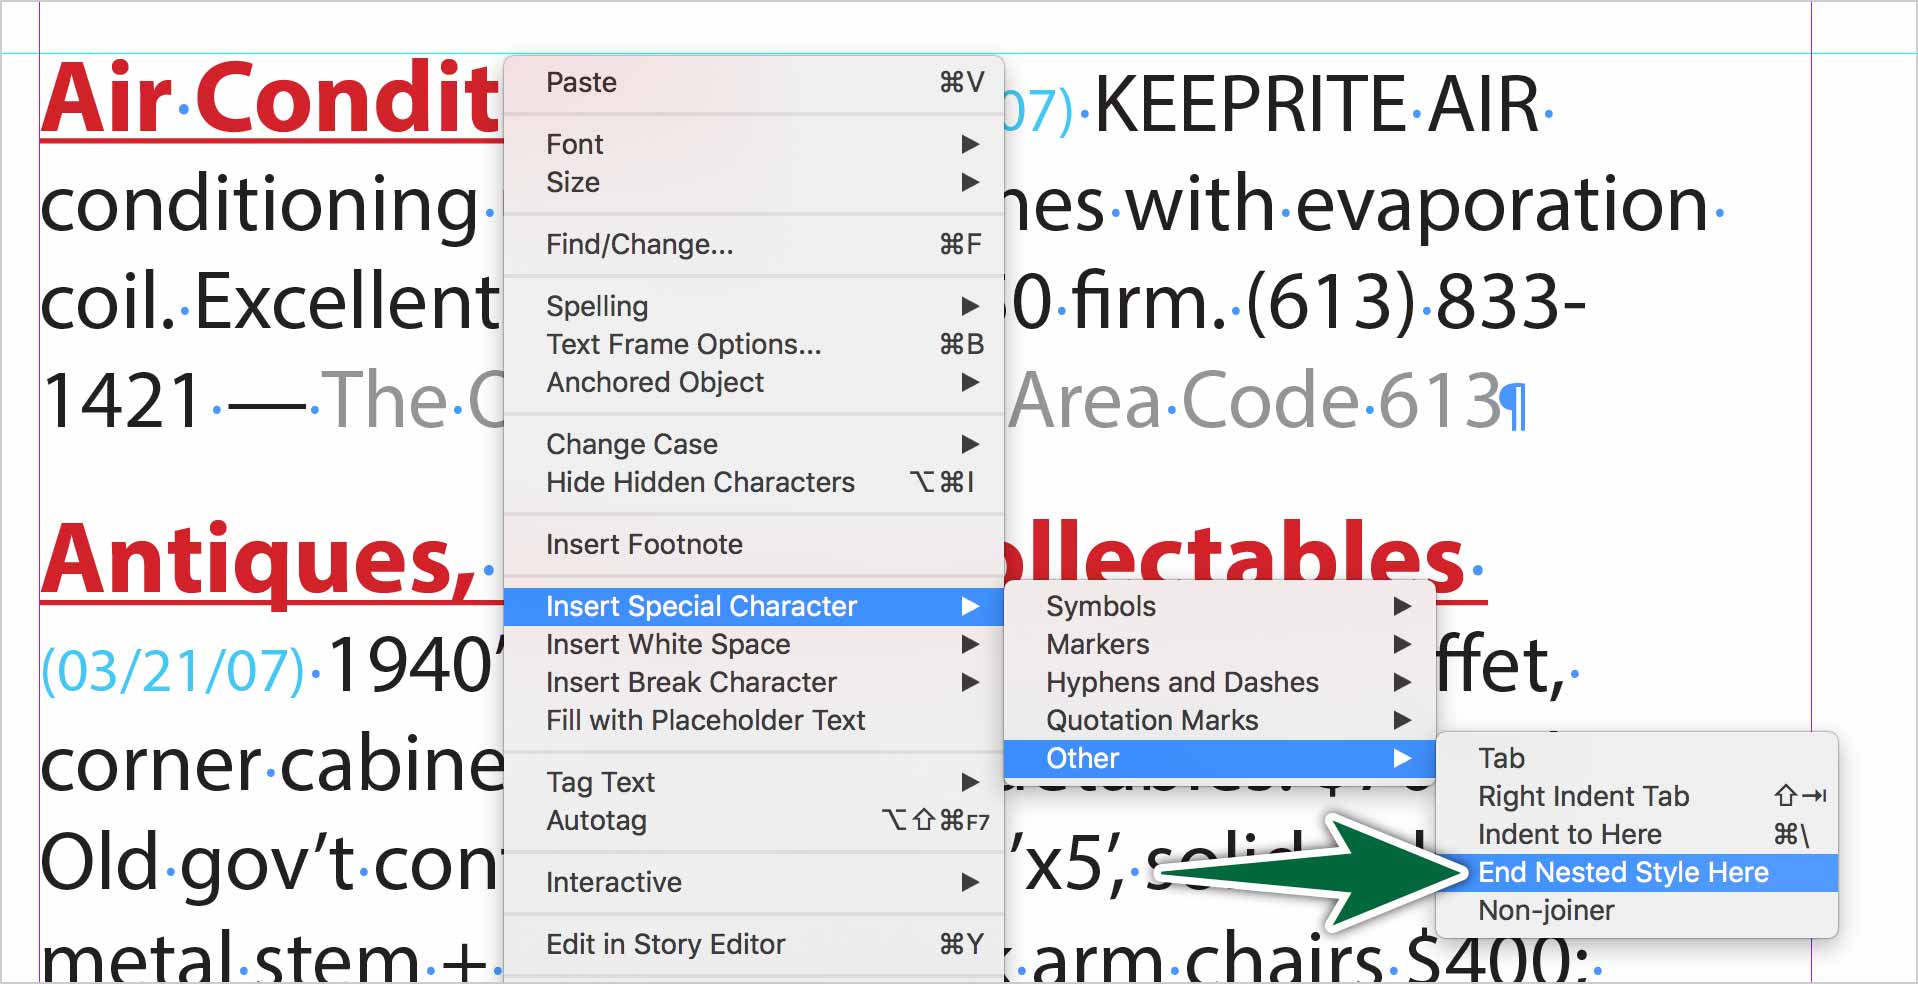
The character itself doesn’t show. It doesn’t print. It doesn’t take any space in the text. Once it’s in the text, the Nested Style will stop at this character. InDesign really does have a solution for every problem you can through at it.
Next Styles
Next Styles are set in the first pane of the Paragraph Styles panel. A Next Style is exactly what the name implies. When you create a Paragraph Style, you simply tell InDesign which style comes after the current one. Once you establish Next Styles, you can establish a pattern.
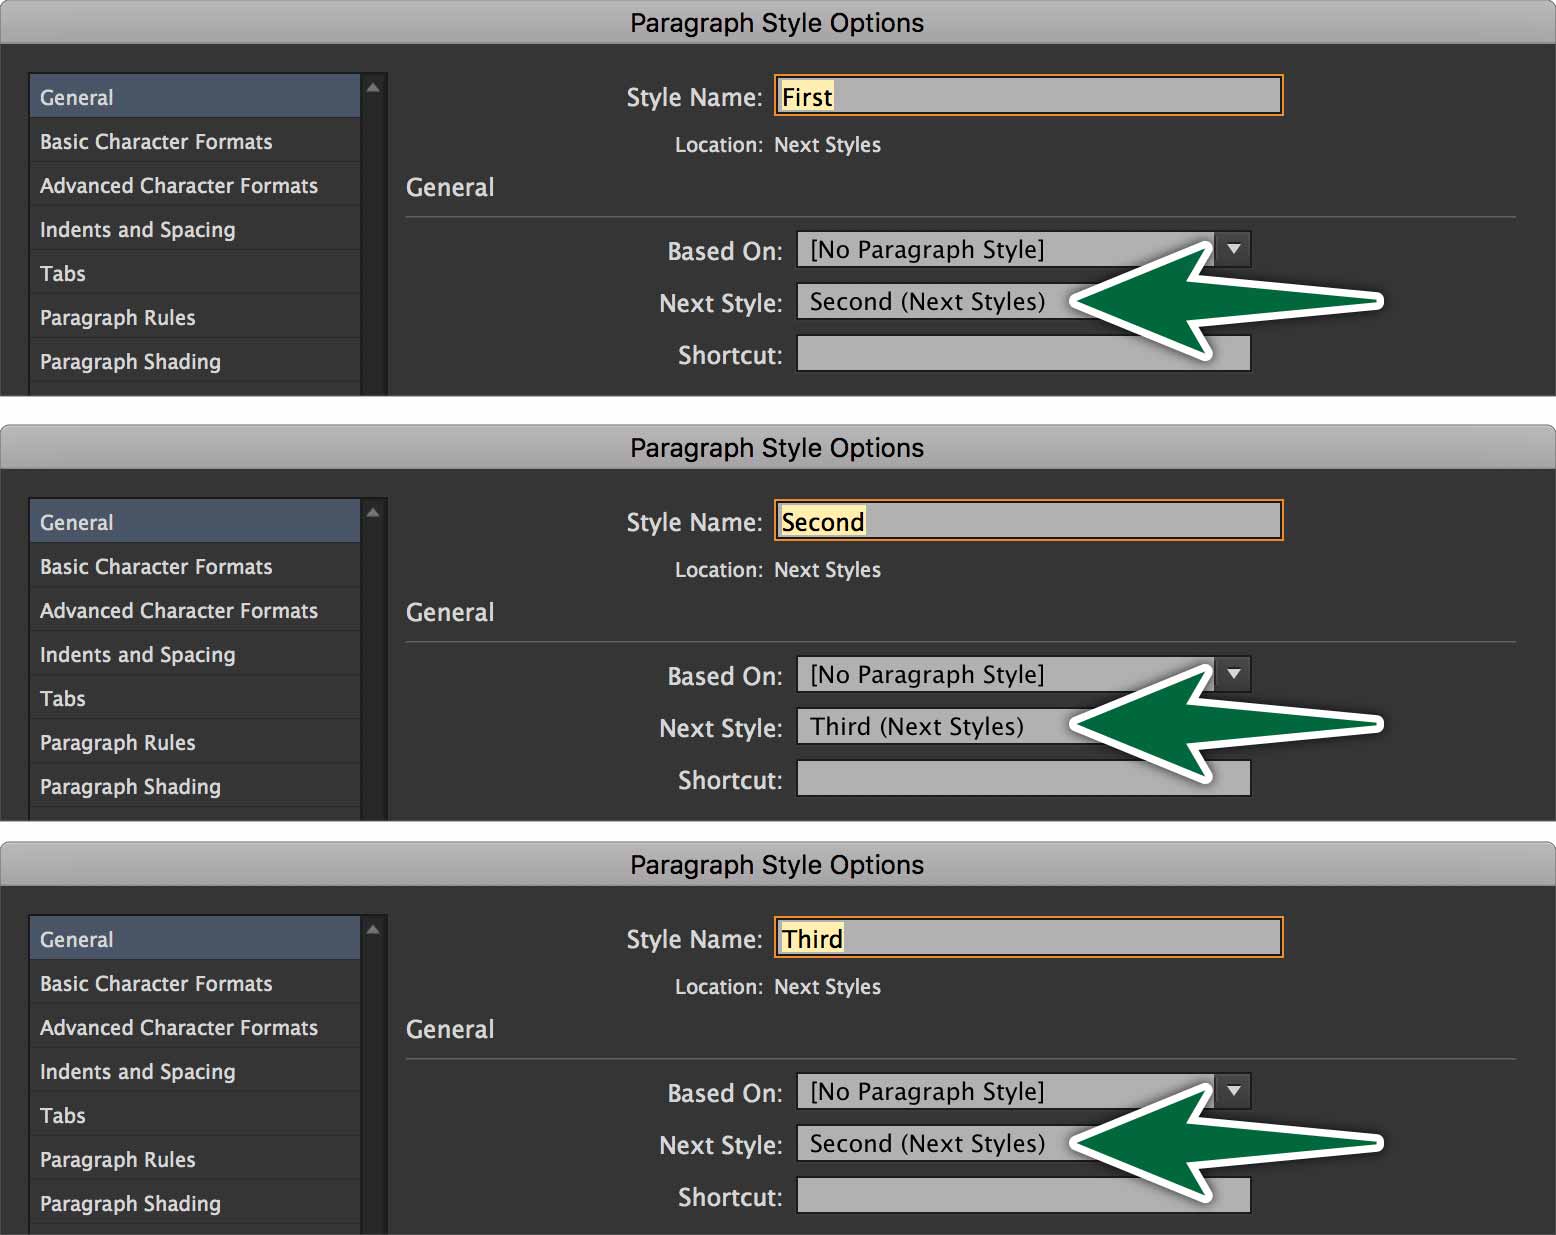
B is the Next Style in A. C is the Next Style in B. In C, you set the Next Style as B. This makes it that InDesign applies the styles in sequence: A, B, C, B, C, B, C, and so on.
Once you have these styles established in sequence, you can apply them all at once. InDesign switches to the next style in the sequence at the start of a new paragraph.
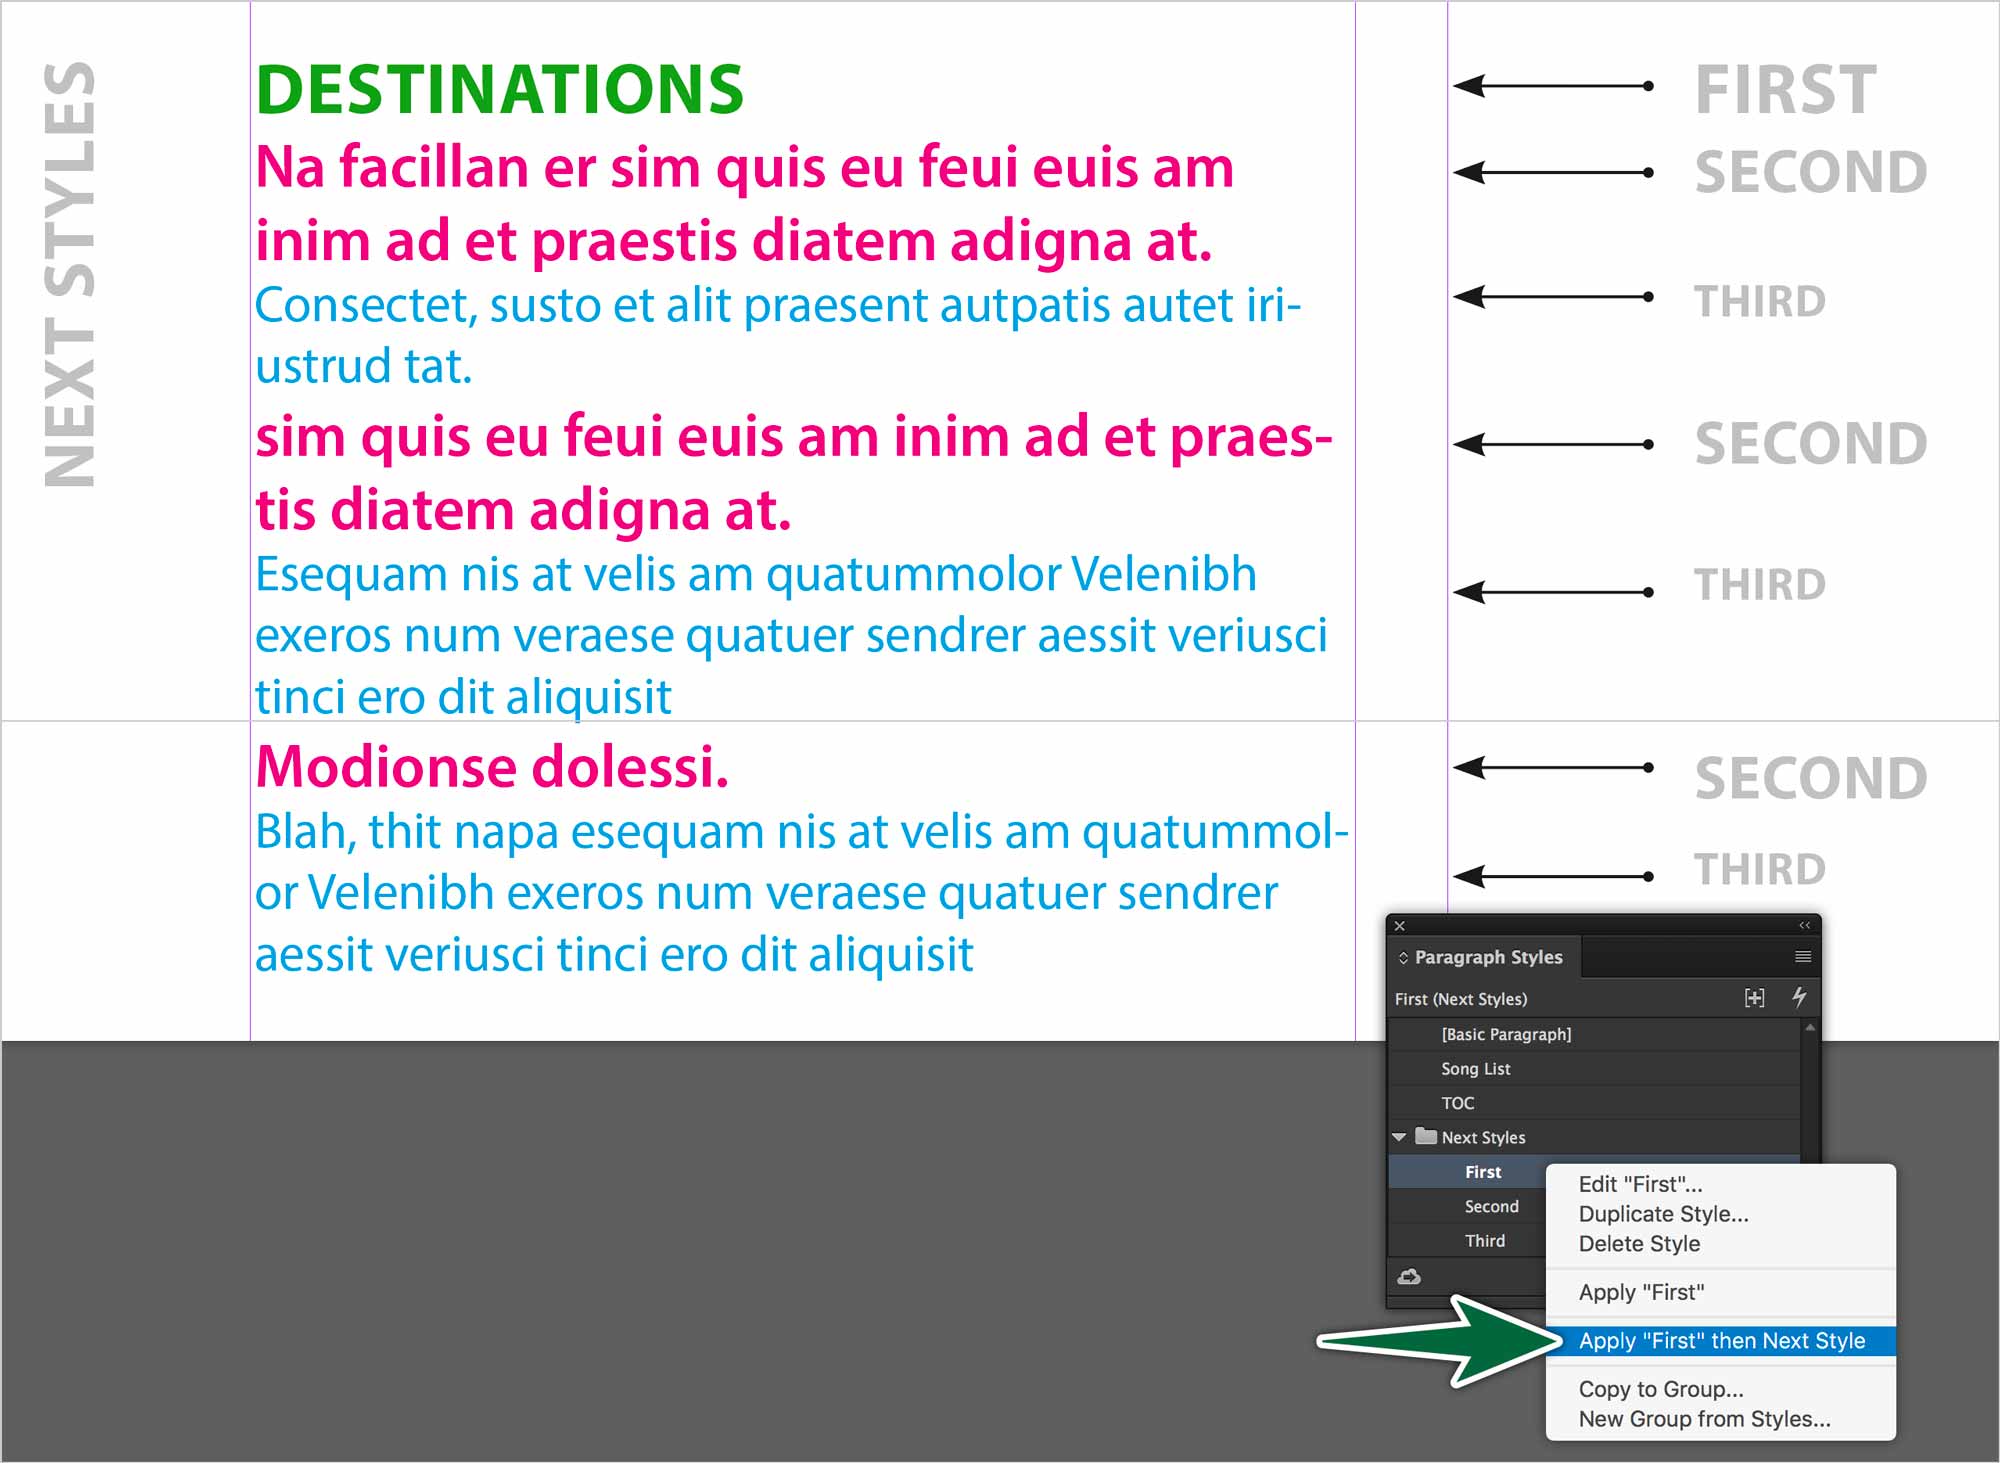
All that was done to style this text was to select it, right-click on the style’s name, then click Apply “First” then Next Style. This styles the whole thing in one go. Cool eh? That’s Next Styles in a nutshell. They’re most excellent for styling repetitive text like directories or listings.
Formative Activity
There are two files to style. One is in folder 02-exercise and in folder 03-exercise. In each folder, there’s a guide to show you what the final product should look like.
Supplemental Links
- Apply Sequential Styles
- Adobe: Next Styles
- Adobe: Nested Styles
