Topics
When you design any sort of packaging, a kit folder or some other printed piece that has a custom shape, the printer needs to cut the custom shape from the stock. To do so, they’ll produce a physical die. The die is pressed hard against the stock until it cuts it to punch out the desired shape.
Anatomy of a Package
A die cut can cut a shape out of a sheet. But it can also score and create slits.

As you can see in the image, the shape of the box has been cut out of some card stock. More than that, the scoring was also done. There’s a slit cut in the top flap so the user can close the box after the initial seal has been broken.
Planning
It’s really important to plan before drawing out your die line. The best way to plan is to take out some scrap paper and your Xacto to build a mockup of your design. Eventually, your design will be physically cut out of card stock, so you can imagine that accuracy is of the utmost importance.
If you’re basing your design on an existing piece, it’s worth scanning, then tracing the original in Illustrator.
Draw Your Die Line
Delete Unused…
Before we start drawing, let’s delete all the swatches from all panels. These are the affected panels:
- Swatches
- Symbols
- Graphic Styles
- Brushes
Go to the respective panel menues. Select Delete unusued… ⌥-click on the panel’s trash icon to delete them without a confirmation dialogue.
Spot Colour
Before you get drawing, you need to create a spot colour in Illustrator with which you will draw your die line. It can be any colour. Name the swatch Die Line.
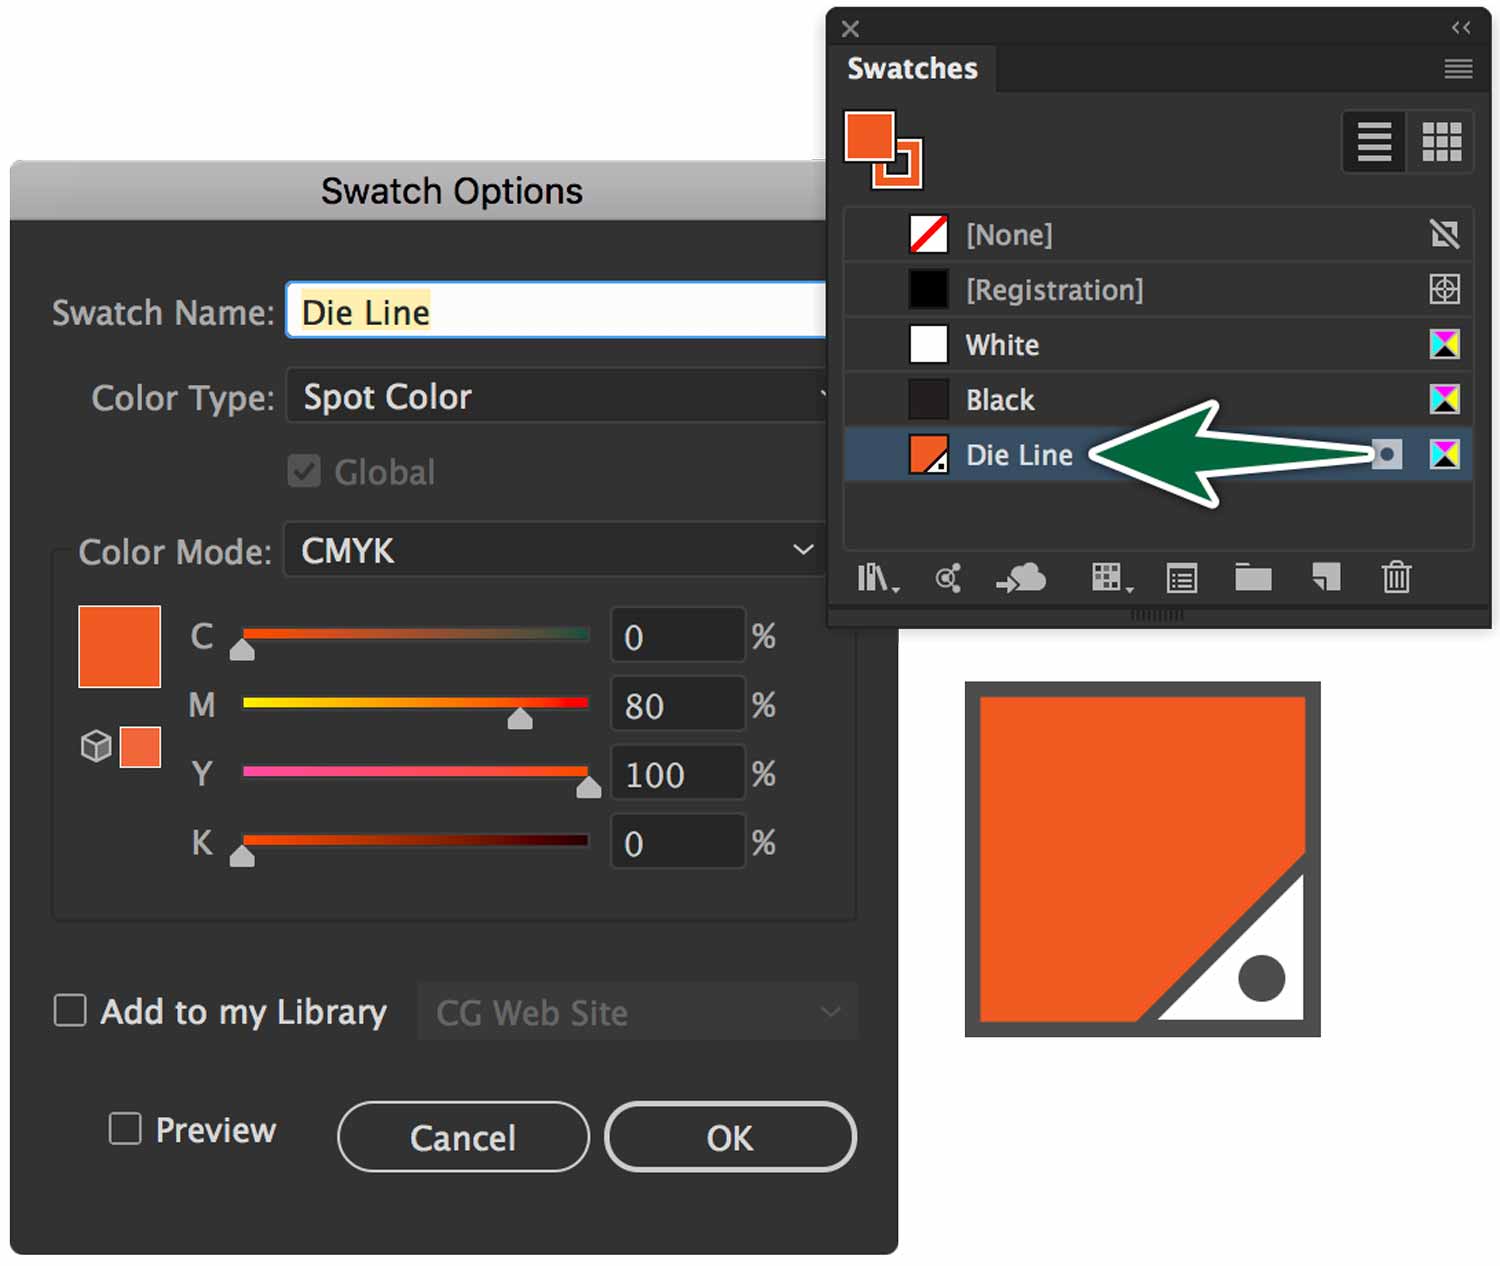
Make sure you die line colour is actually a spot colour. You can tell it is by the dot in the corner of the swatch’s icon.
Set up Graphic Styles
On a die line, a solid stroke represents a cut. A dashed stroke represents a fold. We really want things to be consistent.
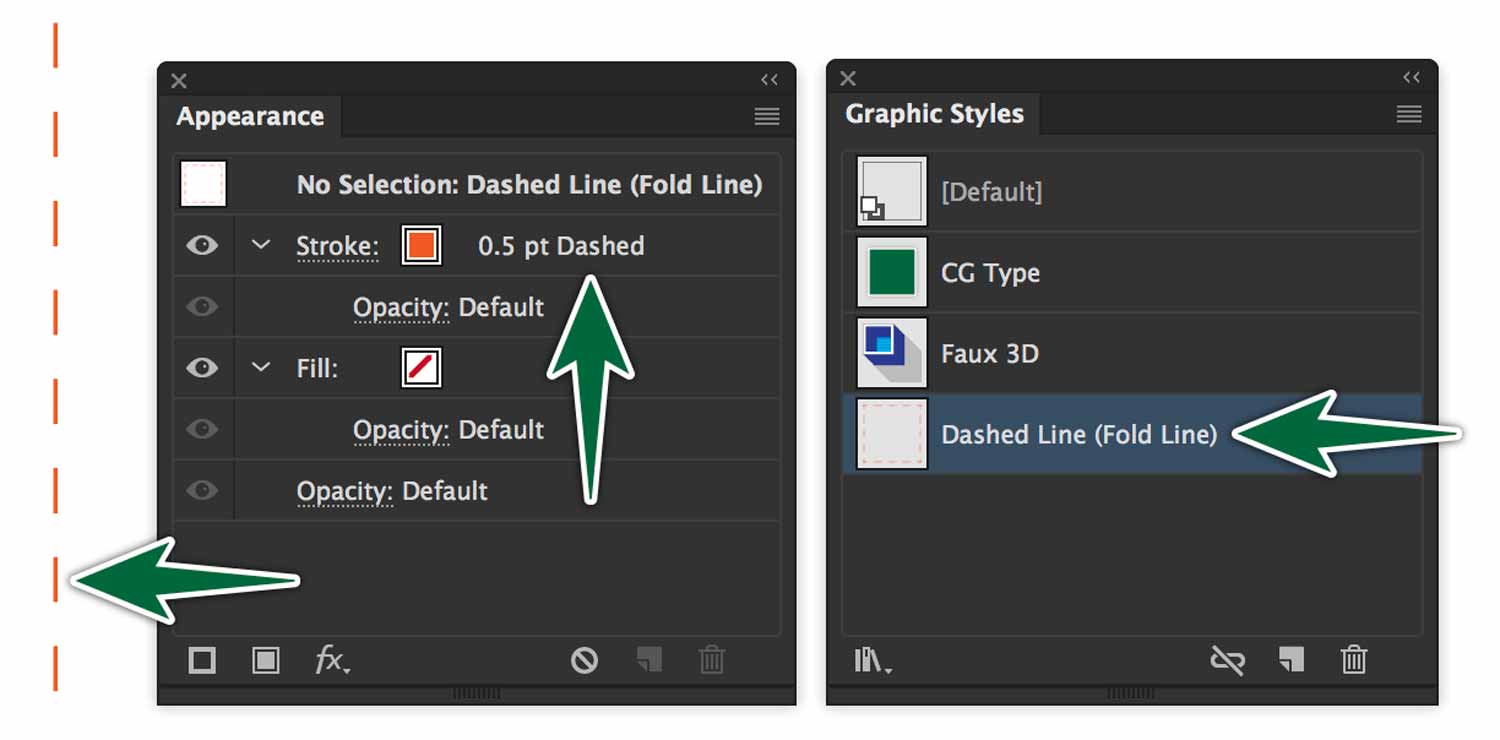
Let’s create a graphic style for the dashed line.
Drawing
The Pen Tool is the only way to go when drawing a dieline. You can’t easily use the shape tools. You can build your package from almost only one line. Draw a line, then use the move/copy dialogue and the Transform panel or the Move dialogue to create your design.
In this case, I select the stroke, hit Return, then enter the value I want. Click copy. Done.
As you draw, keep extras of the shapes you bild on your canvas in case you need to re-used them. When I’m done, I usually hide them on a layer that’s off and non-printing. I delete them from the file I send to print.
As you draw with the Pen Tool, the Scissor Tool may come in handy too. It’s useful for snipping paths. If you have overlapping paths, it snips the one you have selected.
Slits
Slits are a cut made on the inside of the piece that don’t reach the edges. You’ve fought with them on the flaps of a cereal box to re-close it. They’re simply a regular line drawn in Illustrator. They’re not dashed.
To InDesign!
We want to place our completed die line on a page in InDesign in order to place our artwork on it. InDesign is most flexible for doing the layout of your content. If your design allows, you could always complete the whole design in Illustrator. Avoid doing this if your design involves placed images and a lot of text. InDesign is really your best solution for this.
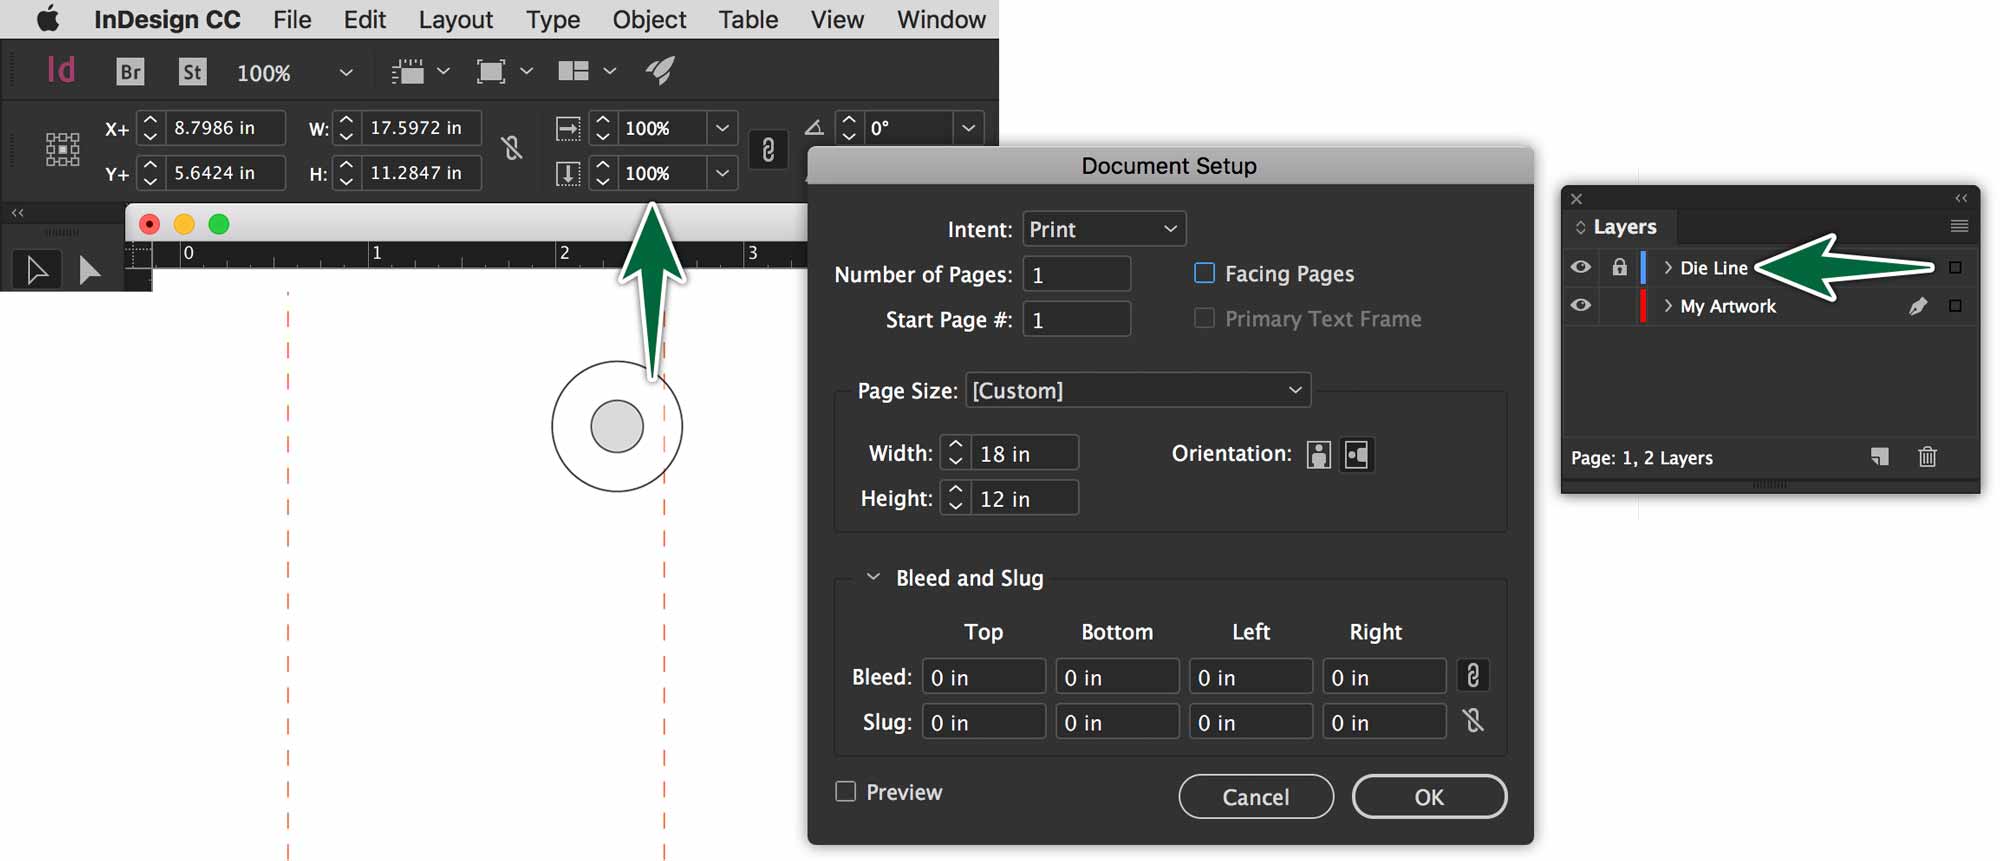
I’ve created an InDesign document that’s slightly larger than my die line. Use File > Place… to import your native Illustrator (.ai) file onto the page. As you’re placing, simply click, don’t drag. This will place the image at 100% of its orginal dimensions. You need to double-check this in the control bar.
Once my die line art is in place, I name and lock its layer. Create a new layer beneath this one on which you’ll place all of your artwork.
To Production!
Using InDesign’s Package function is the best way to collect assets to send to production. The native Illustrator document will be in the Links folder. It may be worth creating another copy of the file at the root of your project folder. It’s also a good idea to print and assemble your die line to make everything absolutely obvious to the printer. You can write instructions on it, if needed.
Formative Activity
Software Skills
- Transform panel.
- Spot colours (for strokes on the die-line.)
- Create artwork on separate illustrator layers.
- Import everything into InDesign upon completion.
- Check Separations Preview panel for correct colour break.
- Printers’ marks
Draw a die line in Illustrator based on this image.
