Topics
Drawing Tablet
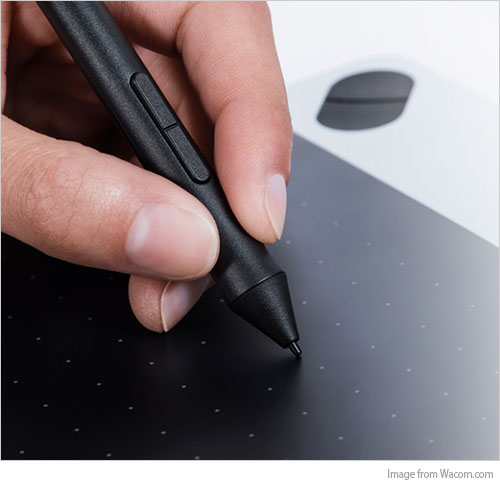
If you own a drawing tablet or pen tablet, this would be the time to bring it to class. If you don’t own one, you’ll still do perfectly fine on this assignment. If you’re interested in purchasing one, this is a great opportunity to be introduced to using one in Photoshop. So mozy on over to the Wacom web site to shop for a tablet. They’re also available at the Connections store at the college or elsewhere online.
Installing Custom Content
Before getting started, we need to install a custom workspace for painting in Photoshop. We’ll install two files. One for Brushes, the other for Swatches.
To install the Brushes:
- Brushes Panel > fly-out Menu > Import Brushes…
To Install the Swatches:
- Swatches Panel > fly-out menu > Import Swatches…
If the import process doesn’t work, you need to delete previous versions of settings files in your ~/Library folder. The only folder in which these files can go is:
Macintosh HD/Applications/Adobe Photoshop CC 2018/Presets/Brushes/
Finding Stuff in Photoshop
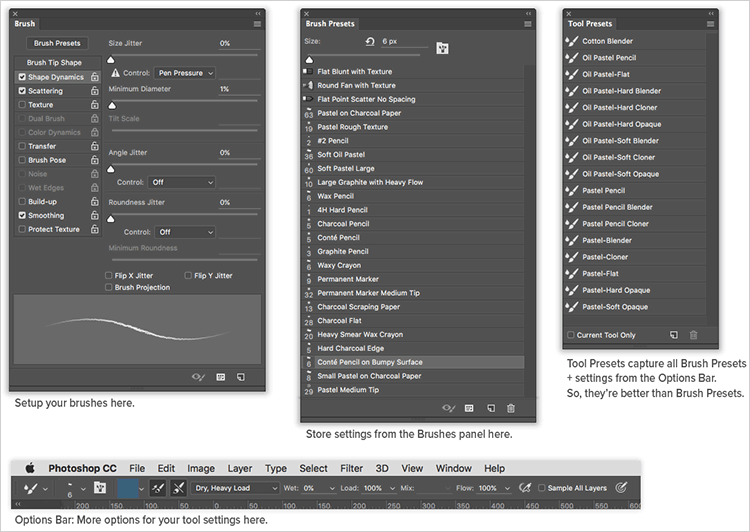
All of our Tool Presets are in the Options Bar along the top of the screen.
It’s handy to have the Tools Presets panel open. It’s quicker to access presets than to go to the dropdown at the top-left of the screen. We’re using Tool Presets rather than Brush Presets because they store the information from the Brushes Panel, plus the information from the control bar along the top of the screen. The Brush Presets don’t save all that information.
Make sure “Current Tool Only” is unchecked so you can choose a preset no matter which tool you’re currently using.
Switch to the Pastels workspace in the Workspaces menu at the top-right of the Options Bar. This will open your Swatches Panel with the new colour swatches.
Photoshop Settings

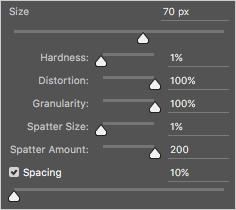
One setting that affects brush performance is its spacing. If you go to your Brush panel, increase the spacing as high as possible. You’ll want to stop the slider before you start to see dabs on the screen. But the higher you put it, the faster Photoshop will apply brush strokes on the canvas.
Feel free to change settings for your the pressure you apply in your Wacom tablet’s settings. You want to affect the Tip Feel setting to match your taste.
Tilt is important too. You can turn on the tilt preview from the bottom of the Brush panel. It’s the icon with the eye in it. You can also turn off tilt for a brush in its settings. Sometimes you want tilt, but sometimes you dont. Like when you want a big brush to fill in a large area.
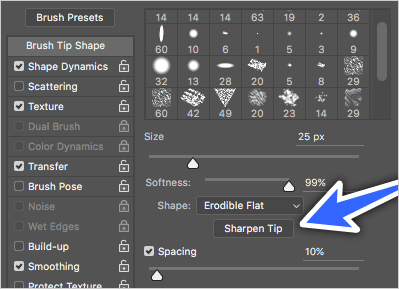
Real pastel tip wears down over time. You can mimick this behaviour in Photoshop. In our case, the brushes called ‘hard’ don’t erode. The ‘soft’ ones do. The setting for this is in the Brush panel. It’s the Softness slider. If you’ve warn down your brush too much, you can click the Sharpen Tip button in the Brush panel. No more need to buy new pencils!
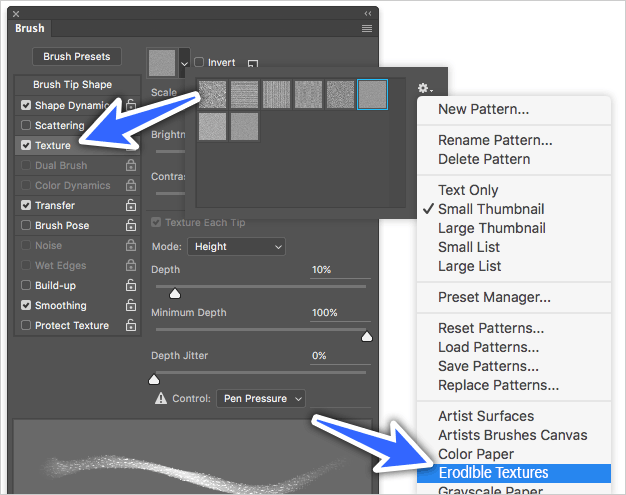
As you control your brush softness to mimick real-world drawing, you can also mimick the substrate’s behaviour. To control this, click on Texture in the left-hand pane of the Brush panel. Choose your paper texture from the dropdown menu. Choose Erodable Textures and click OK.

Experiment with different textures. The Depth slider controls how far down in the paper grain your drawing will go. If the value is low, you can press hard with your pen and it will never clog the grain of the paper.
Brushes for Pastel Drawing
Photoshop ships with lots of great brushes, but it’s way more fun and interesting to create and customize your own. We’ll investigate custom brushes, brush presets and tool presets.
This is a really great Brushes 101 tutorial video at Adobe’s Web Site. Let’s take a look. If you wish, you can open a blank Photoshop document and try the techniques as we watch the video in class.
We’re going to take a look at the Captured, Bristle, Erodible and Airbrush tips in this unit.
Photoshop brushes seem to be painting continuous strokes of colour. The default behaviour is more of a stamping action. When you draw with a brush, it’s really smearing the ink into a line. You can exagerate this with the “Spacing” setting. To get a continuous line, you set the spacing to zero.
Capture Brush Tips
A Capture Brush is one based on artwork you paint on the canvas. Always paint the initial brush daub on a new empty layer.

To create a new Capture Brush, we’ll start with the bursh preset called Hard Round from the Brush Presets panel. In Shape Dynamics, we turn Size Jitter to the maximum. Turn up Spacing a bit too. Go to Transfer to turn on Pen Pressure. If you’re using a tablet, you’ll see a change in opacity with pressure.
Save the brush as a preset from the panel menu. Name it something appropriate.
Bristle Brush Tips
Bristle brushes are brushes with bristles. They’re best used with a pen tablet that has tilt control. You’ll achieve natural effects by editing the settings for the bristles in the Brushes Panel.
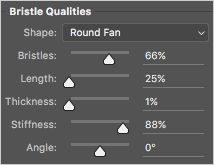
There are various brush tip shapes set it two categories: round and flat. To make the most of the flat brushes, you’ll need a tablet that has tilt controls. Either way, the brushes really behave like a real-world brush. You can do things like daub the tip of the brush and use pressure to vary the application on the canvas.
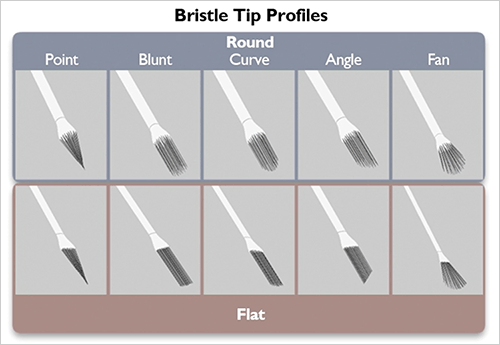
Feel free to customize a Bristle Brush in the Brushes Panel, then save it in the Tool Presets panel.
Erodible Tips
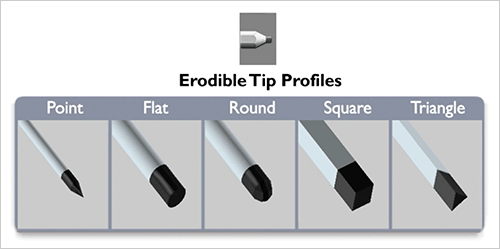
Erodible tips mimic tools like a lead pencil, pastel, charcoal and others. As you can see, they come in different tip shapes.
You can actually lock in the angle of the tool, then purposely rub it to wear it to the desired tip chisel shape. Once you have the tip you want, you can save it in your presets. So erodible tips really mimic traditional dry media in a digital application.
Airbrush Tips
Photoshop has always had a soft-edged brush. What it lacks is a more natural airbrushed look. Something more grainy than the standard soft-edged brush.
You can experiment using the airbrush-specific controls in the Brushes Panel to create beautiful spattering effects on the canvas. Combined with your stylus’ tilt control, you can rally mimic real-world airbrush effects.
A mask is an essential tool when airbrushing in the real world. You can use the lasso tool in Photoshop to define the edges of your airbrushed shapes.
The Mixer Brush
The Smudge Tool was always a poor excuse for a blending implement. But ever since the Mixer Brush was added to Photoshop, it’s become a real contender as a painting platform.
Mixer Brushes
The Mixer Brush gives you the capability to paint and blend colours so they behave like real pastels, oil paint and more.
![]()
Select a Bristle Brush from the Tool Presets panel, then click on the Mixer Brush Tool. You’ll notice that once you have the Mixer Brush selected, the Options Bar offers up different controls.

What Adobe has to say about the Mixer Brush options:
- Current Brush Load swatch
- From the pop-up panel, click Load Brush to fill the brush with the reservoir color, or Clean Brush to remove paint from the brush. To perform these tasks after each stroke, select the automatic Load or Clean options.
- Preset pop-up menu
- Applies popular combinations of Wet, Load, and Mix settings.
- Wet
- Controls how much paint the brush picks up from the canvas. Higher settings produce longer paint streaks. This setting is so sensitive, you can usually leave it below 5. A setting of 1 is a good default.
- Load
- Specifies the amount of paint loaded in the reservoir. At low load rates, paint strokes dry out more quickly.
- Mix
- Controls the ratio of canvas paint to reservoir paint. At 100%, all paint is picked up from the canvas; at 0%, all paint comes from the reservoir. (The Wet setting, however, continues to determine how paints mix on the canvas.)
- Sample All Layers
- Picks up canvas color from all visible layers.
Formative Activity
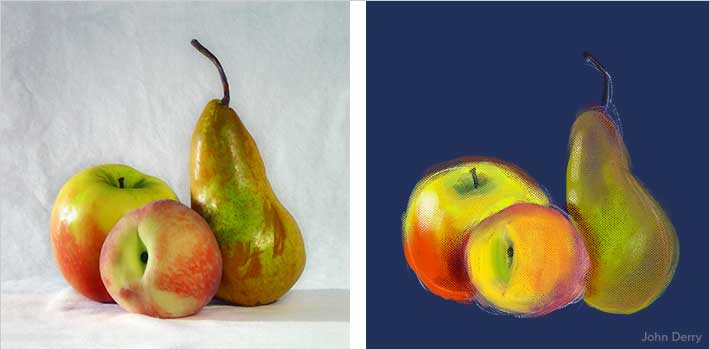
Roughing In Our Pastel Sketch
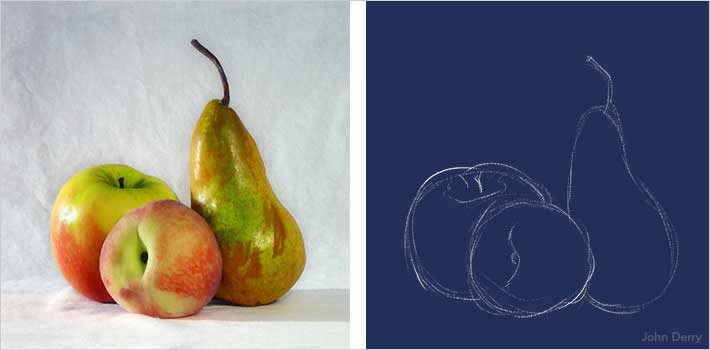
Before we can start actually drawing with pastel bushes, we need to rough out the outlines of our drawing on its own layer. This will create the skeleton on which we’ll build colour.
Roughing In Our Sketch
The rough-in should be on its own layer. You may or may not keep this sketch once you’re done. This is a good stage to experiment.
Tracing On or Next To…
You have the choice of drawing on a layer on top of the photo or simply drawing in a separate file.
If you’re drawing in a separate file, open your blank canvas file and the photo you’ll be drawing, then place your two files by going to Window > Tile…
We can attribute a colour to our background layer to mimick the paper colour. It could be very dark or very light.
Use the Pastel Pencil brush to rough in the general shapes. This is a ‘skeleton’ of the artwork. It’s going to be your guide to fill in with colour.
Blocking in Pastel Colours
This is the guts of this assignment. We’ll use brushes to draw our image. It will look astonishingly natural. It’s as if you actually drew it with pastels; textures and all. But your fingers will remain clean.
Now we’re ready to start applying colour. It’s a good idea to move your Sketch layer to the top of the layer stack, then lock it. you’ll avoid drawing on it by accident. Make a Block-in layer below the Sketch layer.
If you’re have your photo and your drawing in two separate files, we’ll want them to zoom synchronized. We want both windows to move along with us. So what we want to do is click on your Zoom tool, then click on the ‘Zoom all windows’ checkbox in the control bar. Do the same with the Move tool. Check ‘Scroll all windows’. Now everything moves in sync.
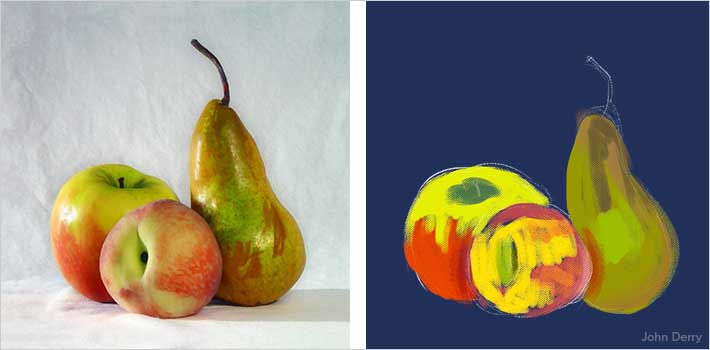
To start applying colour, use your Brush tool, choose a colour from the Swatches panel. Adjust the Texture in the Brush panel. Block in the colours without blending. Get the key colours in place. This is the bottom most application of colour on the page.
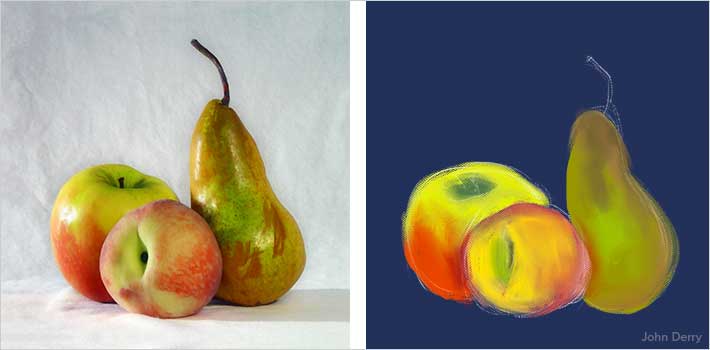
Blending Our Pastel Drawing
Once we’ve laid down colour, we can use the Mixer Brush we’ve previously learned about. This is where you can really make things look natural.
Blending Colours
The next stage is to blend our colours. We need to smooth things out. Create a new layer called ‘Blending’. Lock all other layers to avoid drawing on them. Use the brush called ‘Cotton Blender’. Brush over your drawing to smooth things out. Sample All Layers is turned on in your Control bar, so it will smudge all the content below and above.
Adding Detail to a Pastel Drawing
We could stop at this point and our drawing would look okay. But we want it to look better than okay. We’ll add detail which will give it the touch of excellence.
Now we need to add detail. This is really the final touch that brings our drawing to life. Let’s create a new ‘Detail’ layer. Use our ‘Pastel Flat’ brush. Choose a colour from Swatches. Use a low value for depth in the Brush panel so you’re adding texture to your drawing. Add shadows and highlights.
You can use an Adjustment Layer to affect the colour of your paper in the background in a non-destructive manner.
To add texture to the background, create a new layer above the background. You can draw on it with a similar colour to the background to add realism. While you do this, you can turn off ‘Sample all layers’ in the Control Bar.
Because this process is so personal, it’s a good idea to take some time away from it. When you come back to it after a while, you may decide to make changes. Because we worked non-destructively, this should be simple.
Supplemental Links
- Adobe: Brushes
