Topics
About Bitmap Mode
The term bitmap has multiple definitions. Sometimes, it refers to a raster image. Sometimes it refers to a black & white image. The phrase black & white is also often misused, interchangeably with greyscale. This all just causes confusion.
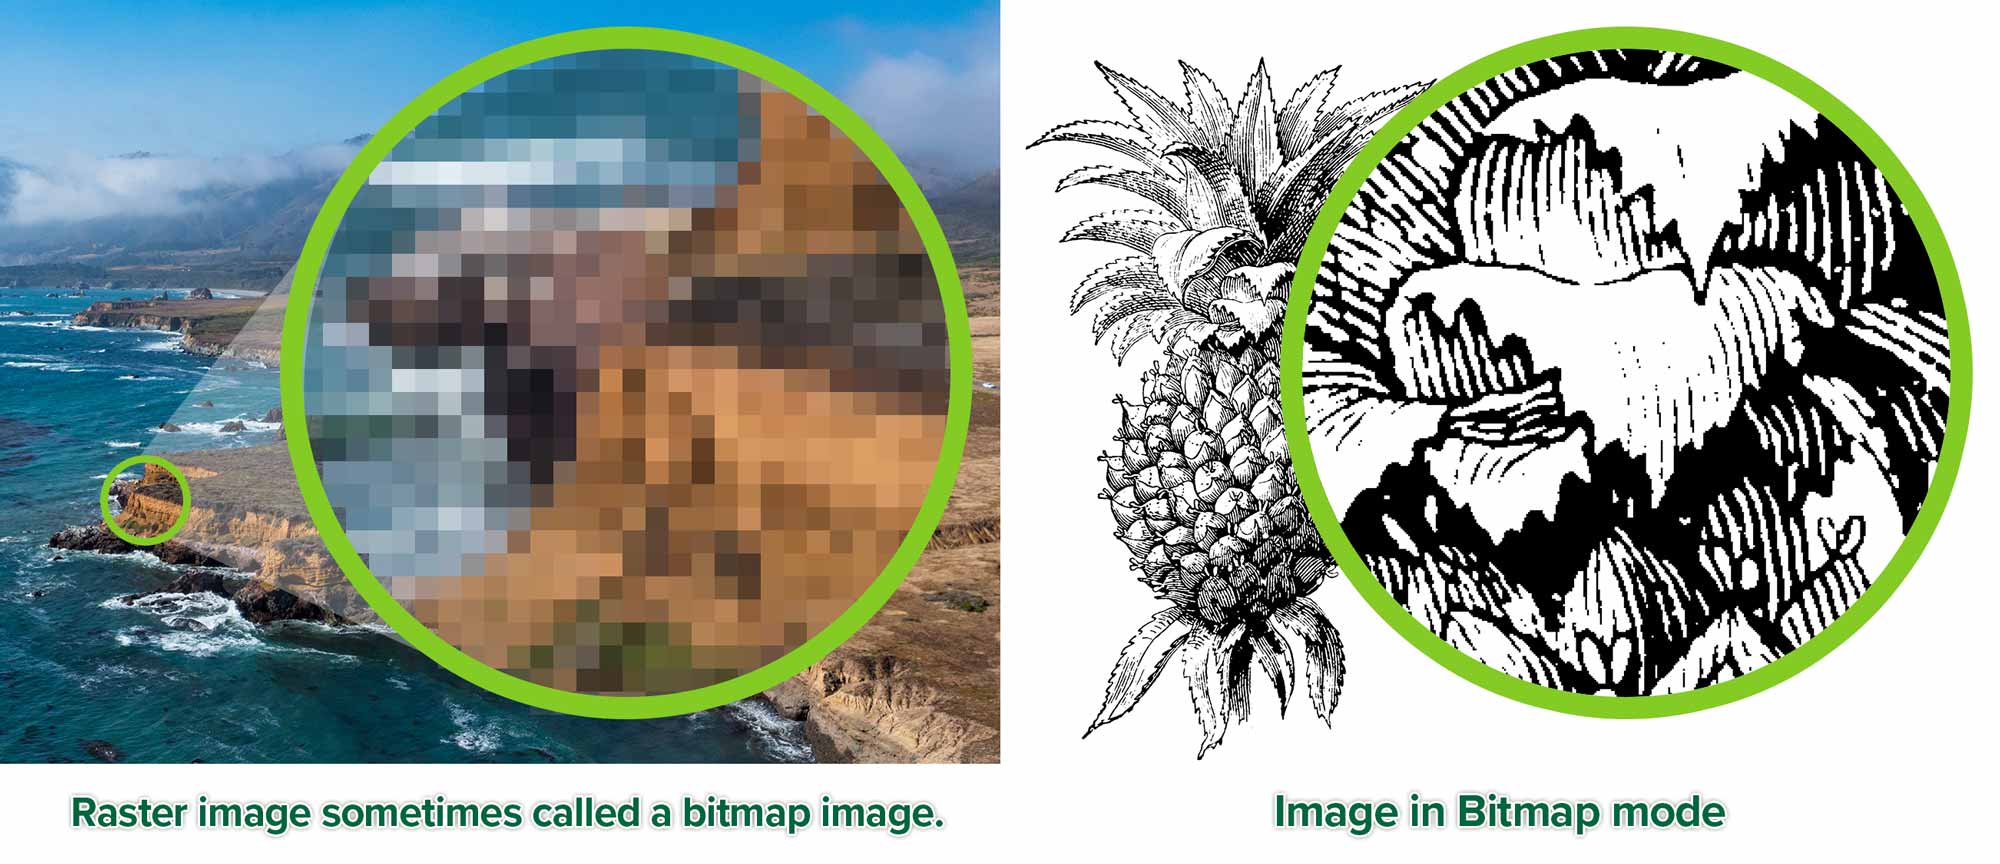
It’s best to use raster when refering to a pixel-based image. Use greyscale for grey images. Use Bitmap or Bitmap mode for pure black and white images.
Bit Depth
A raster image can go from a single bit image, in bitmap mode to an 8 bit image, in colour. Bit depth can go way higher, but such images are rarely used in graphic design.

Bitmap Mode: Each pixel can only either be black or white. It’s like a light switch that’s on or off. There are no other choices. It has only one channel. Bitmap mode is also called 1 bit colour because there’s only one bit of information. A bit is the smallest increment of digital information. This means it has 21 colours. 2 x 1 colours, which are black and white. It’s either ON or OFF.

When creating a bitmap mode image from a greyscale image, you can actually create it at any resolution you want. Picture it this way. You have a hypothetic greyscale image made of 1” tiles. Upon converting it to bitmap mode, you can break those grey tiles into as many black or white tiles as you please.

Greyscale: A greyscale image’s pixels can be one of 256 levels of grey. It has only one channel. That channel is itself a greyscale image. A regular greyscale image is called an 8bit grey image. This means it has 28 greys. This is 2 x 2 x 2 x 2 x 2 x 2 x 2 x 2 = 256 levels of grey. That’s 8 twos.
Greyscale images are not scalable. It is possible to create a 16 bit or even a 32 bit greyscale image, though you could barely tell the difference in quality.
Now that we’ve cleared that up, we can look at the resulting artwork in bitmap mode.
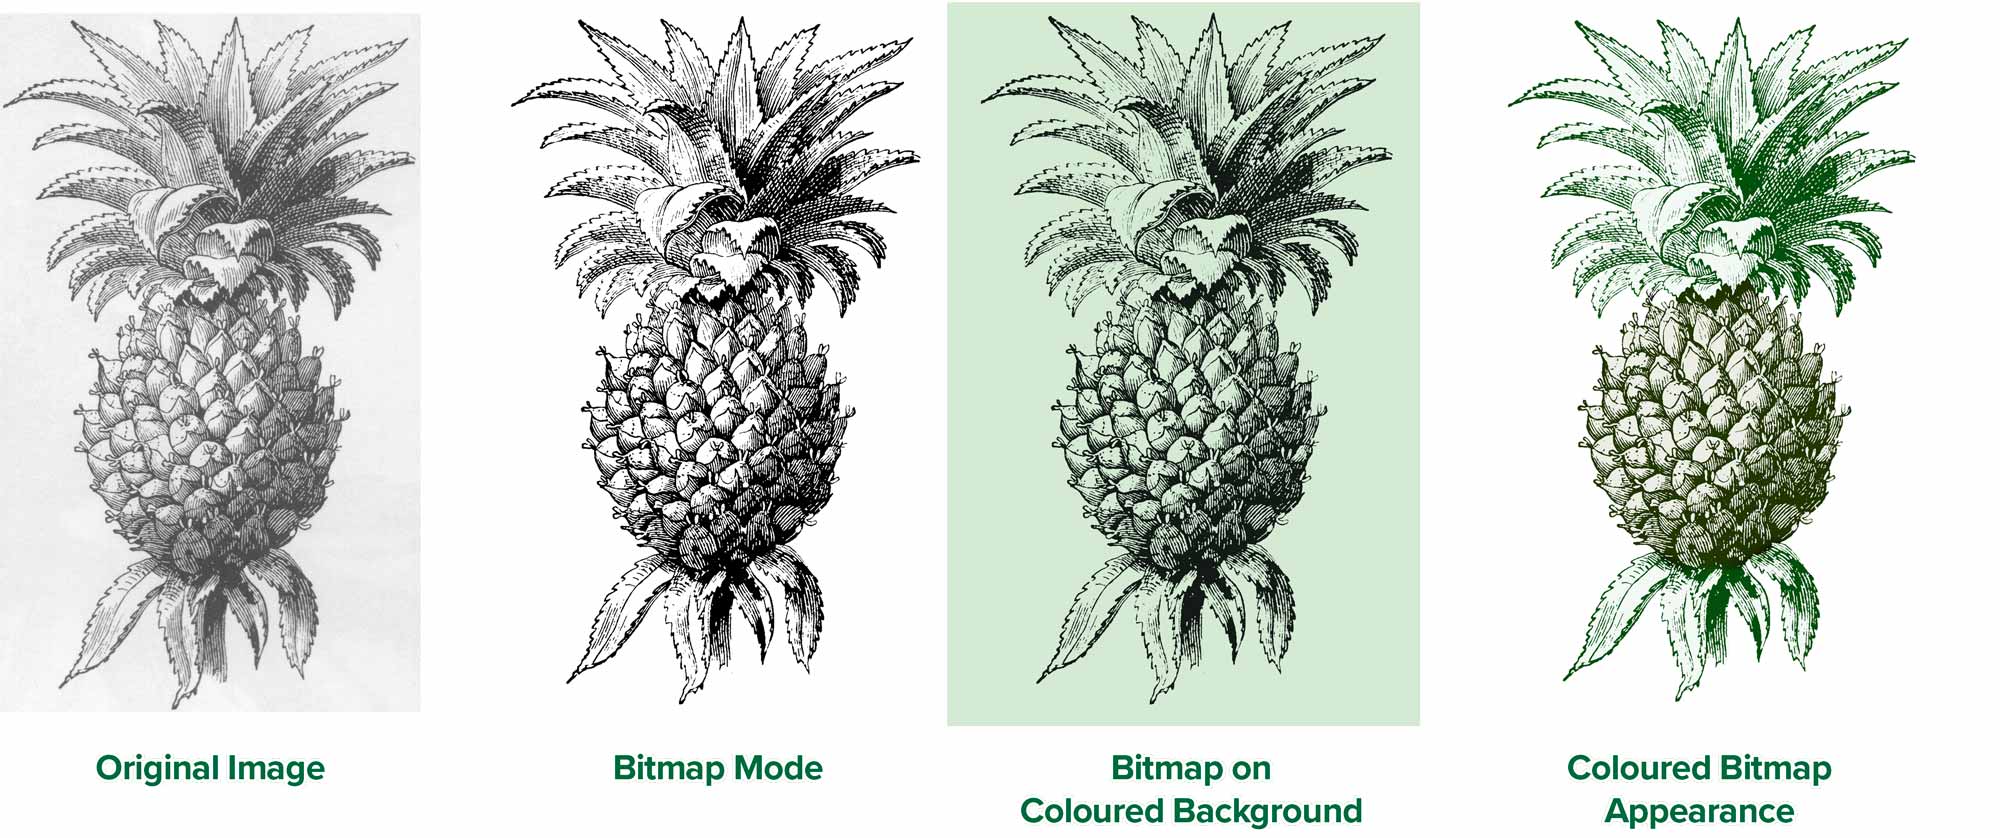
As you can see from the image above, we started with a scan in greyscale mode. From there, we can obtain a variety of looks. The second and third images are actually in Bitmap mode. The third image is placed on a coloured background in InDesign. Where there are no black pixels, the image is transparent. The last image is not in bitmap mode. It’s our layered Photoshop file that’s been colourised.
Getting Clean Pixels
Today, we’ll practice the skills needed to properly capture a line art image. You will use the technique to make them high-quality bitmap images. We want to avoid too many broken lines, clogged dark areas and excessively white light areas.
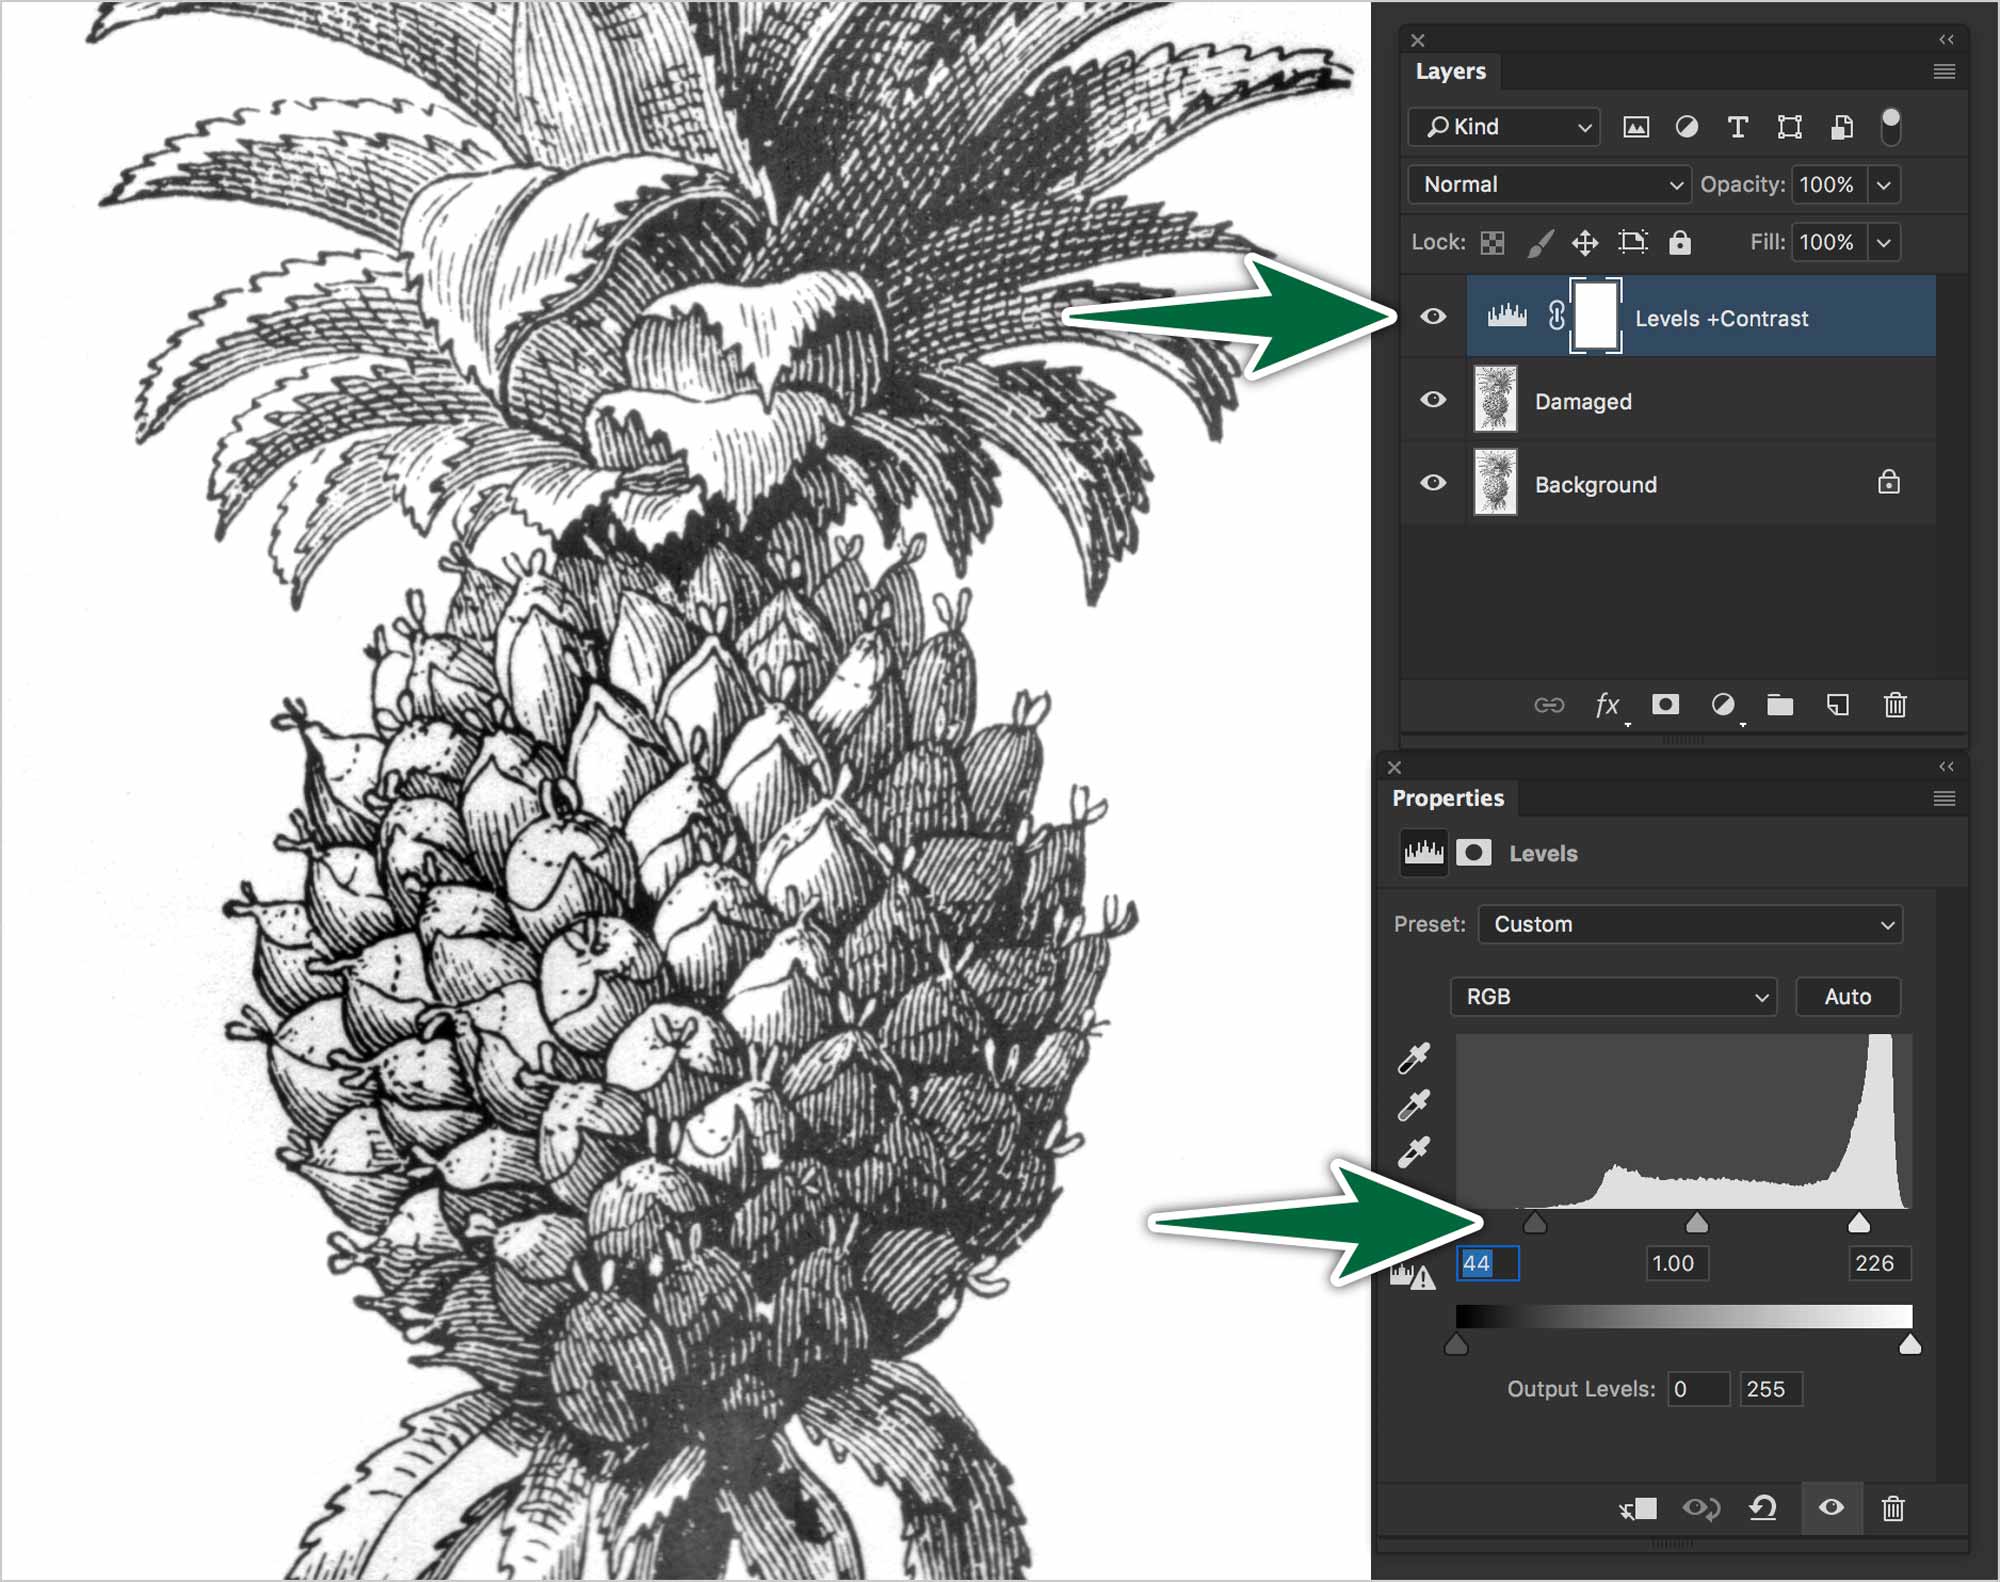
Start by using a Levels adjustment layer to increase the contrast. This will darken the blacks and whiten the paper texture. Be careful, Don’t go too far with this.
Add a Threshold adjustment layer on top. This will make our image look like it’s in bitmap mode, even if it’s in greyscale.
Now we have our image looking like a bitmap image. What we need to do is adjust any areas which either look clogged, have broken lines or have paper texture.
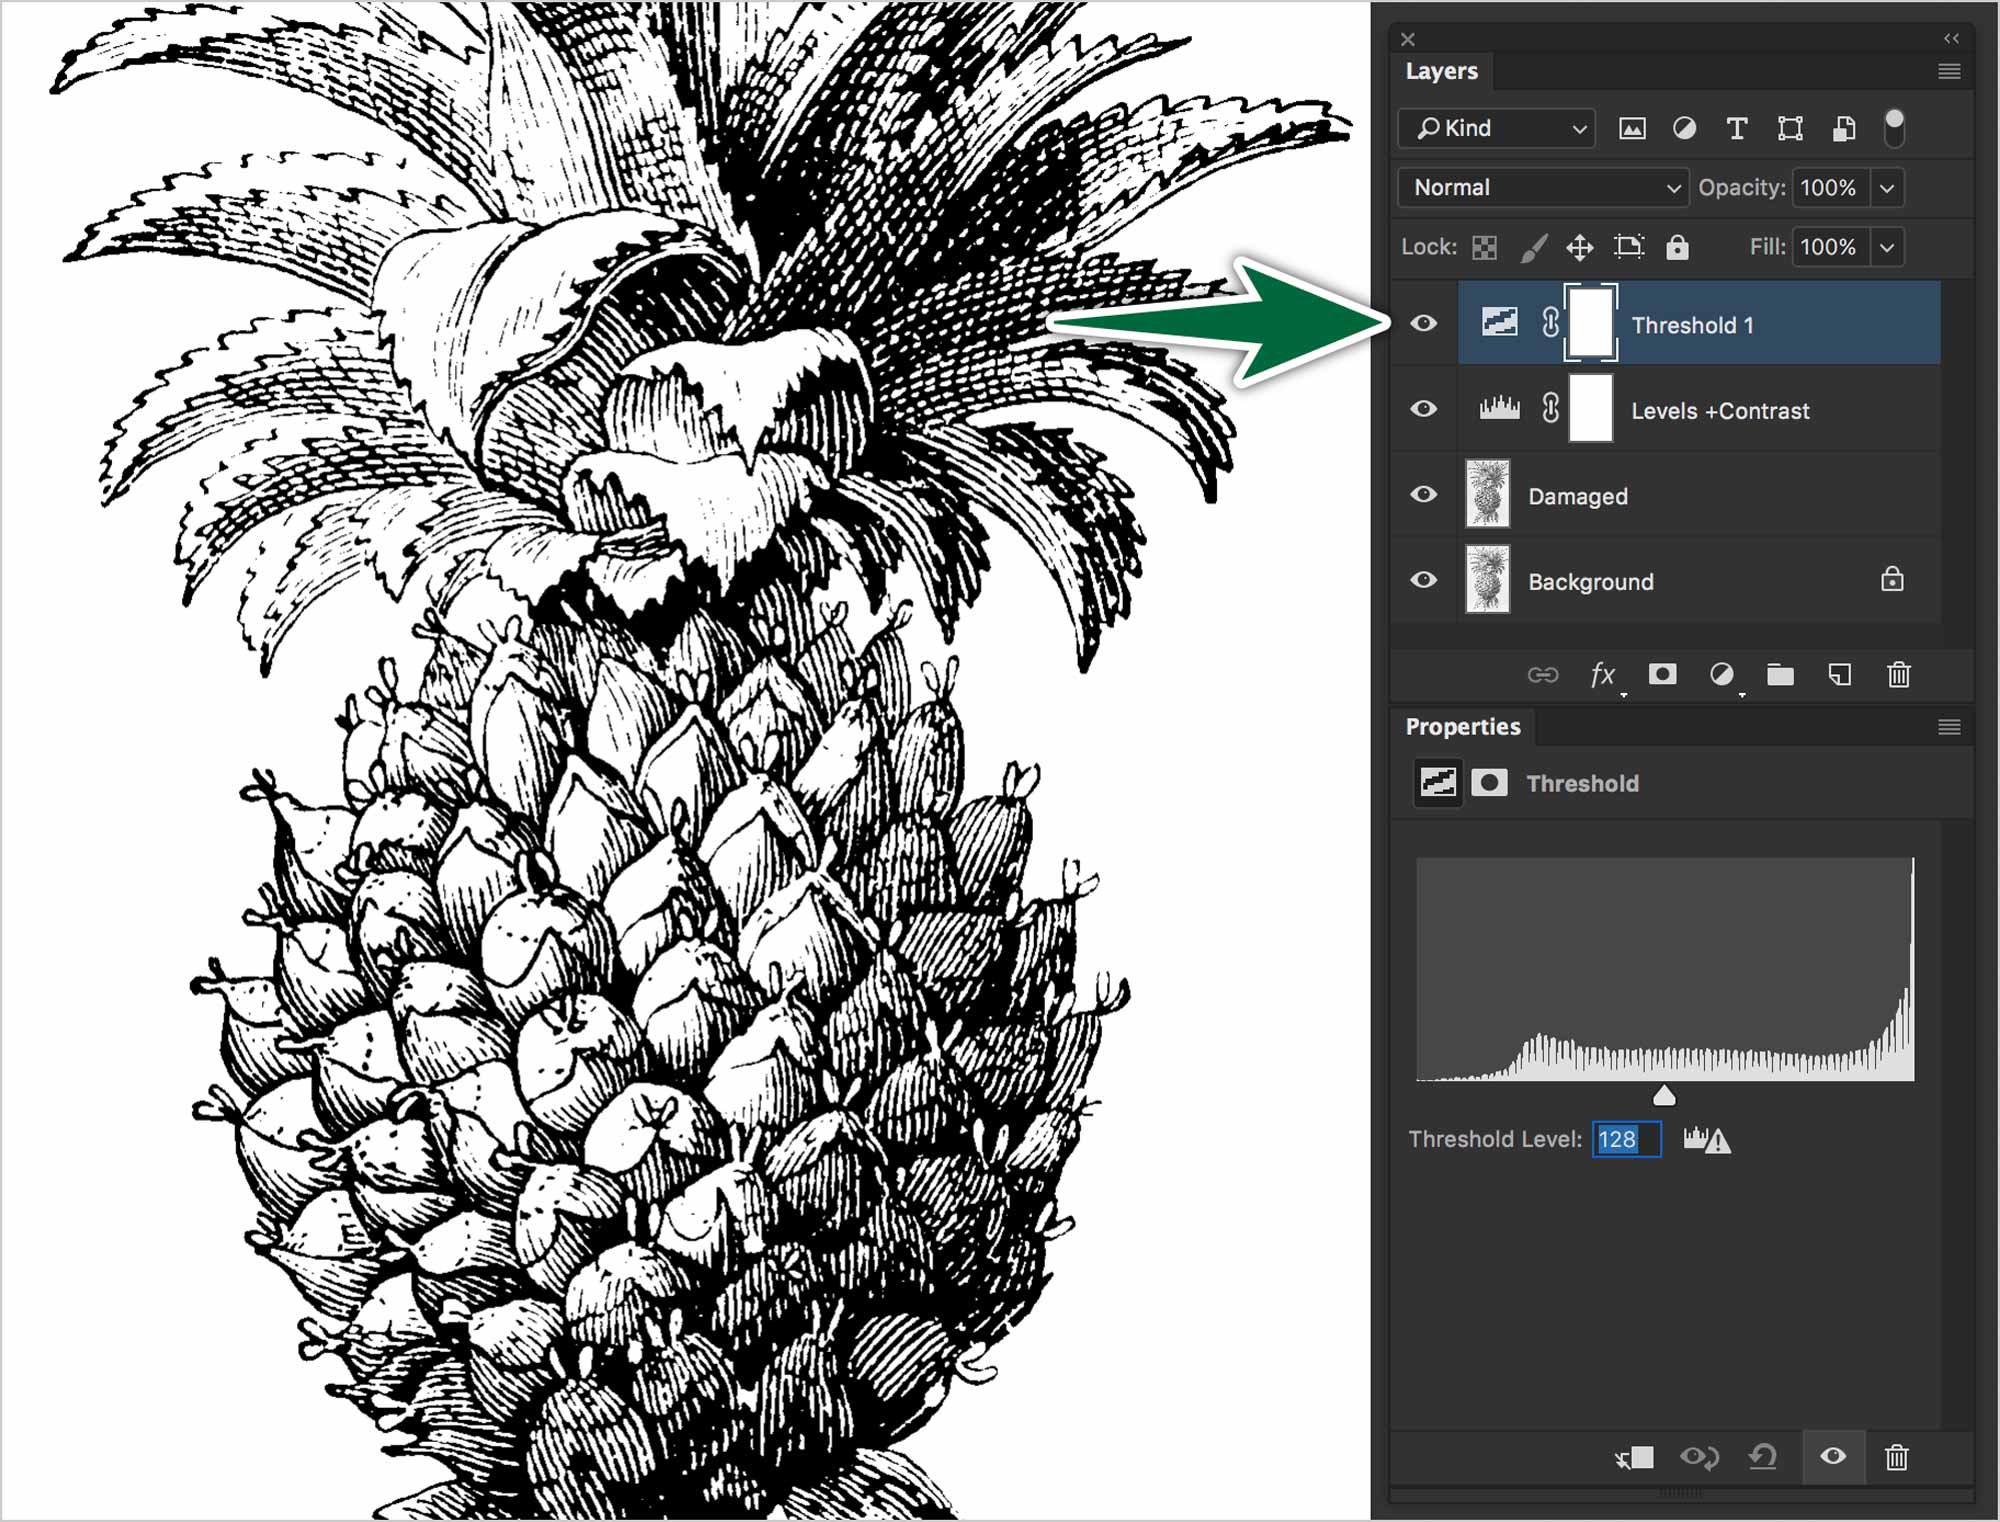
Local Fixes
The adjustment layers caused some areas of the image to have lost details or to have become to clogged with black. These details still exist on our bottom-most layer, on our original image. We’ll rescue them from that layer
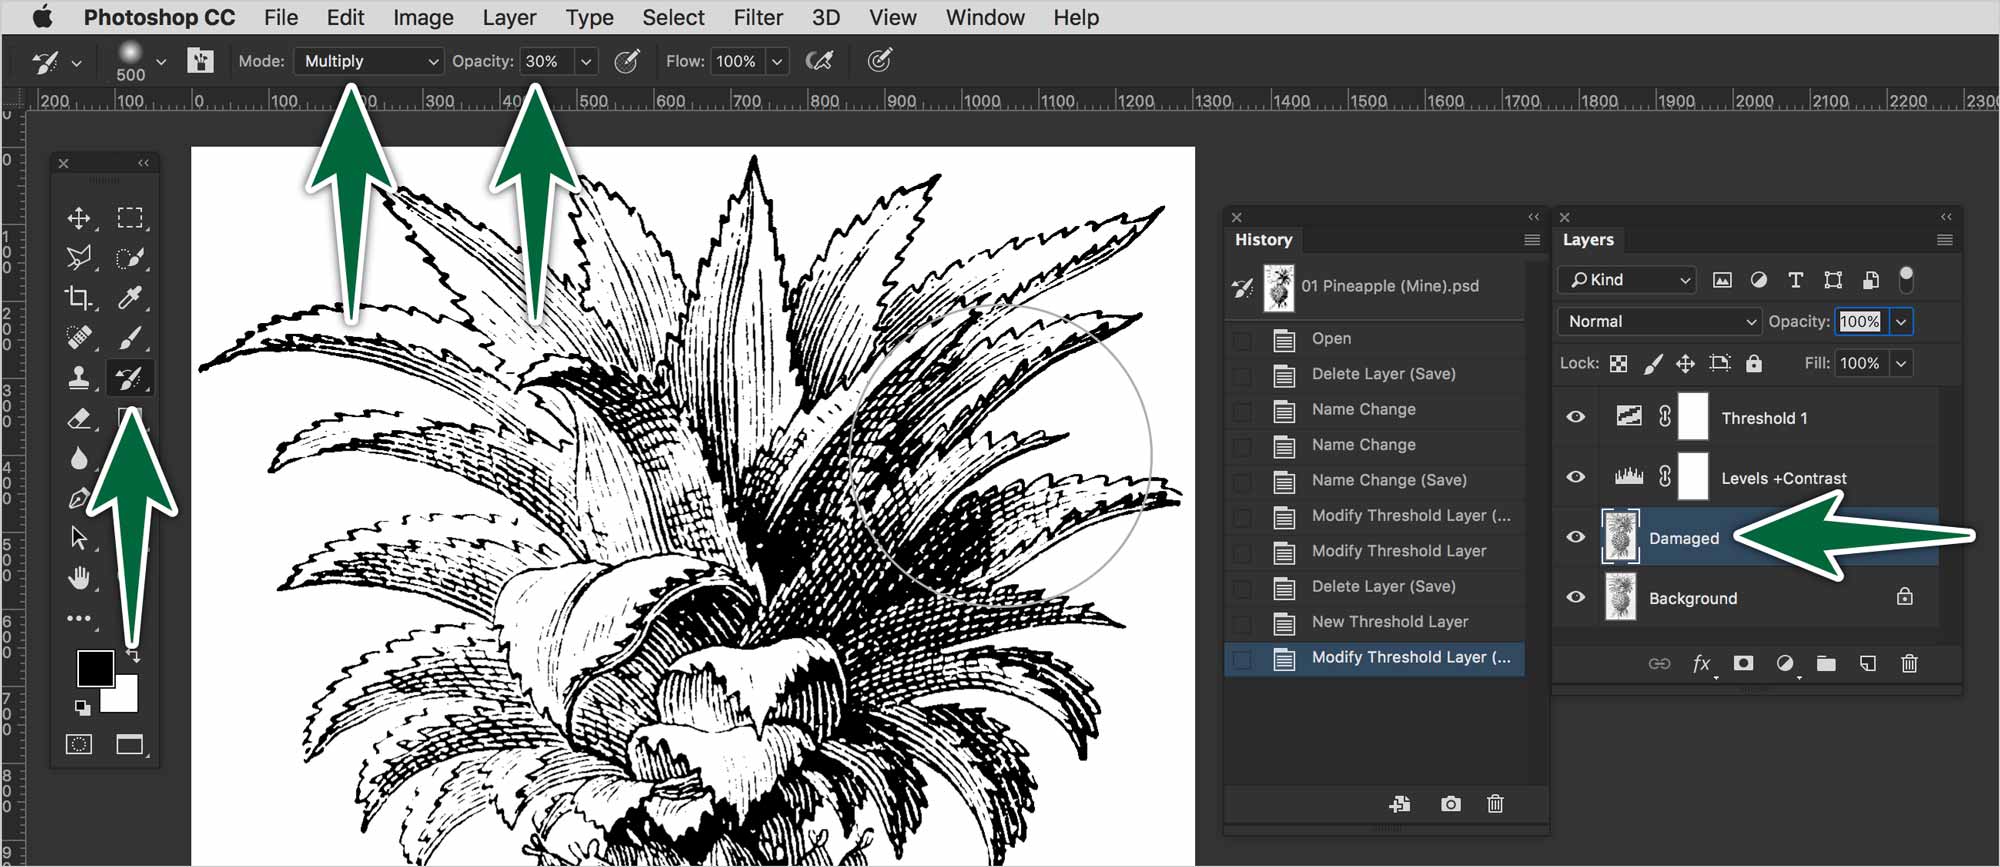
Fix Broken Lines
Use the History Brush with the mode option set to Multiply or Darken to make the lines thicker. Lower the Opacity settings of the brush (not the layer) if the changes are too extreme. A really soft-edged brush is suggested.
Reduce line Thickness
Use the History Brush with the mode set to Screen or Lighten to make the lines thinner. Lower the Opacity settings if the changes are too extreme.
Once you have refined the image, make sure there are no excessive white areas around it — that the canvas is not too big for nothing. You can use Image > Trim and check all the boxes. This should crop the image to its smallest practical size.
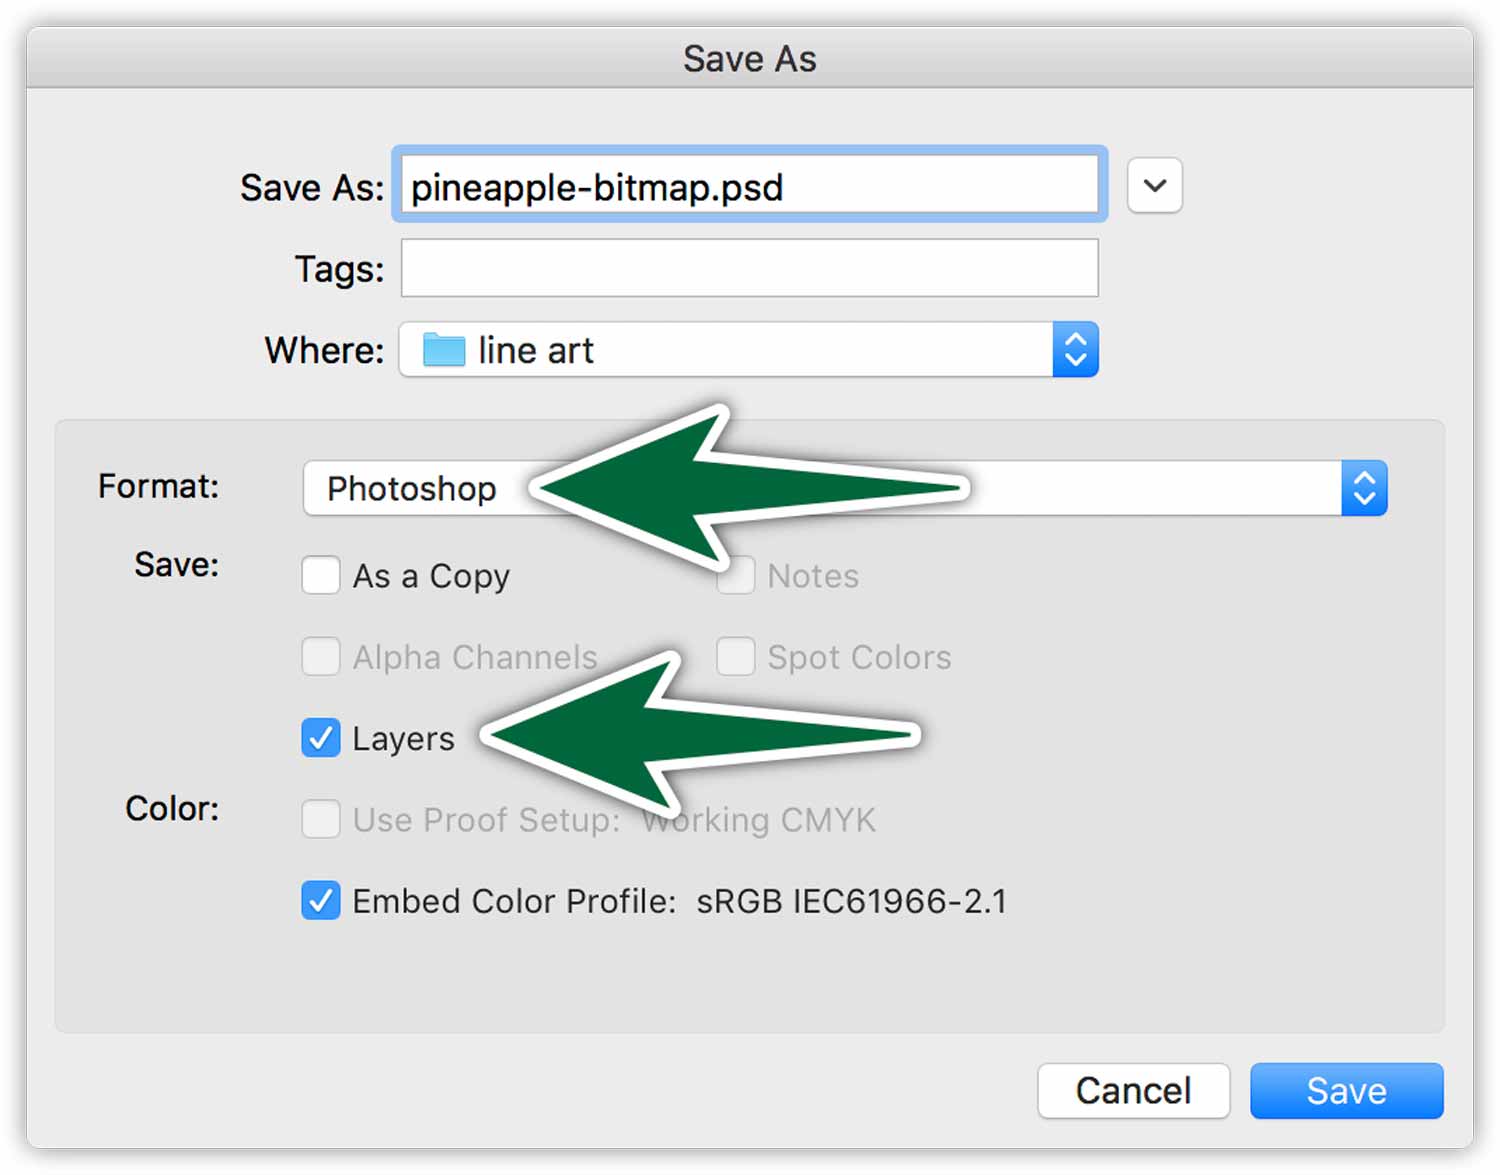
Save the resulting image as a “.PSD” file to preserve all its layers.
Output a Bitmap Image
At this point we have an image which looks like a good bitmap image, but it is still in grayscale mode. Simply go Image > Mode > Bitmap to convert it to bitmap mode.
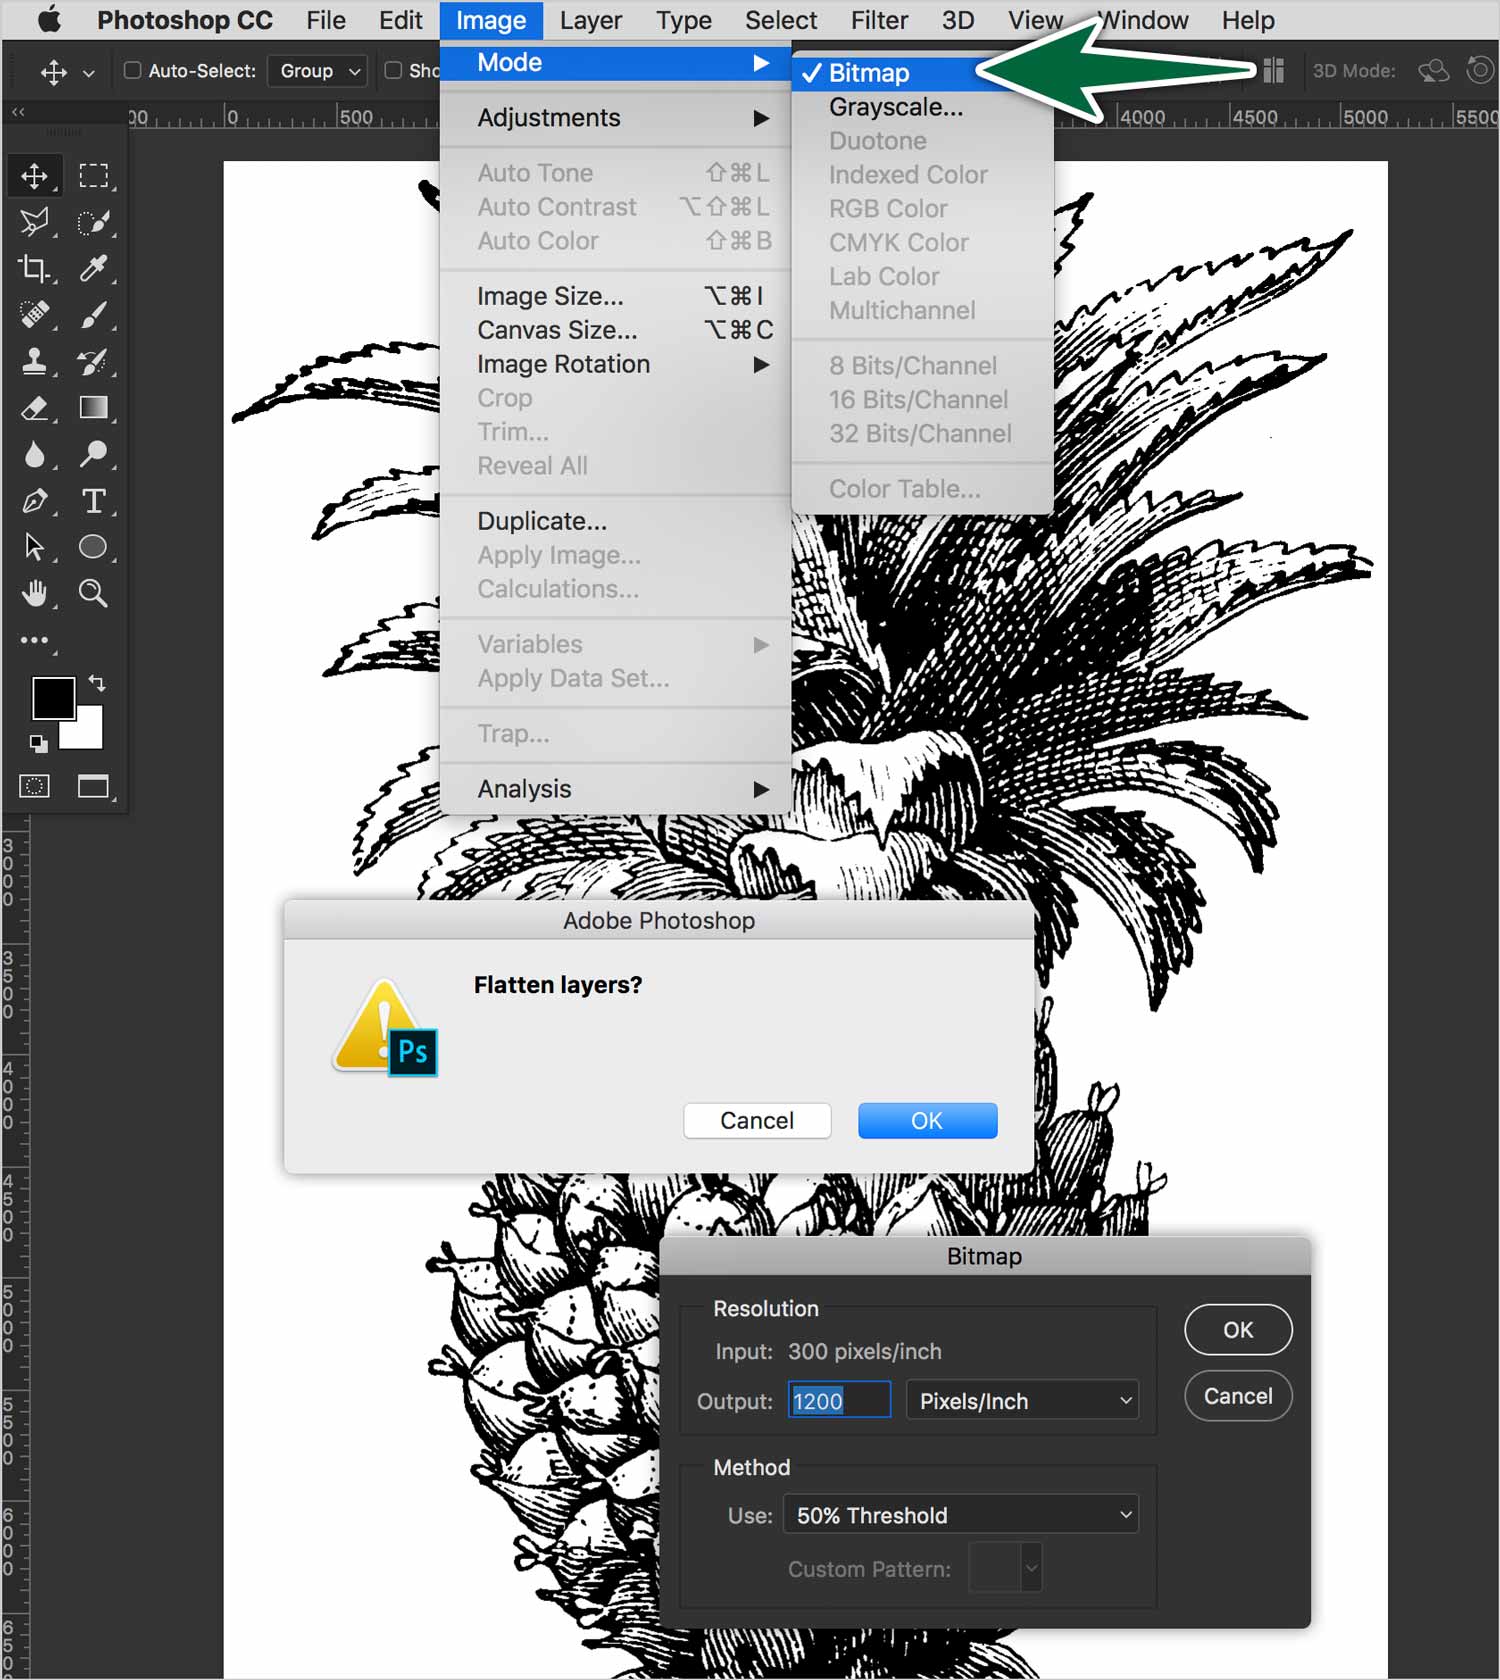
The resulting dialogue will allow you to change the resolution. This is where you can choose any resolution you need. You can go as high as you wish. Click OK.
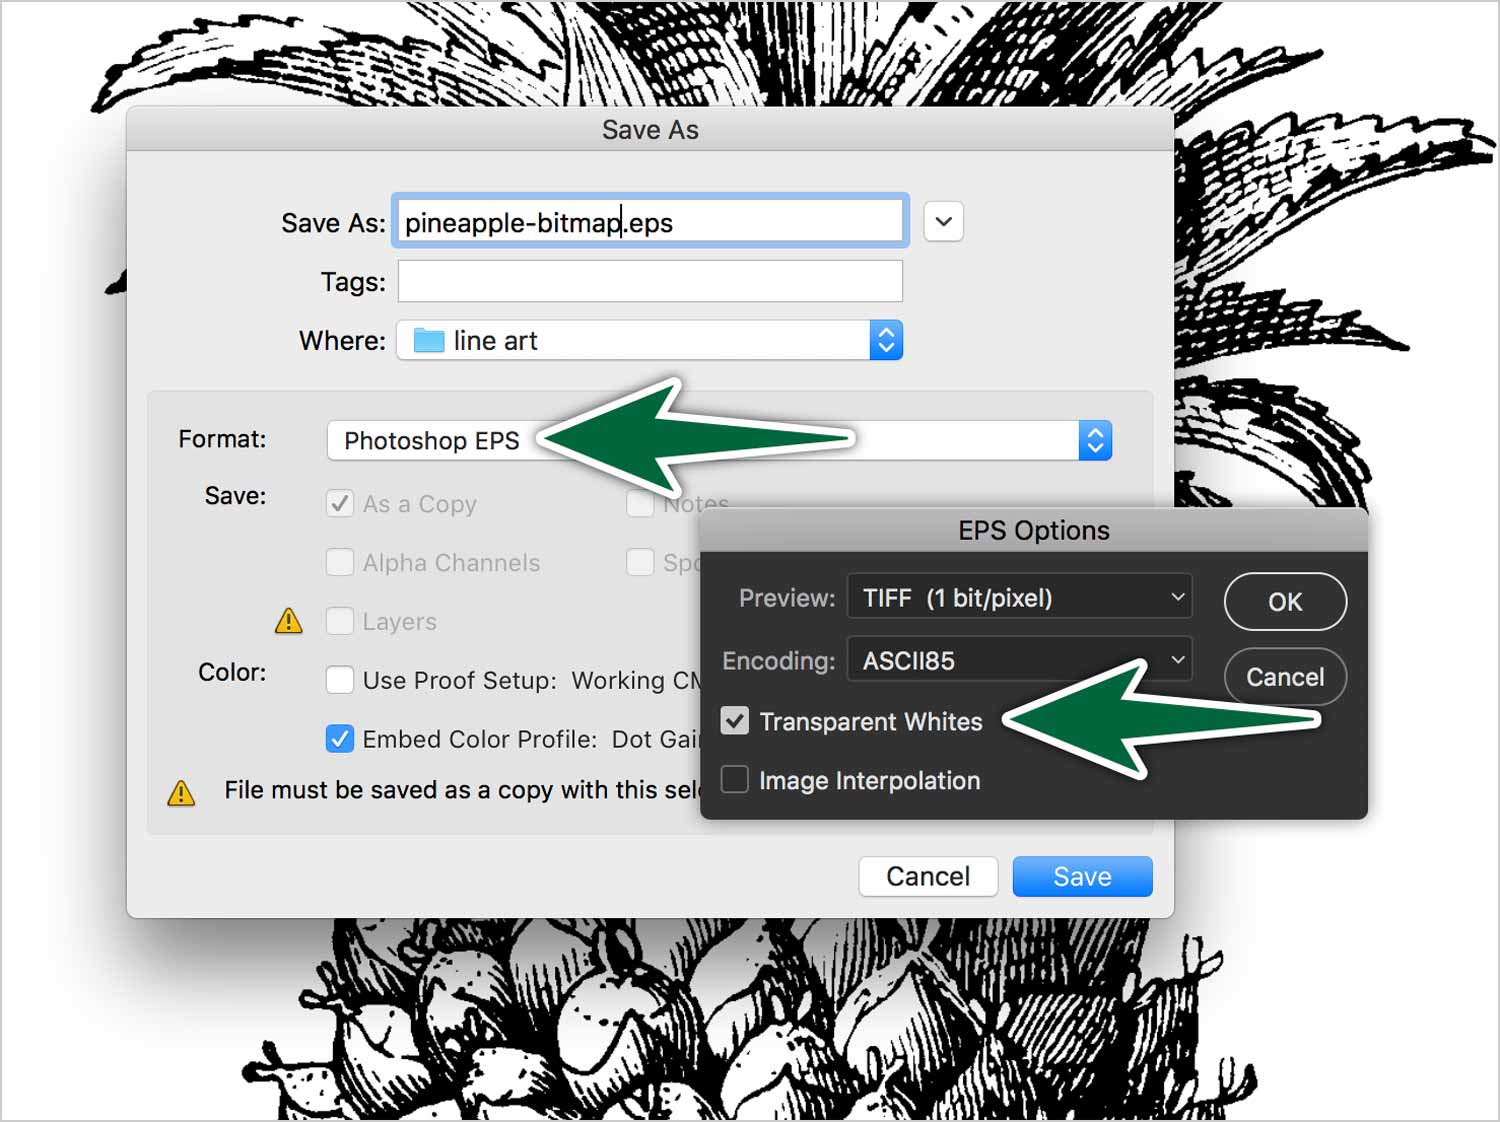
The best way to save bitmap files is as an EPS, if you need to place it against a coloured background. The resulting dialog will give you the choice of making whites transparent.
Place the resulting EPS file in the provided InDesign document. Feel free to reduce the size of it. Hold Command + Option to scale the image and its box.
Resolution & Printing Line Art
If you are sending an image in bitmap mode to press as part of a layout, you would need to set the resolution of the image to the same resolution of the printer’s raster image processor (RIP). Current RIPs use a 2400dpi line-screen or higher. This would make quite a large file. 1000dpi is sufficient to capture the finest line.
Here’s the low-down on printing line-art to various devices. Since line art contains only black and white pixels, we want to match up one image pixel to one device pixel to get the best clarity. Most of today’s monochrome laser printers print at 600 dpi. So if you’re printing to one, set the resolution of your image to 600 dpi at 100%.
Faux Bitmap Effect
You can work on the layered Photoshop file to colourize it. Since it was scanned in greyscale, you’ll need to convert it to RGB with Image > Mode > RGB Colour. This will not be a bitmap image, but it will look like one. Feel free to add adjustment layers or fill layers to colourize your artwork. Once you’re done, save the artwork as a native .psd file with the -colour added to the file name.
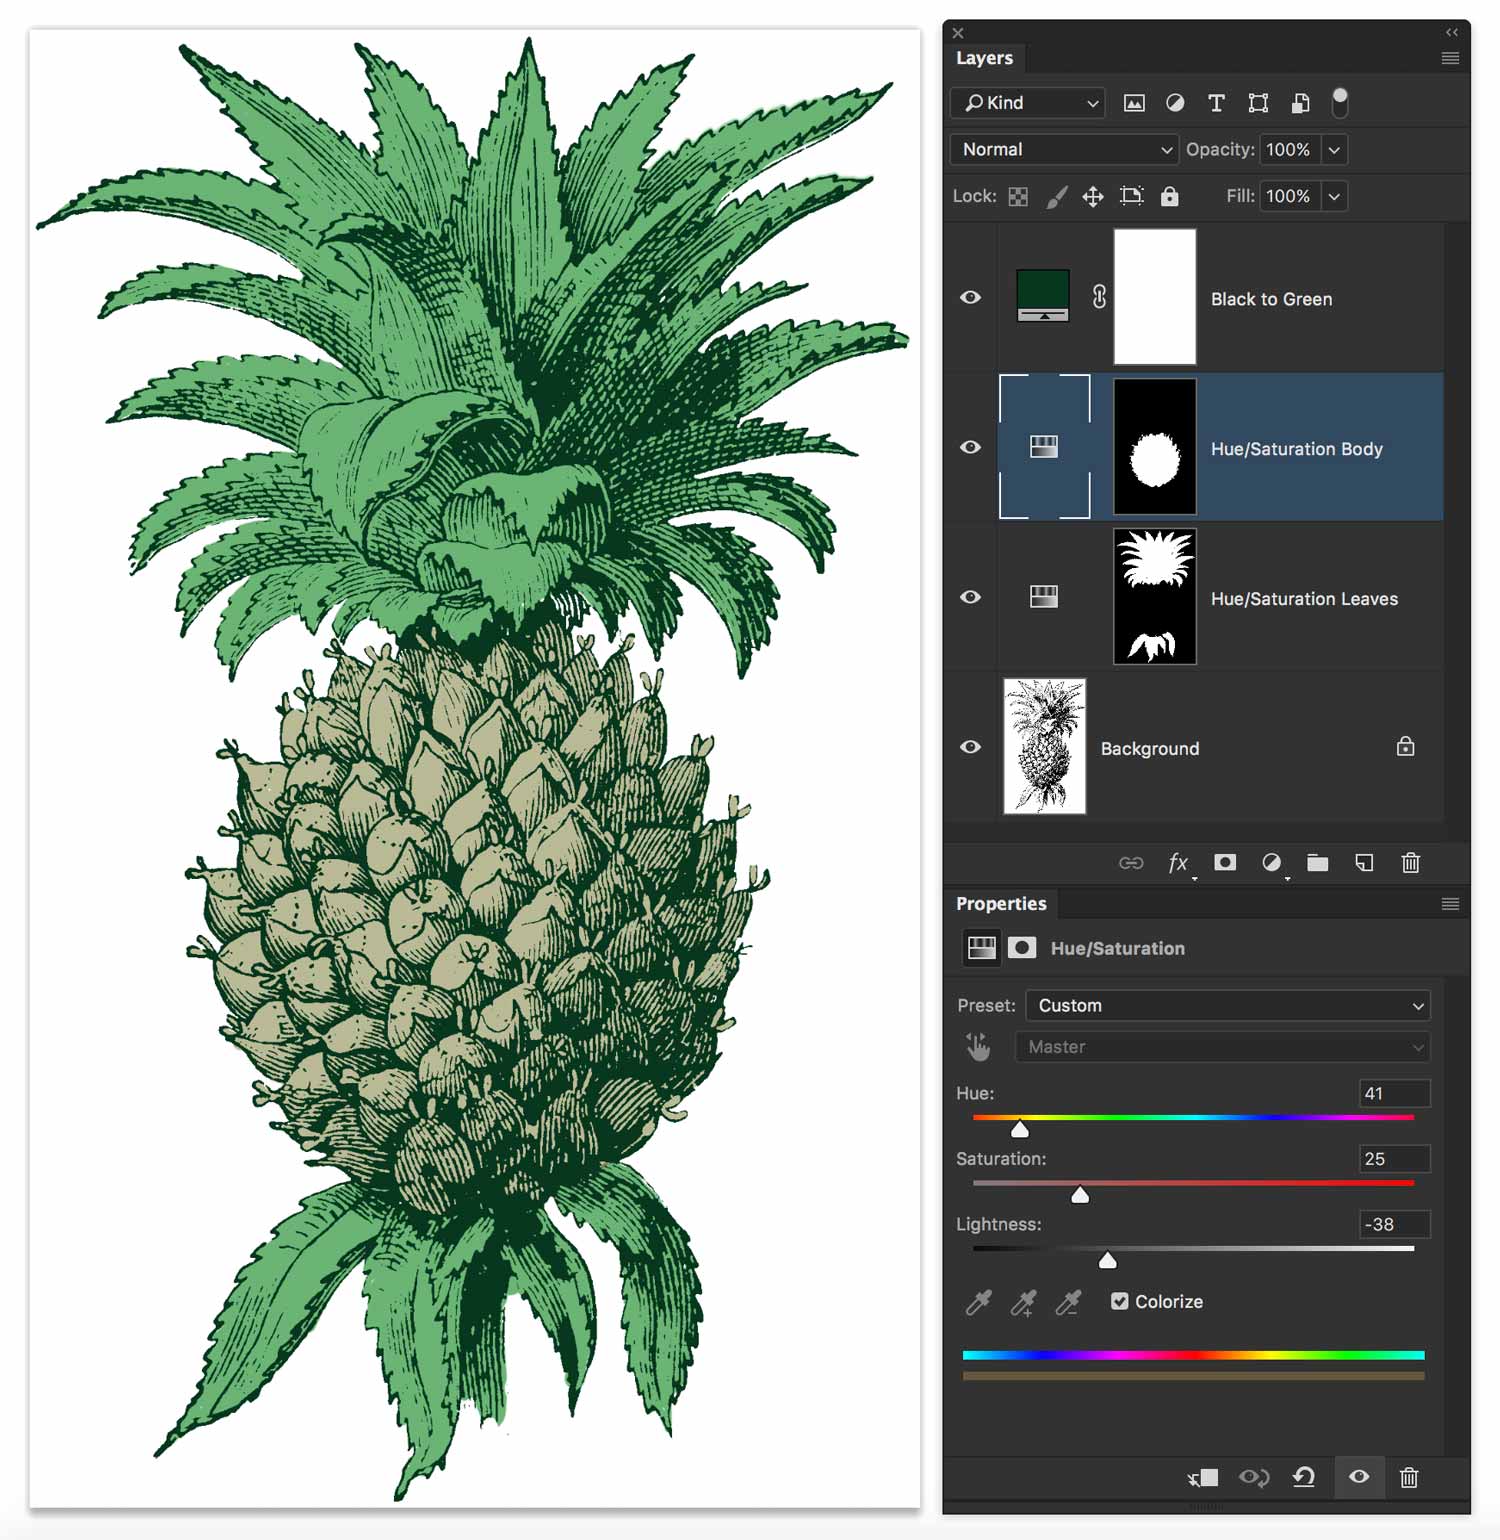
In the image above, there are two Hue/Saturation adjustment layers which colourize the body and the leaves of the pineapple. There’s a fill layer that colourized the black pixels to green. Its blend mode is set to Screen.
Formative Activity
Process each of the provided images to make them high-quality bitmap mode images. Place each of the Photoshop EPS files cleanly on the page in InDesign.
Choose one of the Photoshop files to colourize. Add fill layers and/or adjustment layers to achieve your look. Be subtle with the application of colour. Colours should be light and desaturated. Add -COLOUR to the name, so we can tell which it is.
How to Get an “A”
Place all your images in the InDesign document. To earn top grades, you will need to do the following.
- Use the provided tools and method to process your images
- Not damage your images
- Name all of your layers
- Clear up all clogged areas
- Fix broken lines
- Finish all of the provided images
