Topics
What is Dimension?
Adobe has a long history of attempting to create easy-to-use 3D software for designers. They’ve finally nailed it with the release of Adobe Dimension. It allows us to create high quality product packaging mockups or add 3D art to your photography.
Adobe Dimension CC makes it easy for graphic designers to create high-quality, photorealistic 3D images. Composite 2D and 3D assets to build product shots, scene visualizations, and abstract art.” Source: Adobe
The real-world scenario is that you’d be designing a brand, including the logo and a product package and more. With Dimension, you could apply the logo to your packaging in three dimensions.
You could also have a photo in which you’re missing an object. You could create that object in three dimensions, then add it to the photo. In this scenario, you’d have at least two workflows. You could bring your photo into Dimension to work on it there. You could also do all your 3D work in Dimension, then export it to Photoshop, to work on it there.
About Dimension Documents
New Documents & File Size
Adobe Dimension is a raster application. That means it works with pixels. That makes it very important to create your initial scene the right dimensions from the outset. We need to strike a balance here. We want our scene as large as possible, but not so large as to make the application slow down too much.
Much like working in Photoshop, knowing the intent for the file is really important. If it’s going to be produced at small dimensions, you can create a small scene. If it’s going to be large format, create a large scene. There’s no cheating resolution in Adobe Dimension.
Imported Artwork
Dimension embeds imported artwork. Artwork is not linked like it would be in InDesign. Theoretically, you could delete artwork from your computer after placing it in your scene.
Getting Around
Let’s watch this short video tutorial to learn how to get around in Adobe Dimension.
A Basic Workflow
The typical workflow begins with adding a model to a scene. You can choose one from the Assets panel, or you can import a .obj file you’ve obtained from somewhere else.
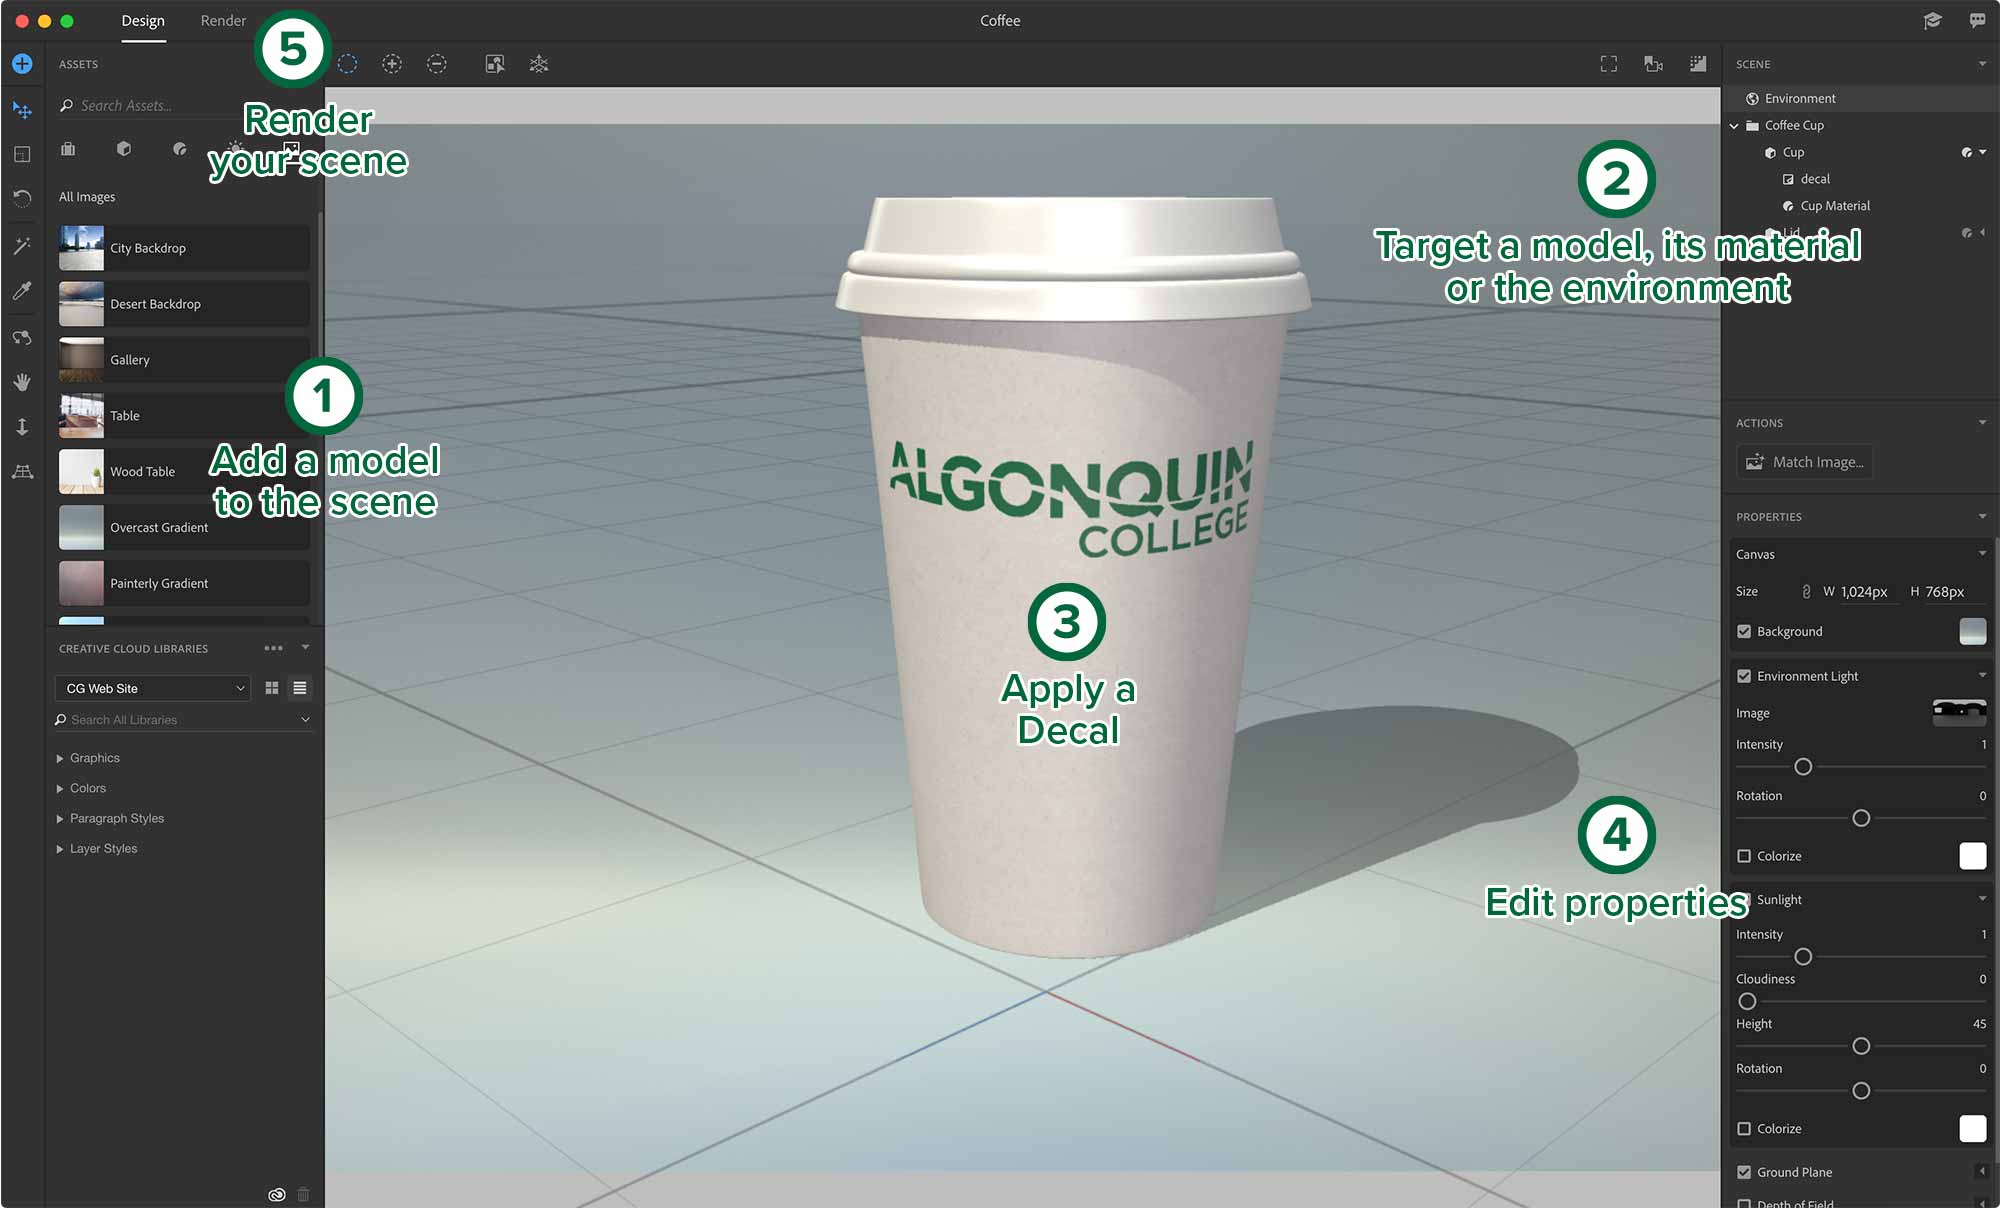
Create artwork to use as a decal on your object. If you have multiple pieces of art, you can combine them in one Photoshop file, then use that file as a decal. You can edit the object’s texture and the scene’s lighting. Once you’re scene is complete, you can render your scene as a raster file.
Dimension Tools
The tools allow us to navigate in our 3D scene. You can either edit the objects in the scene or move yourself around the scene without moving the object.

- Move Tool (v)
- Scale Tool (s)
- Rotate Tool (r)
- Orbit Tool (1)
- Hand Tool (2)
- Dolly Tool (3)
- Horizon Tool (n)
The first three tools above edit the object. The others move the viewer around the scene without affecting the objects.
Assets
The Assets panel offers all the different types of assets you can add to your scene.

- Packs
- Models
- Materials
- Lights
- Images
- Packs
- Packs are simply different types of assets grouped by type. They include all the other types of assets.
- Models
- Models are three-dimensional objects. Models can be imported in the .obj file format.
- Materials
- Surface types like wood, metal, glass and others can be applied to three-dimensional objects. These are called materials.
- Lights
- Three dimensional scenes can be illuminated with lights. Lights can be imported in various formats. In Dimension, sunlight is a global light in your scene.
- Images
- You can import photos or graphics into your scene in raster file formats.
Views
Since we’re working in three dimensions, positioning your view isn’t as simple as it might be in an app like Illustrator. Dimension offers to save a view of the scene as a Home View. You can save multiple views to make returning focus to an area easier.
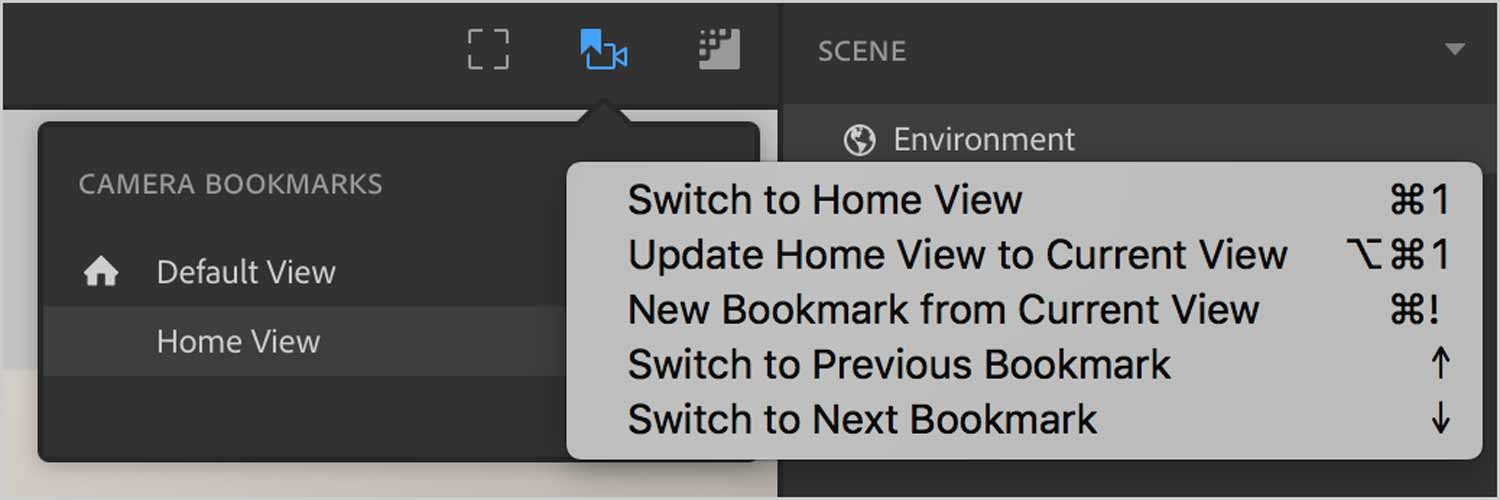
Once you’ve positioned your camera the way you want it, you can create a new camera bookmark of that view. Simply type ⌘-!. To cycle through all your camera bookmarks, simply use the Page Down or Page Up keys on your keyboard.
Lighting
Adobe Dimension has Environment Lights and Sunlight. Environment lights are panoramic images that are wrapped around the scene to project light. Read more about lighting in Dimension…
Sunlight
Dimension integrates the V-Ray rendering engine and uses the Sunlight feature of the renderer. Sunlight is a customizable system which generates an artificial sun to provide strong directional lighting and shadows. Read more about Sunlight in Dimension…
Import Lights
Dimension currently supports three formats for loading environment lights:
- .IBL
- IBL or Image Based Light is another term for an environment light. IBL is a format used to store high-dynamic range panoramic images. .IBL files are packaged containers that hold multiple images for lighting, reflections, and backgrounds in a single package.
- .HDR/.EXR
- These image formats store high-dynamic range imagery. Unlike the IBL format, .HDR and .EXR do not contain separate reflection and lighting images.
- .JPG/.PNG
- Dimension supports low-dynamic range images such as .PNG and .JPG as an environment light. To improve the lighting results, Dimension converts them into a 360 panoramic image using Content Aware Fill technology from Photoshop to fill in the missing areas. However, dramatic lighting and shadows are not produced and are best paired with sunlight. Since the images are low-dynamic range, they provide ambient lighting and reflections. However, dramatic lighting and shadows are best created with sunlight.
Source: Adobe Support
You can either create a .jpeg or .png file yourself or search the web for other formats of light files to import into Dimension.
Import .obj Files
A .obj file is a three-dimensional object file understood by many 3D modeling applications, including Adobe Dimension. There are a number of web sites that distribute free or paid .obj files, like TurboSquid.
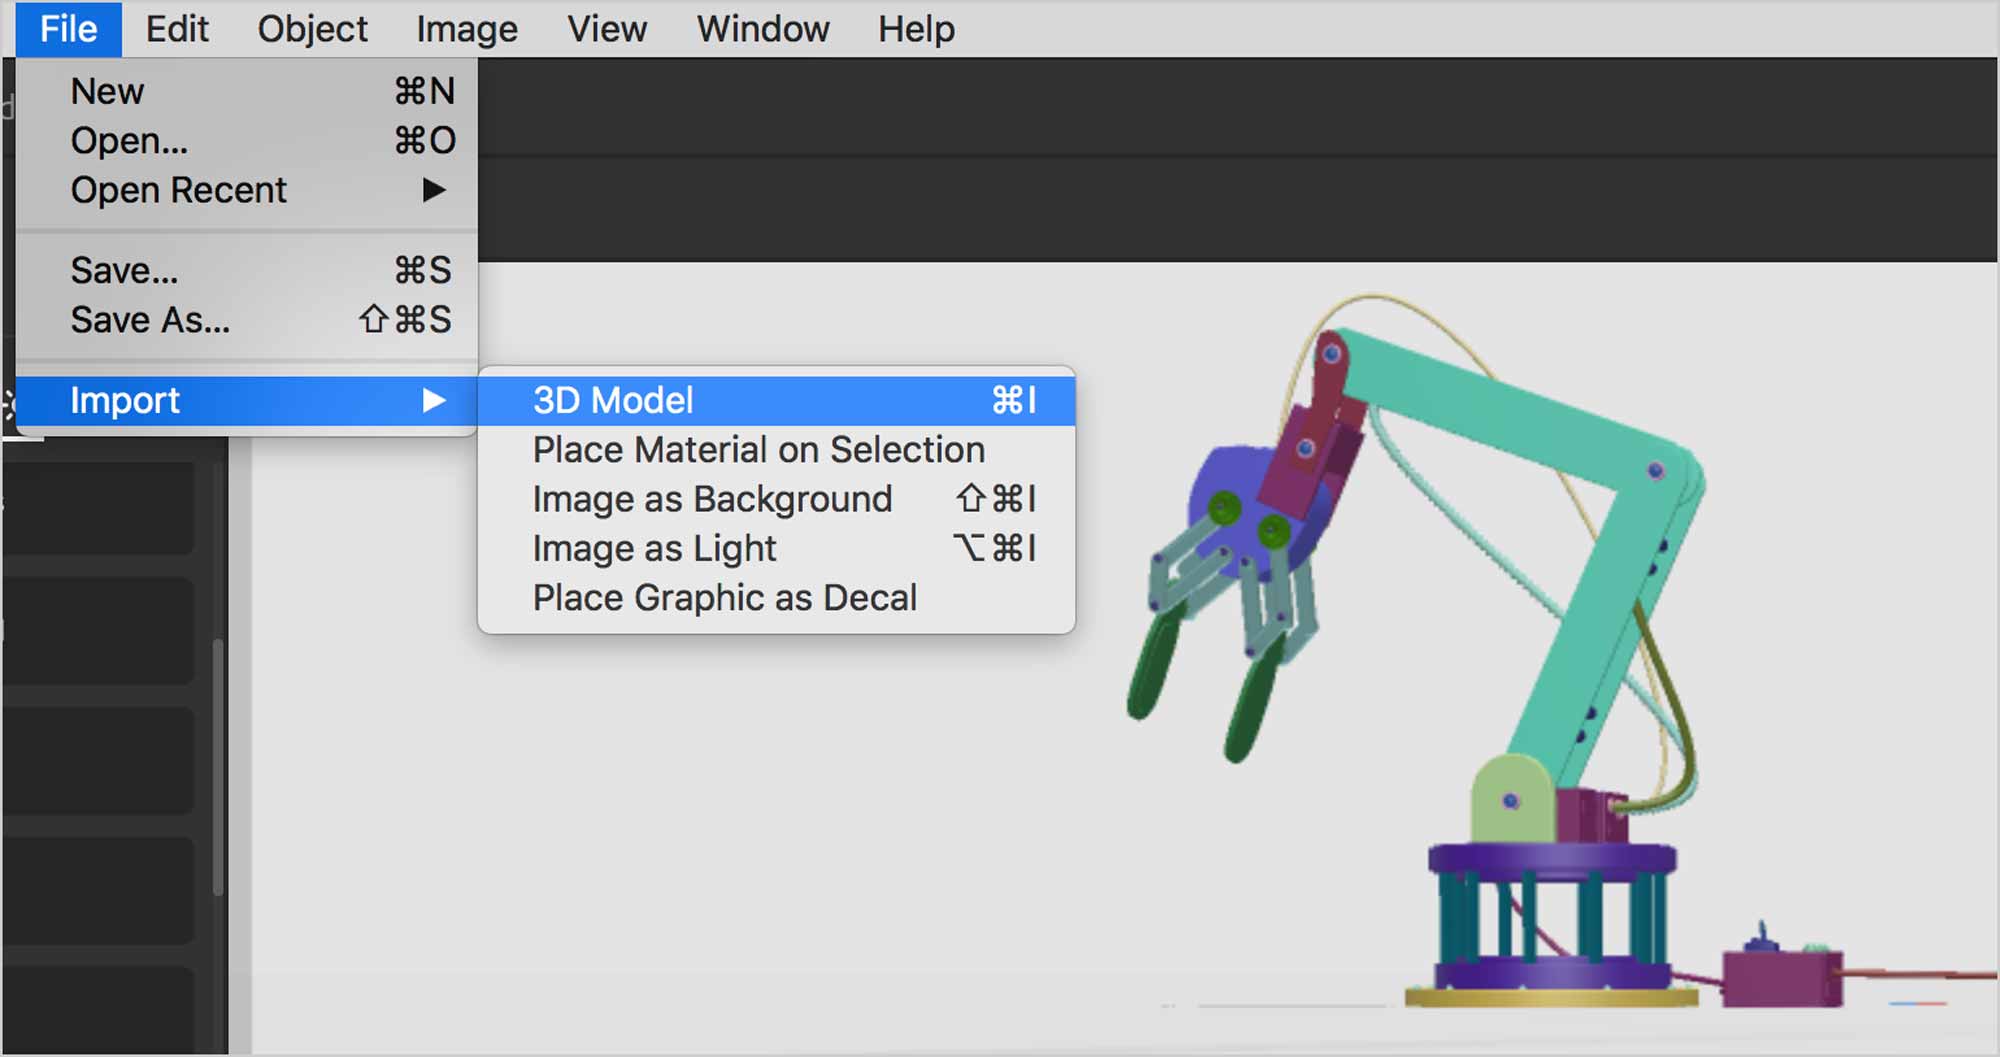
Once you’ve obtained a .obj from a third-party web site, you can import it into Dimension to integrate it into your scene. The more complex the object, the slower Dimension will be.
Background Photos
You can import any .jpeg or .png file to make it a background for your 3D construction. The background image is a property of the Environment in your scene.
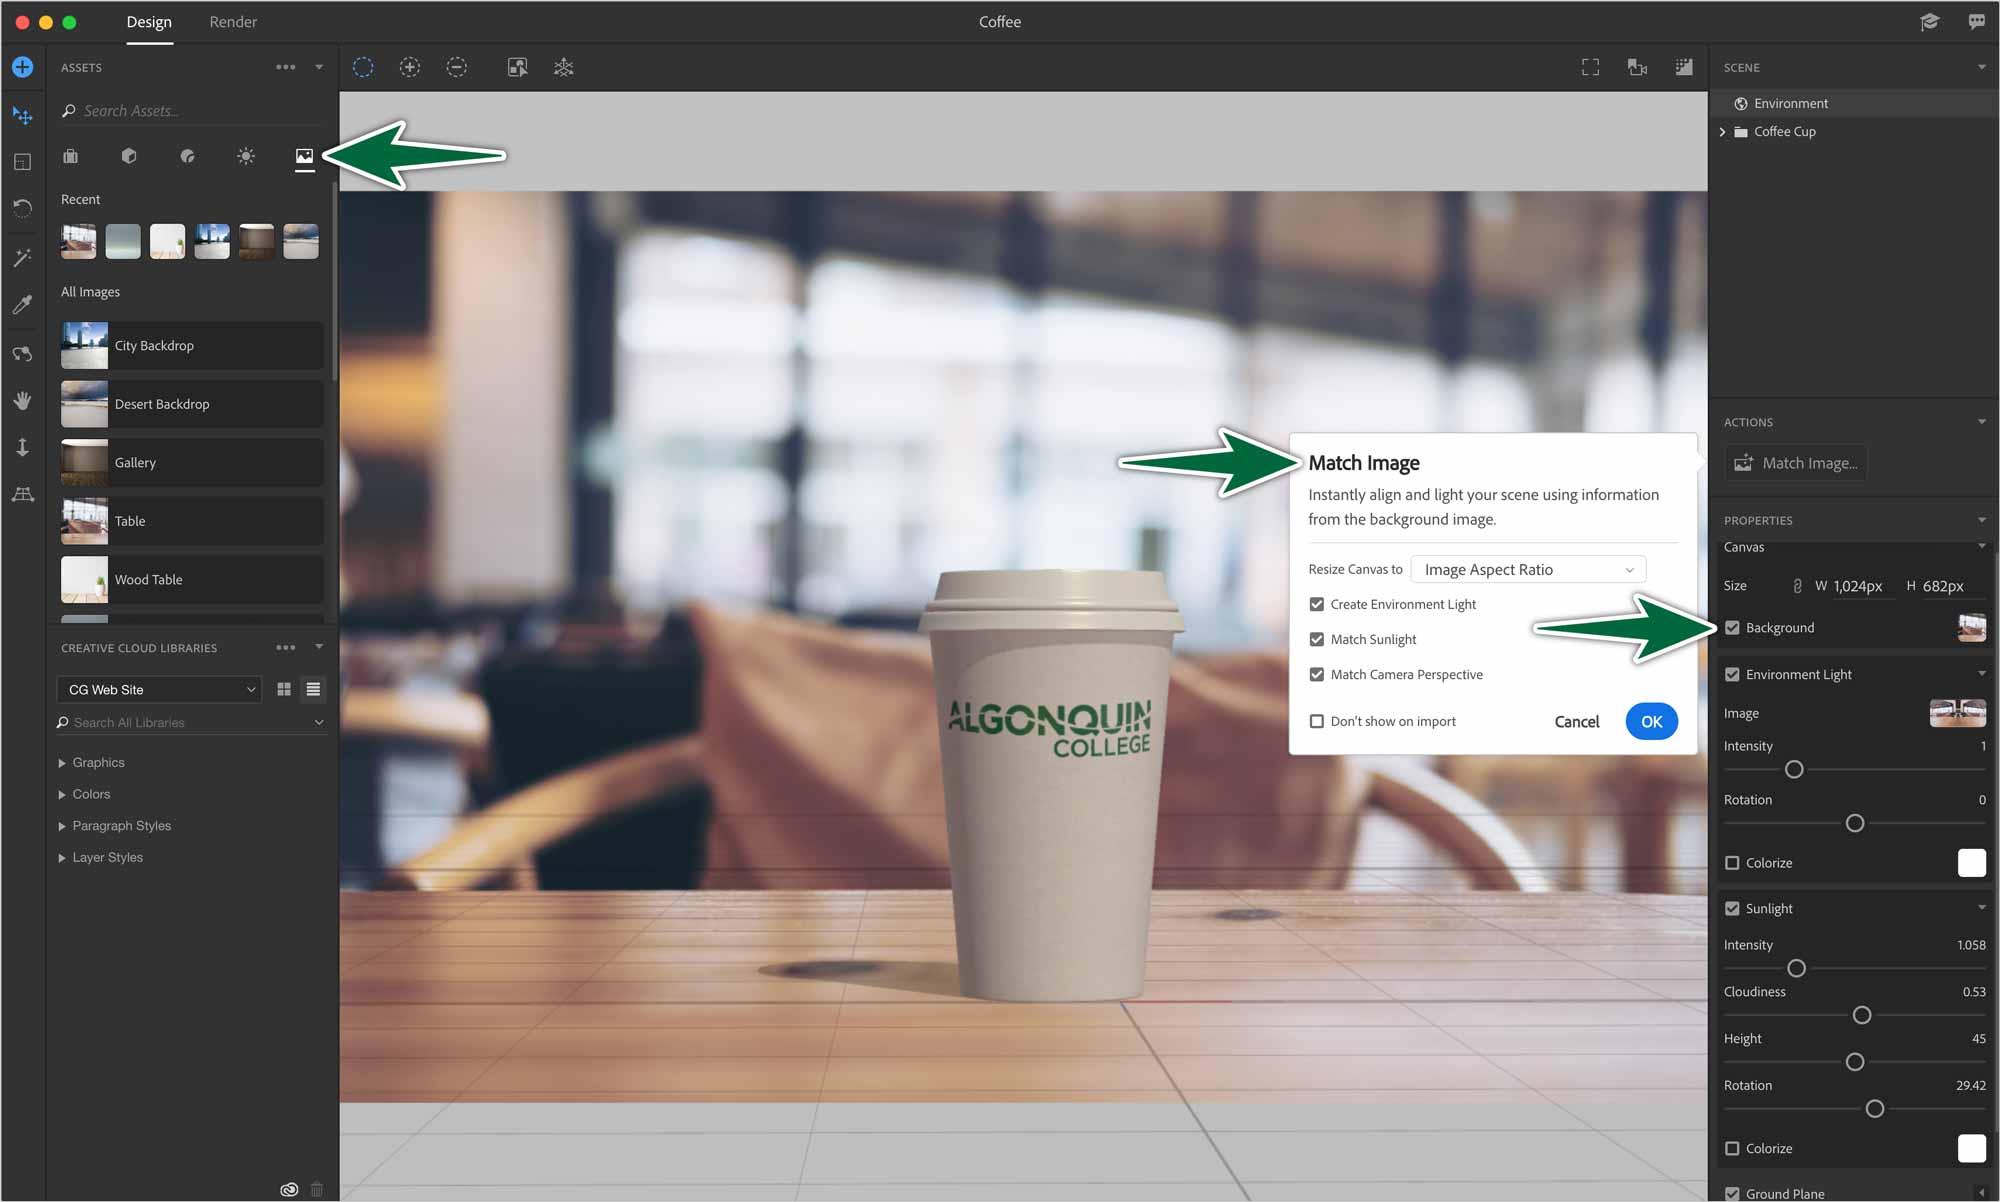
The Match Image… feature will create an environmental light based on the background image. It also uses the background image to try to position the ground plane on a surface from the photo.
One limitation is that when you orbit your scene, the photo remains stationary. Photos always remain two-dimensional.
Decals: Map Artwork in 3D
Decals are where Adobe Dimension really shines for the graphic designer. One of the key uses of Adobe Dimension is to map your own artwork to a surface in 3D. This makes it that you can do things like create a comp of a package to show a client. You can add an object that’s ‘
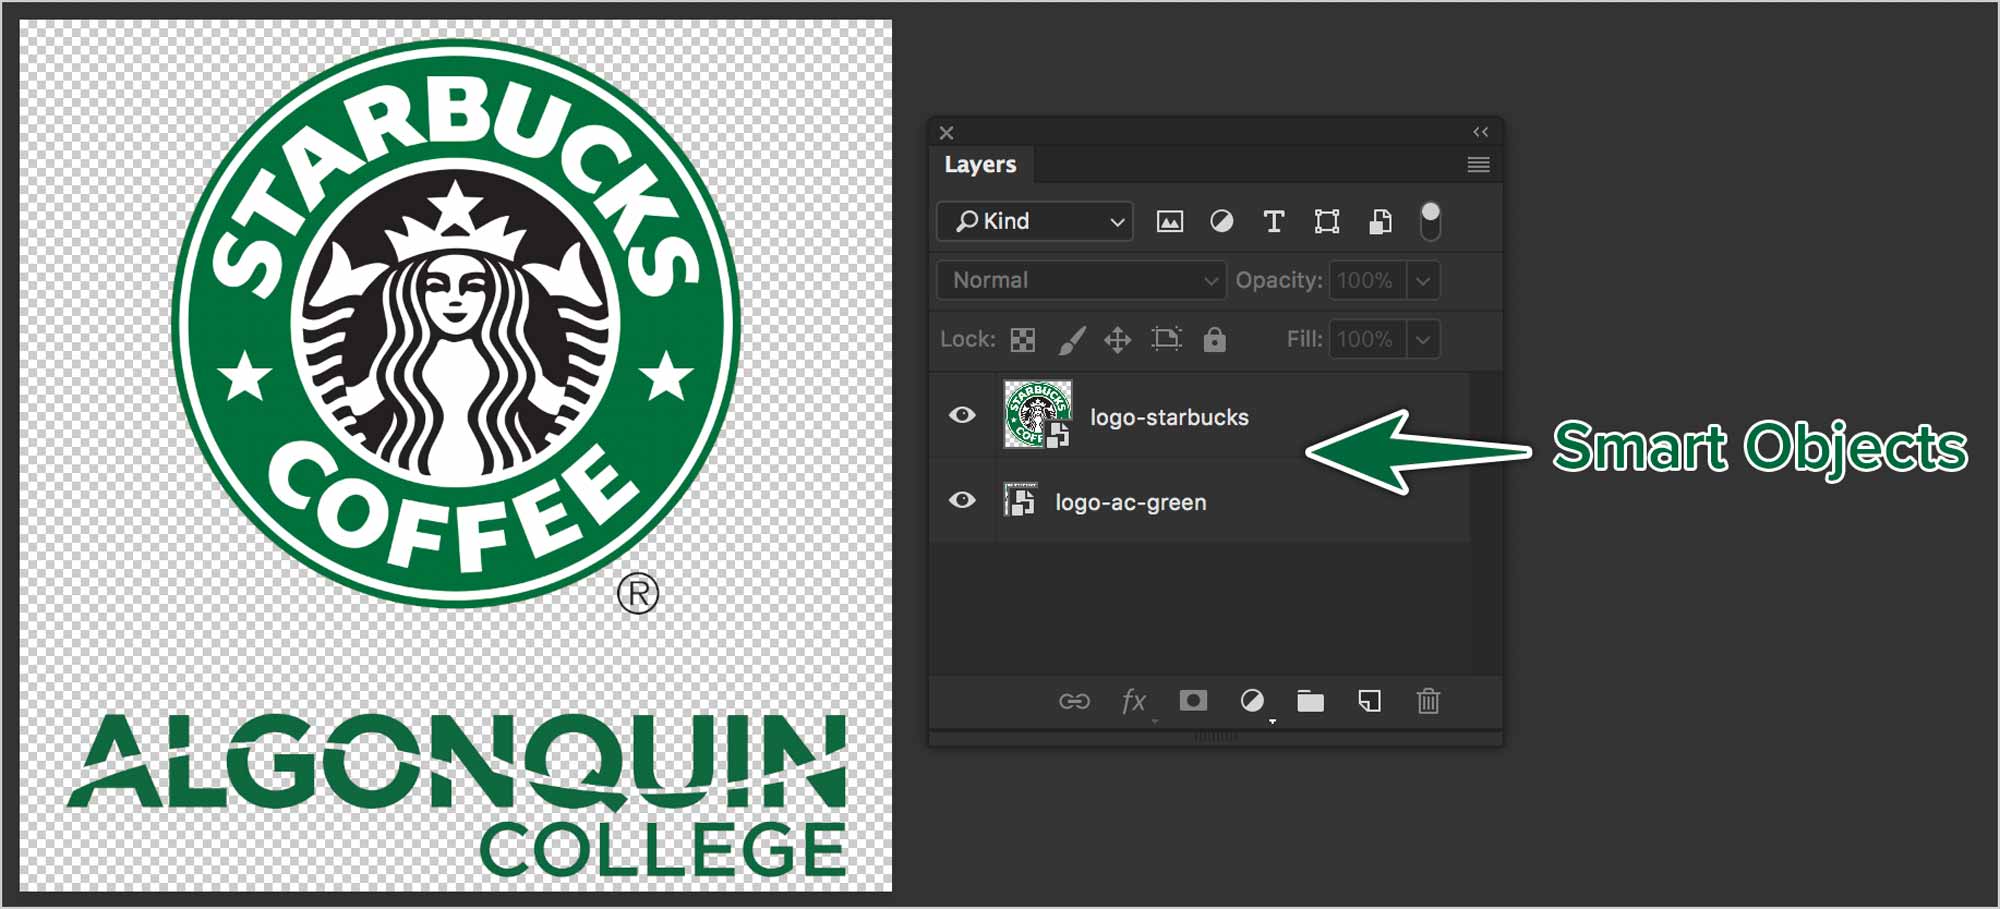
In version one of Dimension, you can only place one decal on a model. If you place a second, the first will be removed. The solution here is to put both in a single Photoshop file, preferably as Smart Objects. Then you can place your artwork as a decal on your model.
Rendering
Rendering is the process of transforming your three-dimensional scene into a two-dimensional image. The method for interpreting how light and shadow behaves in the file is called ray tracing. Read more about rendering…
To render your scene, switch to Render Mode with control-Tab
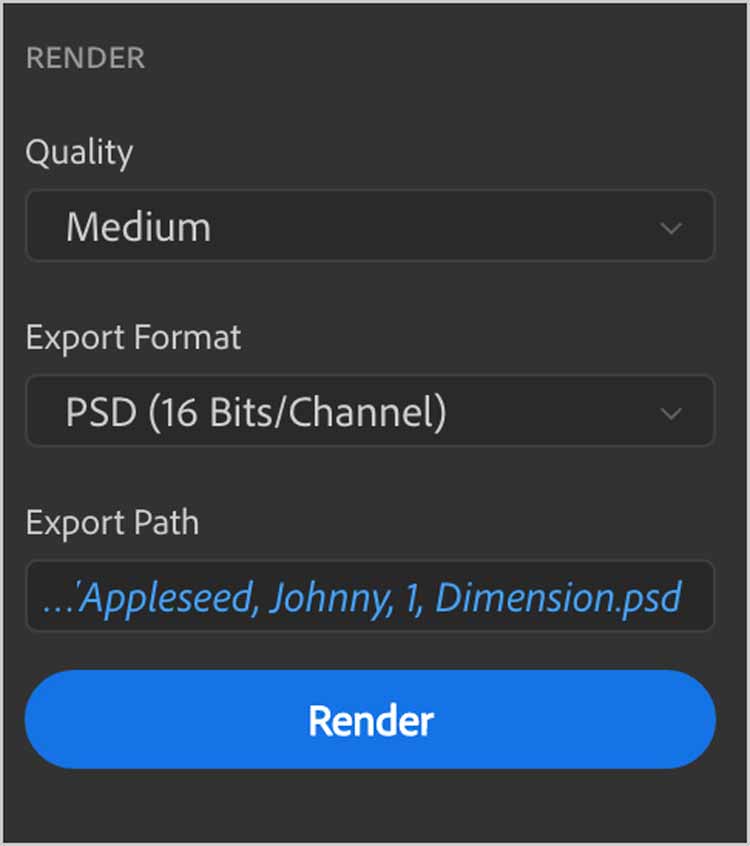
The Quality & Export Format choices shown above are good for most of your renders. All you need to do is choose the path for the saved file. If you’re rendering an image for press, the highest quality is probably your best bet.

Formative Activity
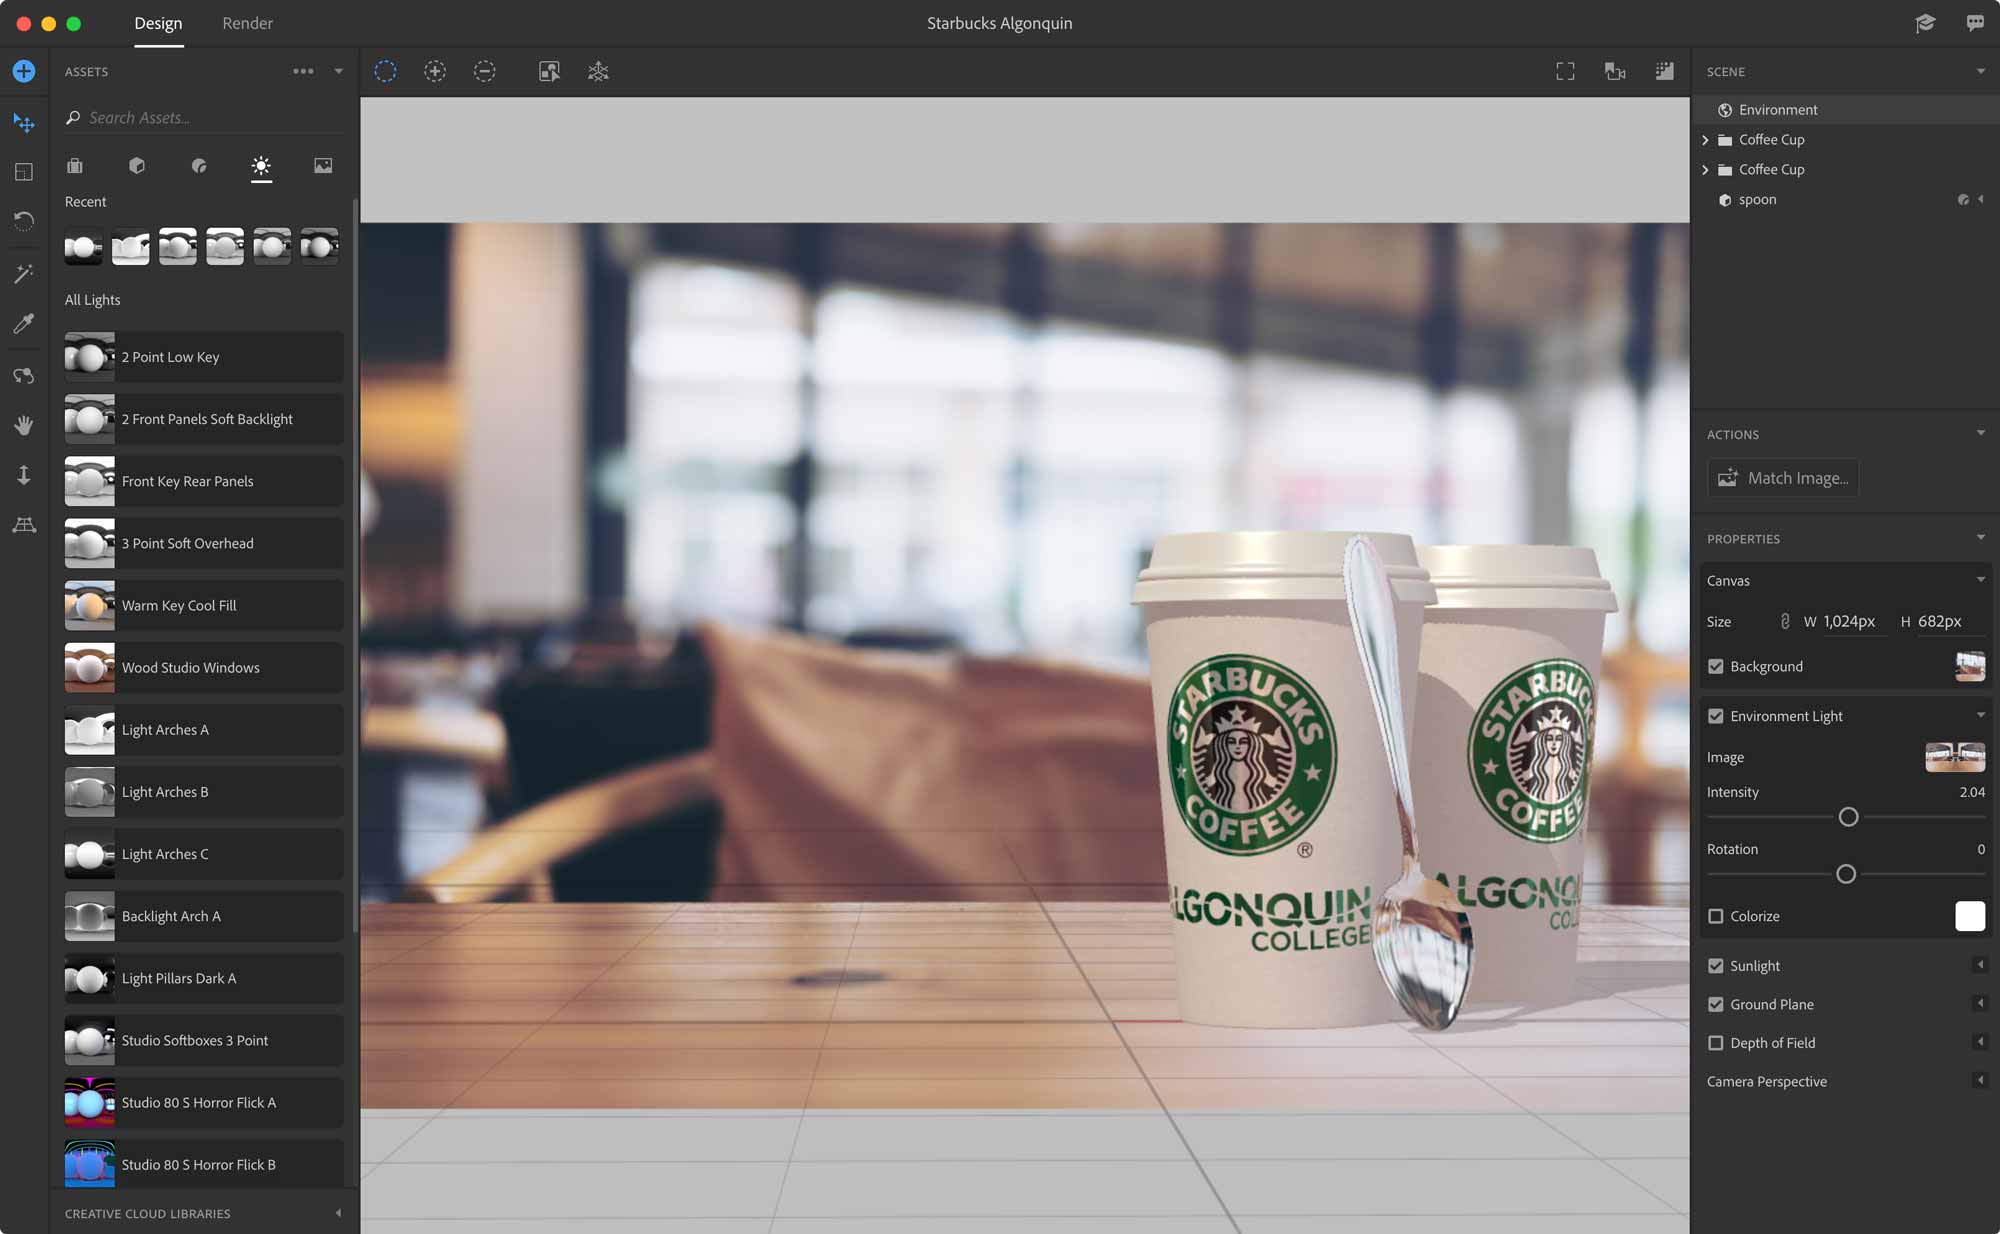
Let’s create this simple scene. It’s made up of a background photo from the Adobe Dimension Image assets library. We’ll use the coffee cup from the library, too. To finish it off, we’ll import the provided .obj file of the spoon.
Prepping Our Decal Art
We need to start in Photoshop. Create an 8” x 8” @ 300dpi canvas. Drag both logos from Finder into the canvas. Save your Photoshop file into the 01-appleseed, johnny, #, dimension exercise folder.
Make sure to delete the background layer in your Photoshop file. Save this as a .psd file. Now we’re ready to create our Dimension document. The default dimensions are fine, 1024px x 768px.
Save your Adobe Dimension file into the 01-appleseed, johnny, #, dimension folder.
Background Image
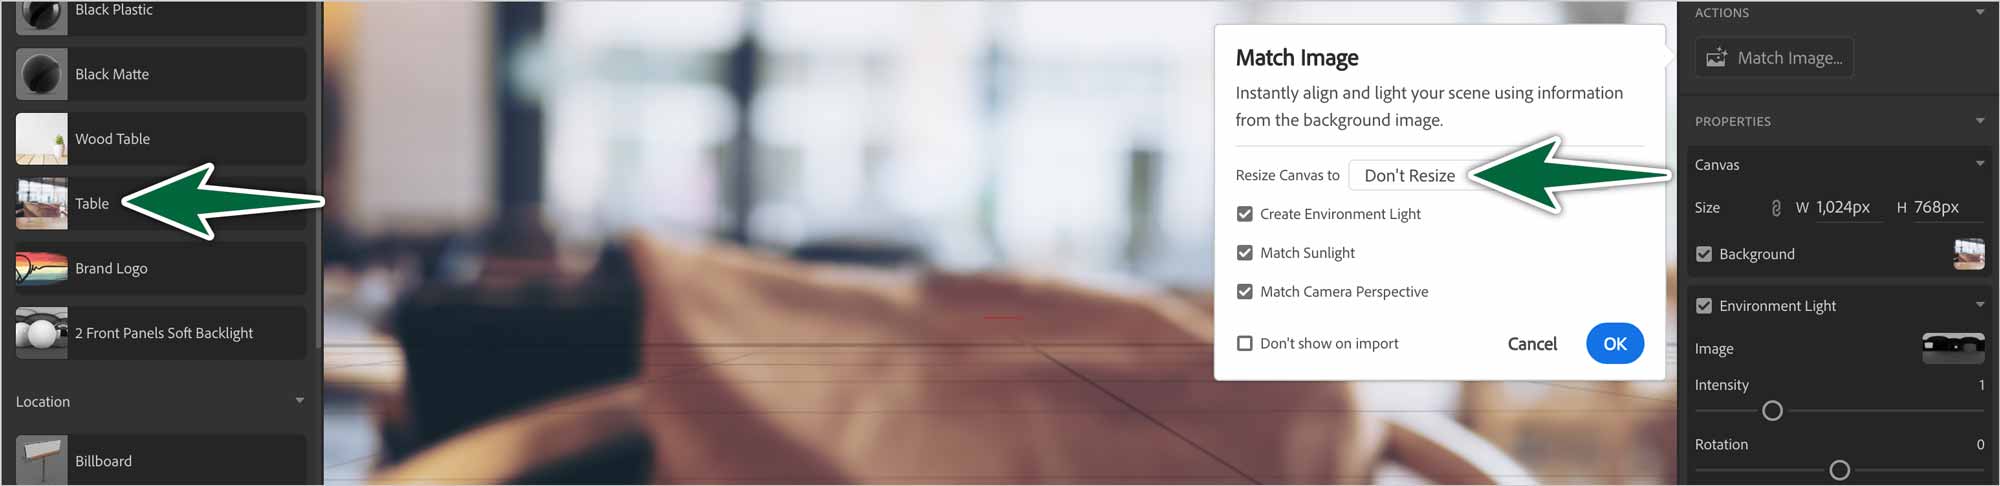
Place the asset called Table in the scene, then click to match it to our scene. Dimension will offer to automatically create correct lighting, match sunlight and camera perspective. This will change our scene dimensions to match the photo’s size.
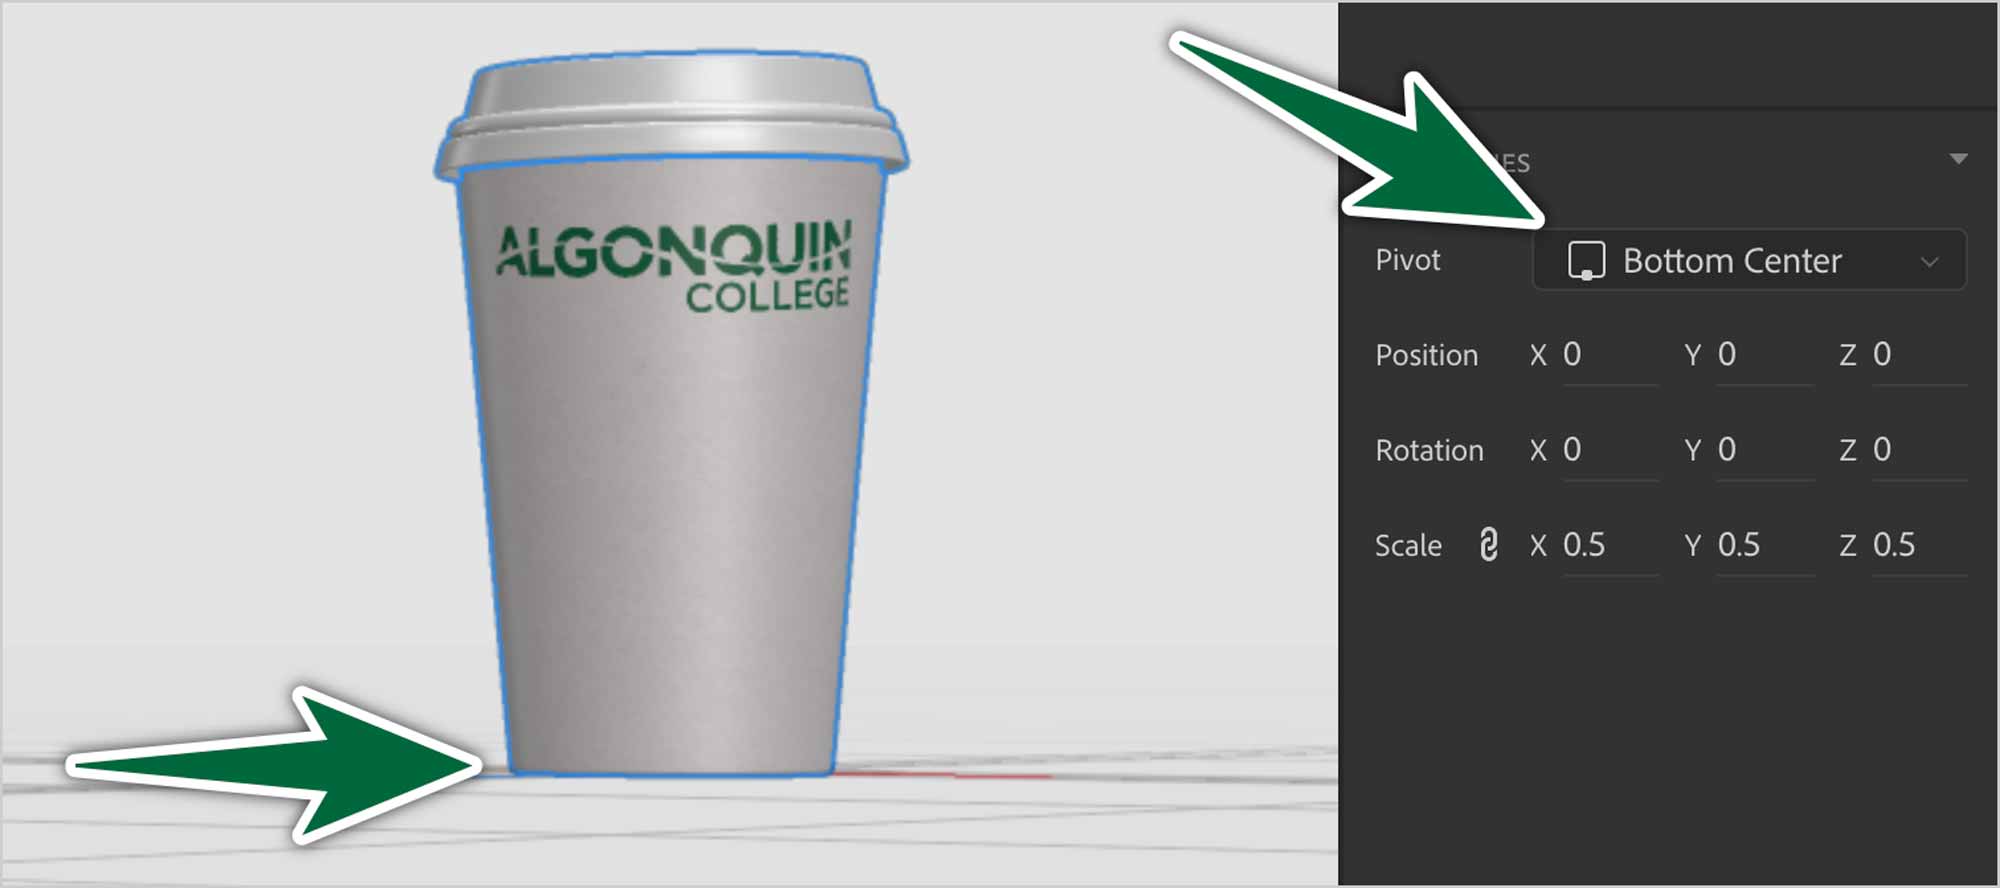
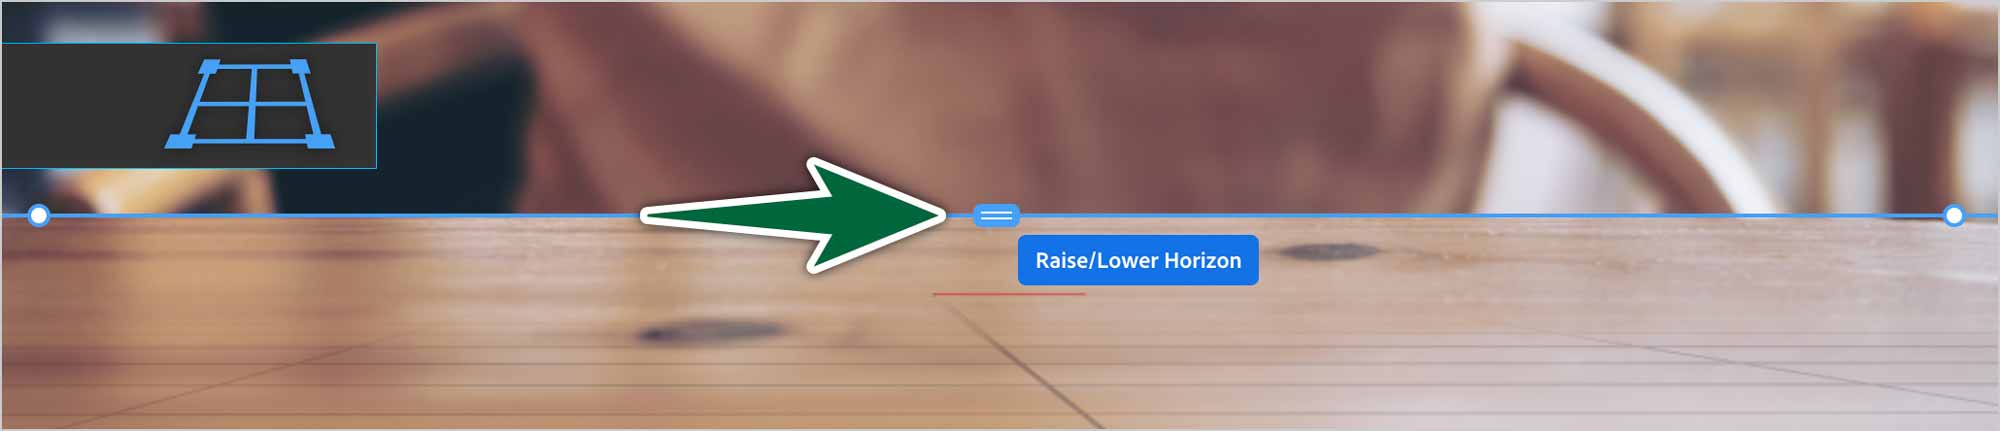
Position the Ground Plane
Before we place object models in our scene, we need to ensure the ground plane is where we want it. To that end, we need to drag it down onto the surface of the table.
Our First Object
Now, we’re ready to place the coffee cup on the table. Find it in the assets library, then click on it. It should position itself on the ground plane, which is matched to the table’s surface. It’s always a good idea to run Image > Match Image… after placing an object in a scene.
Let’s adjust the lighting on the Coffee Cup object to make it brighter. We do this in the cup’s Sunlight settings.
Place a Decal
In Adobe Dimension, Decals are artwork which are placed on surfaces of objects. In this case, we’ll place the Photoshop file we created earlier on the cup’s material. In the Scene pane, we need to specifically target the cup’s material to apply the decal. When you do, you’ll see the Decal button in the Actions pane.

Simply click the Decal button, then choose the Photoshop file in Finder. To edit the decal’s appearance, target it in the Scene pane, then adjust its settings in the Properties pane.
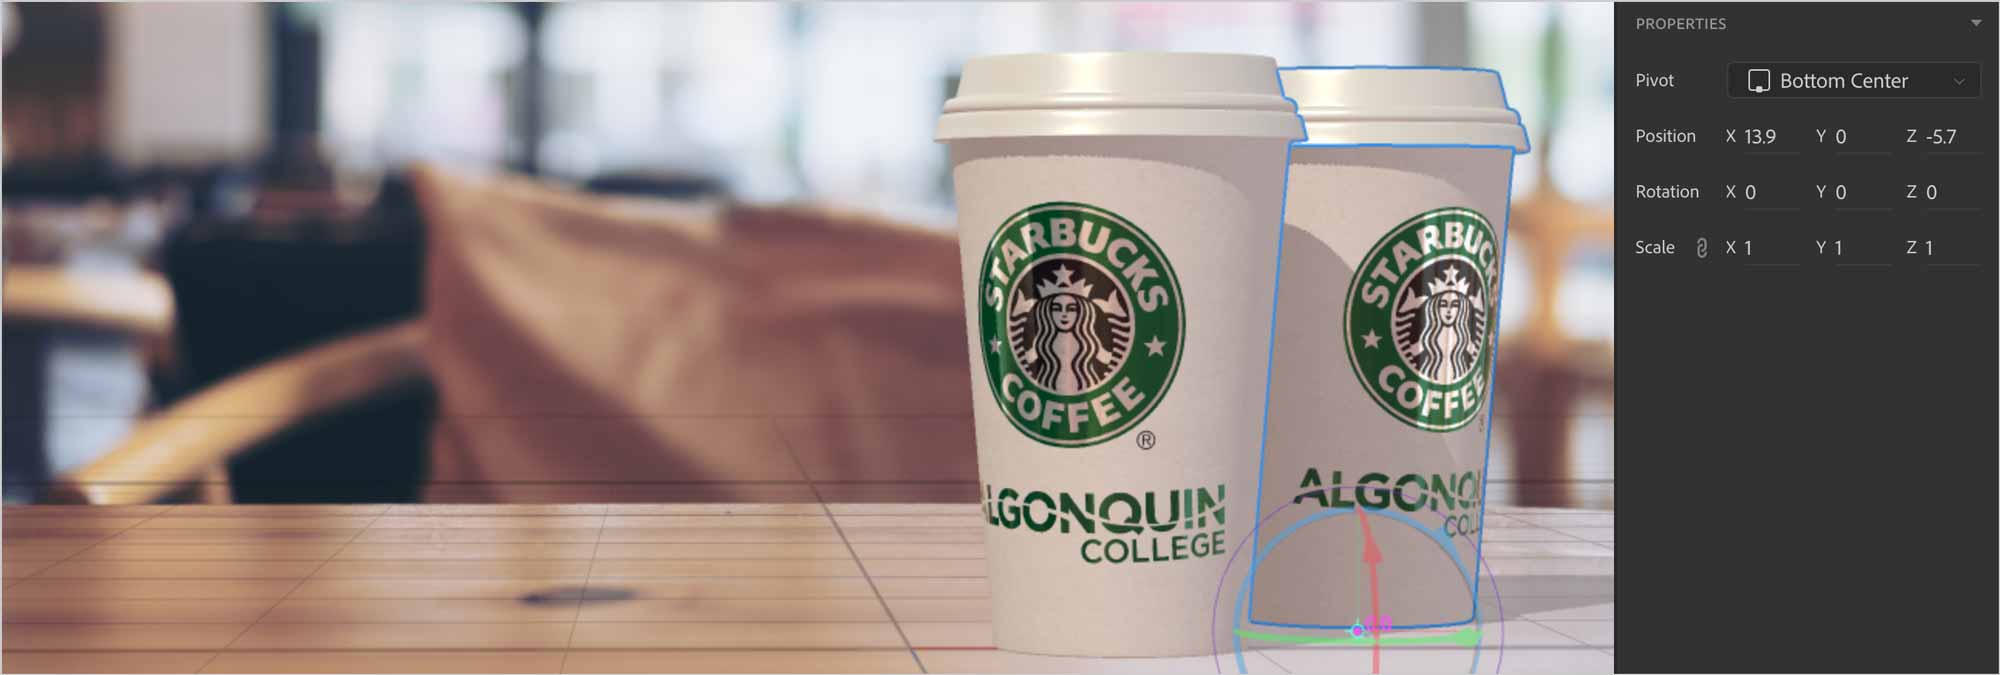
Let’s create a second cup (no pun intended) targeting the existing one, then typing ⌘-D. Position both cups in your scene using the Move tool.
Import the Spoon
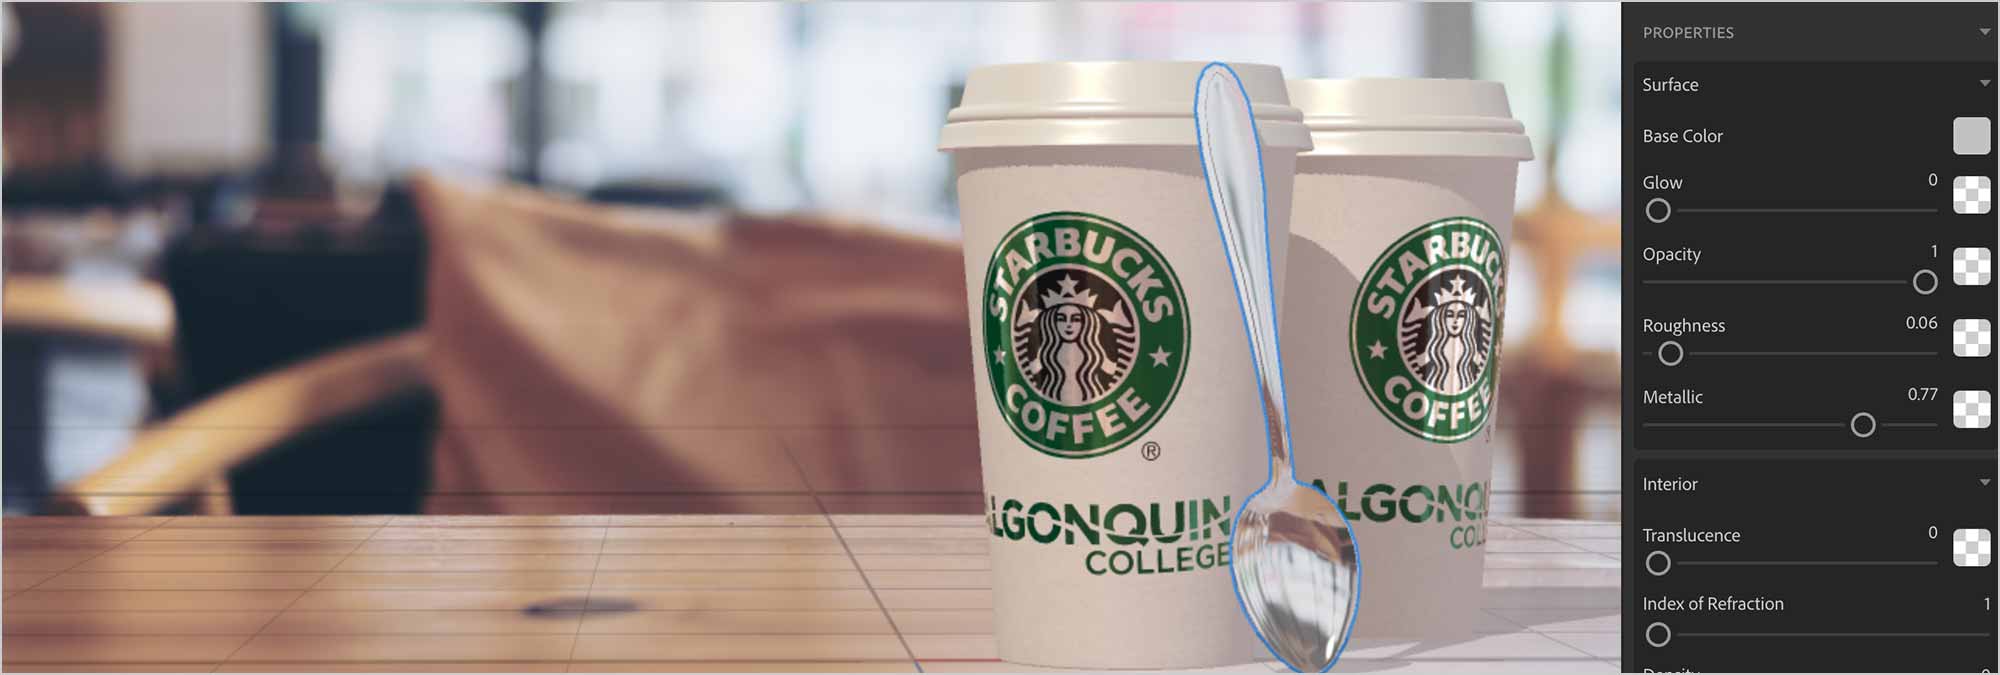
Let’s place the spoon .obj file in the scene using ⌘-I. Position it to lean on the cup, as shown above. Edit the surface properties to increase the spoon’s reflectiveness. Change its Base Colour, Roughness & Metallic properties.
Ready to Render
Make sure your file is saved. Switch to Render mode by typing Control-Tab. Save the Photoshop file into the 00-dimension-practice folder.
