Topics
What is Isometric Illustration?

Isometric illustration is a type of 3D illustration. Rather than having lines lead to vanishing points, those lines are parallel. Isometric illustration is a very functional type of illustration which can communicate a message in a simple way that other styles cannot. It’s both fun and very effective. And the process is at once challenging and rewarding. These are some examples of isometric illustration.

See how isometric illustration differs from 2-point perspective drawing. This is how isometric transformations work. We’ll examine how to build such shapes in Illustrator quickly and accurately.
One benefit which makes working in an isometric projection is that you can move objects anywhere in the scene. The objects fit to the isometric grid no matter where they are on the page. You can scale them at will. Because there are no vanishing points, everything just fits. You can give the illusion of perspective simply by positioning objects and scaling them.
Impressive Isometrics Portfolios
These are are a few portfolios of artists who excess at drawing in the isometric form. The first and most important one to look at is Von Glitschka’s web site. He was the inspiration for this assignment.
Isometrics: Illustrator Setup
Before we can draw isometric shapes, we need to change a number of settings in Illustrator.
Setup Illustrator
Edit default .ai document
We’ll take a moment to edit our default Illustrator document. This task isn’t specific to this project. It’s just a useful thing to do.

- Change your default fill/stroke to black stroke, no fill.
- Add a ⅛” bleed. That’s 0.125” or 9 points.
- Change the default stroke to 0.5 points.
- Delete all content from the Graphic Styles panel.
- Delete all Symbols from their panel.
Create an Isometric Workspace
We’ll create a new custom workspace with these panels. Open only these panels.
- Layers
- Appearance
- Graphic Styles
- Actions
- Swatches
- Colour
- Colour Guide
- Gradient
Once you have them all placed where you want them, go Window > Workspace > New Workspace…. Give it a name, like Isometrics.
Smart Guides Setup
We’ll go to the Illustrator menu, then Preferences > Smart Guides…
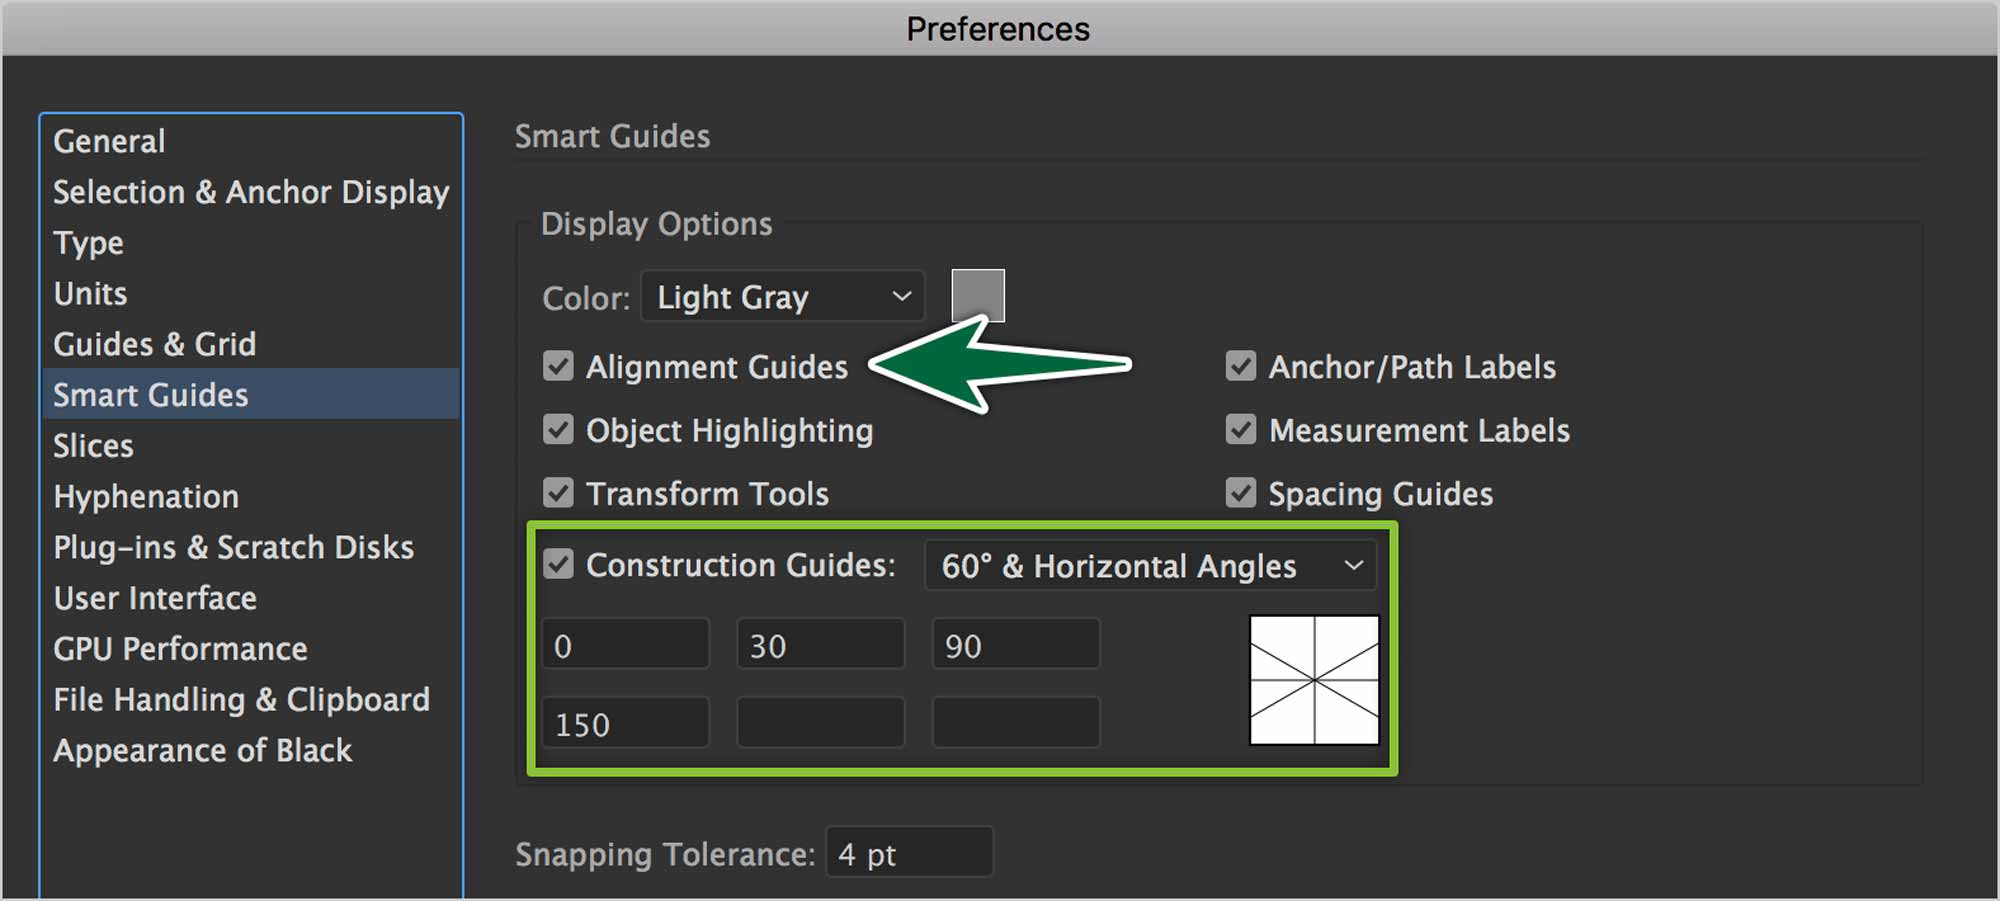
This allows you to draw free-hand with the Pen Tool while using the Smart Guides to help you stay in an isometric projection. So, you don’t need to use your actions for everything.
Important Keyboard Shortcuts
- Selection tool: v
- Direct Selection tool: a
- Temp switch to Move tool: hold ⌘
- Lock selection: ⌘-2
- Unlock all: ⌘ ⌥ 2
- Bring to front or send to back: ⌘ ⇧ [ or ]
- Smart Guides on/off: ⌘-U
- View as outlines on/off: ⌘-Y
- Paste in front: ⌘-F
Isometrics: Start with a Grid
We’ll need a grid to guide us in sketching our isometric illustration. In this unit, we’ll draw that grid on our page which we can also use to draw our final work.
Draw an Isometric Grid
We’ll draw a grid which we’ll be able to print to sketch with. We’ll also be able to use it to draw our work with.

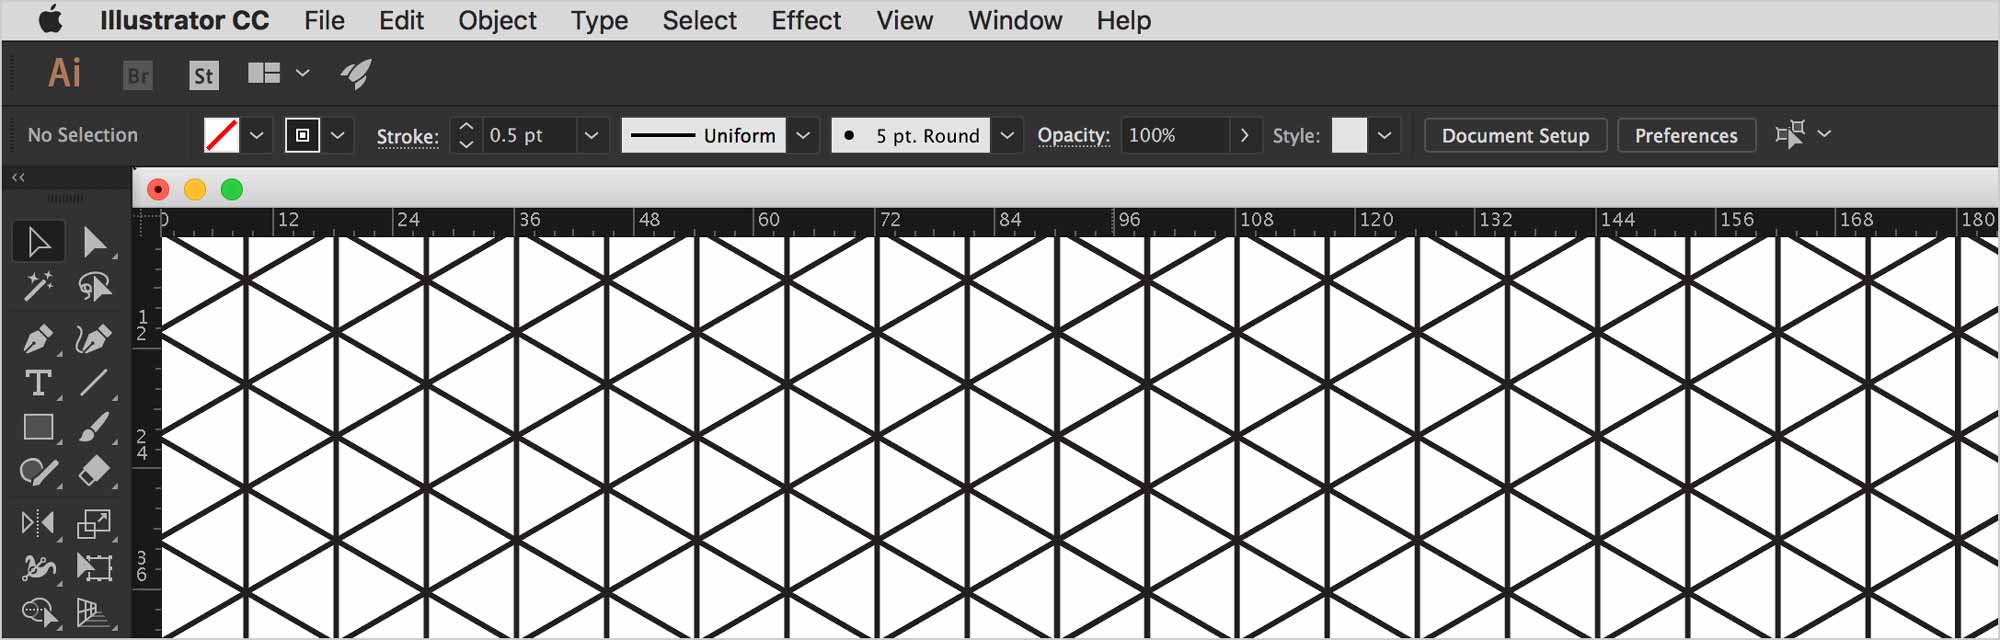
We’ll create vertical strokes across the page at equal increments. This increment will be the density of your grid. Once you have paths across the page, rotate them all -60º. Once you’ve done so, reflect the rotated ones vertically. You’ll end up with the effect above.
If you stare at the grid long enough, you’ll get the illusion of seeing cubes throughout.
Draw a rectangle over the whole page. Select all your artwork and type ⌘-7 to create a Clipping Group. Now you have a grid you can print. Print one, then use a tracing paper overlay to draw your sketches.
Create Illustrator Guides
You can use the grid you’ve drawn to create guides on your page in Illustrator. Duplicated the whole grid.
- Type Option-⌘-7 to release the Clipping Mask. Once you’ve done so, select all the paths.
- Type ⌘-5 to convert paths to guides. You’ll want to make sure they’re locked.
- Type Option-⌘-; to lock/unlock guides.
Isometrics: Tonal Values
Lighting is a crucial ingredient in an isometric illustration. It’s really going to drive home the three dimensional appearance of your artwork. We’ll set up swatches with tonal values to help you get there.
Create Tonal Value Swatches
Lighting is really what brings life to isometric illustrations. To create lighting effects, we’ll choose a key colour. We will then derive a range of tonal values from that colour using the Colour Guide panel. The colours will be saved in our Swatches panel for easy access.
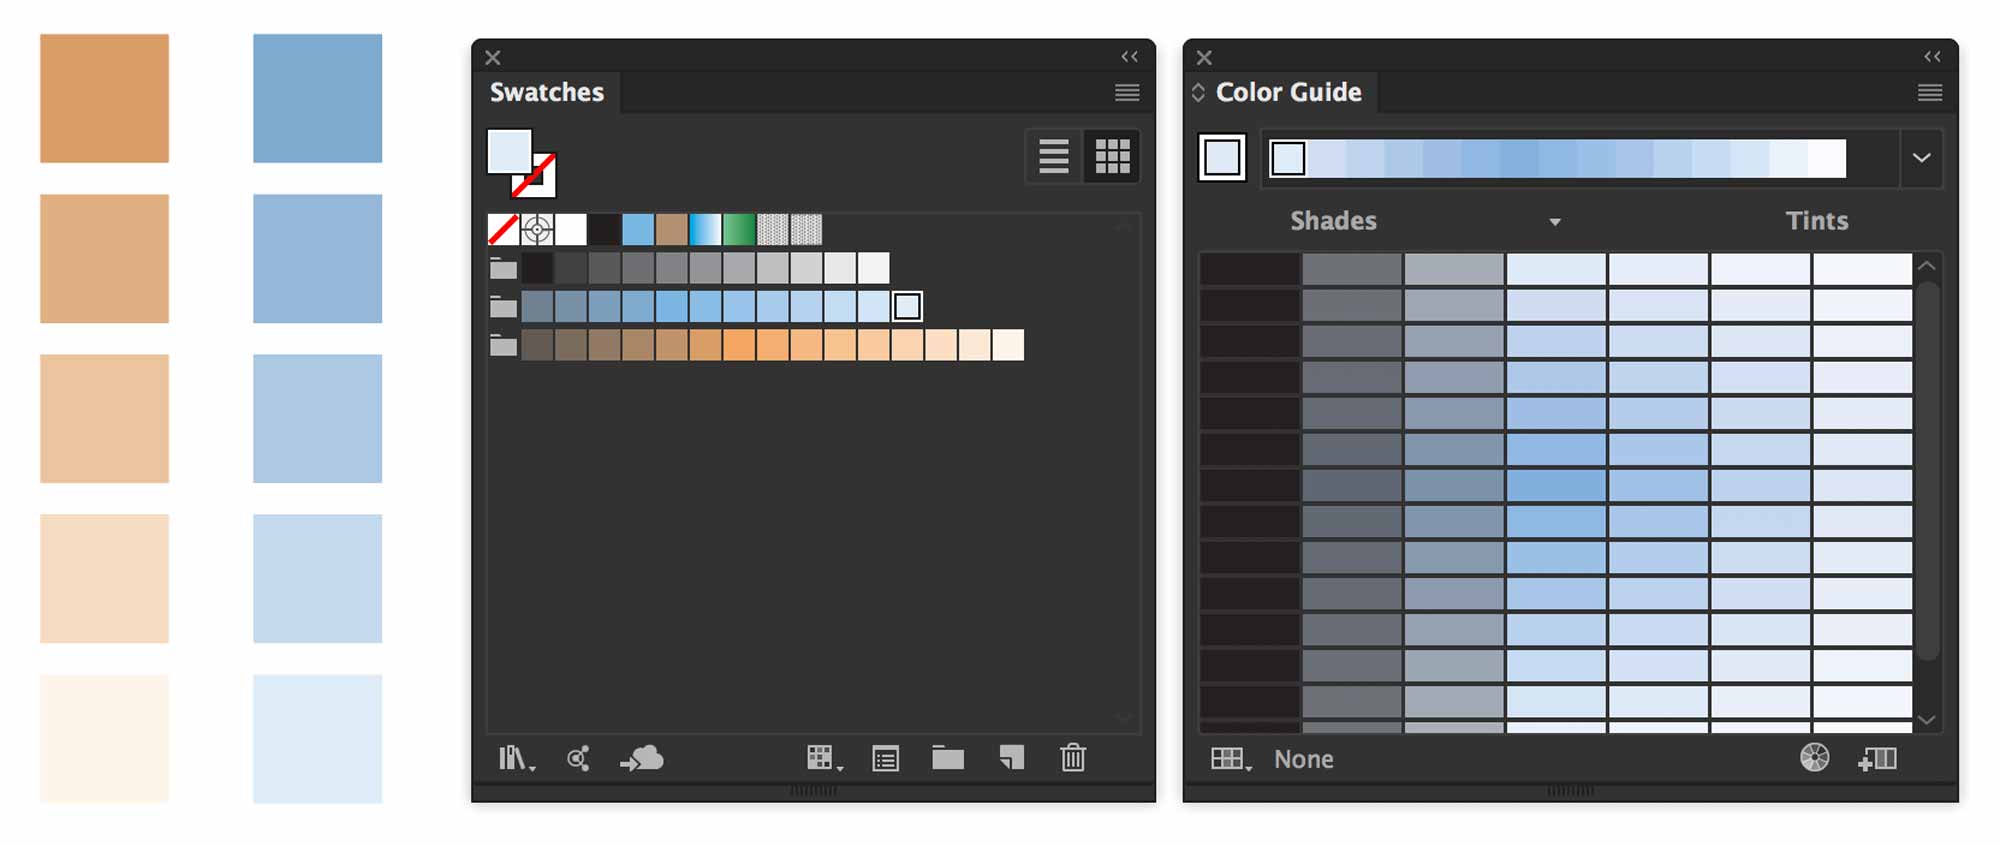
You can add colours to your Swatches Panel and you can also leave colour chips outside of your artboard.
Remember, while you have an active Eye Dropper tool, you can hold the ⌘ key to temporarily switch to the Selection Tool to select artwork, then sample a new colour.
Formative Activity
Let’s draw our first isometric objects. We’ll start with a simple cube. We’ll explore how lighting can affect objects in surprising ways.
Isometric Transformations
Open the provided practice file. There are practice steps on each layer in the file. We’ll do these together.
Our First Cube
We’ll use three identical squares and the angles indicated above to draw our first cube.

You can set an intial colour to the squares, then use the Colour Themes to create the lighting effects.
A Box
Let’s test out some lighting effects. Draw a cube, then we’ll make it look like it’s hollow with the help of a light source.

It’s useful to place an orange circle off the page somewhere to remind me of my light source location. Once you’ve done so, select colours which will create the lighting on the box.
Isometrics: Actions
Rather than drawing each facet of each object manually, we’ll automate the process. Let’s create actions to move facets the an isometric projection. We’ll also create actions to make them flat again. An undo of sorts.
Actions Setup for Isometrics
There are three facets on an isometric object. If we were to position each facet manually, we’d never finish a project. It would be much too tedious. Actions are the perfect solution to speed things up.
Create an Action for each of the transformations, then create an action with the exact reversed steps so we have an ‘undo’ function.

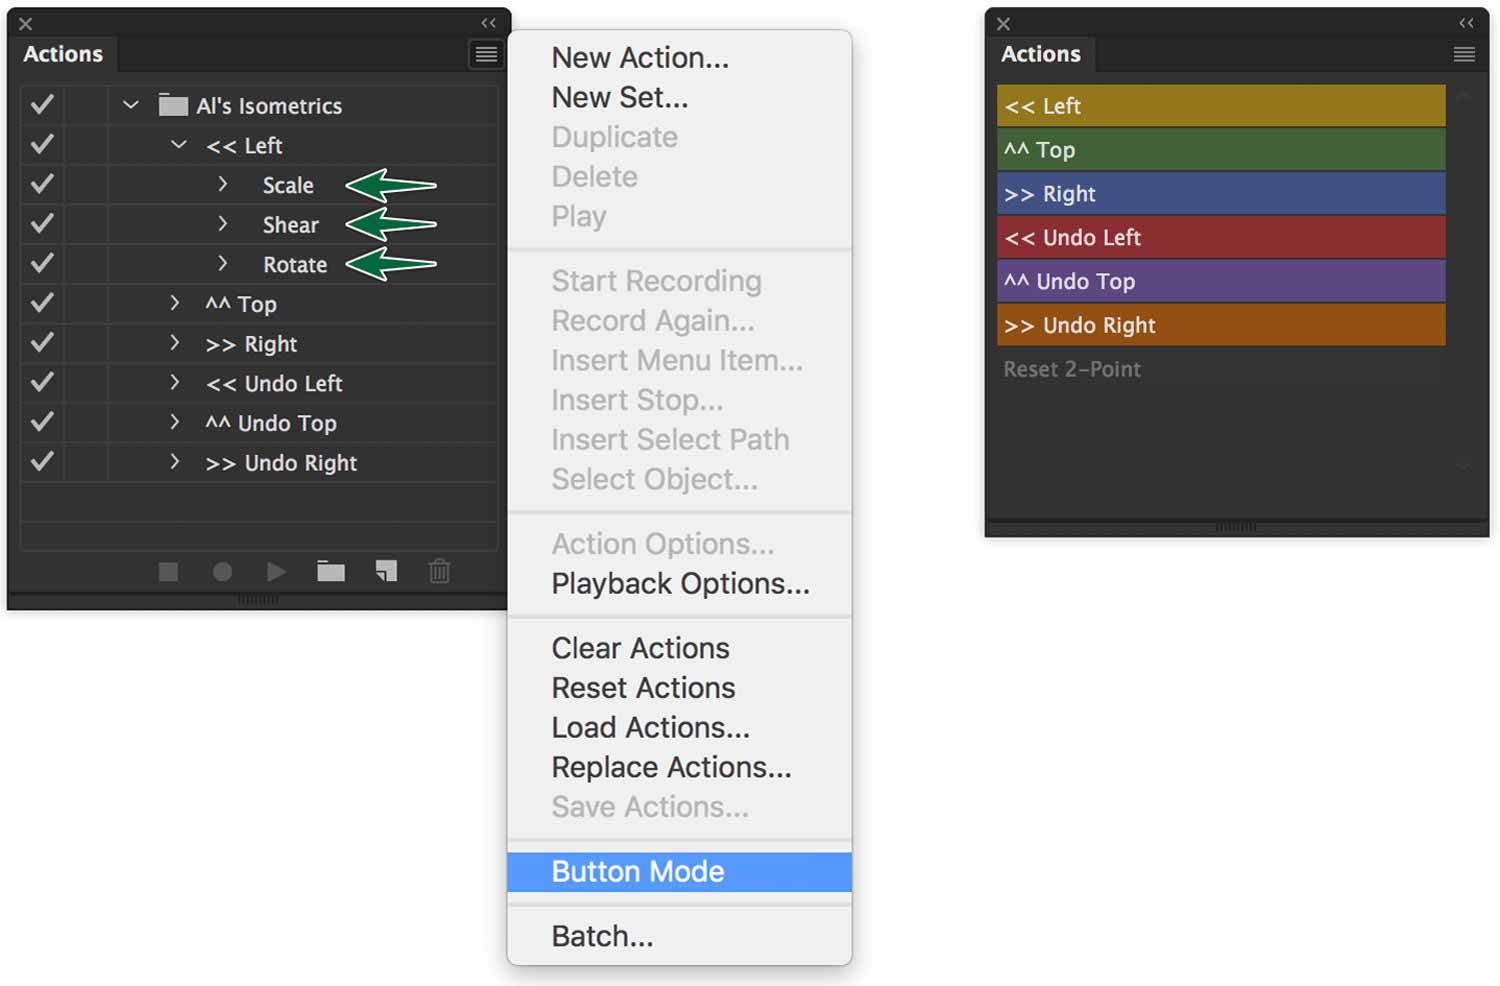
This is my Actions panel in Button Mode and normal mode. Access Button Mode from the panel’s menu once you’re done recording all the actions.
Isometrics: Drawing Cylinders
Drawing an isometric cube fits right into the grid. A cube is a natural. But what about a cylinder? We’ll explore how to draw cylindrical shapes in an isometric view.
Drawing Isometric Cylinders
We’ll practice drawing a cylindrical shape.

There are quite a few steps to draw a cylinder. It’ll be best if you repeat them often…
Geometric Shapes
There are more shapes than simple cubes. We’ll elaborate various different geometric shapes in isometric projection.
Other Geometric Shapes
We’ll create other geographic shapes with an isometric projection. We’ll create a pyramid, a cylinder, a cone, a pyramid and a hexagon and sphere. Child’s play.

Wrap-up
Once we’ve completed the task on each layer of the provided Illustrator document, you’ll save it to submit on Brightspace.
