Topics
Why Use Data Merge?
If your studio is approached by a client who needs many variations of one document created, a manual solution is not realistic. The time spent would be too long, thus too expensive. Also it’s too easy to make mistakes when dealing with so much data manually.
Using the Data Merge feature in InDesign may be a solution. The process requires a bit of setup the first time around, but it’s much easier to deal with repeat orders. All we need to do is edit a spreadsheet. Dealing with a spreadsheet is much easier than working in InDesign. It’s easier to sort content, spot duplicates or delete entries.
Types of Variable Data
The basic variable data is text. InDesign will go through a .csv file row by row and replace the content in the InDesign document with the content from the .csv file.
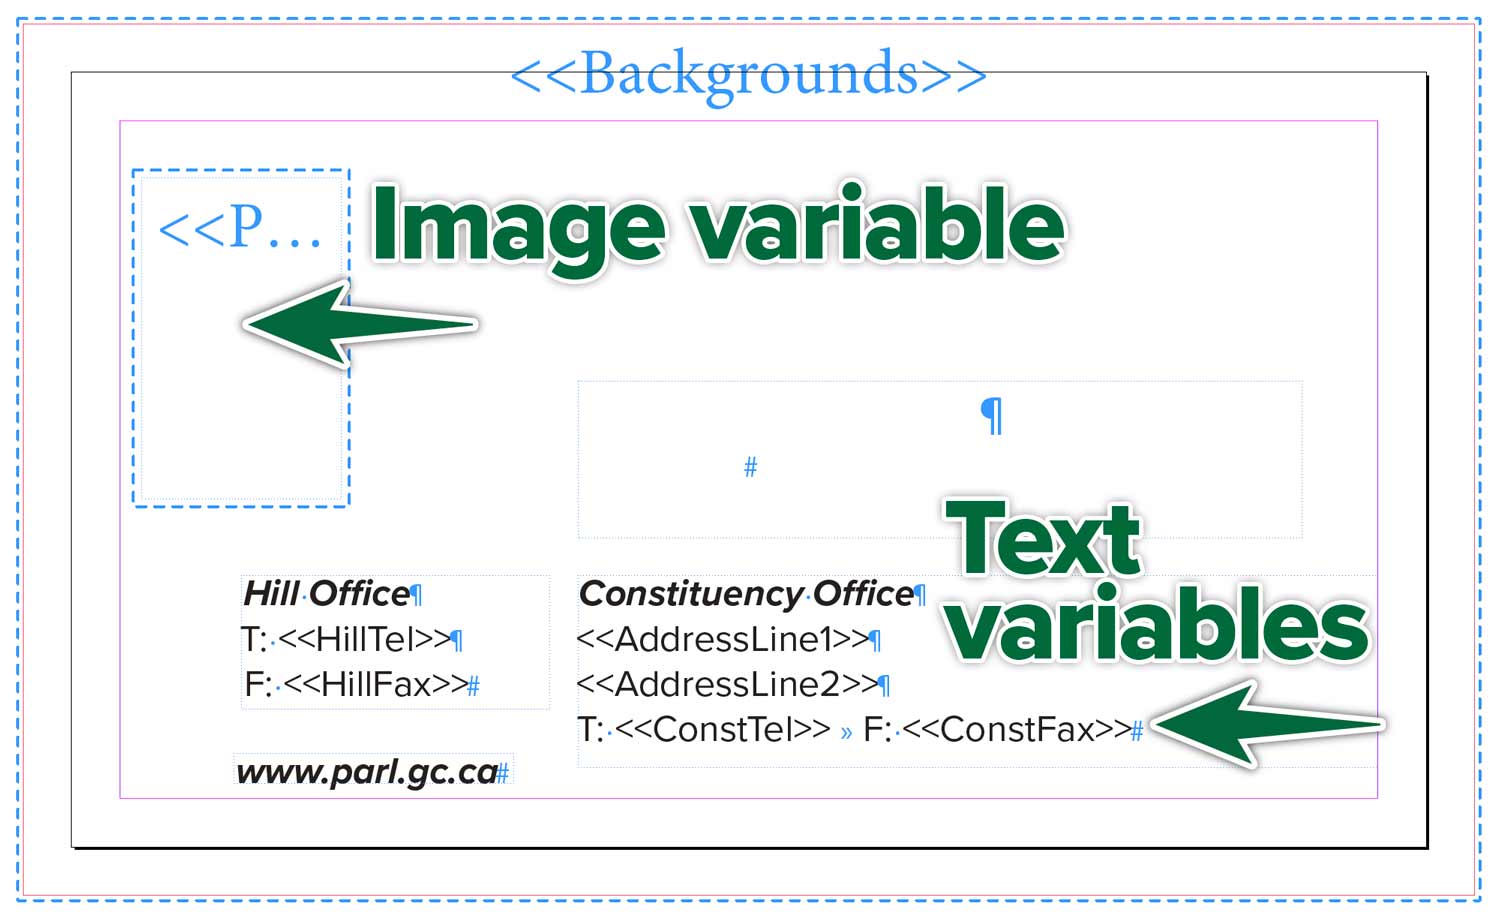
The second type of variable is an image swap. InDesign will go through the .csv file row by row and swap out images based on the path to a folder on images in the .csv.
InDesign File Setup
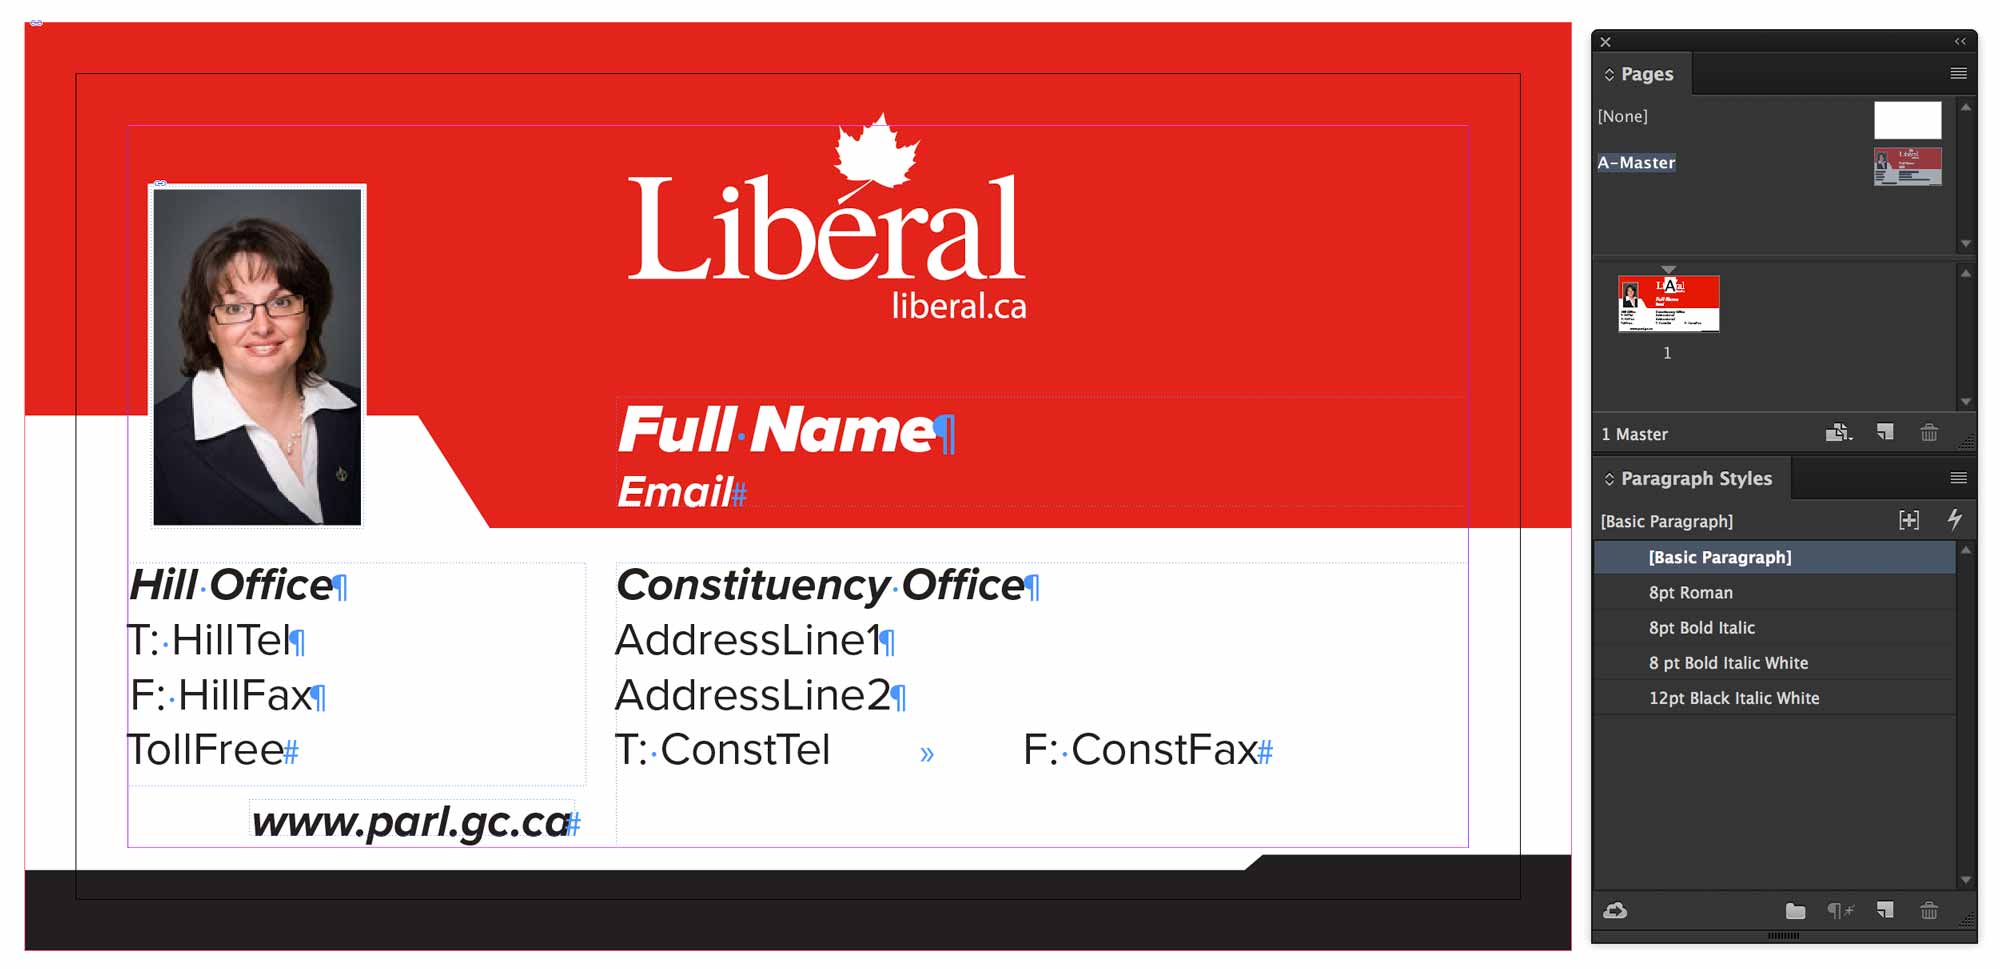
The InDesign file needs to be built with placeholder content. Create all the text and image frames you would usually create to design your business card. Use a Adobe Fonts sans serif in your design.
Create your whole design on a Parent Page. This will make it that if you need to edit after the fact, you can do your edits on the Parent. As you can see, rather than typing in the individual’s info, we’ve entered the column headers in their places. This makes it easier to identify things as we work.
Consider that when the data is swapped, some text may be longer or shorter. Your design needs to accomodate longer or shorter text for each data point.
Make sure you create a Paragraph Style for each bit of text. This will make editing easier. If ever a piece of text is too long, you can make the text smaller in the style sheet to accomodate available space.
Perform a Save As… on the document. Name the new document Placeholders.indd. In this file, empty out the images from the frames.
.csv File Setup
In your .csv file, a column is a variable and a row is a record. That means that each column lists a specified type of data. It will either be text or an image. Each row is a set of related data.
Name the column headers carefully. It’s important to be able to recognize where the variable will end up on the page in InDesign.

Make sure you type an @ symbol before the name of a photo variable for InDesign to recognize it as an image swap variable. If you’re working in Excel, you’ll need to place a quote mark before the @ symbol, so “@photo. Or you could just not use Excel. There are many better alternatives, like Apple Numbers and Google Sheets.
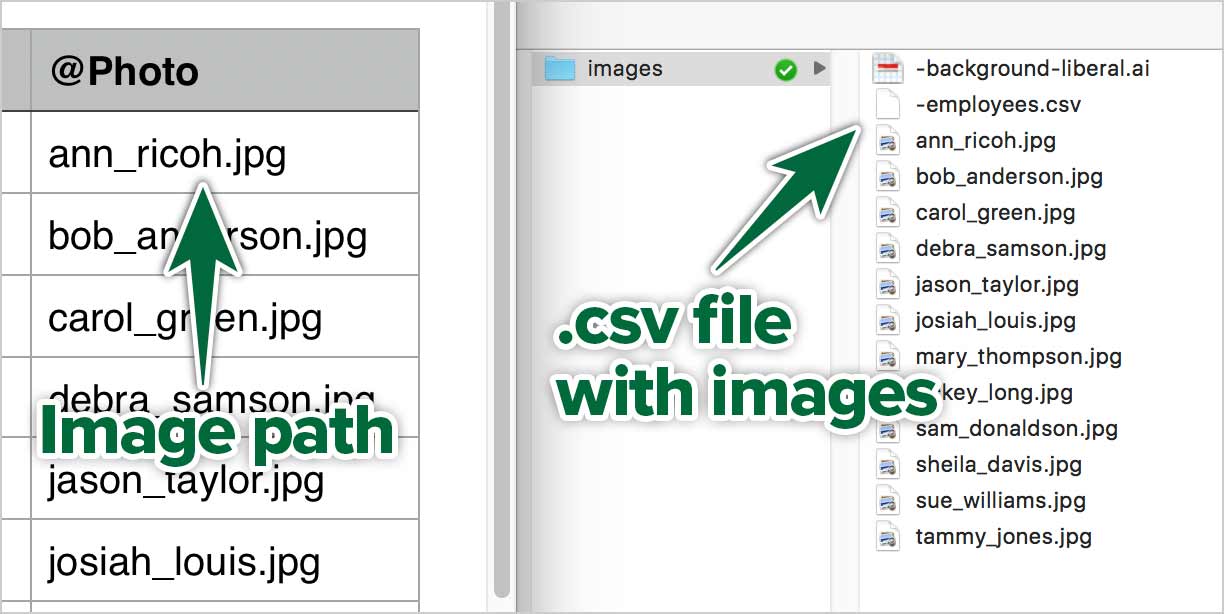
Since the list of images in the .csv file is actually a file path from the .csv to the images, it’s easiest to simply place the .csv right in the images folder. If you were to place the .csv outside the images folder, you would need to prepend the image list with “images/…” like you do when you’re building a web site.
Connect To Our .csv File
To connect to our .csv file, we need to use the Data Merge Panel. Window > Utilities > Data Merge
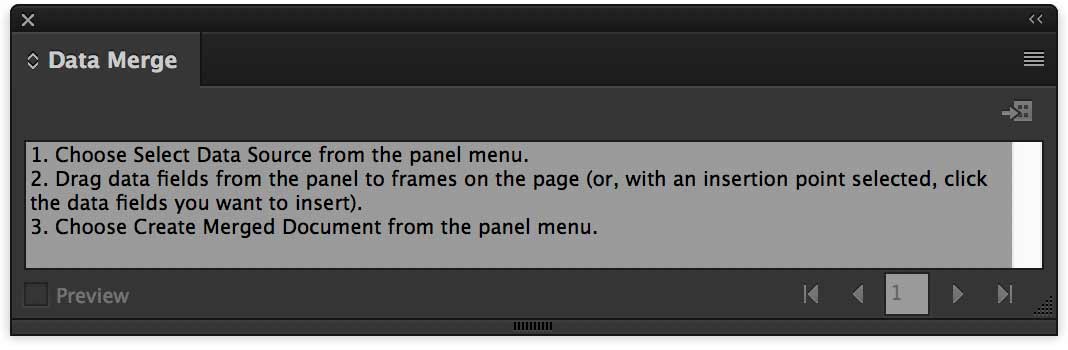
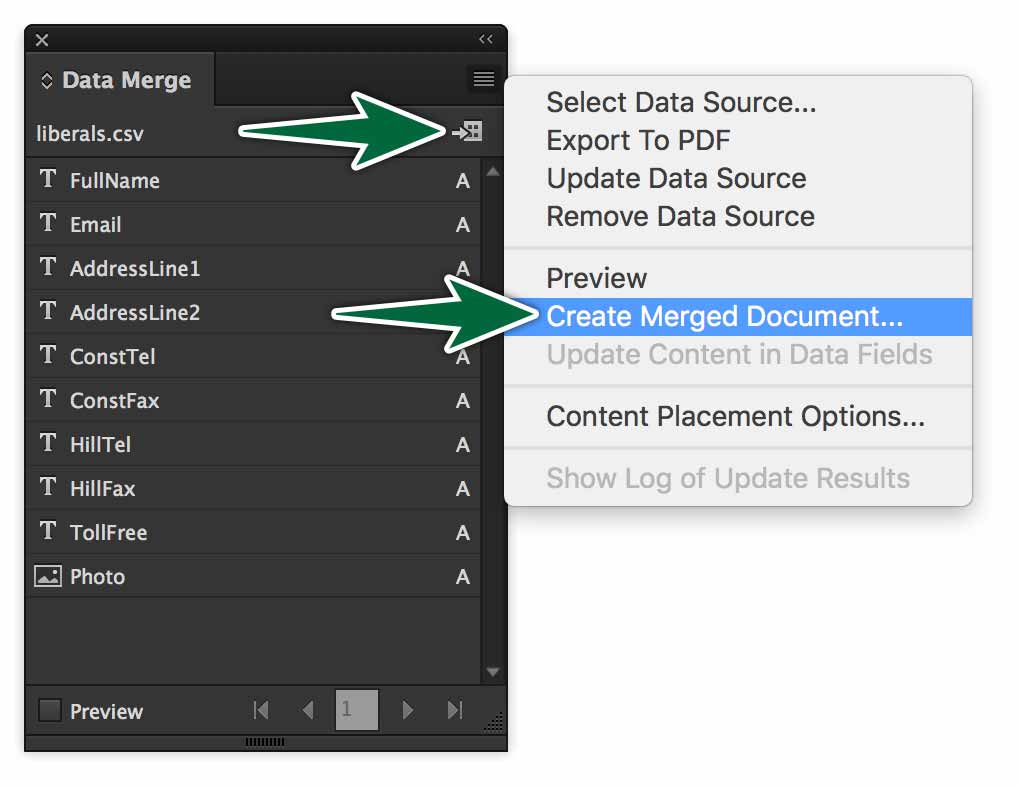
Go to the panel menu, the choose Select Data Source… Open the .csv file. The list of variables will appear in the panel.
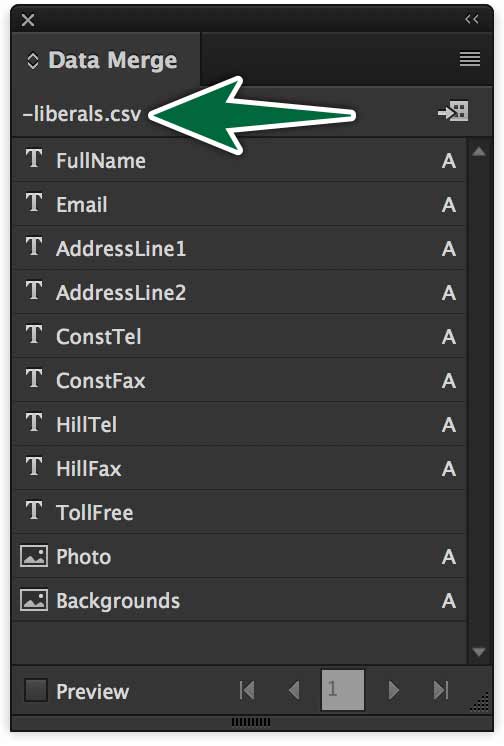
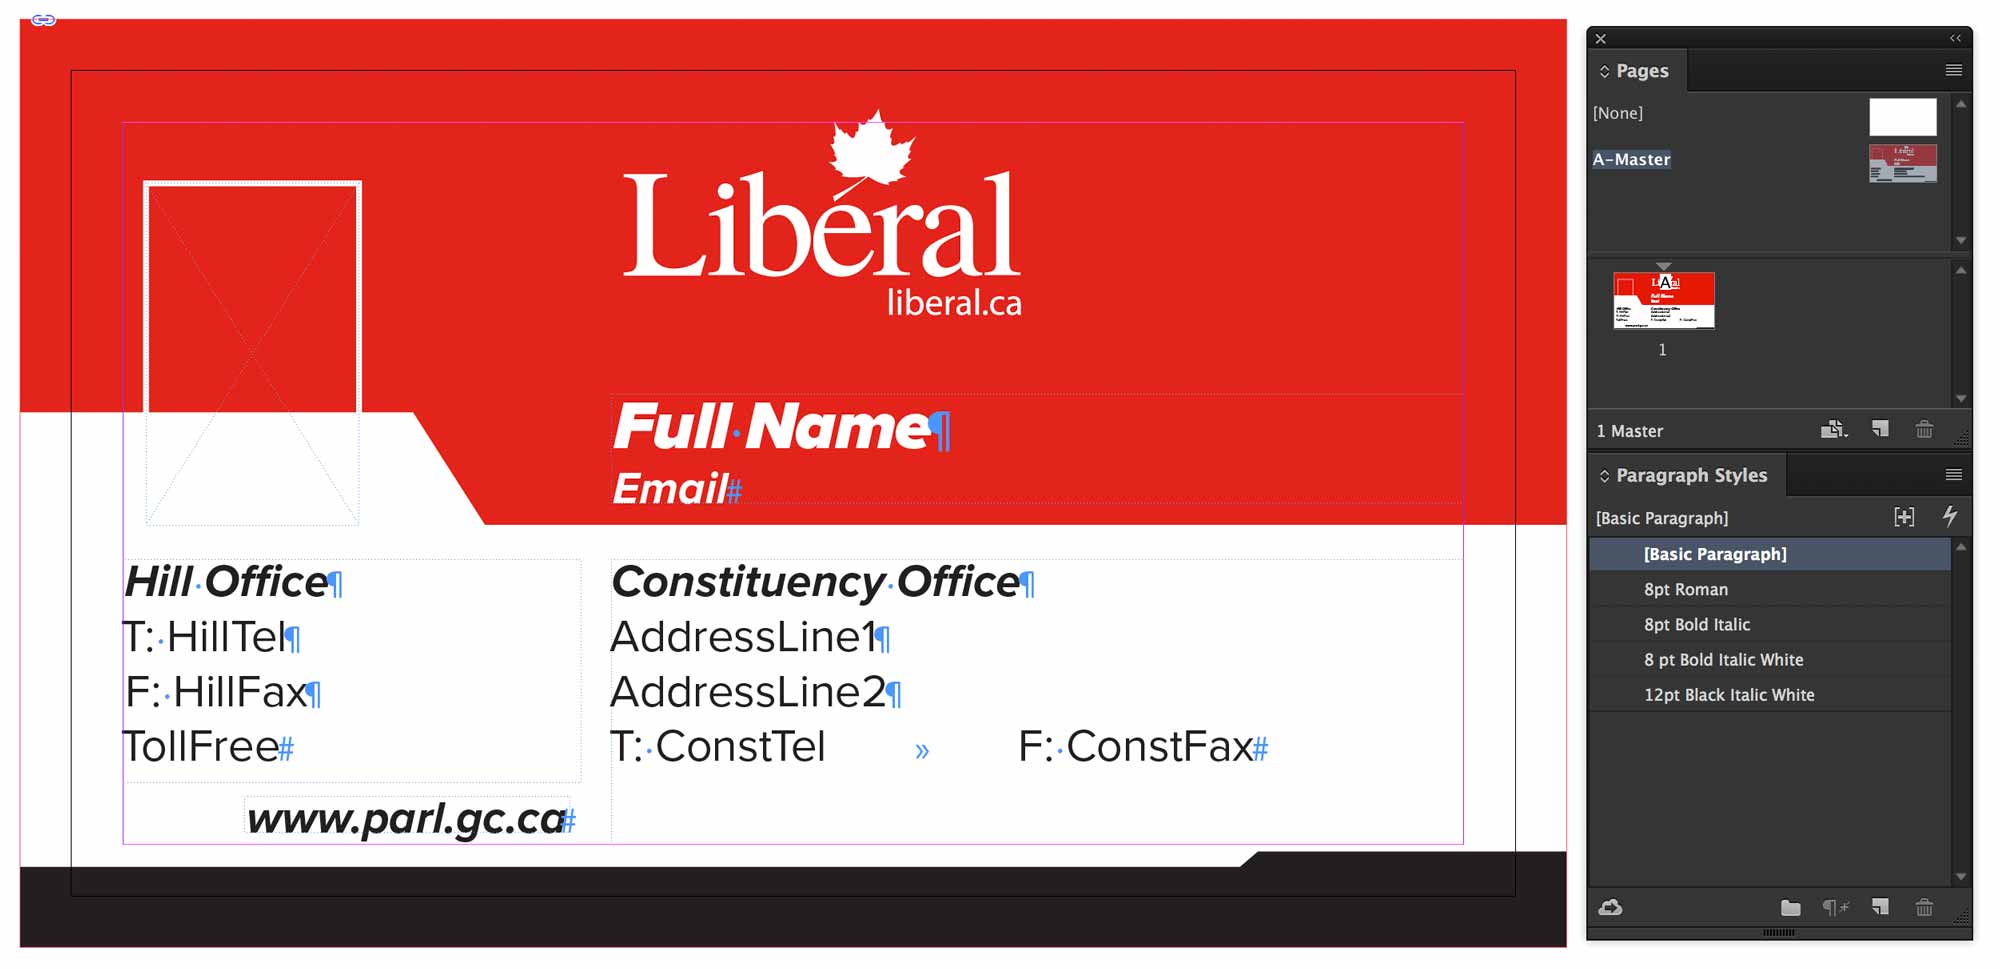
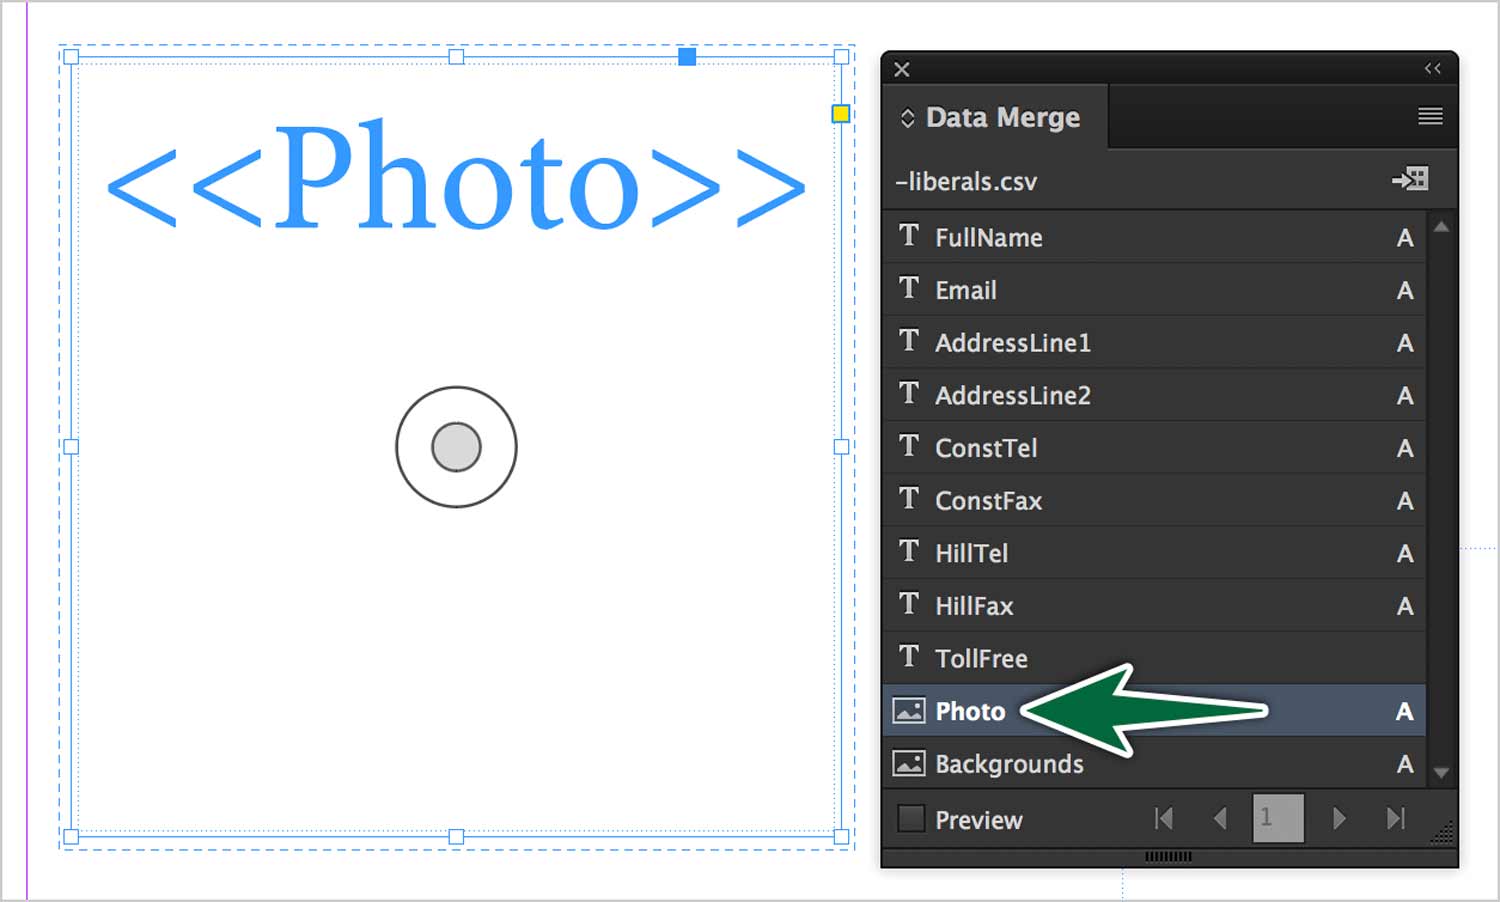
Highlight some text, then click on its variable in the panel. That will bind the variable to those characters. When it comes to an image, select the frame, then click on its variable in the panel.
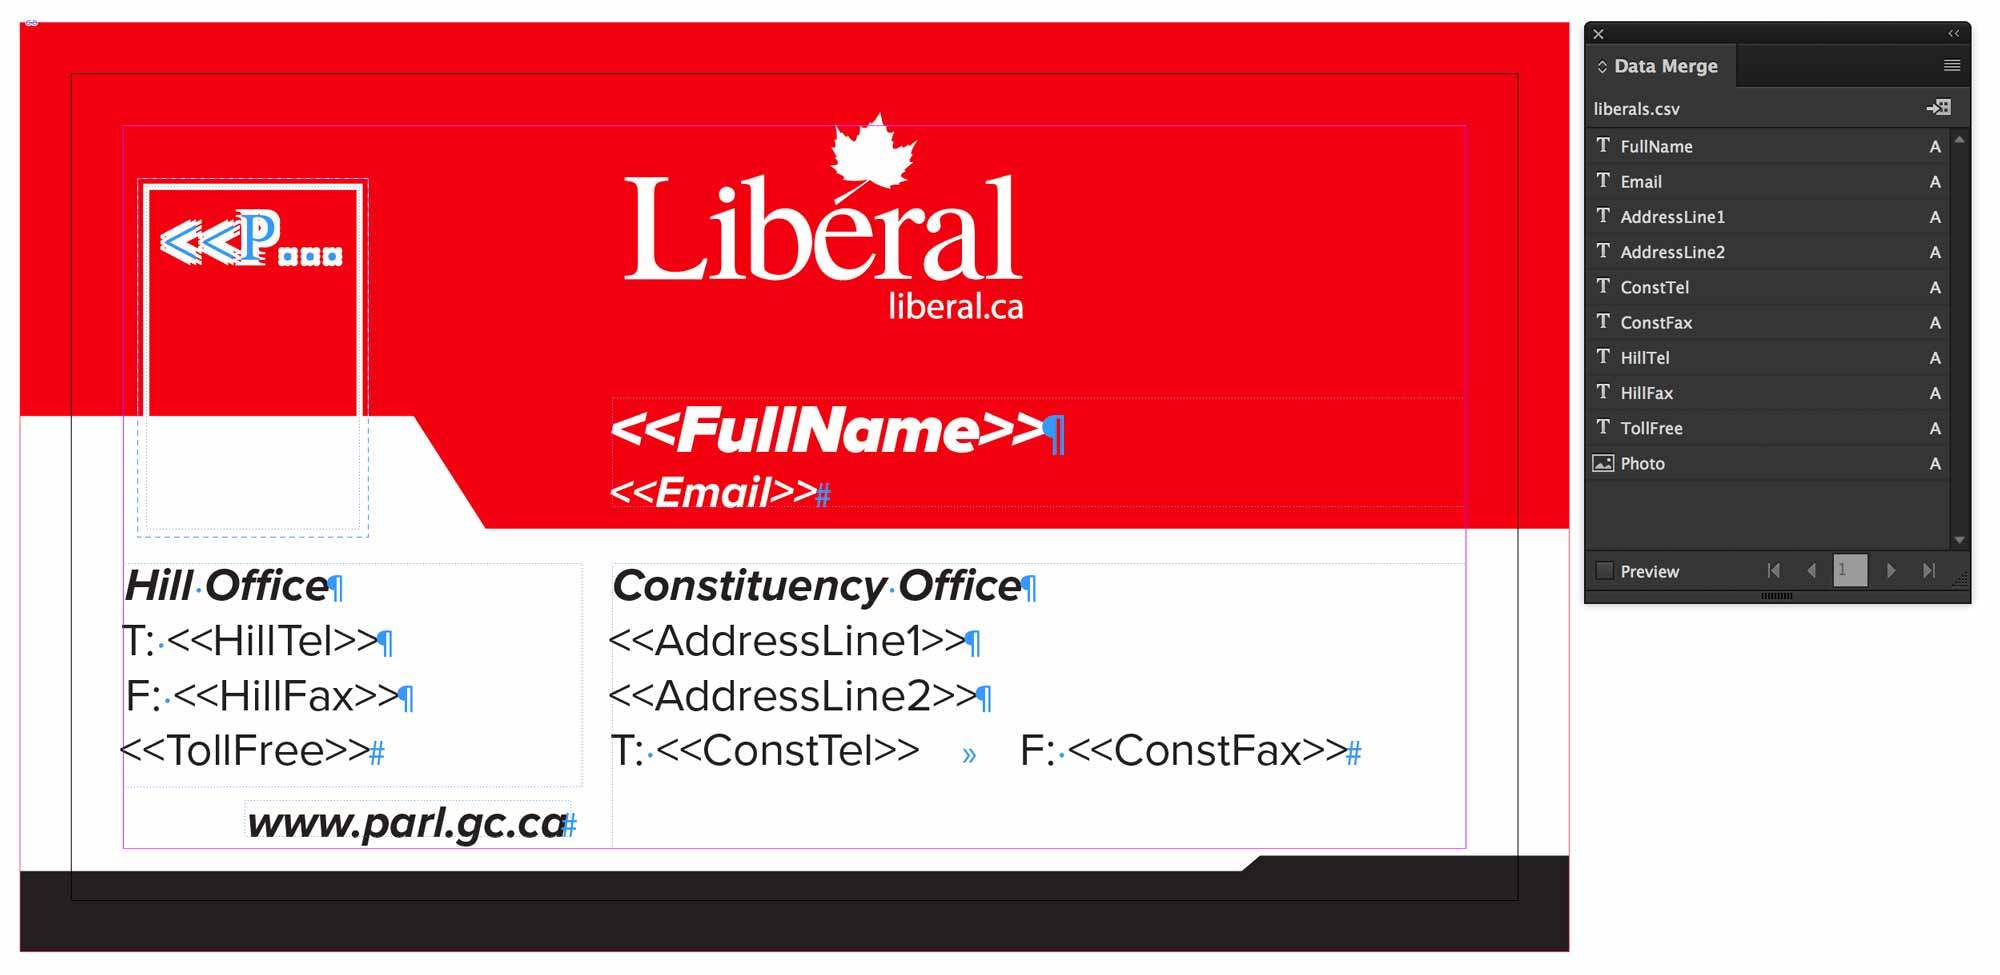
All the variables are now wrapped like this « variable ».
Images
Click on a frame on the page which is a container for an image. Cick on its variable in the panel to attribute that variable to the frame. That’s it. Now the variable is bound to the image frame.
Previewing Results
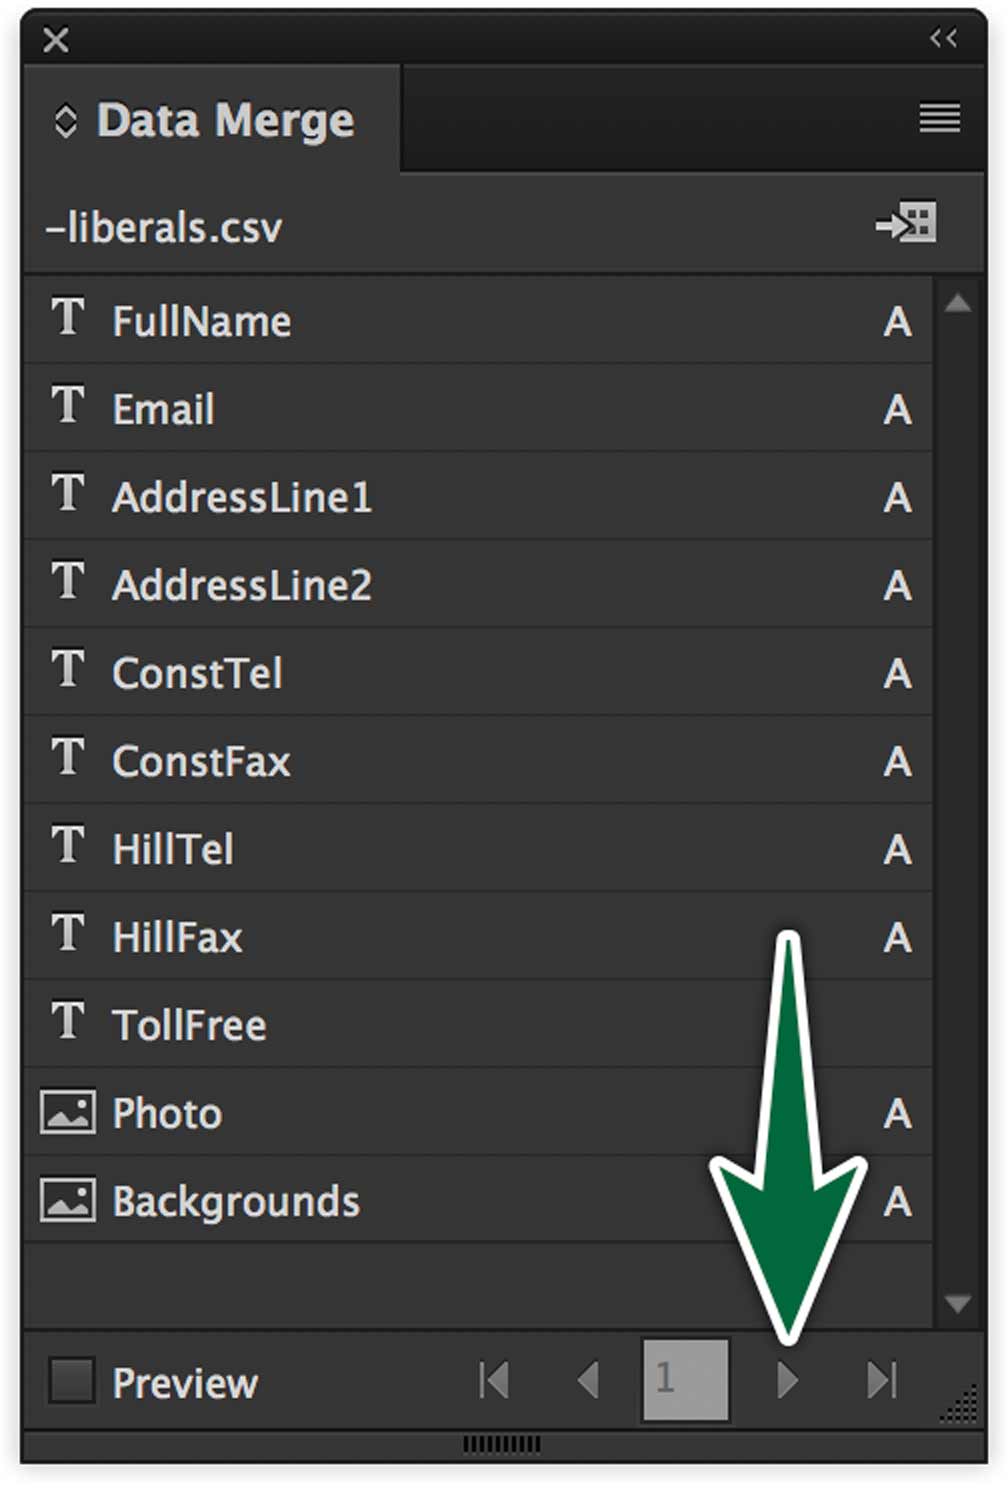
Now that everything is set up, InDesign allows us to preview the result. Use forward and back buttons at the bottom of the Data Merge Panel. You can spot errors, then fix them.
The most common errors are overset text and character enconding errors. Look out for the + symbol, which is overset text. Make your text frame longer to resolve this.
If you get strange characters in your text in the pace of accented characters, this is an encoding error. You need to make sure your .csv file was save with macOS Roman encoding. Excel is not very good at this. I suggest you either use Apple Numbers or Google Sheets for this exercise.
Output the Document
At this point, we’ve completed the Data Merge process. The document is considered merged with the data file. Now we need to know the intent for the file. Are they business cards to be sent to press? Are they web banners to be output as .gif files? We output differently depending on the intent. In our case we can output an InDesign document with a record on each page. To do so, click on the button in the panel (or go Create Merged Document from the panel menu).
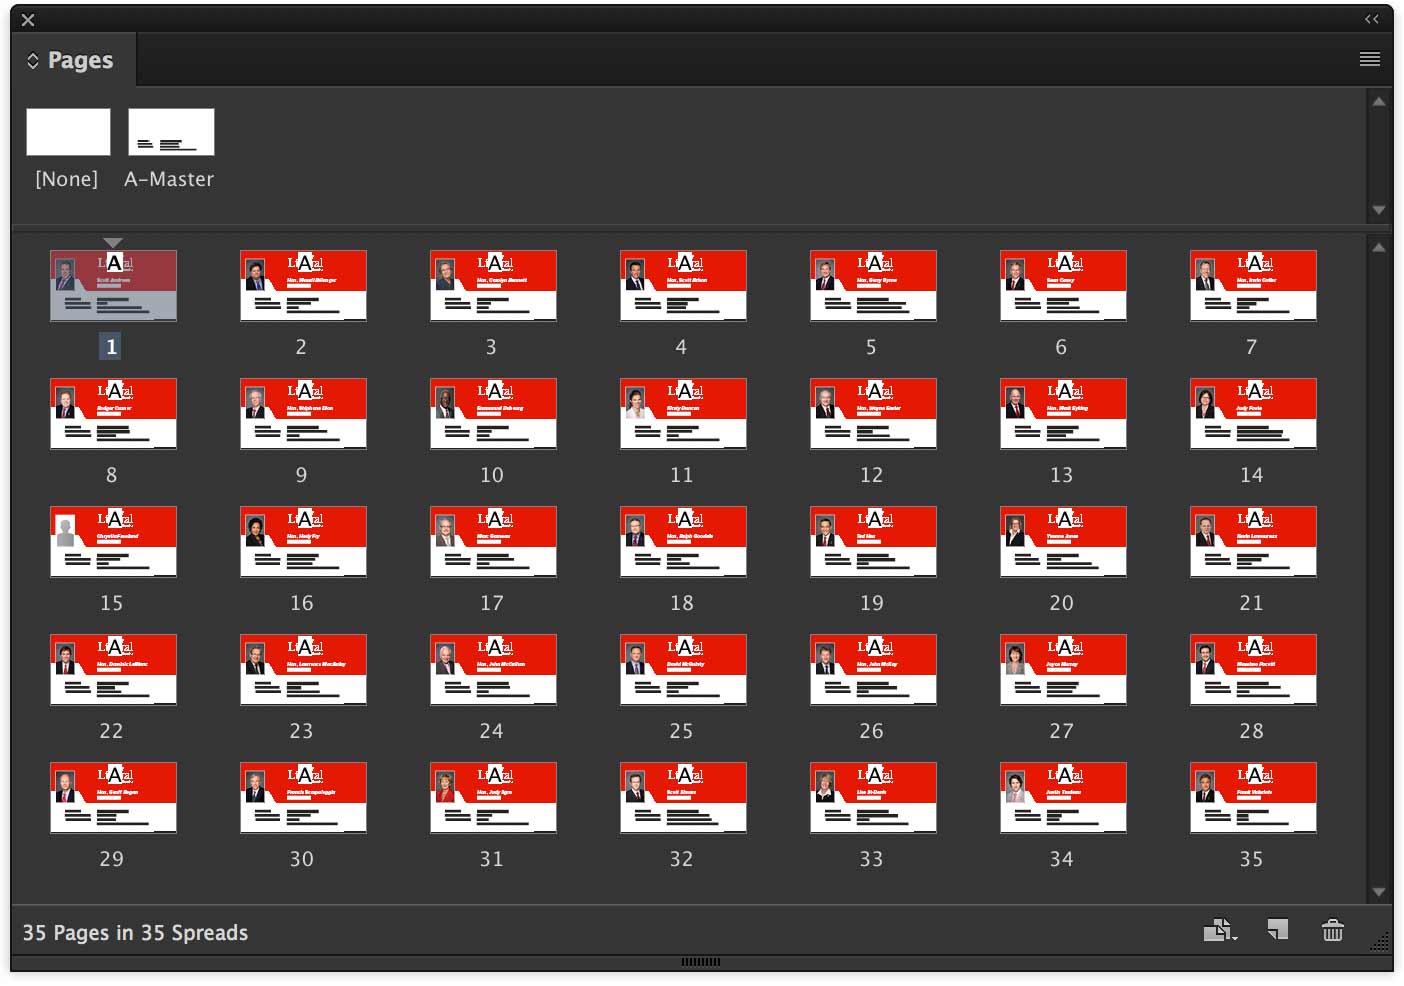
Once you click OK, InDesign creates a new document. If you look at the Pages Panel, you’ll see as many document pages as there were records in the .csv file.
Now that this is done, you can output this however you want. You can simply use the Package function to gather all related assets and produce a PDF file all at once.
Formative Activity
We’ll build the business cards for the Liberal party together.
