Topics
Why Image Trace?
The Image Trace feature is part of a workflow that also includes Live Paint and Recolour Artwork. With these three powerful tools, you can create hand-drawn artwork, then transform it into vector art. You can then paint it in colour with Live Paint. The final stage is to create multiple colour variations with Recolour Artwork.
Together, these tools give you a practical real-world workflow from pencil to final vector artwork.
The Workflow
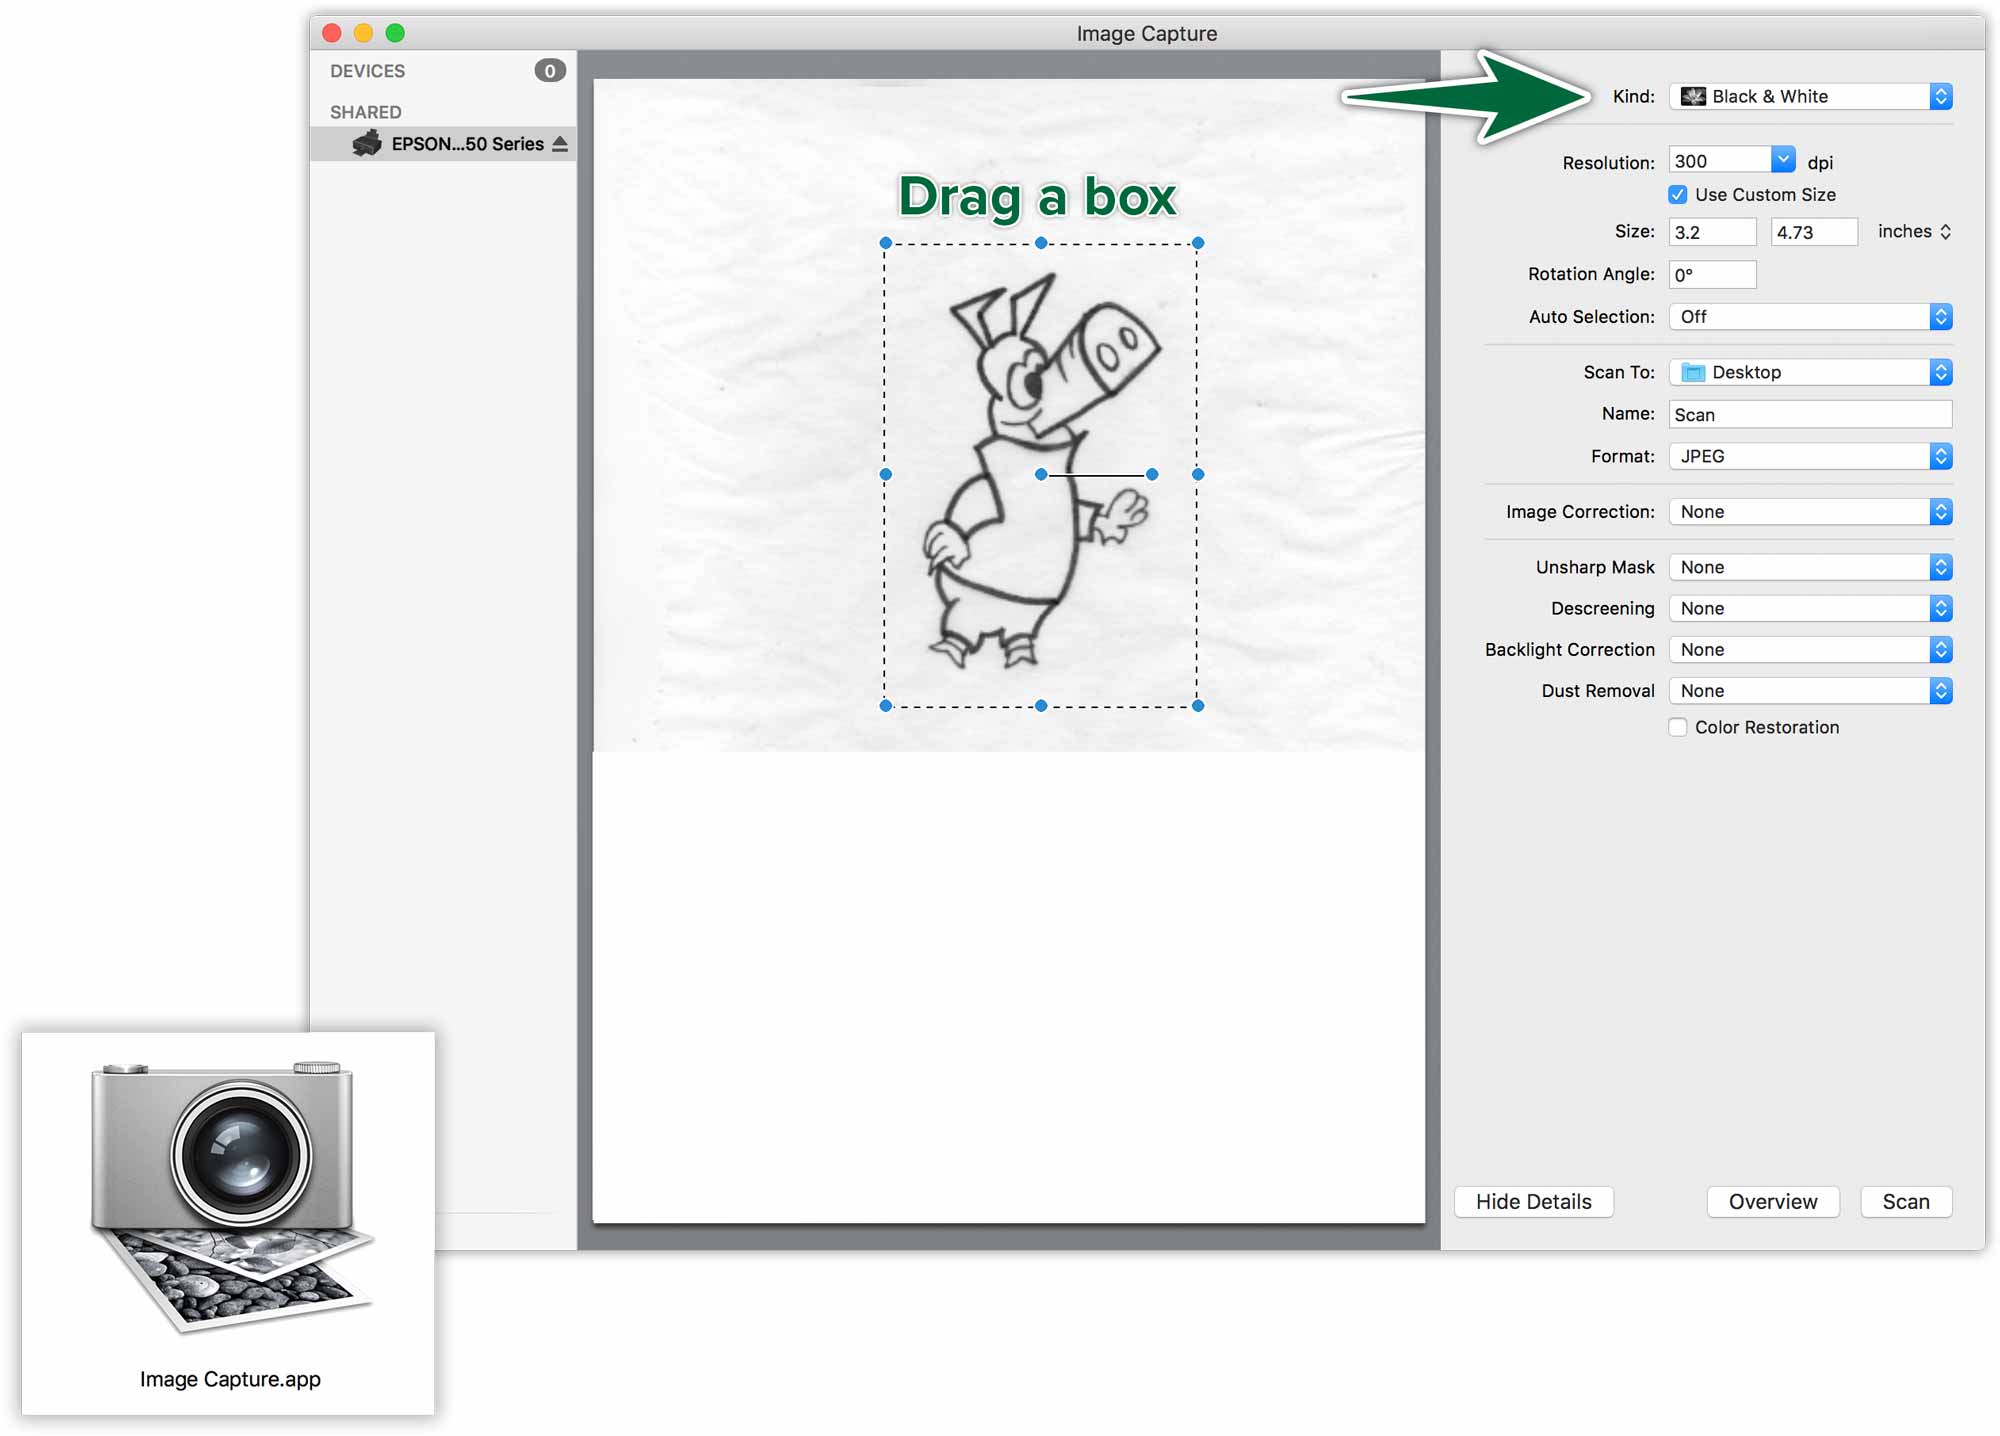
Once we’ve created a sketch of our artwork on paper, we need to scan it. The best scanning application is the one you already have on your Mac. It’s called Image Capture.
Scan your image with the Black & White setting, which should actually be called Greyscale. The resolution isn’t actually that important. Sometimes a lower resolution is actually better for tracing. You’ll need to experiment with this.
Once you’ve scanned your drawing, it’s a good idea to clean things up and increase the contrast in Photoshop.
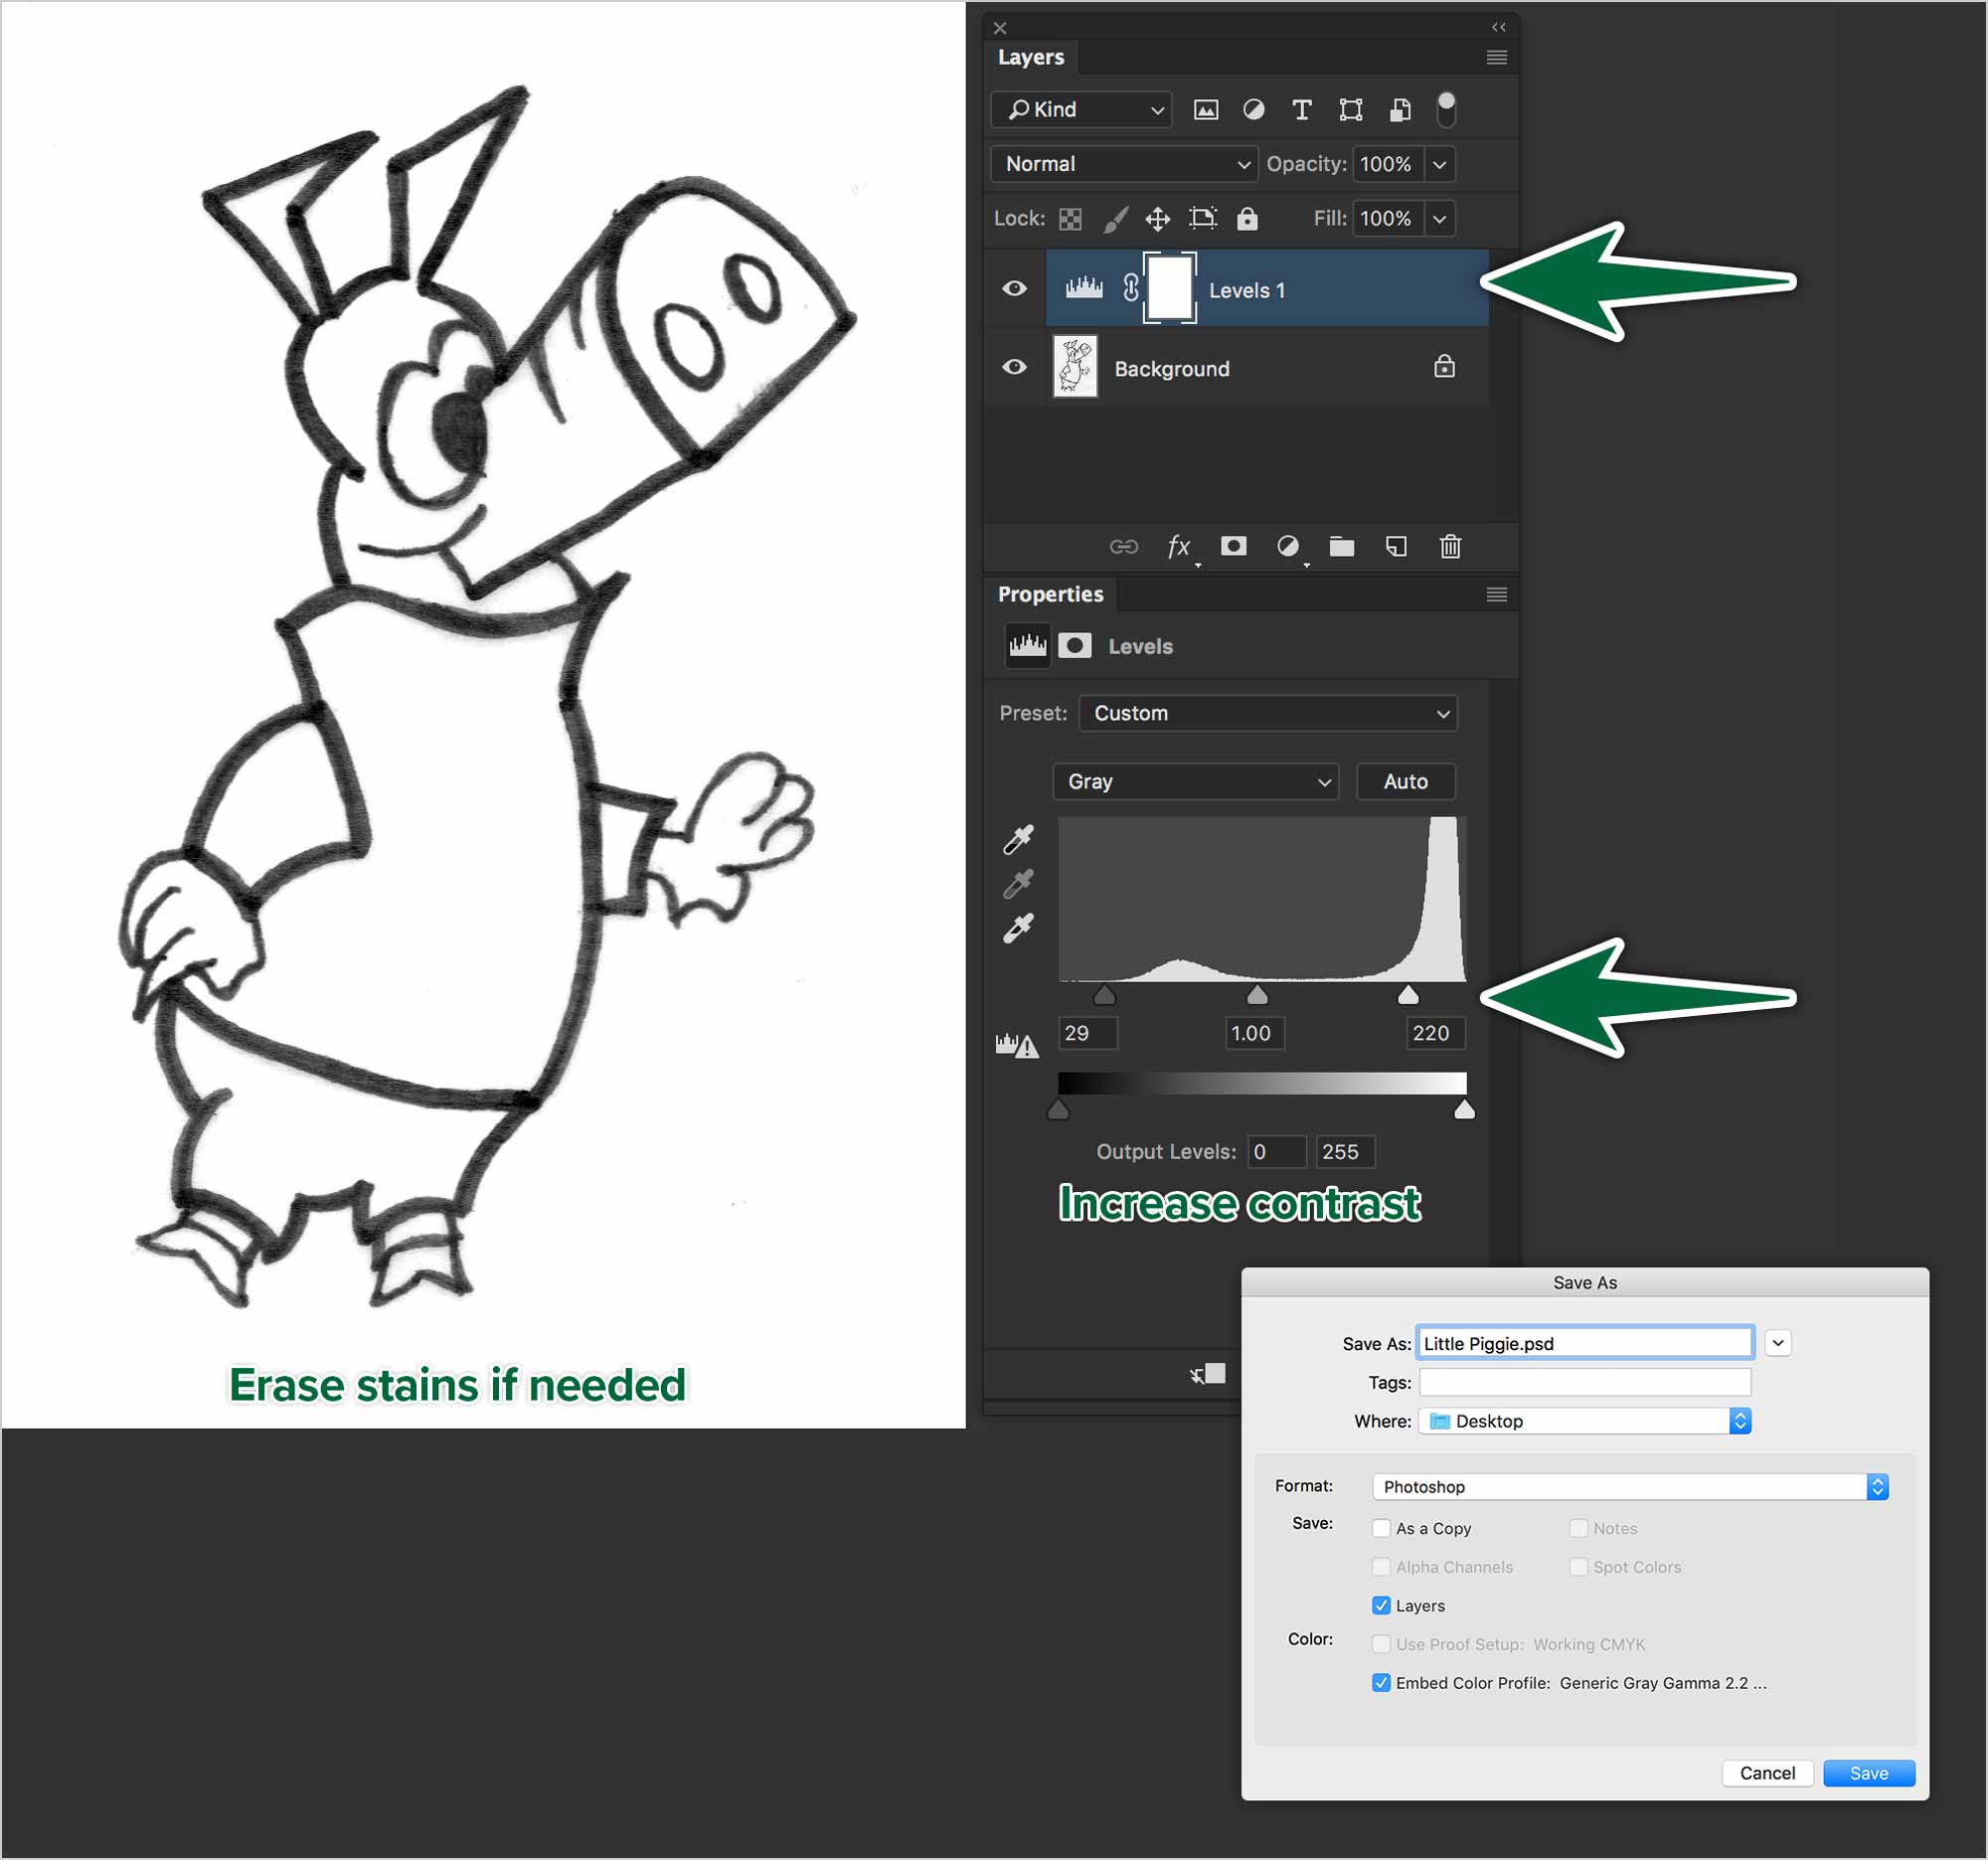
You can paint out any stains you may have made while drawing on paper. It’s also useful to increase the contrast to ensure the blacks are as dark as possible and the whites are as light as possible. A Levels Adjustment Layer is the best way to do so.
Create a new letter document in Illustrator. In order to be able to trace our sketch, we need to place it in Illustrator with File > Place.
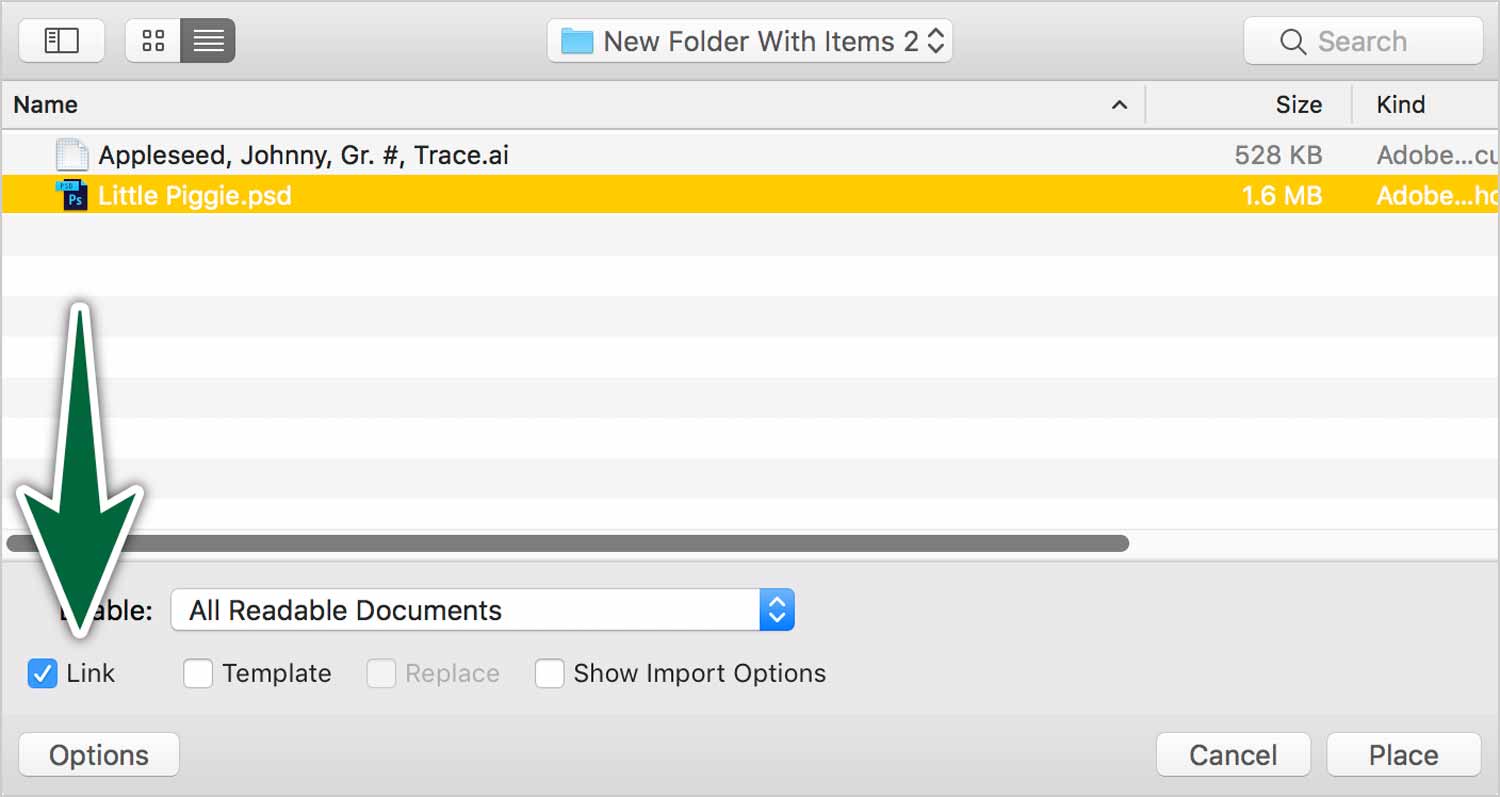
Make sure that the Link check box is checked in the Place dialogue. This will ensure that there’s a link between your Illustrator document and the image file. So, the image should be linked and not embedded. Embedding images is largely frowned upon because it slows down Illustrator’s performance a lot.
Select the image and click Place, you will get a loaded cursor, where you see an icon attached to your cursor. Simply drag a rectangle to the size you want your image. Feel free to re-size your placed image at will. We have no concerns about it’s resolution for output. It will be deleted from your Illustrator document in the process of tracing it.
Tracing Images
Once our image has been placed on an Illustrator Artboard, we’ll be ready to Image Trace it.
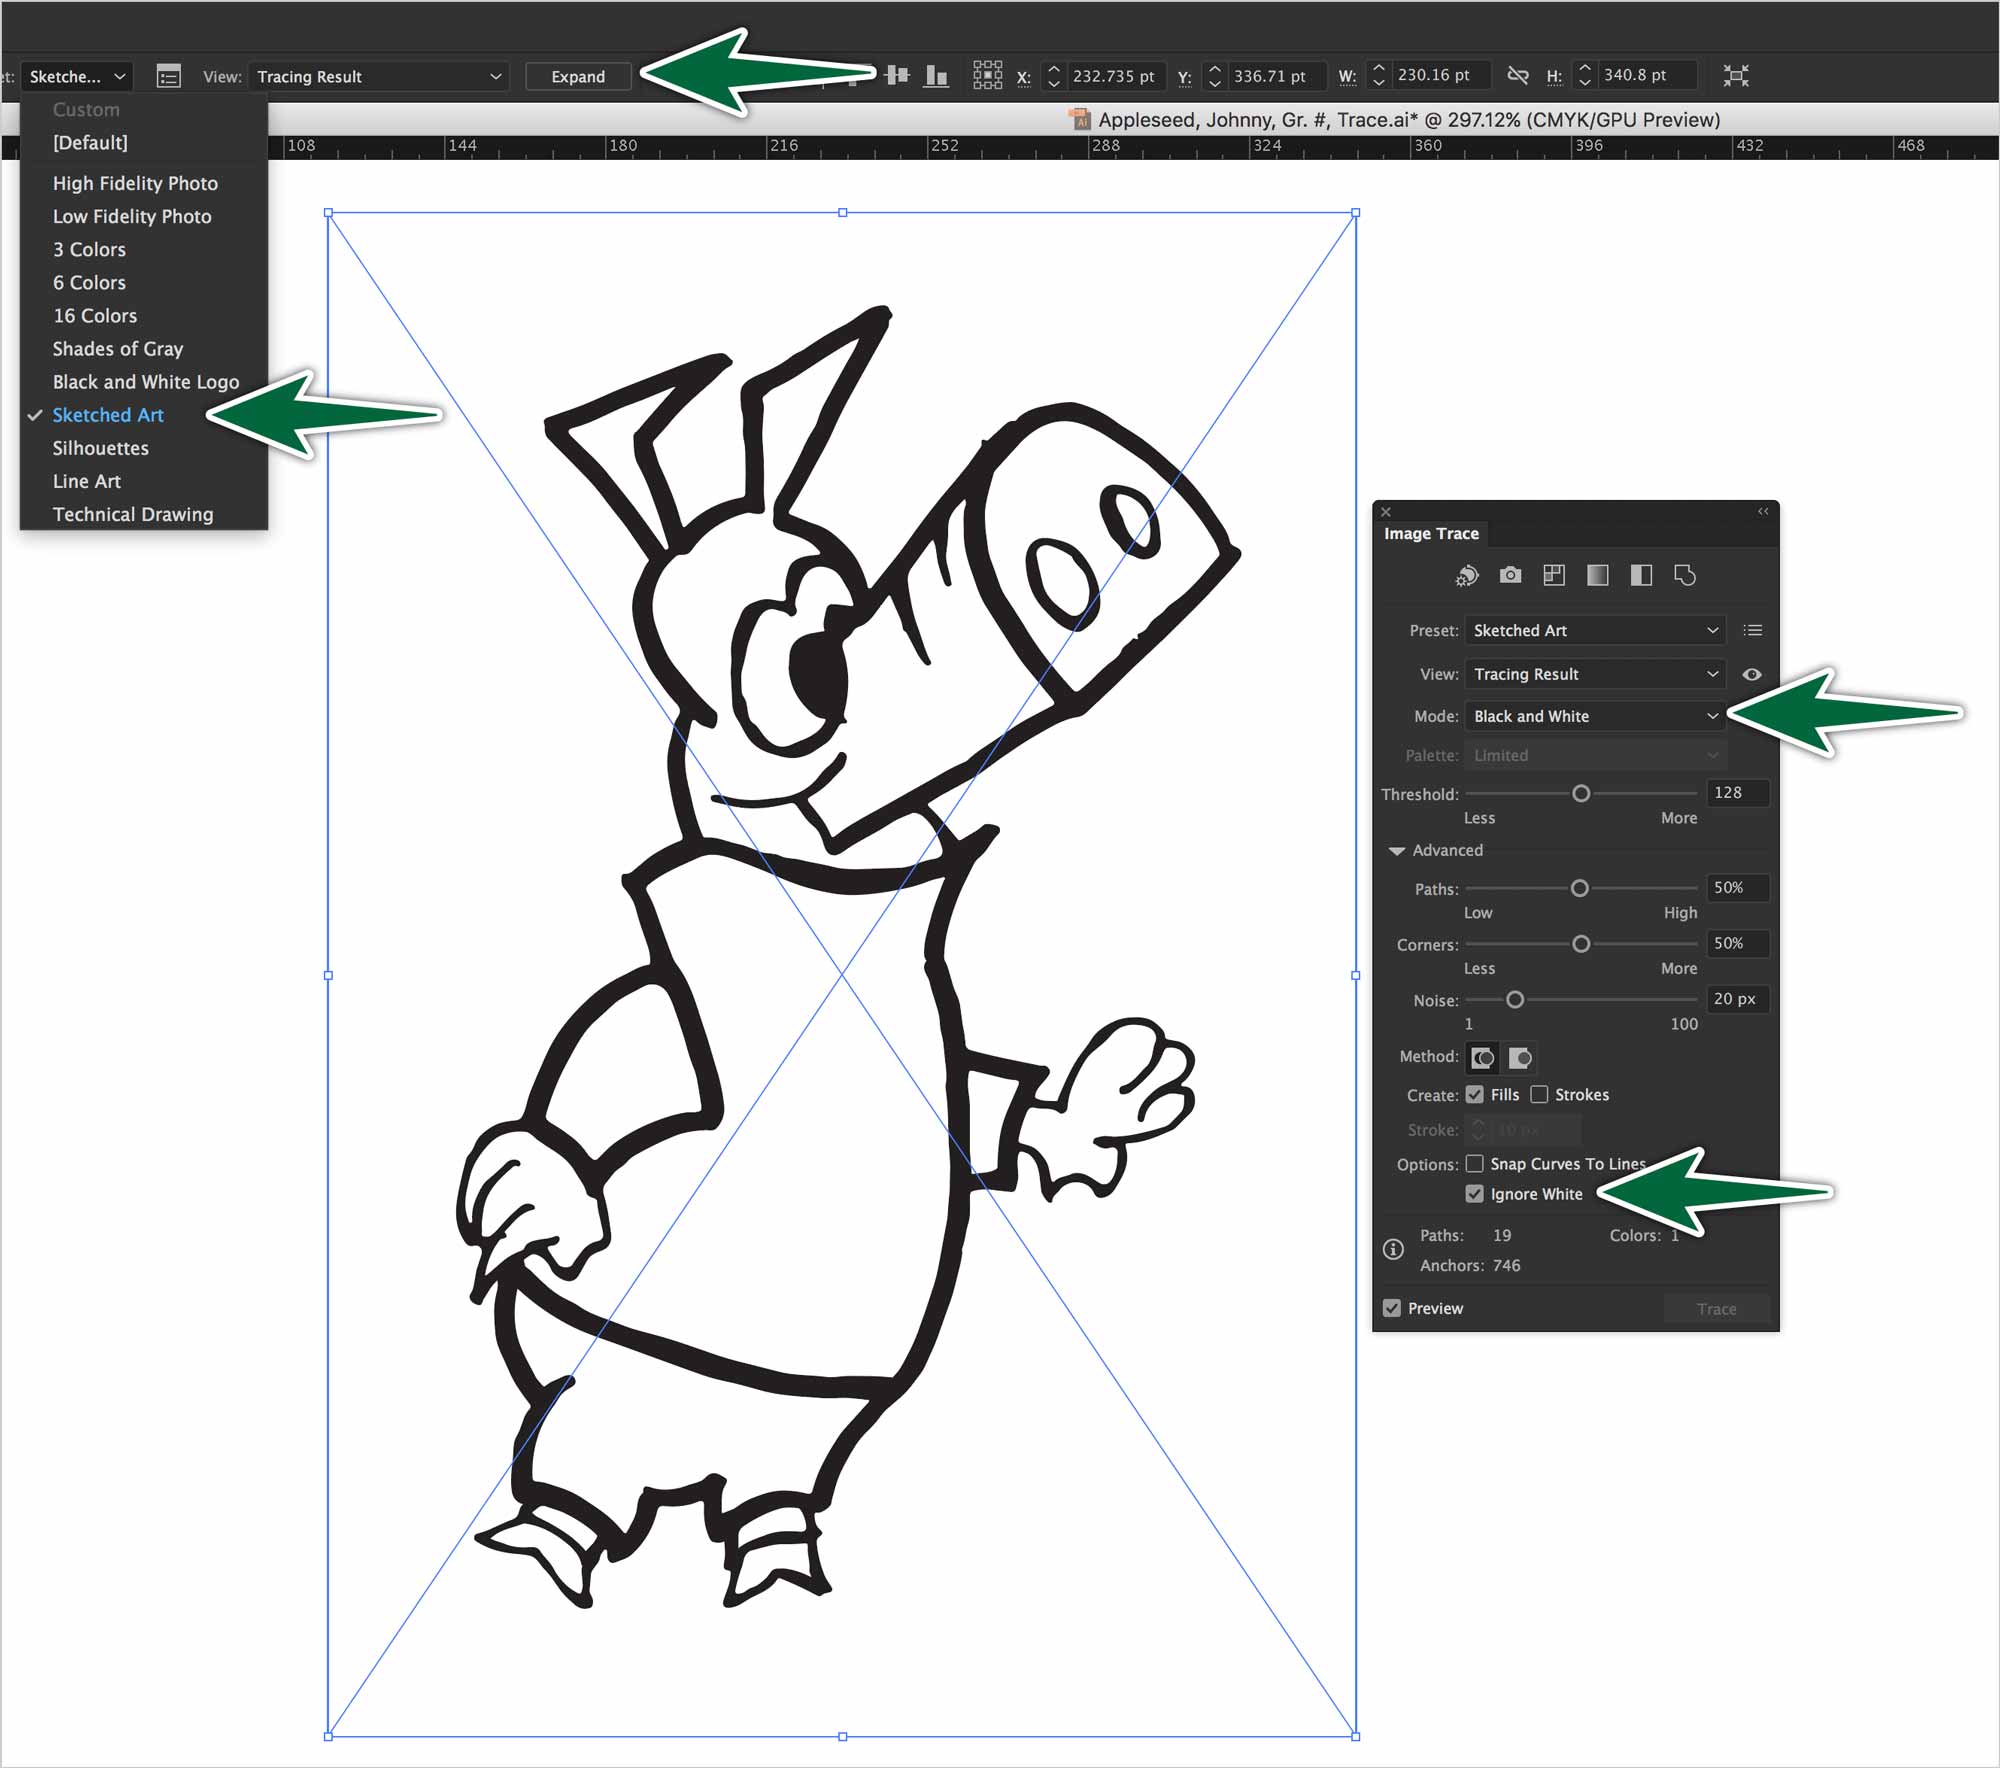
You can start by selecting your image, then clicking the tiny downward arrow next to the Image Trace button in the Control Panel. This will do an initial tracing of your image. We need to open the tracing options dialogue in order to refine our results.
We’ll dive in to the Image Trace options to make sure we get the most of our image tracing. Keep in mind that what we’re seeing in Illustrator is not yet vectors. It’s a preview of what our tracing will look like once we’re done. If you take a gander at your Links panel, you’ll see that your scan is still placed on the page. That needs to be gone by the time we’re done.
Once our tracing looks just right, we’ll hit the Expand button in the Control Panel to finally vectorize our tracing.
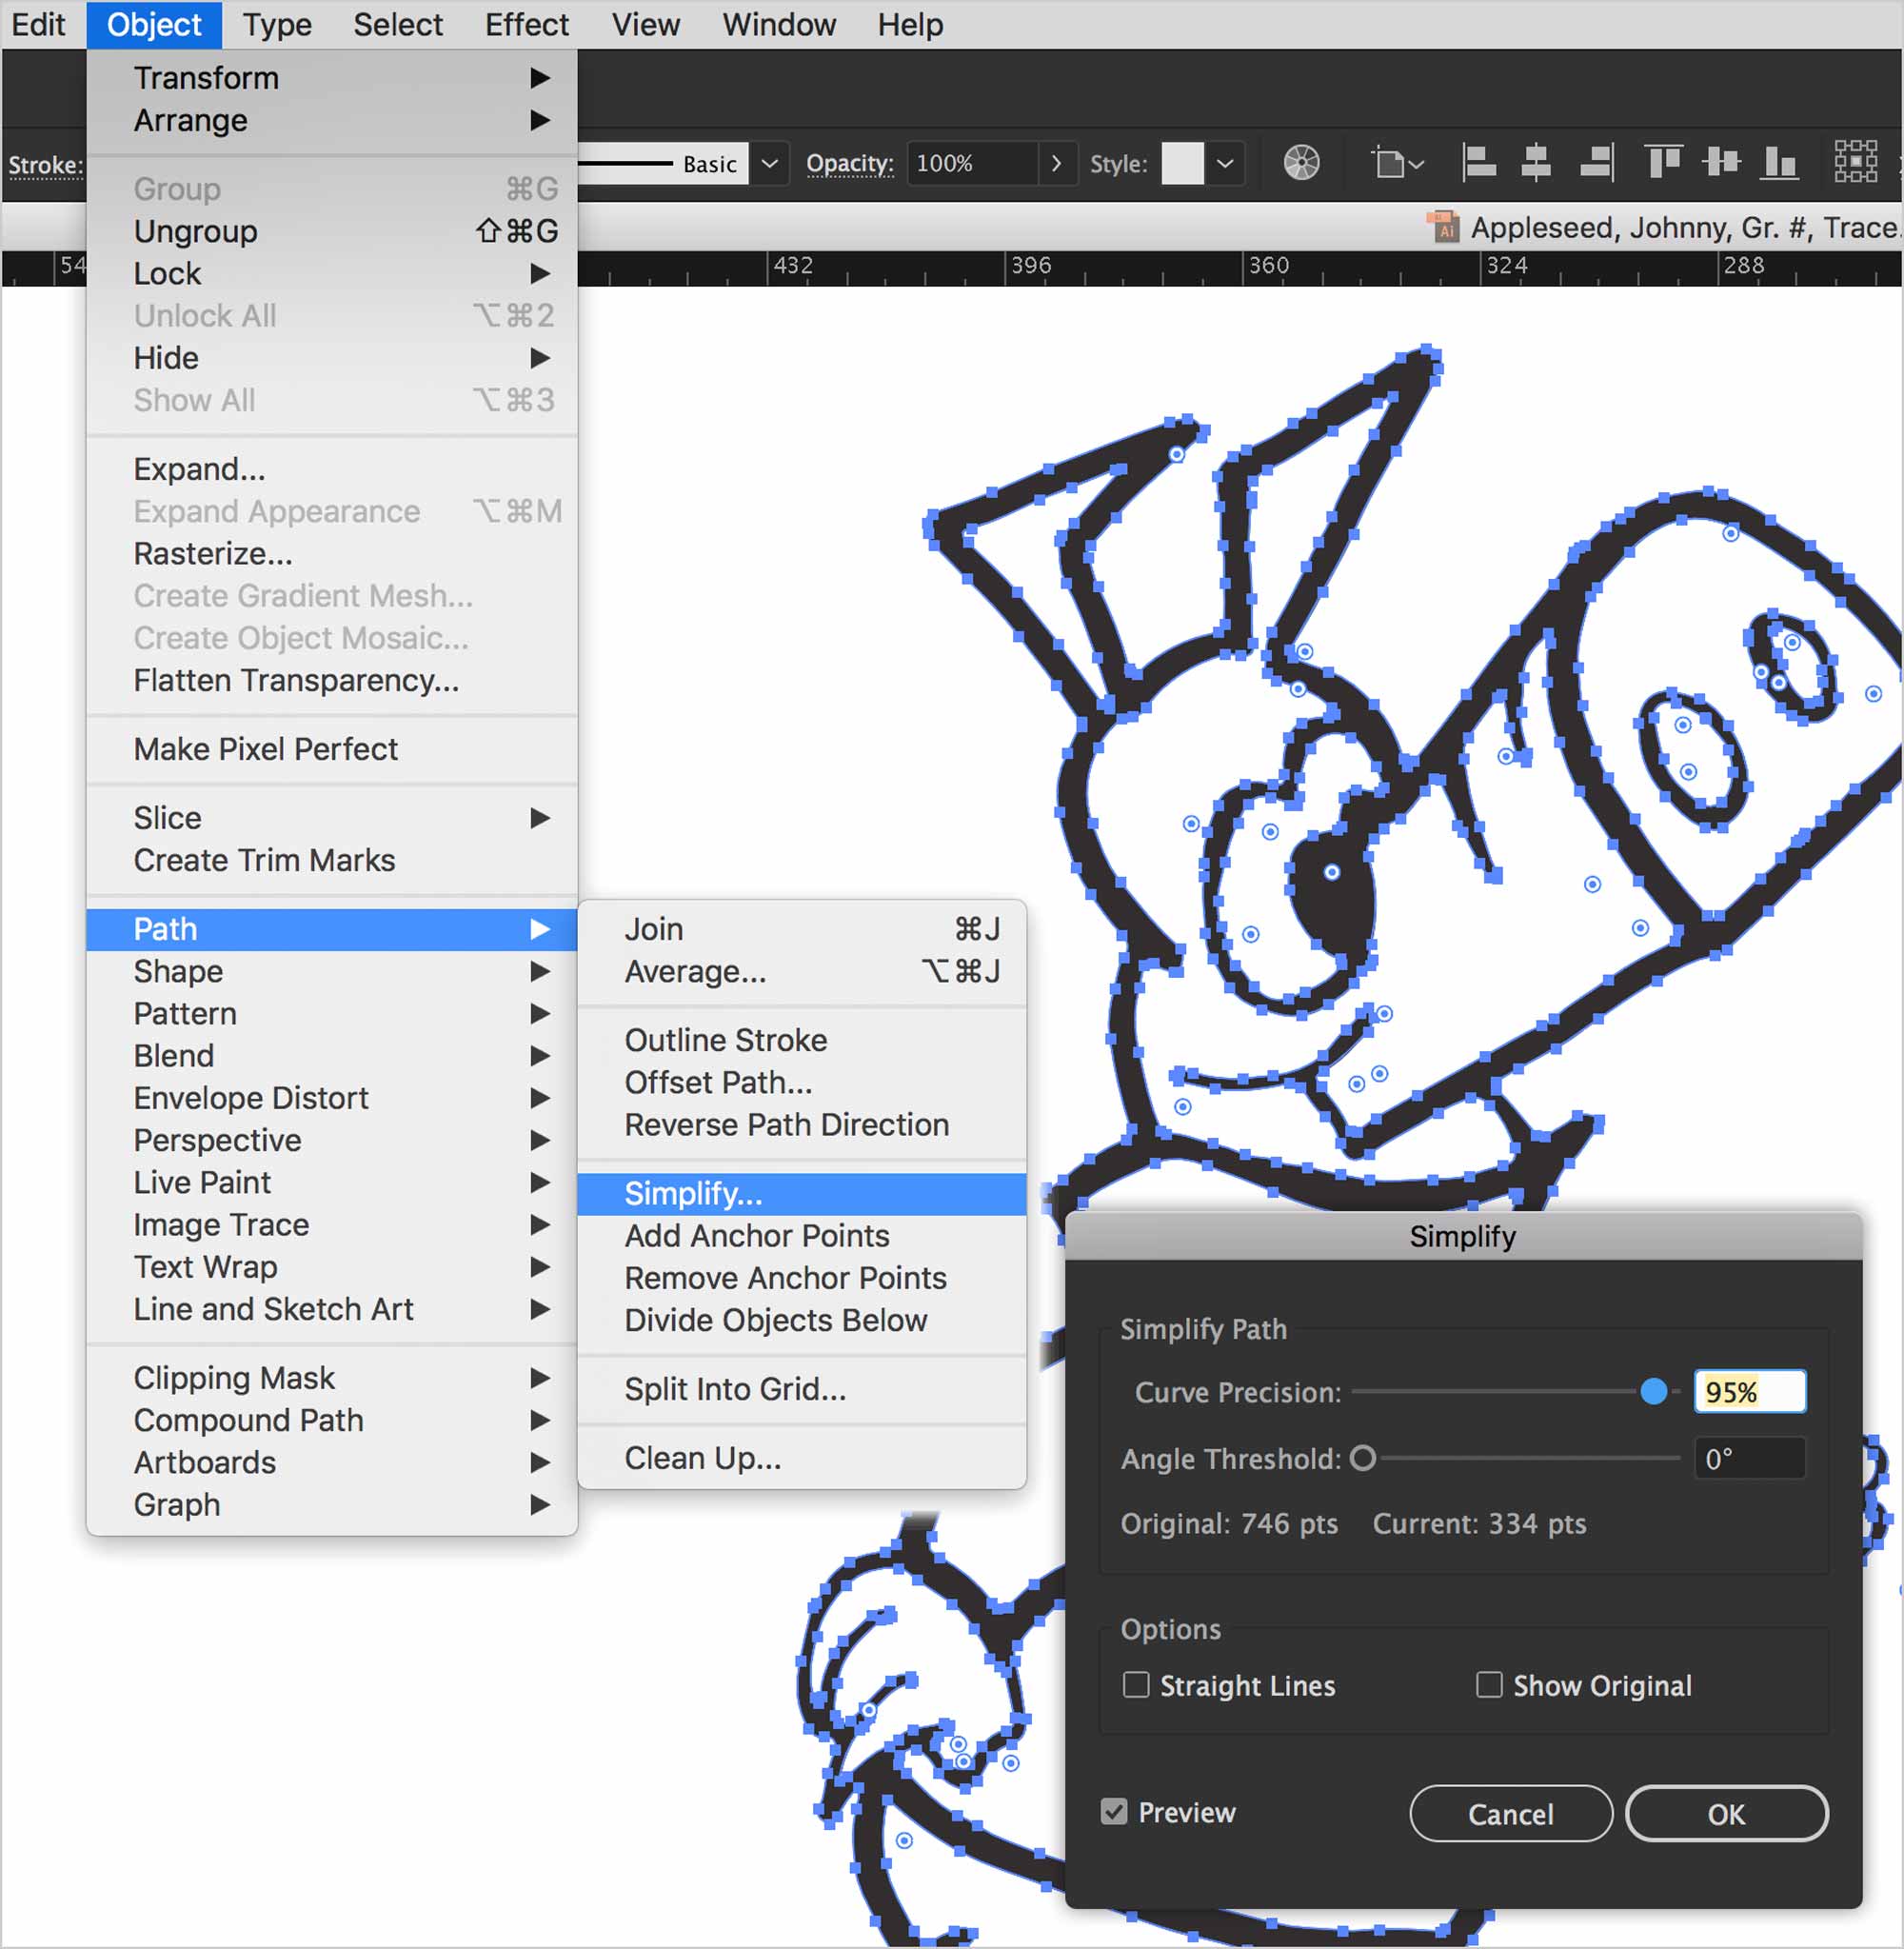
You can finish up by smoothing paths, if necessary. Select your vector art. Go Object > Path > Simplify… Go easy. If you simplify too much, you’ll distort your illustration. The best plan is to work on a duplicate of your illustration.
Keep this folder in order to submit it with the Live Paint part of this project.
Live Paint
The Live Paint function in Illustrator is a great example of how Adobe caters to designers’ workflow. They create tools that fit right into how we work. After we sketch a concept and Image Trace it, we want to quickly apply colour to the shapes. This is what Live Paint does.
Using Live Paint is like pouring liquid paint into your vectors. It fills areas with colour until it encounters a boundary. We’ll use it to paint our traced artwork.
Let’s move on to the illustration that we’ve image-traced. To get some colour into our vectors, we’ll select the whole sketch, then click on it with the Paint Bucket tool. This will make our vector art a Live Paint Group.

You can tell by the little asterisks in the bounding box anchor points.
Let’s get a few different colour themes. We’ll open some from Illustrator’s libraries and download some from Adobe Colour.
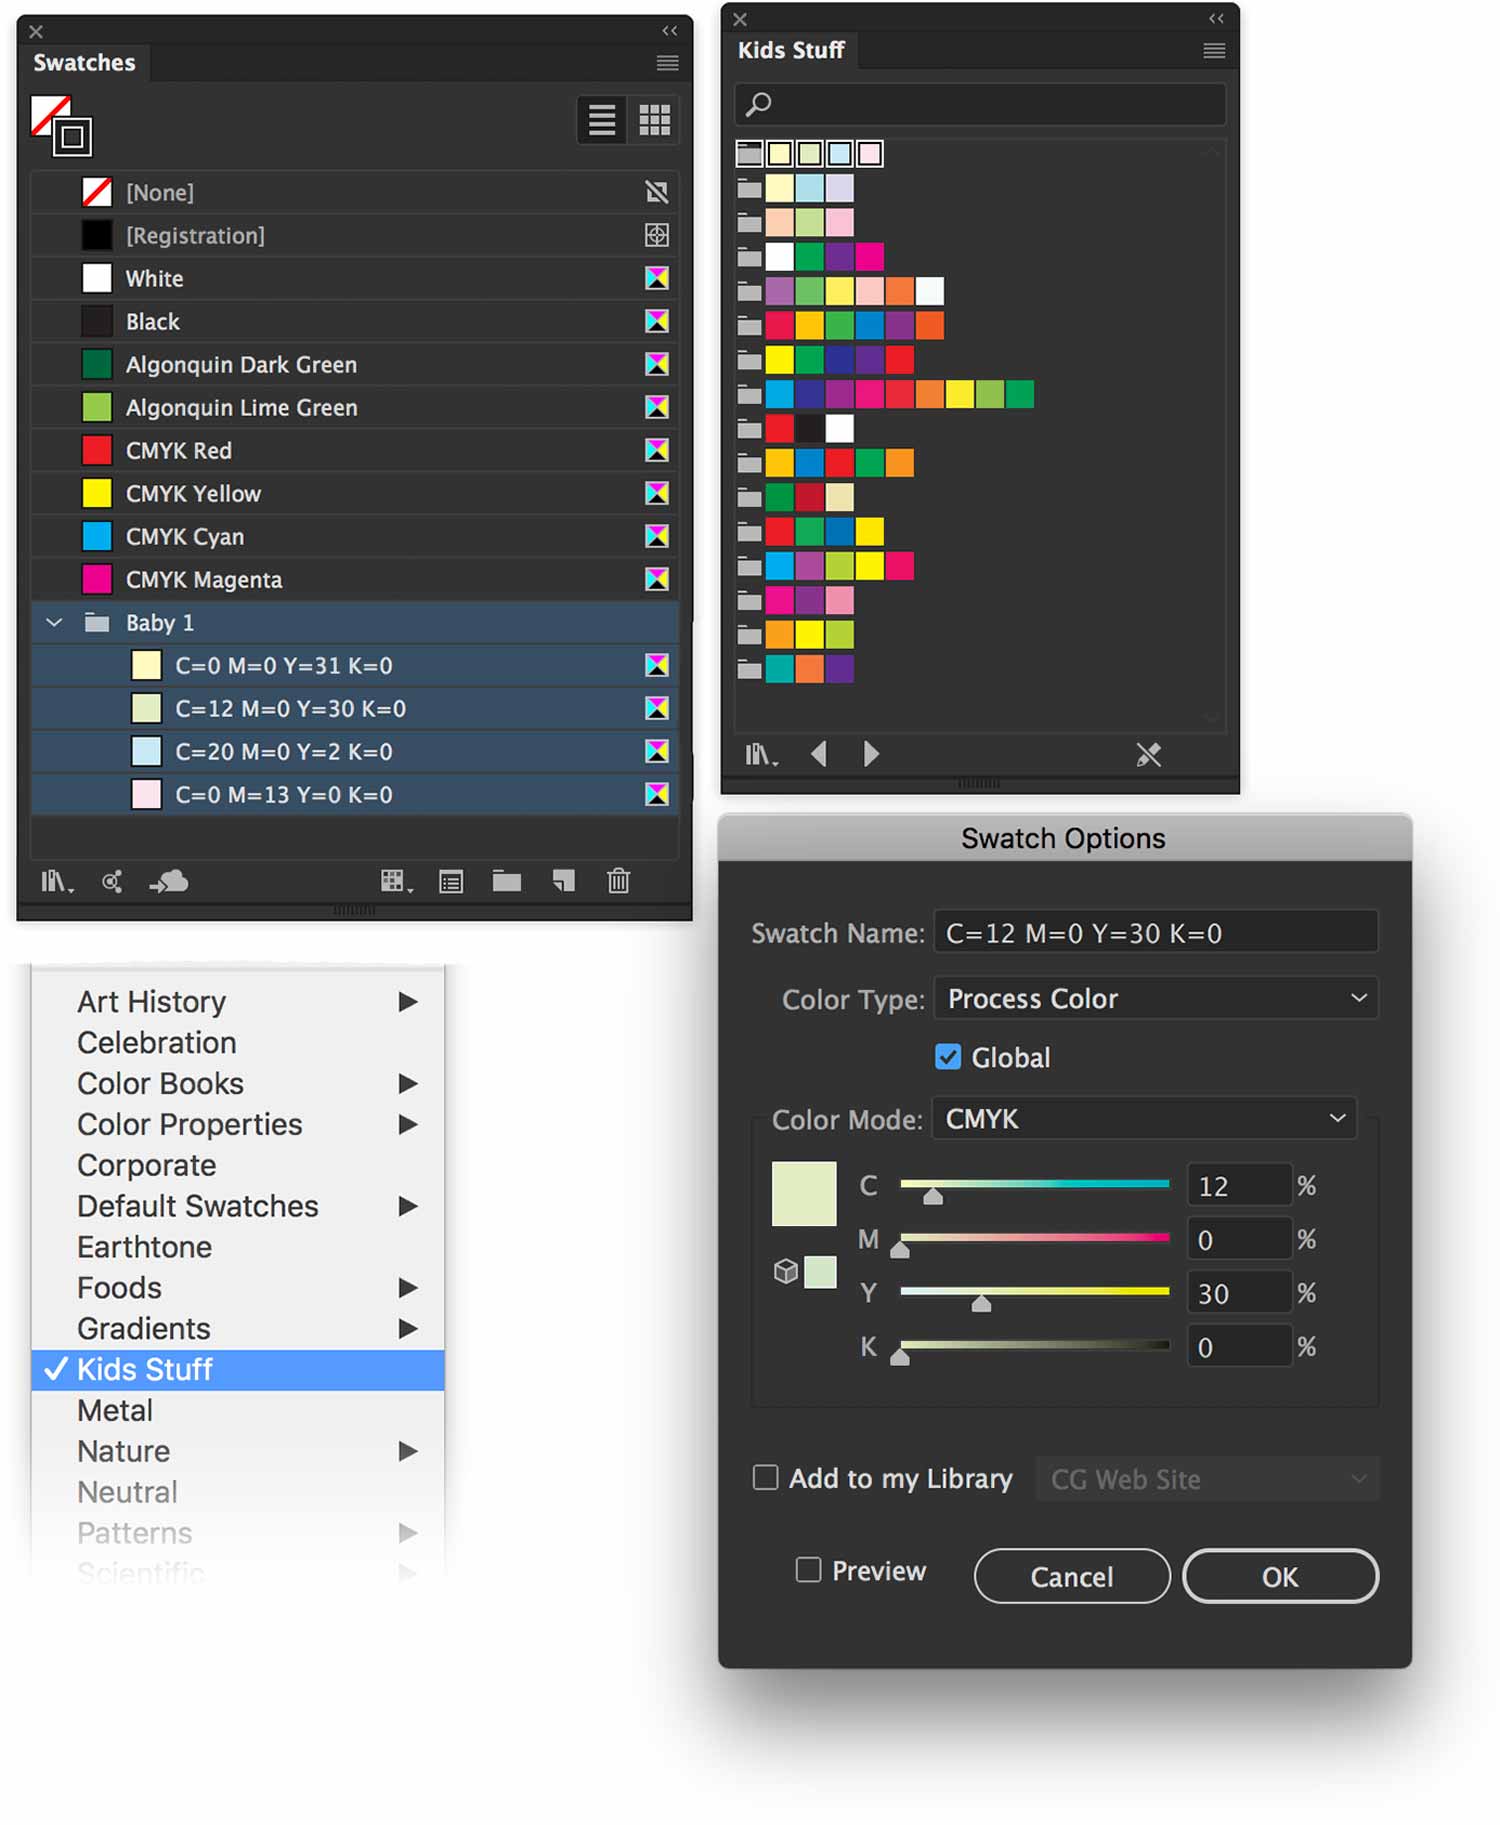
We’ll go to our Swatches panel and use the provided colours to paint our sketch. We’ll make the colour swatches Global Colours before we apply then in our Illustration. To do so, double-click on the swatch, then check Global Colour in the options dialogue.
First, we need to select the swatches, then click on the folder icon at the bottom of the panel. This will put them in a Colour Group, which will in turn, make them available with our Live Paint Bucket tool.
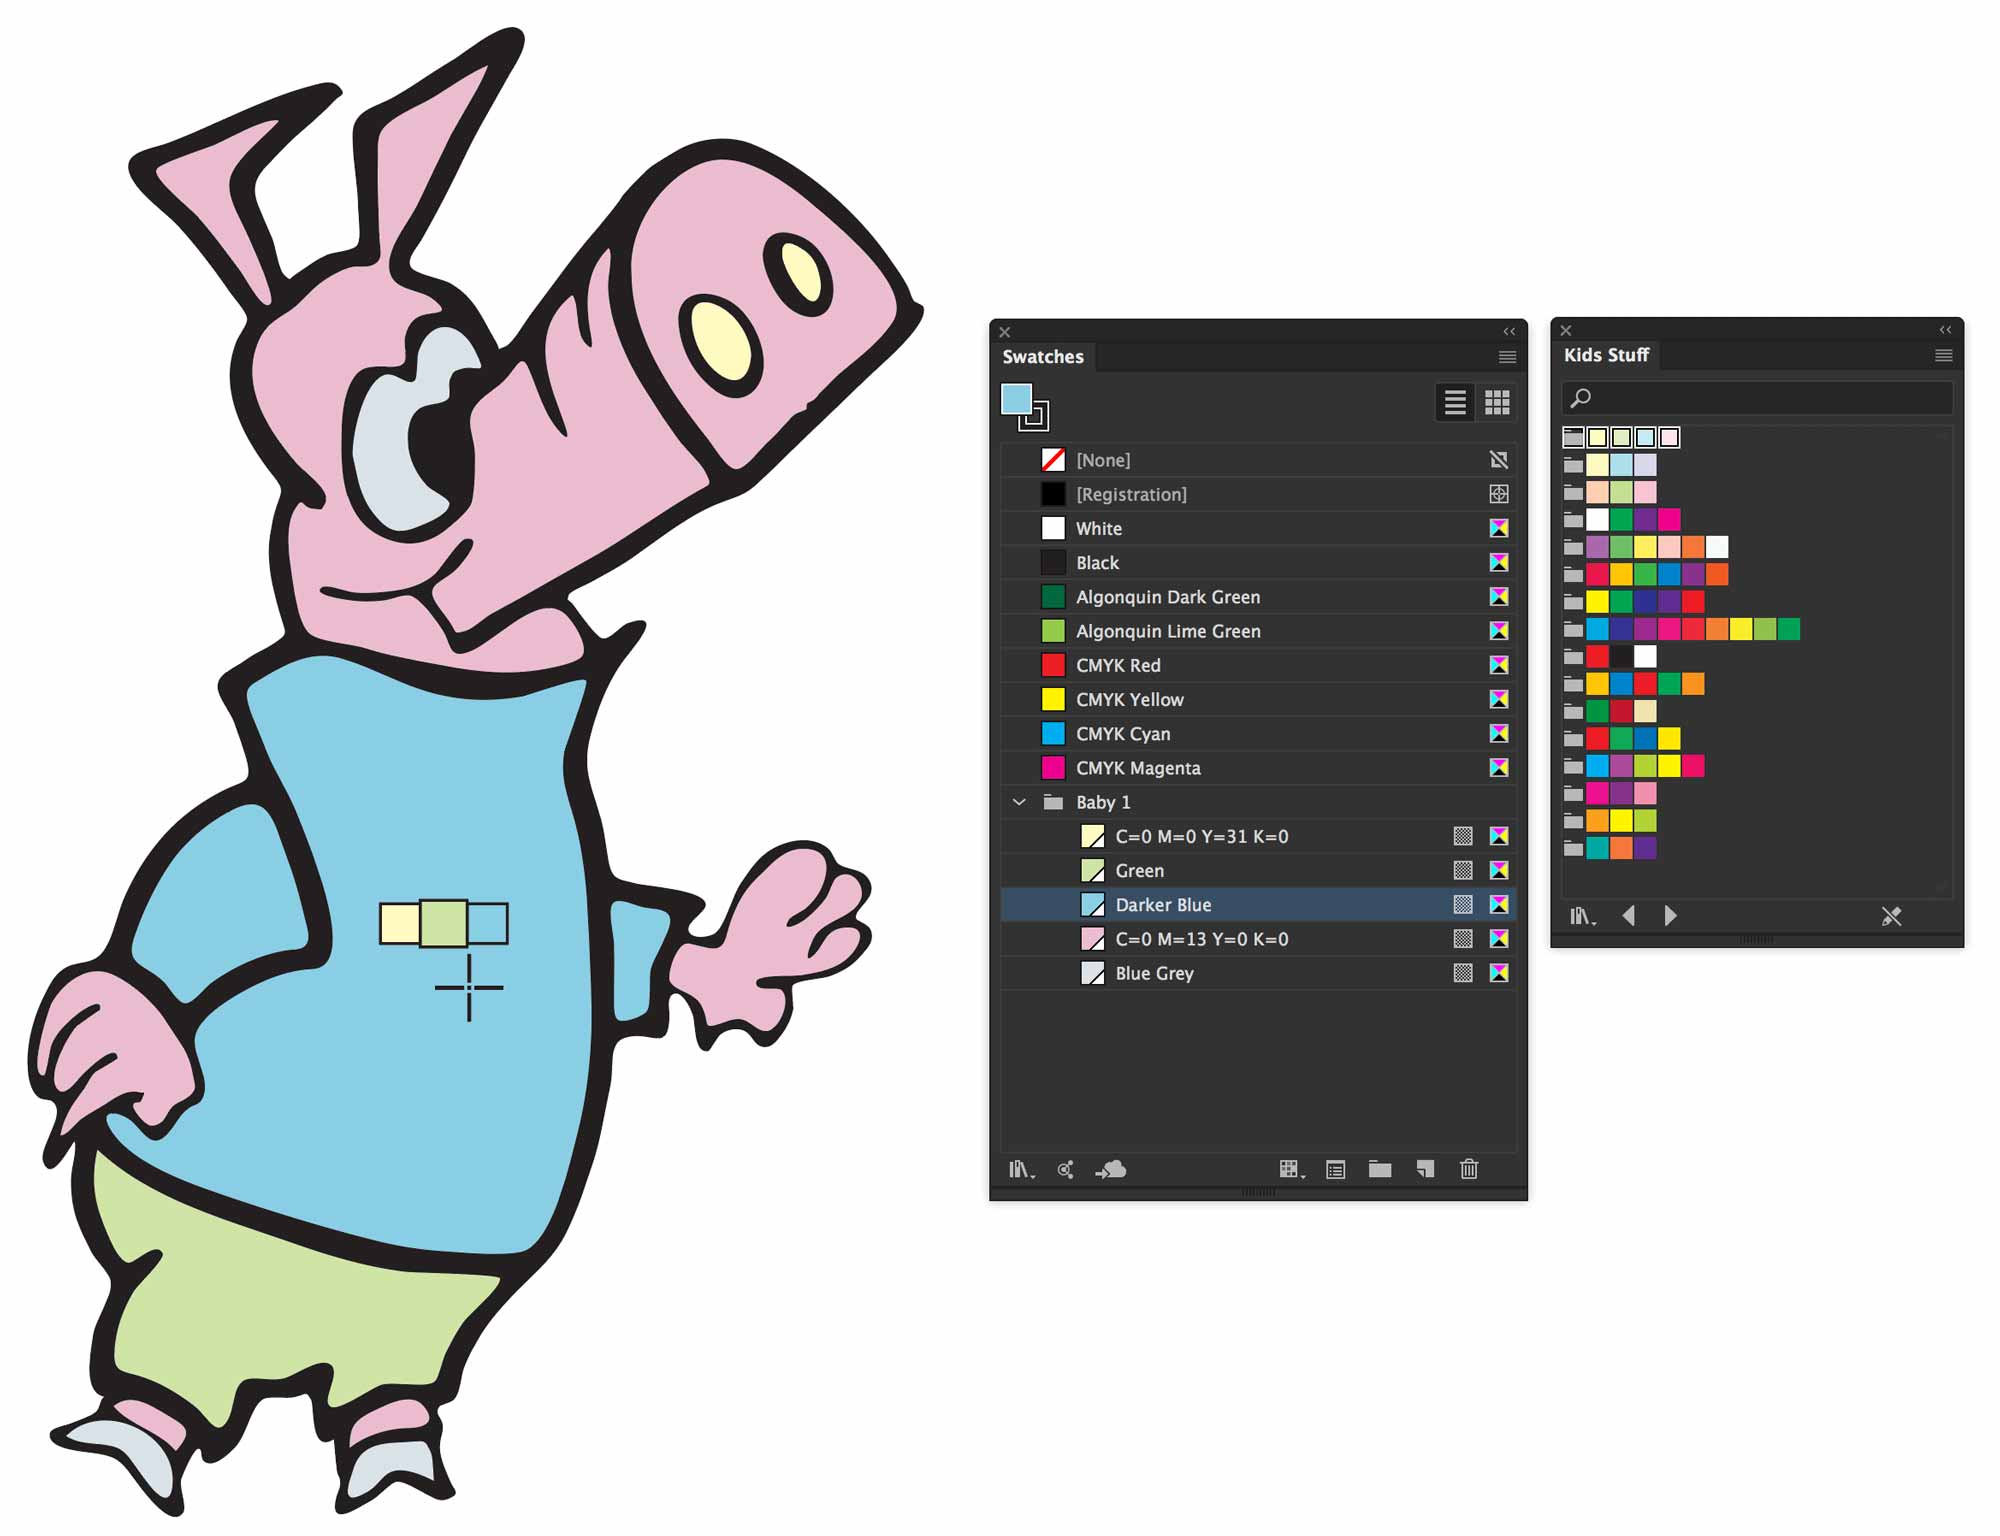
Now you’re free to use these colours to paint your artwork. You can use the left/right arrows on the keyboard to choose colours while using the Paint Bucket tool. Click away!
Gap Detection
If there are gaps in your drawing that are making paint pour outside the shapes, you can use Illustrator’s Gap Detection settings to close them.
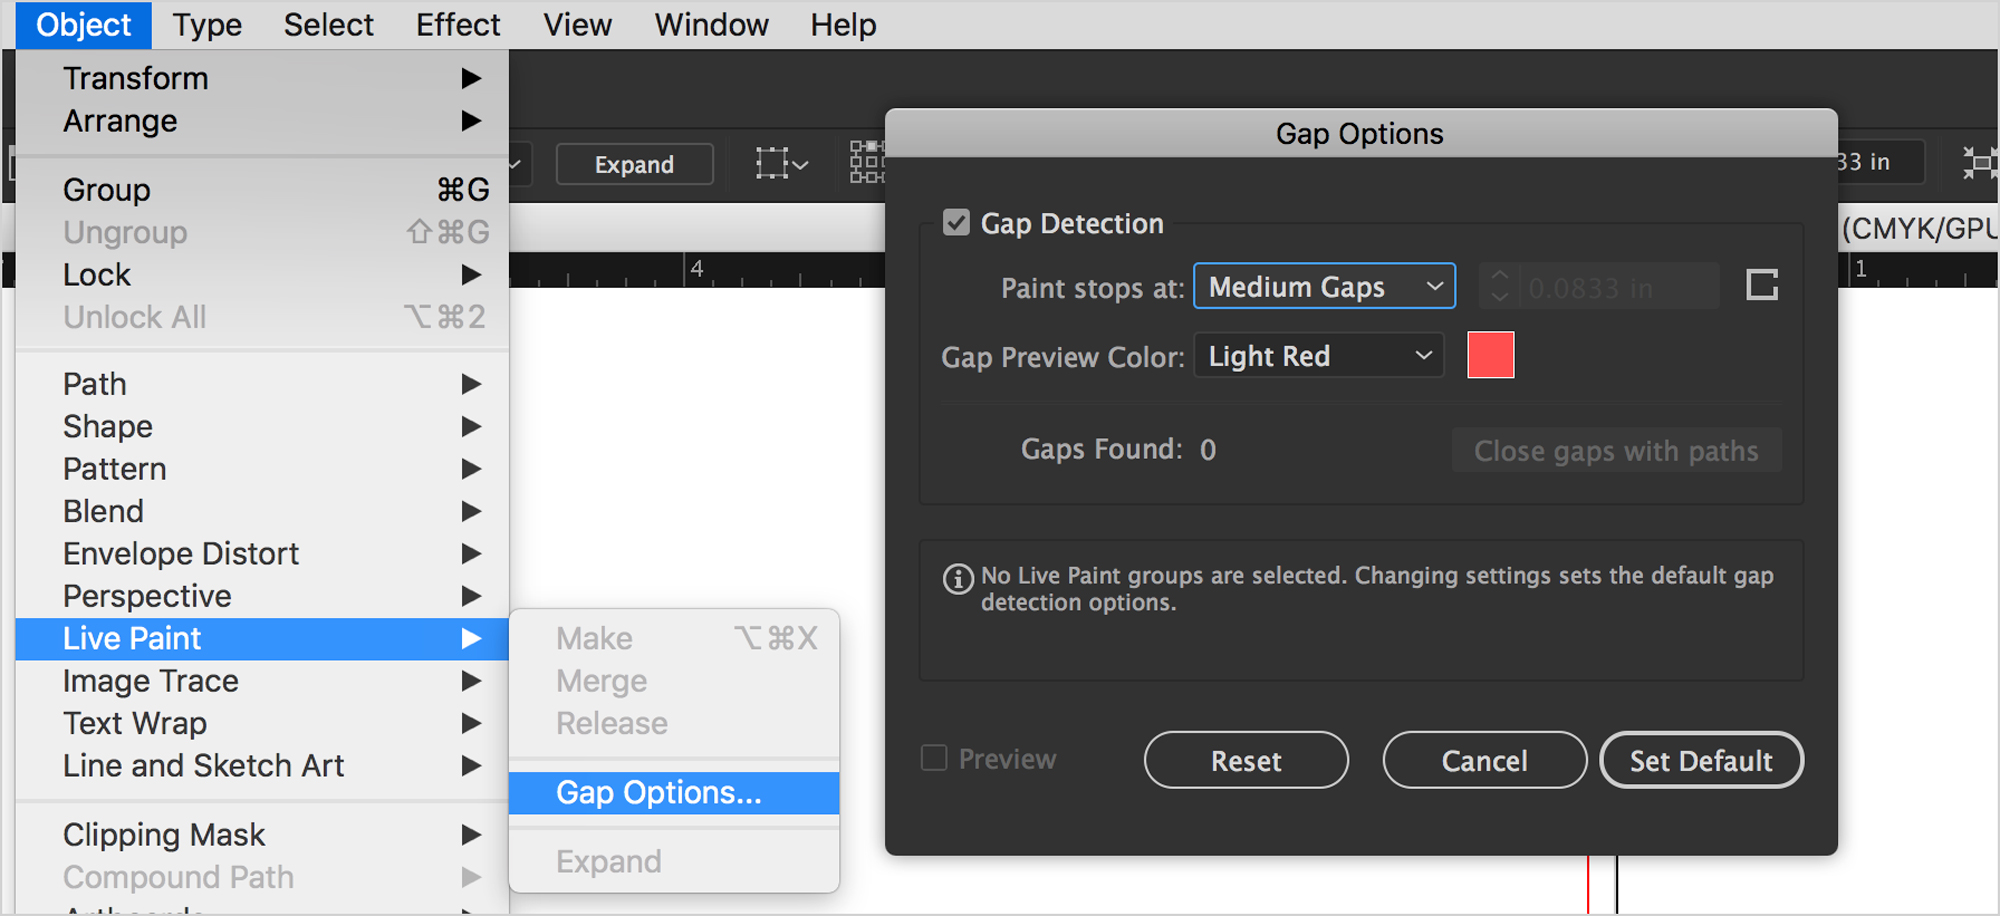
Gap Detection has its limits. You may need to use the Direct Select tool to manually close gaps.
Recolour Artwork
Now that we’ve produced a vector version of our sketch with colour in it, we’ll want to show our client different colour themes. This is where Re-colour Artwork comes in.
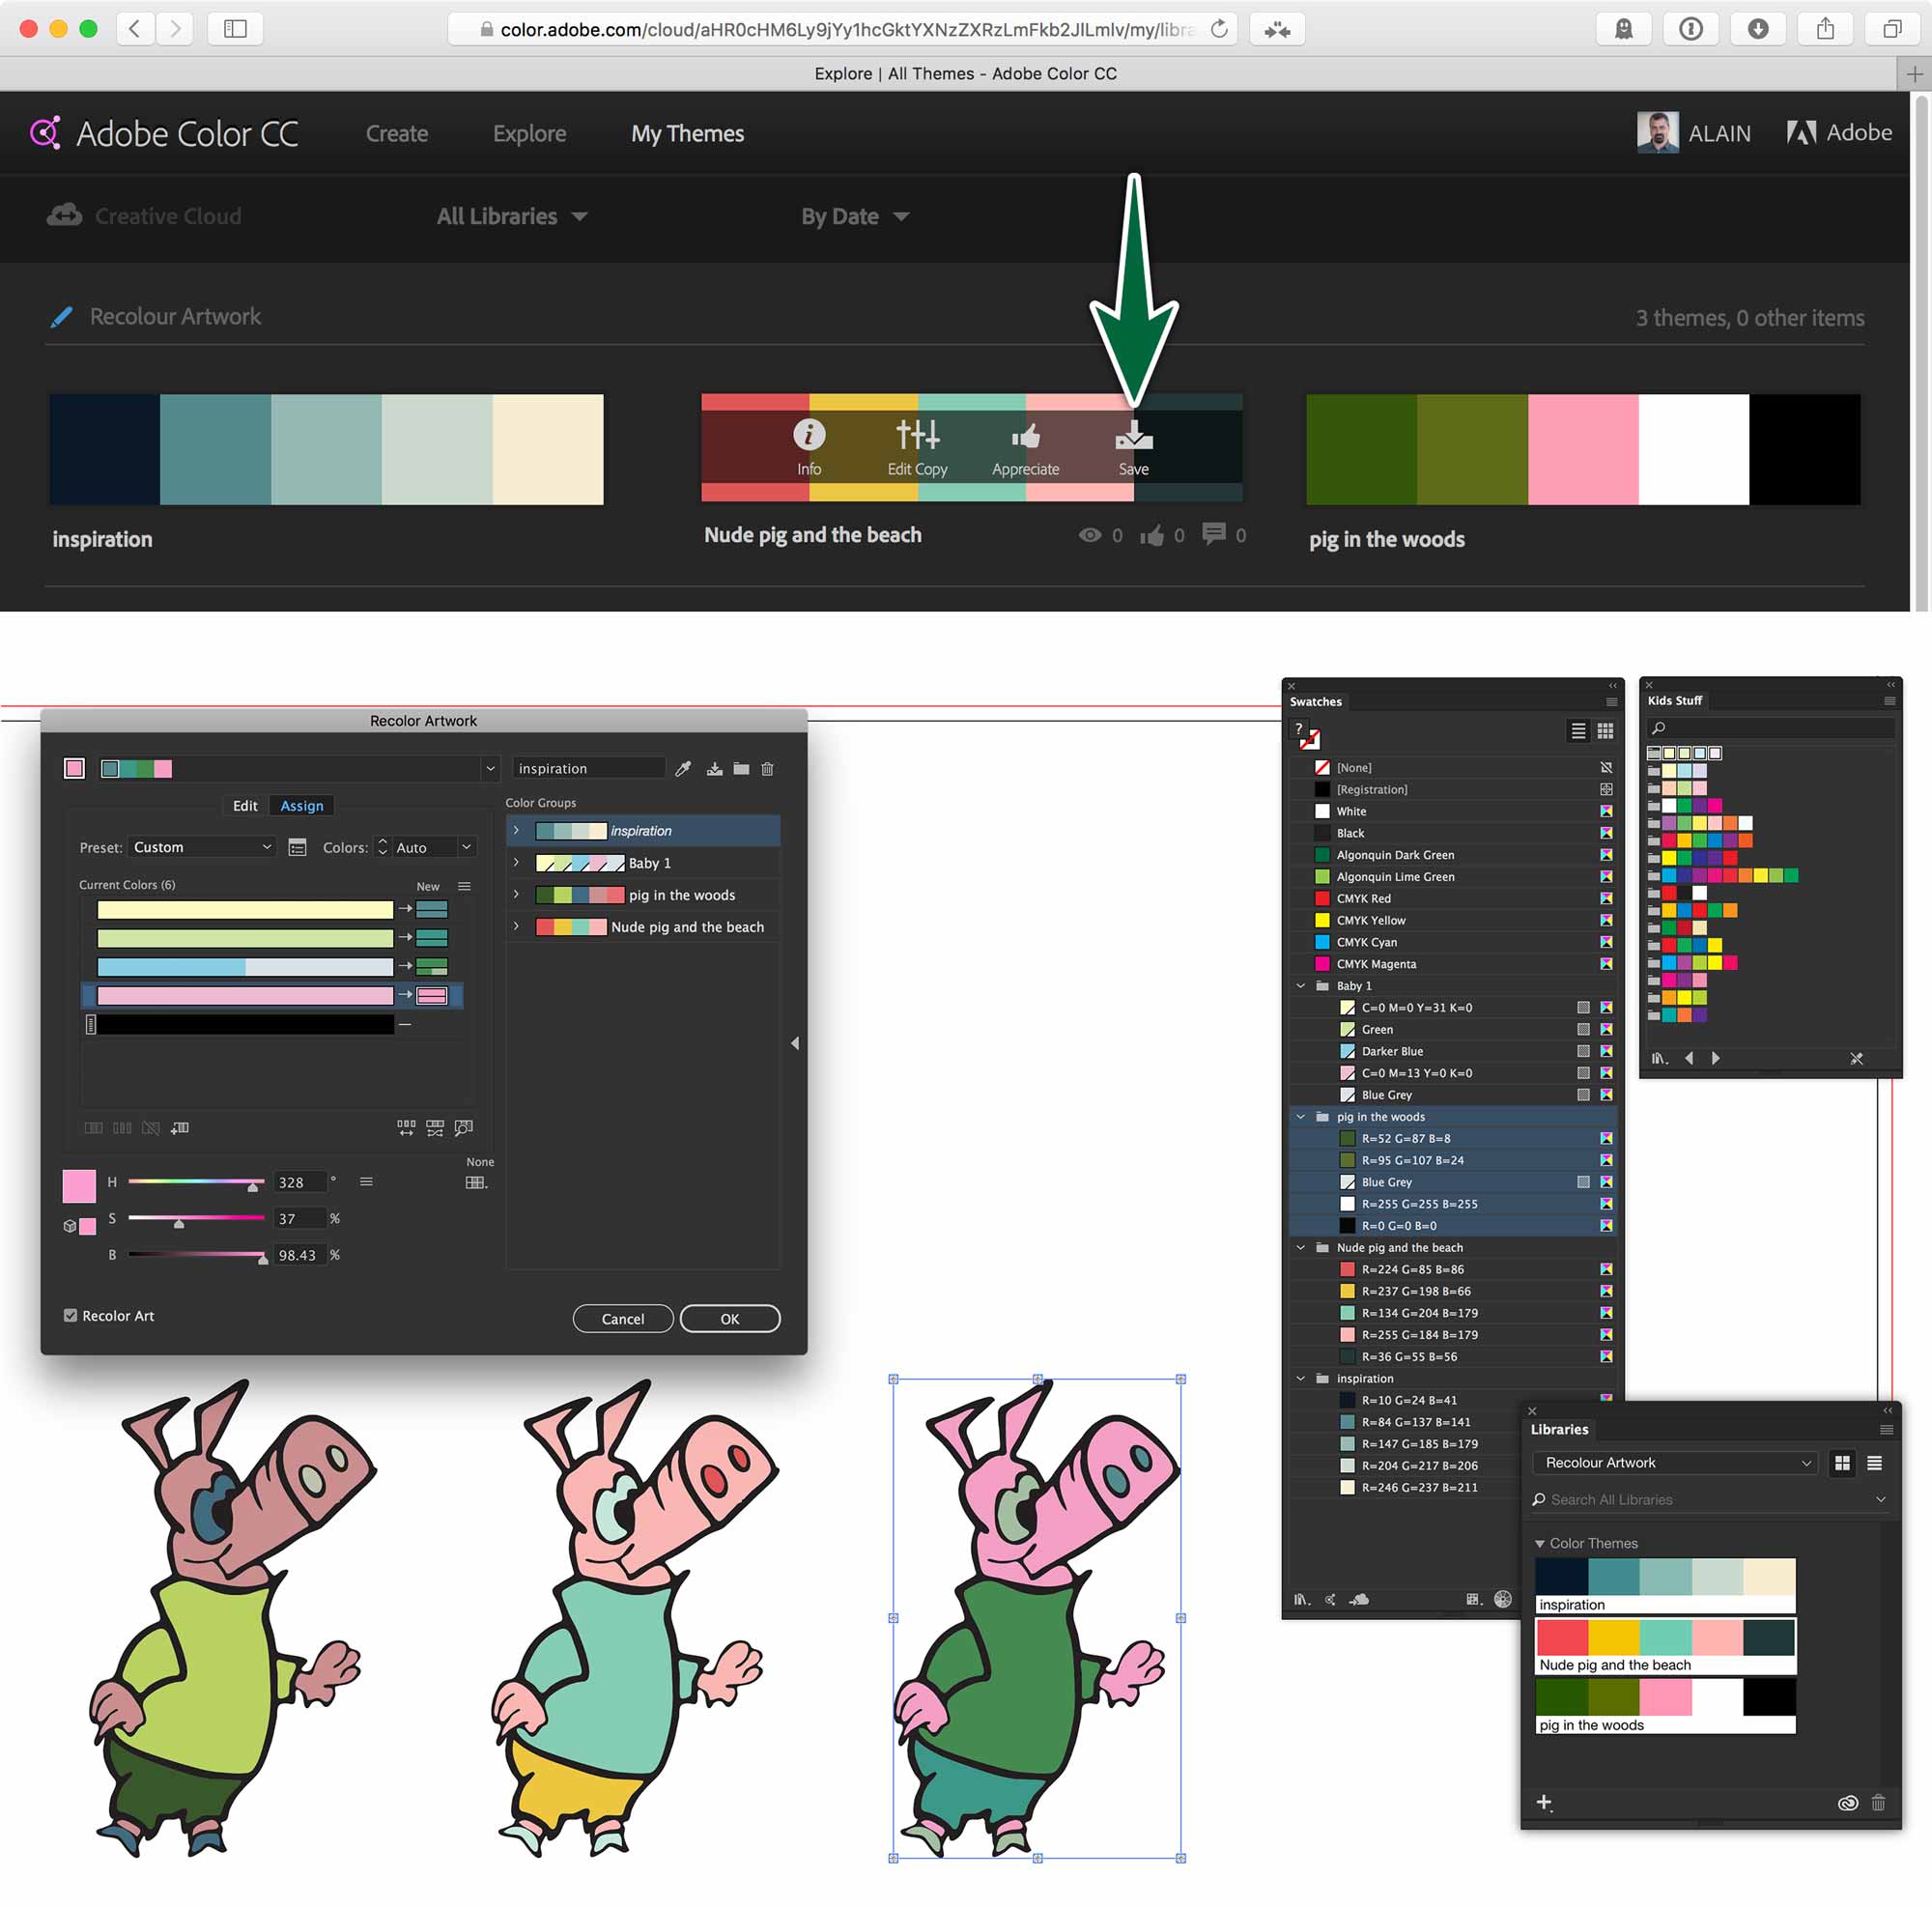
Use color.adobe.com to either create or simply find different colour themes for your sketch. Sync them to Illustrator, then apply them to multiple instances or your original sketch the same way you applied colour the first time around.
If you organize swatches in Colour Groups, they become accessible in the Edit Colours dialogue. We’ll use this to create colour variations for our artwork.
This is an awesomely quick way to create multiple colour variations to present to your client.
Formative Activity
Your assignment is to use the provided image to image-trace and live-paint. Once you’ve completed that, produce three different colour themes.
You’ll end up with the first image-traced graphic. Aside from that, you’ll create three other versions, each with their own colour schemes.
Supplemental Links
- Adobe: Image Trace
- Adobe: Image Trace Video
- Adobe: Recolour Your Artwork
