Topics
Photoshop layers are like sheets of stacked acetate. You can see through transparent areas of a layer to the layers below. You move a layer in the Layers panel stacking order to position the content on the layer, like sliding a sheet of acetate in a stack. You can also change the opacity of a layer to make content partially transparent.
The Layers panel is dense with buttons, sliders and other controls. We’ll explore these in class. Layers can be locked in five different ways, like locking transparency, locking position and more.
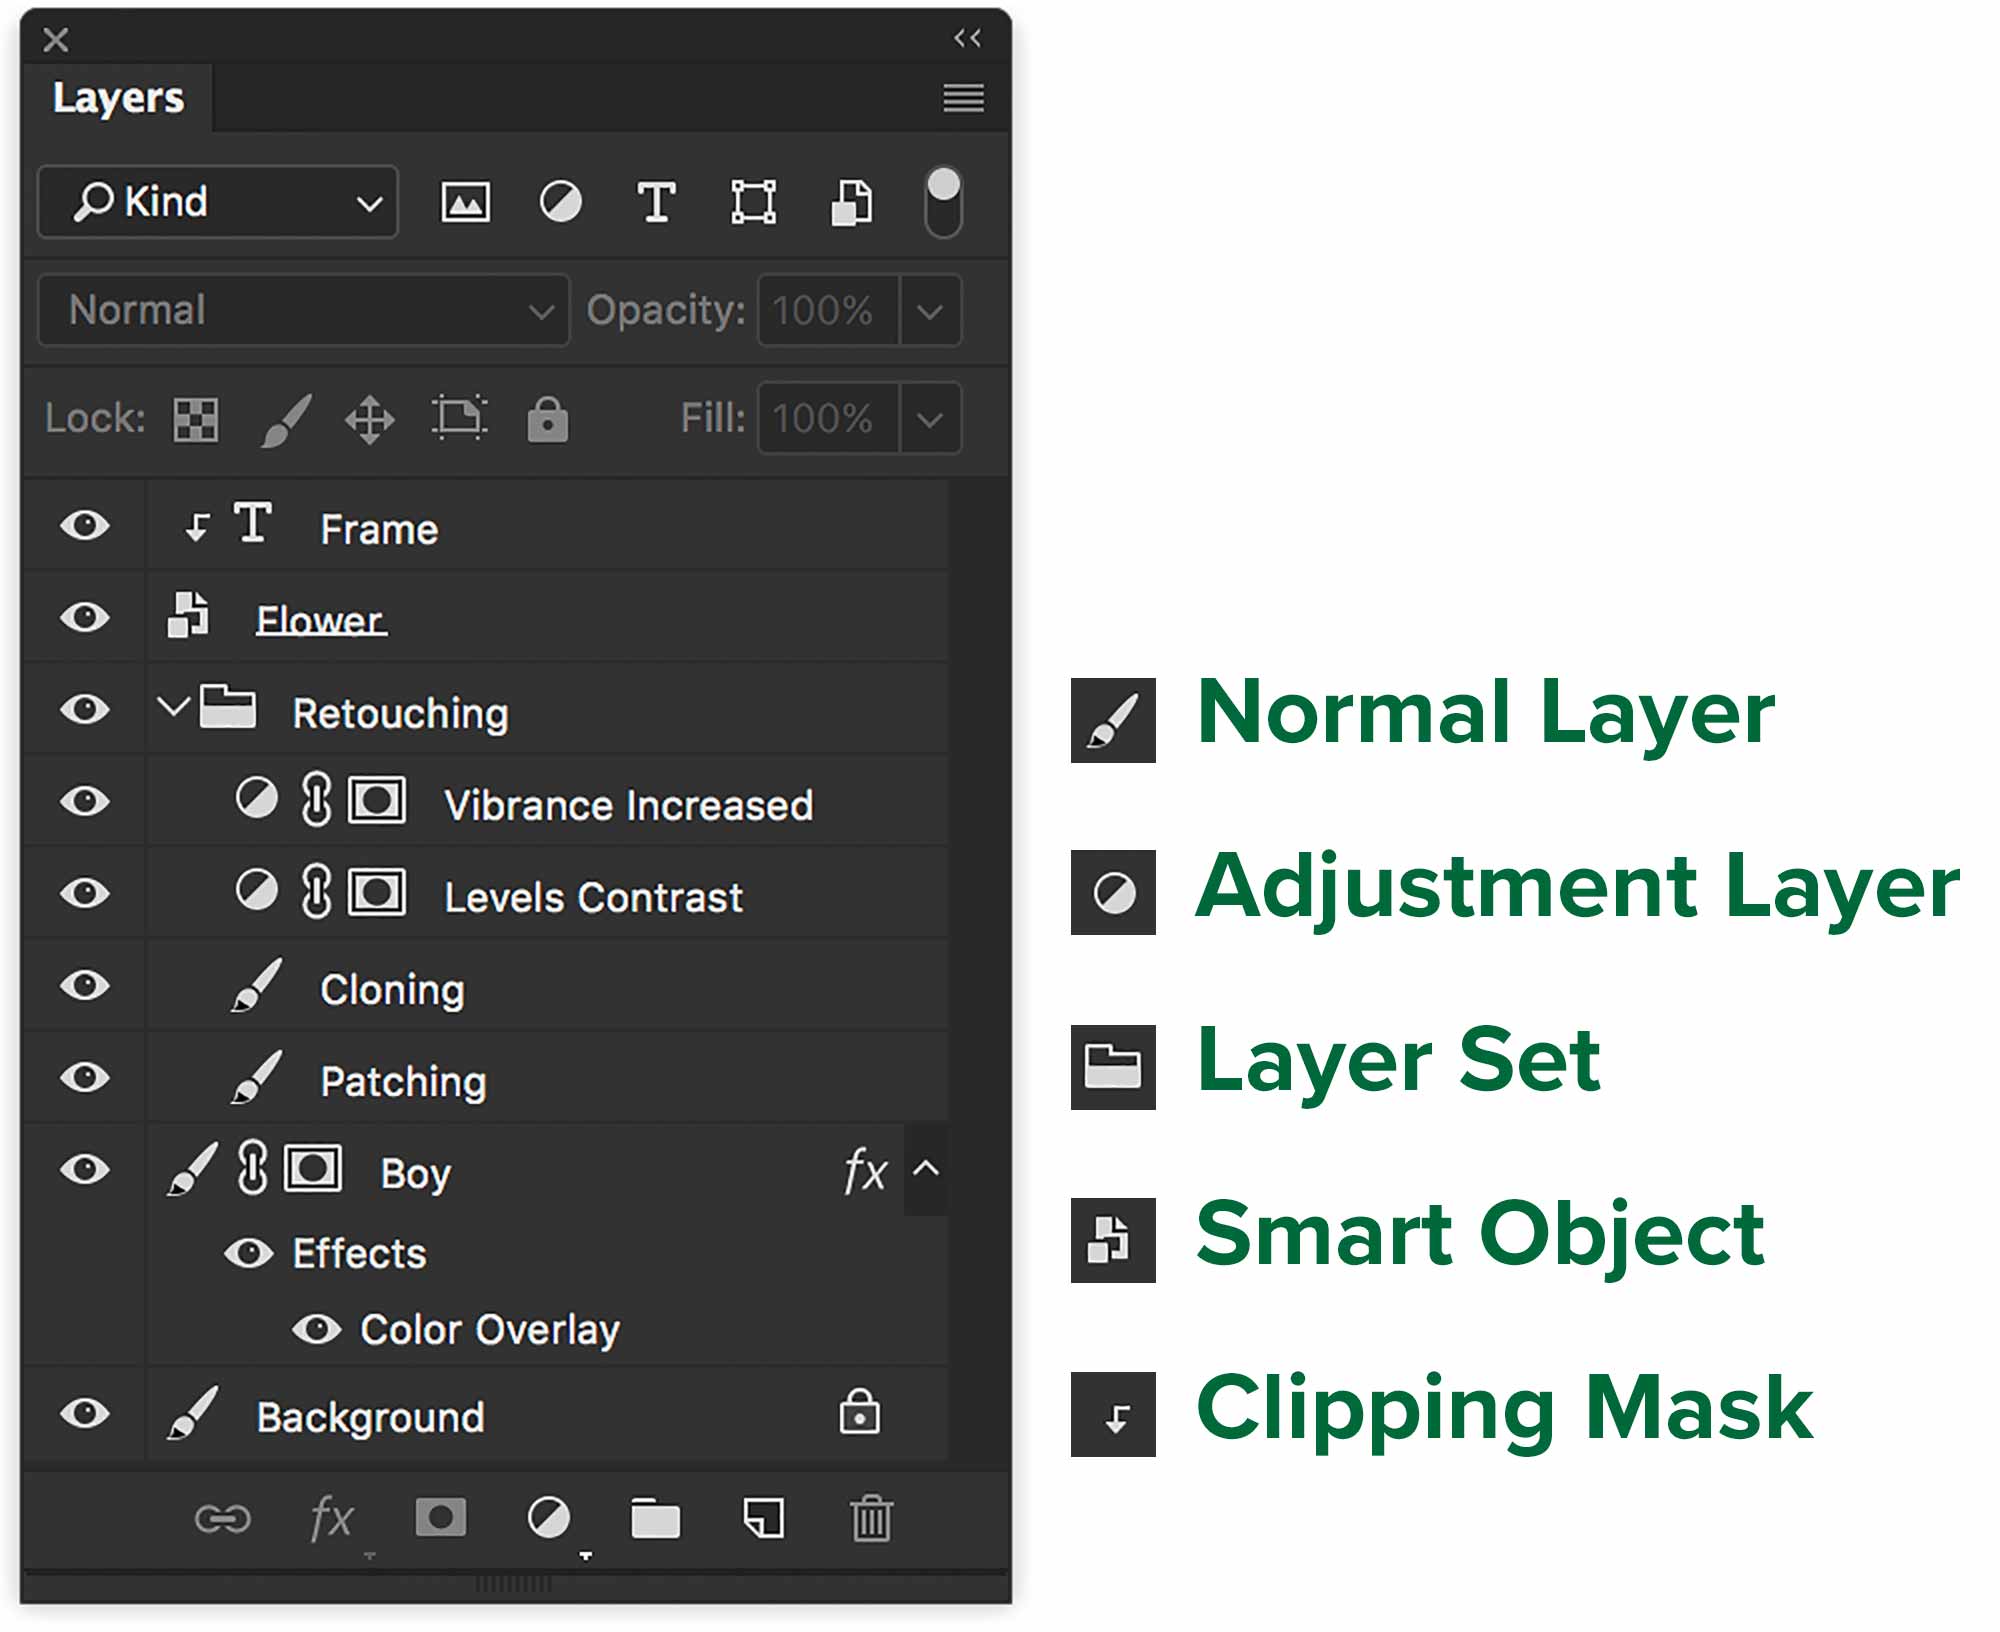
Layer organization and stacking order is a whole other area to master. Naming layers is important for your own work and even more for collaboration. This is a must-read if you want to respect industry-standard Photoshop etiquette.
Filter Layers
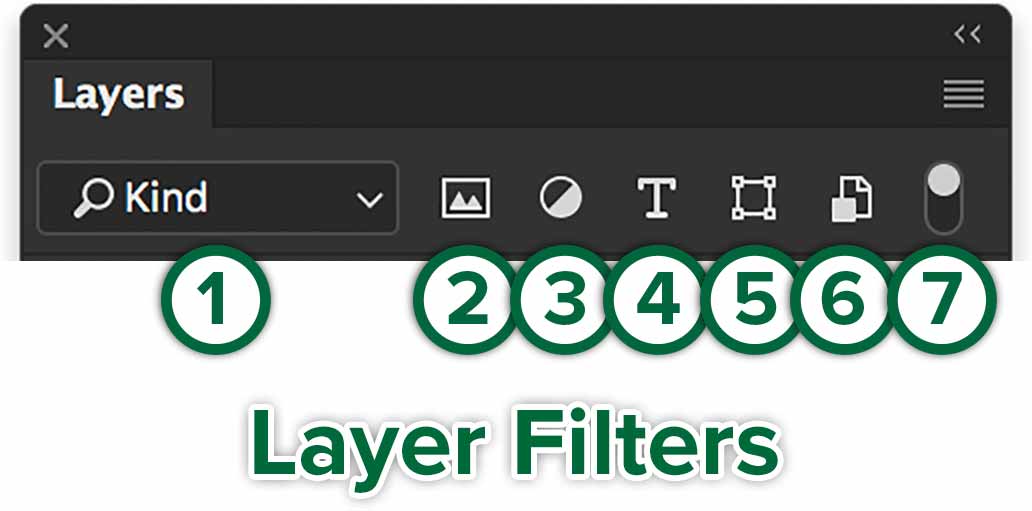
- Pick a filter type
- Filter for pixel layers
- Filter for Adjustment Layers
- Filter for type Layers
- Filter for shape Layers
- Filter for Smart Objects
- Turn filtering on/off
These buttons are especially useful when you have a large number of layers in your Photoshop file. You can click one of them to see only that type of layer. As an example, you can vew only Adjustment Layers.
This doesn’t turn on/off the visibility on the canvas. It only filters the layers in the panel.
Blend Modes
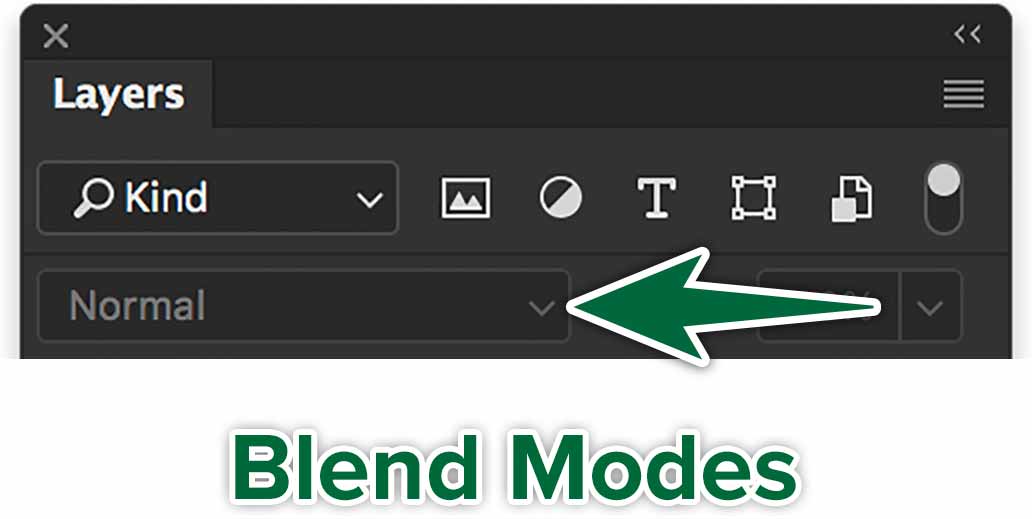
Blend Modes determine how the pixels on a layer above mix with pixels on the layer below. They can also be used with an individual tool. So, you can brush in a specific blend mode. This is Adobe’s detailed descriptions of each Blend Mode.
Locks
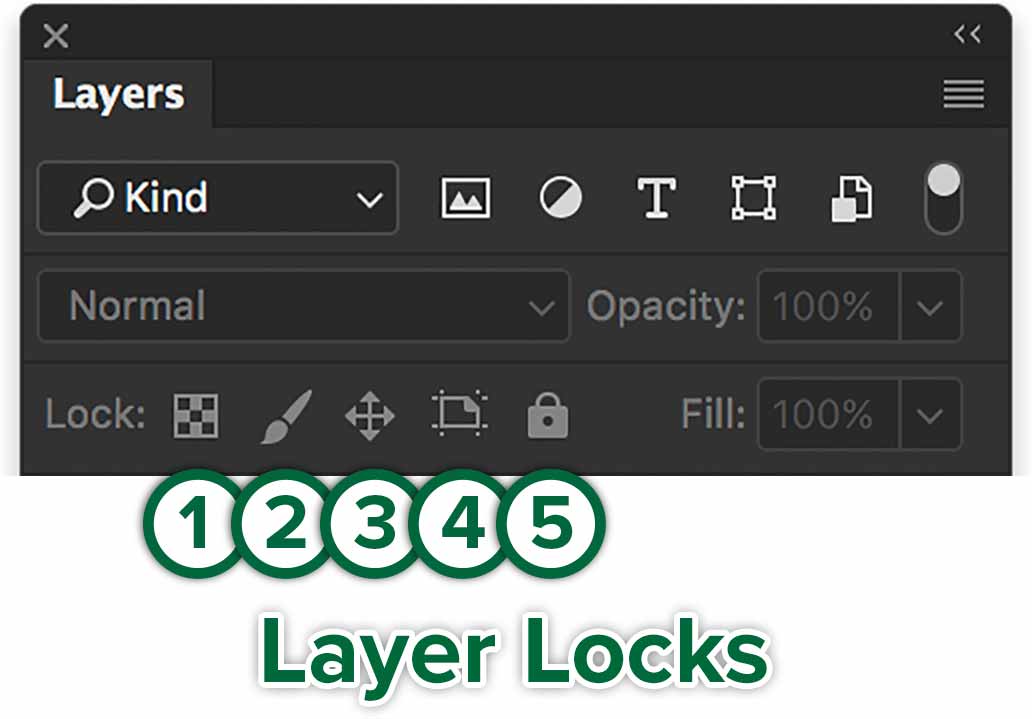
- Lock transparent pixels: When you paint, only pixels get painted. Transparency isn’t affected.
- Lock pixels: Where there are pixels, you can’t paint. You can move them.
- Lock position: You can’t move things with the Move Tool. You can paint them.
- Artboards: Prevent auto-nesting into and out of Artboards.
- Lock everything: You can’t paint or move anything.
These locks are different from the one at the bottom of the Layers panel. These lock the ability to move or paint a layer. The chain link at the bottom of the panel link layers together so them move together.
Opacity & Fill
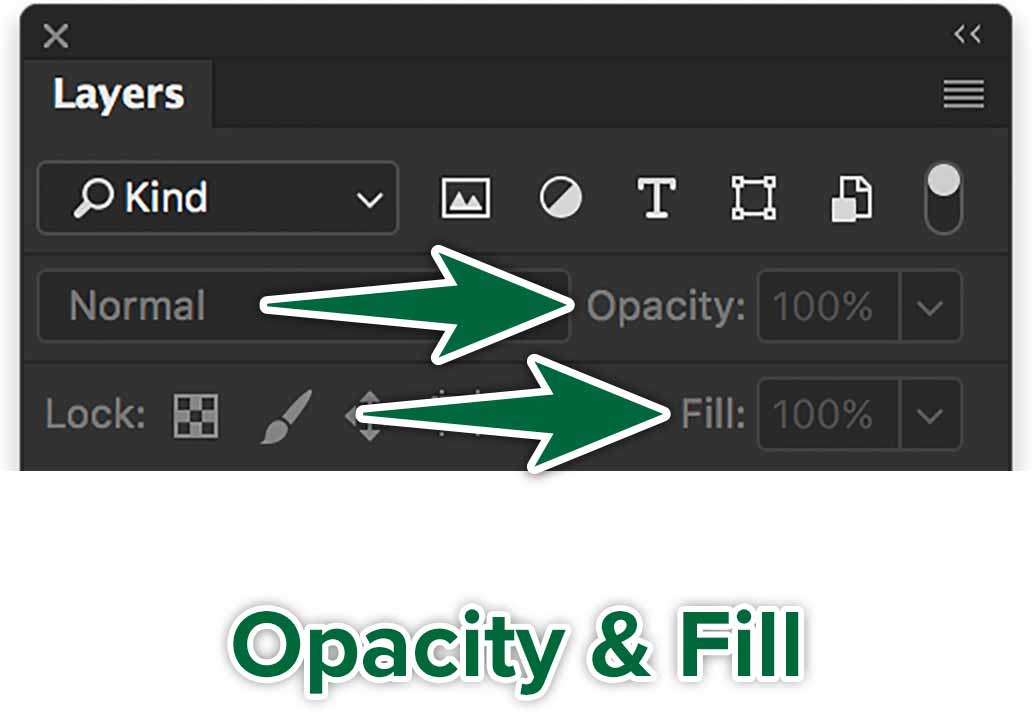
Opacity is transparency. Lower it and the contents of the whole layer become translucent or transparent.
Fill mostly works exactly like the Opacity control. The major difference is that it doesn’t affect effects. So, if you have Fill set to 0, the photo will disappear, but its Drop Shadow will show.
Bottom of the panel
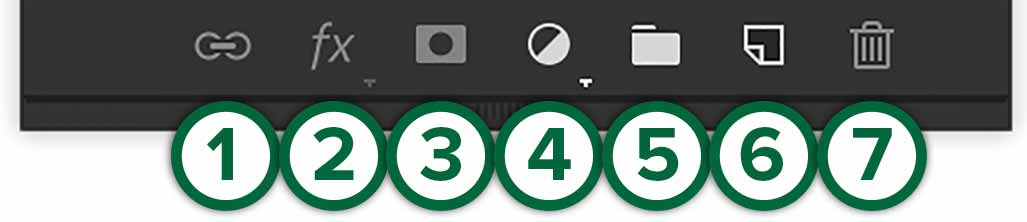
- Lock layers so they move together with the move tool. This doesn't prevent them from being painted on.
- Layer Effects, like *Drop Shadow*.
- Add a Layer Mask.
- Add Adjustment Layers.
- Create Layer Groups. These are folders to organize your layers.
- Create a new Layer. Option-click on it to name the layer on creation.
- Delete a layer. You can also simply target the layer, then use the Delete key.
Let’s Practice
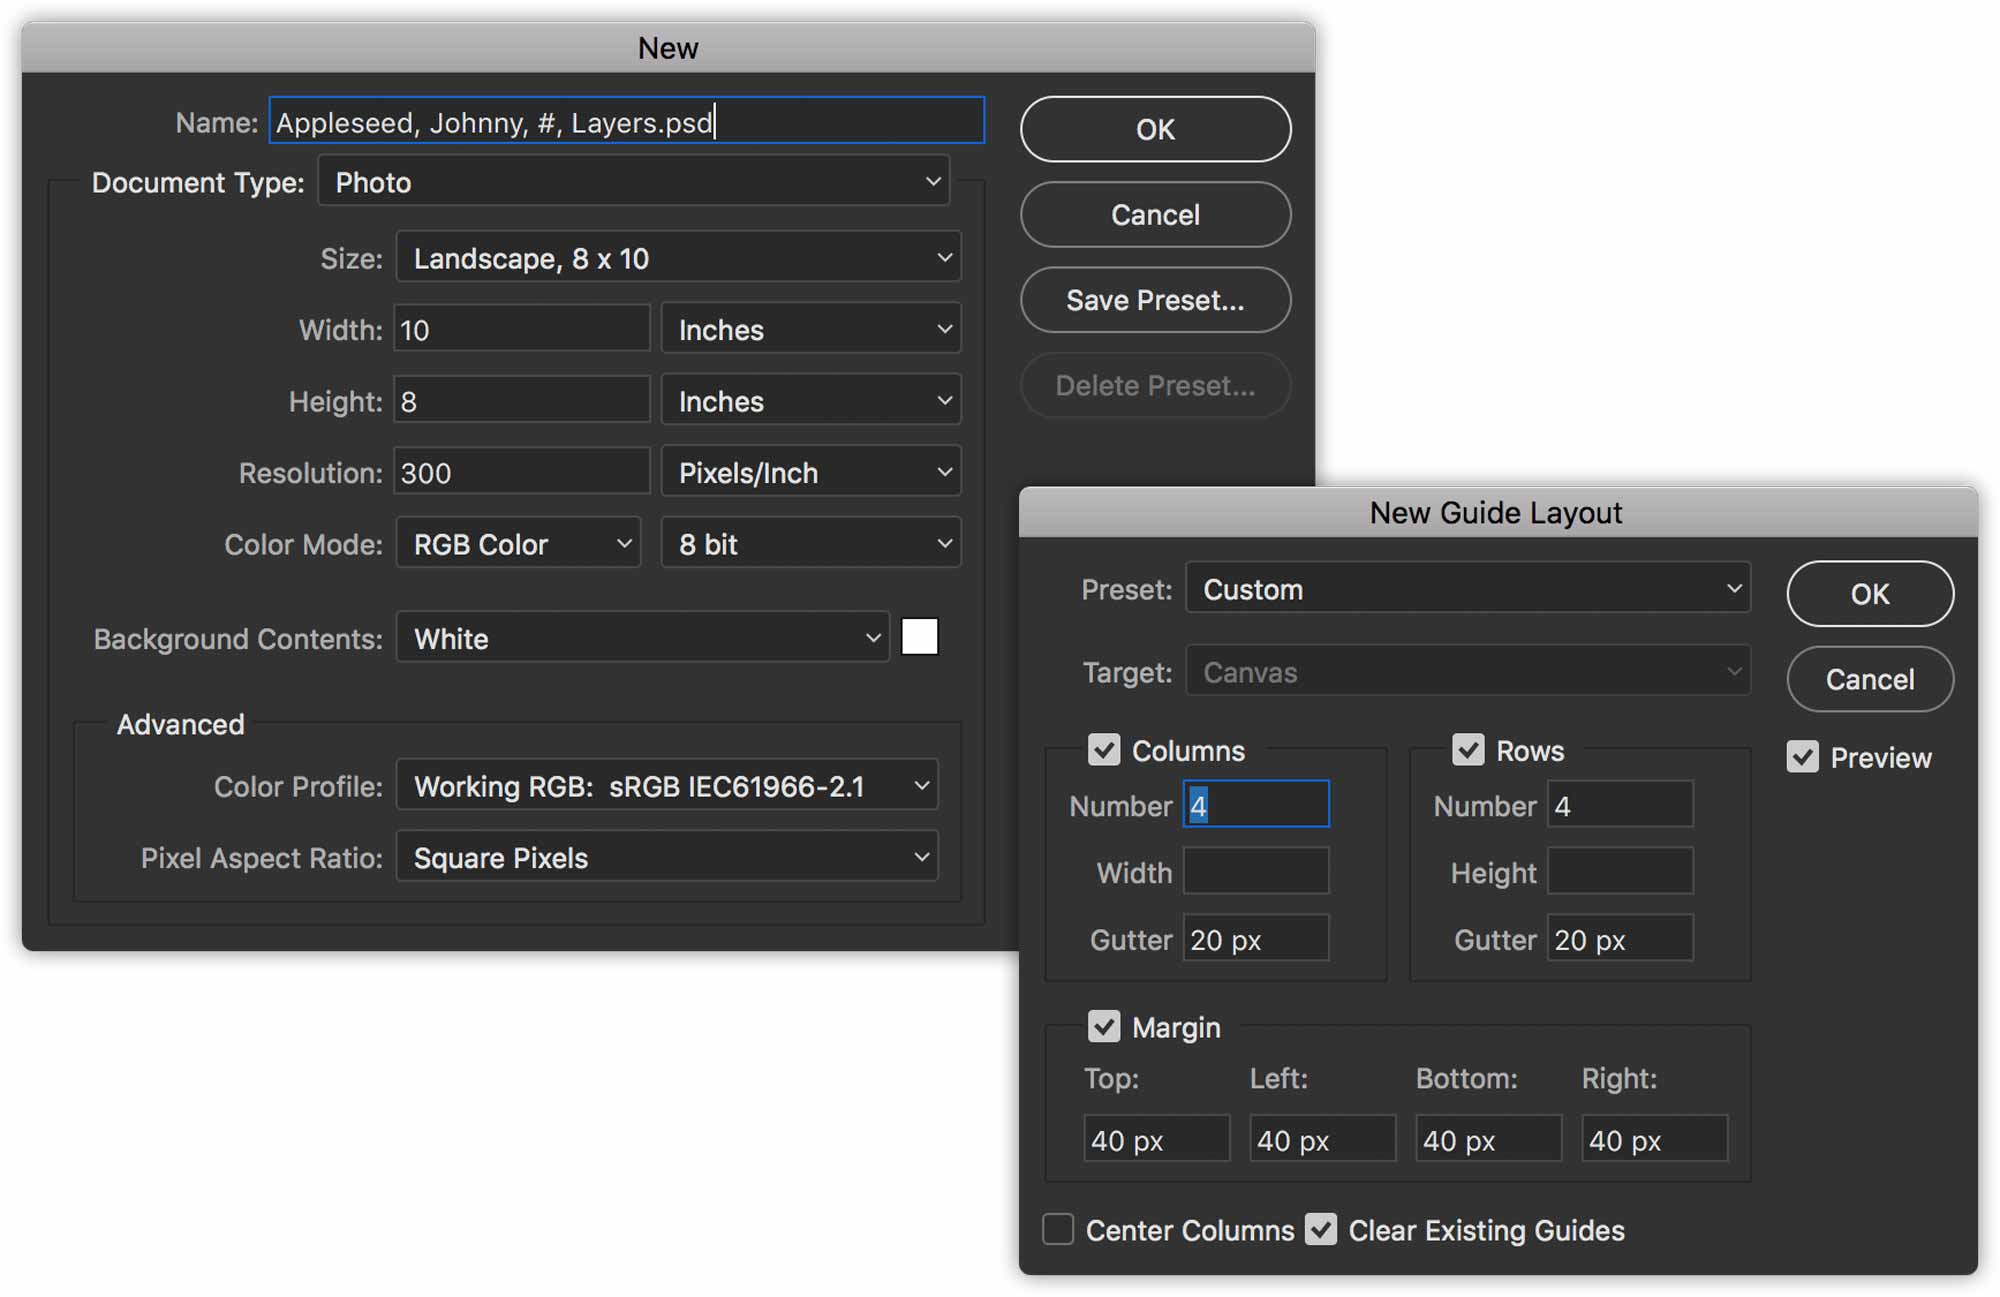
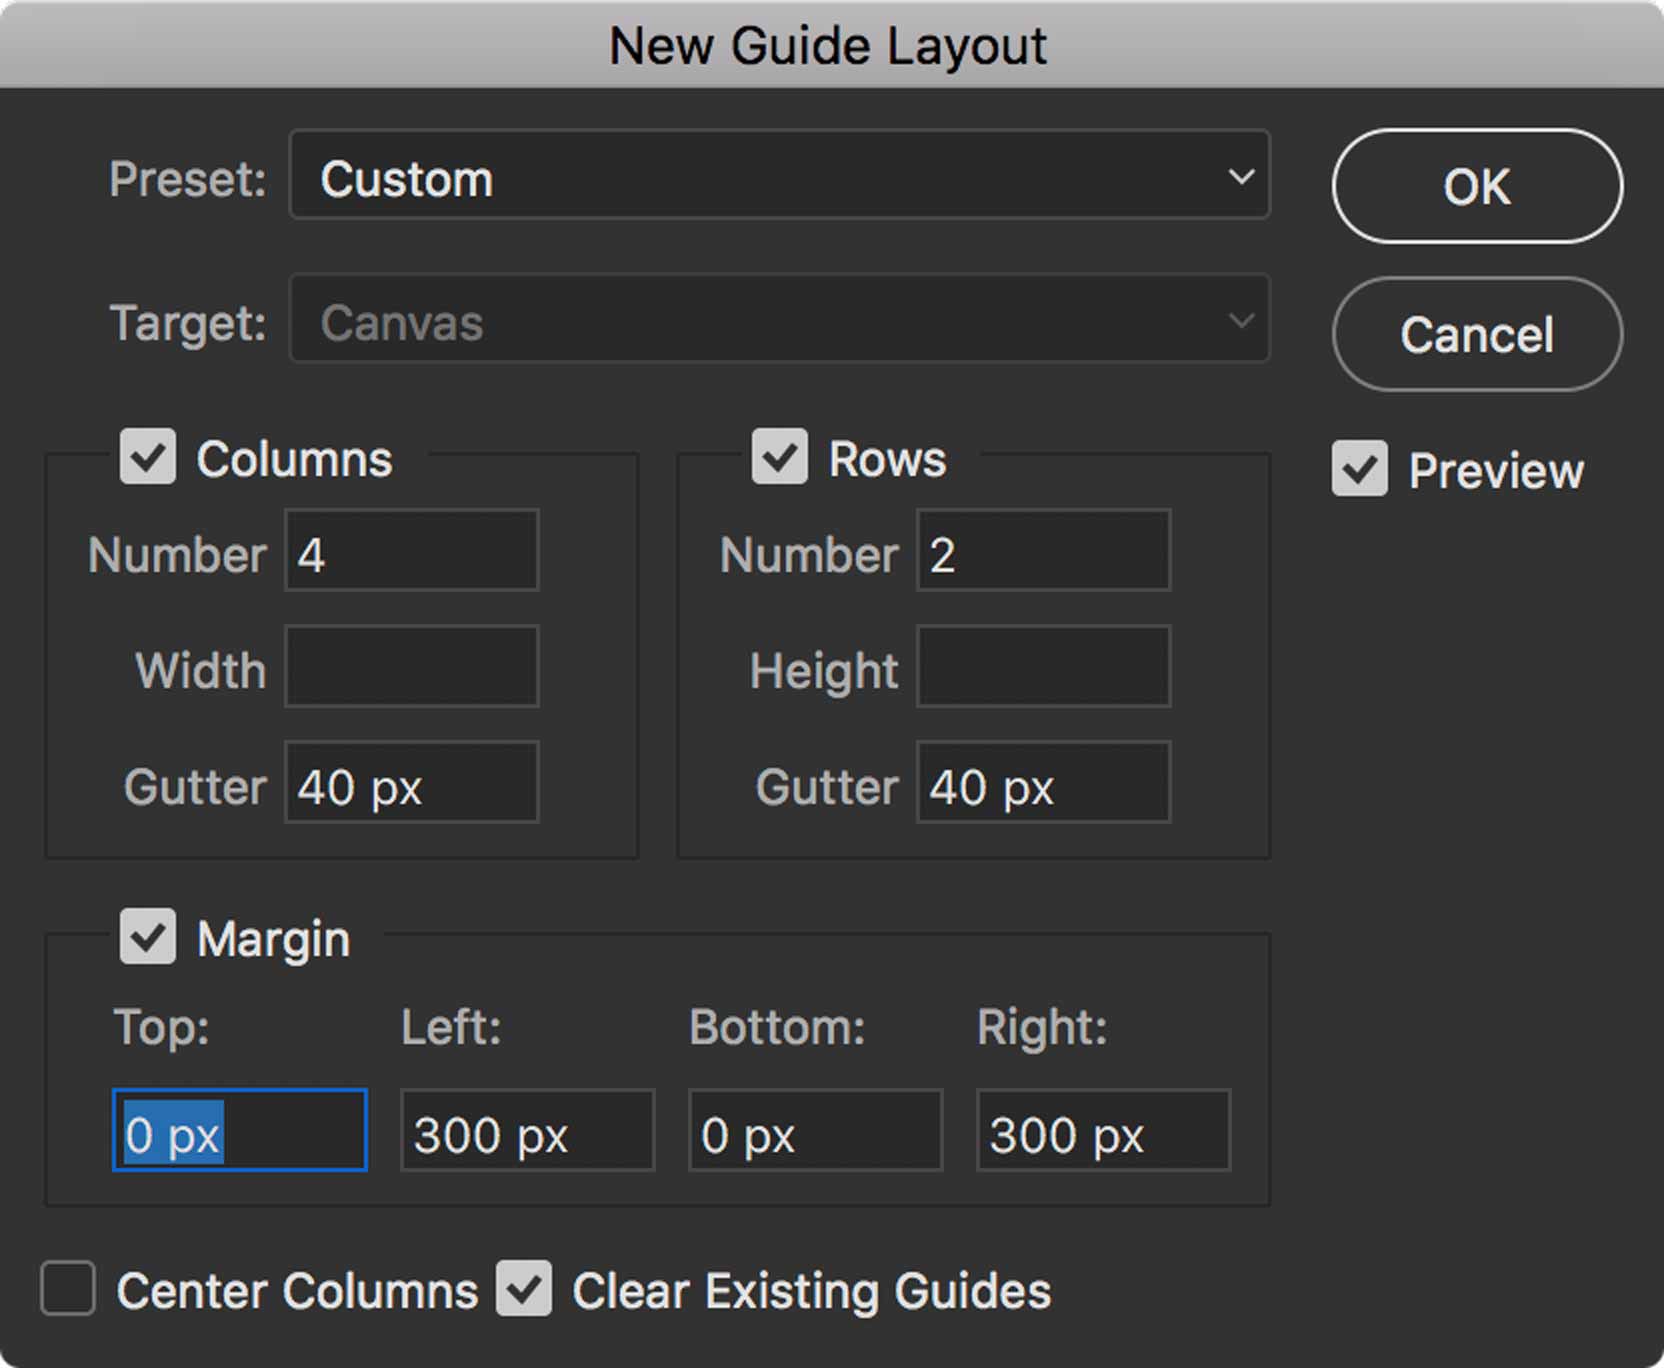
Let’s use each one of these types of layers. Create a new document, then add guides on your canvas with View > New Guide Layout..
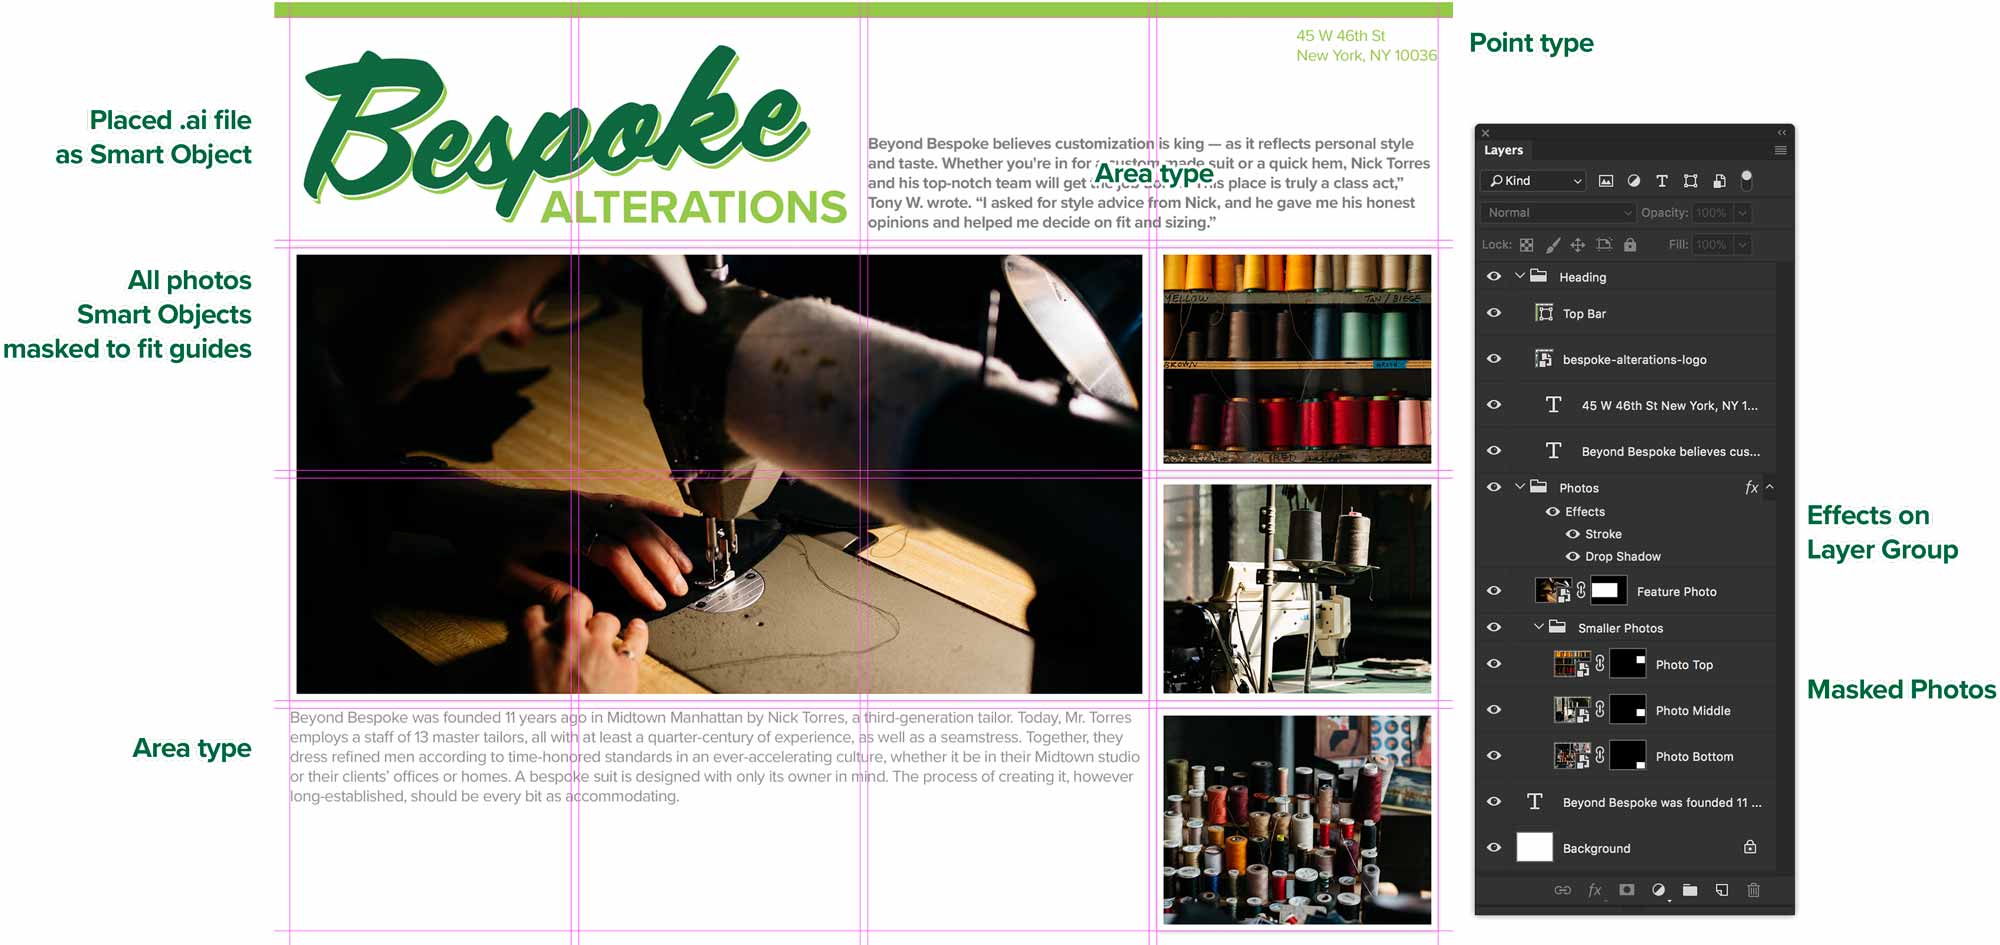
Use the guide below to build the layout as shown. Start by dragging each of the provided photos from the Finder into your Photoshop canvas.
Header type is Proxima Nova Semibold 9.5pt/Auto.
Body type is Proxima Nova Regular 9.5pt/Auto.
Grey colour is 0 / 0 / 0 / 70
Lime green is 50 / 0 / 80 / 0
Save this file as Appleseed, Johnny, #, Layers Practice.psd
Formative Activity
Let’s build the file below to get the hang of creating and managing different types of layers.
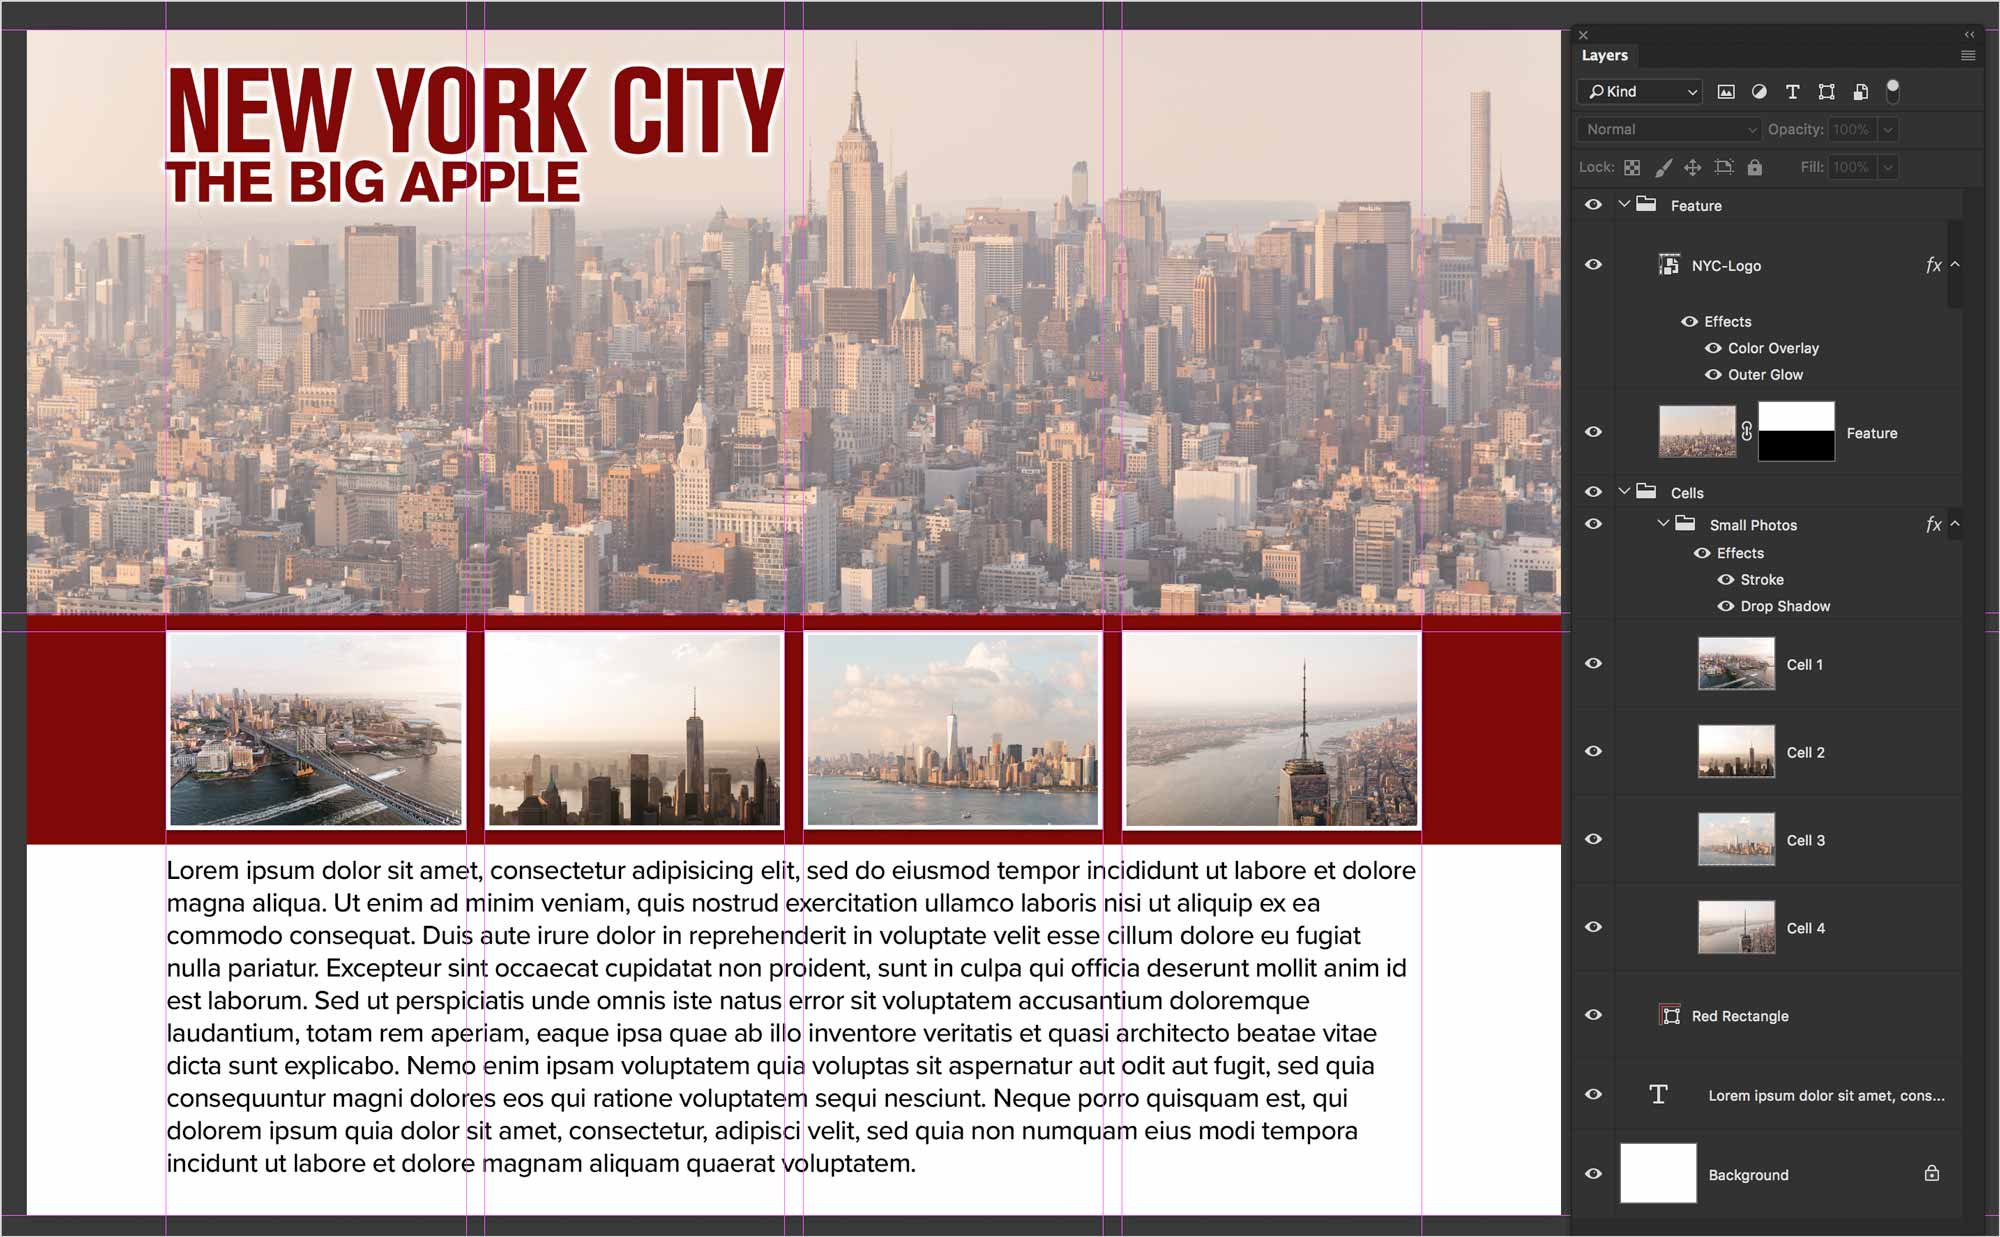
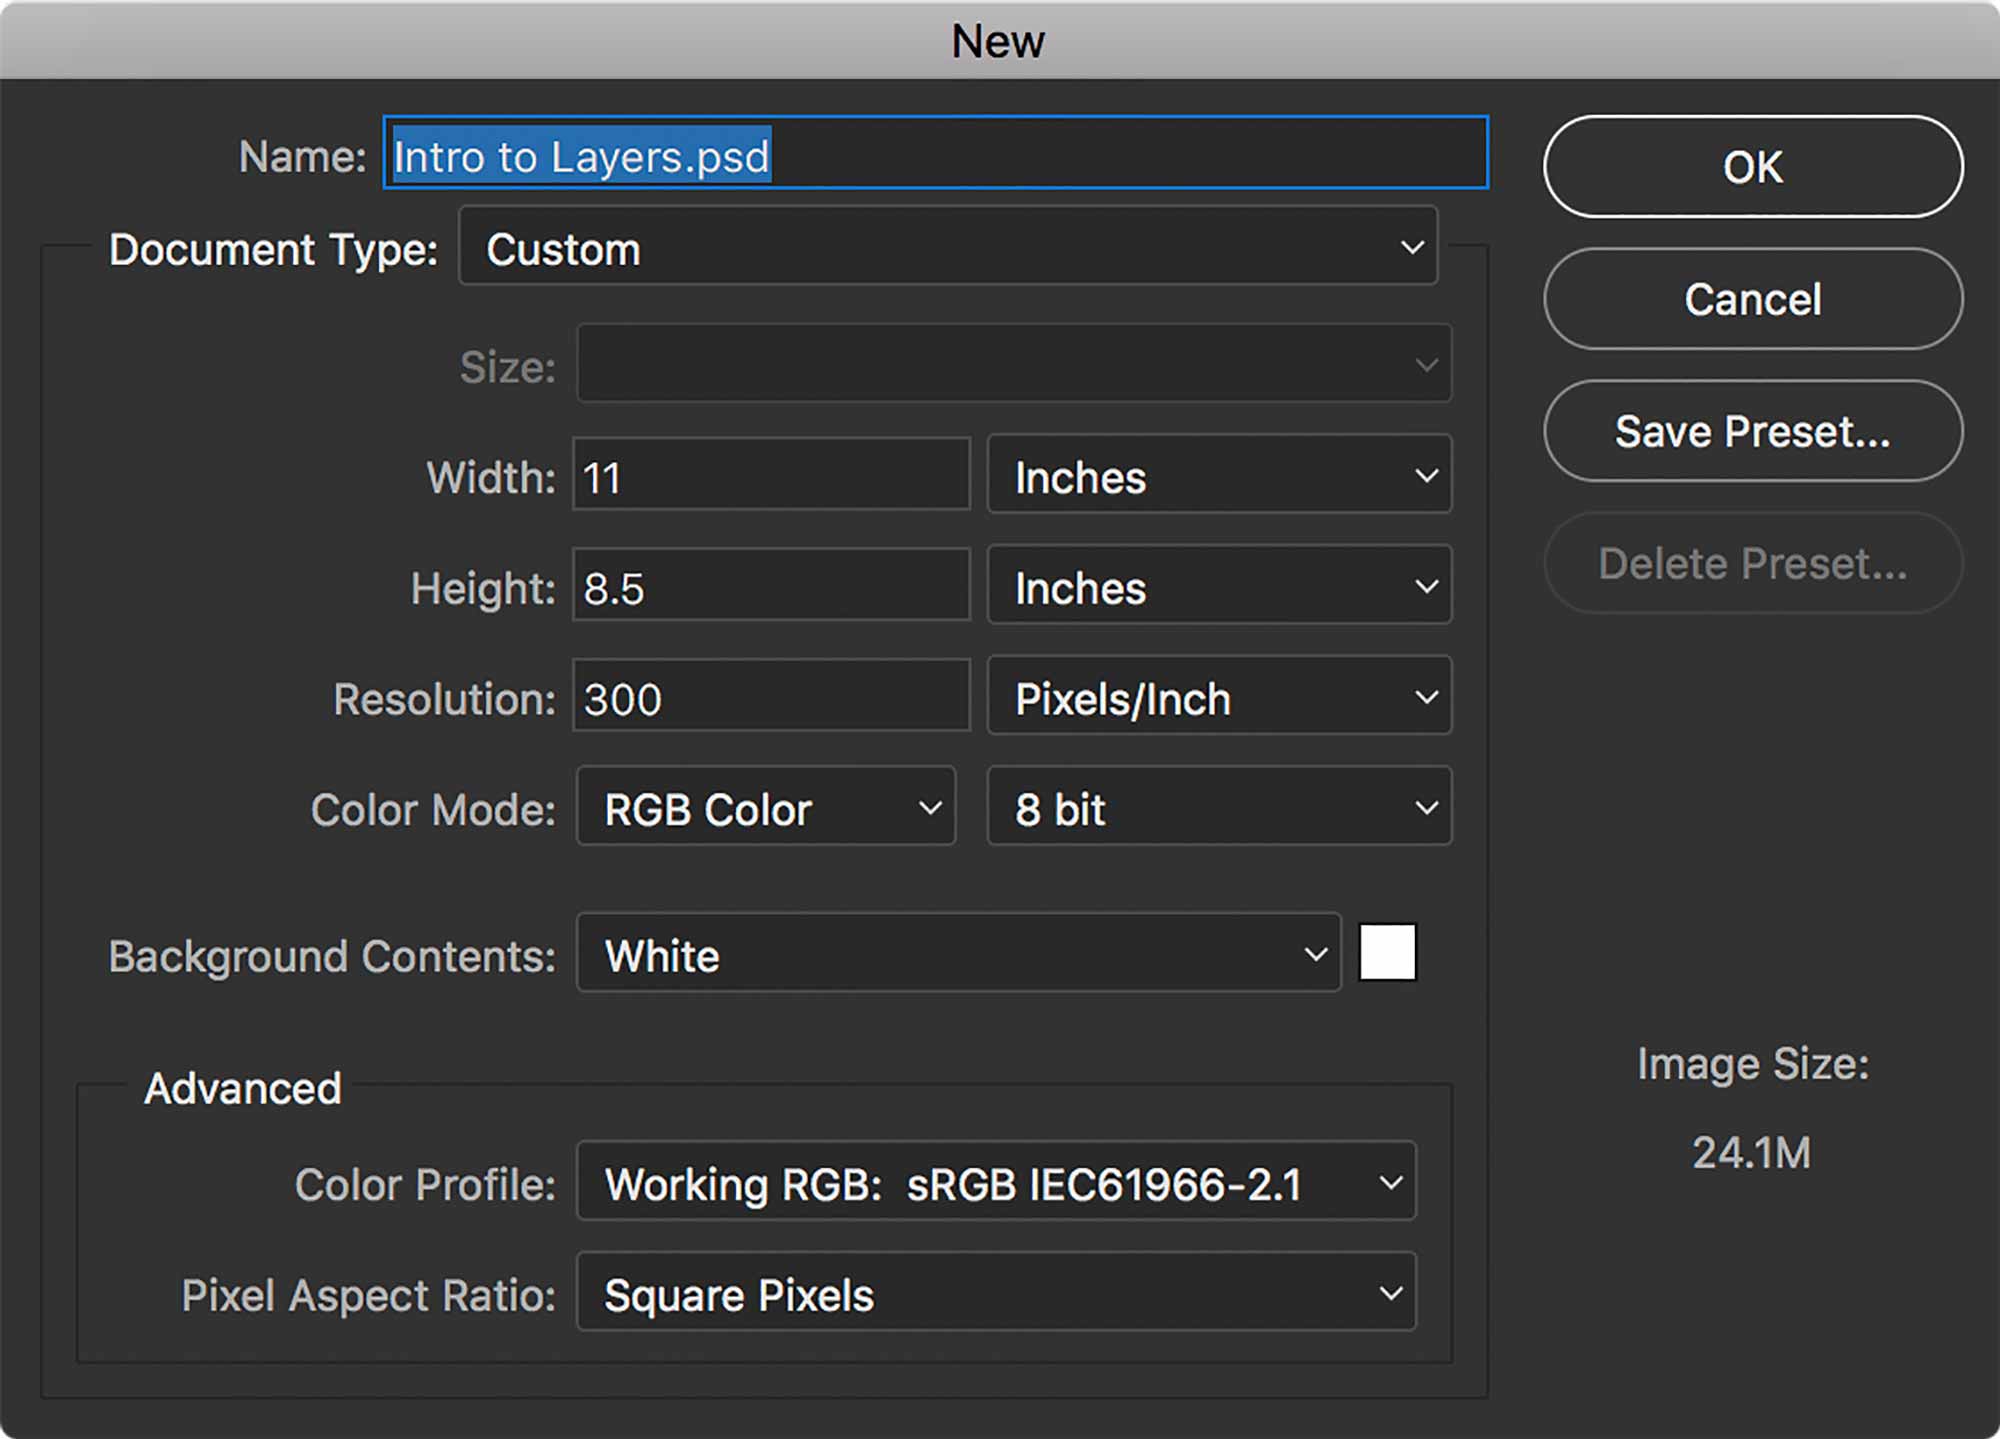
Start by creating a letter-sized landscape document.
We’ll drag the photos into our canvas so they become Smart Objects. This allows for non-destructive resizing.
We need to create guides to line up all of our content in a structured layout. Go View > New Guide Layout…
We’ll use the Free Transform command to resize photos to fit our grid. Make sure you import the provided title text. It’s an Illustrator document.

Use the vector rectangle tool to create a rectangle behind the four photos. We can use the fill controls in the Control Bar to choose a colour.
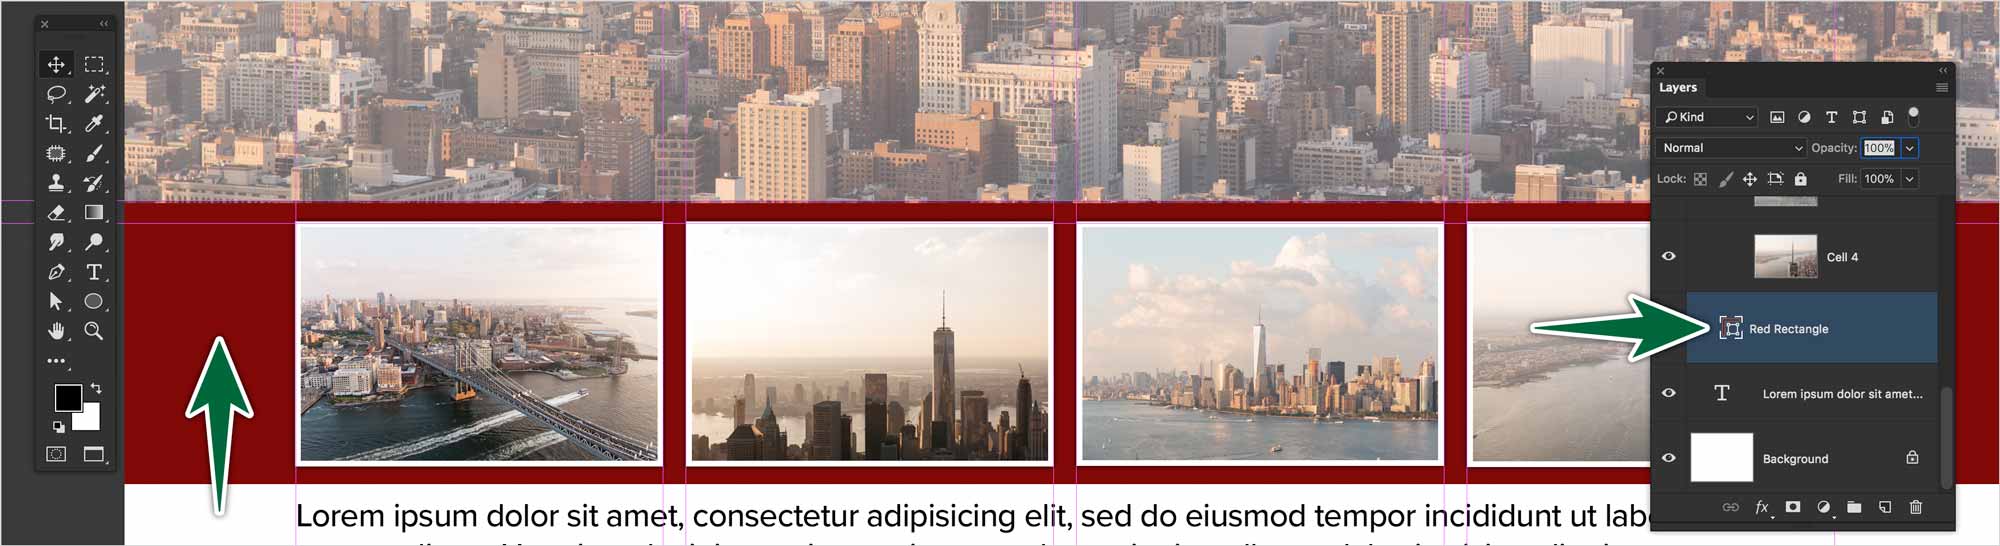
Red colour is 30 / 100 / 100 / 30
Body copy is Proxima Nova Regular 12pt/Auto (100% Black)
Next, we’ll apply a stroke effect to the four smaller photos. To do this, go to the Fx menu at the bottom of the Layers panel and choose Stroke.
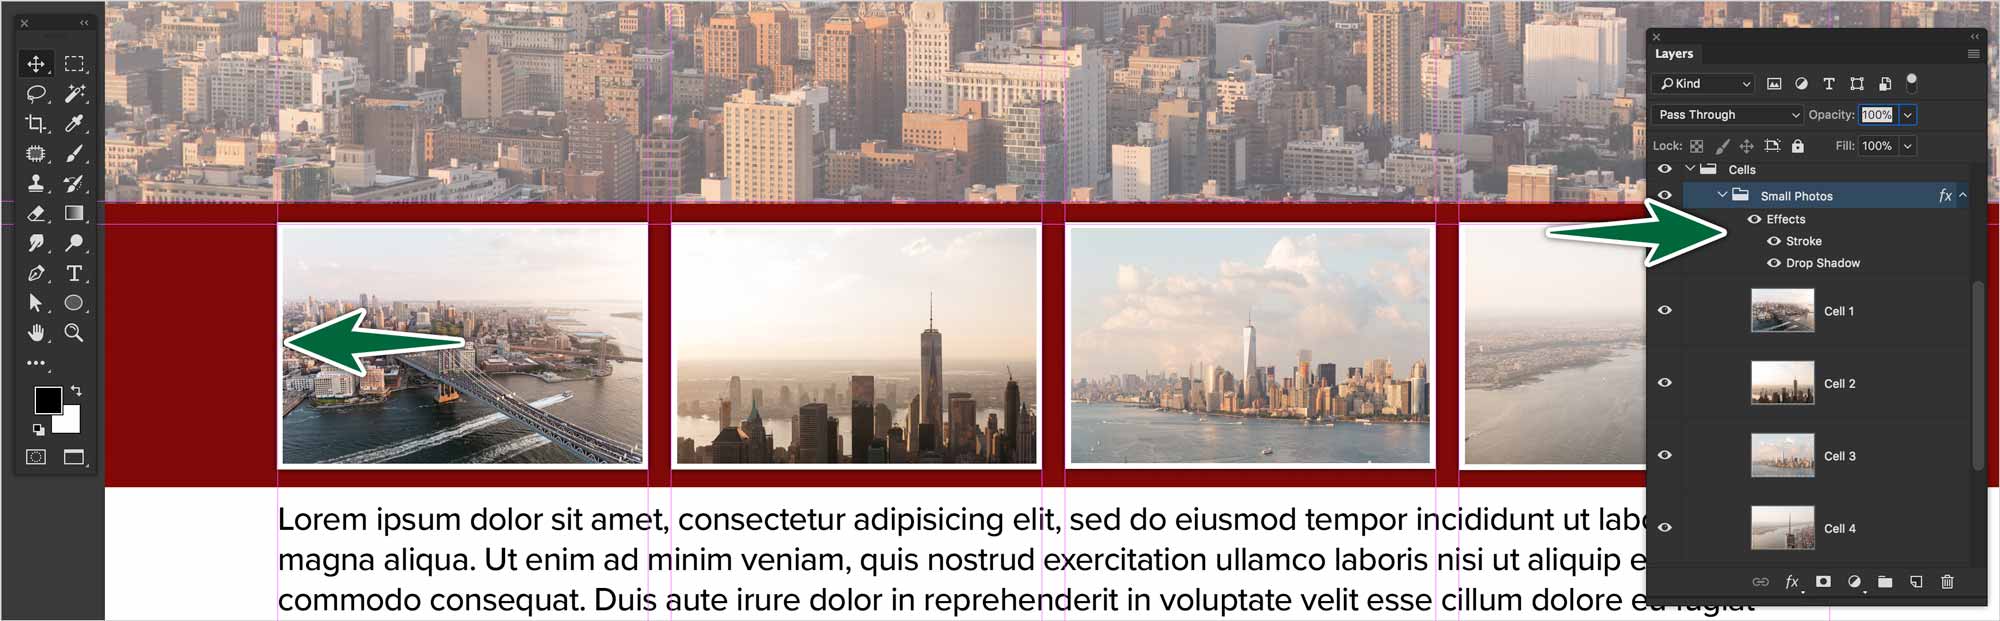
Add an 8pt white inside stroke to the photos. We’ll apply the effect to the layer group so it applies to all the layers inside it. Add a Drop Shadow using the default values (Click ‘Reset to Default’ at the bottom of the dialog)
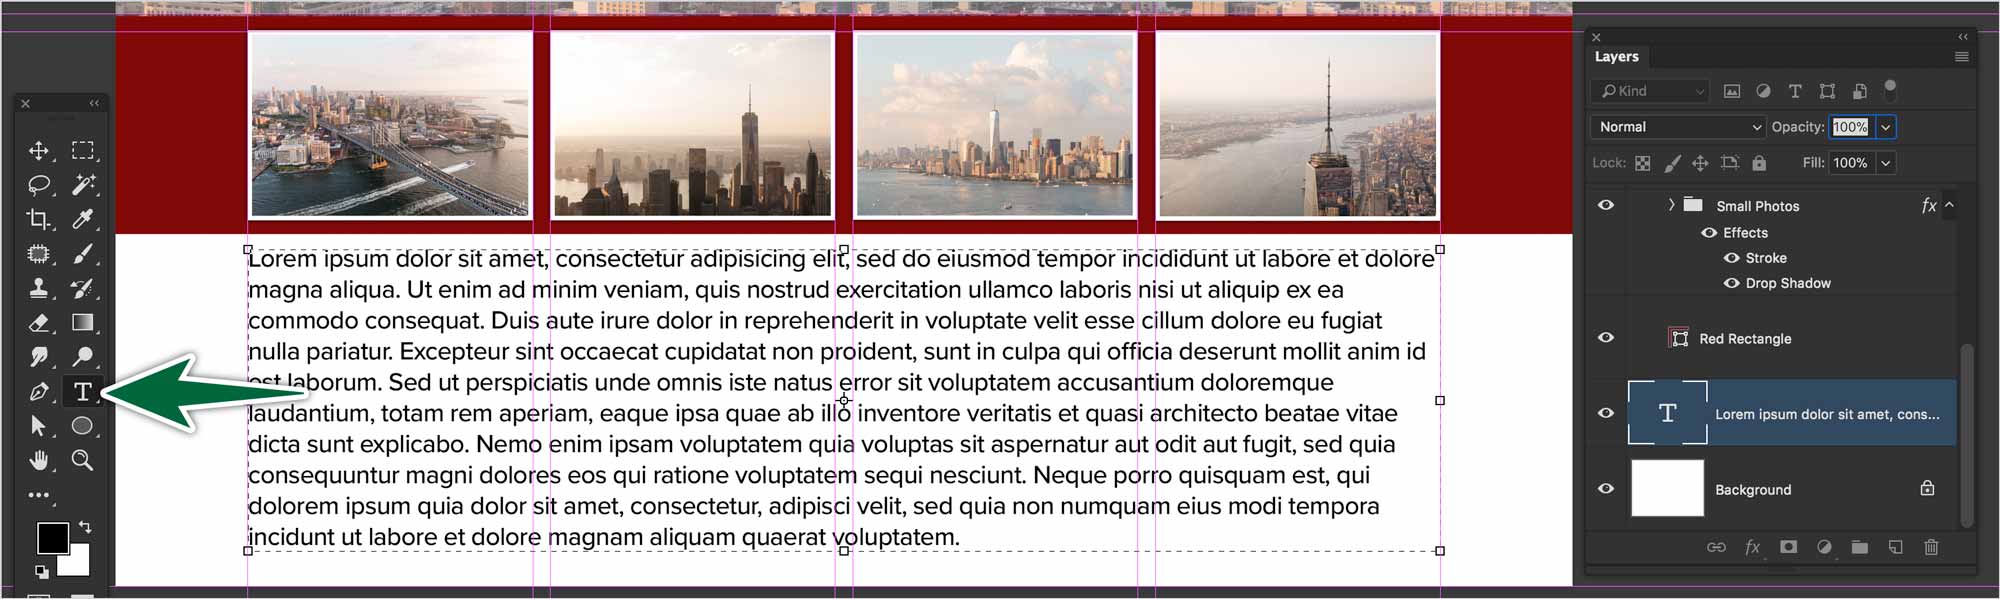
To fill your frame with text, you can go to the Type menu: Type > Paste Lorem Ipsum. You can change the colour of your type from the colour control in the Control Bar. Target your type tool and the type layer to do so.
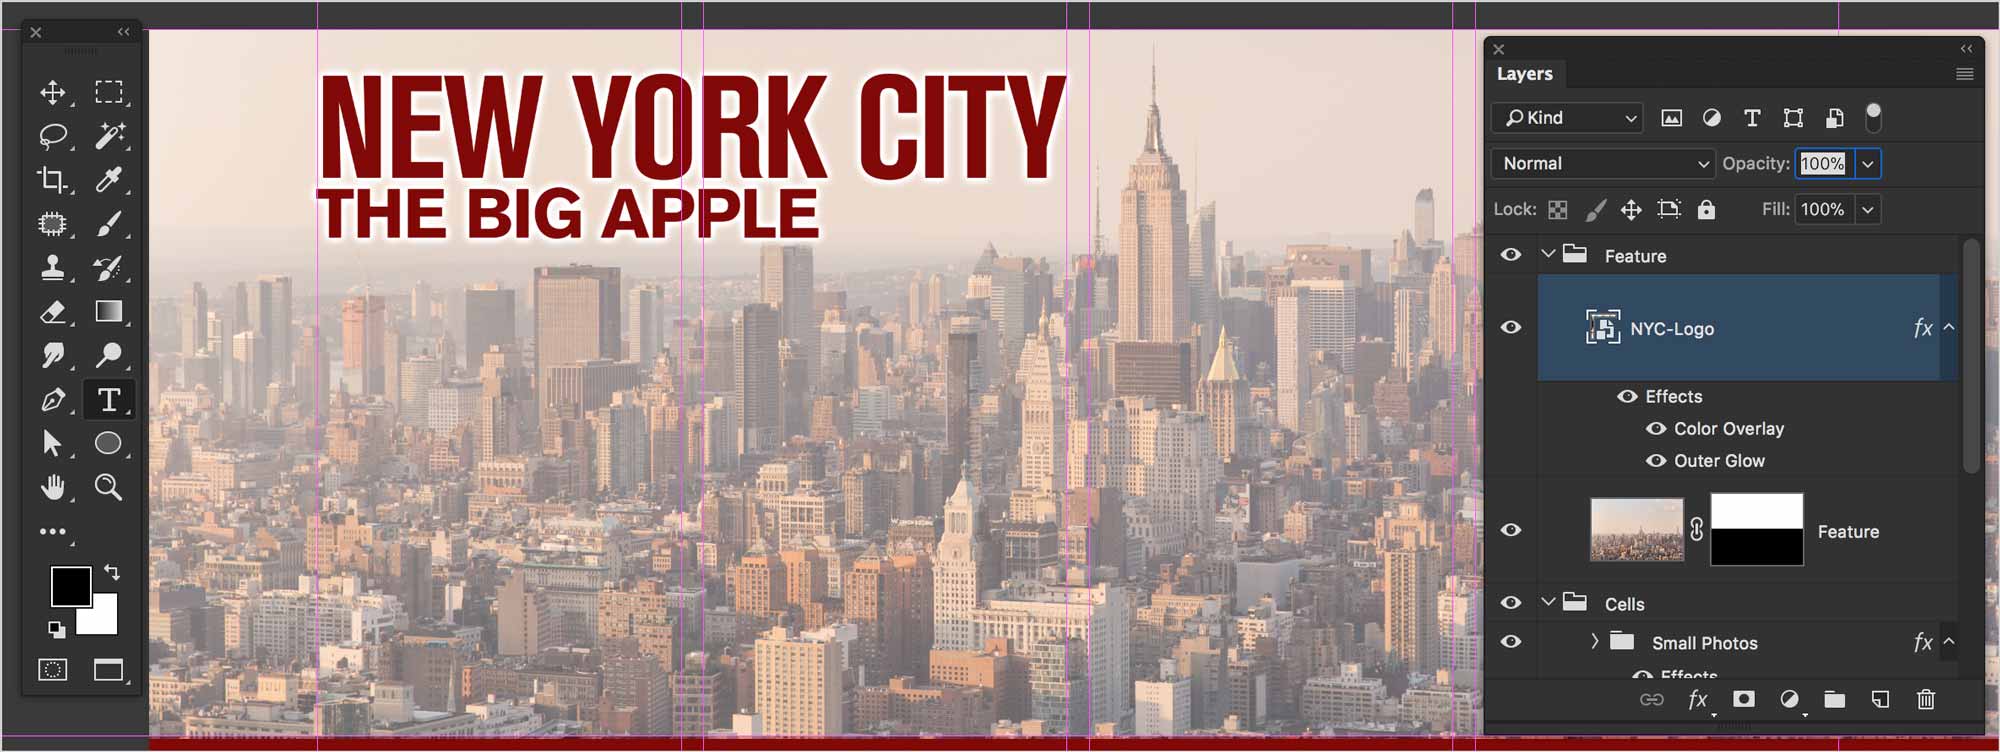
Lastly, we can make our title graphic stand out a bit more with Layer Effects. We can use a Colour Overlay and an Outer Glow or a Drop Shadow.
There we go. We’ve successfully used the Layers Panel to create a layout in Photoshop in a non-destructive workflow.
Make sure all layers are named properly.
