Topics
What is Compositing?
A composite is made of a selection of images with a theme. Multiple images are part of a seamless composition.
What Are Our Goals?
Goals, Conceptual
The goal of this assignment is to have you design a composition with a theme of your choice. You need to use your own photos. The composition can be memories of an event, a person in your life or some other personal topic. Feel free to take photos for this assignment.
The more specific you are about your theme, the better. For example, rather than simply choosing My Travels, choose The Grand Canyon, 2019 . The more specific you are with your choice of concept, the easier it will be for you to design your composition.
Your concept can convey a message. It could be an environmental, anti-gun, political, social or whatever else you can think of. It can be edgy; even controversial. Just keep it decent. The decency test is: would the College allow you to post it on their bulletin boards?
Goals, Technical
One of the principal goals here is to build a file in Photoshop which is easily editable. To this end, you must use most of these features in your file.
- Layers
- Use layers to organize your work and maintain editability. Make sure you name all of your layers meaningfully.
- Layer Masks
- Don’t erase. Ever. Use masks to show/hide content. Option-click on the mask to see it. Make sure it’s clean — no crumbs or unnecessary sloppiness.
- Blend Modes
- These dictate how one layer’s content mixes with the layer(s) below. These can sometimes be used in the place of a lowered opacity setting.
- Layer Effects
- Examples include drop shadow, colour overlay, and many more. Effects are editable. They’re accessible from the fx button at the bottom of the Layers panel.
- Layer Groups
- Organize your layers in named folders. Name all folders. Note that you can nest folders.
- Masks on Groups
- If you wish to mask all content in a group, you an add a mask to a folder.
- Effect on Groups
- The same goes with Effects. You can apply them to a group.
- Blending on Groups
- Ditto to Blend Modes.
- Adjustment Layers
- These are special layers which only hold an instruction to the layer(s) below to change somehow. Make sure to name them by what they do. ie: H/S Make Blue is a Hue/Saturation layer that makes things blue.
- Clipping Masks
- Clipping masks show pixels on the layer above only where there are pixels below. Option-⌘-G does the trick.
- Point Type
- Create a meaningful title for your composition. Just click and type. Do not drag a box. Feel free to add Layer Effects, Clipping Masks and the like on your text, but don’t over-do it.
- Vector Masks
- Vector masks hide content based on a vector path. This makes it that the mask has an absolutely sharp edge. It either hides or reveals. There are no grey areas.
- Smart Objects
- Use File > Place Embedded… to import a photo as a Smart Object. You can also right-click on a layer, then choose Create Smart Object. This will make that layer scalable without damaging the pixels. Just don’t scale it up much passed 100%.
Placing Images
Import images for your composition by using File > Place Embedded…. You can also drag their icons from Finder into you canvas. Do not use File > Place Linked…
My Example
When I was seventeen, I circumnavigated the globe on a tall ship. These are a few photos from my trip.
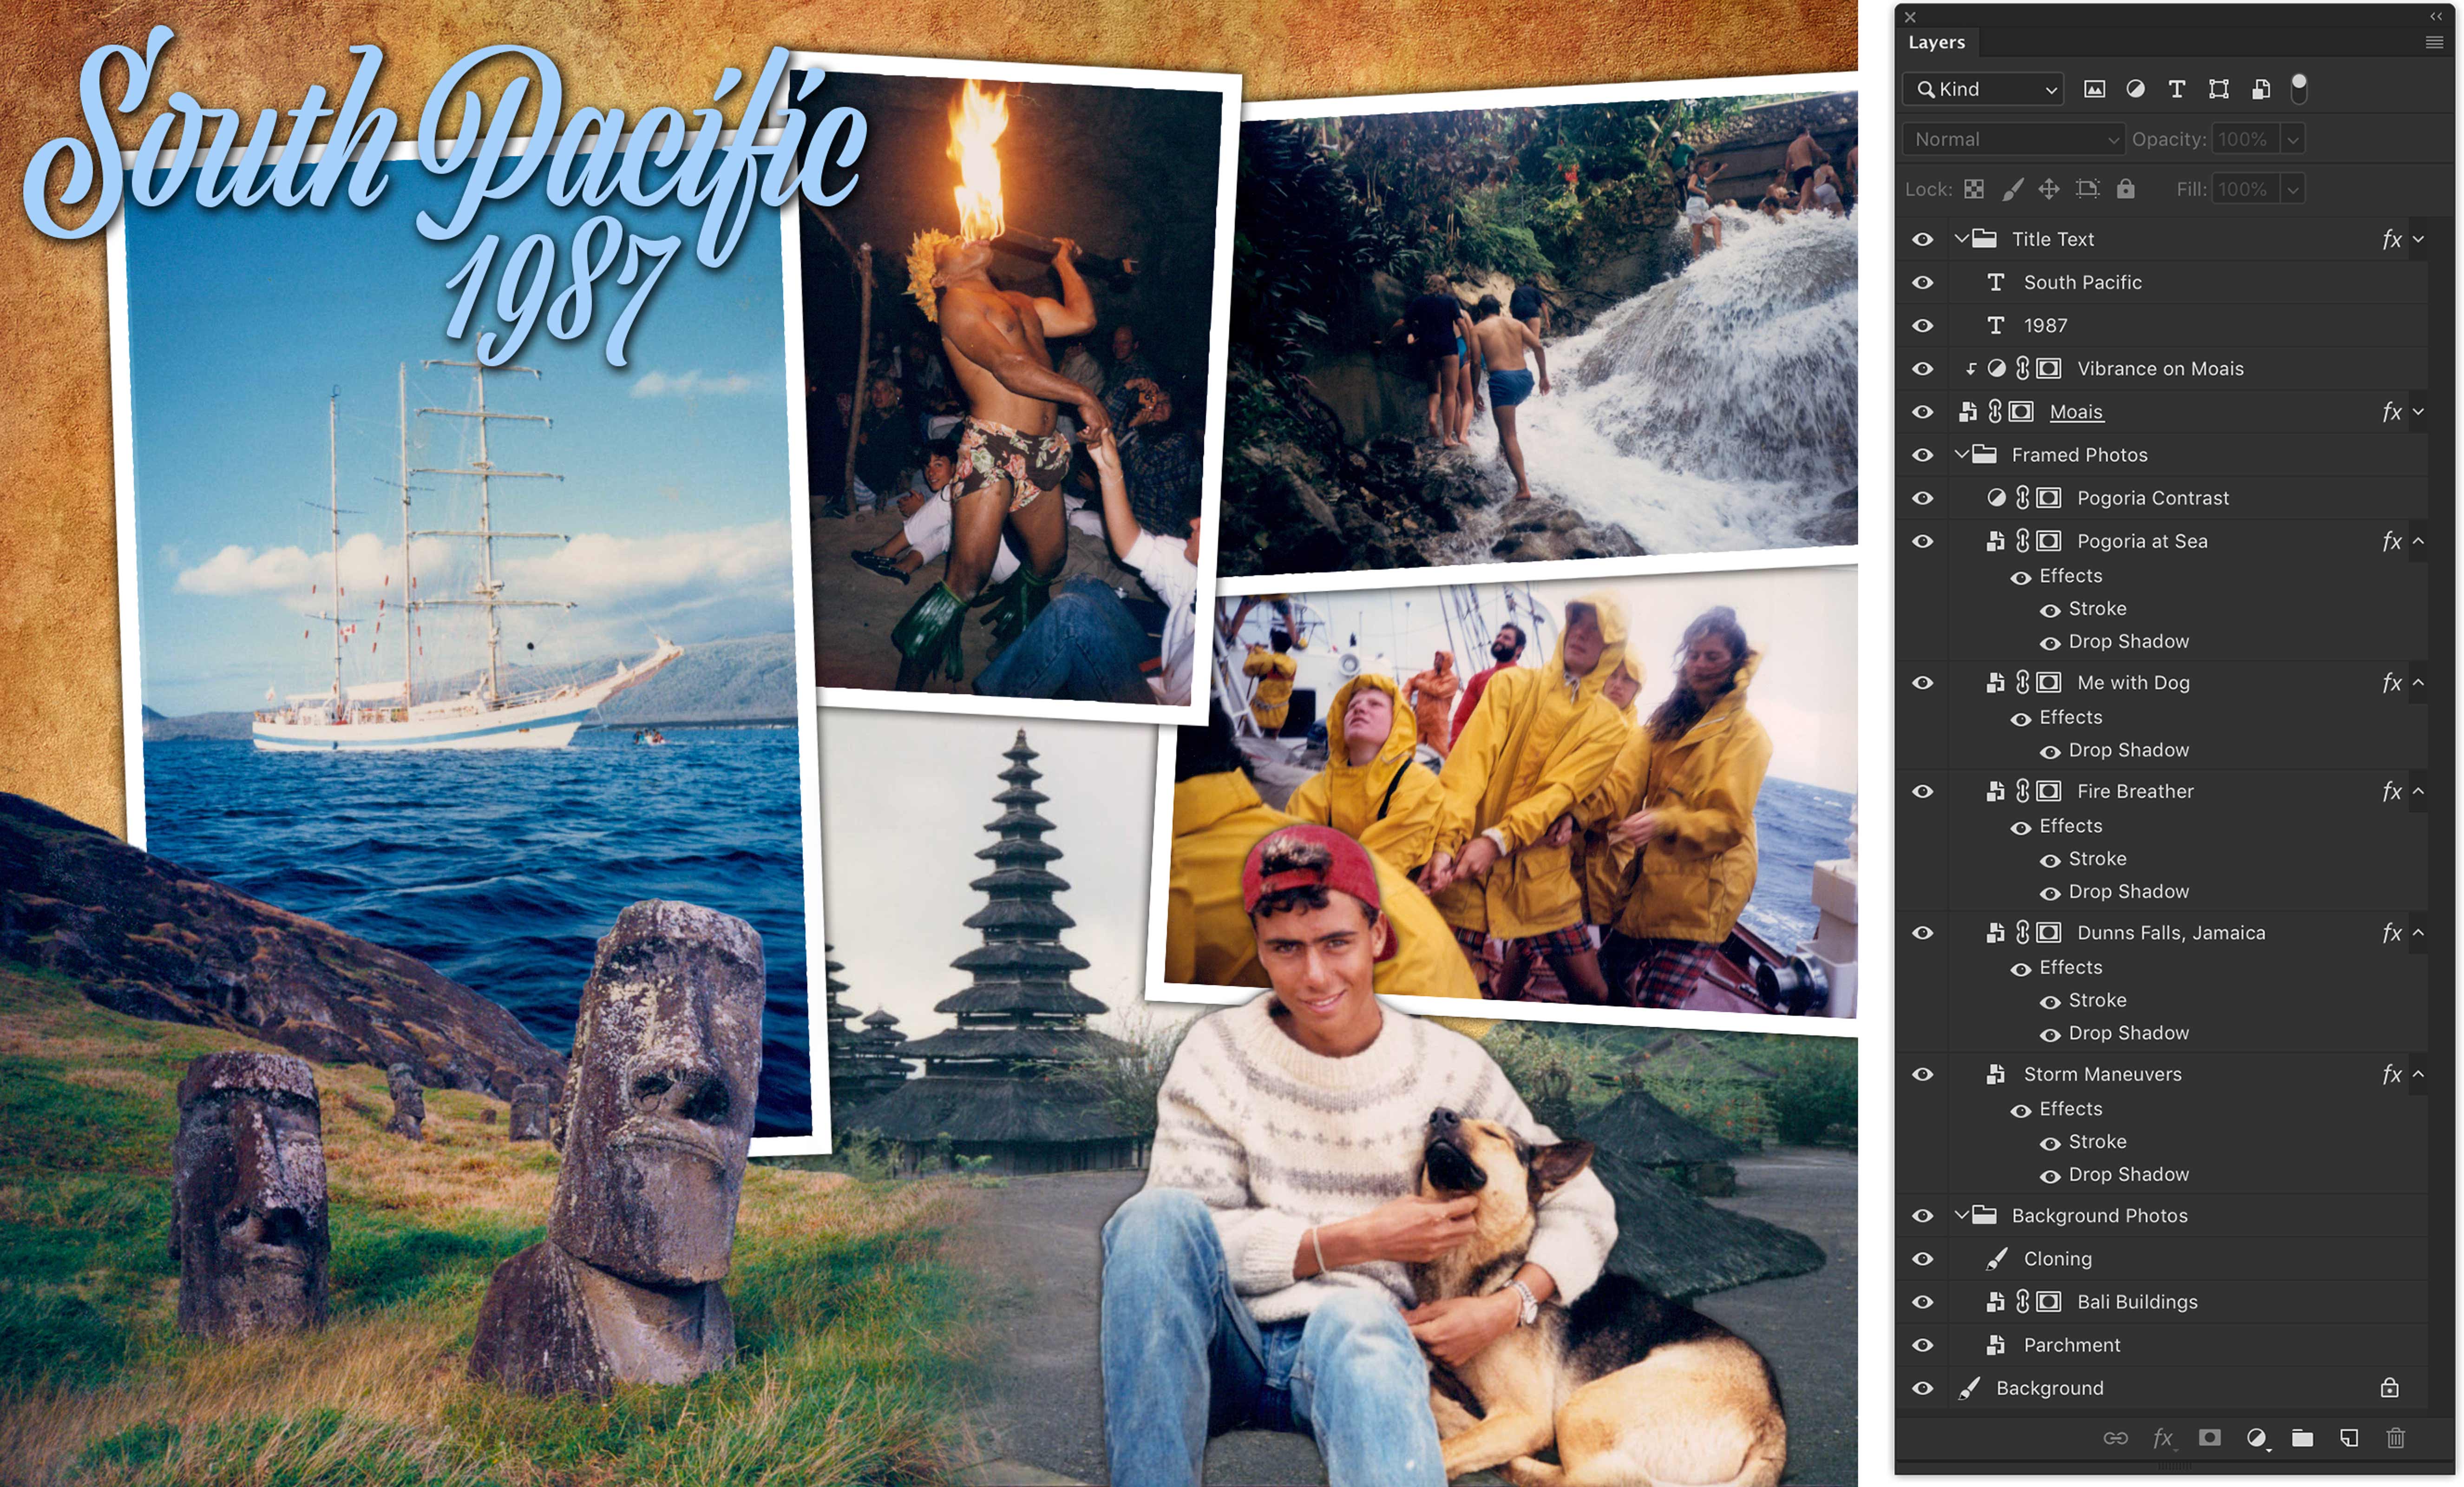
Note the various techniques used here.
- There's a parchment background behind the whole composition to ensure we don't see a transparent or white background.
- The photo of the temple is fades into the Moai photo seemlessly.
- The Moais are masked.
- I'm masked.
- Some photos have a photo frame built with a layer effect.
- The type in the title has a drop shadow to pop it off the photos.
- The overall composition visually revolves from top-left to bottom-right, which is a natural flow, in reading direction.
Make sure you achieve definition like this. Avoid making a muddy composition. That’s one where there’s nothing distinct. All the photos just meld together.
Your Assignment
Document Setup
Create a new Photoshop file that’s a minimum of 8” by 8” at 300 dpi in RGB. You can make it rectangular if that better suits your content and your theme. Landscape or portrait are both acceptable. These dimensions ensure that the file will be large enough to print for your portfolio. Choose one of these three formats:

Content Restrictions
- You must have a minimum of 5 photos in your composition.
- You can have vector content. This can be created right in Photoshop. It can also be placed as a Smart Object from Illustrator.
- Leave your type live. Use only TypeKit fonts.
- Image choice is restricted to your own photos.
Source Images
You can take your own photos. Use only your own images for this. It would really make your composition unique and your own.
