Topics
When you create lists in InDesign, each bulleted or numbered item is a paragraph. Numbered lists aren’t only numbered; they include lists with arabic letters or roman numberals. Each item gets its bullet or number automatically. You can’t select the bullets or numbers; nor can you search them. They’re kind of virtual.
The best practice is to create list from within a paragraph style. Creating them manually causes difficulty in editing. A list has text alignment, an amount of left indent, first line indent and a tab position.
By default bullets and numbers inherit their styling from the paragraph they’re in. You can, however, create a character style from within the paragraph style to change the appearance of the bullet.
Lists can become complex. You can create multi-level lists which have multiple levels of indenting. They can have custom bullet glyphs. Text styling can vary by level. You can even have paragraphs within a list that don’t have bullets.
Units of Measure

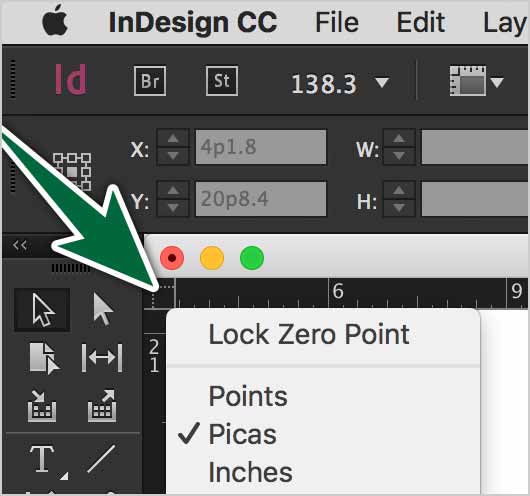
Before we get started with formatting lists, you should make sure you’re working in Picas. Picas and points are a smaller unit of measure. This makes it that you can nudge measurements in very small increments. Aside from that, we should be working with picas in print.
Formatting Tips
When formatting lists, hanging punctuation is the best way to go, as shown in the middle option below. Outdented formatting is a rarely used option. It looks clean, but it means you need to indent everything else on the page, which is annoying to manage.
The first example is unformatted and to be avoided. The bullets get lost within the text. It’s even worse with number lists.
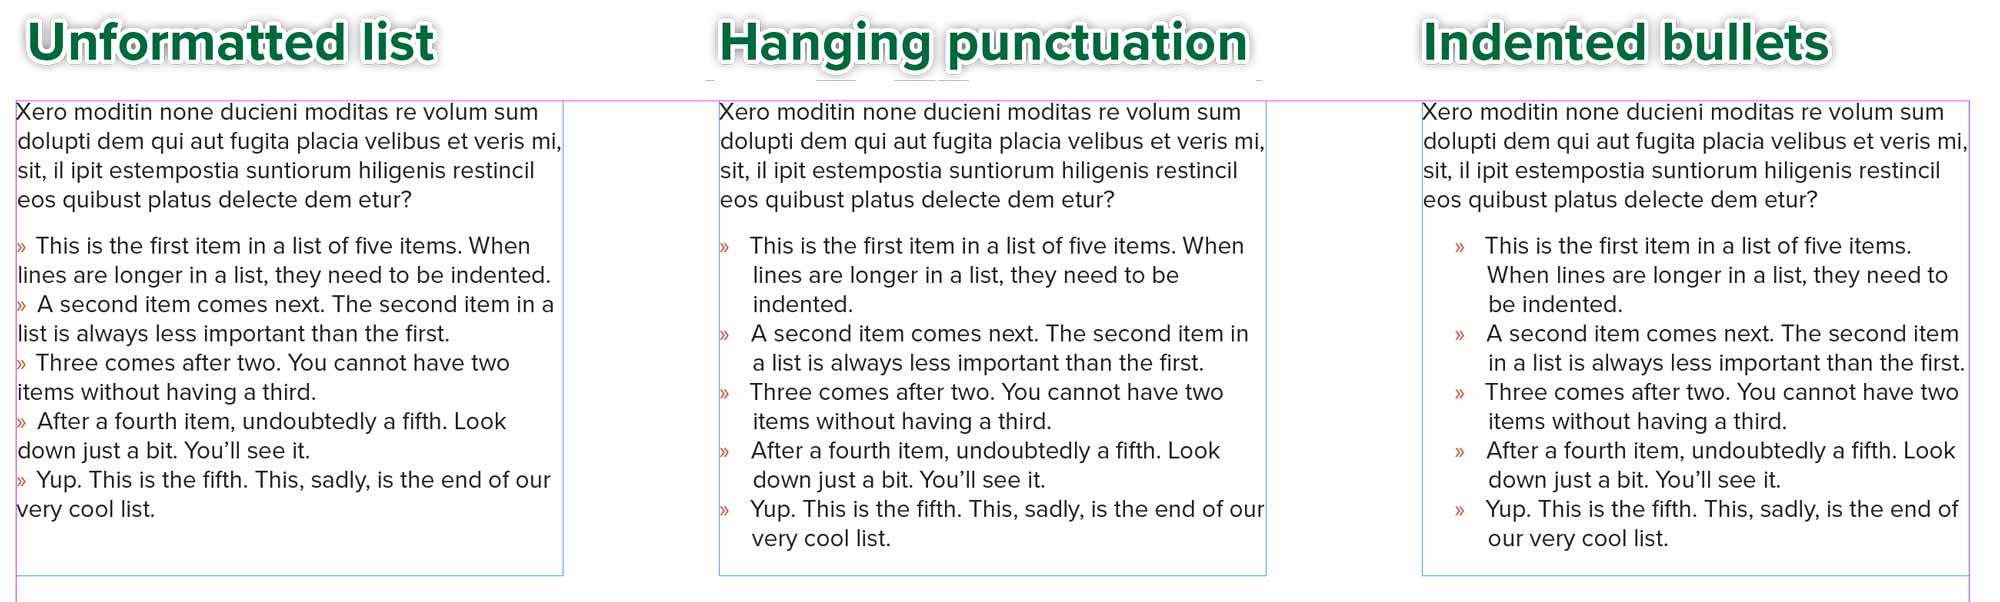
- Avoid leaving lists unformatted.
- This is ideal formatting, with hanging bullets.
- Indenting bullets is also good.
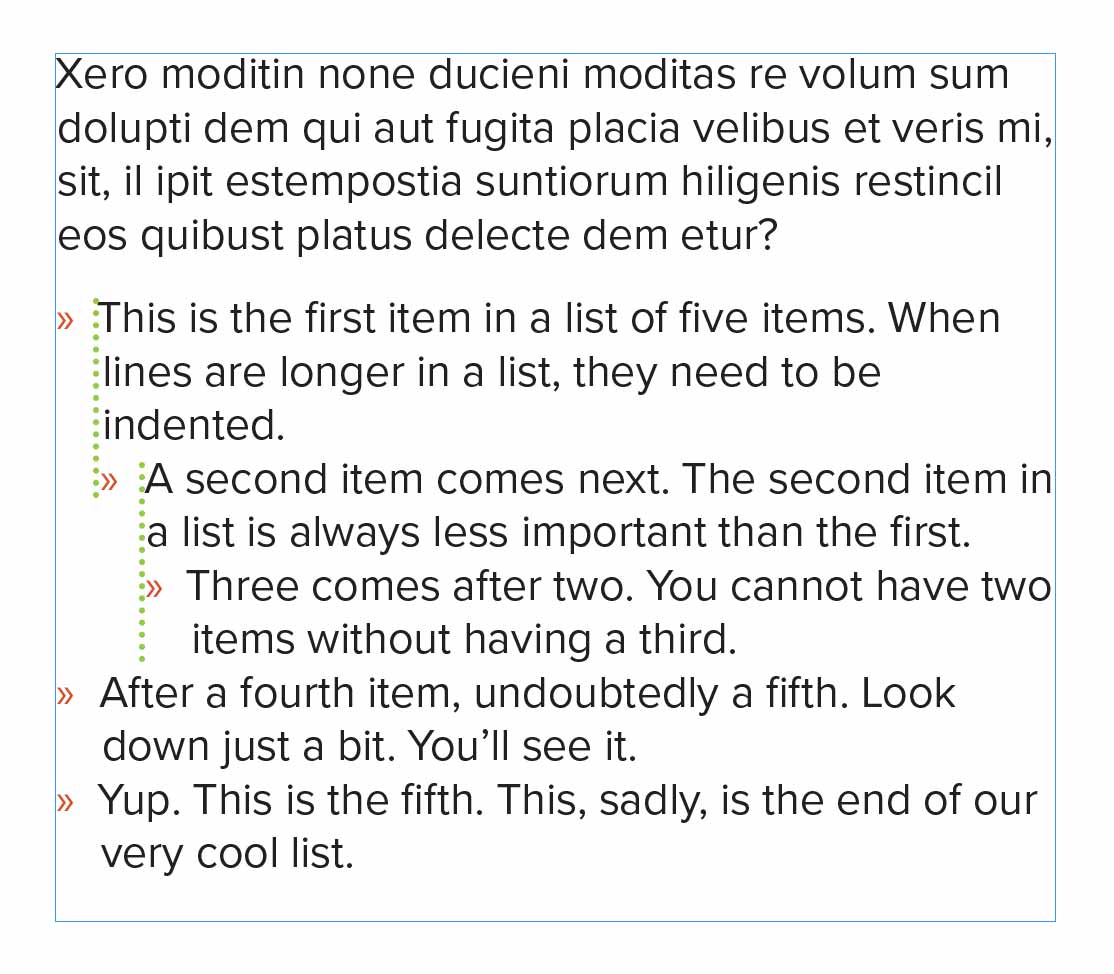
In a simple multi-level list, your indenting should line up cleanly. Avoid making the tab space too large. If possible, line up one level with the previous one.
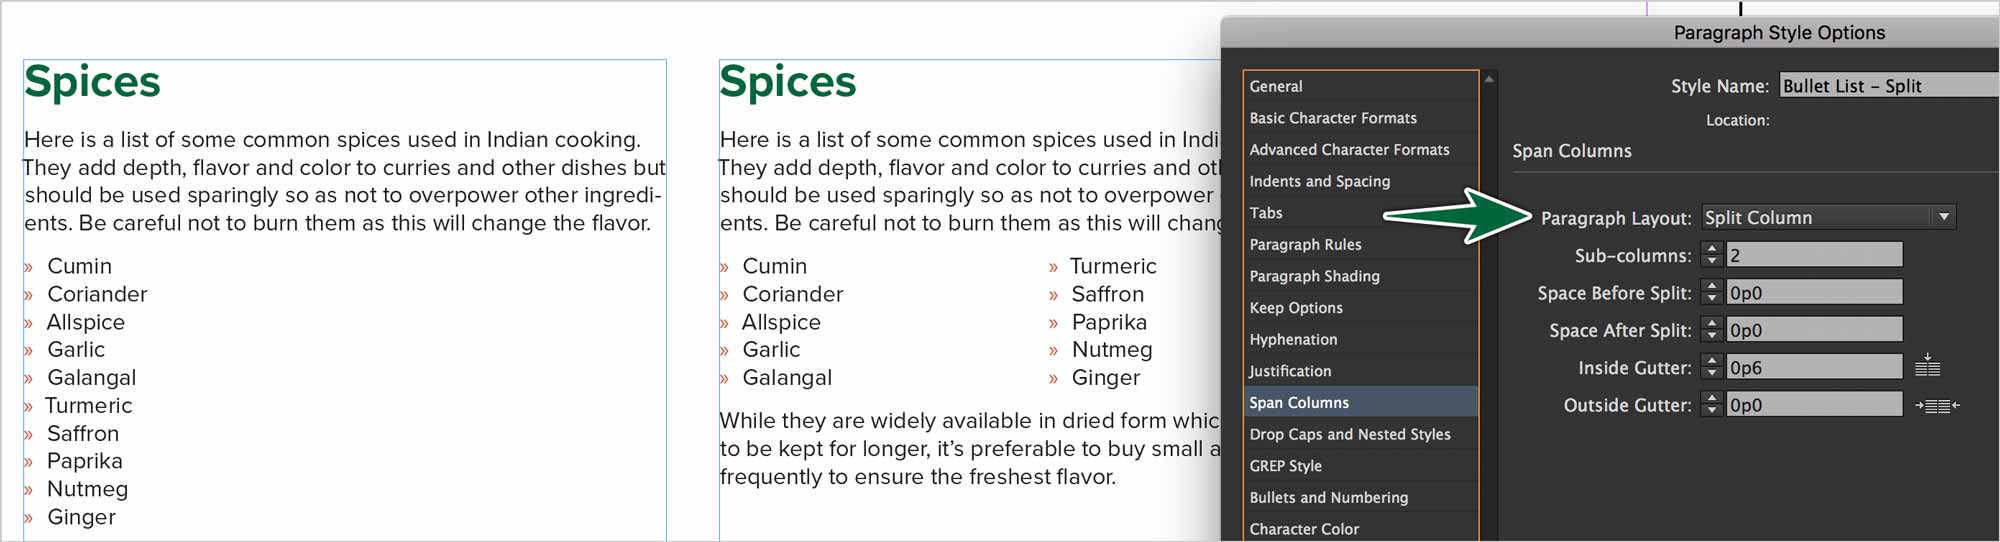
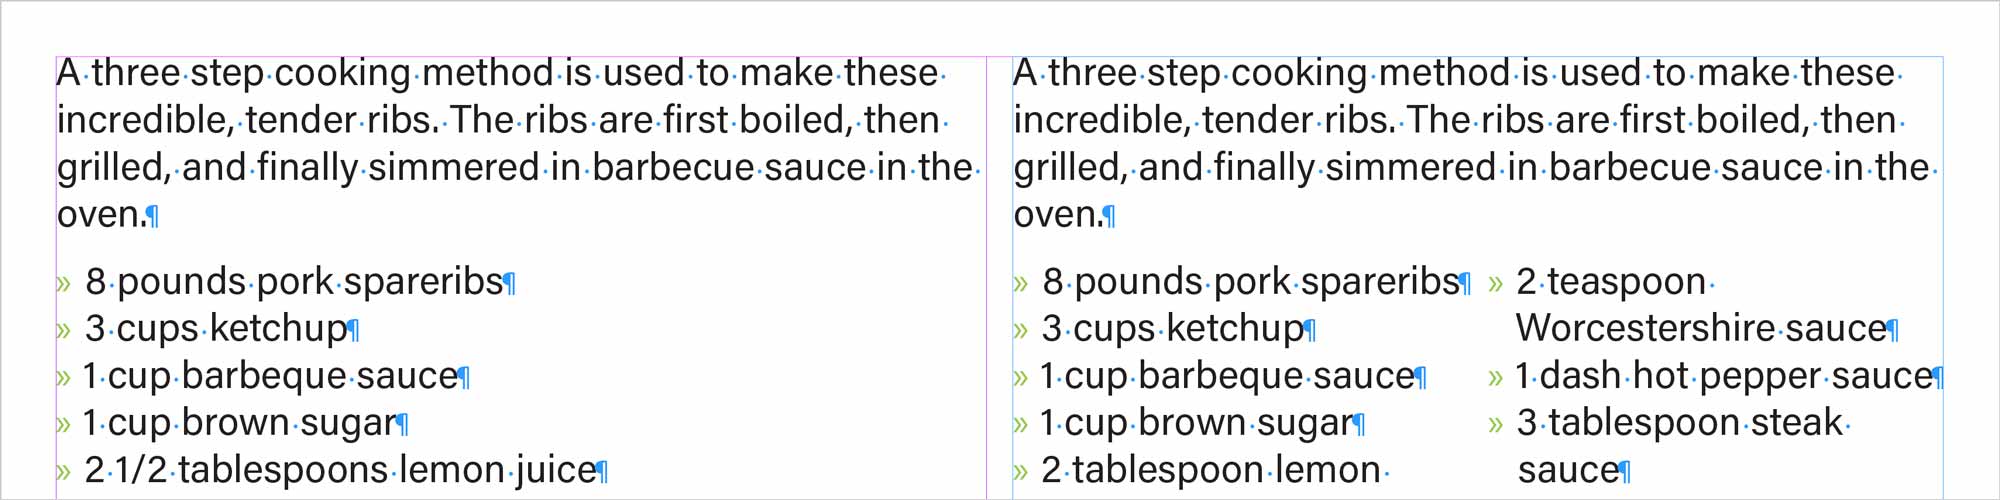
If you have a simple list that appears too long, use Span/Split options in the paragraph styles to put the list in two or more columns.
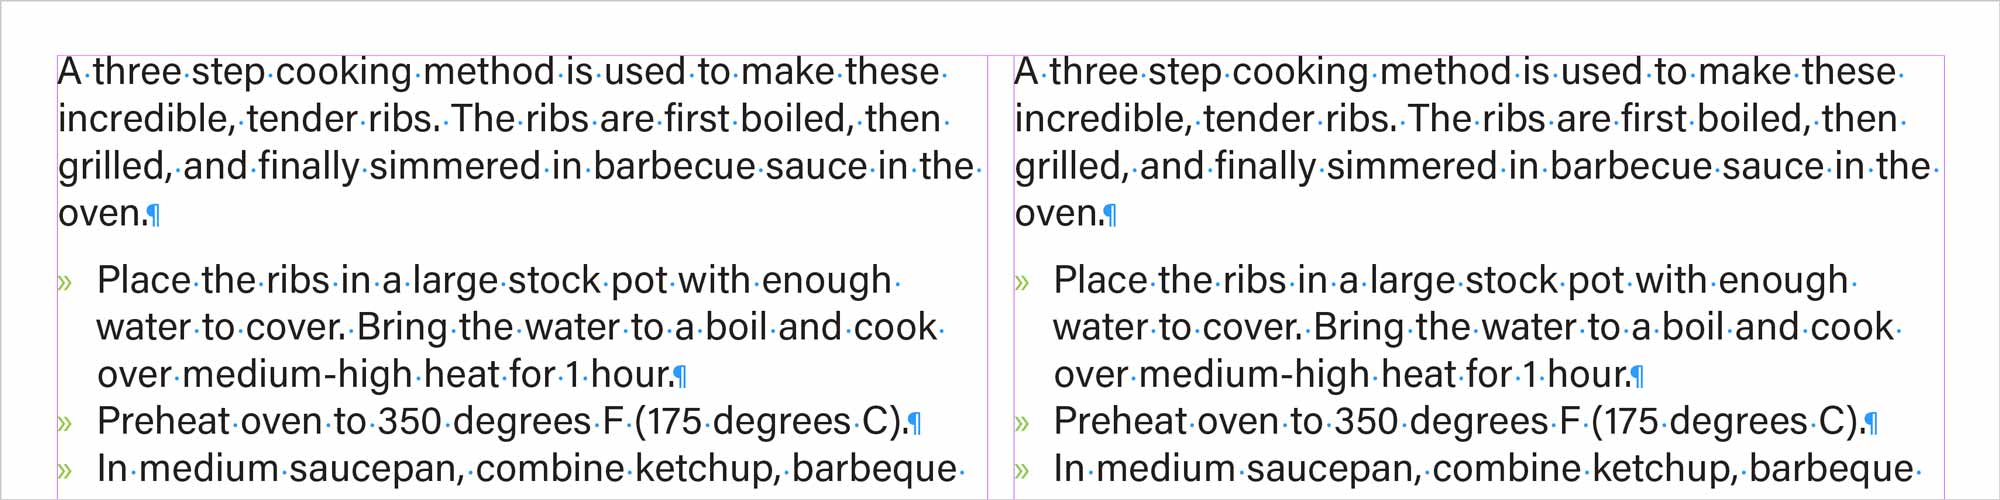
If you’re working with words or phrases that are not sentences, avoid using a period. Turn off hyphenation for lists in the paragraph style’s Hyphenation settings.
Bullet Lists
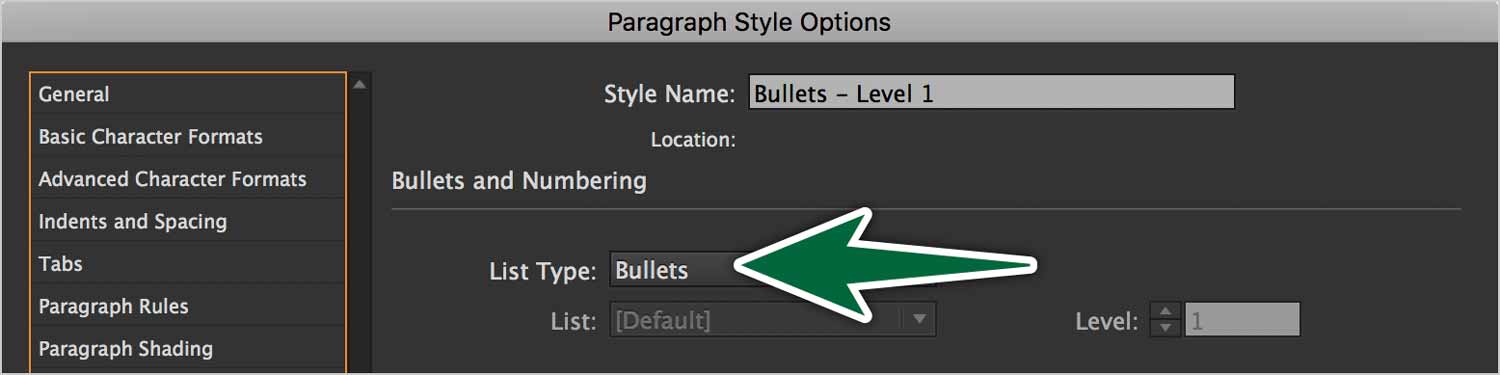
To create a bullet list, simply choose Bullets from the List Type drop-down menu. If you have Preview checked, you’ll see the bullets appear on the page.
Once you’ve set the list type, choose the type of bullet you want. You can add to the list by clicking on the Add… button. Choose a glyph from the font you want. If you check the Remember font with Bullet box, InDesign will grab the glyph from the specific font each time. This is assuming the font is active.
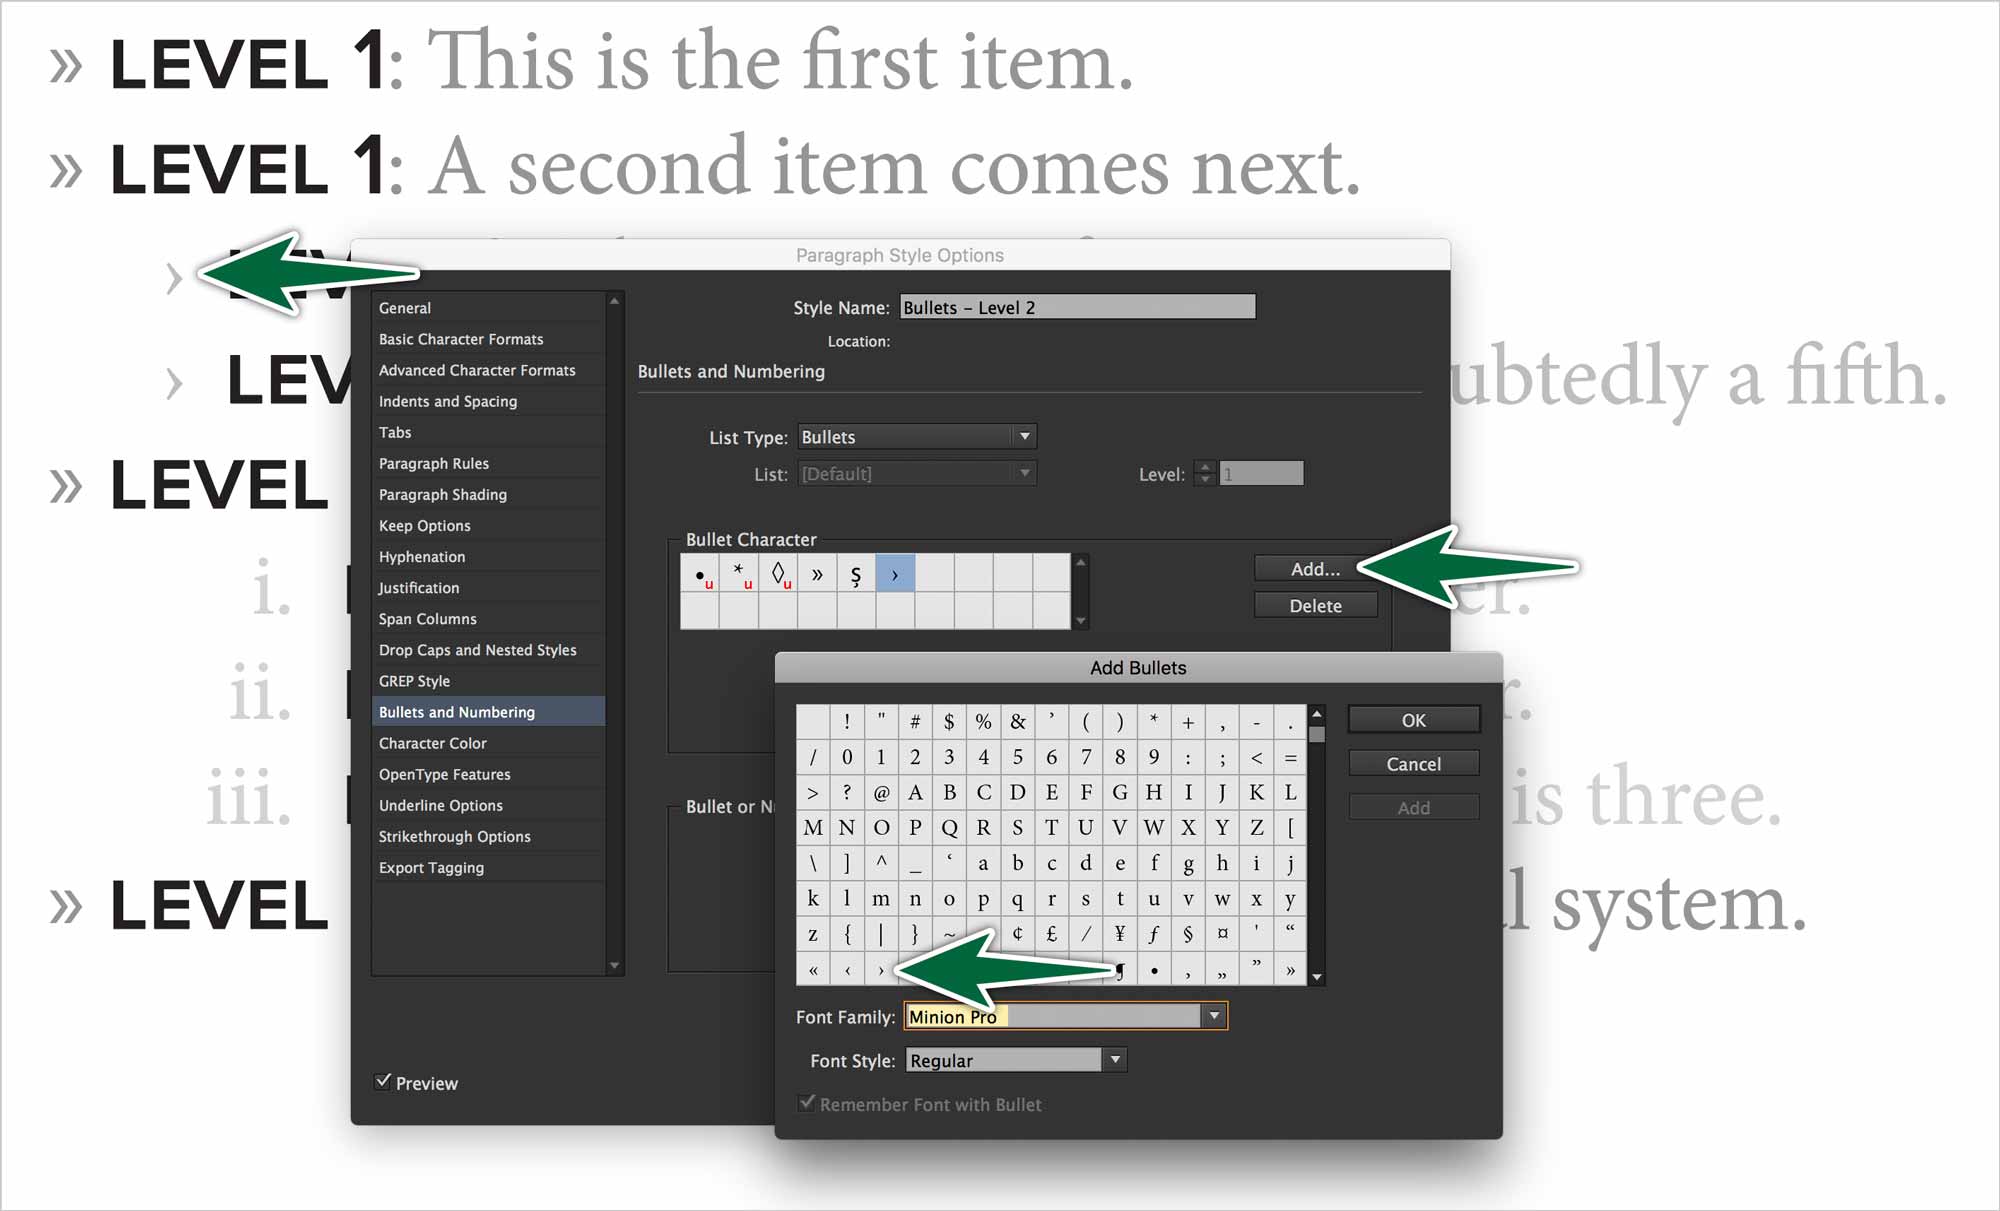
Bullets you add are only in the current document. If you create a new document, the new bullet won’t be there.
The final step is to establish the spacing for your list.
There are four settings:
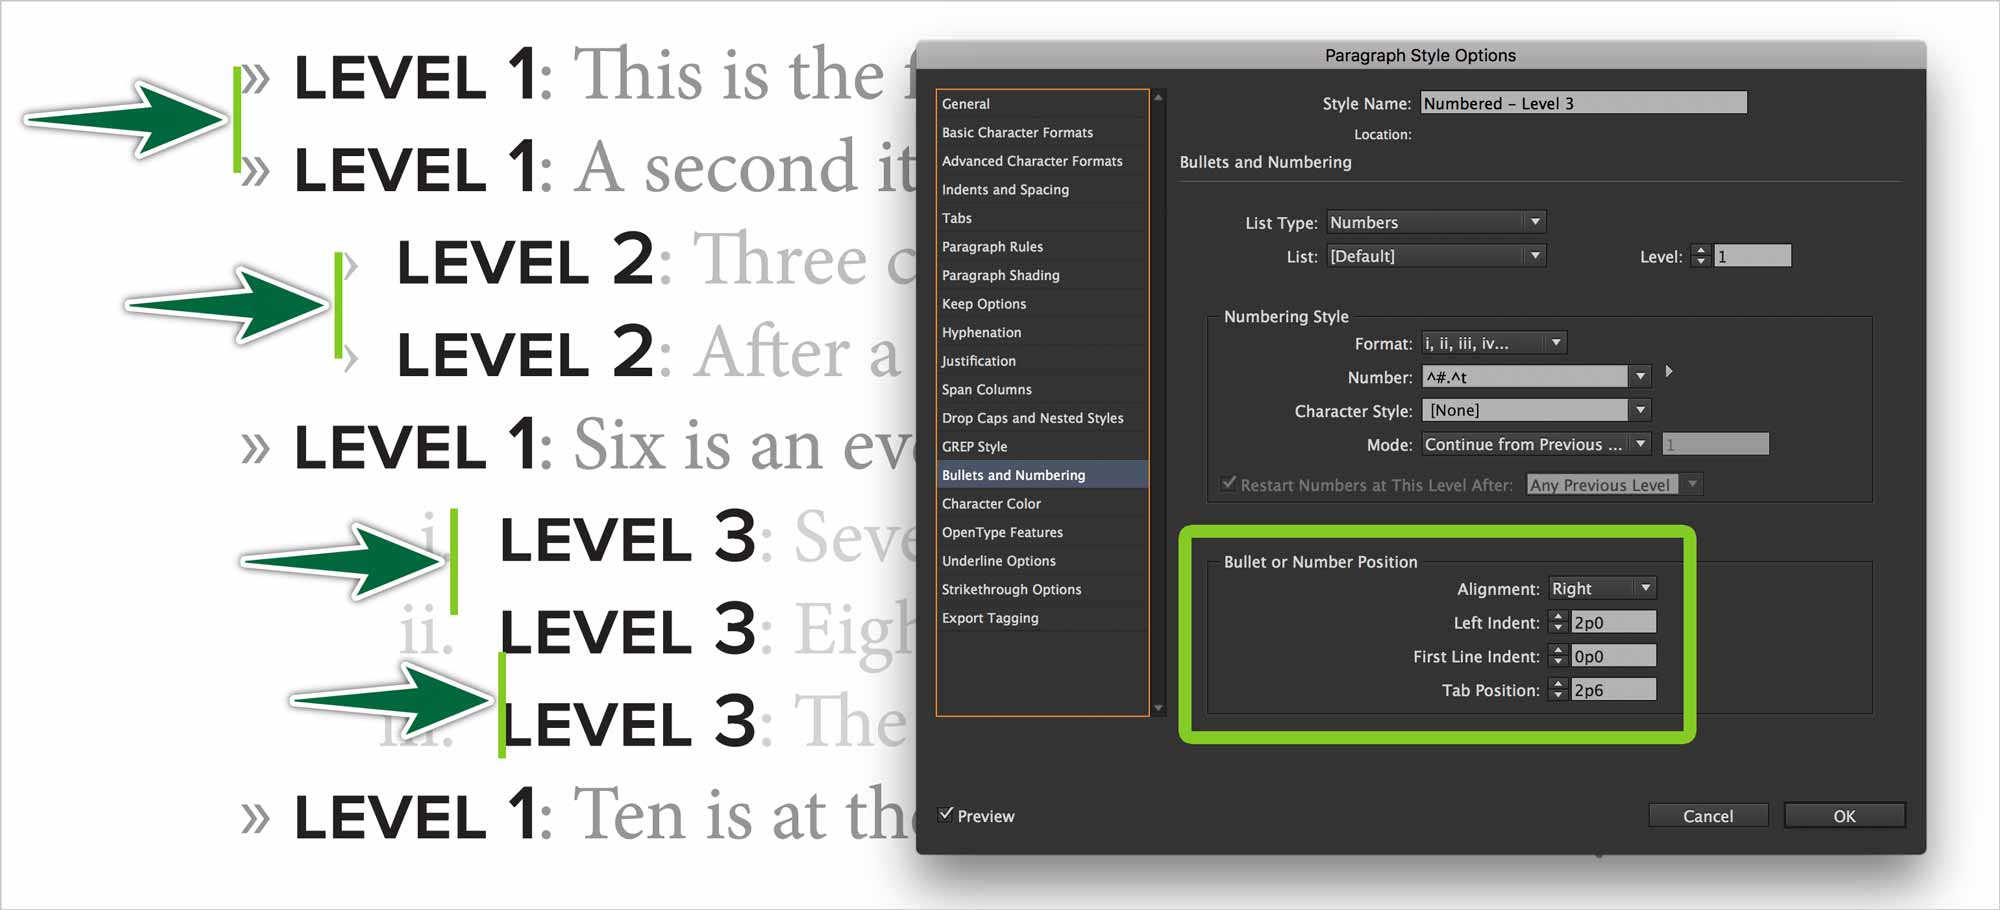
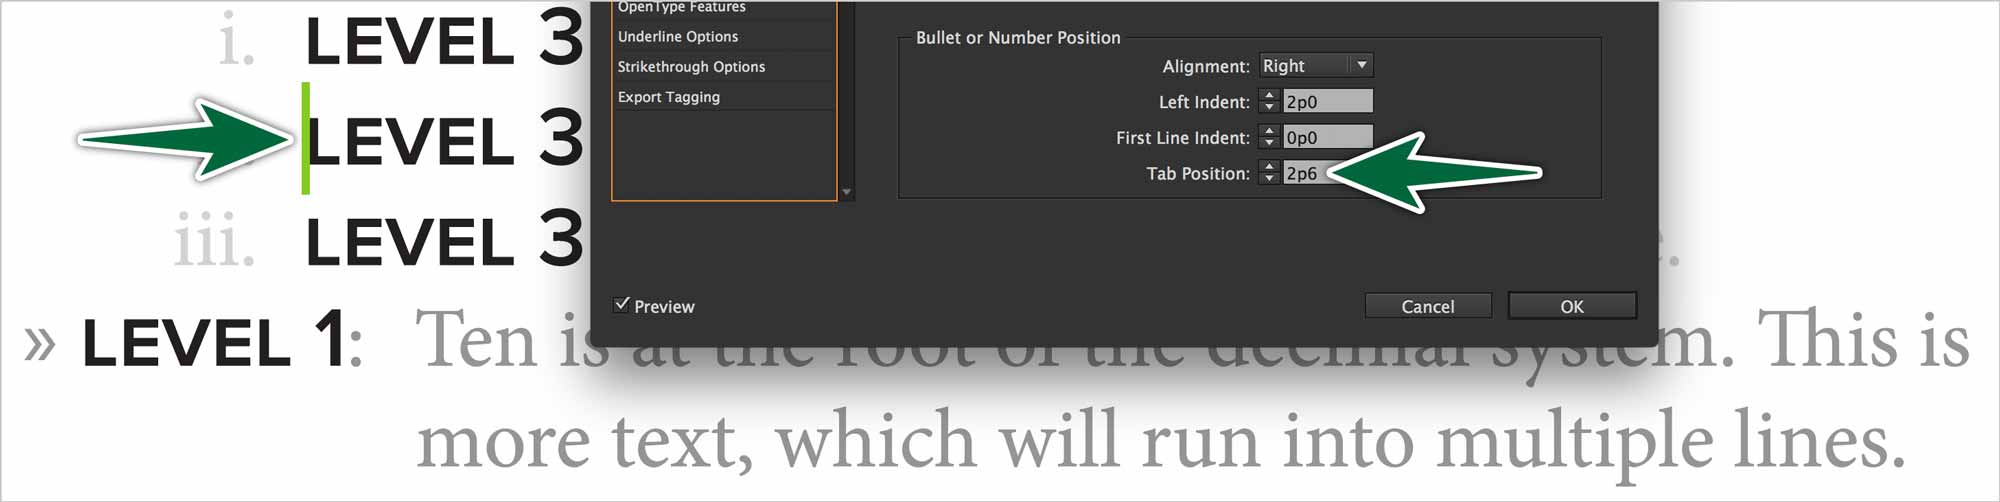
Alignment
This refers to the alignment of the bullets, not the text itself.
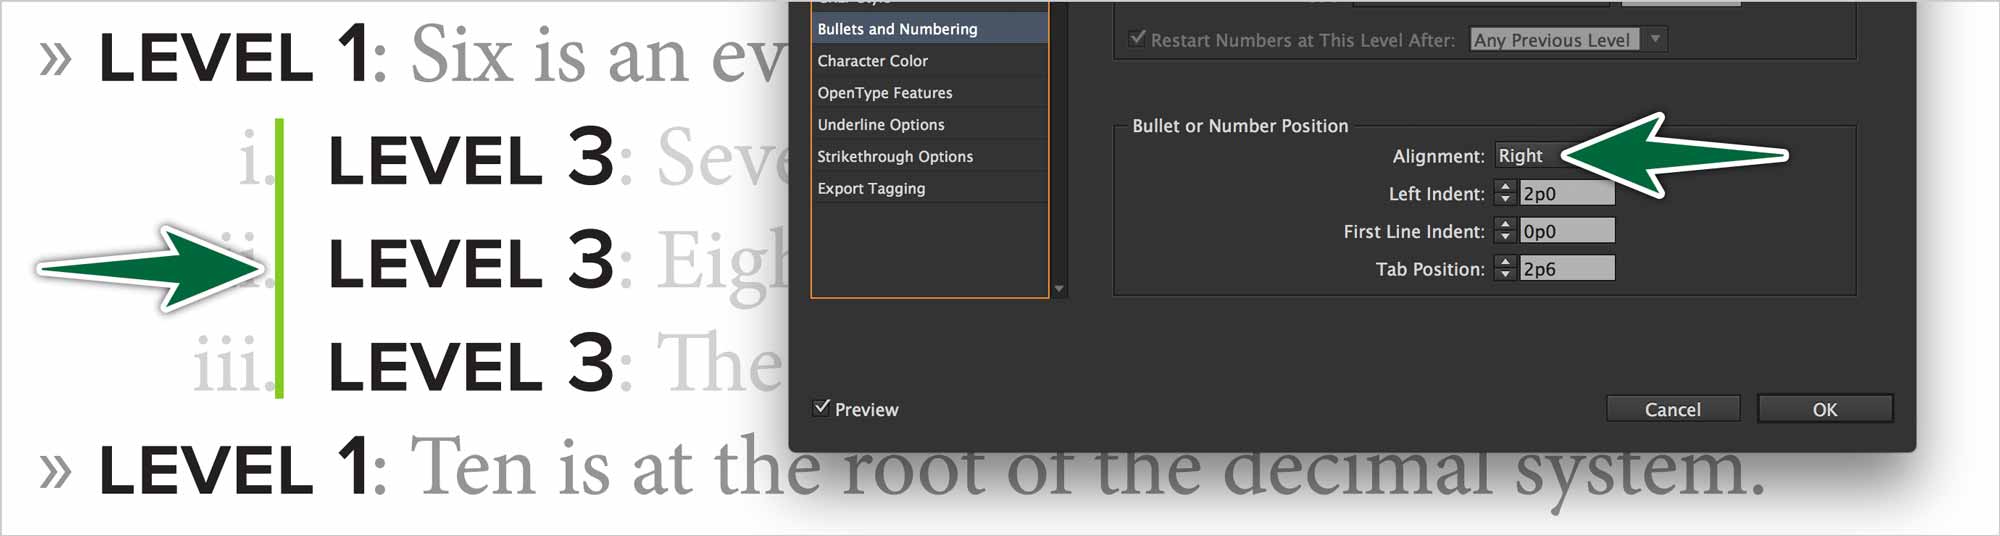
Note how the lower-case roman numberals in the example above are right-aligned. Whenever you have a numbered list with two-digit numbers, make sure the numbers are right-aligned.
Left Indent
This is the distance from the margin to the right edge of the bullet.
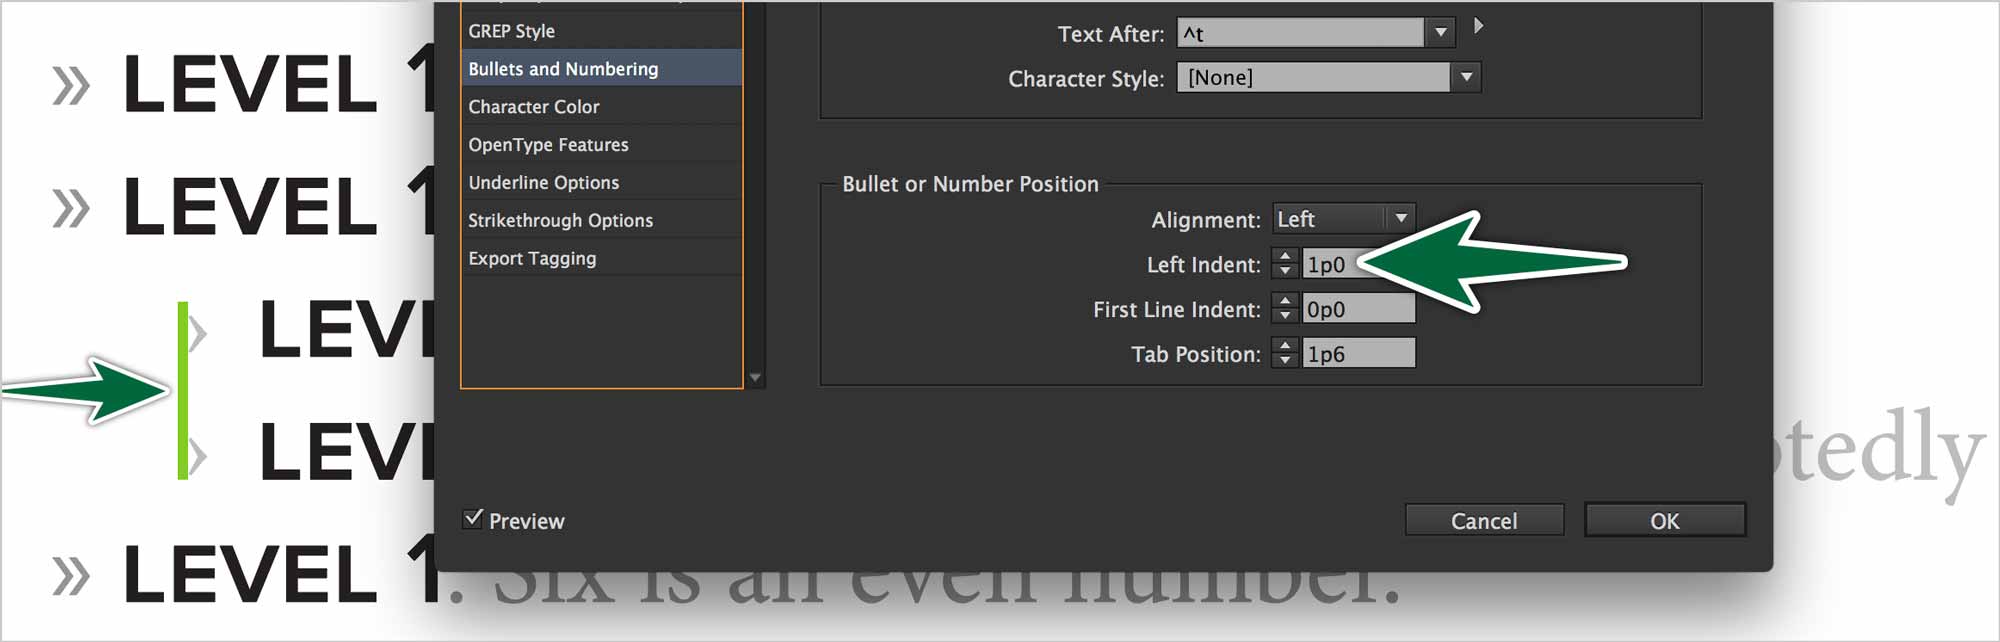
First Line Indent
When you have multiple lines in a list item, this will align the first line.
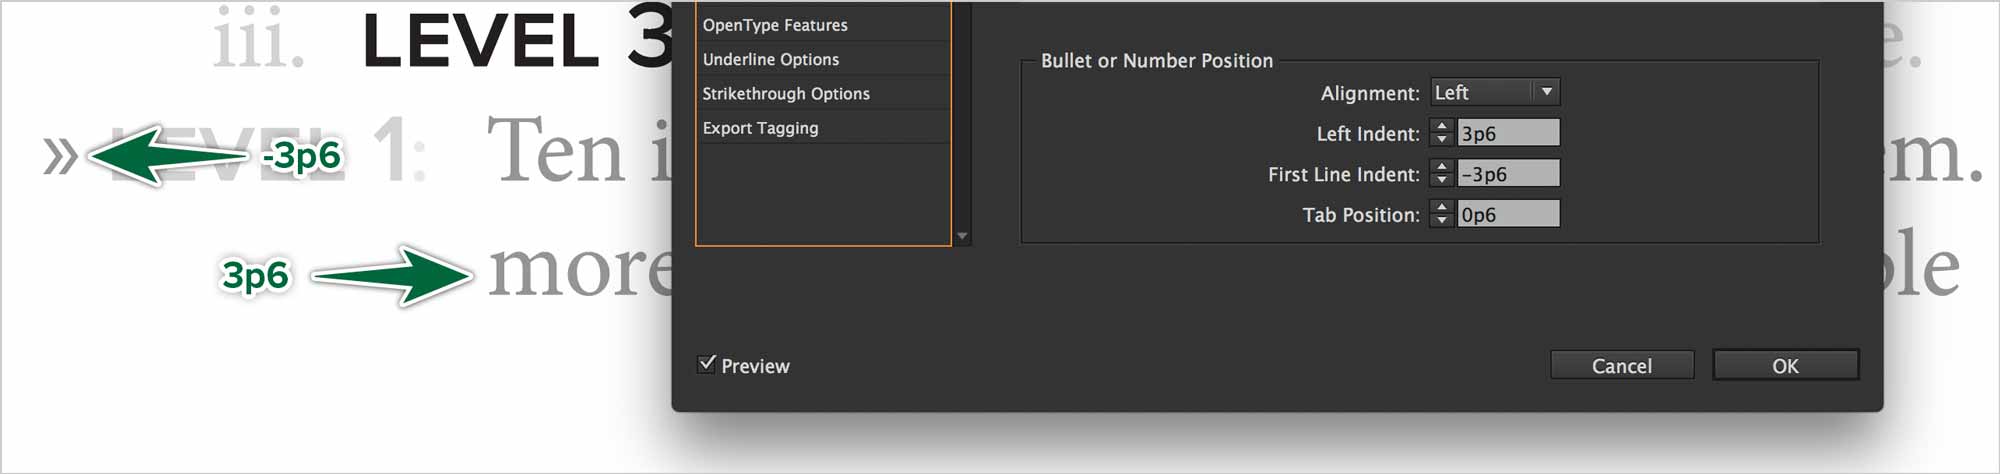
Tab Position
The distance from the margin to the start of the text. Combined with the left indent, it sets the space between the number (or bullet) and the text.
Number Lists
When you choose to create a numbered list, you have a selection of number styles for your lists in the Format drop-down menu. You can even style the numbers with a character style, as shown here (cyan text).
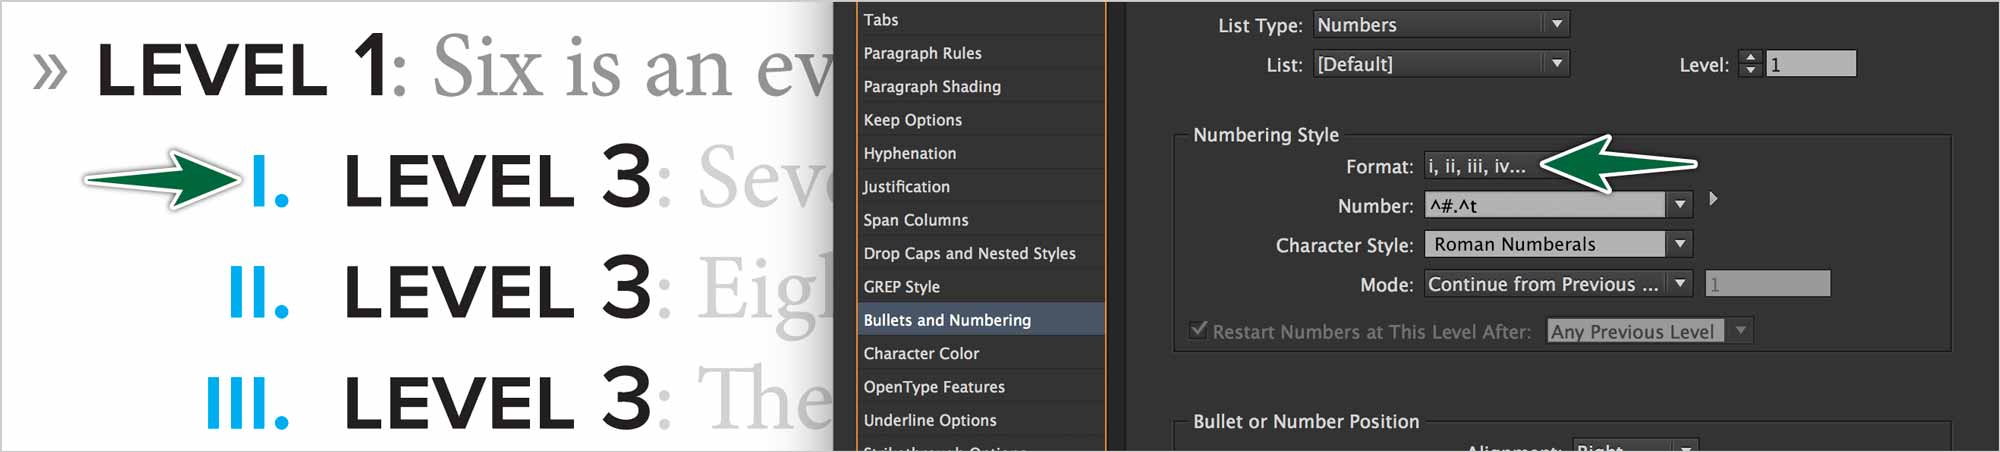
Note again that the numbers in cyan are right-aligned, as they should be.
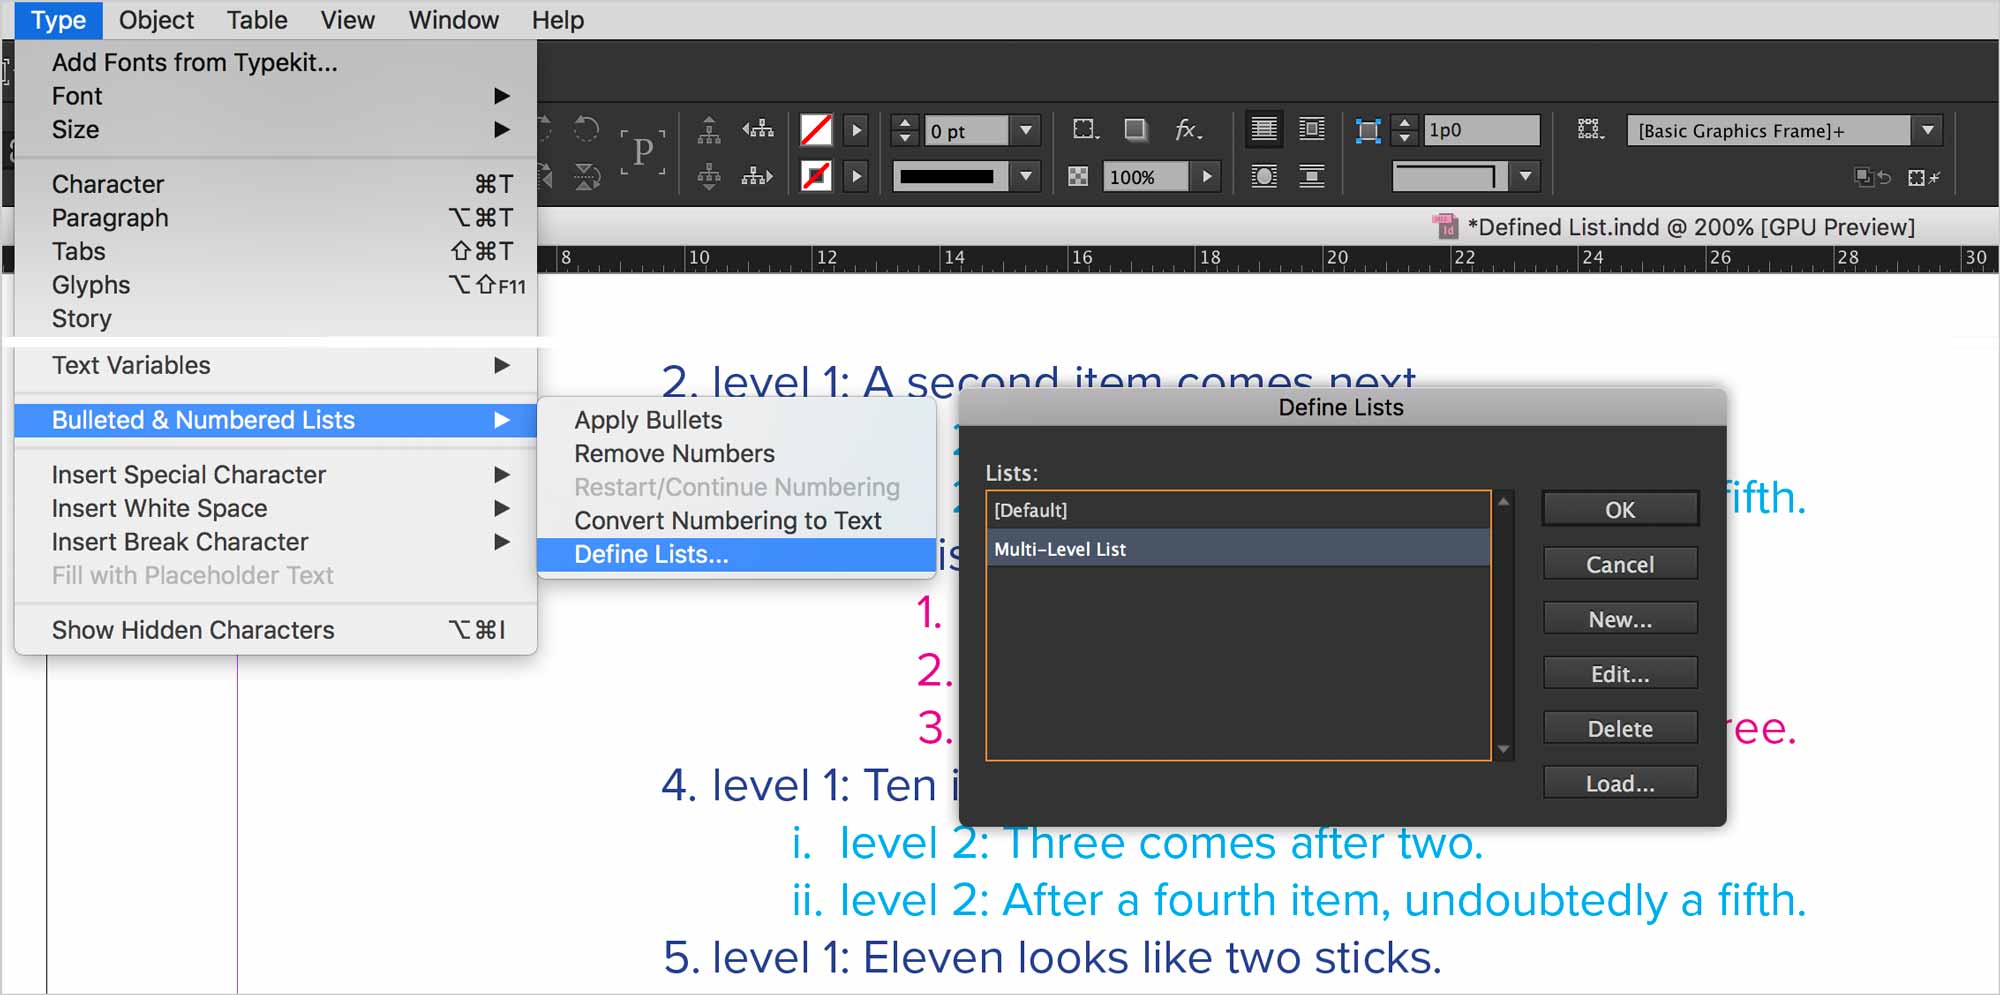
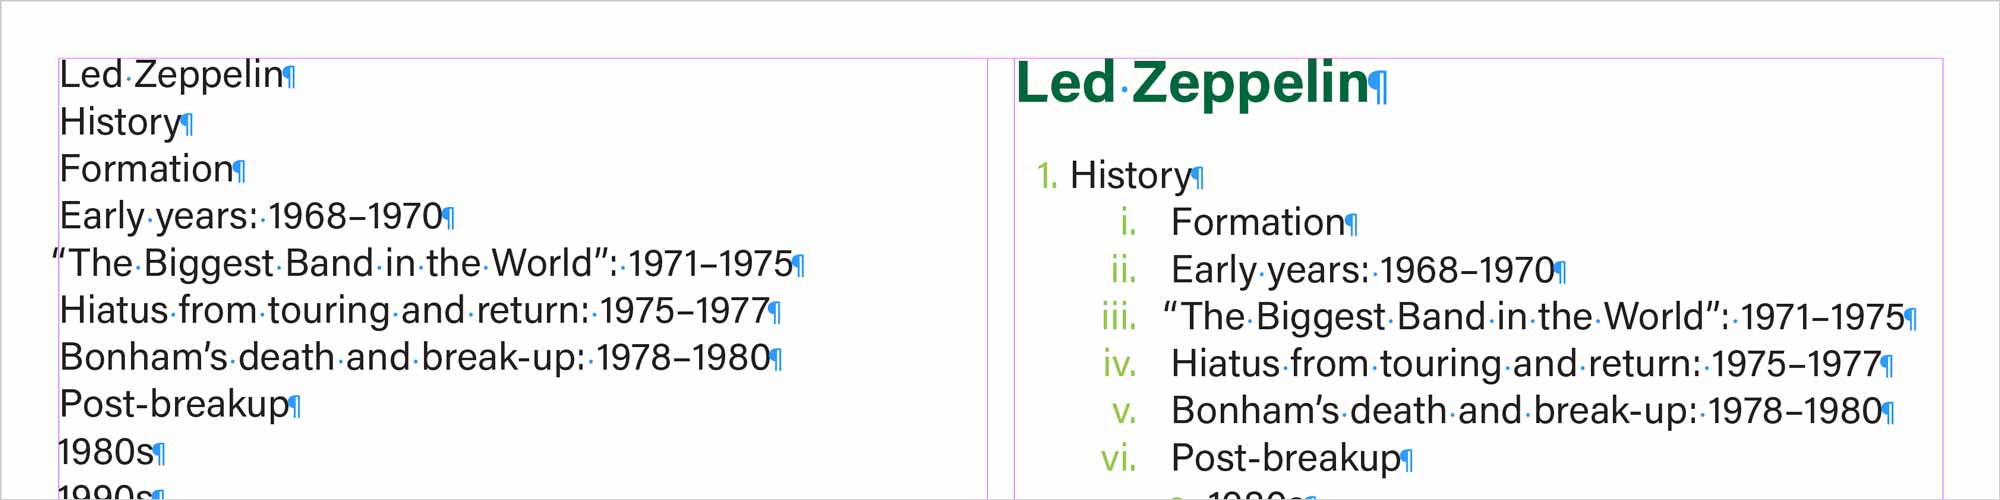
Defined Lists
Creating defined lists gives you more control over your lists. A defined list is a container for a list. The list can be built with multiple paragraph styles. Start by defining a list.
One you’ve defined a list, you can go to your Paragraph Styles panel to start to create styles for each level within the list. The likely important differences between the styles will be the format of the numbers and the relative indentation, as shown below.
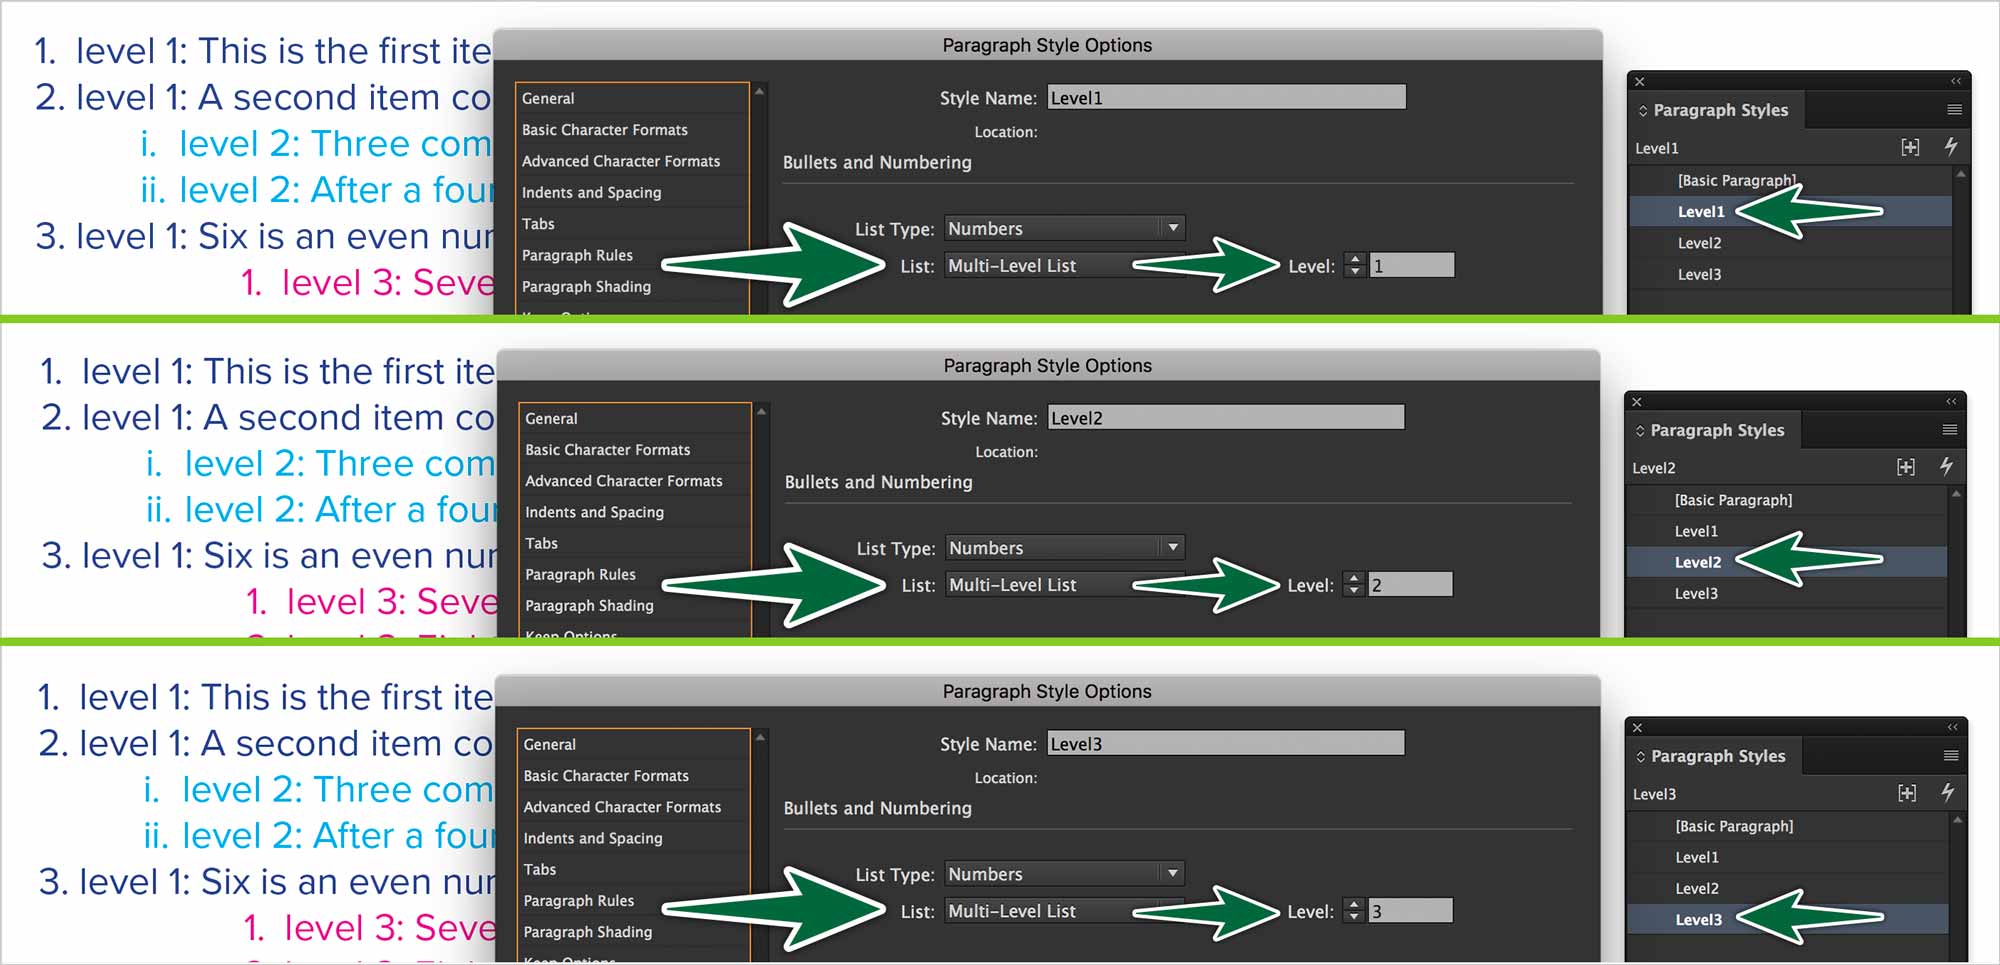
If you take the cyan content above as an example, you can see that the roman numerals restart. This is controlled within the paragraph styles. You create a paragraph style for each level in the list.
If you create a new list elsewhere in your document using these styles, the numbers will start from scratch.
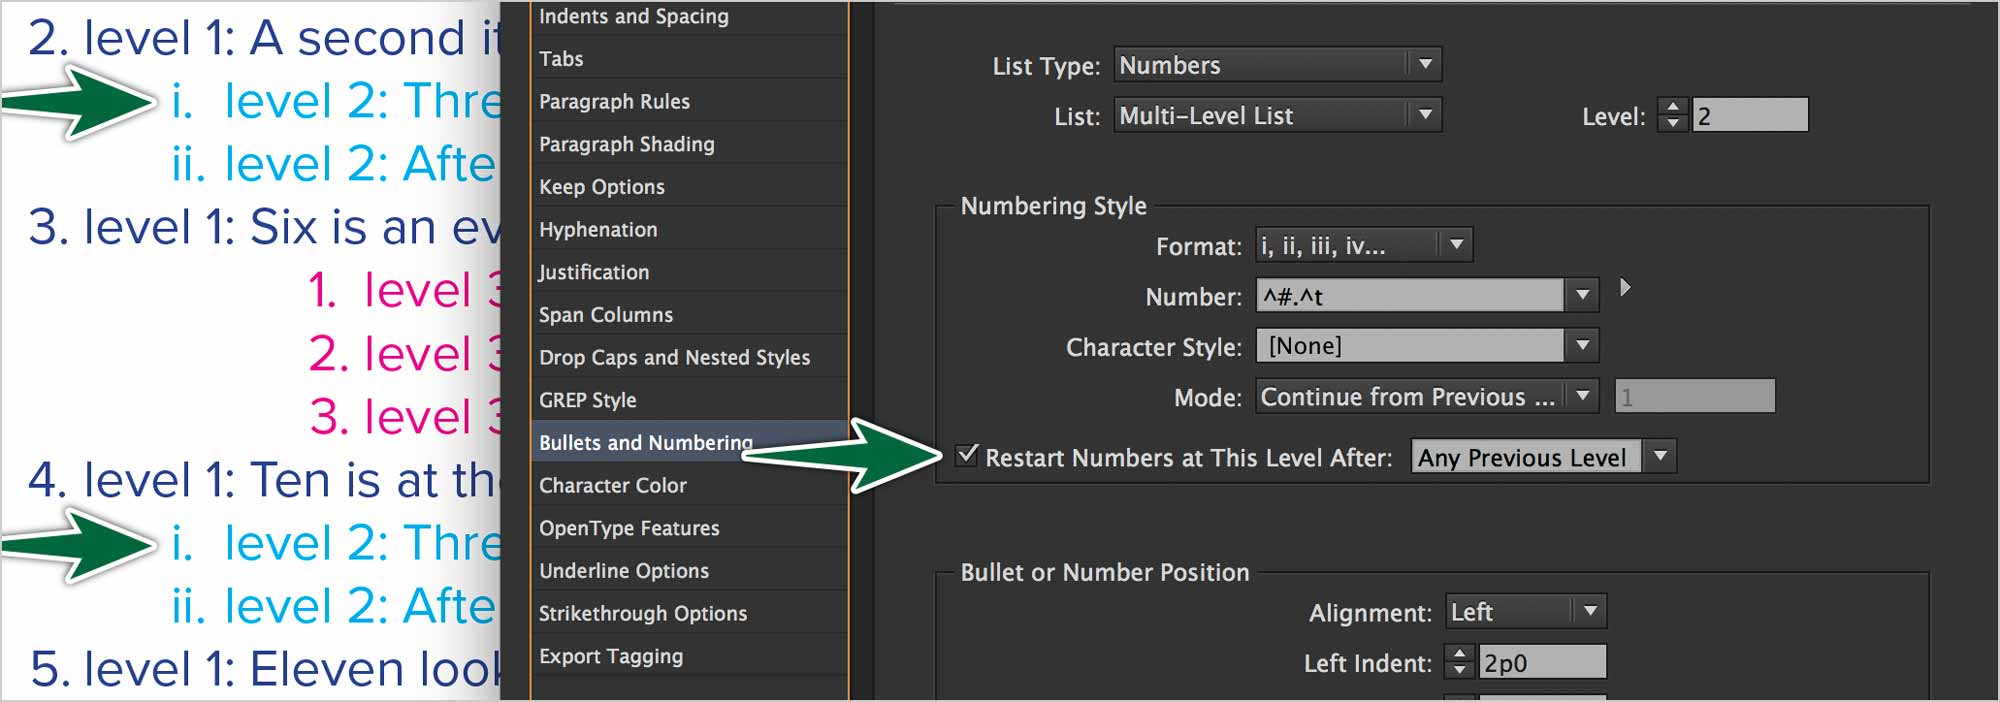
Check Restart Numbers at This Level After to have the numbers restart from the previous level.
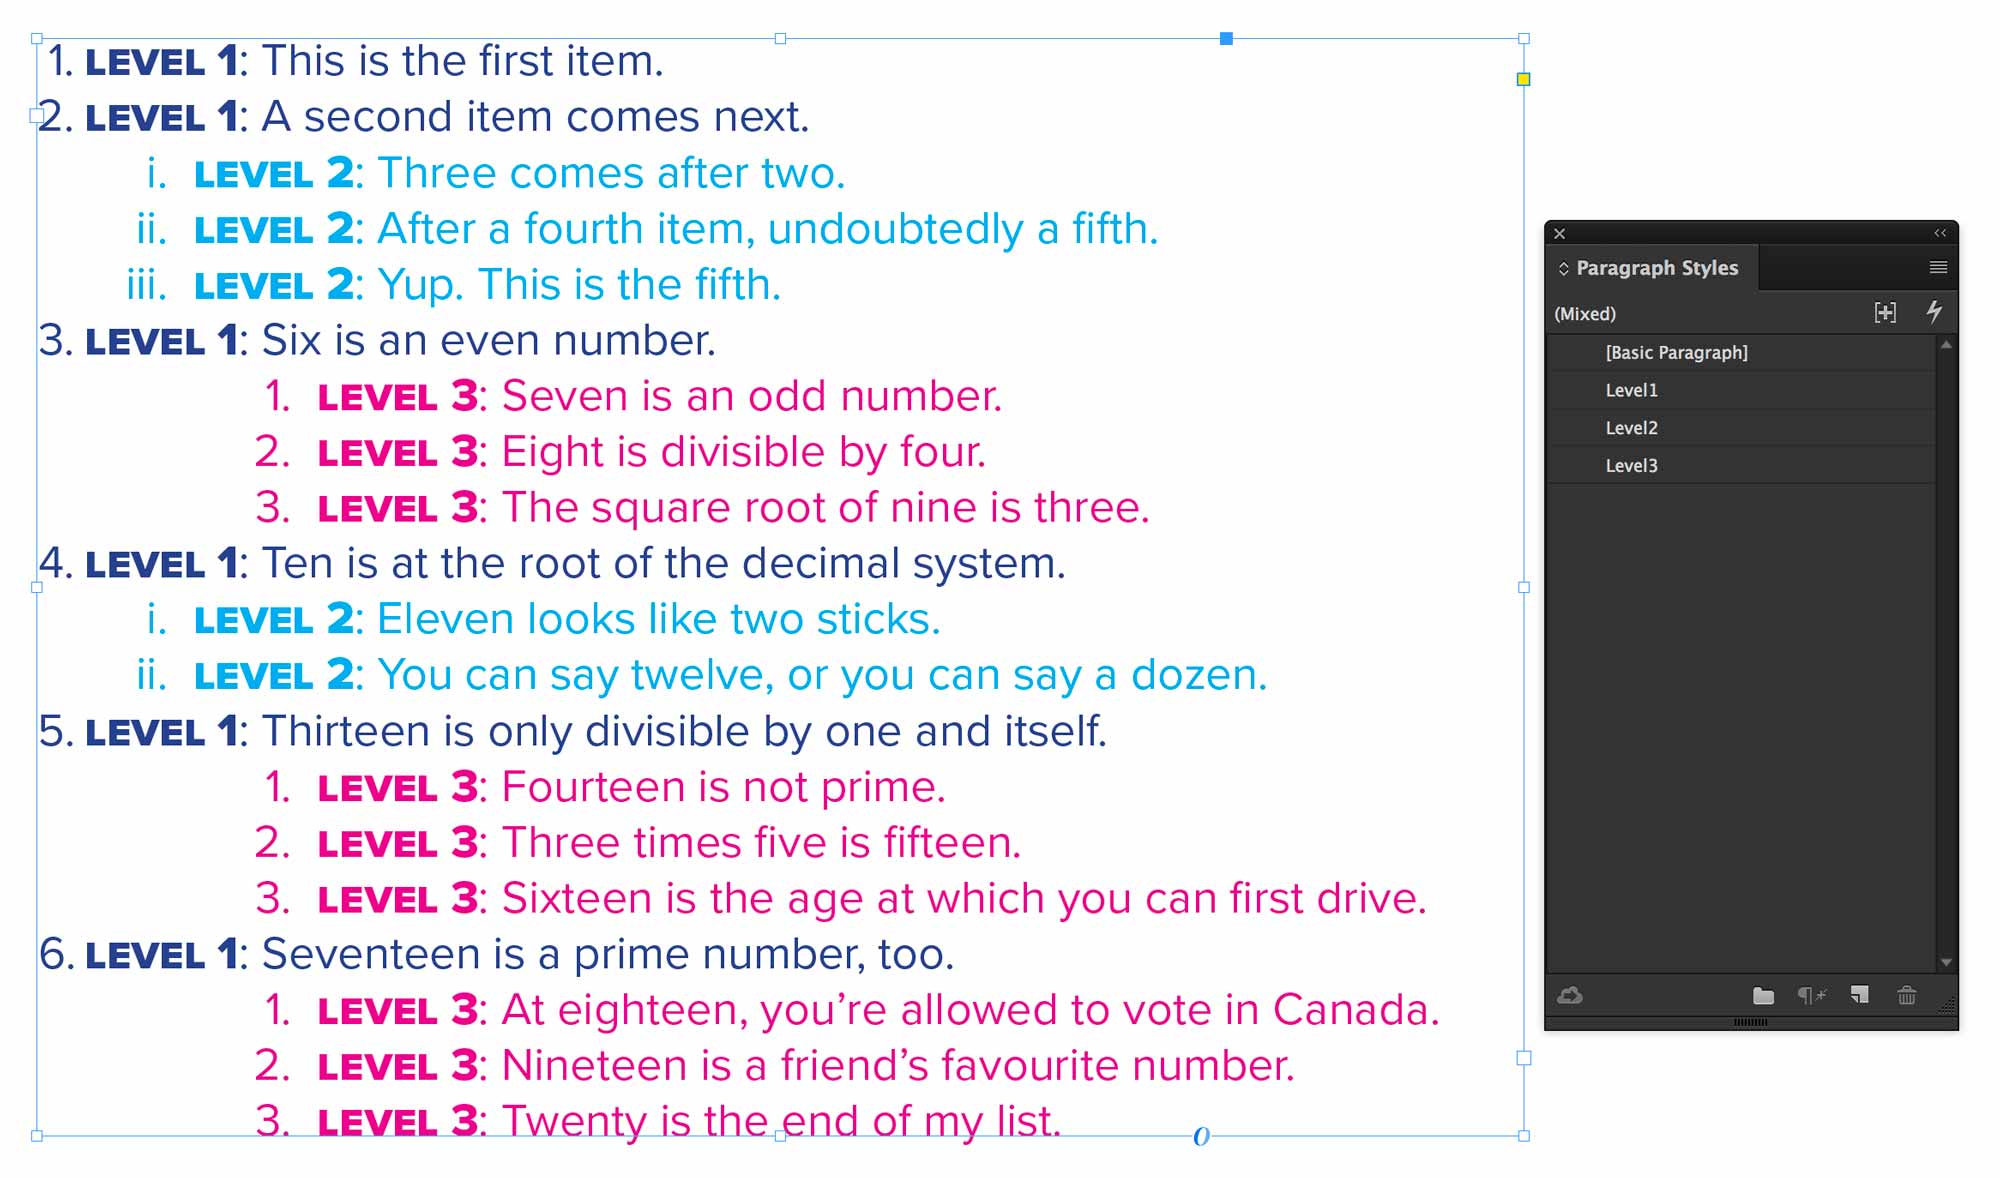
This is what my final list design looks like.
If you want to restart numbering manually, you can use Type > Bulleted & Numbered Lists > Restart Numbering.
Figure Captions
If you wish to number figures throughout your document, you can use a defined list. This way, you’ll avoid having to number the items manually.
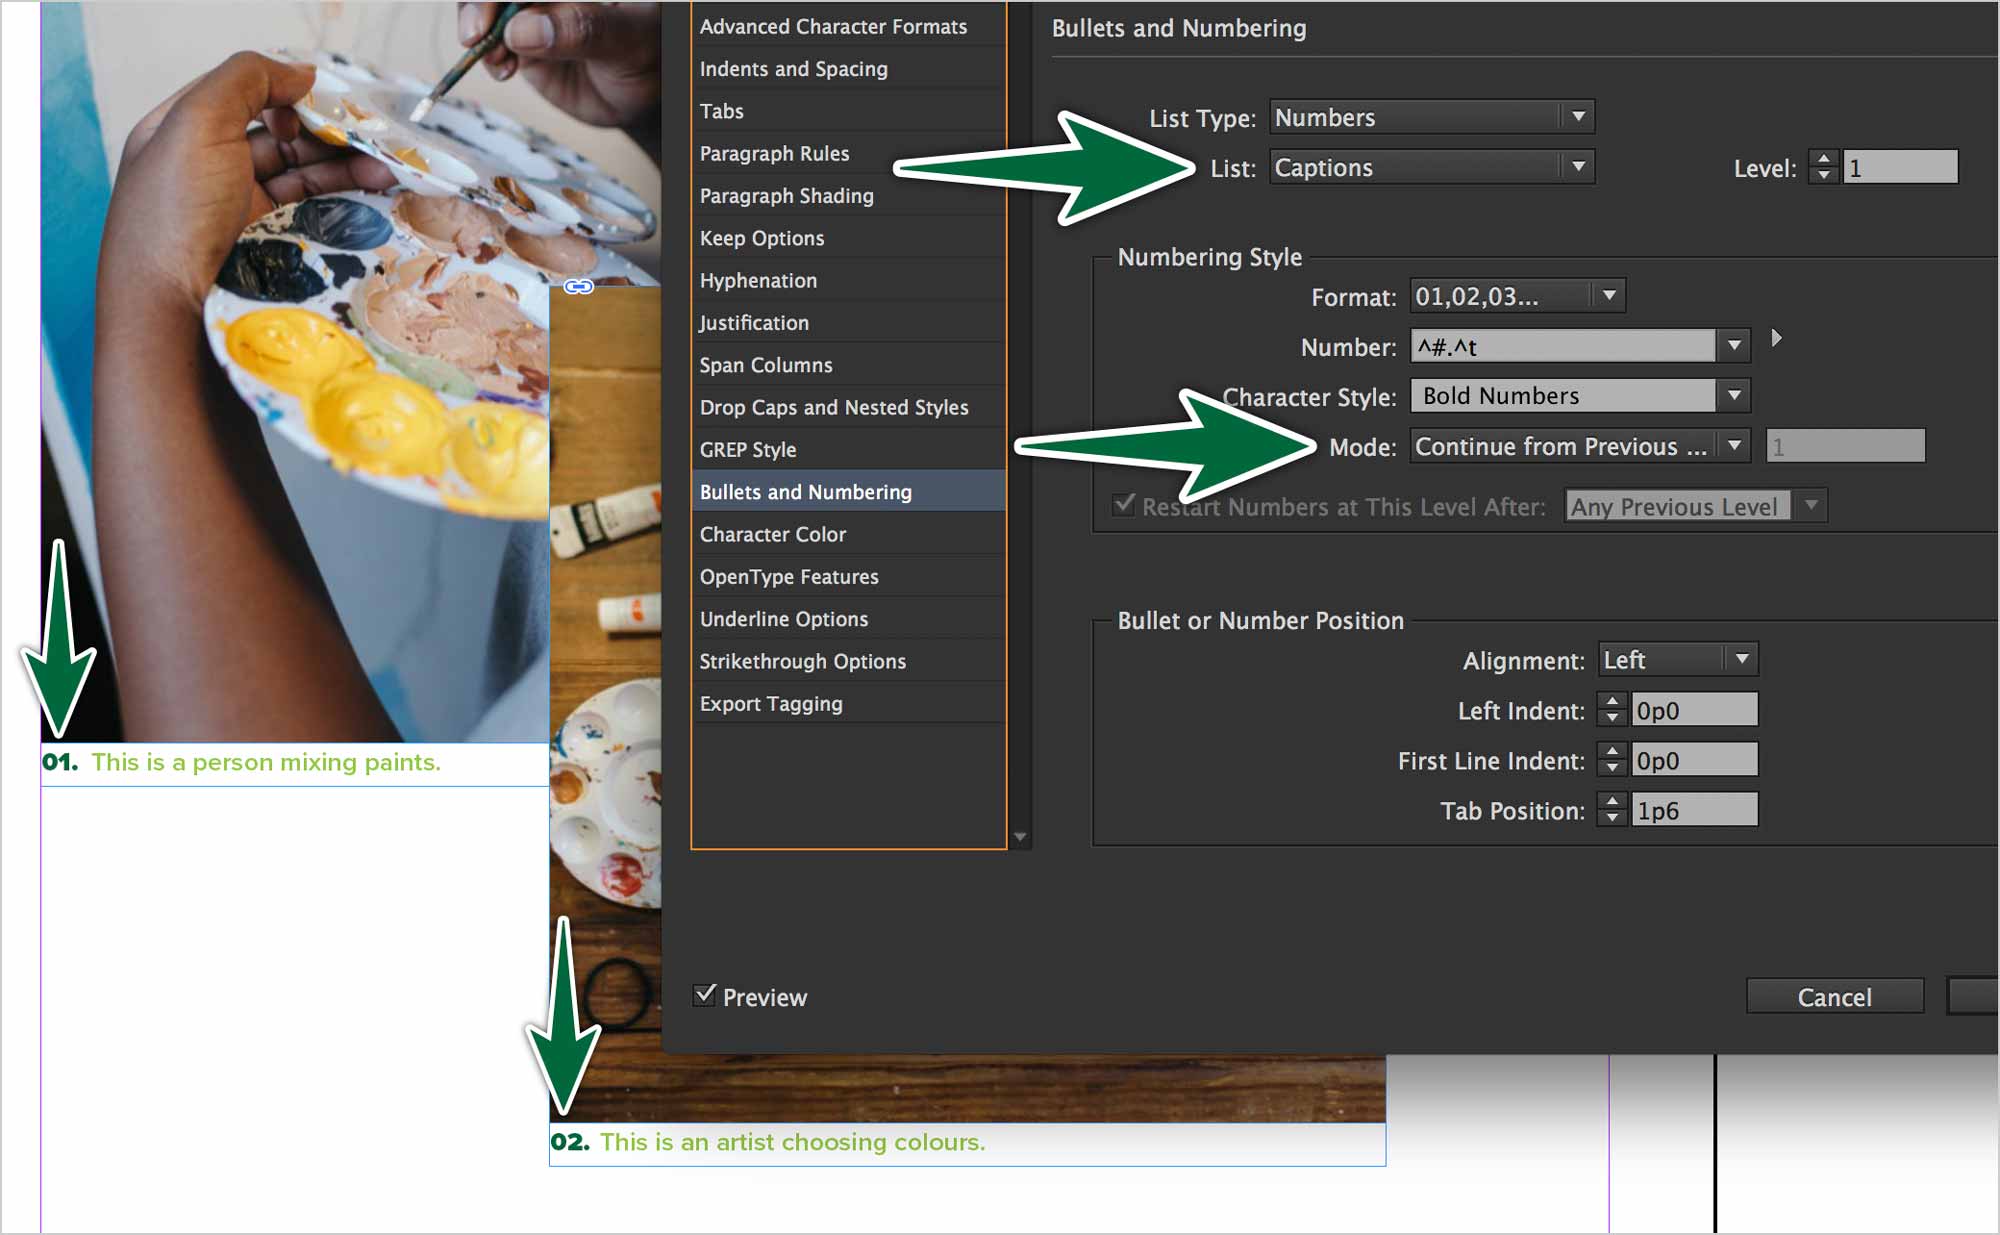
You can create a new list from in the Paragraph Style. Set Mode to Continue from Previous…. This makes it that each caption to which you apply this style will take on the next number. The down side is that the numbers to not re-order themselves if you re-order the images.
Formative Activity
Start by renaming the Appleseed folder with your name and group number. Then, go to Adobe Fonts to activate Acumin Pro Regular and Acumin Pro Bold.
Bullet List
Create a bullet list from the provided text on page one of the exercise InDesign document.
Split Columns
The provided list is too long to have in one column. Format the list properly, then make sure it’s split into two columns.
Multi-Level List
This list is a mix of bullets and numbers. Note that the numbers will continue through the list. They don’t re-start.

Defined List
Define a list, then format the given text as shown. Note that the numbered items for this list restart within the list.
Supplemental Links
- Adobe: Bullets & Number Lists
