Topics
Believe it or not, Photoshop blend modes are pretty cool. Just take a look at this.
Important Keyboard Shortcuts
These keyboard shortcuts should be committed to memory. They’ll help you with this assignment and all the rest of your Photoshop work, especially when you’re working with layer masks.
D: Set foreground & background swatches to default colours, black & white.
X: Switch focus of foreground/background colours.
⌘-Delete: Fill with background colour.
Option-Delete: Fill with foreground colour.
B: Brush Tool. Right-click with Brush tool for controls.
[ or ] : Make brush smaller or bigger.
Blending Basics
Opacity
Opacity is the most basic type of blending. If you reduce the opacity of a layer, it blends with the layer(s) below.
Blend Modes
You’ll find, as you navigate through Photoshop, you’ll encounter Blend Modes menues everywhere. As you create new layers, there’s an option to choose a blend mode. There are blend modes for individual painting tools, too. They’re everywhere.
The modes available from the Blend Modes menu determine how a layer blends with a layer below. The painting tools also have their own blend modes. That means that you can paint on a layer with a tool in a certain blend mode, while the current layer can have a different blend mode.
There are three blend modes that you really need to know:
- Screen
- Ignores black. Light pixels get lighter. It’s like aiming two projectors at the same spot. The dark pixels cancel each other out. The lighter pixels get lighter.
- Multiply
- Ignores white. It makes things darker. It’s like stacking two coloured transparencies on top of each other. The darks get darker.
- Overlay
- It ignores grey. This is a combination fo Screen and Multiply. It increases contrast.

Open the provided file. Test switching the blend modes for each of the grey, black or white bars. This will help you understand the main categories of blend modes.
You can make tonal adjustments in a non-destructive workflow by using blend modes. Let’s fix a photo using this technique.
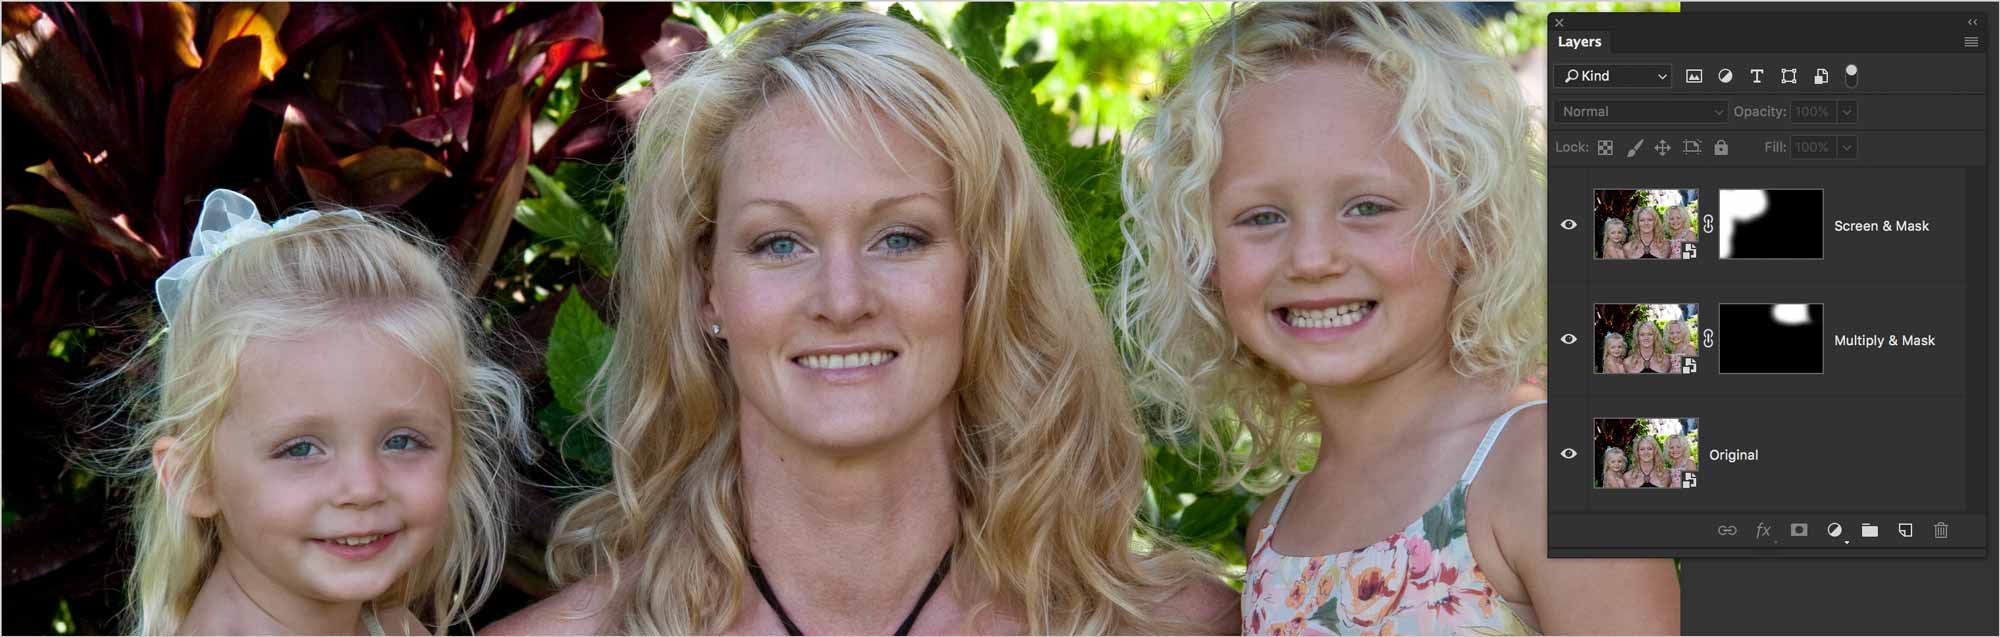
All we need to do to lighten the dark leaves is to duplicate the original layer. Set its blend mode to Screen. Mask out the parts of the photo you don’t want to be lightened.
To darken over-exposed areas, duplicate the original layer again. Set the new layer to Multiply. Mask out the area of the photo you don’t want darkened.
Lens Flare
We can use blend modes to make the most of the lens flare filter.
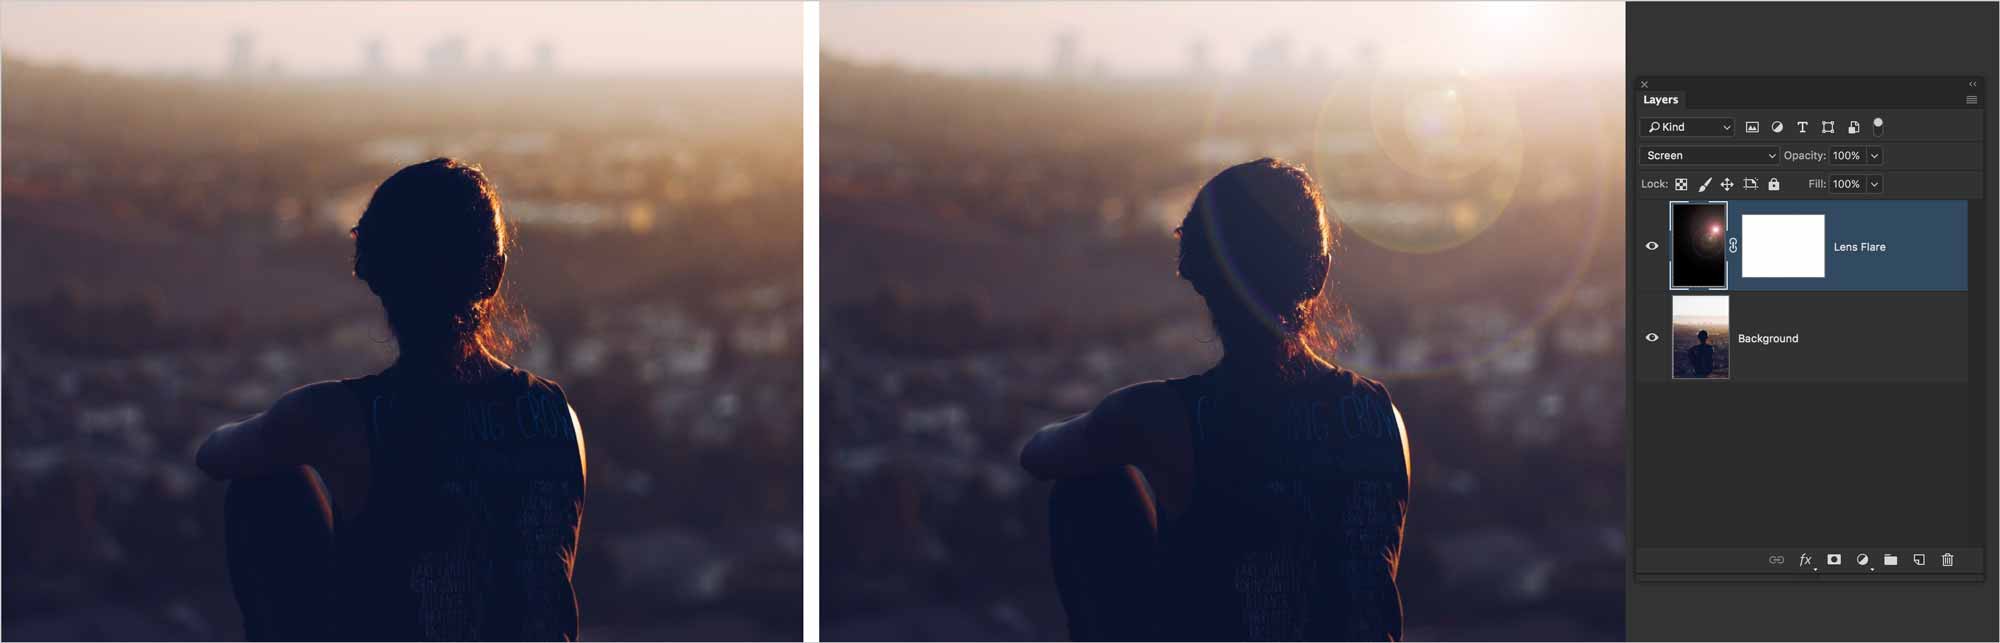
Create a new layer above your photo. Fill it with black by hitting D, then Option-Delete. Use Filter > Render Lens Flare…. Change the blend mode of the black layer to Screen.
Sharpening
You can even use a blend mode to sharpen a blurry photo. Sharpening with this method is a non-destructive and subtle way to apply sharpening.
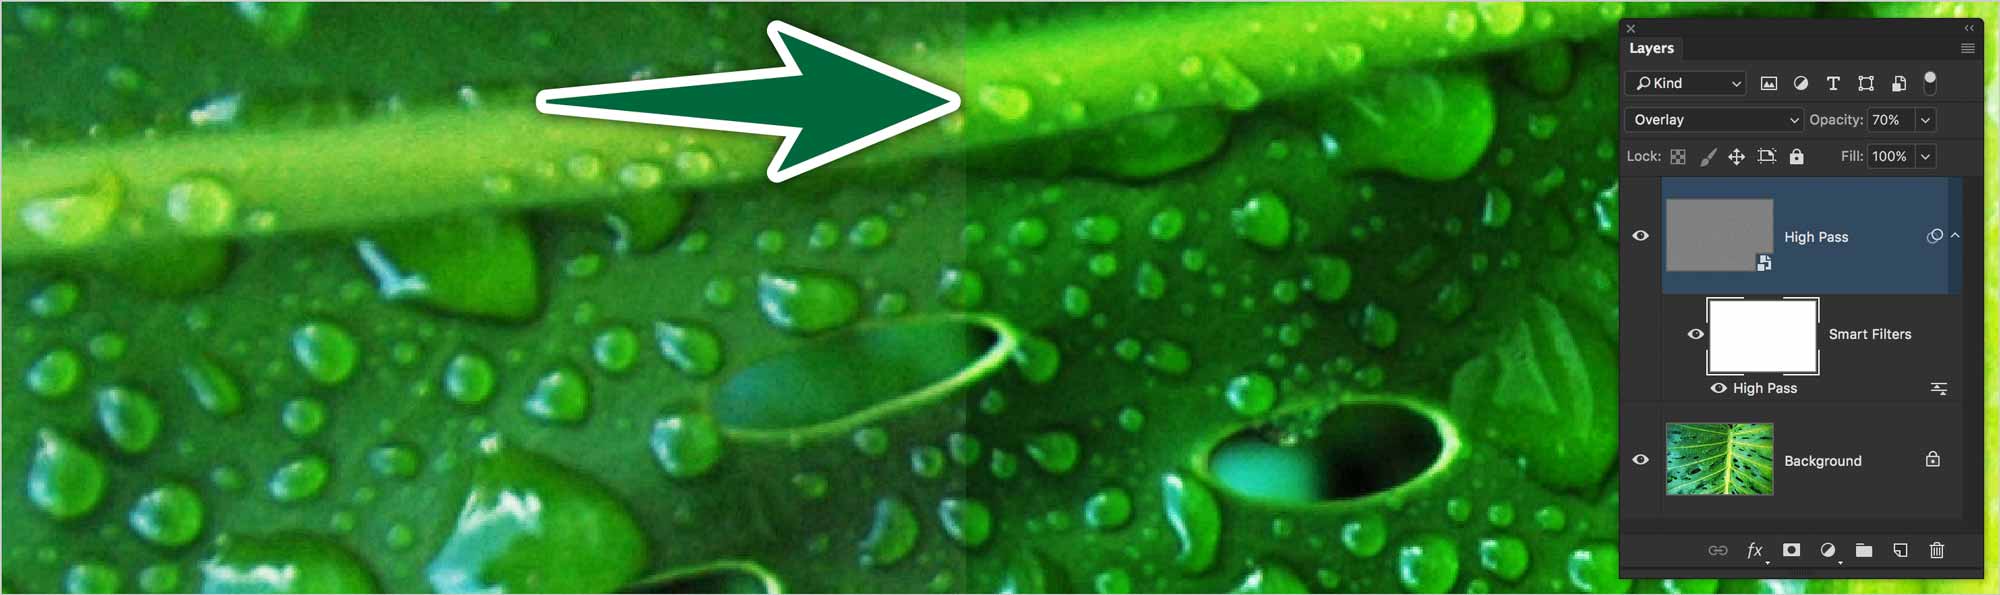
- Duplicate the layer you want to sharpen with Option-Command-J.
- Name the new layer. Right-click on the new layer, then choose Convert to Smart Object.
- Now use Filter > Other > High Pass….
- Set the number as high as you can without showing colour through the grey.
- Change the grey layer’s blend mode to Overlay.
If you need to sharpen more or less, simply double-click on the High Pass entry in the Layers panel to edit its value.
Softening
Now, allow me to blow your mind further. You can use the same technique to create the opposite effect. Rather than sharpening, you can smooth/blur areas very gently.
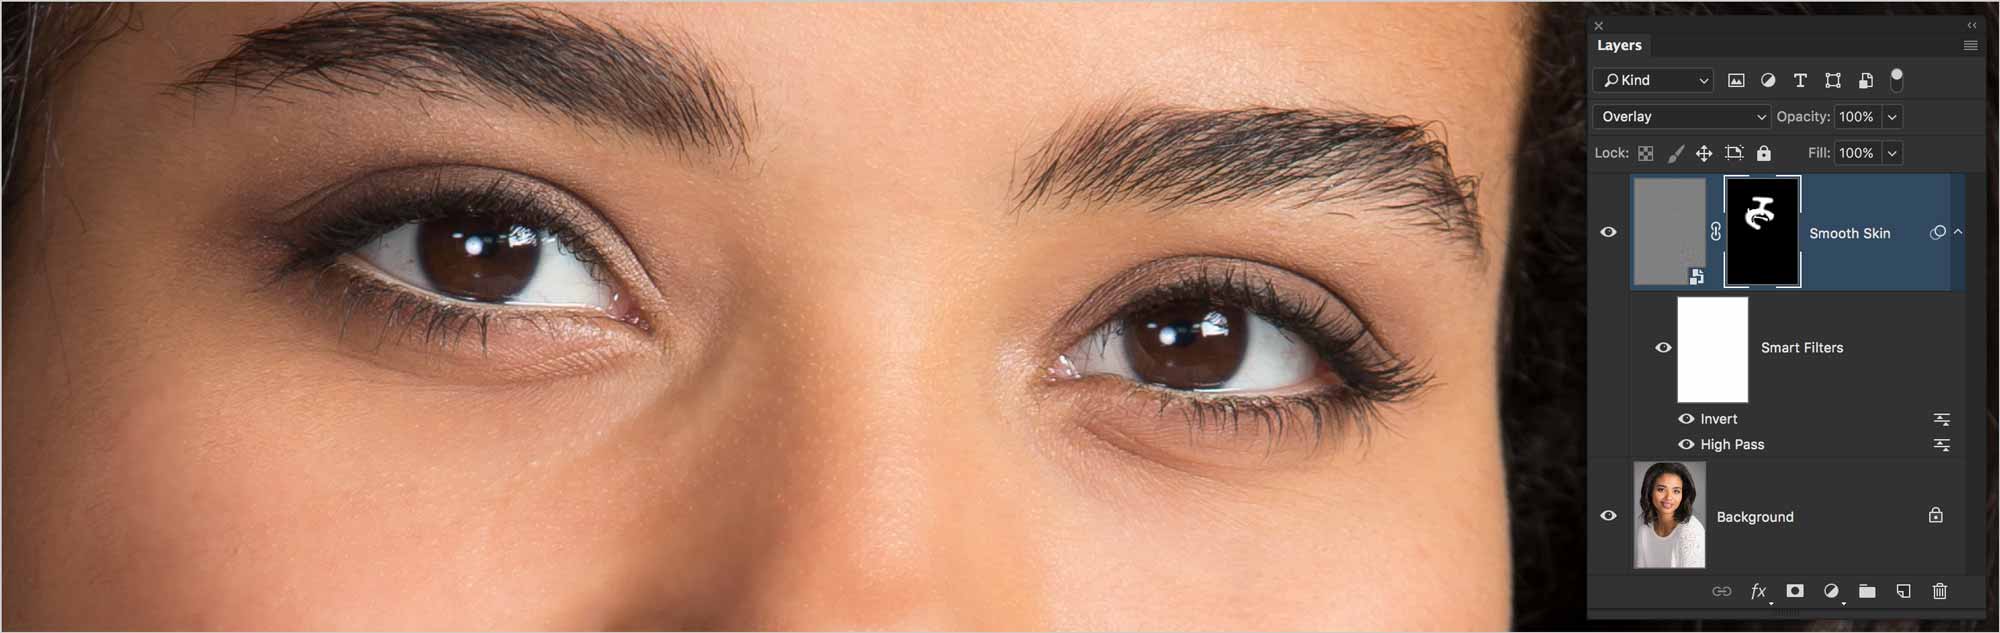
All you need to do is invert the grey layer with ⌘-i. This will have a smoothing effect. All you need to do is mask areas you don’t want smoothed.
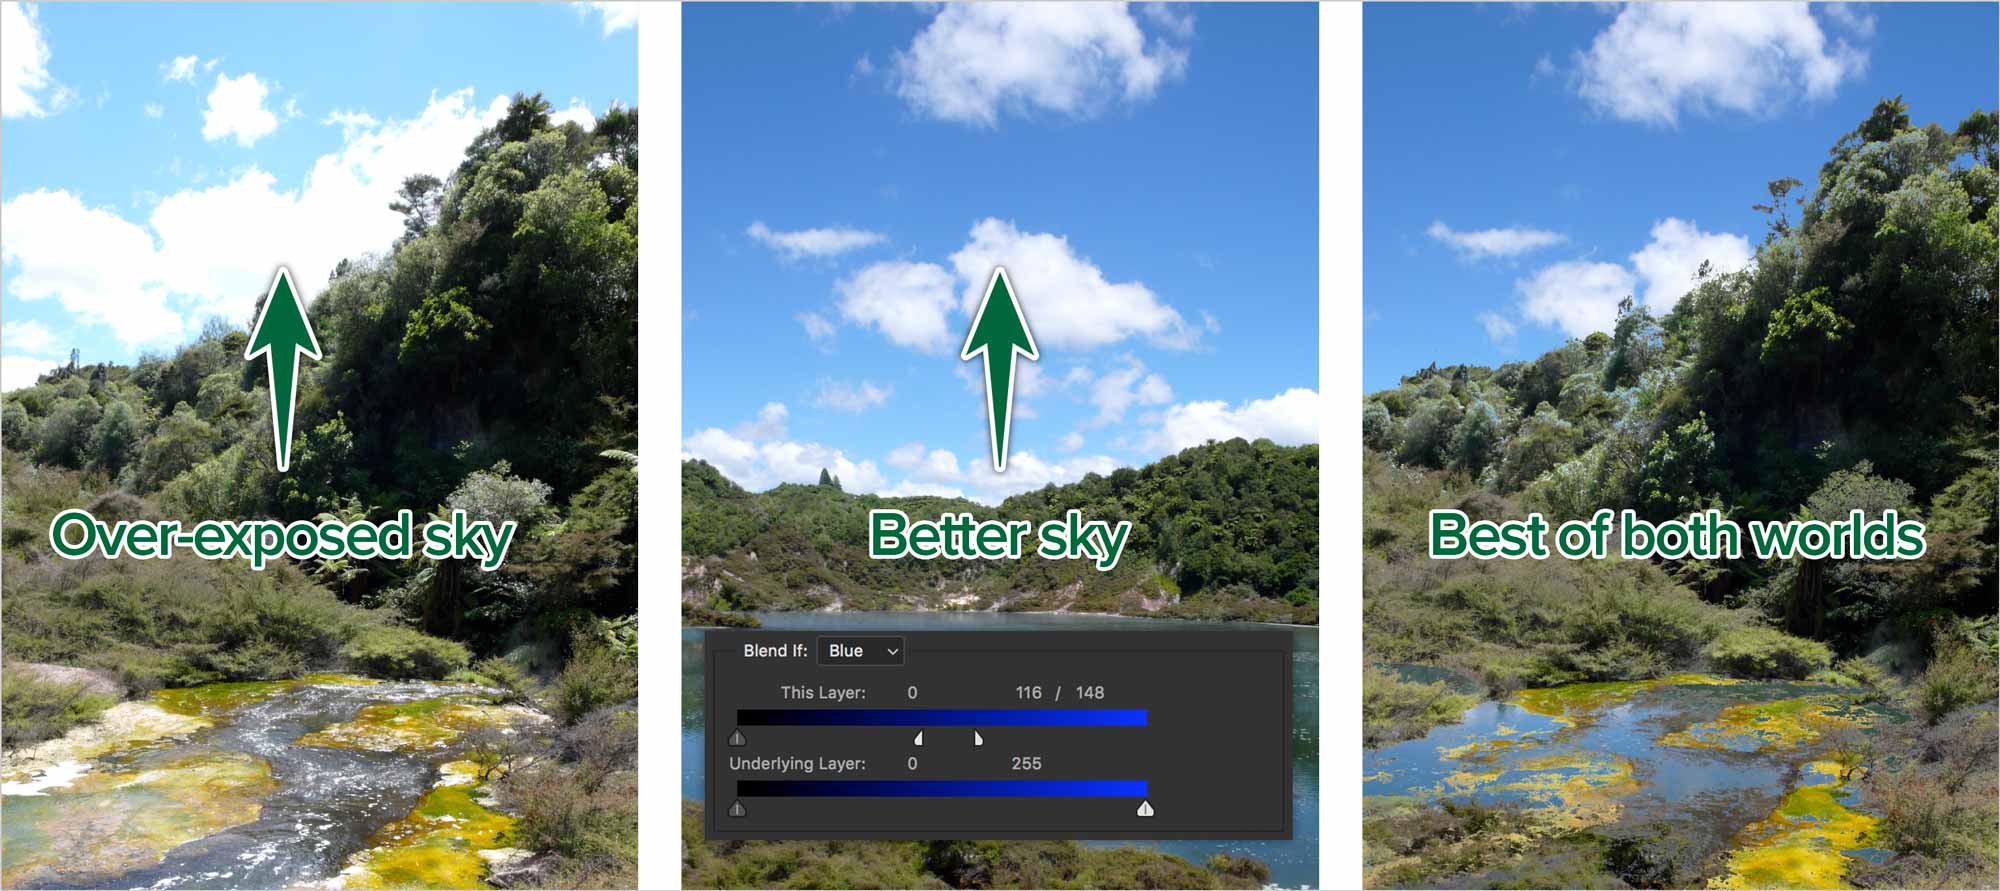
Blend If
Blend If functionality is accessed in a layer’s blending options. You can access this from the fx button at the bottom of the Layers panel or by double-clicking on a layer’s icon. At the bottom of the Blending Options dialogue, you’ll see the the Blend If controls.
Formative Activity
Use blend modes in the provided photos to execute each of the tasks described above.
- 01-photoshop-tonal-corrections-with-blend-modes.psd
- Lighten the foreground and darken the background using blend modes (and masks).
- 02-photoshop-lens-flare.psd
- Create a lens flare where the sun is shining behind the man.
- 03-photoshop-sharpen-with-high-pass.psd
- Use the sharpen with High Pass method to gently sharpen the photo of chipmunks.
- 04-photoshop-smooth-skin-with-high-pass.psd
- Use the High Pass technique to smooth the woman’s skin.
- 05-photoshop-blend-if-full-moon.psd
- Use Blend If to blend the black around the moon. Also, make the moon appear as though it’s behind the grass using Blend If.
Supplemental Links
- Adobe: Blending Modes
