Topics
Adjustment Layers are our go-to tools for adjusting colours in a photo in a way which allows us to easily edit our changes. They’re a special type of layer which affects everything below them in the stacking order, unless it’s masked.
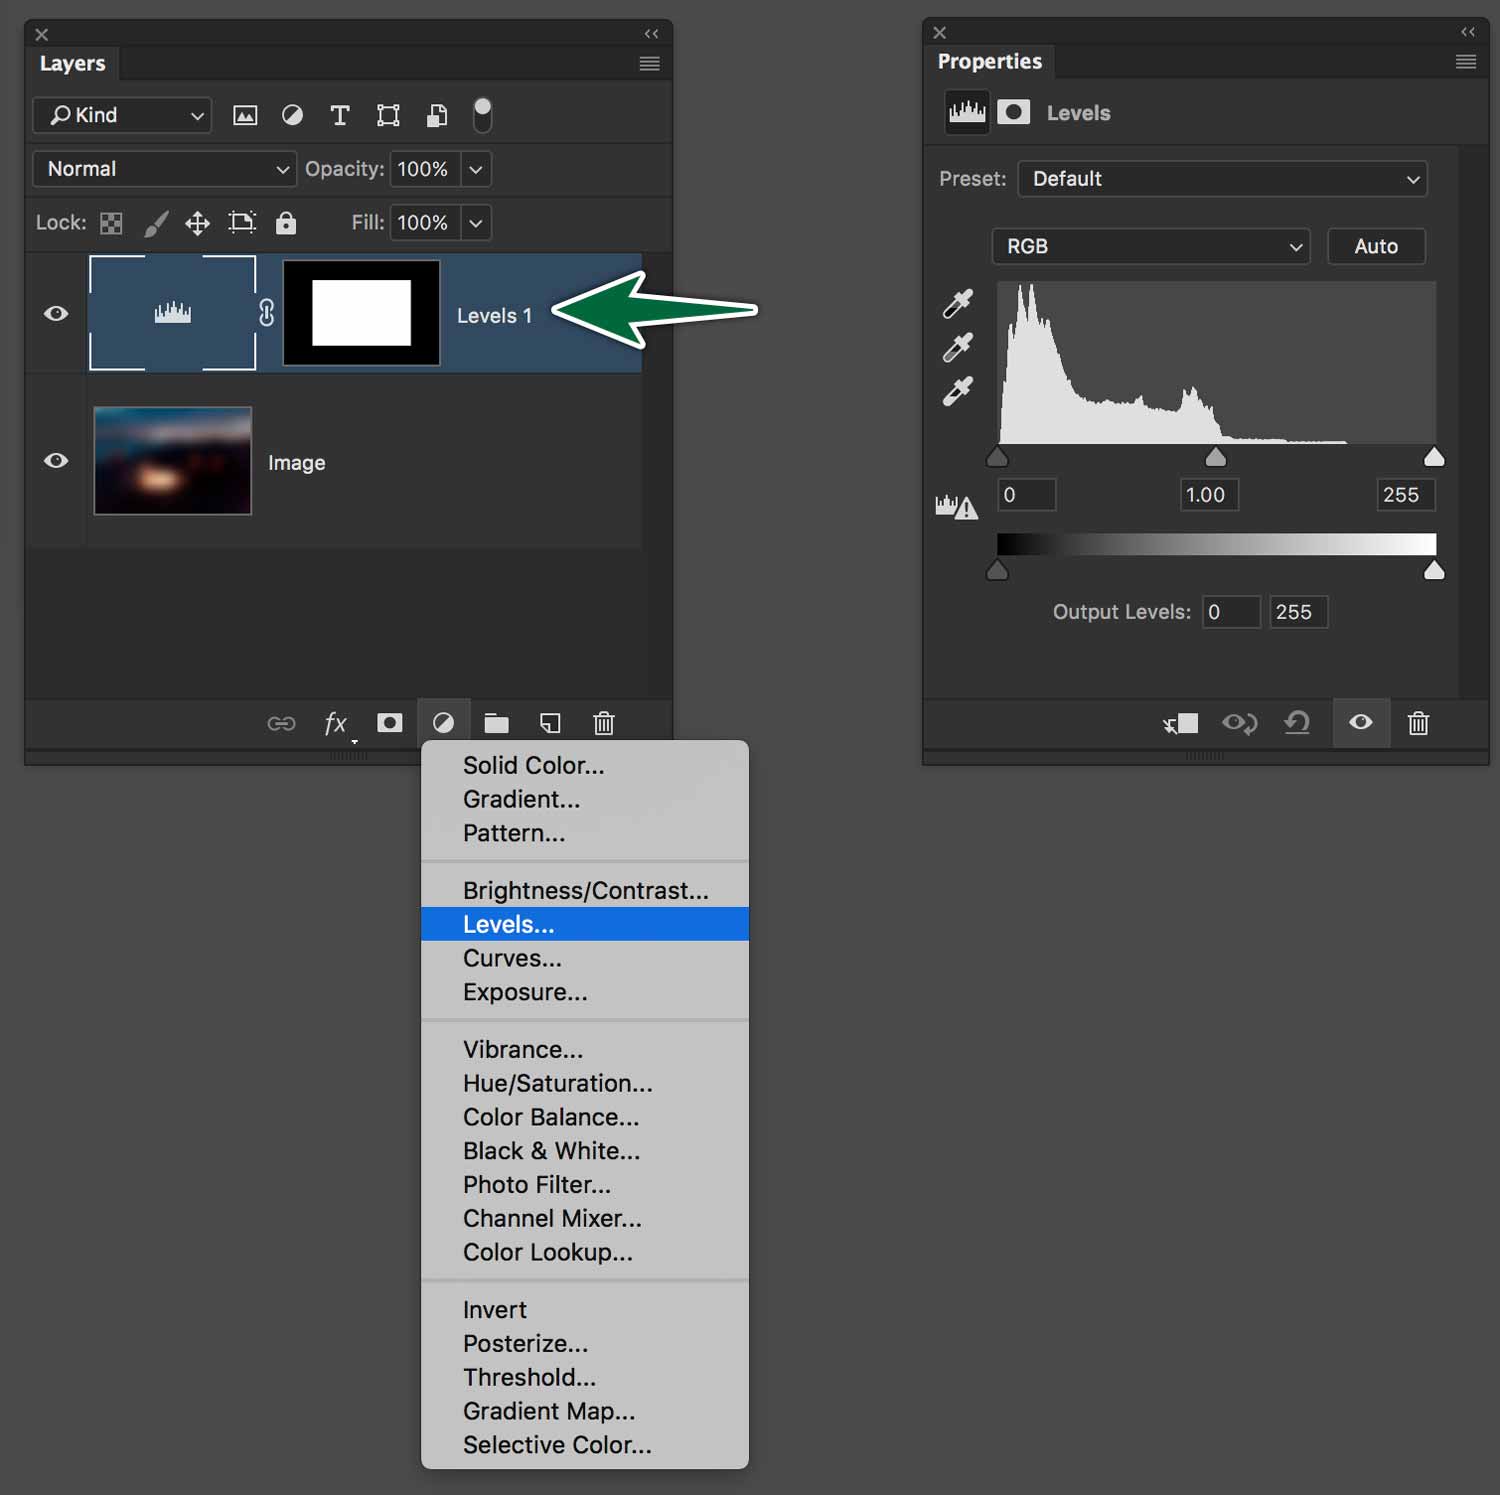
You can add an Adjustment Layer on an image from the button at the bottom of the Layers panel, as shown above. The Adjustment Layer appears above the targeted layer in the stacking order. It affects all layers below it.
Masking
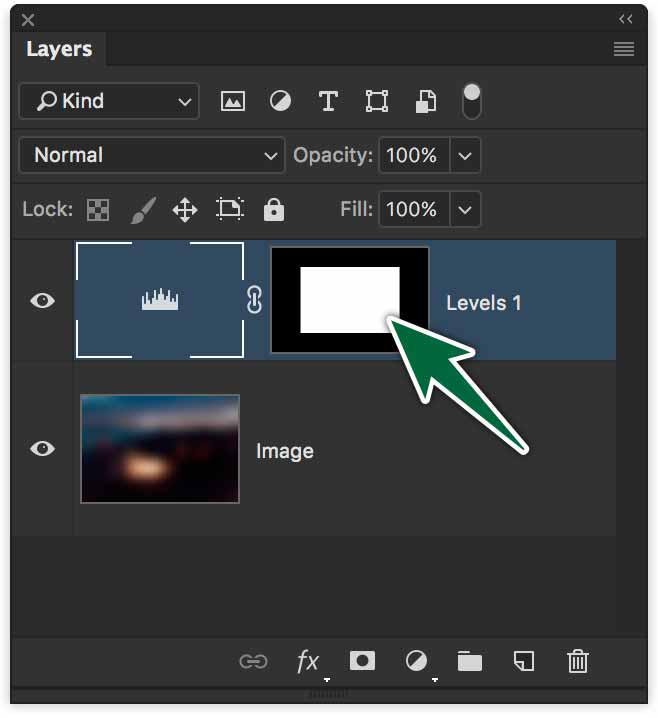
All Adjustment Layers come with a mask. In the image above, the adjustments affects the layer below only where the mask is white.
Adjustment Layers allow you to edit colours in photos without touching the photo’s original pixels. They’re overlays that sit above (or between) your layers to affect the layers below. It’s like looking through rose-coloured glasses. Adjustment Layers come with a Layer Mask built in. We’ll experiment colouring part of a photo.
Properties
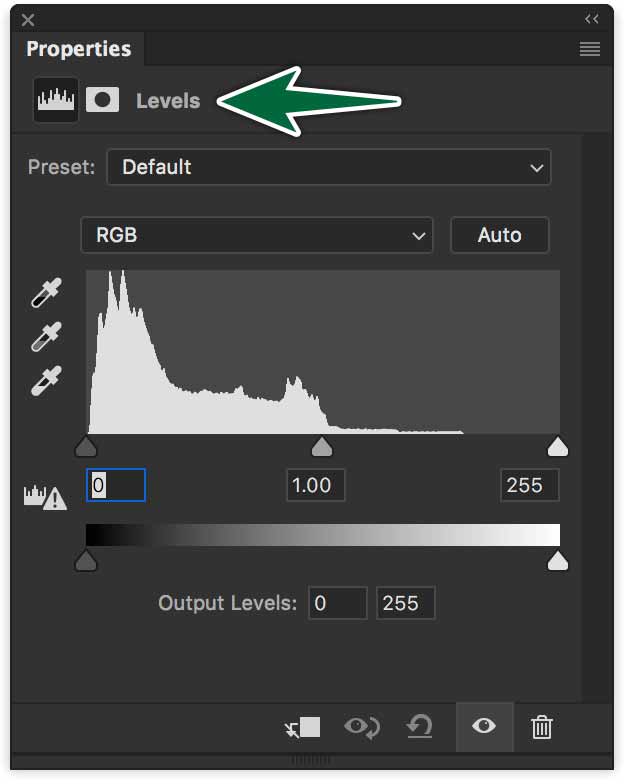
When you add an Adjustment Layer, the Properties panel appears to allow you to edit its settings. The Properties panel changes depending on the type of Adjustment Layer you’re using.
Opacity & Blend Modes
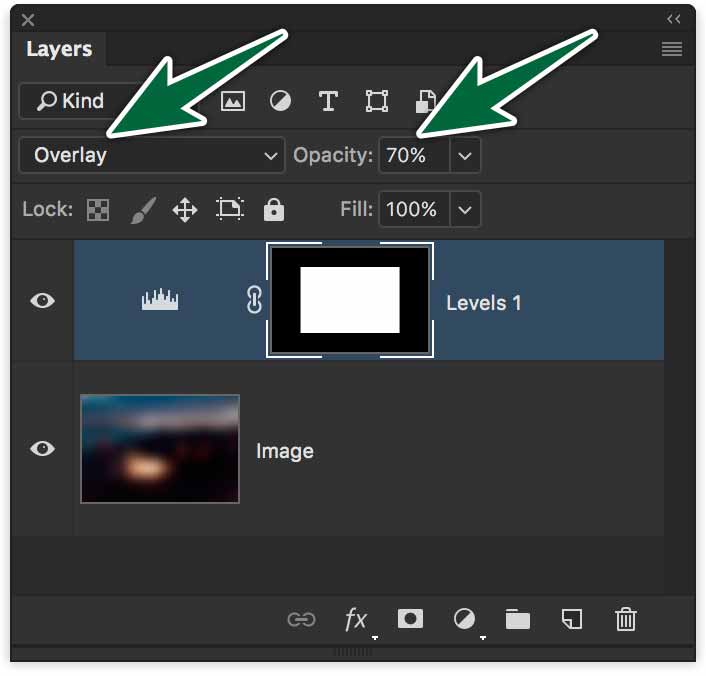
You can also edit the opacity and the blend mode of an Adjustment Layer to affect how it interacts with the layers below.
You can explore Adjustment Layers freely because they’re non-destructive. You can simply edit settings or delete the Adjustment Layer if things don’t work out. Keep in mind, that the stacking order in your Layers Panel counts.
Examples
Colourizing
Let’s open the flower photo to colourize the flower itself.
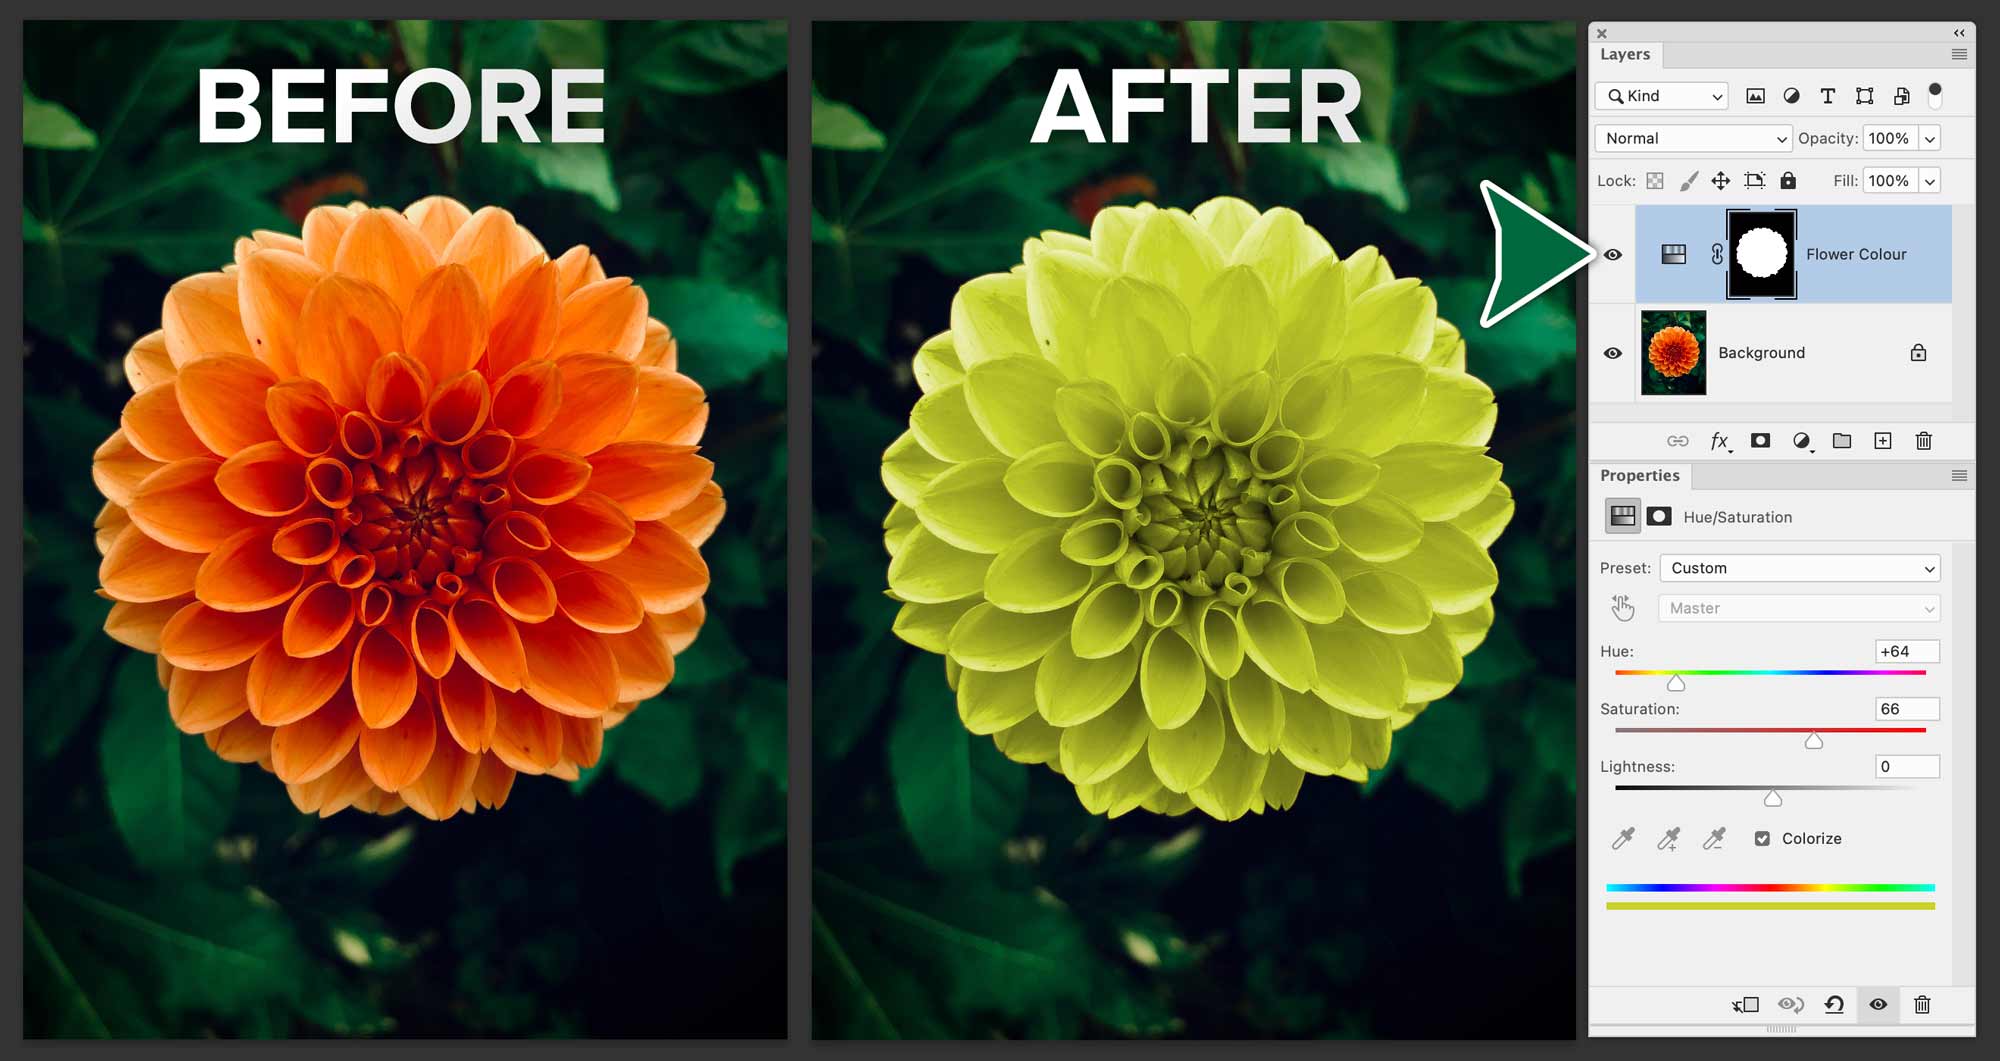
We’ll use Select Subject to create a marquee around the leaf since it has a unique colour in the photo to start with. Now we’re ready to add our Hue/Saturation Adjustment Layer. Adjust the colour of the leaf in the Properties panel. Remember to rename your adjustment layer by what it does, like Flower Colour.
Correcting Colour
Let’s use Levels Adjustment Layers to increase the range of colour in this photo.
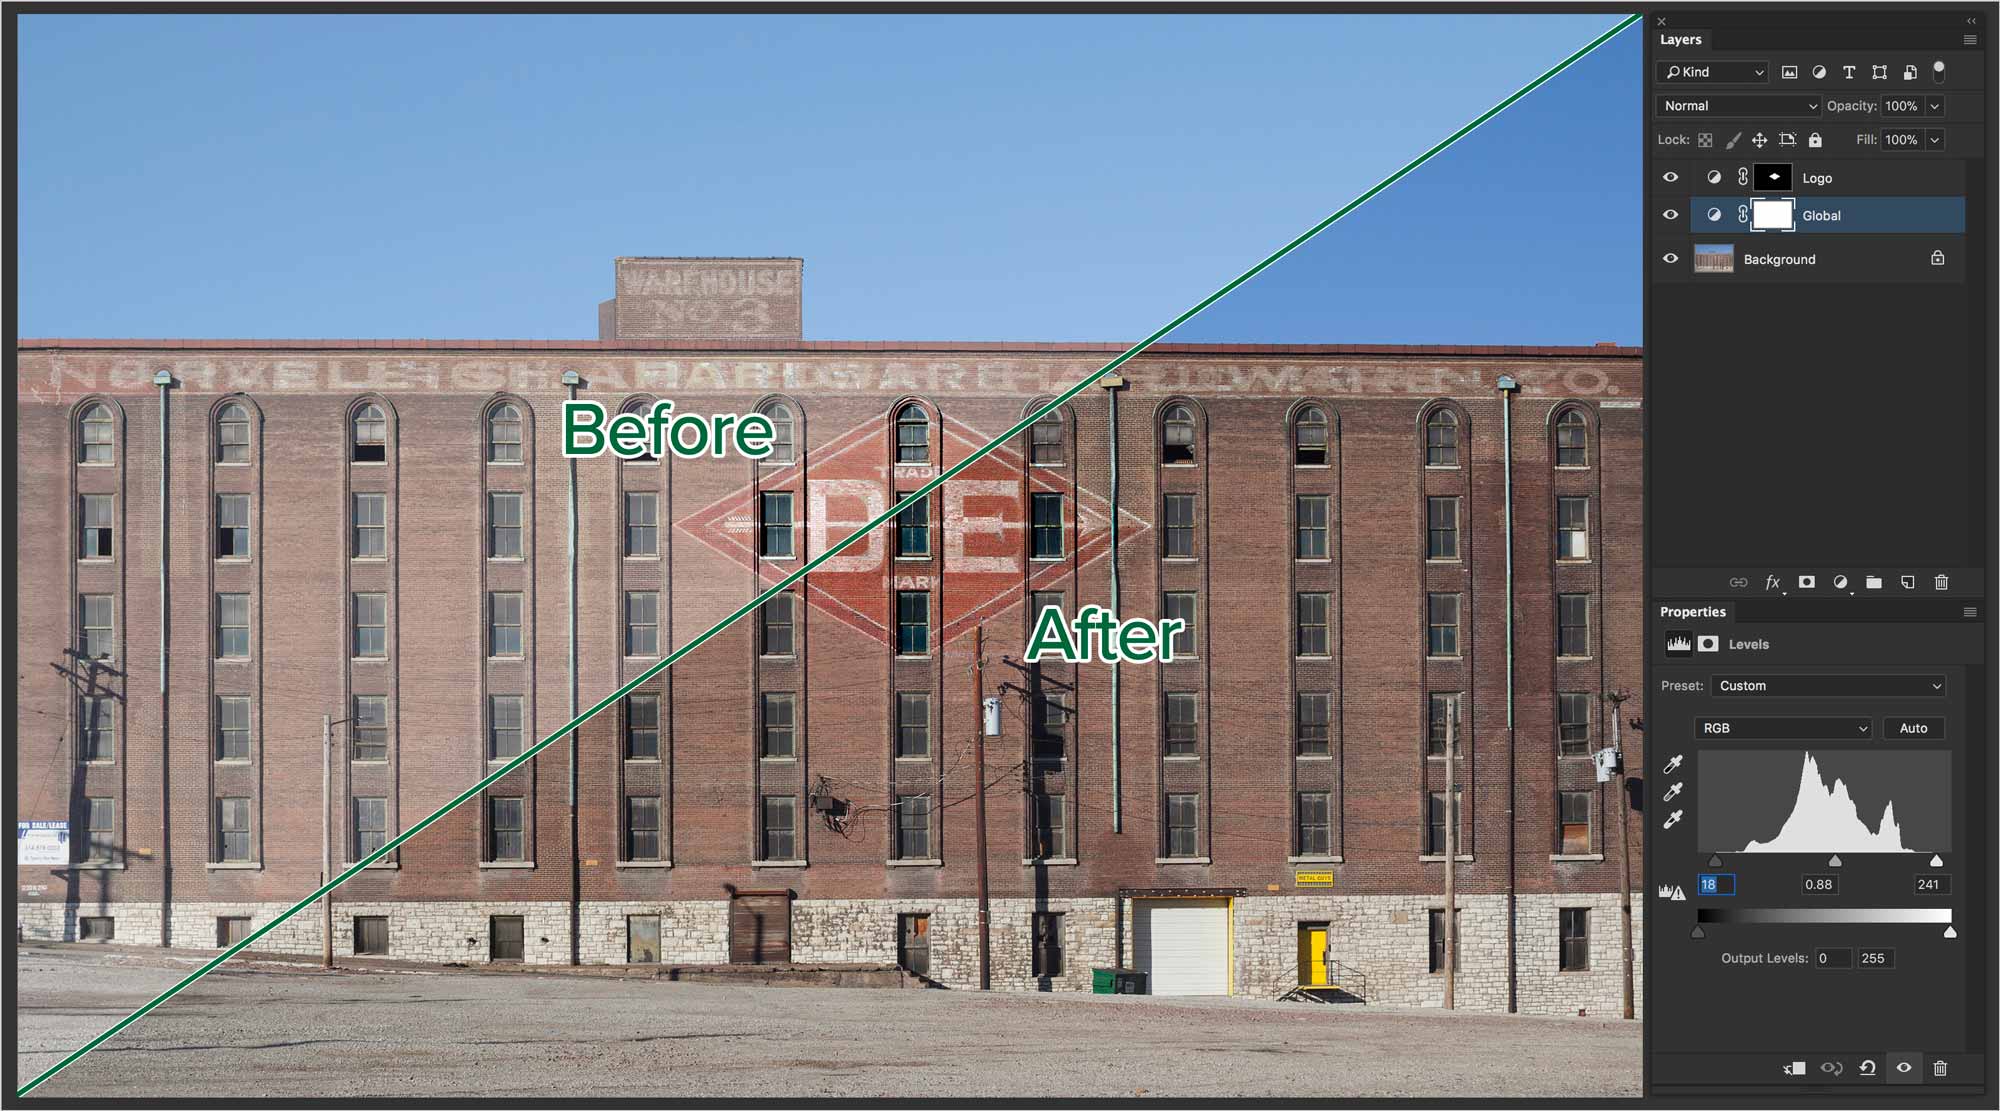
We’ll also enhence the logo that’s painted on the building. Once you’re done, it’s best to proof the photo in its final intent ie: web, print…
Blending Adjustment Layers
We’ll colourize some of the berries in this photo as seamlessly as possible.
The Adjustment Layer is acting like a coloured acetate over our photo. The Hue Blend Mode helps the colour blend with the paint below.
[The Hue blend mode] creates a result colour with the luminance and saturation of the base colour and the hue of the blend colour. Adobe

These are the steps:
- Add a Hue/Saturation adjustment layer.
- Name your adjustment layer.
- Click Colourize in the Properties Panel
- Fill the adjustment layer’s mask with black with Edit > Fill > Black.
- Paint berries with a very soft brush to change their colour.
- Set the blend mode of your adjustment layer to Hue.
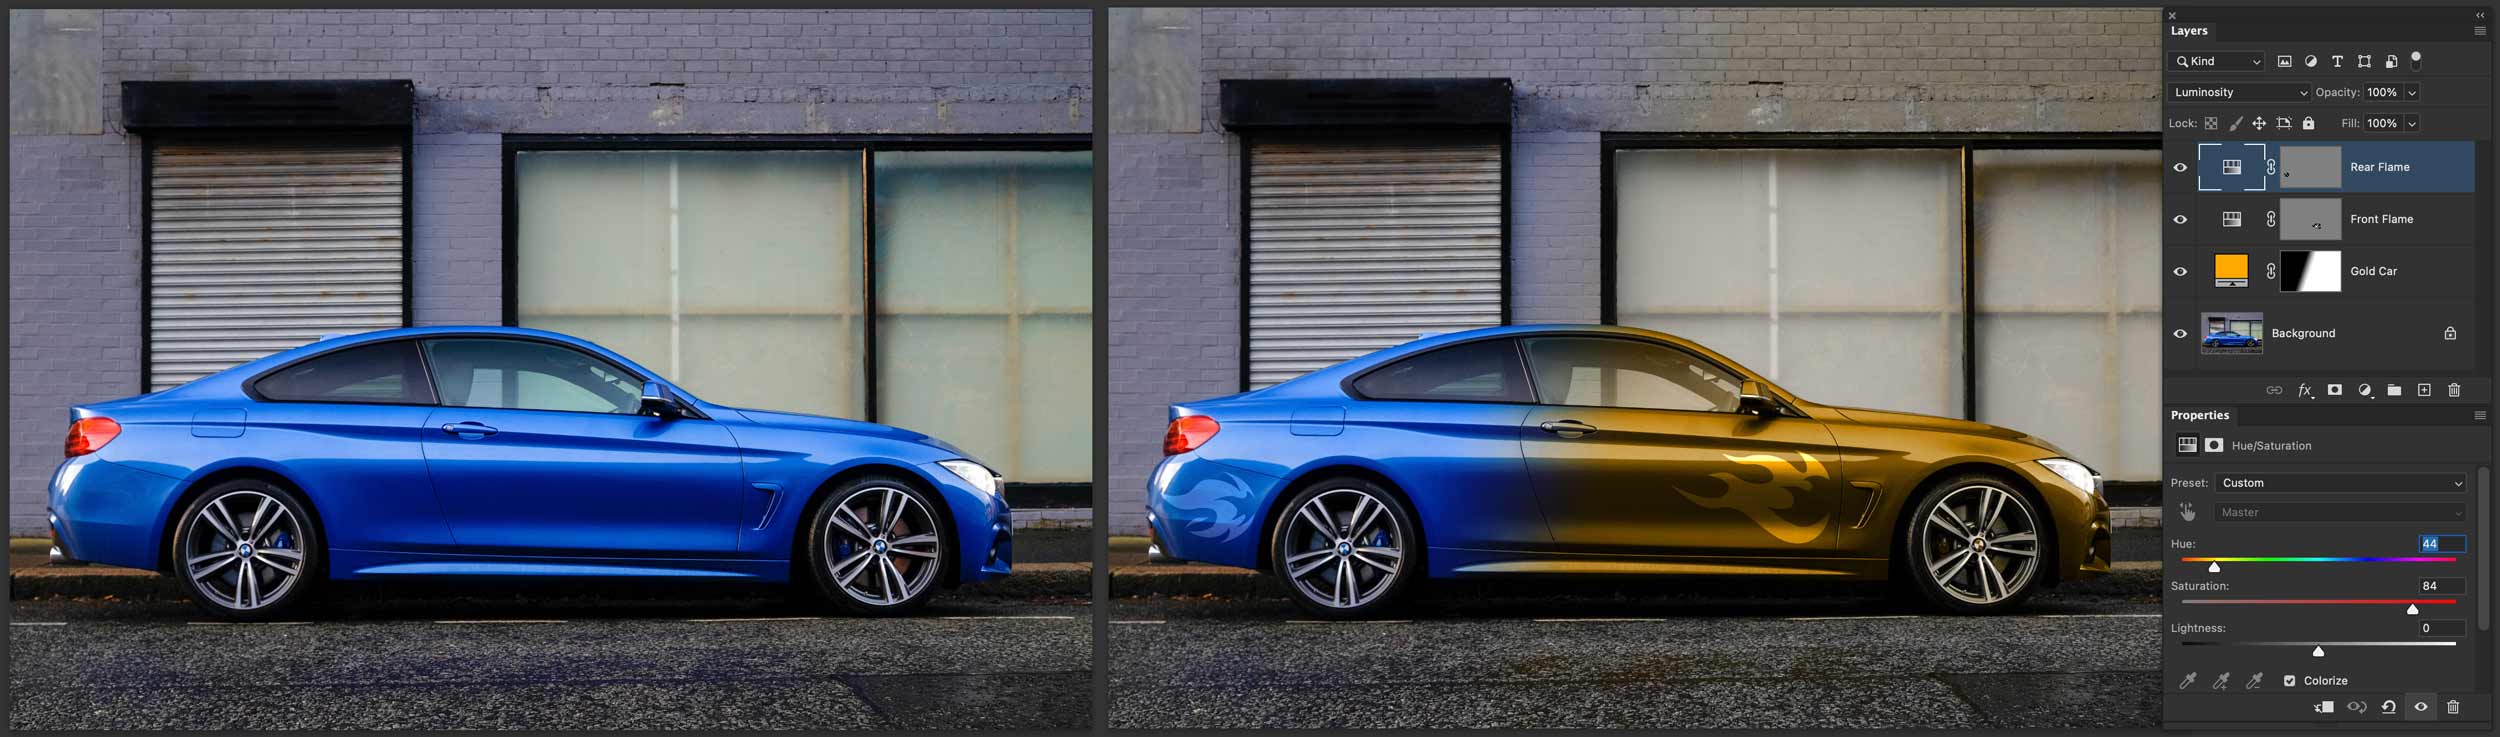
Hot Rod a Car!
Let’s have some fun turning an every-day Fiat 500 into a real hot rod.
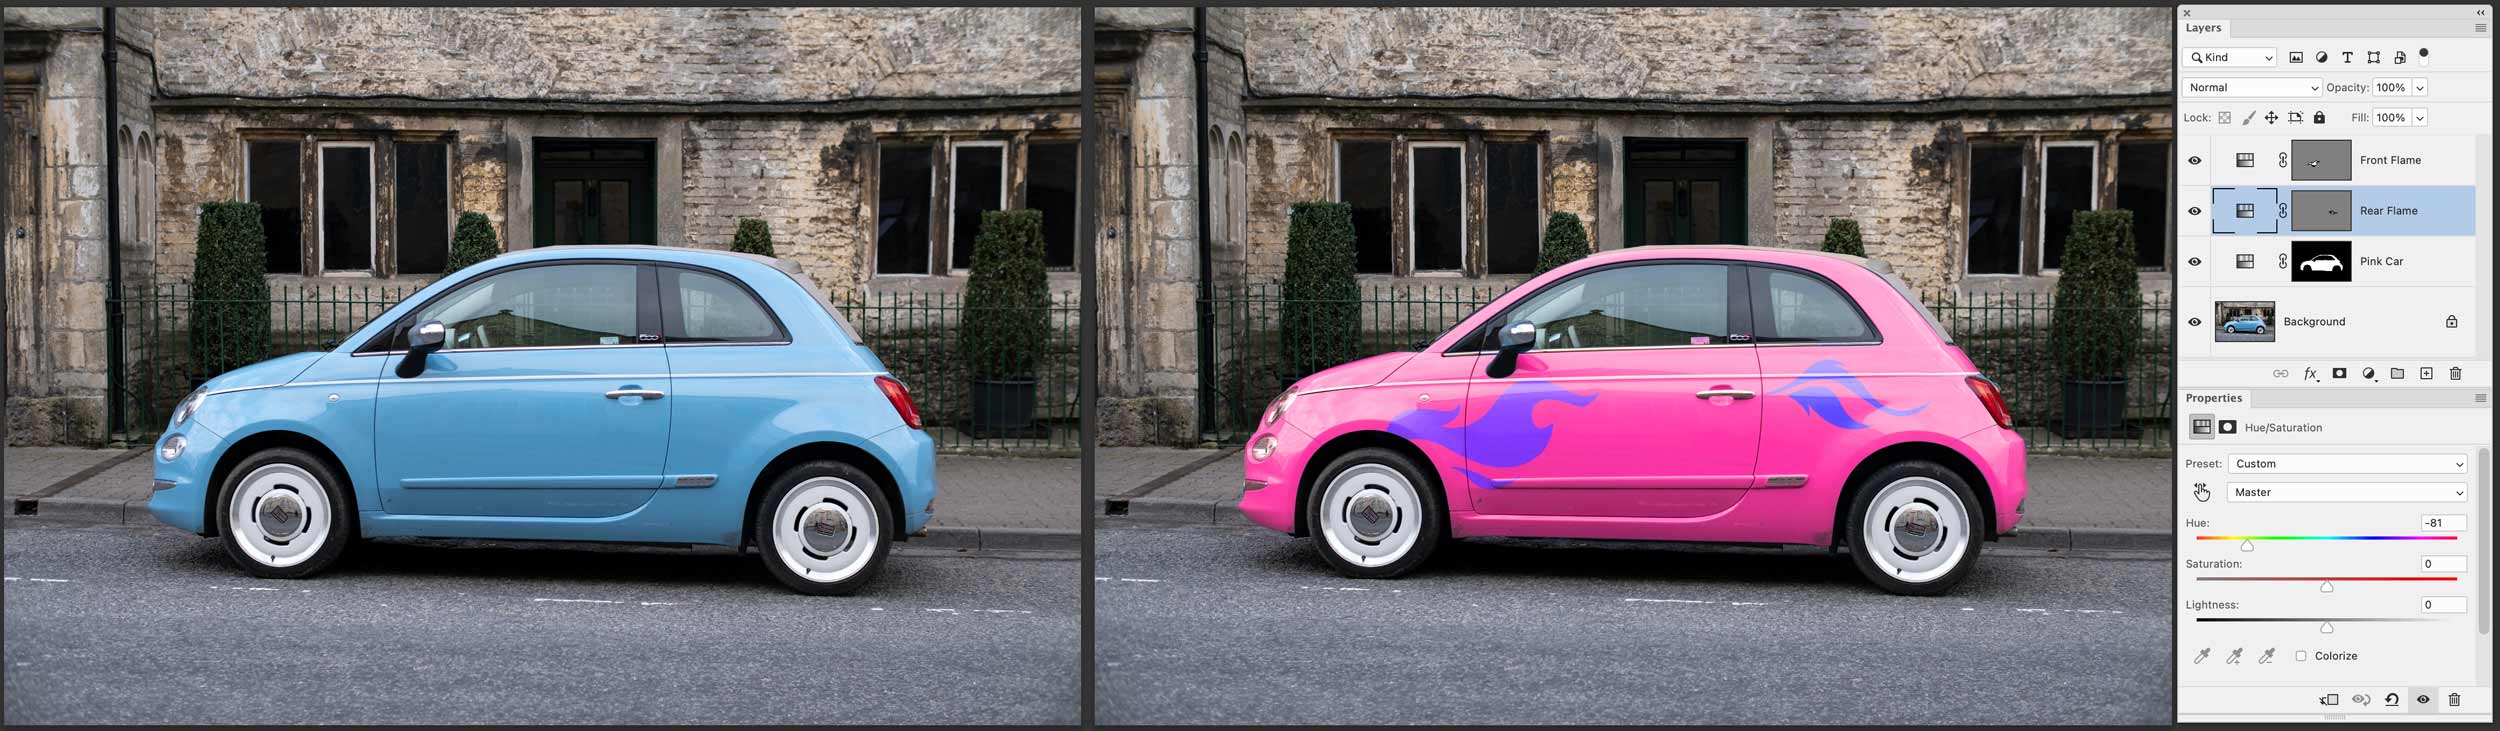
First, we select the car, then add the adjustment layer to make it the colour you want. Now we can jazz it up with some cool flame decals – all on Adjustment Layers.
Formative Activity
Your job is to use Adjustment Layers to edit the photos as shown below.
Colourizing Photos
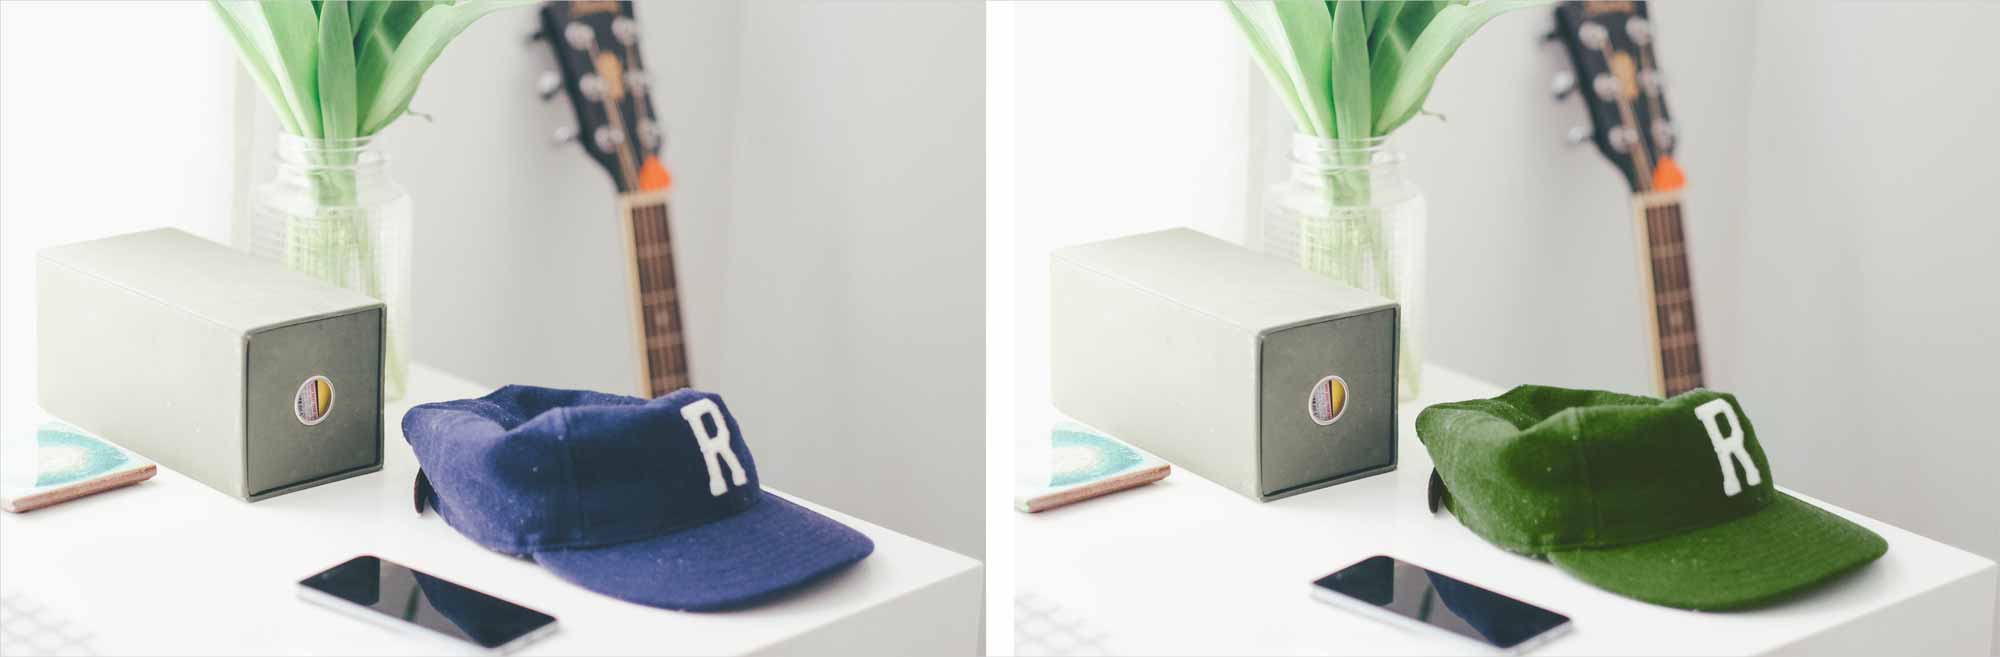
Change the colour of the hat with a Hue/Saturation adjustment layer. Your edits mustn’t be detectable.
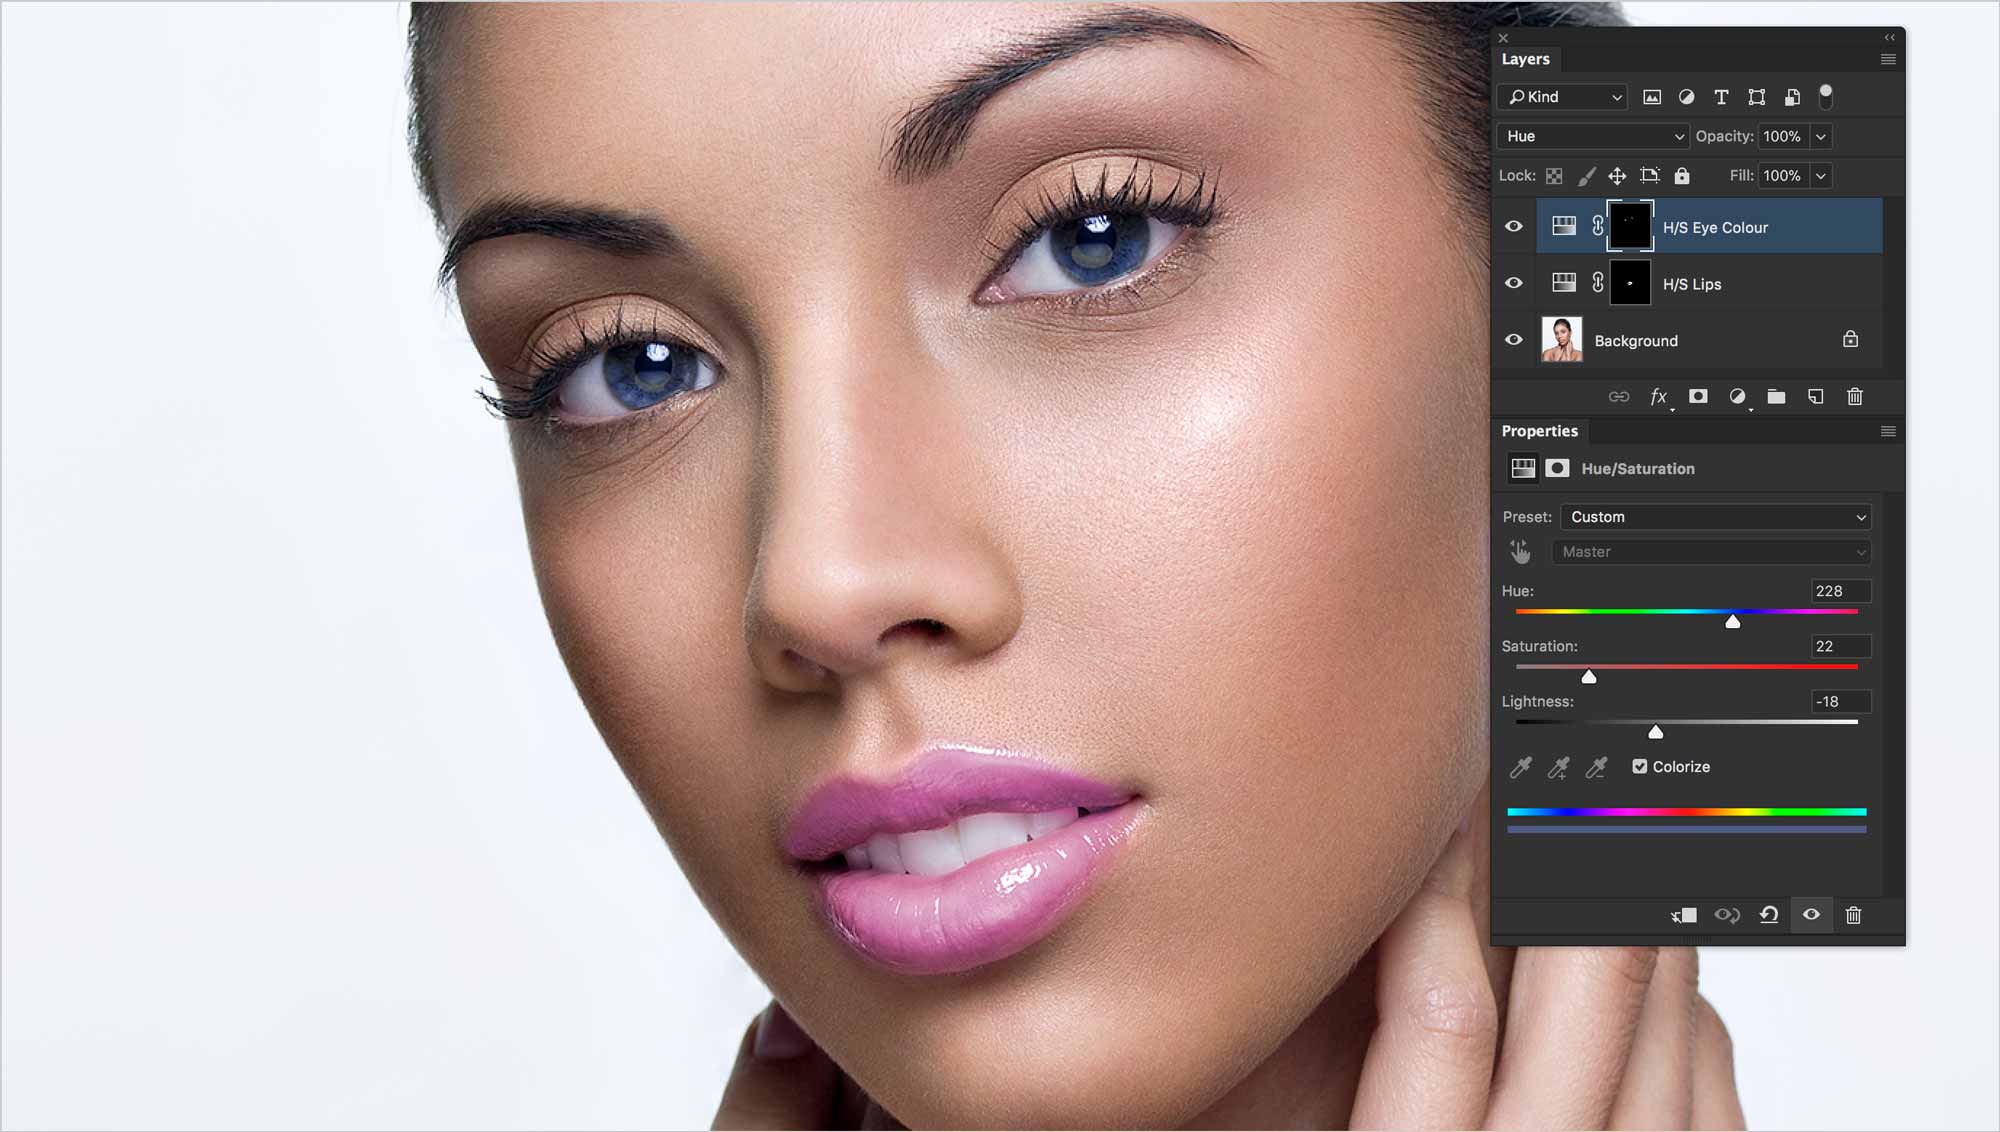
Create Adjustment Layers to edit the colours of her eyes and of her lips. Make sure your edits are as seamless and realistic as possible. I know it’s tempting, but no silliness here.
Correcting Colour
Use Adjustment Layers to bump up the colour in this photo.
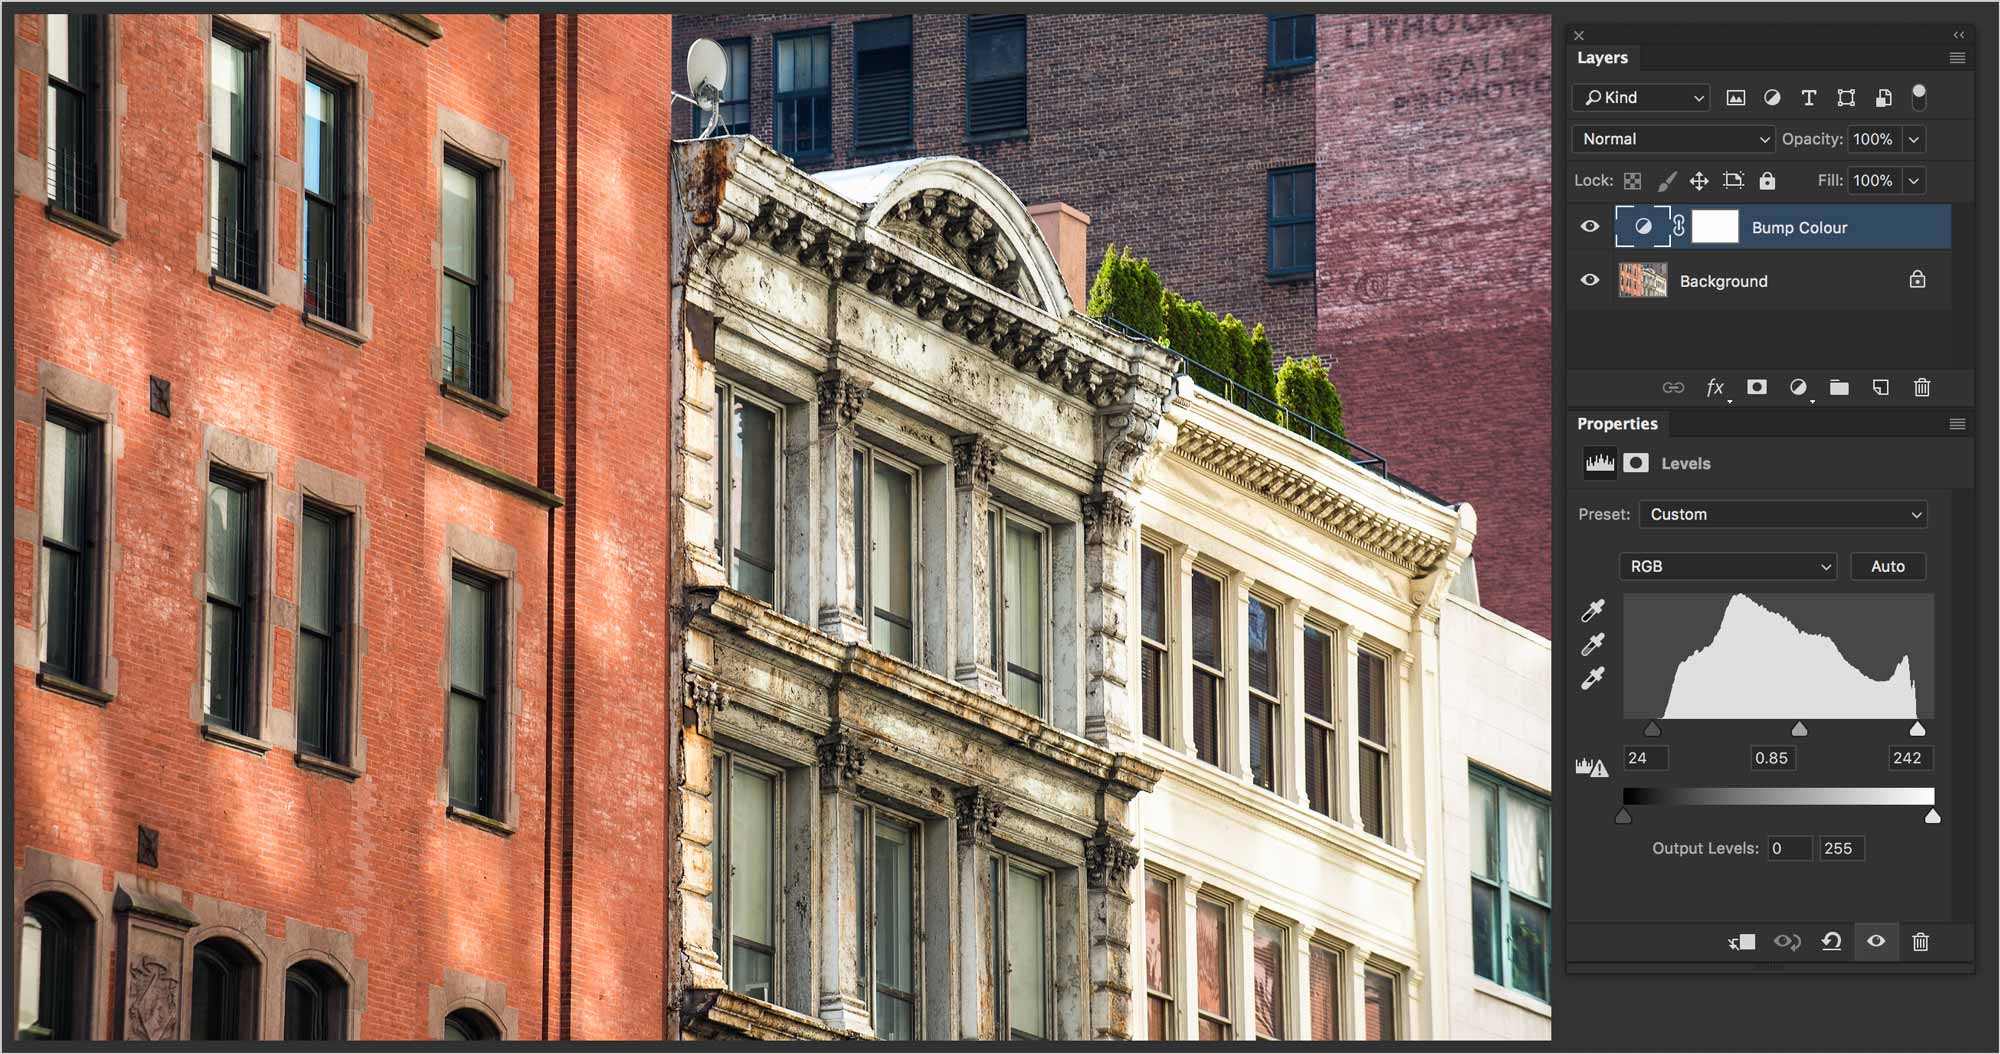
Adjust White Point and Black Point with a Levels Adjustment Layer.
Blending Adjustment Layers
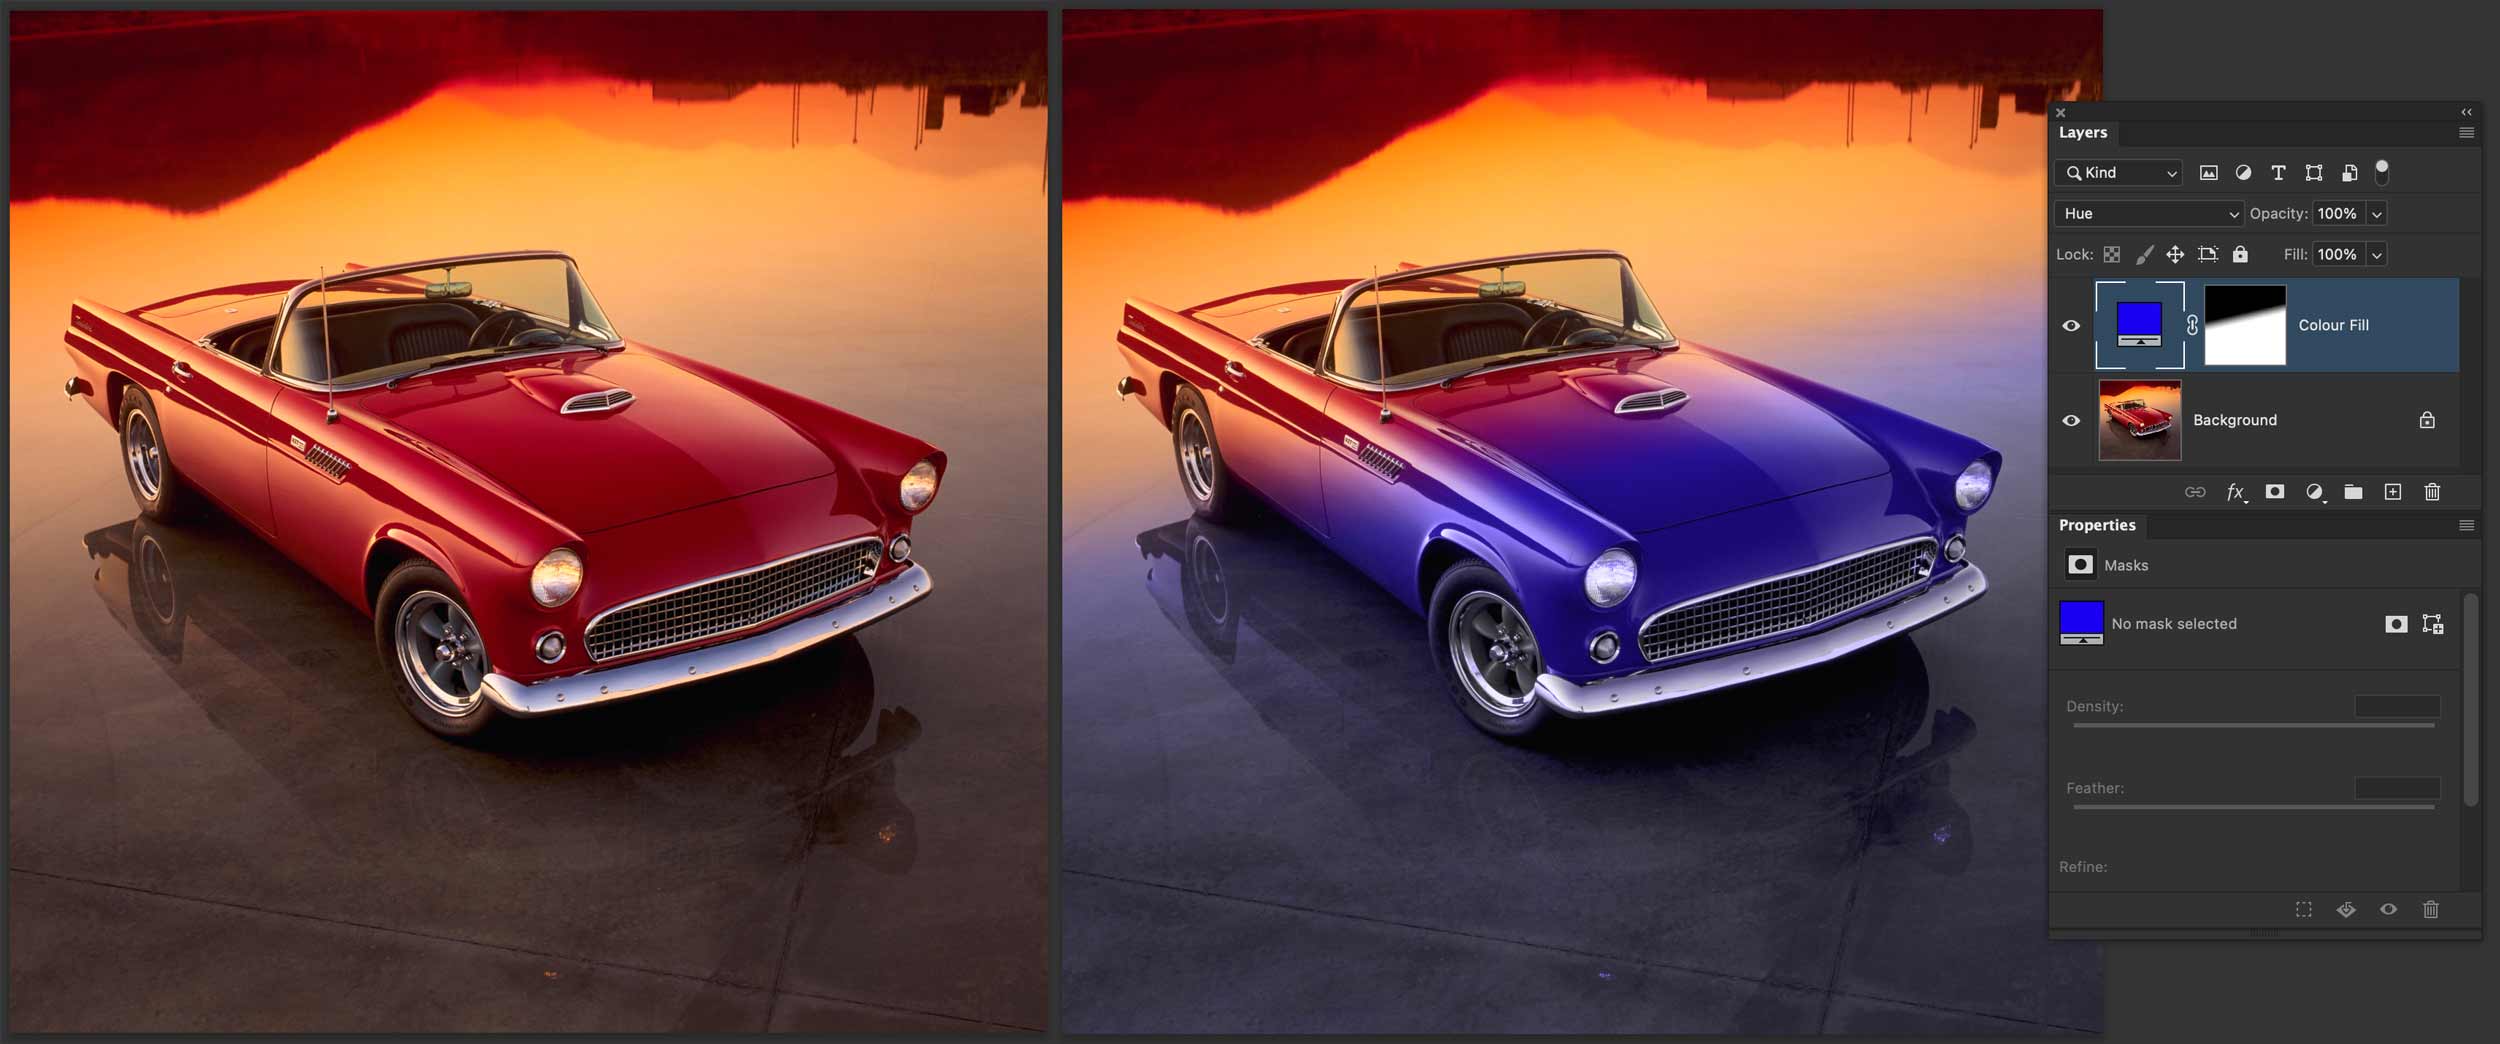
Use a gradient on Colour Fill Adjustment Layer and a blend mode to colourize the front of the car.
Hot Rod Your Own Car!
Use the provided photo of the BMW and the vector flames to trick out your ride.