Topics
In this unit, we’ll go through Photoshop’s settings to fine-tune them to suit our needs. We’ll also create a custom workspace to manage the application’s panels. We’ll get rid of that pesky Application Frame in the process.

We will also load a set of custom keyboard shortcuts. We’ll be learning these during the semester. They’ll greatly speed up our work, as we gain experience using Photoshop.
Download and un-compress the file. Navigate to and move the file to this folder. You may or may not need to quit and re-launch Photoshop to see the new set of keyboard shortcuts.

Preferences
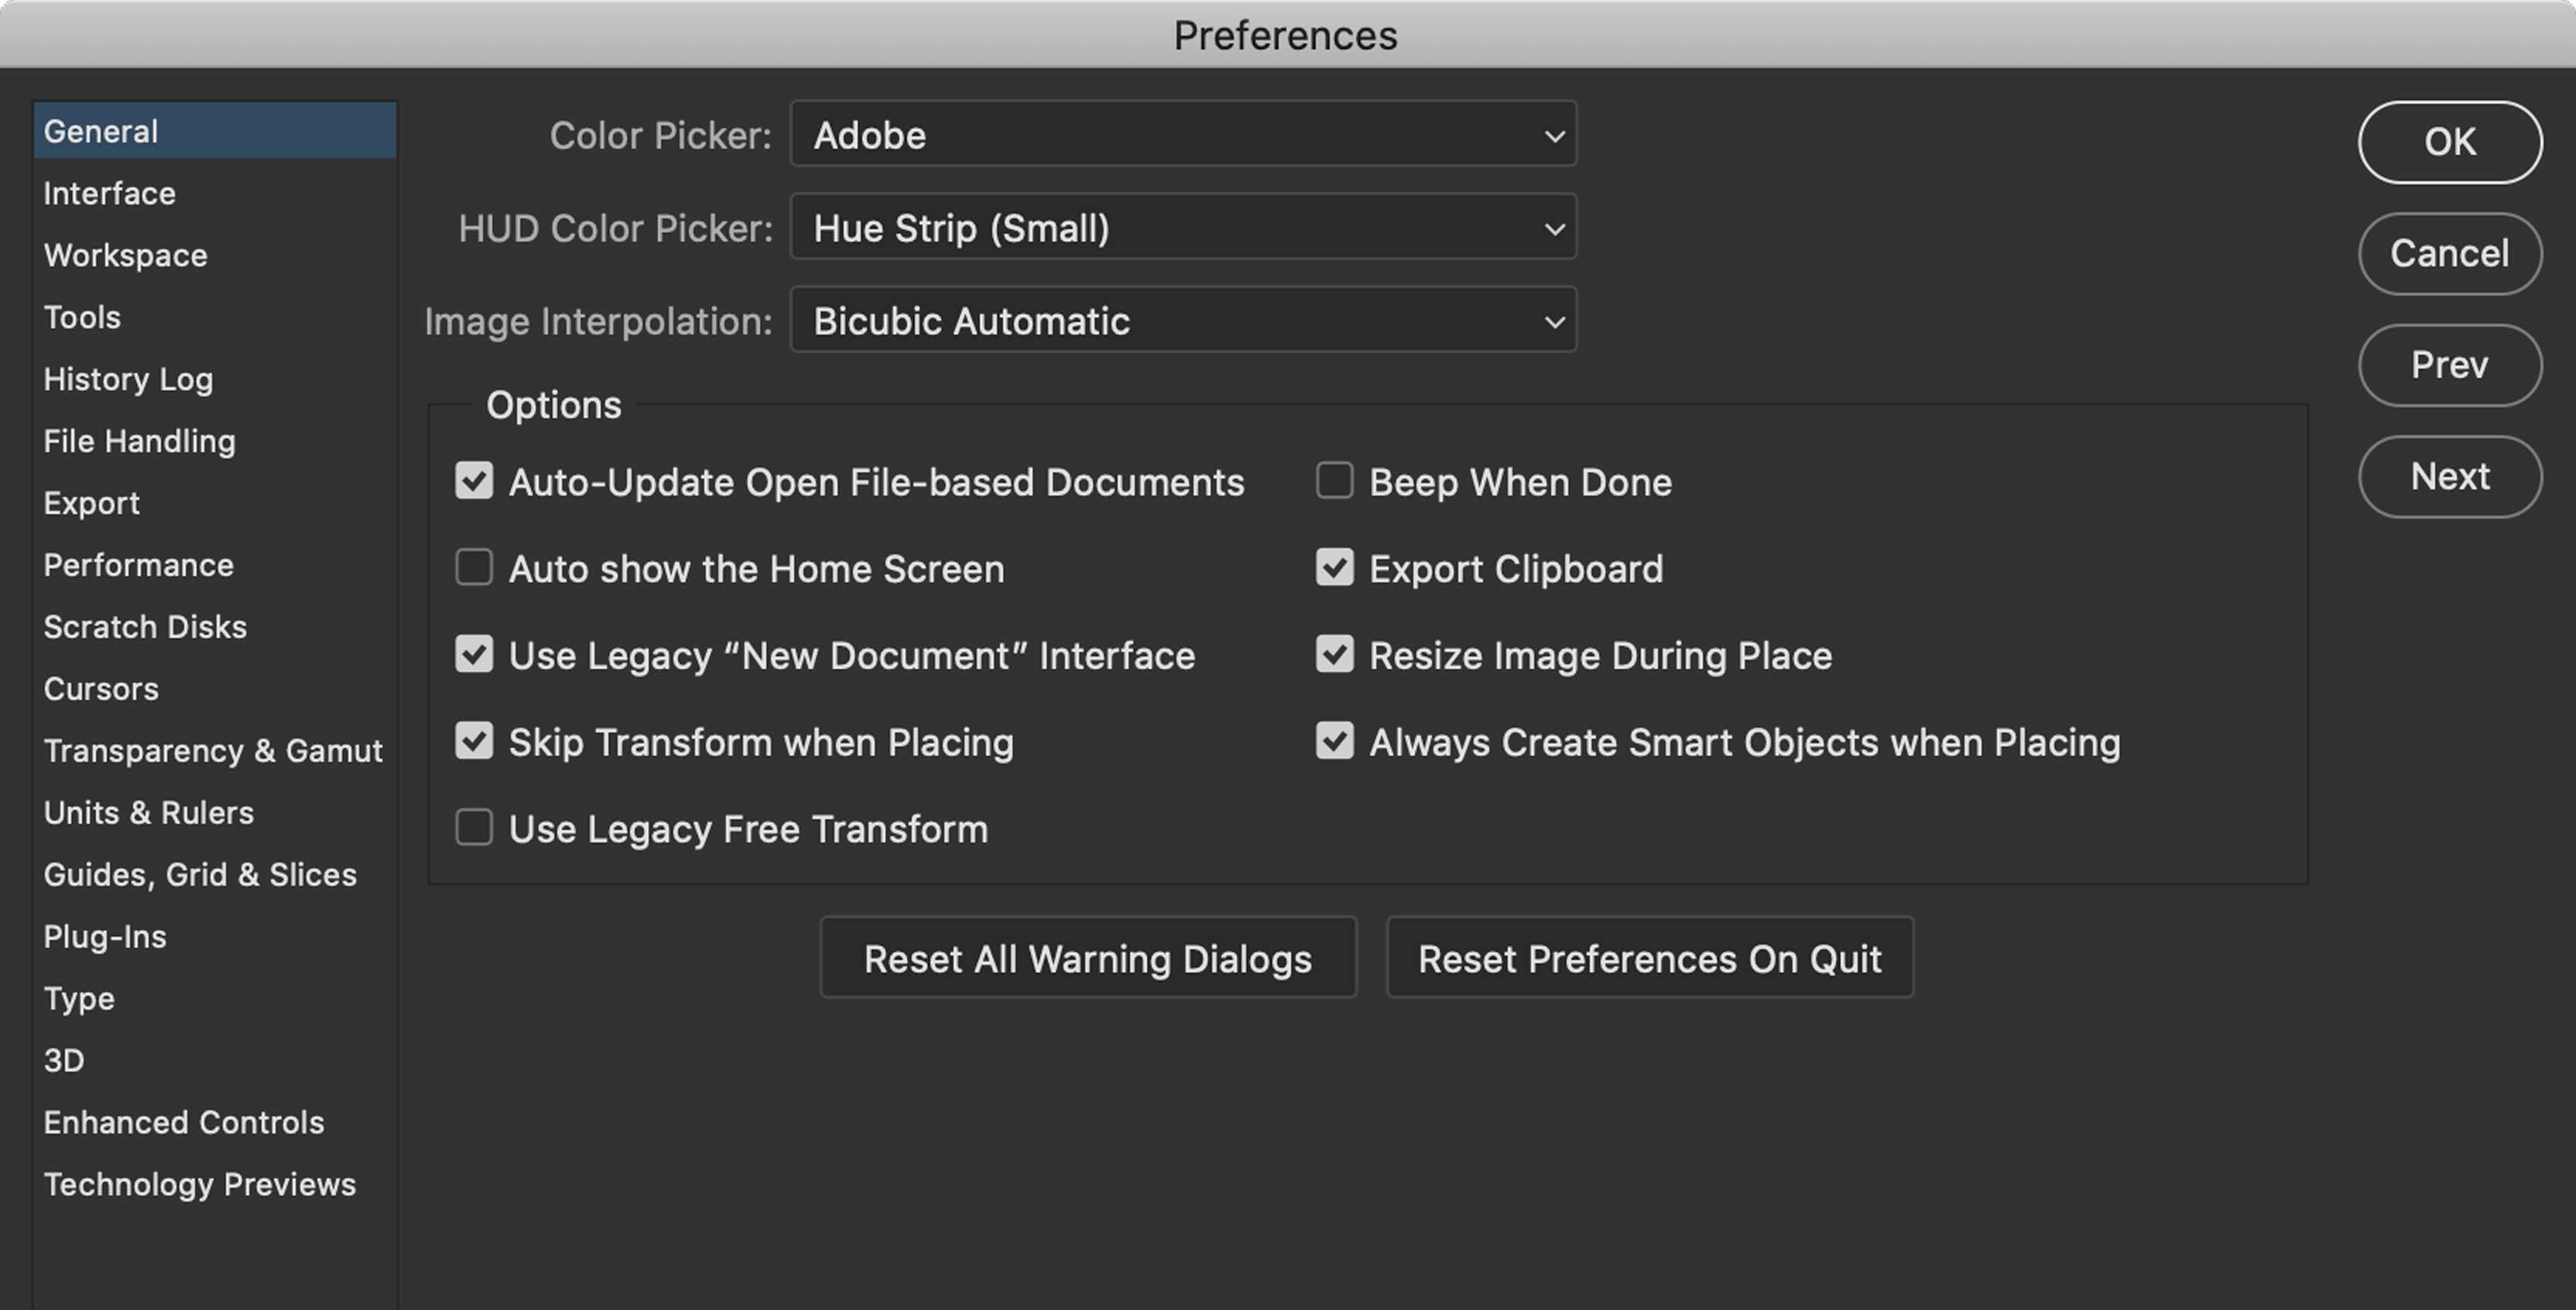
Download the support files for this page. There are a series of images of Photoshop Preferences panes. Match your settings to these.
Custom Workspace
Photoshop has many panels. You don’t need them all open at once. We always want to open only the panels we need for the job at hand. That’s what workspaces are for. They are simply saved sets of open panels.
Your best bet is to hit Shift-Tab on your keyboard. That will turn off all panels except for Tools and Control. Now we can start from scratch. Go Window > Application Frame then un-check it to turn it off.
Now turn on these panels from the Window:
- Layers, Channels, Paths are docked together
- Colour, Swatches are docked together
- Adjustments and Properties can be docked together
Go Window > Workspace > New Workspace… then name it with your name. Uncheck all the checkboxes in the save dialogue. Once you’ve done this, it will be your default set of panels. My default workspace is simply called AL.
If you want to add or remove a panel from this set, all you do is make then change, then re-save a new set with the same name. This will over-write your old one.
If you find yourself needing a whole different set of panels for a specific type of work, go ahead and make new sets.

