Topics
In order to keep all course files organized, you’ll create a folder for each course inside a Semester One folder. Place the Semester One folder inside of either a Google Drive, a Dropbox.com folder. Once you’re done, drag your Semester One folder to the Sidebar of a Finder window.
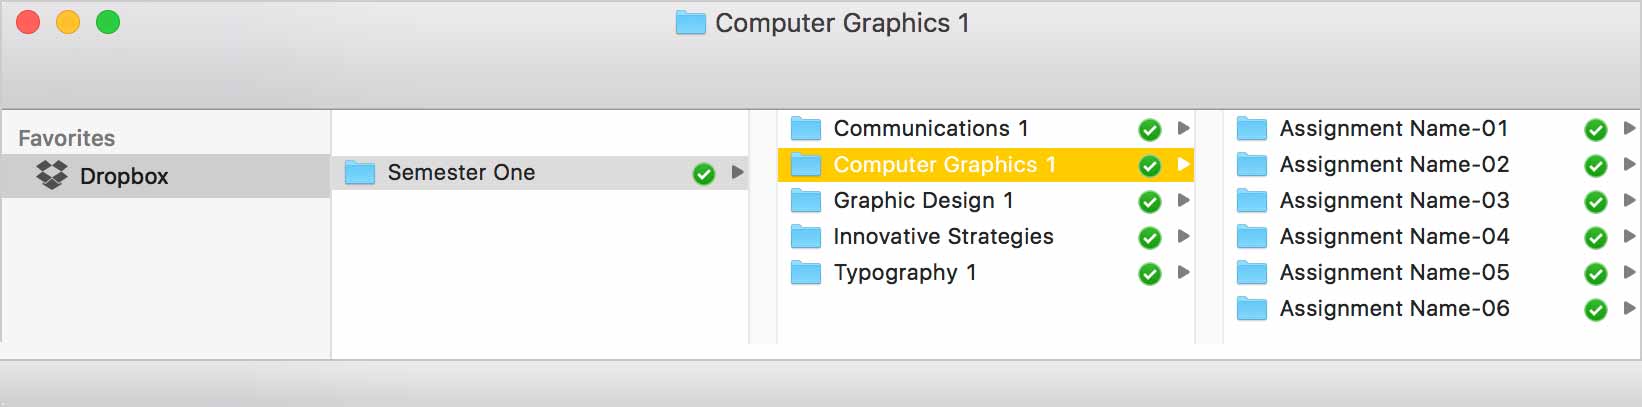
Remember, Column View rocks! There’s no better way to navigate Finder.
Inside of each course folder, create a folder for each assignment as you start that assignment. Keep files organized inside each assignment folder.
Watch the video tutorial, then set up the same folder structure.
Returning Student? Archive Away!
If you’re a returning student, you need to keep files from previous semesters. Hopefully, you kept your work organized. If not, take the time to file everything away.

The simplest solution is to purchase a USB key. A 32GB thumb drive should suffice.
Copy all your files from last semesters onto it. Then you can remove them from your laptop. By the end of the semester, you should have six folders at the root of the drive – one for each semester.
Backups!
In addition to having your current active files in DropBox or in Google Drive, it’s a good idea to have the rest of your files backed up.
- Option #1: Time Machine
- Your Mac has built-in software to back up all of your files automatically. It’s called Time Machine, and this is how it works. All you need to do is purchase an external hard drive, then plug it in. These are hard drives you could purchase for use with Time Machine.
- Option #2: BackBlaze
- BackBlaze is a complete cloud-based backup product for only $5 per month (or $50 per year). It backs up your whole computer online constantly.
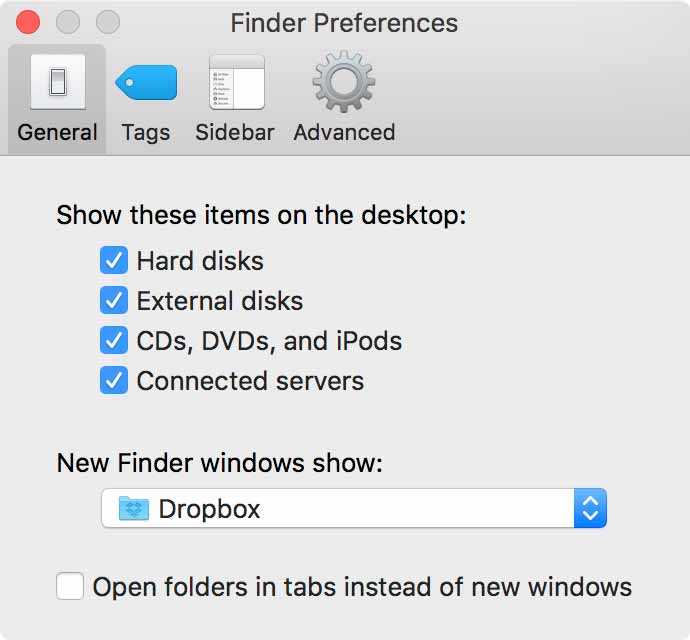
Finder Preferences
Let’s change your Finder’s Preferences to make navigation easier and more convenient. We want to make sure that Finder windows help us work faster. We’ll have drives show on our Desktop. Make Finder windows open in our Semester # folder so we can get right to work. Apple sets up new Macs with some really inconvenient settings. We’ll get rid of those.
Watch the video and set up your Finder the same way.
Desktop View Options
We want icons on our desktop to snap to a grid, but not sort themselves in any way. We want icons for folders and files to be easy to find, so we can clear our Desktop easily.
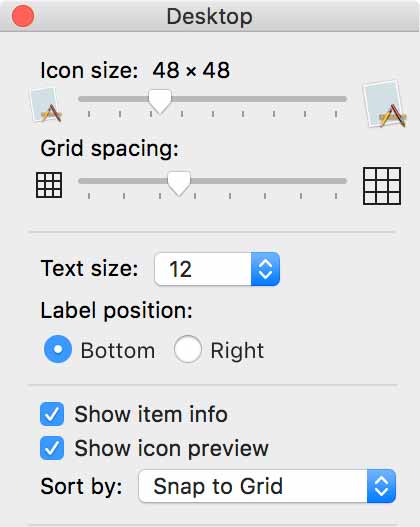
A messy desktop is a bad thing. It can cause you to mistake files when submitting assignments.
Watch the video and set up your Desktop the same way.
Browser Download Folder
Odds are that if you look in any random Mac user’s Downloads folder, you’ll find that it’s full of unused downloaded files. Odds are, there are many duplicates too. This just burns up a pile of disk space for nothing.
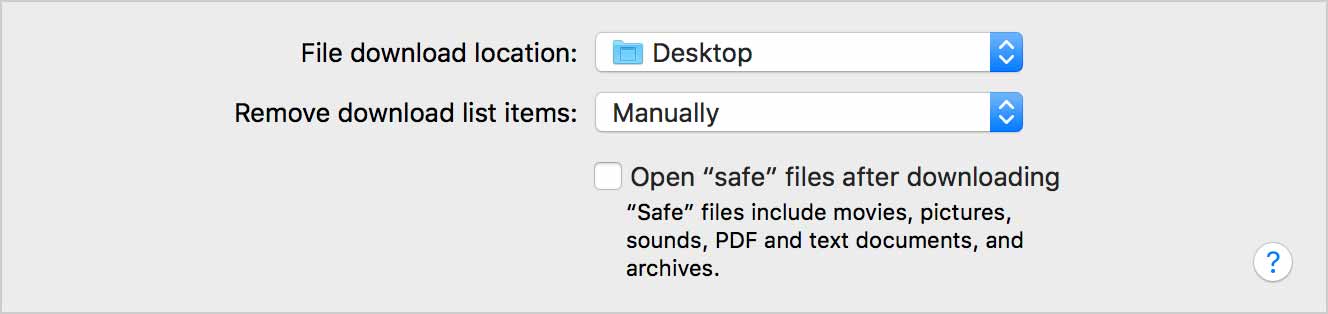
The goal here is to have files download to the Desktop, so you can use them and file them right away. What we want to avoid is having a Downloads folder full of cruft. Download, use, file away. Download, use, file away. Say it with me. Download, use, file away.
Watch the video and set up your browsers the same way.
Dock Setup
The goal of the Dock on your Mac is to give you quick access to apps, files and folders. By default, your Mac’s Dock is full of icons you don’t need. You’ll remove un-needed items and add the Adobe Creative Cloud applications.

Watch the video and set up your Dock the same way.
Finder ‘Open with’ Defaults
This tutorial will guide you through setting up your Mac so raster files are opened by Photoshop by default. The Mac OS is set up to open raster files with its own Preview application. That’s useless to us. We want a TIFF, JPEG, PNG and other raster file formats to open with Photoshop when we double-click their icons.
This change will also make it that you’ll be able to open these file types in Photoshop from right inside InDesign.
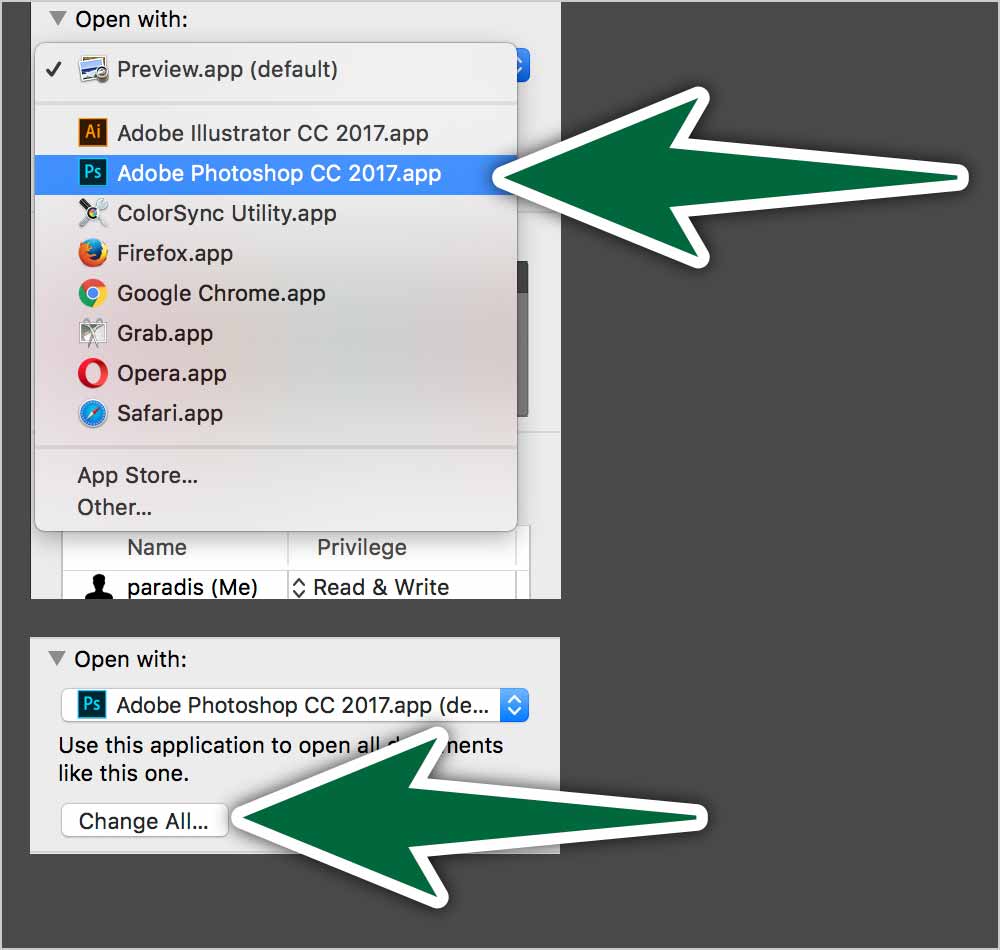
Watch the tutorial in the playlist above to learn how to change these settings. Do it for these file formats:
- tiff
- jpeg
- png
Reveal Your Library Folder
By default, the Library folder that resides in your Home Directory is hidden. It contains important files like application preferences and the Fonts folder. We want to show the folder so we can access it more easily. Go to your Home Directory by typing Shift-⌘-H. Then type Type ⌘-J.
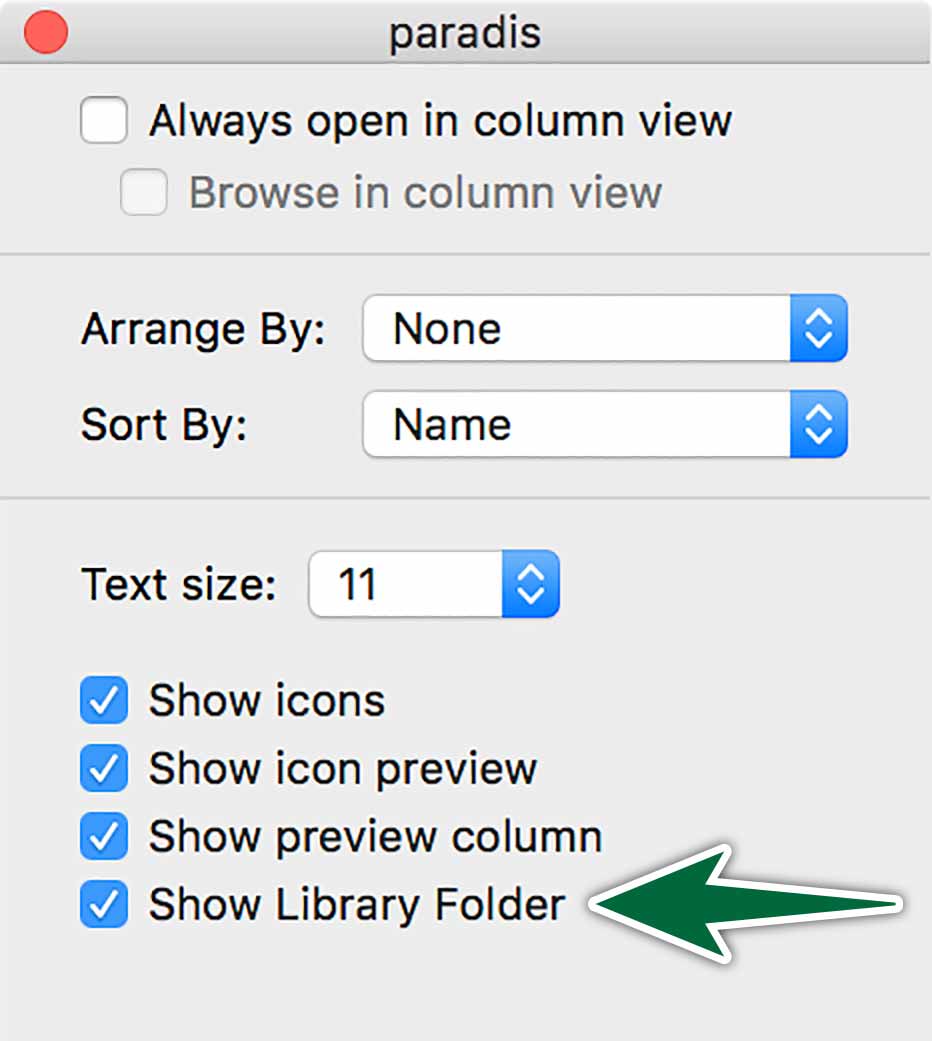
Check the Show Library Folder checkbox. This checkbox appears in the settings only when you’re at the root of your Home Directory.