Topics
InDesign has thousands of settings. Some of them can really speed up our work. Let’s change a few to make sure the application works best for us.
Workspaces
Un-check Application frame here: Window > Application Frame.
Workspaces in Adobe applications are saved sets of panels. You open only panels you want. Position them where you want them, then save them as a Workspace. To do so, go Window > Workspace > New Workspace…, then save it with your first name.
You’ll also want to use the Legacy New Document Dialogue. It’s simpler and faster.

While you’re there, un-check the Show Start Workspace….
Keyboard Shortcuts
Download and install Al’s Most Excellent InDesign keyboard shortcuts. Unzip the file, then move it here:

InDesign Defaults
InDesign has a system of default settings. To establish them, change settings with no document open. Each new document your create after this will have those settings.
Change these settings.
Better Basic Paragraph
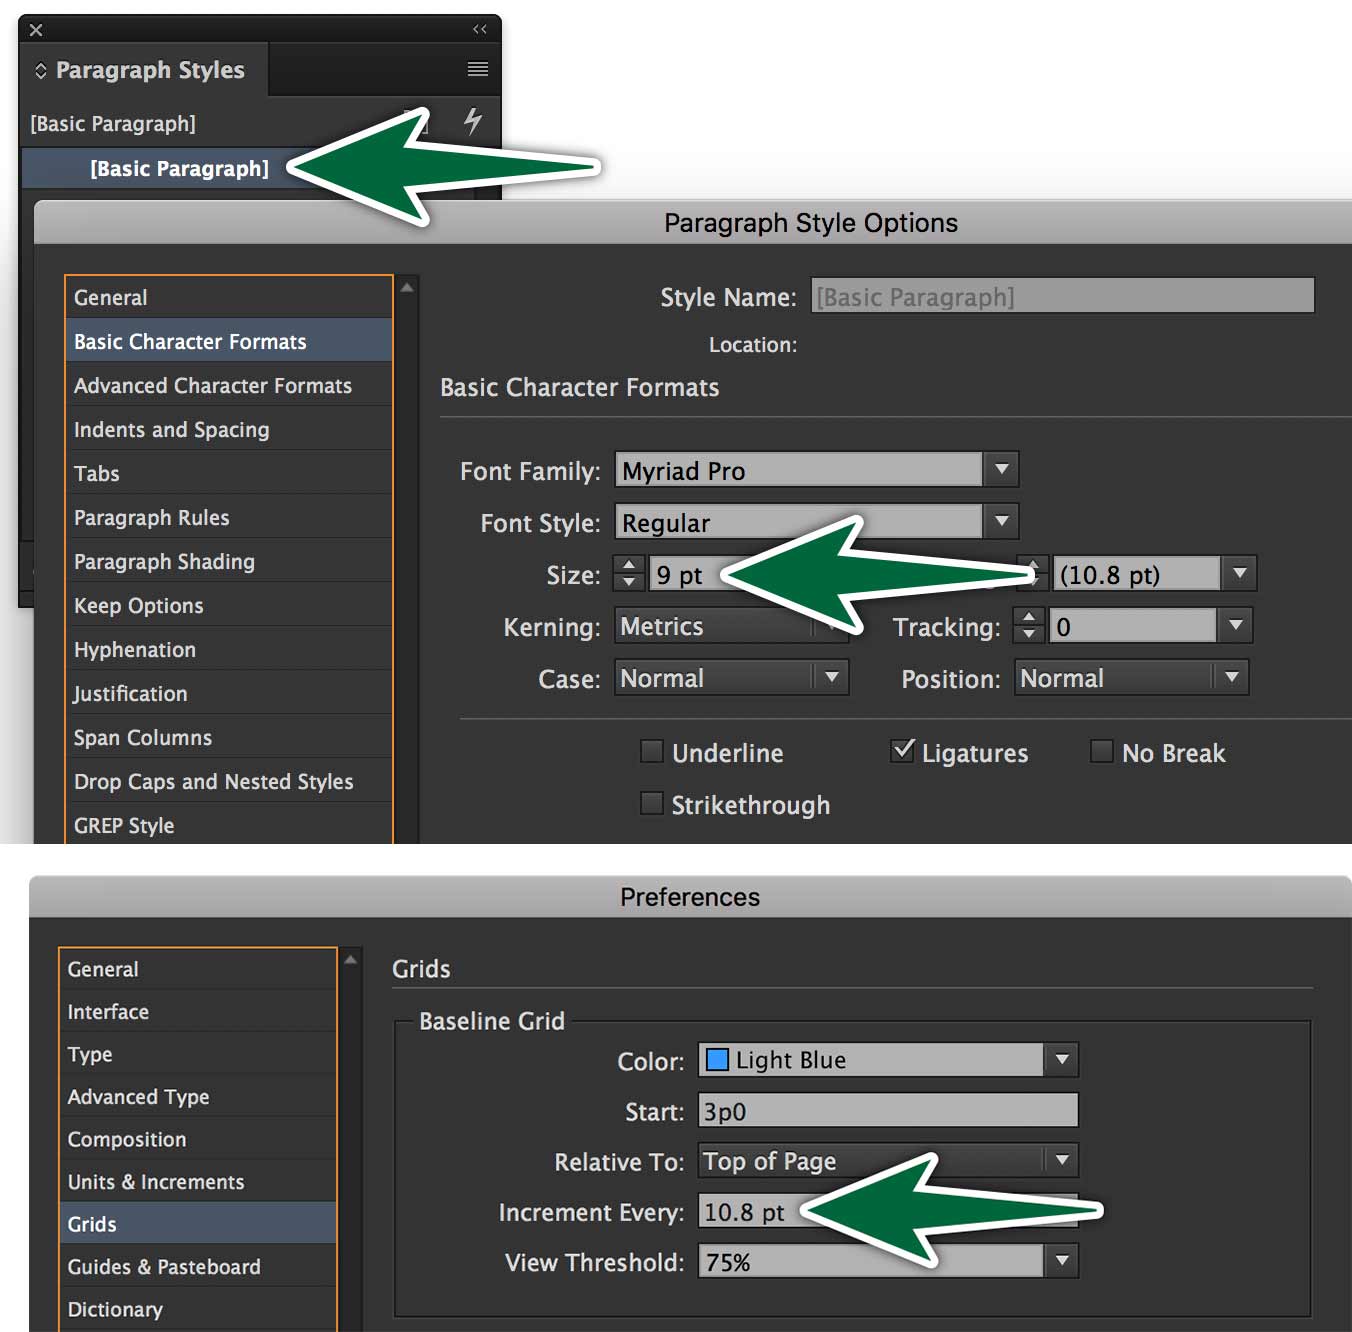
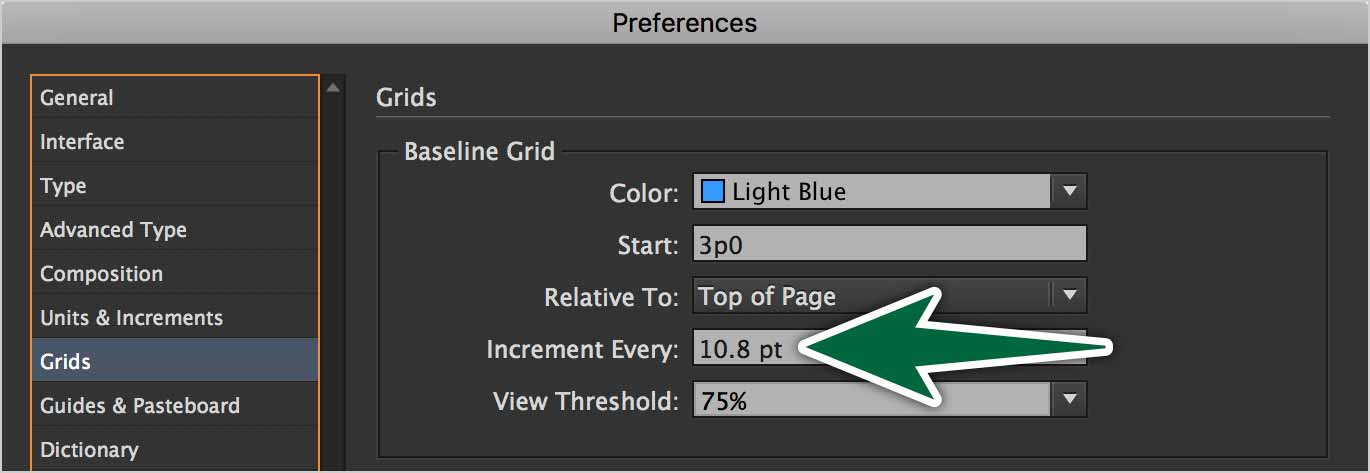
Make Basic Paragraph 9pt in the Paragraph Styles panel. Since we’re making the default font size 9 points, we should change the default baseline grid to the corresponding leading size, which is 10.8 points.
Hyphenation
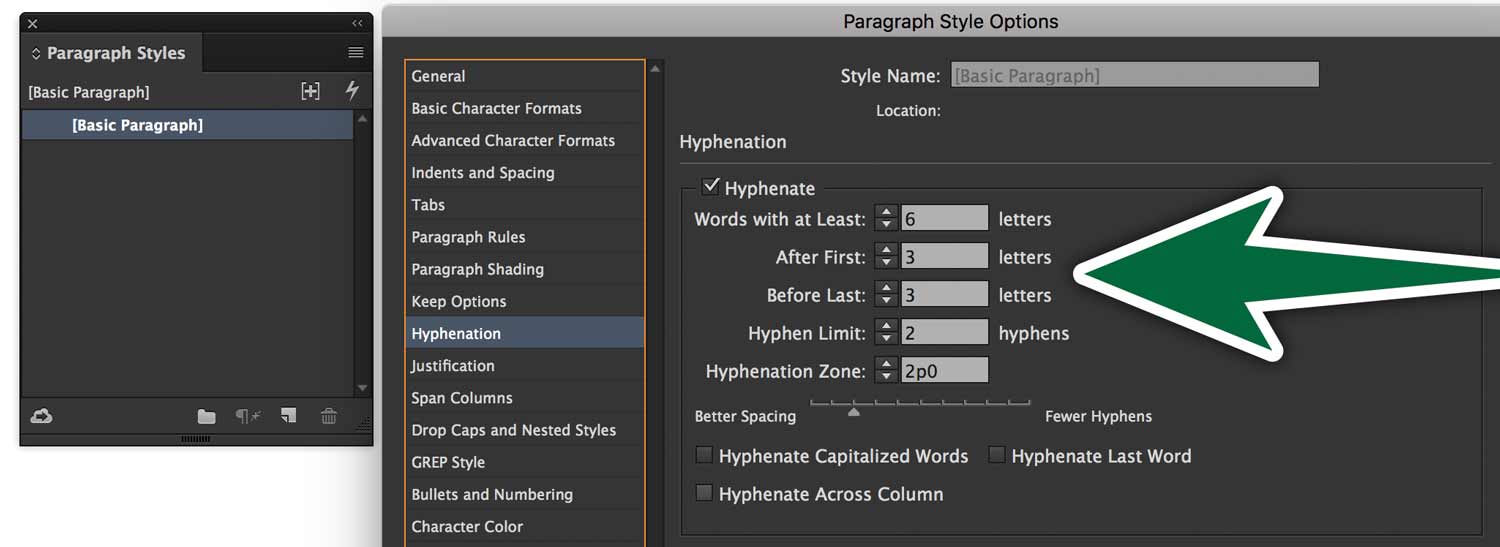
Change Hyphenation defaults in Basic Paragraph. This way, this hyphenation will be the default in all future documents. If it’s not right in some document you’re working in, you can always make changes in that document.
Justification Settings
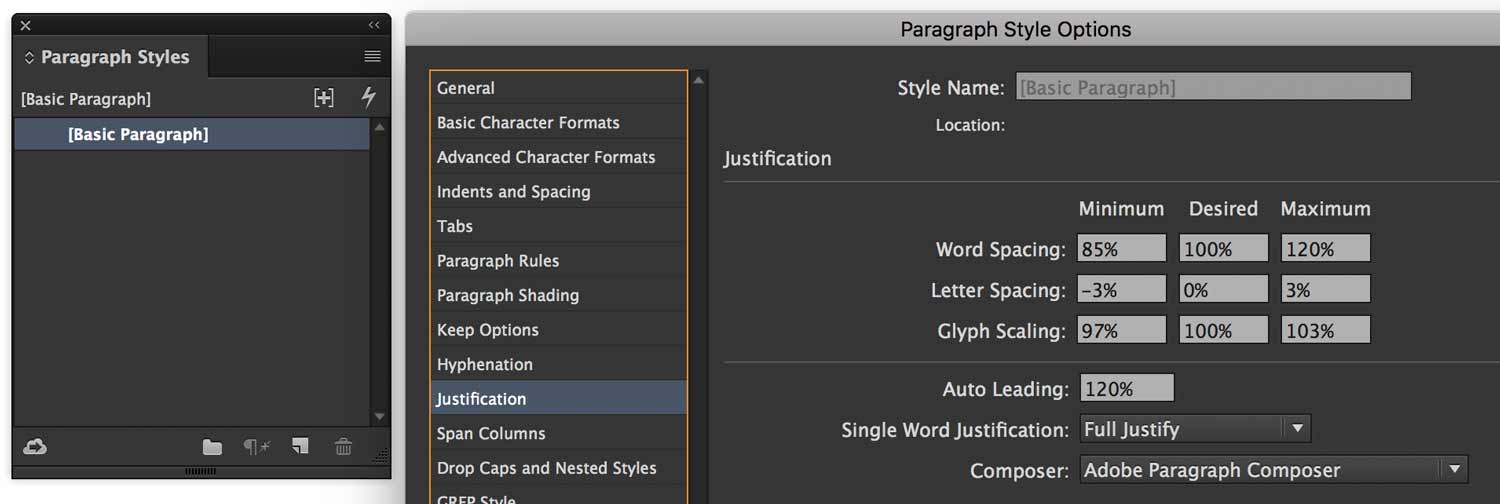
Change Justification defaults. This will make justified type set prettier. It makes the spaces between words, letters and glyphs flexible in small amounts. They’re really subtle changes, but they make a big difference over long lengths of text.
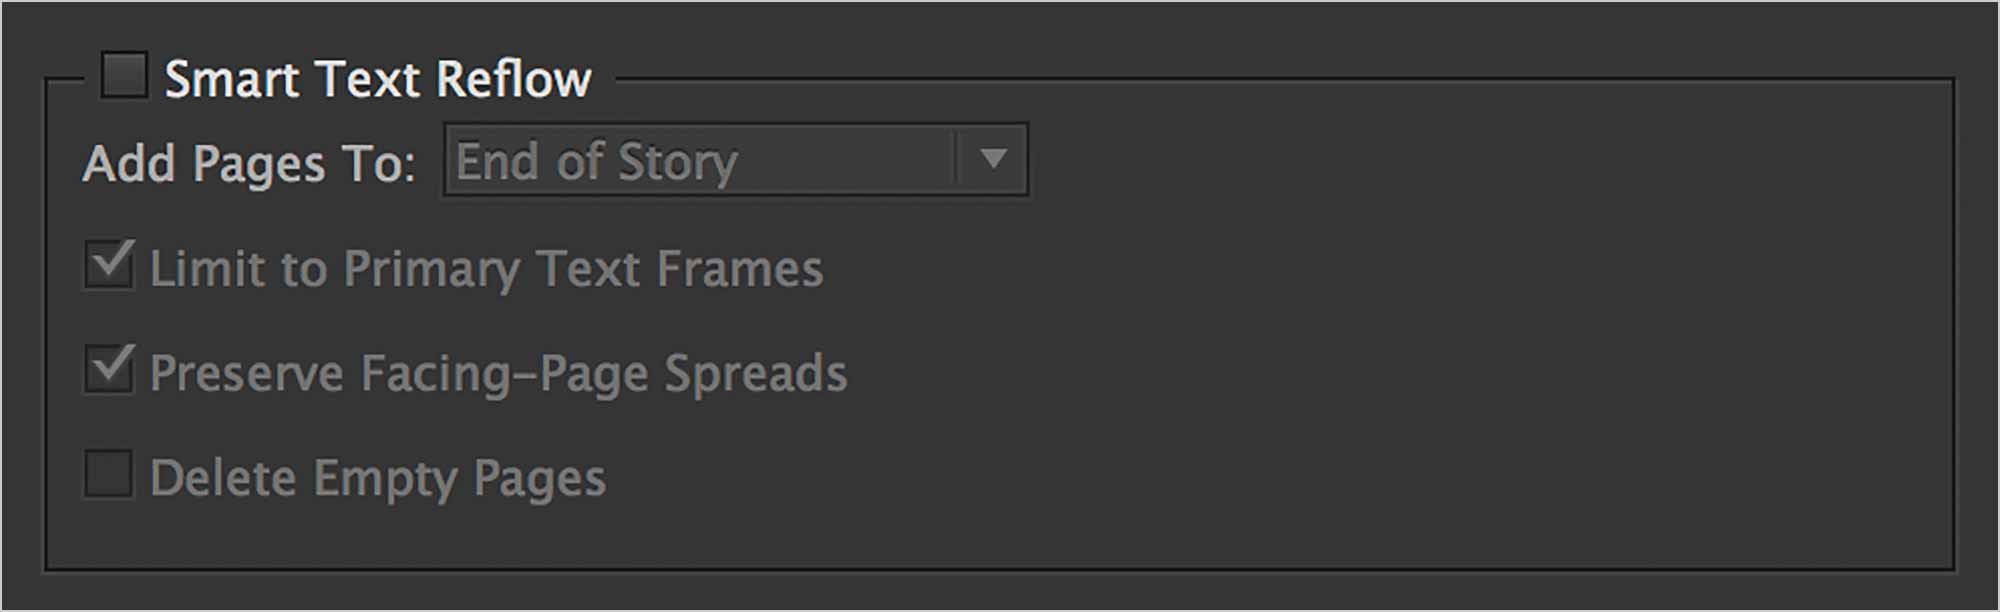
Smart Text Reflow
Smart Text Reflow add and removes pages from your document as you add or remove text. It does it automatically. It’s quite surprising, if you don’t know why it’s happening. Let’s turn it off.
No Dark Pasteboards!
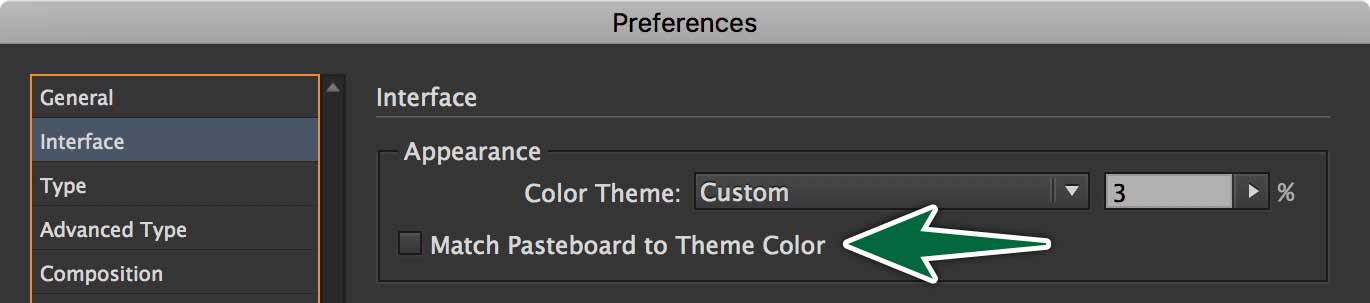
Uncheck Match Pasteboard to Theme Colour. This will make the area outside your pages white rather than grey. Grey is just silly. You can lose artwork on a grey background. I think Adobe sets it to grey to look stylish, but it’s not functional.
H & J’s
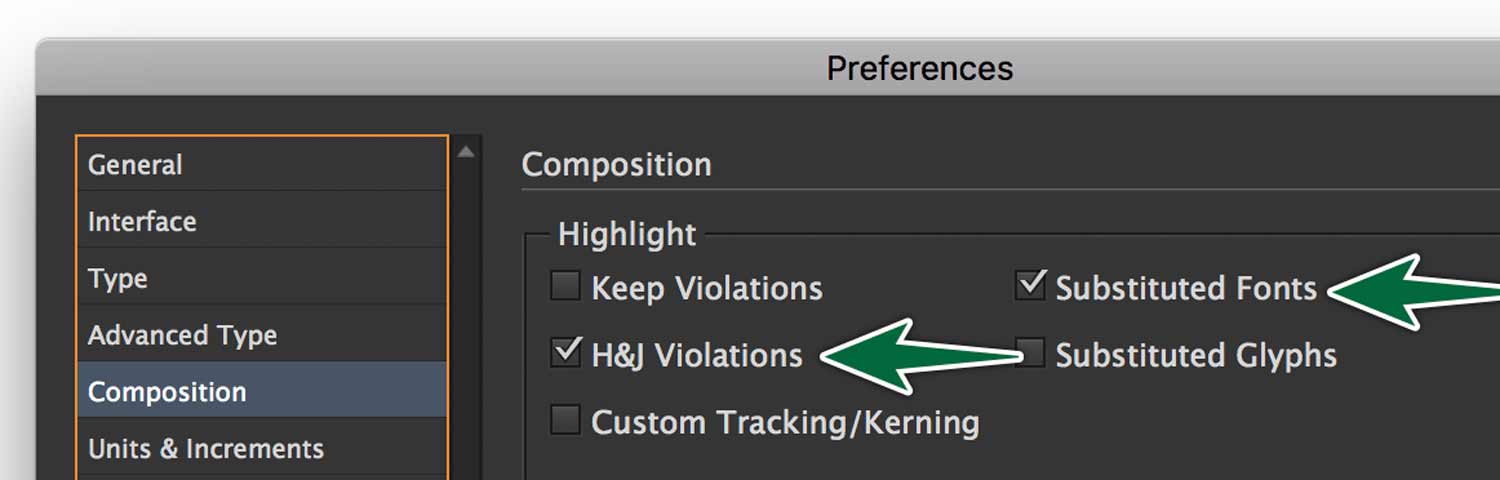
Turn on highlighting for H&J Violations and Missing Fonts. This makes it that missing fonts and hyphenation & justification problems get highlighted in yellow so you can resolve issues.
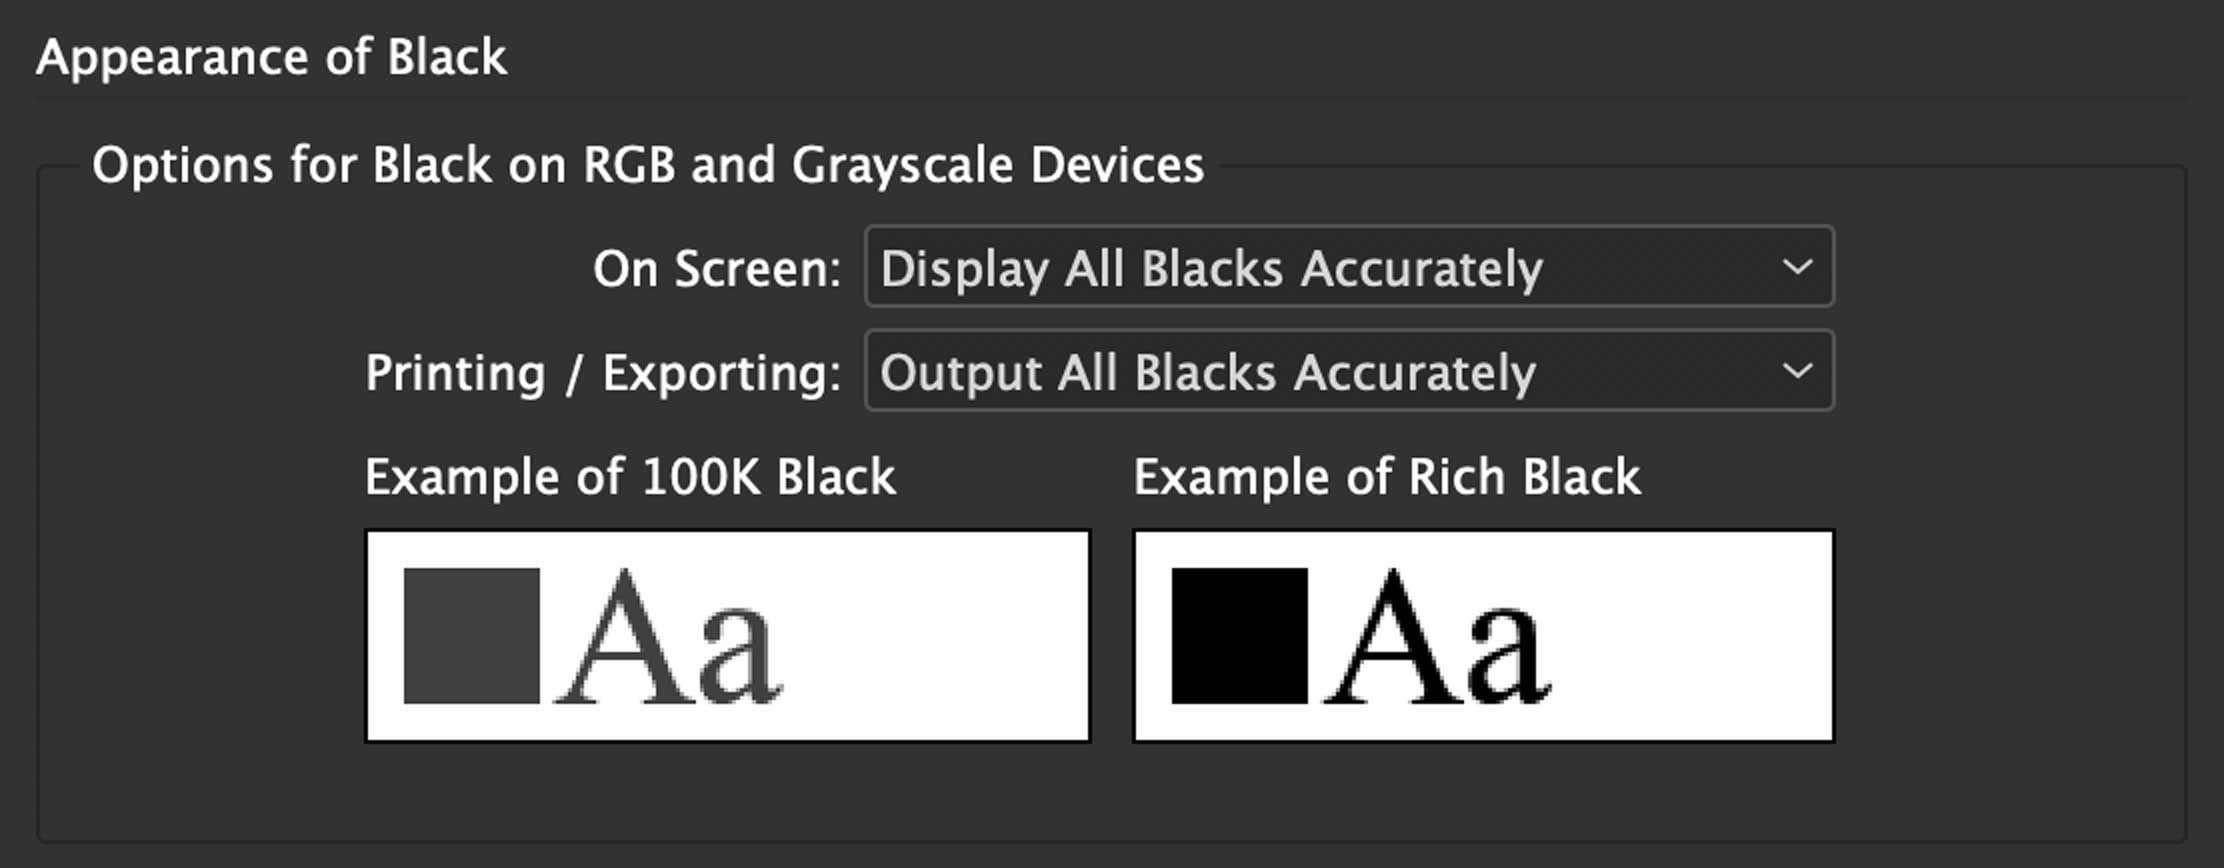
Appearance of Blacks
Change blacks printed or on-screen to appear as they are built.
Optical Margin Alignment
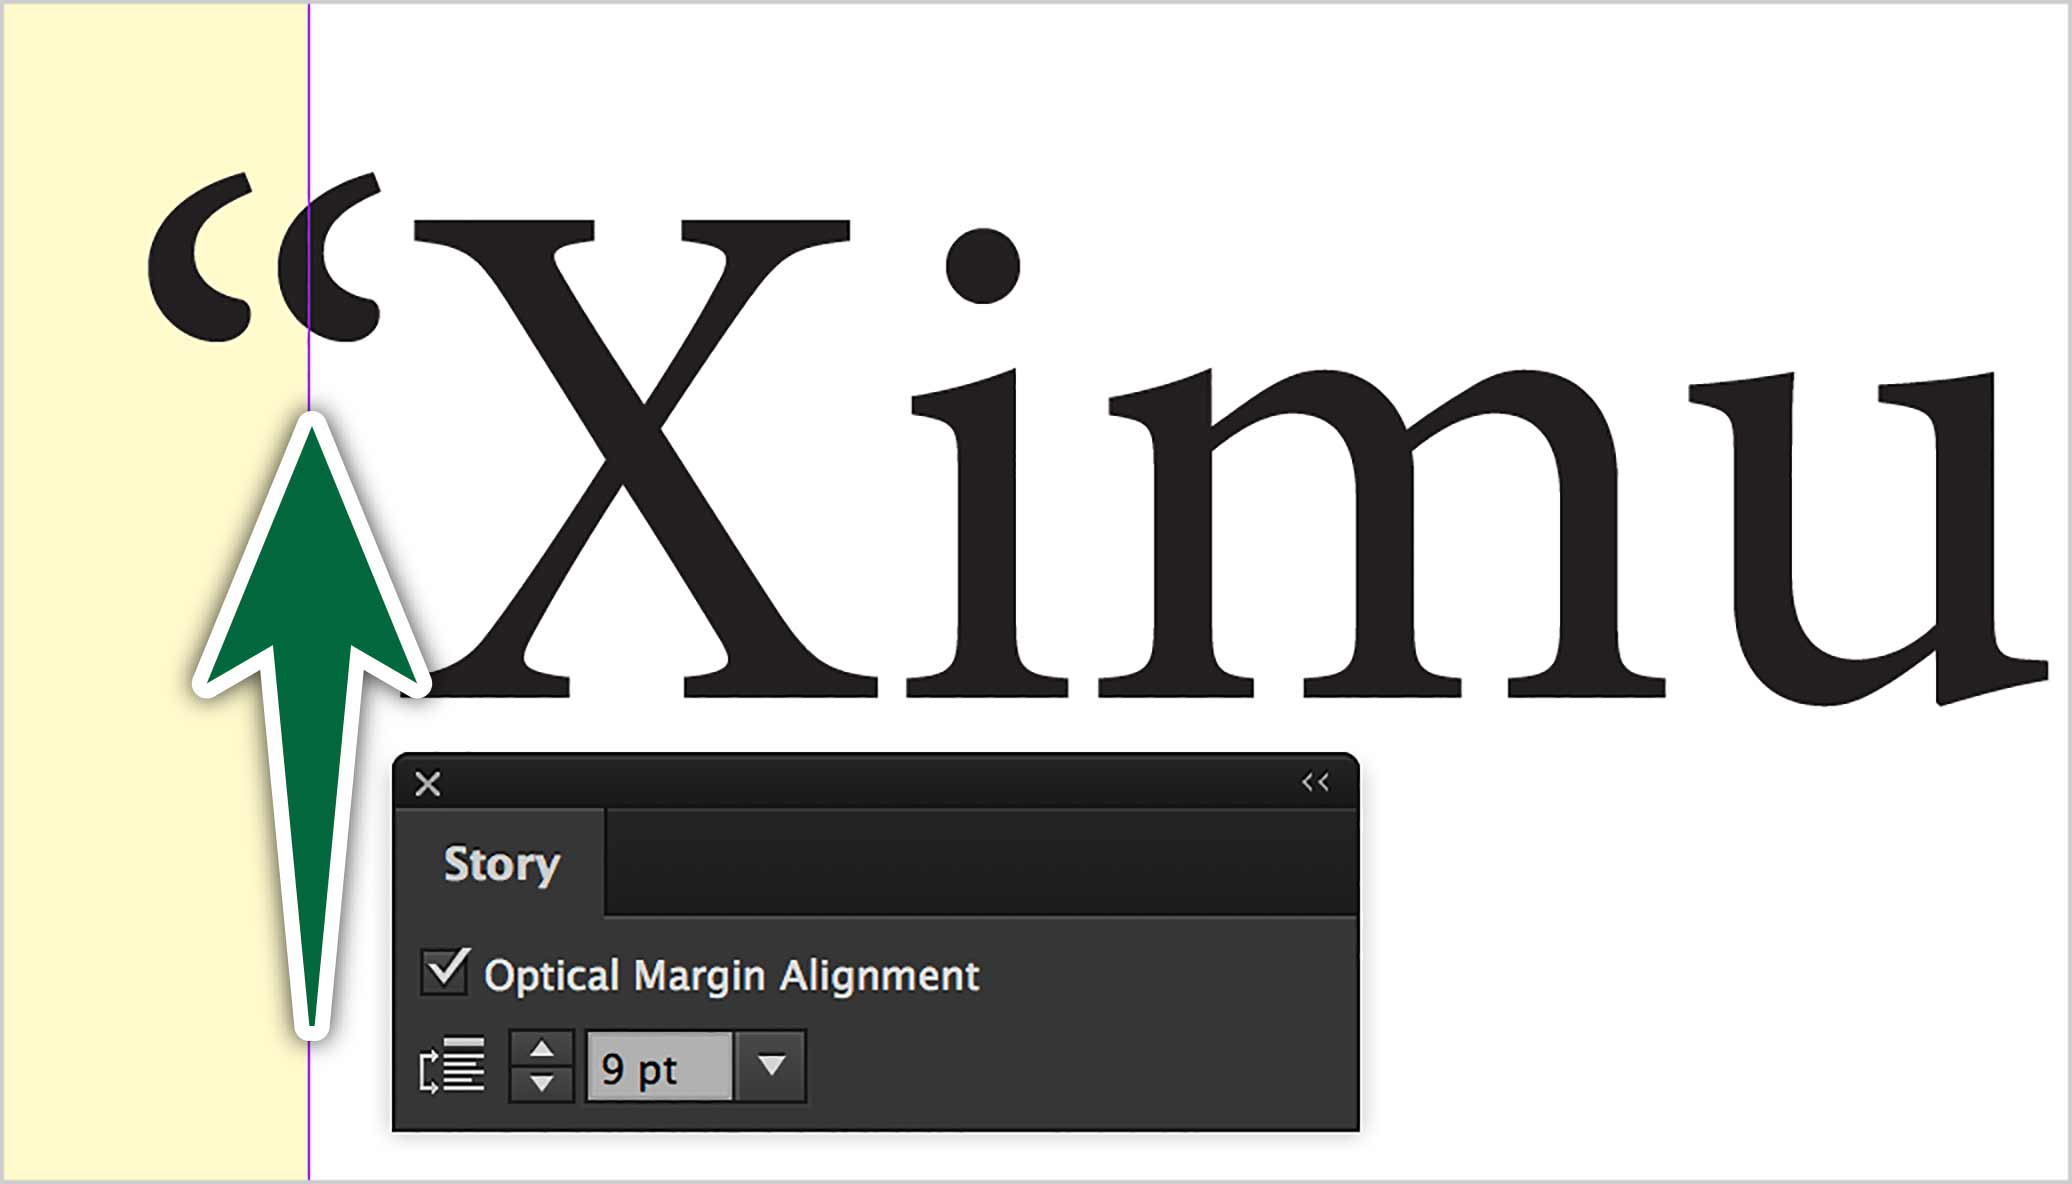
Turn on Optical Margin Alignment in Window > Type > Story panel. The number in this panel should always match the body copy text size. It makes glyphs exceed the text frames by a bit. This makes the margin alignment look straighter.
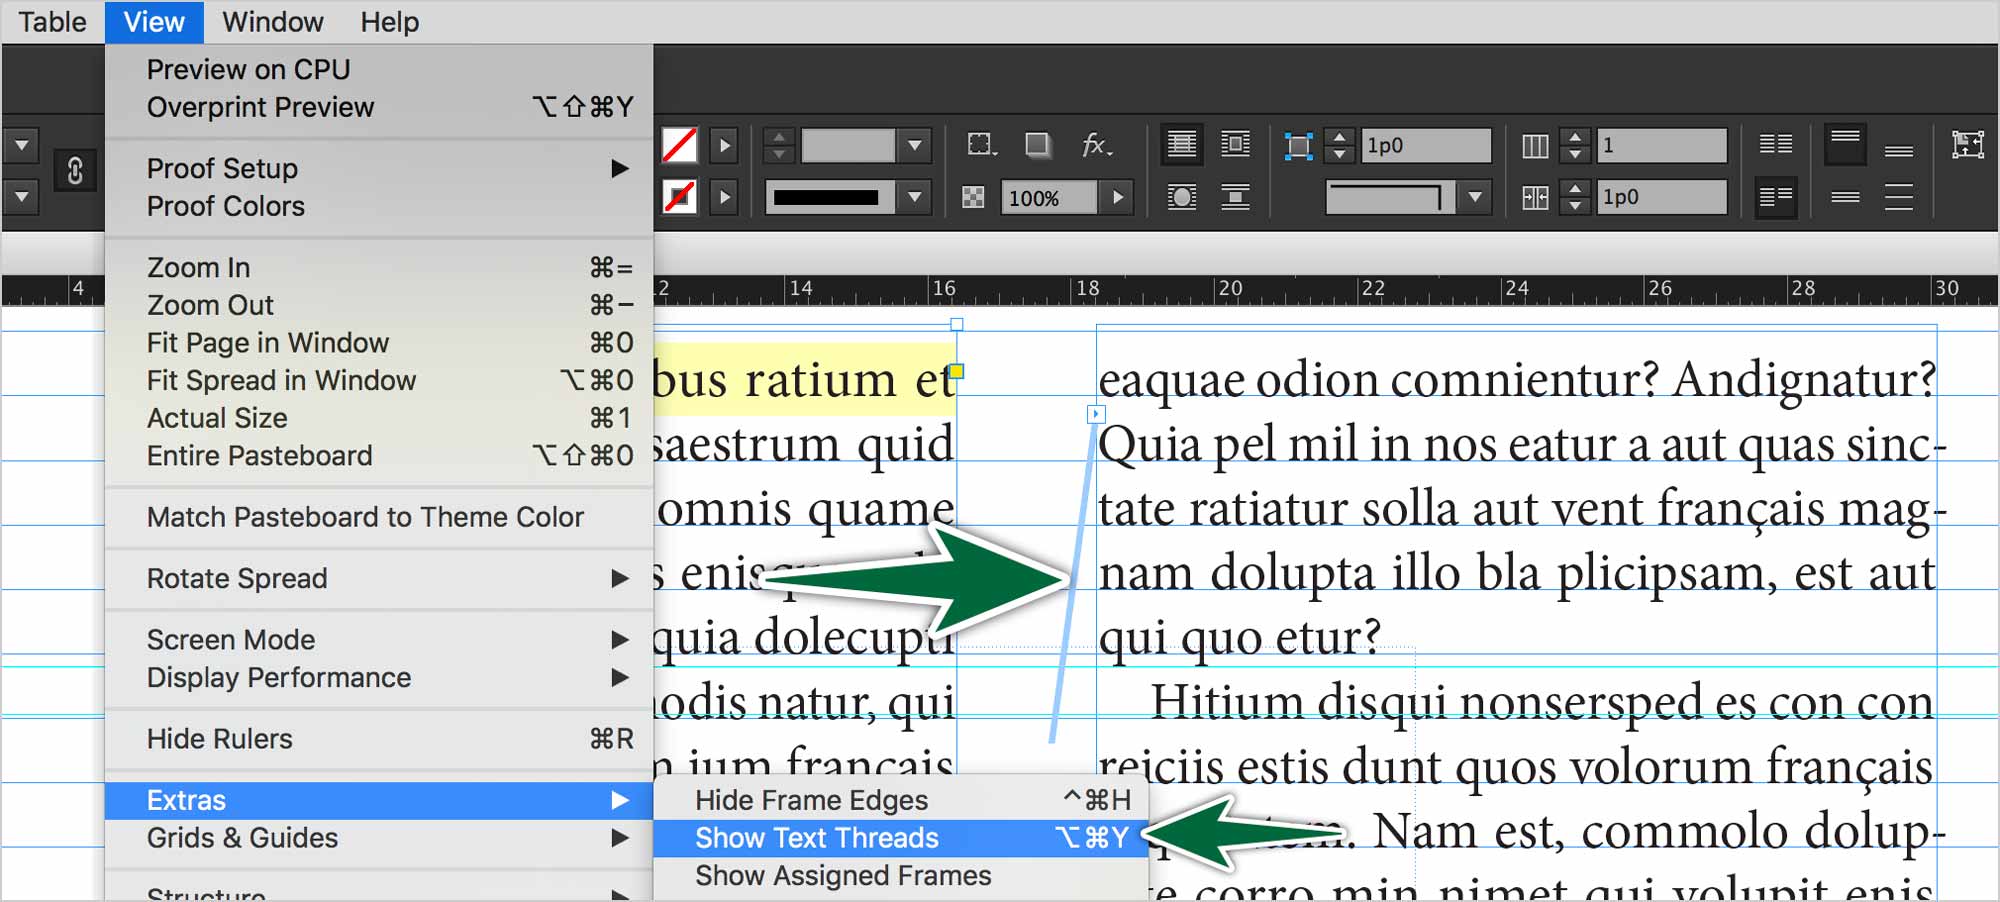
Show Text Threads
Go View > Extras > Show Text Threads.
Quit and Re-launch
Once we’ve done this, re-launch InDesign. Setting for an app are written to disk when you quit the app. So it’s a good idea to quit and re-launch.