Topics
Your Assignment
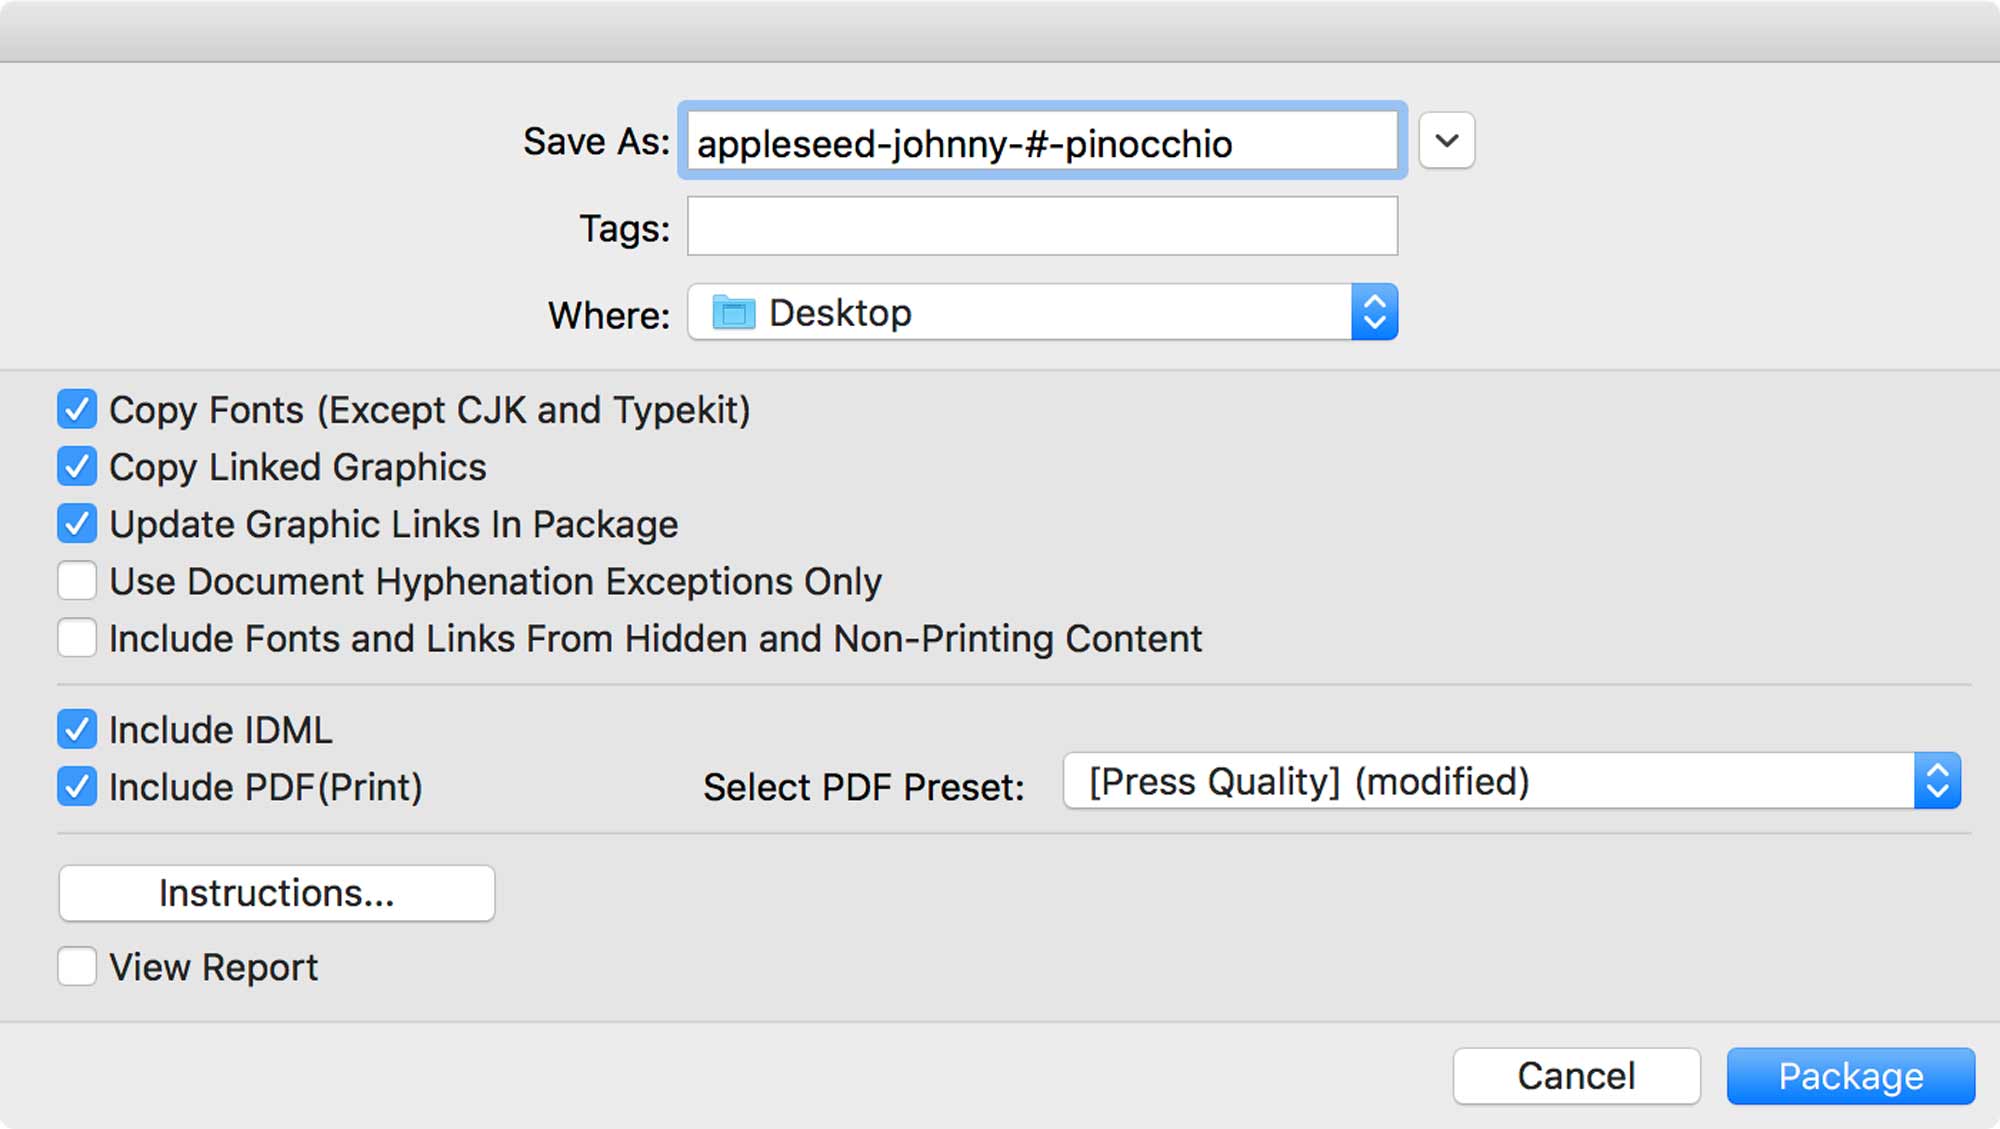
During class, you’ll assemble the story of Pinocchio in a series of InDesign documents which will make up an InDesign book file. It will include a cover, front and end matter documents and the story content. All the features are:
- Automatic page numbers
- Custom colour swatches
- Paragraph styles
- Character Styles
- Defined number lists
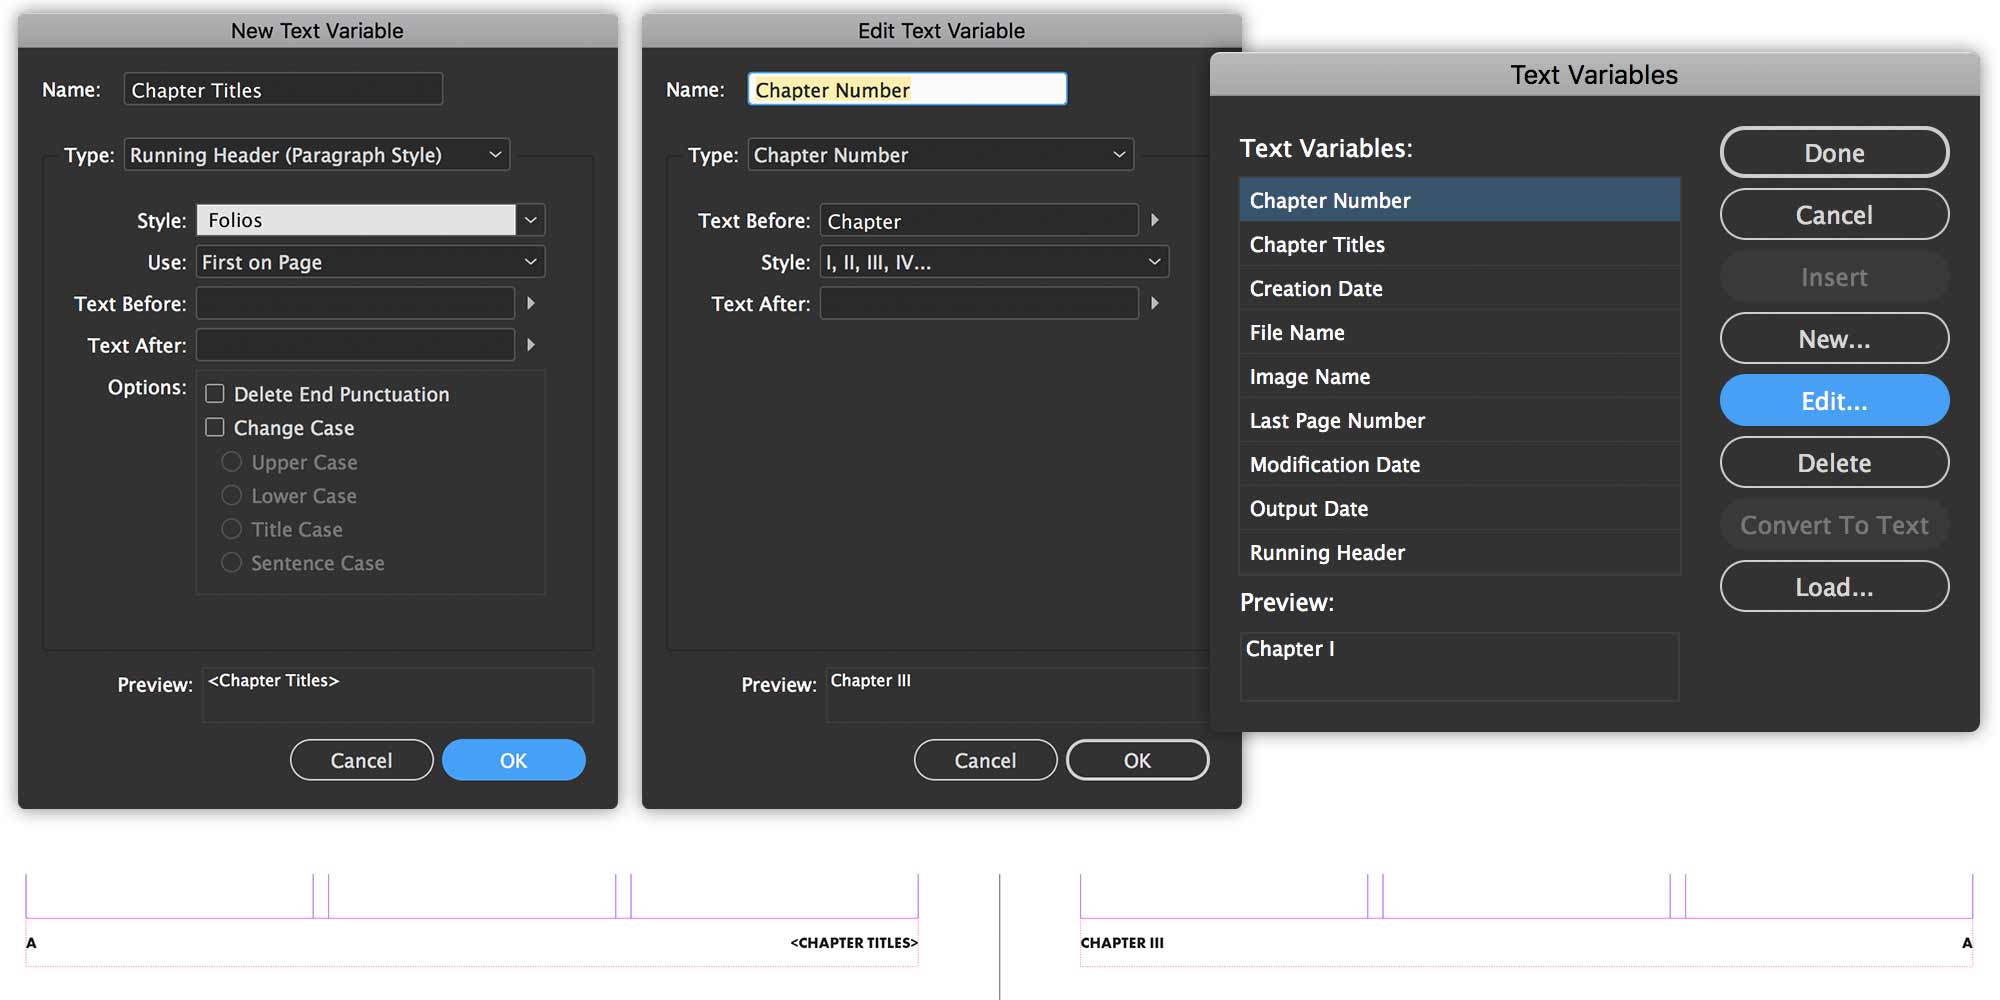
- Chapter titles
- Running headers
- Table of contents
Let’s start setting this up.
Create Book Documents
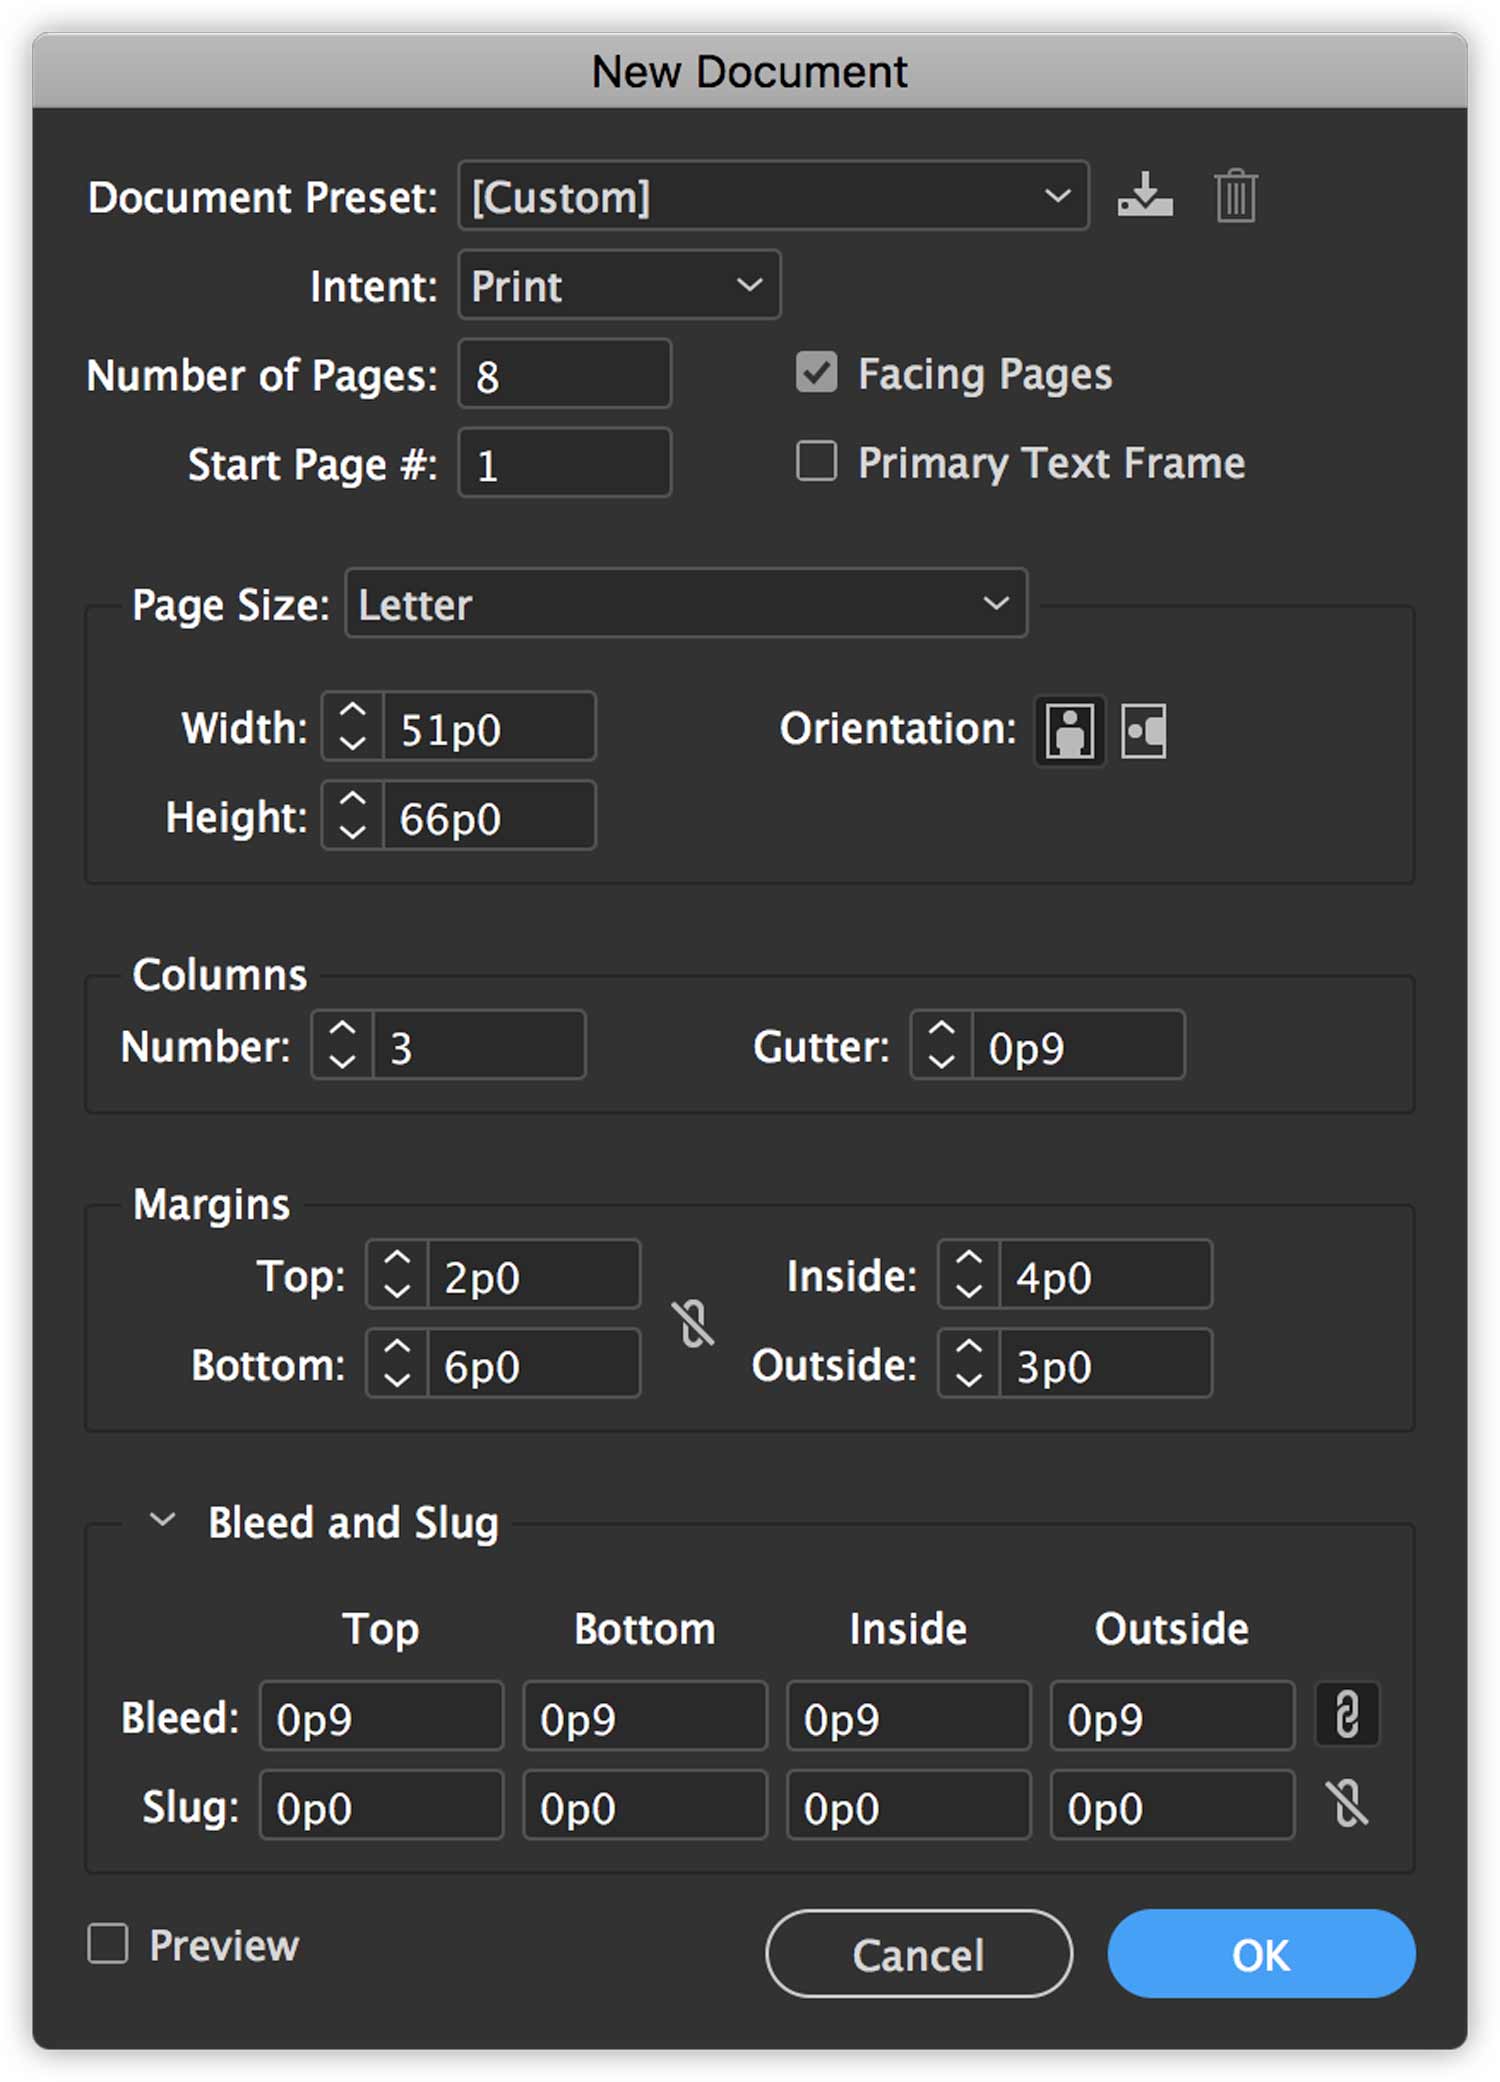
Start by creating an InDesign document. This is the file which will serve as the parent file from which all the other book files will be based. This is the format:
We’ll need to set up our parent document before we duplicate it for each chapter. Remember, if you leave unwanted content in the panels in this document, it’ll be present in all your book files. We don’t want that. That’s why it’s important to plan ahead to build this document properly.
Initial Document Setup
Paragraph Styles
Define the base serif in the Basic Paragraph style. Create a new style for the Base-Sans paragraph style. Create styles as shown below. Changing their appearance isn’t that important for now.
We’re using Adobe Caslon Pro for body copy and Futura PT for titles. They’re both on Adobe Fonts.
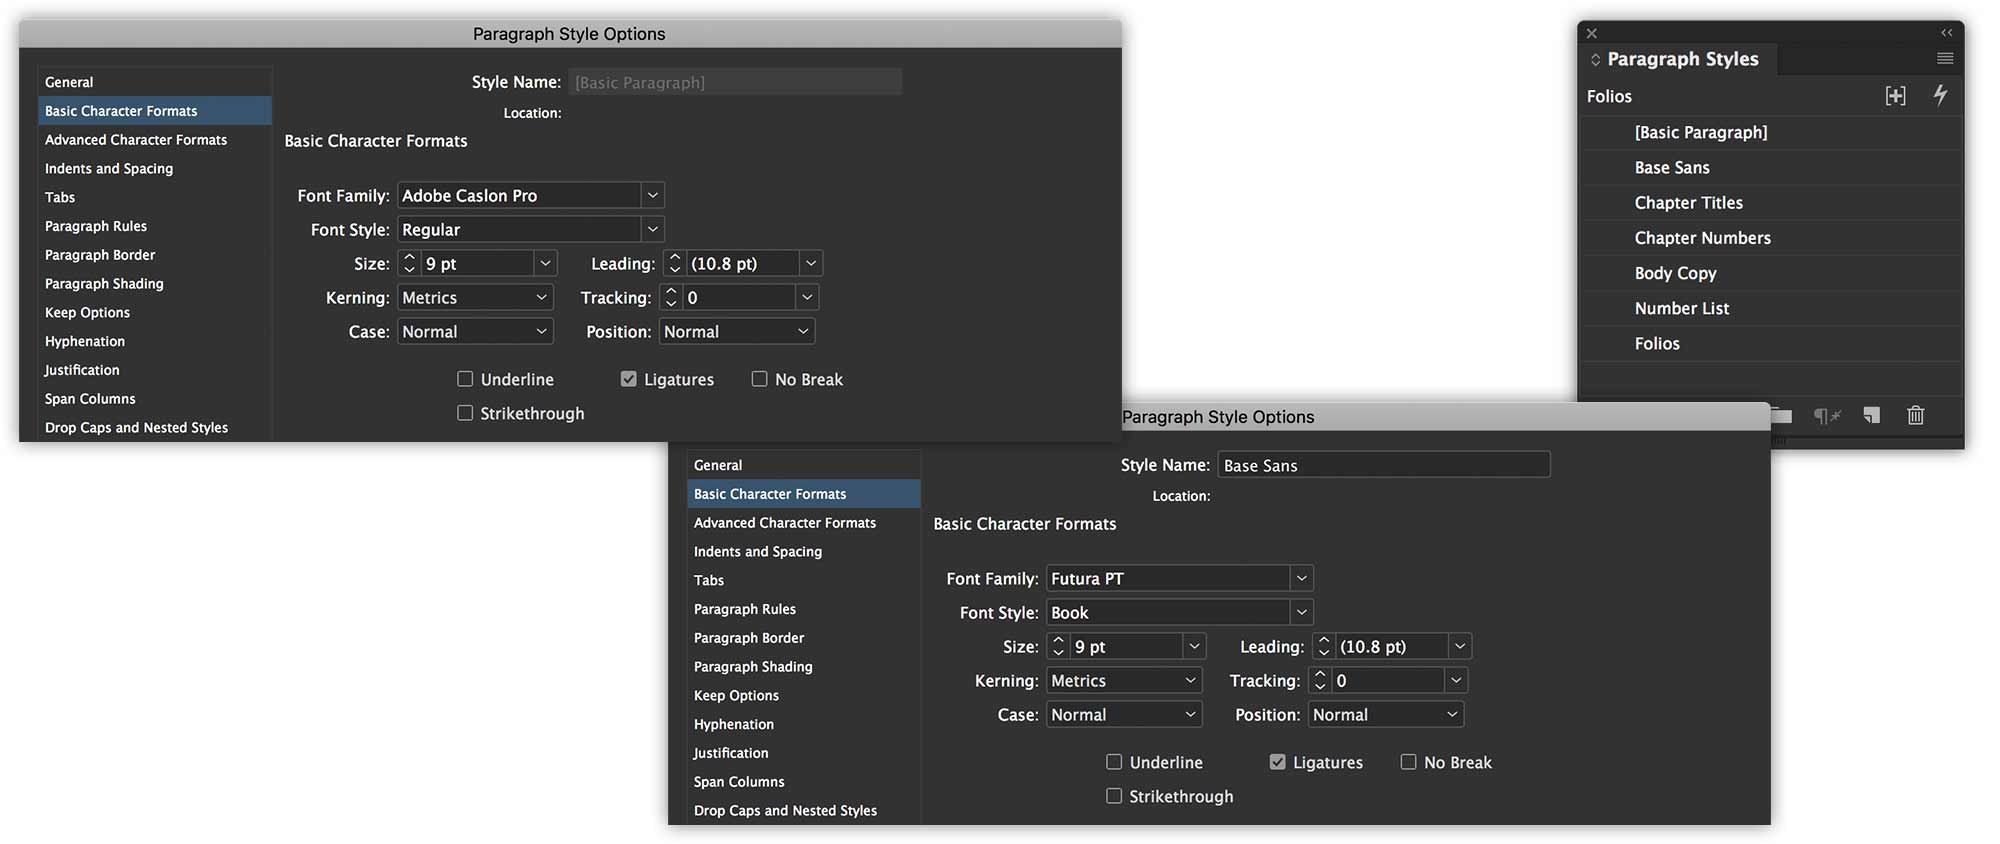
For Futura, make sure you sync a bold instance. You’ll need it for titles and the TOC later on.
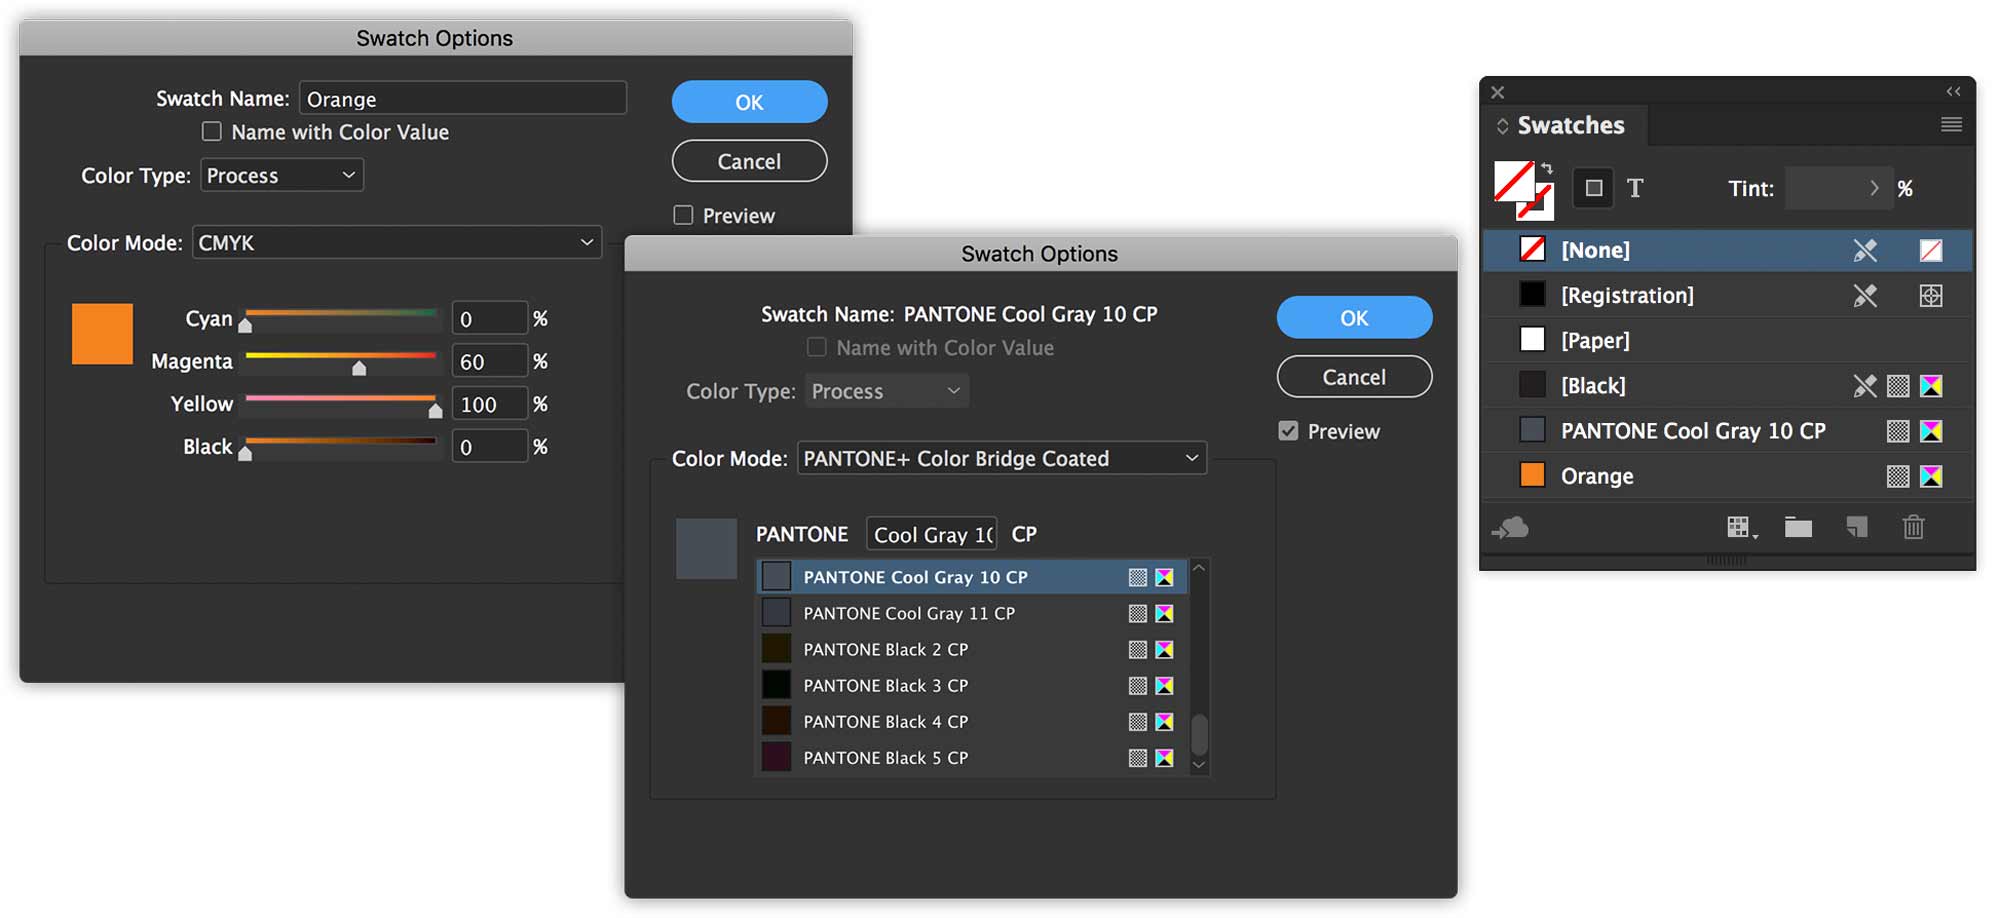
Clean out the Swatches panel
We want to remove all un-needed swatches from the Swatches panel. Remember that book sync is non-destructive. It only adds content across documents, it doesn’t remove any. That’s why this needs to be done at the outset.
Delete all unused colours. Let’s add two colours to the panel.
Layers
Create layers for Folios, Images and Text. Make sure they’re in that order. Folios underneath, then images, and text on top of everything.
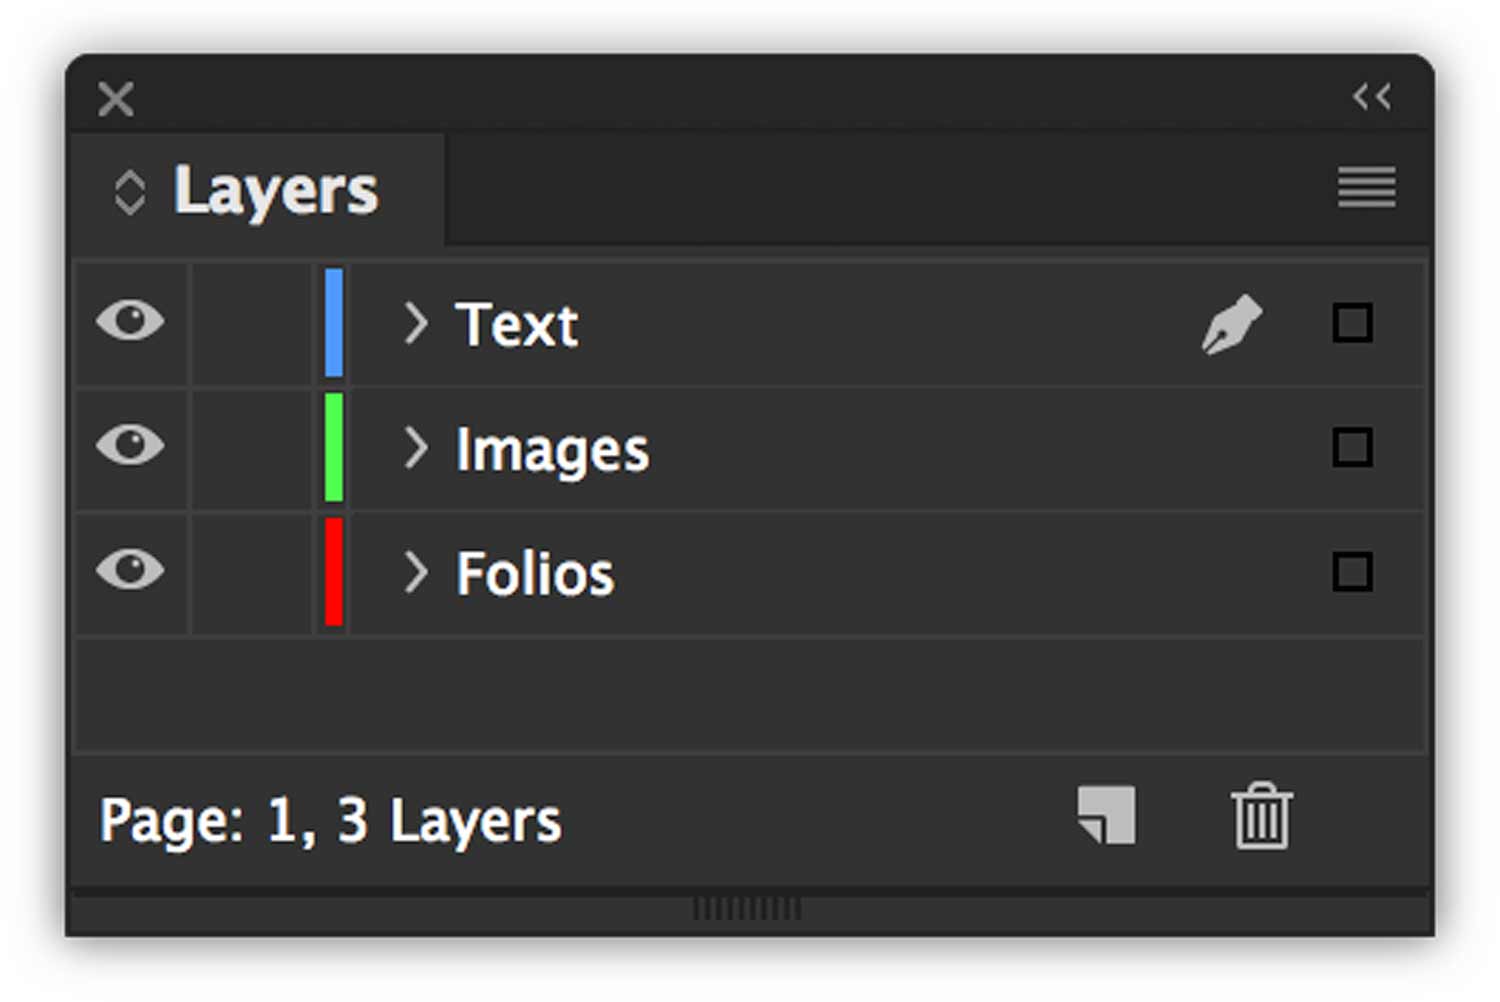
Remember, layers don’t sync across documents unless you have content on them on parent pages. When the parent pages sync, the layers get created.
Text Frames
Create a primary text frame on your parent pages. Make sure you have one on each parent. Thread them together on the parent. When you import your text in the next steps, hold the Shift key. That will make the text thread onto all the pages. Cool, eh?
Book Documents
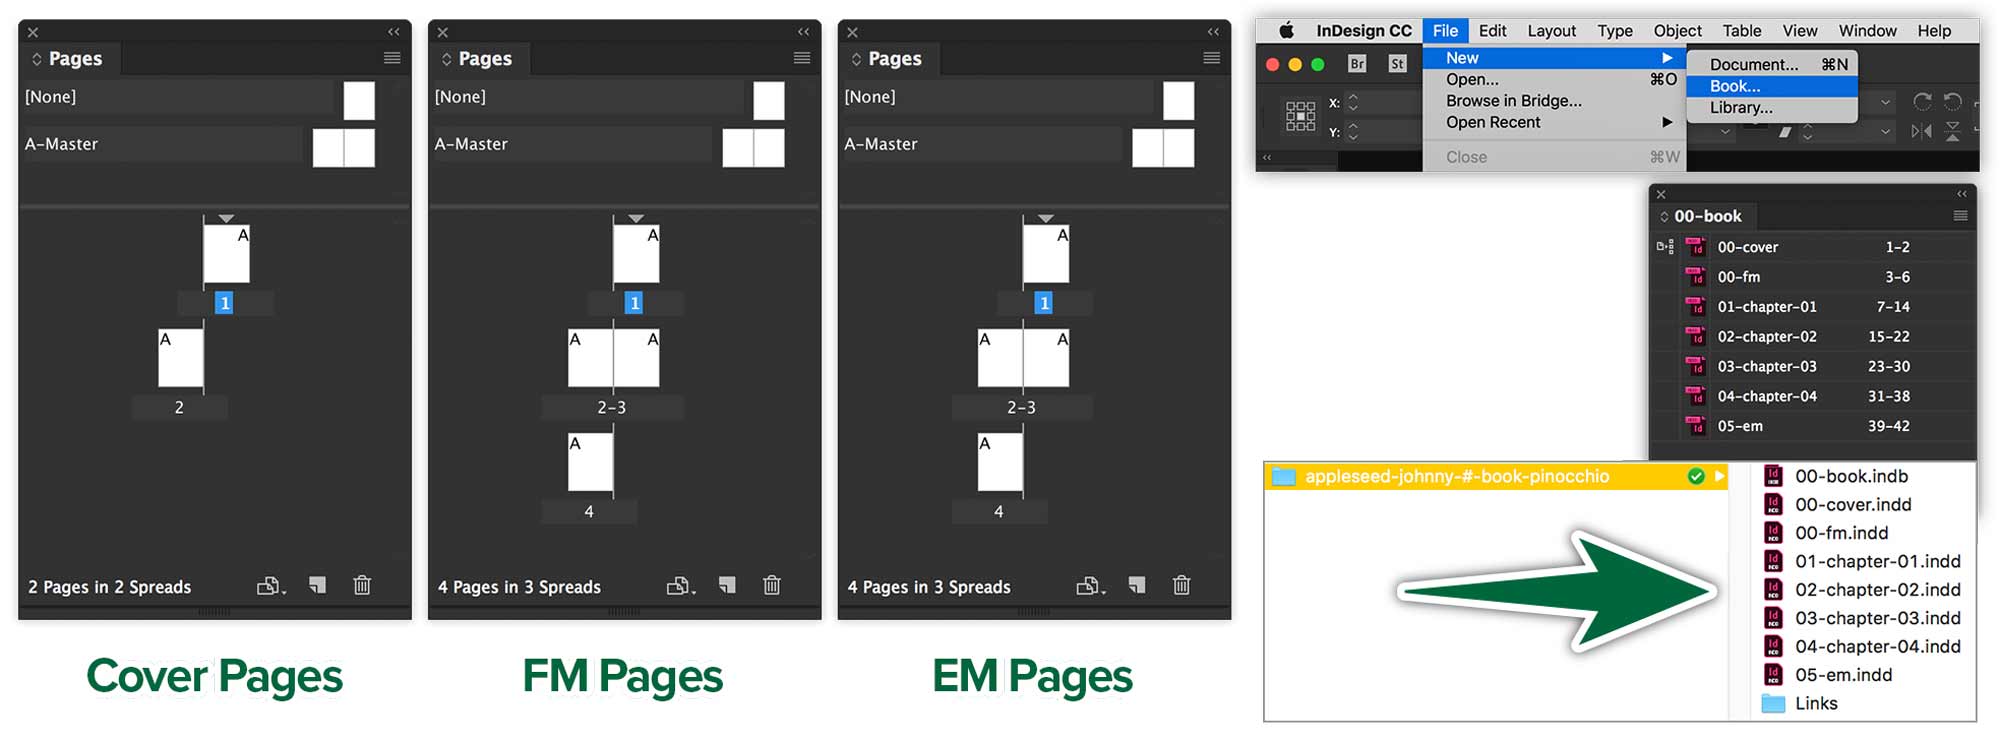
Once your InDesign parent document is ready with all the basic settings, we can duplicate it to have a total of seven files. See the image below.
Cover, FM & EM
Rename files for your Cover, Front Matter and End Matter files. Delete pages from the files to match the image below. Once all your InDesign documents are created, make a new Book file. Add the documents to the book file.
Now we have all our documents set up, it’s time to add content to them. Remember to keep all book documents open except for the Cover and the End Matter file. We don’t want them to sync the page numbers. They don’t need them.
Import each chapter’s text into the appropriate InDesign document. Apply the Body Copy paragraph style to the text. Style the chapter numbers and chapter titles, too.
Pagination
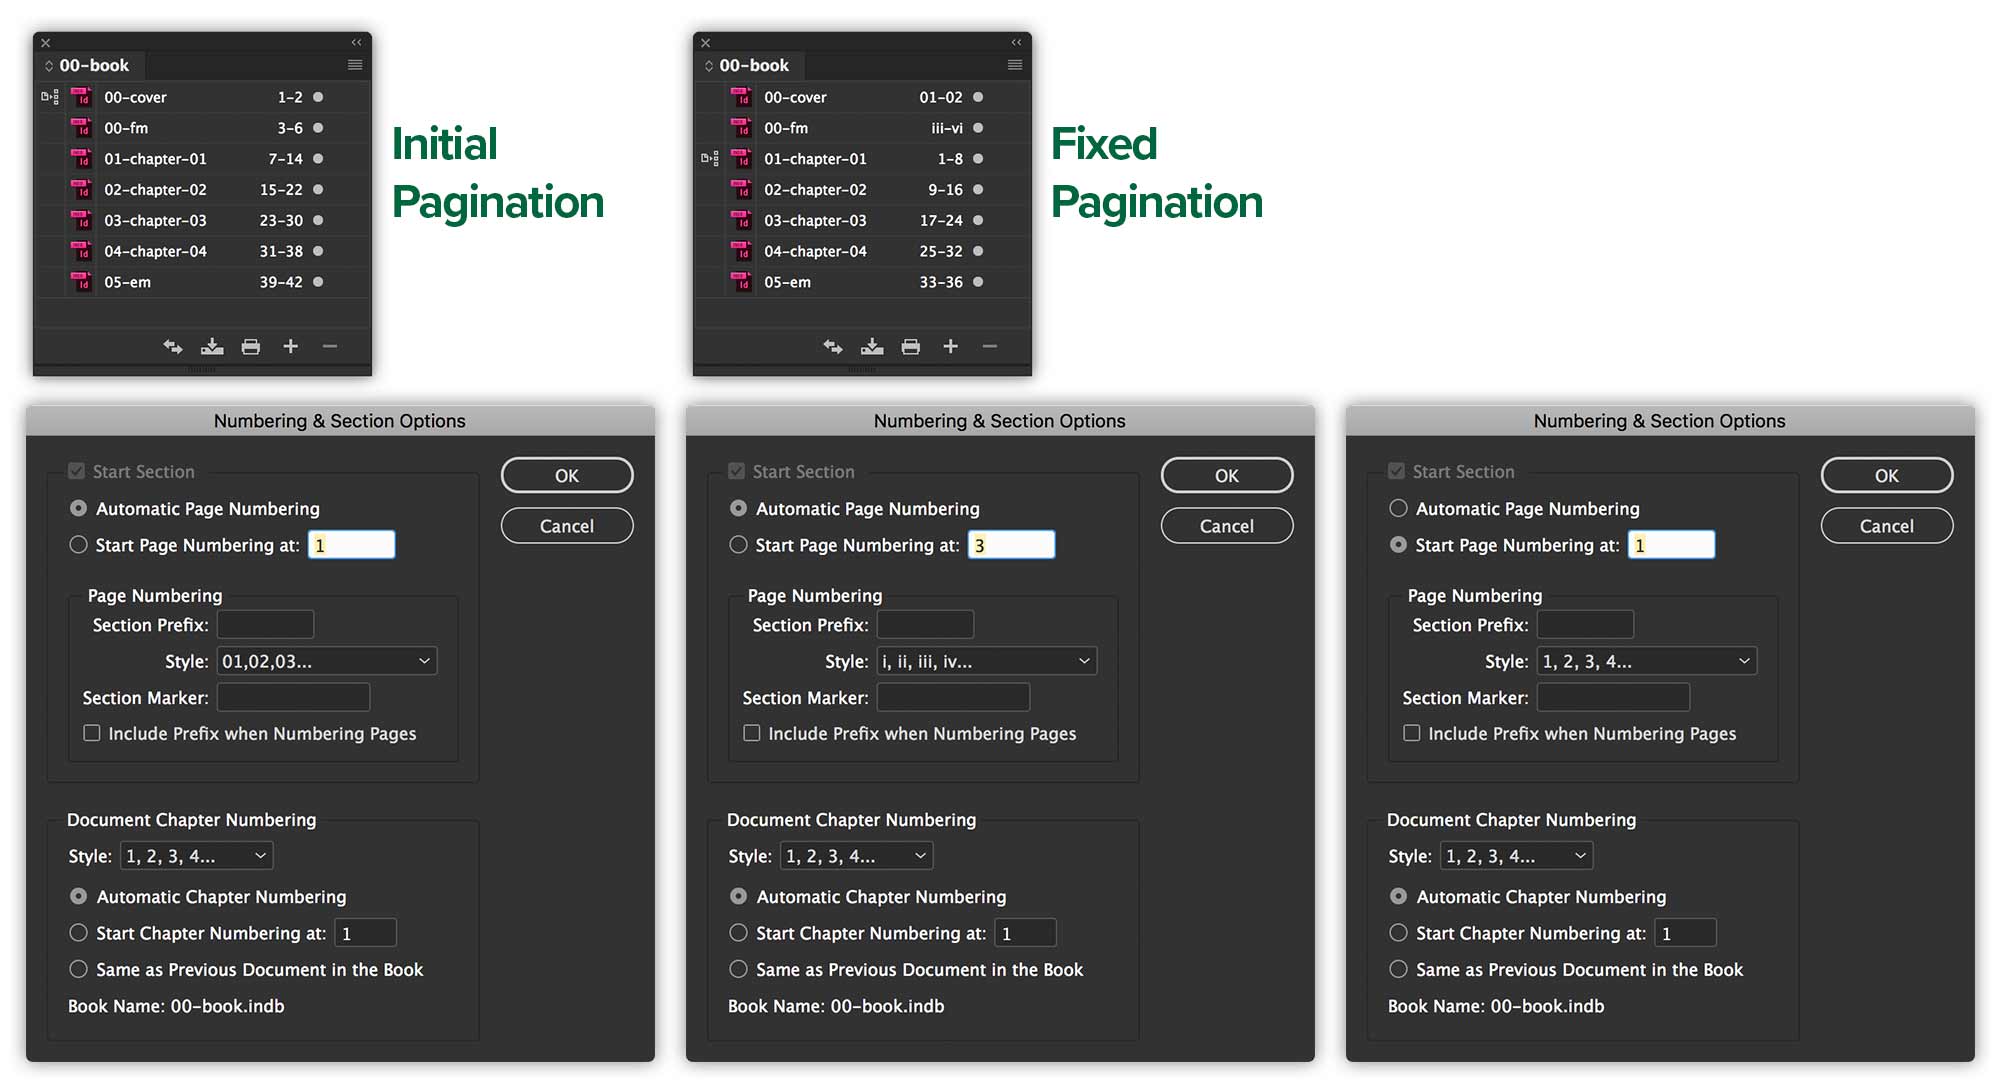
Set Up Numbering
Set up page numbering on the documents. There will be no page numbers on the cover document, obviously. We want lower case roman numerals for the Front Matter document, ie: i, ii, iii, iv, etc… There’ll be regular arabic numerals for the chapter files of the document. ie: 1, 2, 3, 4, etc…
Folios
Let’s add page numbers to our parent pages for the FM, EM and chapters. Make sure they’re on the Folio layer and on the Parent Page. Create a paragraph style for them.
Number List
Let’s make a number list across book files. Use the provided list of Pinocchio characters. You’ll need to create a defined list in Paragraph Styles.
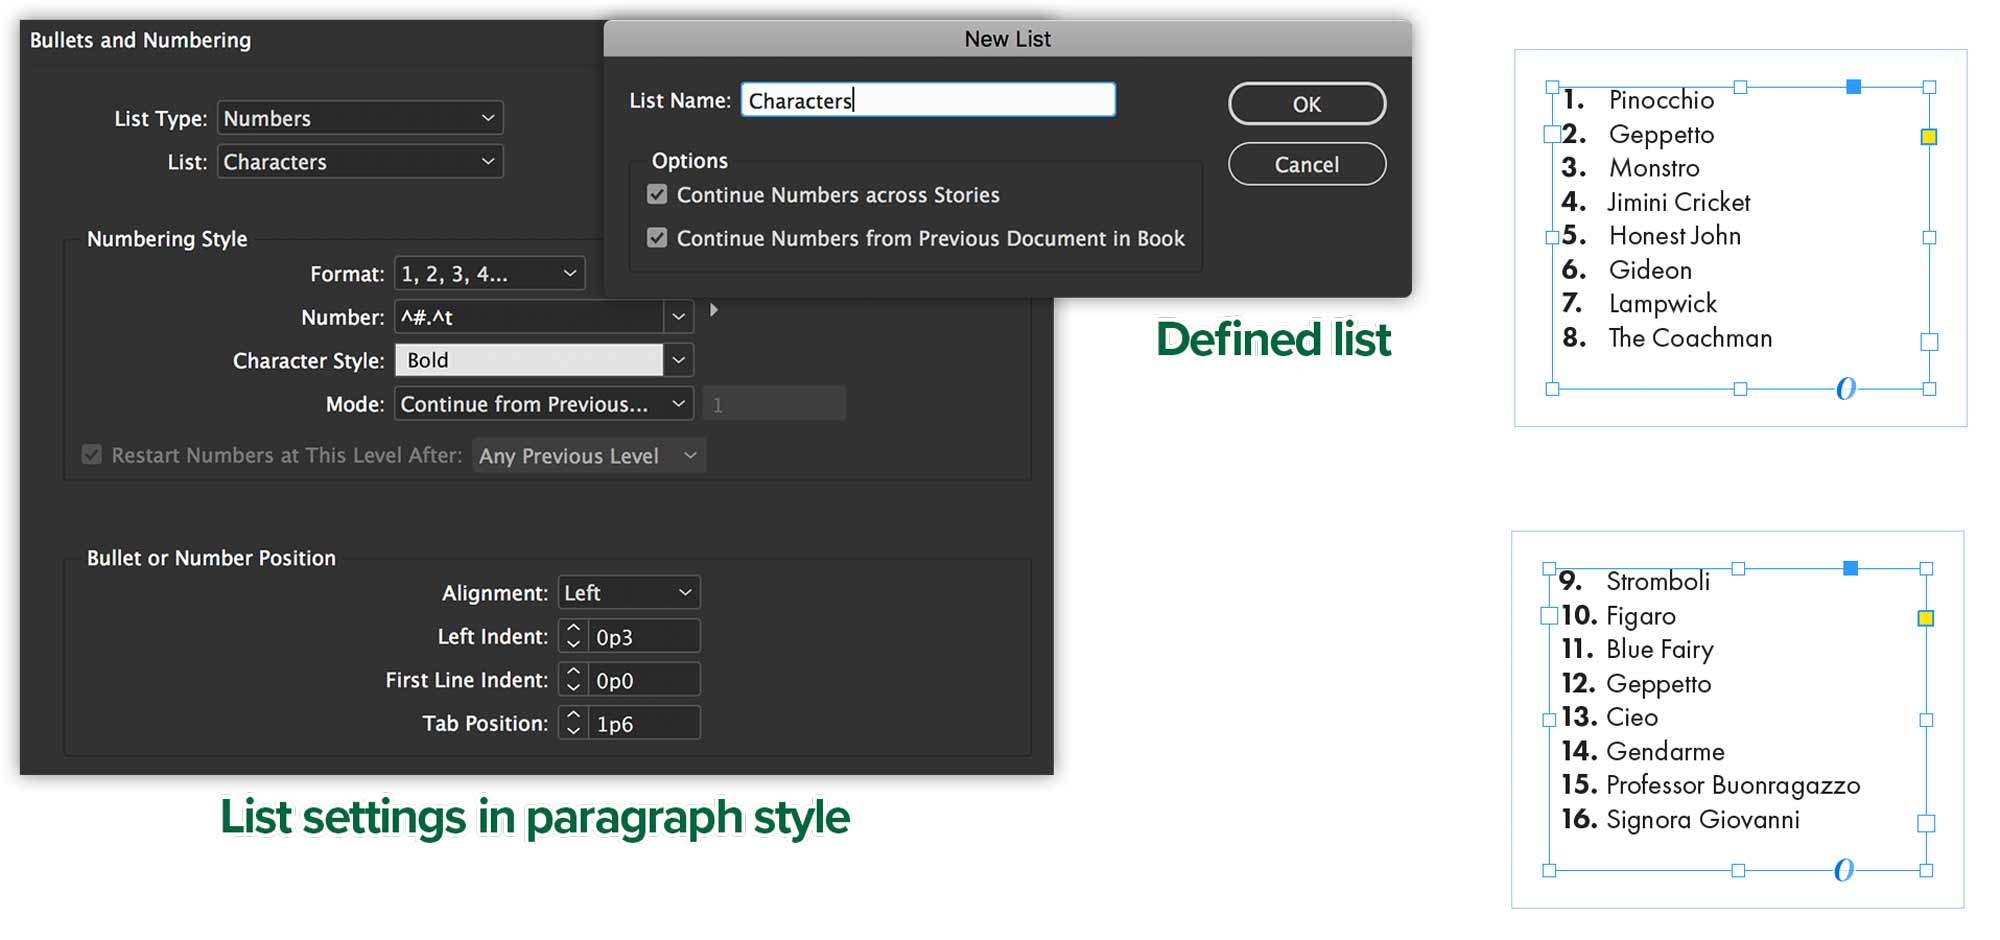
If the numbers don’t update in the second part of the list, make sure you update them from the Book panel’s menu.
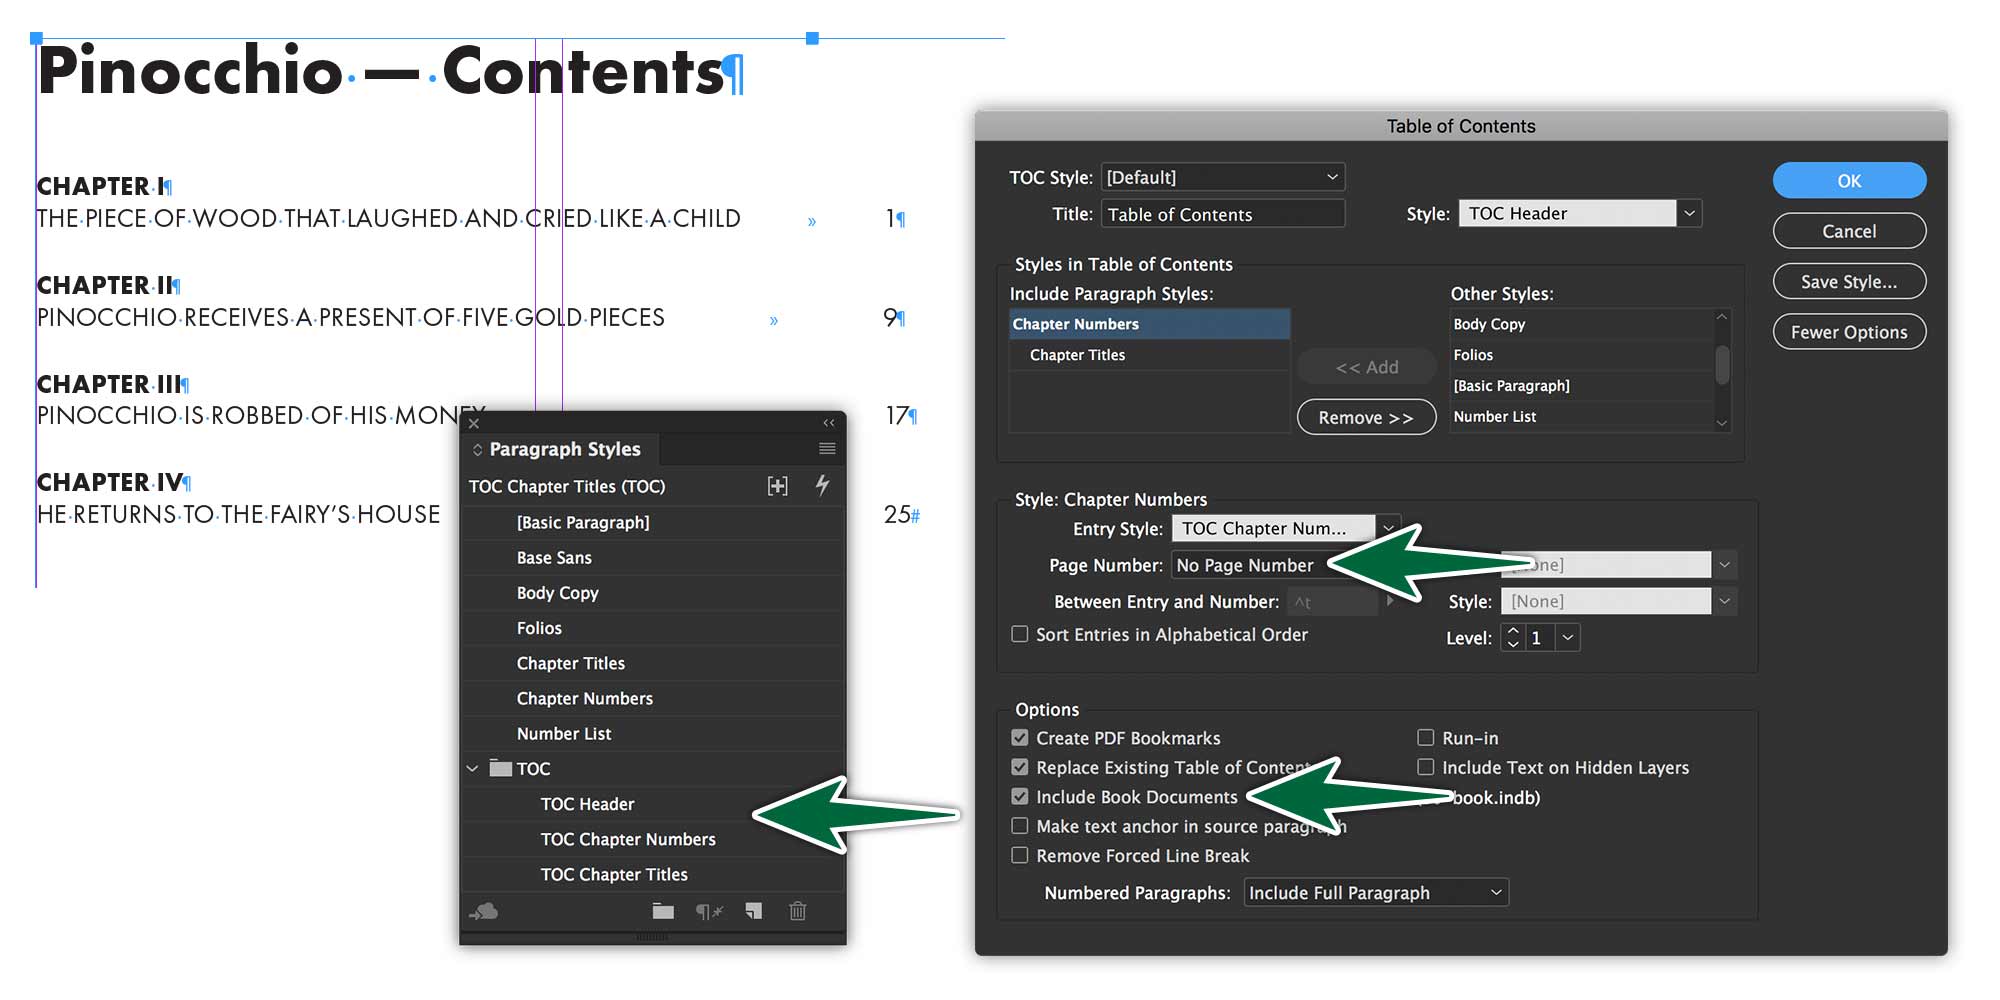
Table of Contents
Build a two-level table of contents in your Front Matter file for your document, including all the necessary paragraph styles.
Cover Image
To wrap things up, place the provided image on the cover.
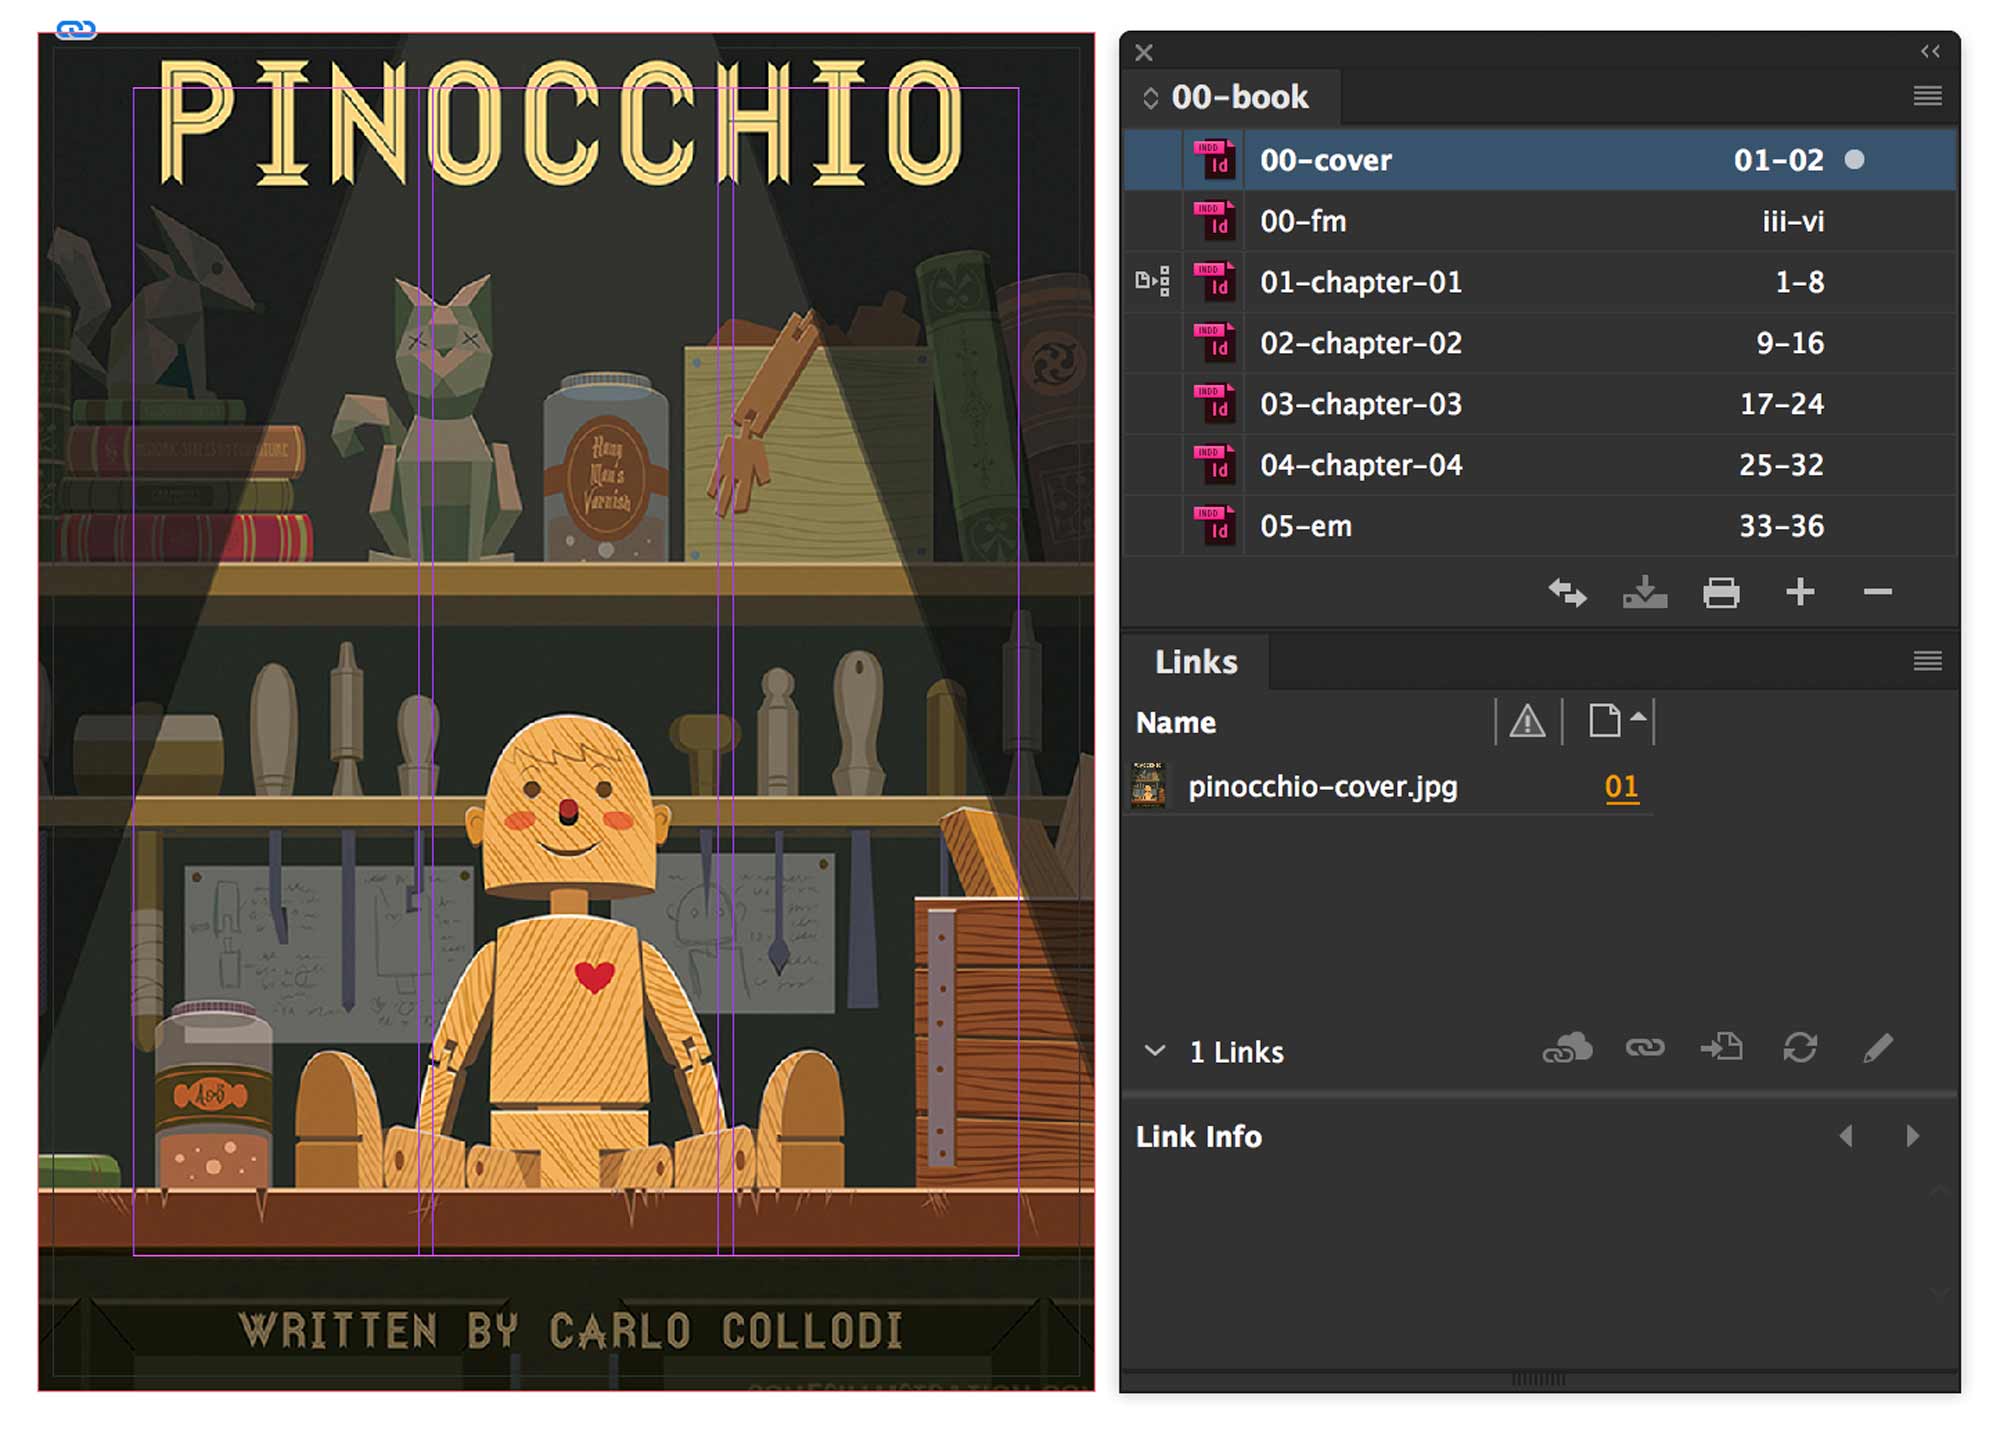
Remember to make sure you image extends to the bleed line.