Topics
The Double Exposure Effect
The double exposure effect has been very popular of late. The trend will most certainly fade, but the exercise of creating the effect has valuable techniques which can be applied in varied circumstances.
This is how Wikipedia defines the effect:
In photography and cinematography, a multiple exposure is the superimposition of two or more exposures to create a single image, and double exposure has a corresponding meaning in respect of two images.”
We’ll be using two images to create an original and creative composition.
You can peruse some examples of the double exposure effect that’s become so popular here.
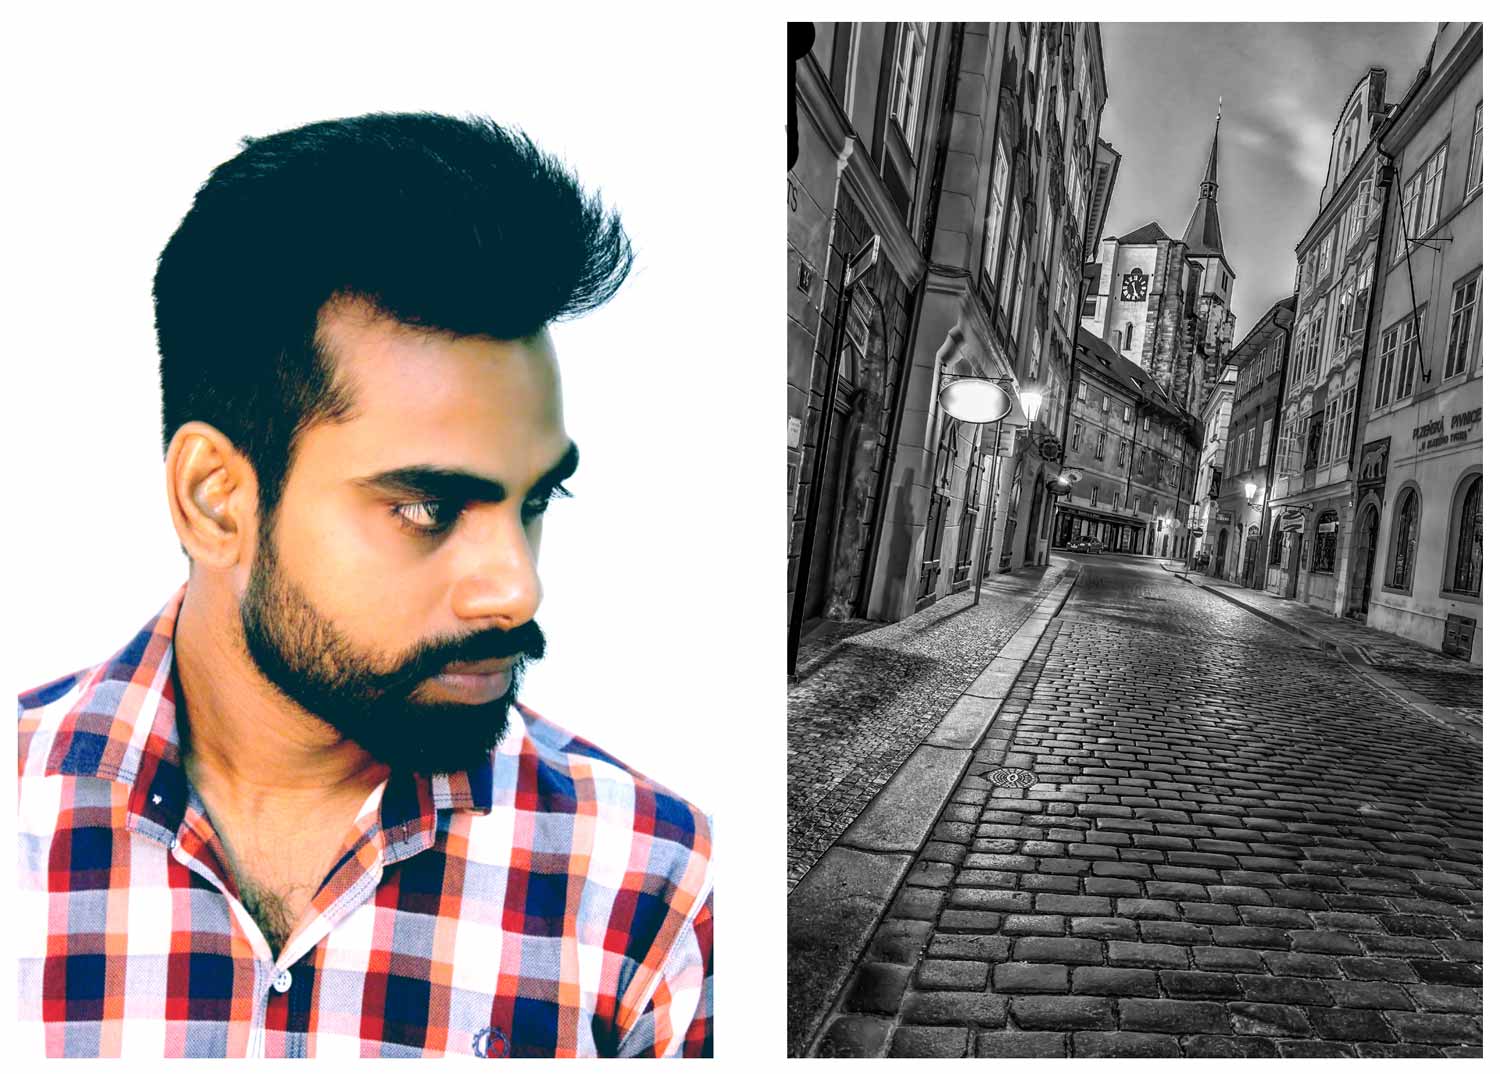
Source Images
We need two types of photos. One portrait of an individual. It’s best to either have a white background on the portrait. The second is an outdoor scene. The source photos play a large role in the final effect. The more you practice with the effect, the more you’ll be able to predict the outcome.
Once you’ve practiced the technique enough that you undestand the mechanics of it, you can experiment with different content, like architectural photos and others.
Technique #1: Paste Onto a Mask
The most basic method for achieving the double exposure effect is to simply paste the portrait onto the mask on the scene’s layer. Just ⌘-A select all to copy the portrait. Add a layer to the scenery layer. ⌥-click on the mask, then paste. Voilà. You have your most basic double exposure effect.
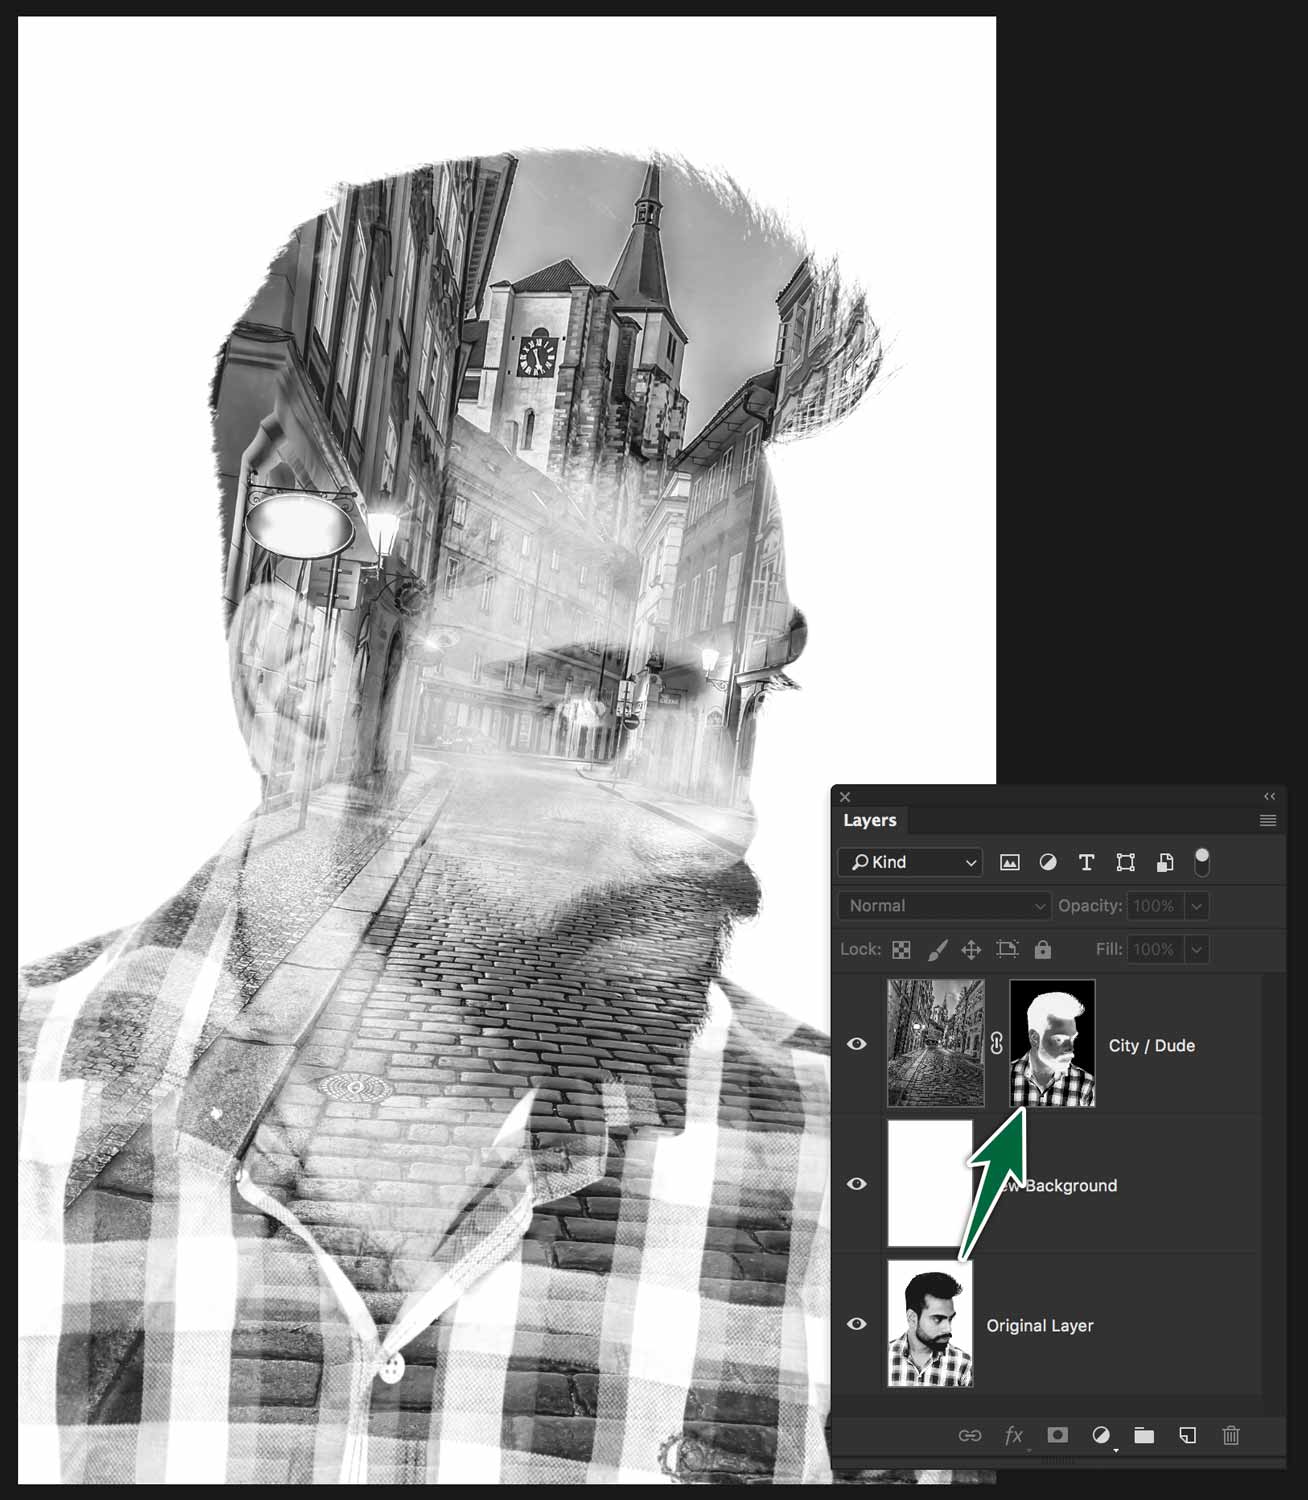
This is the result of a simple copy/paste onto a mask. The photo’s colours were also inverted ⌘-I. We did this because the portrait has mostly dark content. On a mask, white pixels reveal, so invert the mask’s colours if needed.
You can see that a new white layer was added as a background to the composition.
You can make further selective enhancements by creating a duplicate of the portrait on top of the whole layer stack. Set its blend mode to Multiply. Add a mask to the portrait layer. Use a large soft brush to paint black gently on passive areas of the photo.
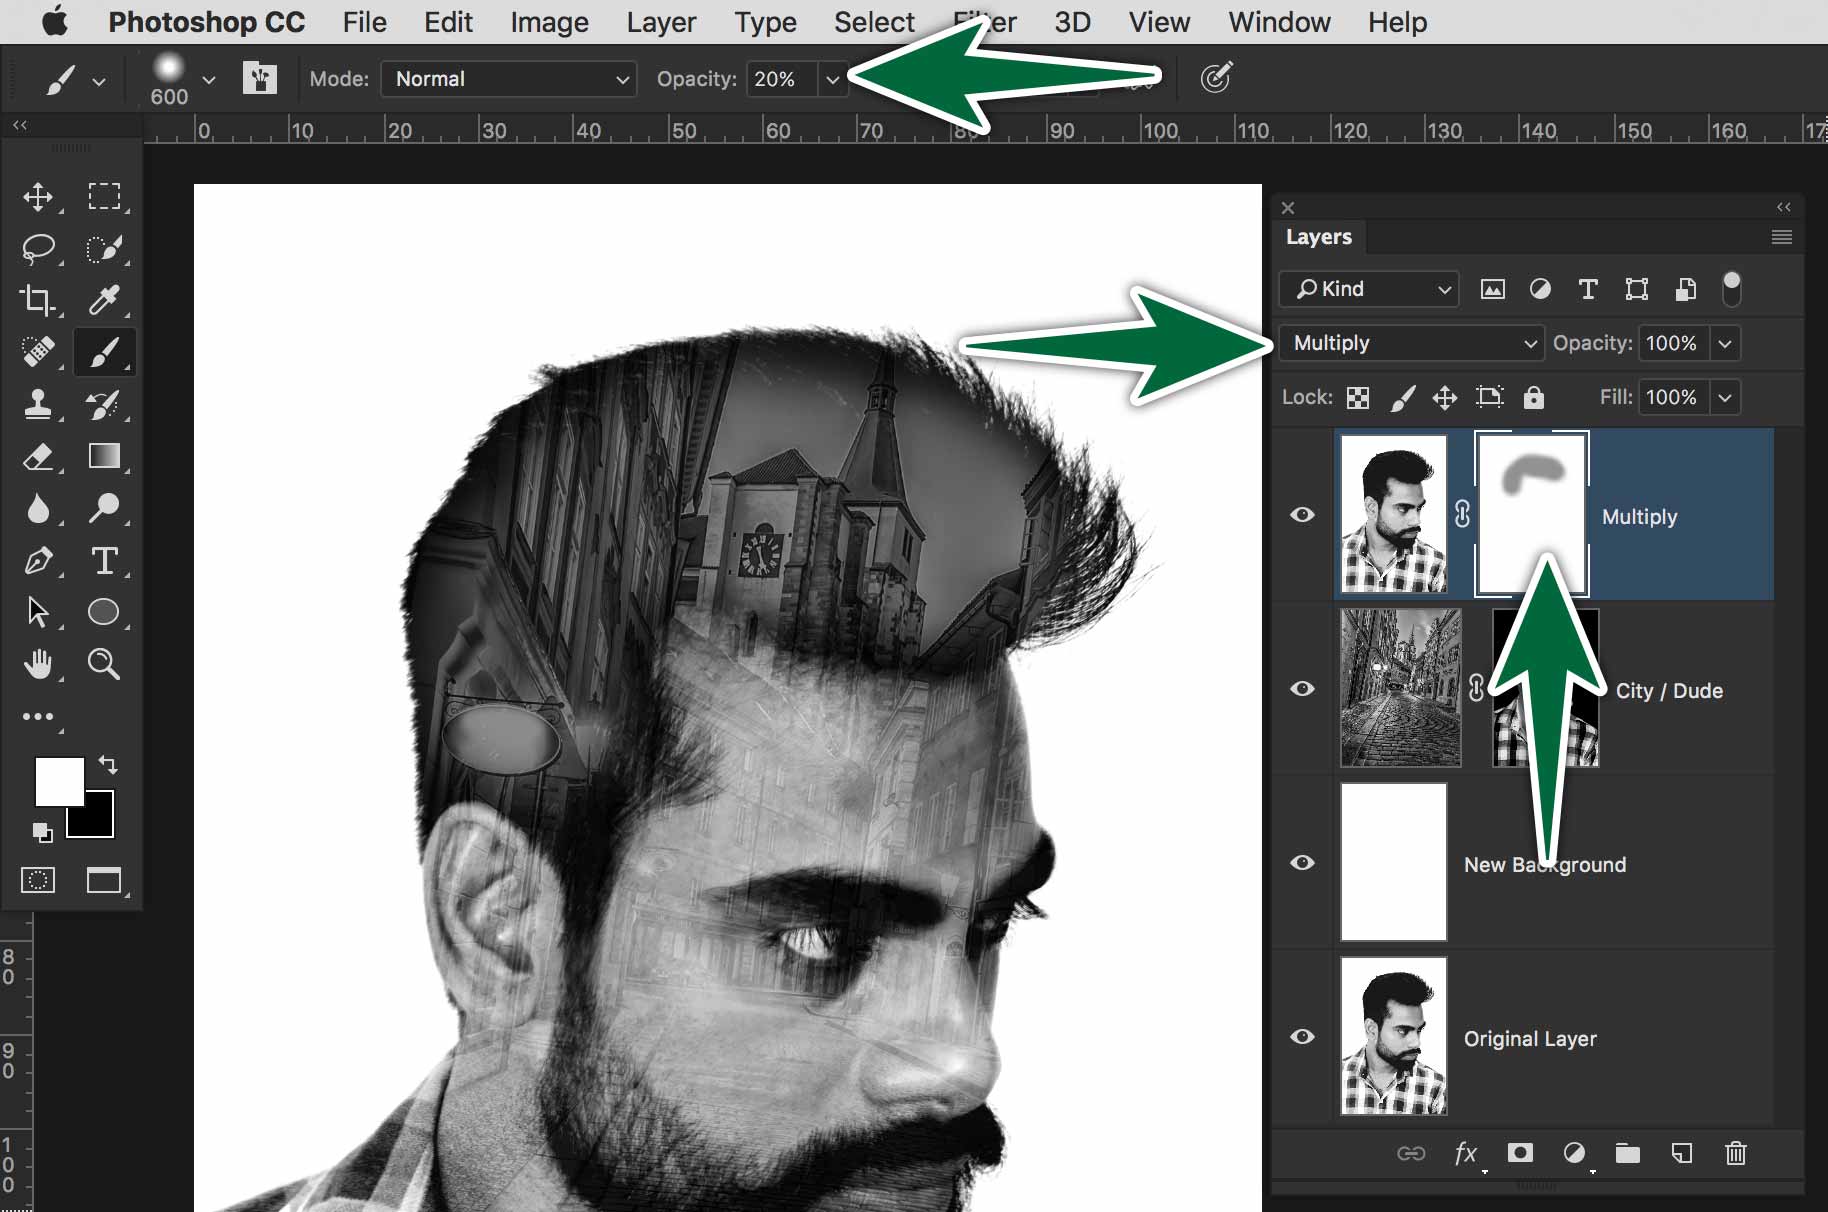
If needed, increase the contrast on the whole composition with a Levels adjustment layer.
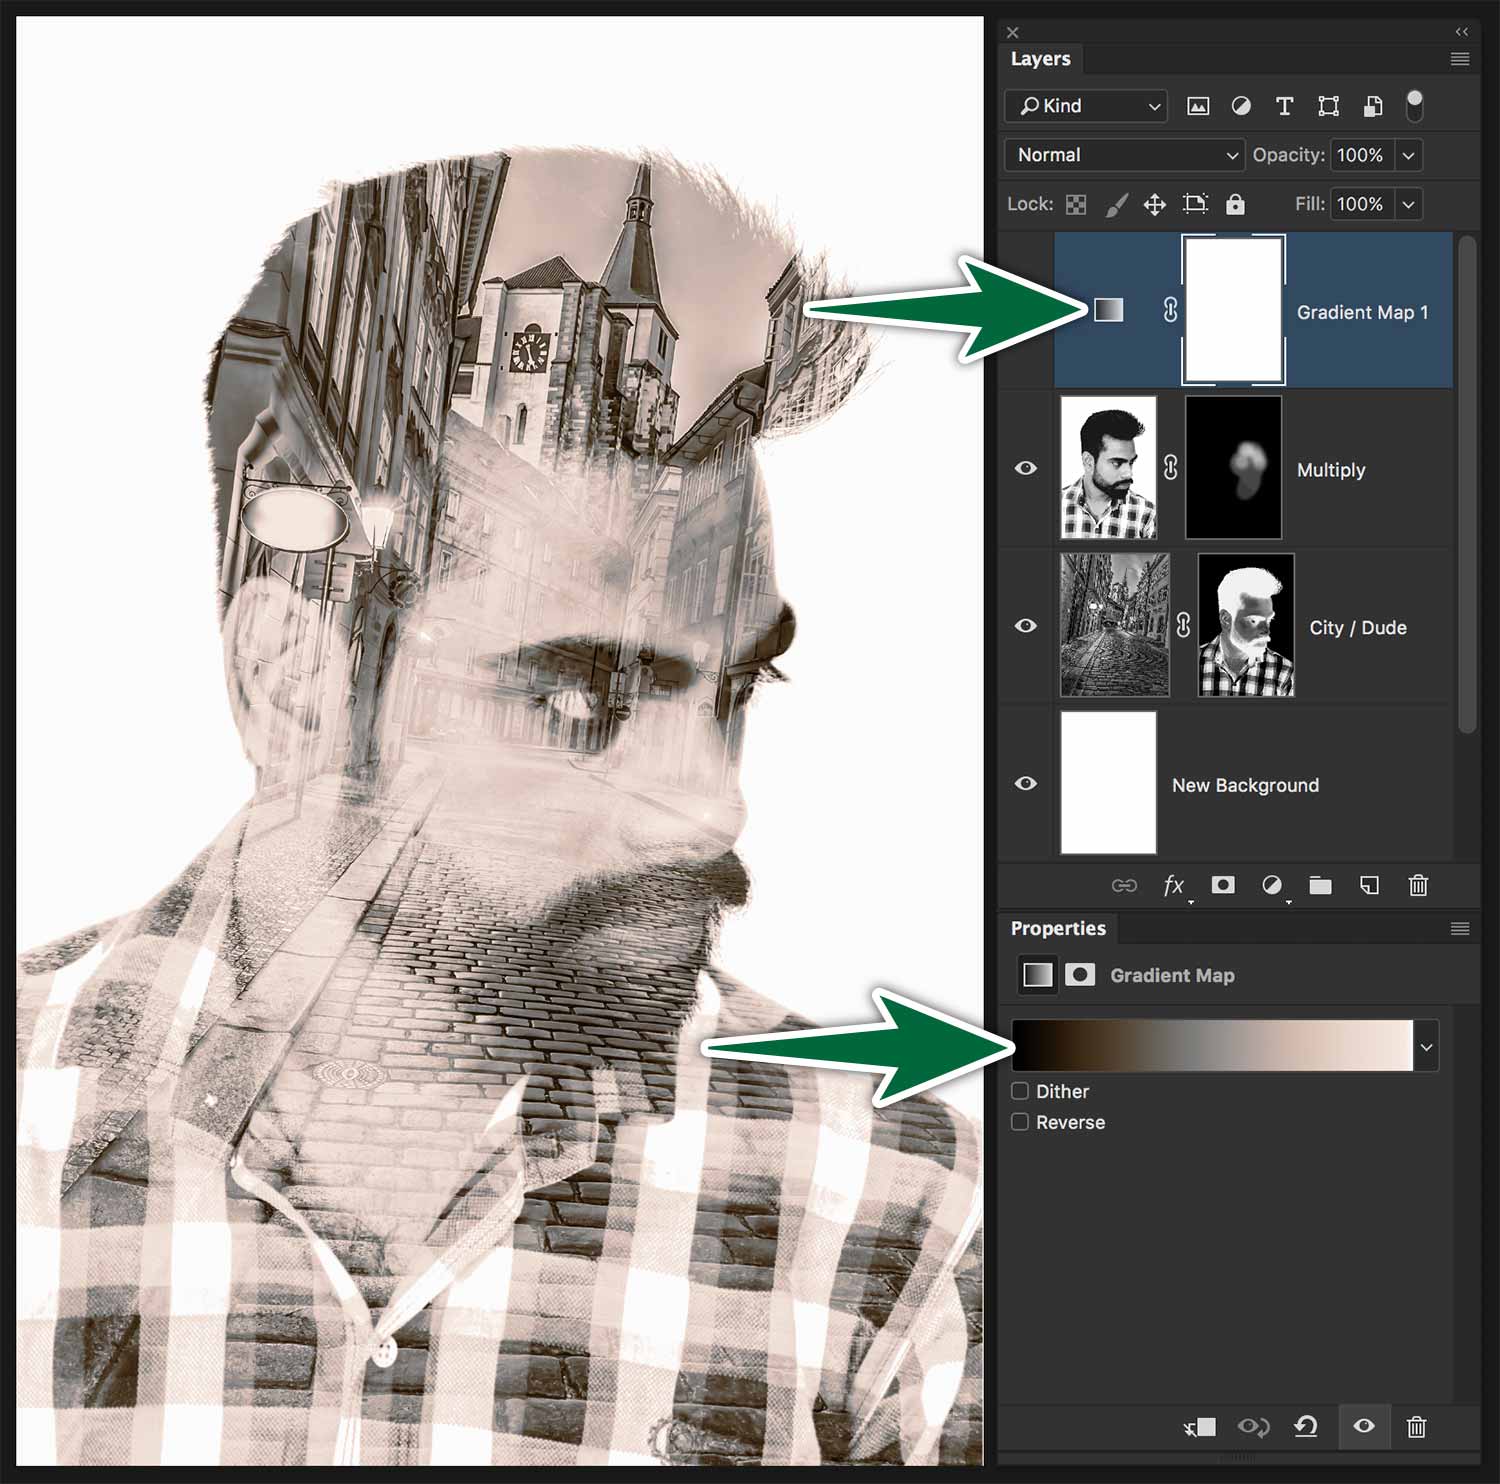
Add Gradient Map adjustment layer to colour the composition.
With some experimentation with various photos, you’ll see that you can achieve pretty great results.
This technique may not give you the control you want. The following technique will.
Technique #2: Blend Modes
This is by far the most versatile technique. It gives you the best control of each layer in your composition.
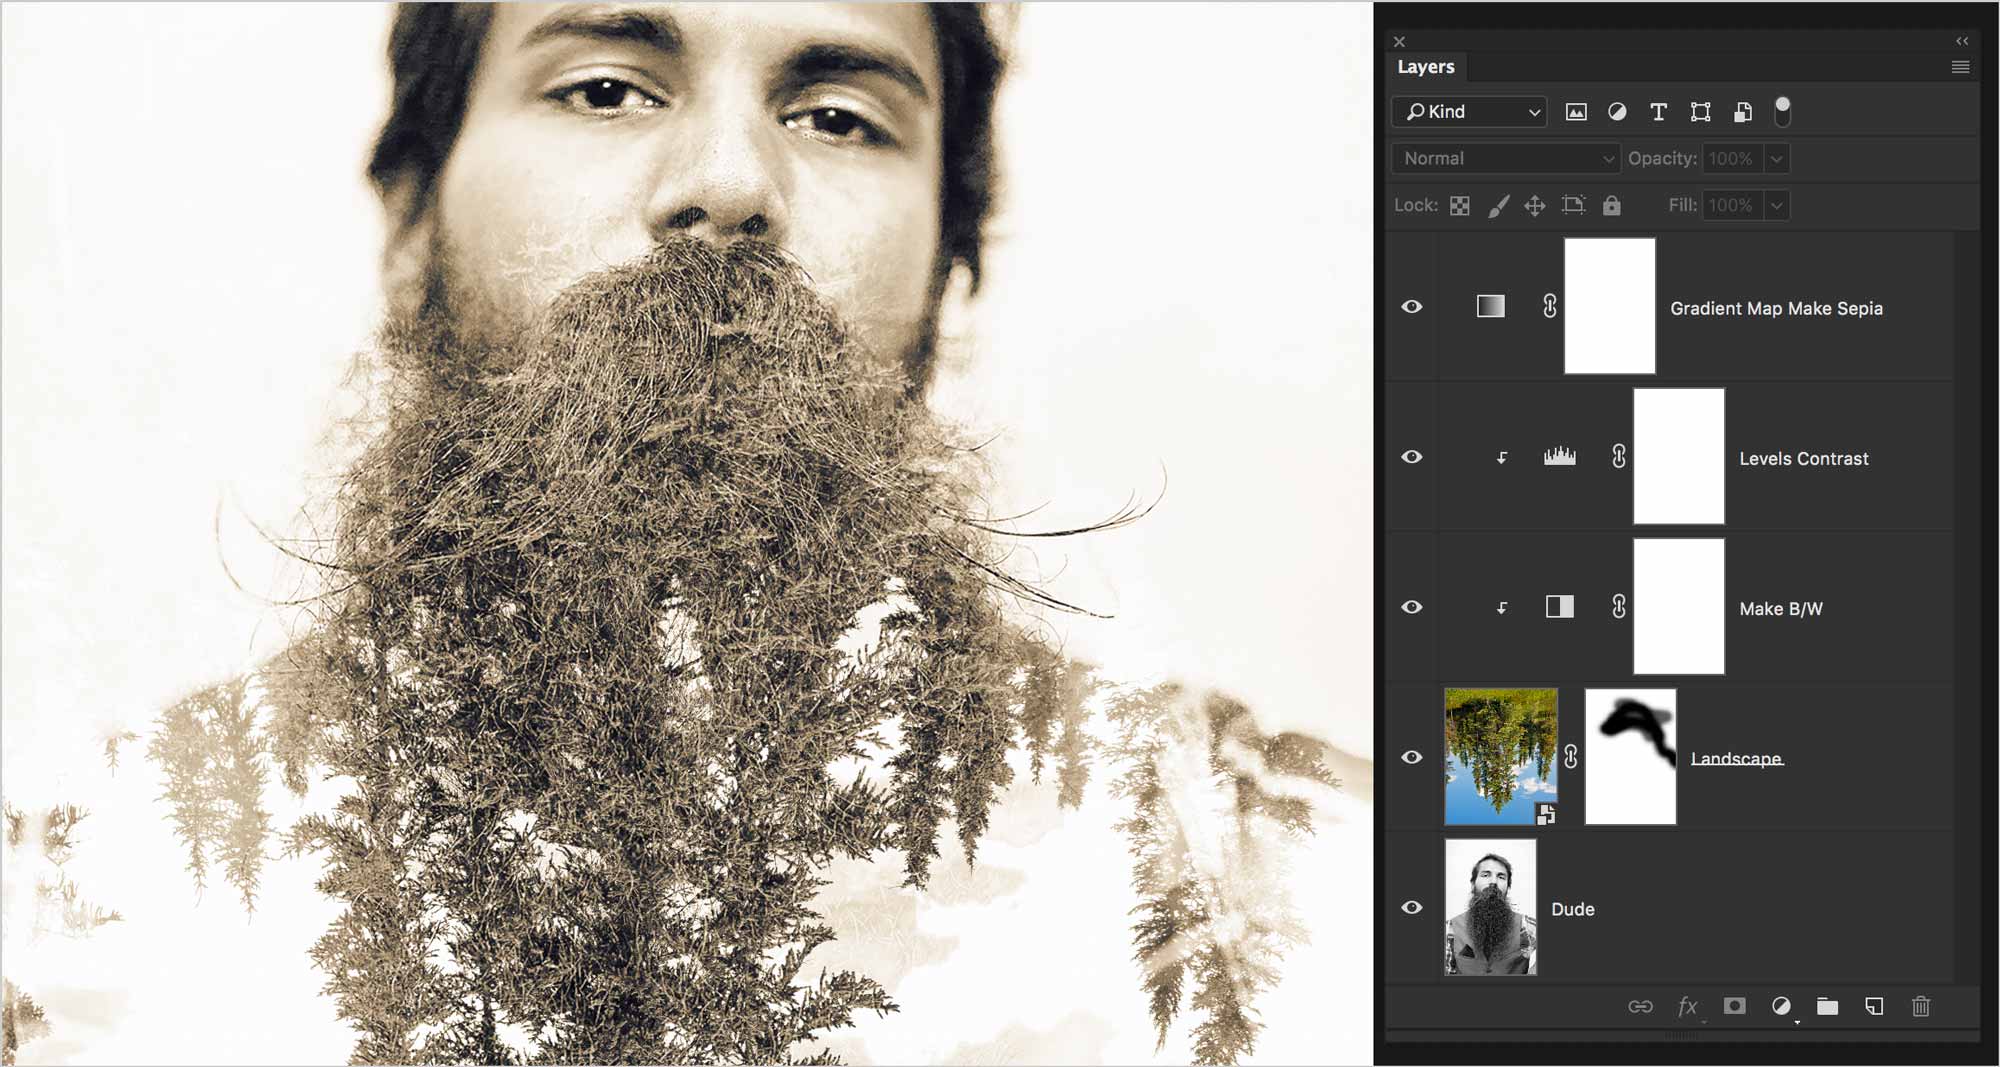
Drag your landscape photo into the portrait from Finder, or use File > Place Embedded…. Either way, make sure you landscape is a Smart Object before you scale it.
Create a Black & White Adjustment Layer on top above the landscape in the layer stack. Clip this adjustment layer to the landscape photo.
Change the blend mode of the landscape to Screen. This will make the light areas tranparent, leaving only darker pixels behind.
To increase the impact of the effect, you can add a Levels or Curves adjustment layer above everything, then clip it to the landscape layer too.
To finish this off, you can optionally add a Gradient Map adjustment layer on top of the whole composition to give it a vintage look.
If there are unwanted landscape elements, add a layer mask to the landscape and brush them out in black with a very large soft brush.
Formative Activity
Apply each of the techniques to the provided photos.
